 Your Geek Fix
Why? I ordered my kit back in 2019. It was made by the Wand Company, after a number of hurdles and problems with the game nearly resulted in it not being made. I also saw the video by TESTED where Norman Chan interviewed Chris Barnardo at E3. They showed the working modules that were to be released, including a radio and Geiger counter. There was also a screen, but it was only a backlit sticker. I was hoping to have a fully working screen, like the 3000 version. Chris said they wanted to release a working screen that interacted with the game, but screens these days were not the right size and shape for that large square screen, and making a fully functional screen would cost so much, "Fans would not be able to afford it." Also, it was said by several people, "There was not enough room behind the screen to make that area an independent device. I took this as a challenge! I was determined to find a way to make that area a device with a square screen of that size, independently powered, that could not only play fallout and the holotape games, but also play video, music, make calls, play Fallout Shelter. At this time I was planning on being able to purchase the radio and the Geiger counter. This is where it began.
I did document this build and the two year journey on Youtube, but I plan to go into more step to step instruction here and answer questions if you have them. But if you are impatient, you can jump to the video.
This is the Blackberry Passport! I wish finding the device was more exciting, but using the dimensions of the model screen, I began looking for any android or Apple device that had a screen that could fit. I was looking for Android and Apple because I wanted to use the existing app and also planned to use other apps from these operating systems. There are a number of devices that are really odd and obscure with square screens, but not of that size. The Blackberry Passport had a great screen, but I was unsure about the area where the keyboard and USB were.
Parts:
1x Blackberry Passport
1x Blackberry Passport replacement screen (without backing if possible)
1x Small Bluetooth Critter speaker
1x micro USB cable
1x small magnifying sheet
1x Kapton tape
1x Black electric tape
Now, before I tell you how I did it, I will warn you not to modify cell phones as they will not only void warranties, but could cause fire! Also, install apps and set up the phone before dismantling it. After the phone was discontinued and the servers taken down, you have to use a hack to keep it from reminding you to complete setup.
1. First, I removed the upper plastic backing covering the SD card.
2. Then, I unscrewed the top mounts to remove the rest of the backing.
3. under the keyboard is a plastic cover that can be pulled off to reveal the keyboard screws. At that point the speakers will come off.
4. unclip the keyboard ribbon from the keyboard, and remove the keyboard. !!You officially have no keyboard. pair a wireless keyboard before this step!!
5. There is a metal bezel that was at the bottom of the phone that you will also need to cut off or remove carefully as to not harm the board. You may want to keep the plastic covering for the USB for later.
6. Cover headers and other possible areas of concern with Kapton tape. I also kept my plastic backing from the phone and modified it to fit on the board area, with an open area exposing the ribbon connector for the screen.
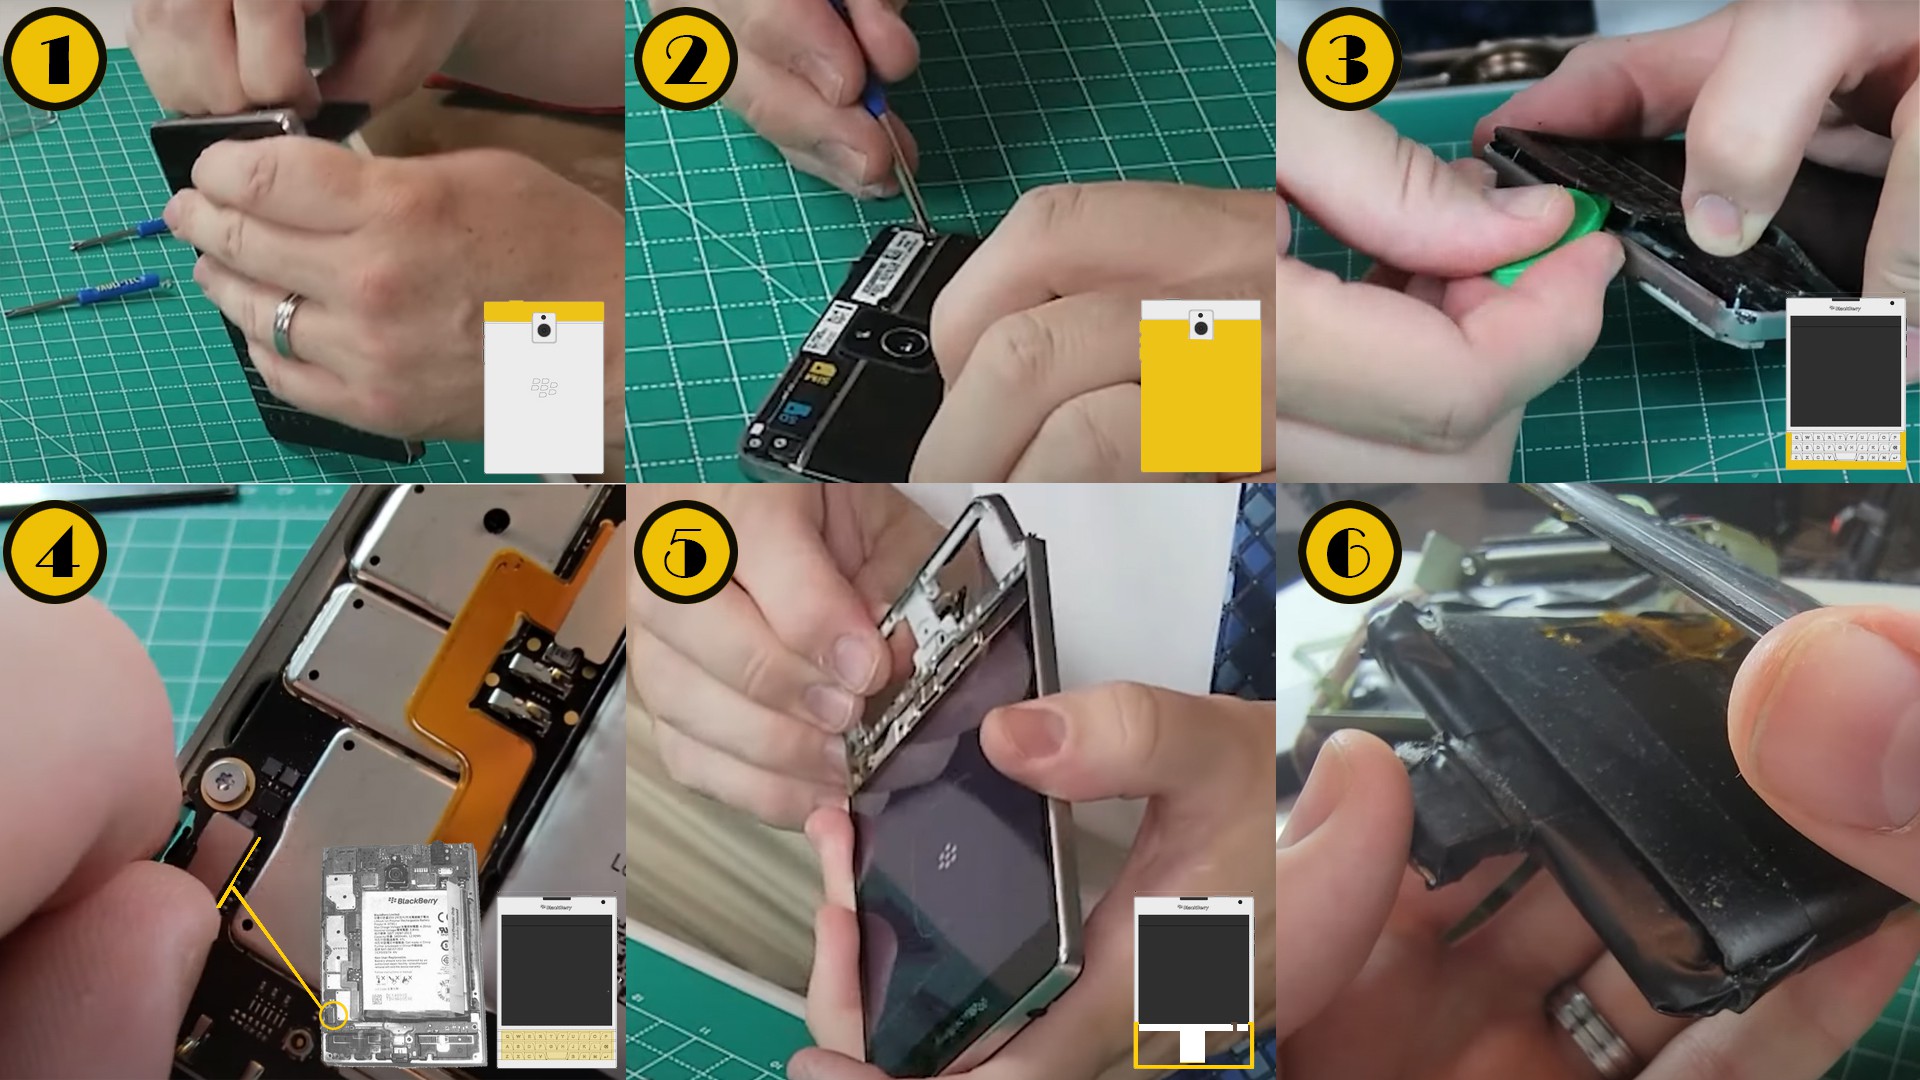
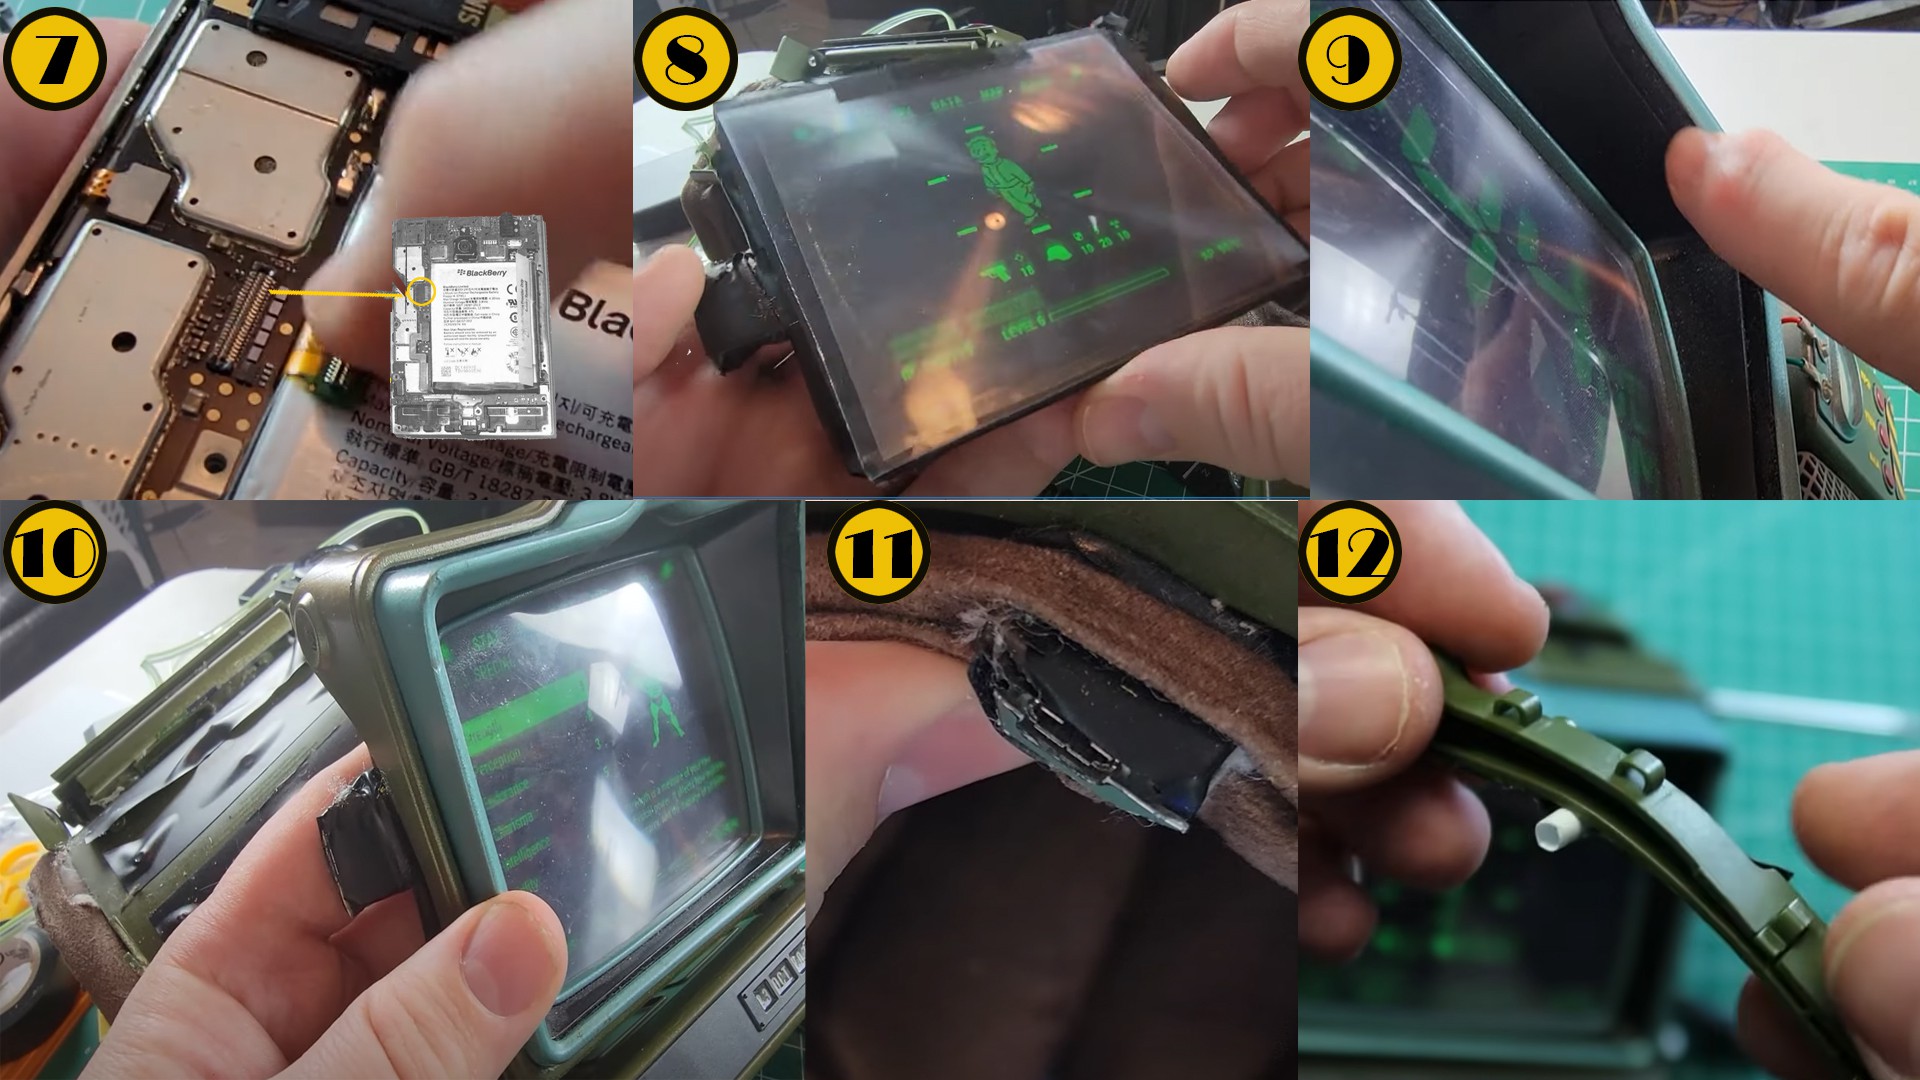
7. I unclipped the screen and attached a new one to the back of the phone (If you bought a screen with backing, you will need to remove the backing first to give the ribbon more flexibility and length). These screens are cheep and this is the easiest way to make the phone work in the correct orientation. Before you ask about forcing screen rotation and other things, trust me this was the best way to make the phone work, put the assistant and power buttons in the right locations and have all apps work. Most of all, this is the only way to make the screen fit in the window area of the Pip-boy.
8. I cut a plastic magnifying sheet to fit the Pipboy window and taped it to my new screen. This will give it the appearance of a CRT and fill any gaps. The flat side should be facing the screen to maintain touch screen capability. You may also but another thin piece of plastic on top if you want a smoother look.
9. Having said what I did in step 7, the black screen area still does not sit flush. I added foam and pushed the screen back slightly to fit against the phone better.
10. I also used a heat gun on the back plate of the Pipboy to flatten it more, and cut off side pieces that got in the way of the phone and the board. You may also need to use the keat gun on areas of the pipboy you need to meld into a better shape for your board.
11. I cut slits in the cuff to slide the USB area of the board through. Make sure you first strengthen and protect that area with plastic from the bezel and electric tape.
12. You will notice the power button is on the right and can be seen through a gap on the Pipboy. You can attach tubing to the back of the middle sliding piece of the Pip-boy that the wires go though that can push the power button each time the right side of the Pip-boy is pressed. The benefit of these modules sliding on the bar is that they can slide when kept just loose enough. You will know it is too tight if the power keeps trying to turn off or on.
13. This step is optional. I wanted to use the Blackberry assistant and added a button on top to press the assistant button on the phone. Now that most features of the assistant are disabled and this button cannot be remapped, it may not be something you are interested in. I like that it allows me to open apps using my voice.
The only problem at this point is that you no longer have a speaker. Next, time I will post how to put a powered wireless speaker in the top, allowing me to still install the radio module.