 Max.K
Max.K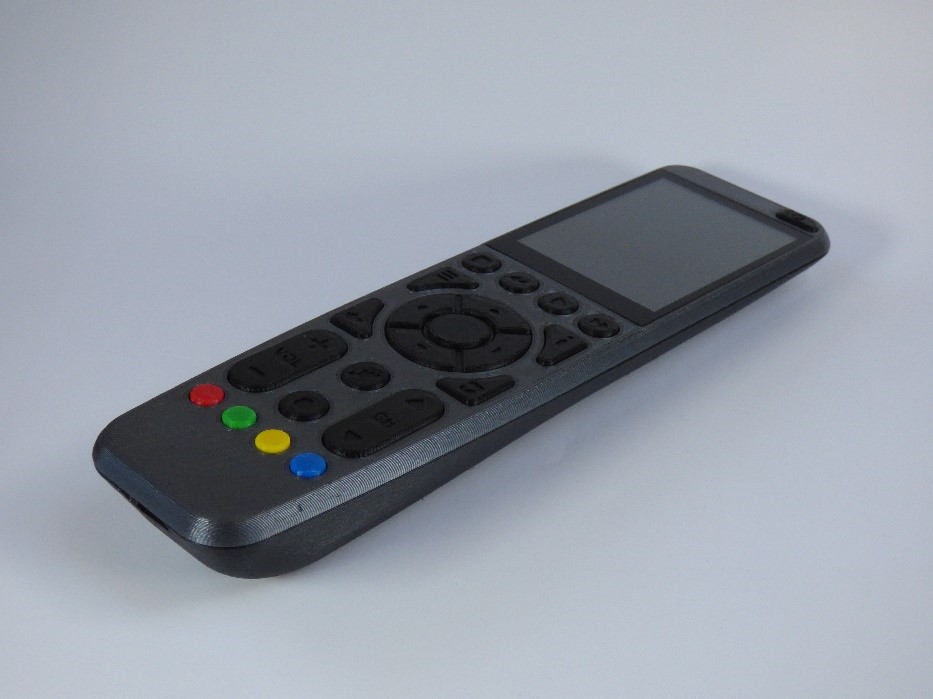
My initial idea was to build a universal remote with both a touchscreen as well as physical buttons. For communication the remote would need an infrared LED and optionally an RF module for Wi-Fi and Bluetooth. Like in most of my previous projects, I wanted to use common, off-the-shelf components and 3D-printing so anyone can build the remote themselves.
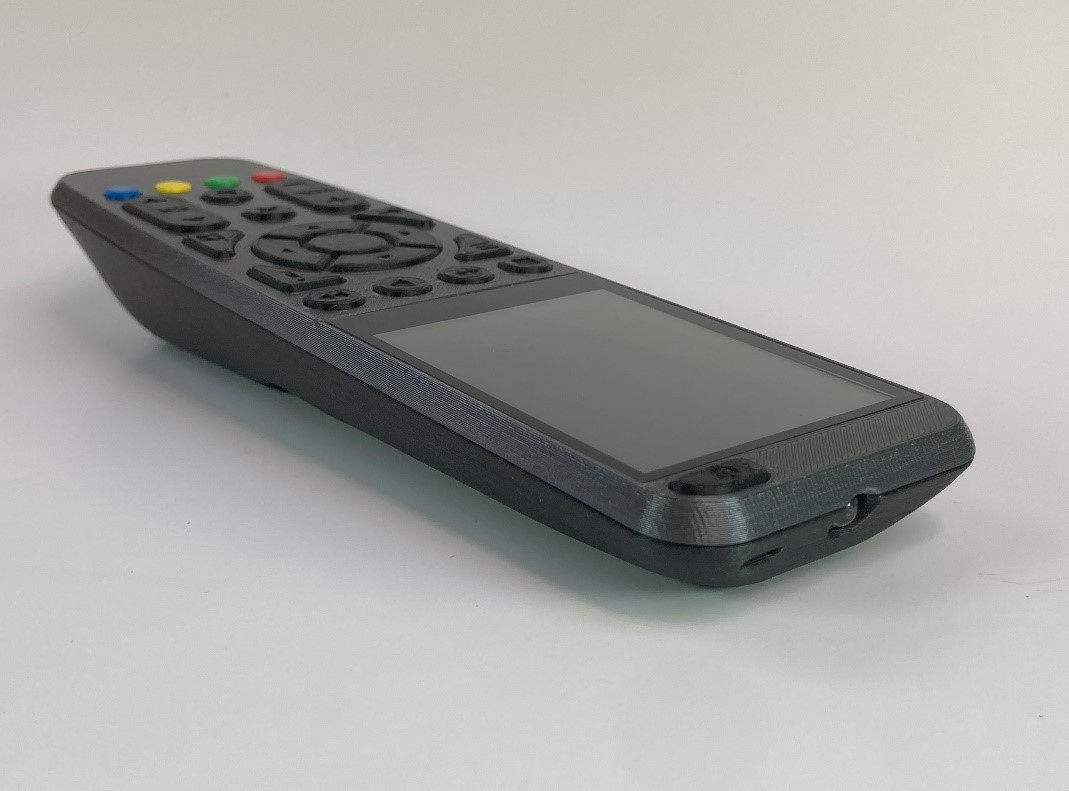
For the display I picked a 2.8” screen from Adafruit with a built-in capacitive touchscreen. Adafruit sells these displays either standalone or on a breakout board. There is also a slightly cheaper version that has a resistive touchscreen. But in my opinion capacitive touch feels nicer for this type of device and the screen is also more durable due to the glass surface.
The size of the screen defines the overall dimensions of the remote. I ended up with roughly 20x5cm.

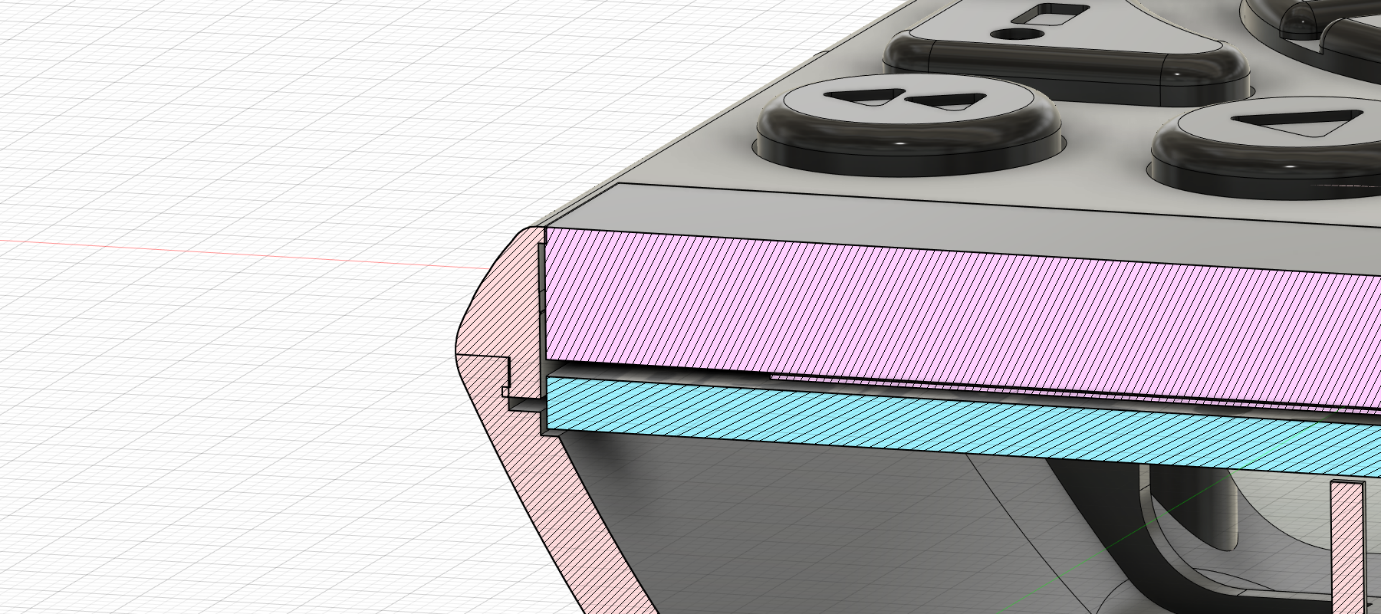
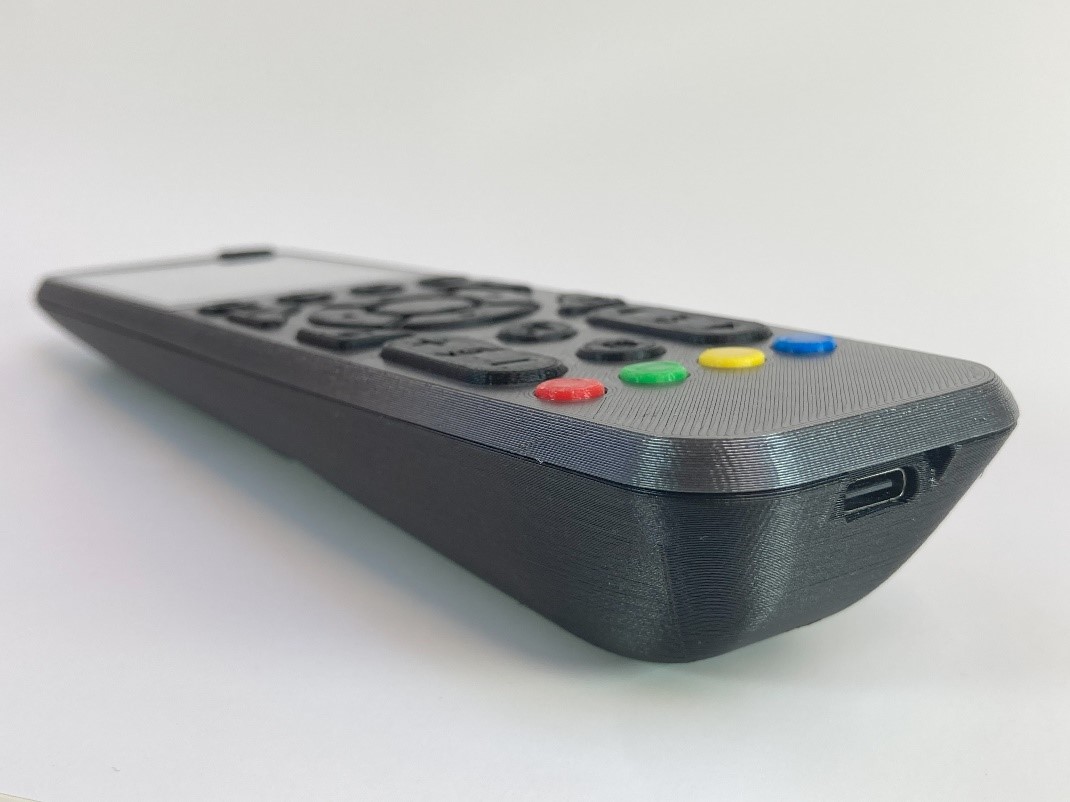
I started by drawing some sketches to figure out the best shape for the remote. To make 3D printing easier, I wanted to keep the top of the remote completely flat. This way the case can be split into two parts. The top part can be printed with the flat outer surface facing the print bed. The larger, lower part will be printed on the separation plane with the inside facing down. This way elements like snap fits can be printed that protrude this separation line.

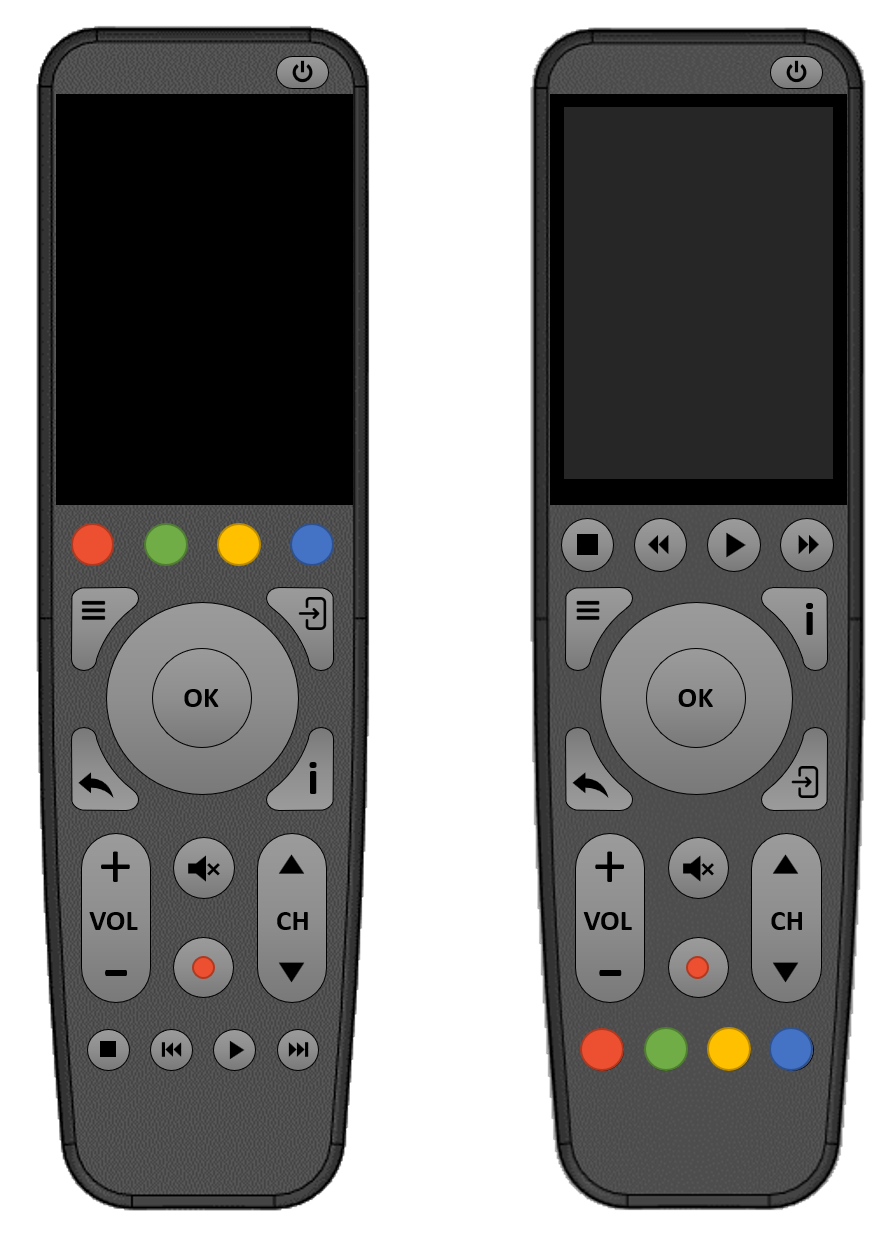
For the buttons I wanted to have the most common media and navigation keys that are needed to control a TV. This includes four-way keys, playback control, four color keys and a few more buttons for functions like input select and menu navigation.
Based on these sketches I went on to create a first concept in Fusion360. It is designed around the large display, so the case is flat and wide at the top. Towards the bottom the remote is tapered and thicker, so it can be held comfortably. A small indent is where the index finger goes, so the thumb automatically lands on the OK button. I printed this first draft to test how the shape looks and feels. Since I happy with it, I barely changed the design but only added more details to it. This included splitting the case into two hollow halves and adding ribs for stability. One of the main challenges was fitting the halves together as I did not want to rely on visible screws. I experimented with small snap fitting hooks but they broke off too easily. Instead, I went with a lip and groove joint that goes around the entire edge of the device. On the sides there is a slight undercut so the parts interlock but can be separated with little force. This obviously means that the 3D printer must be well calibrated or the parts will not fit at all.
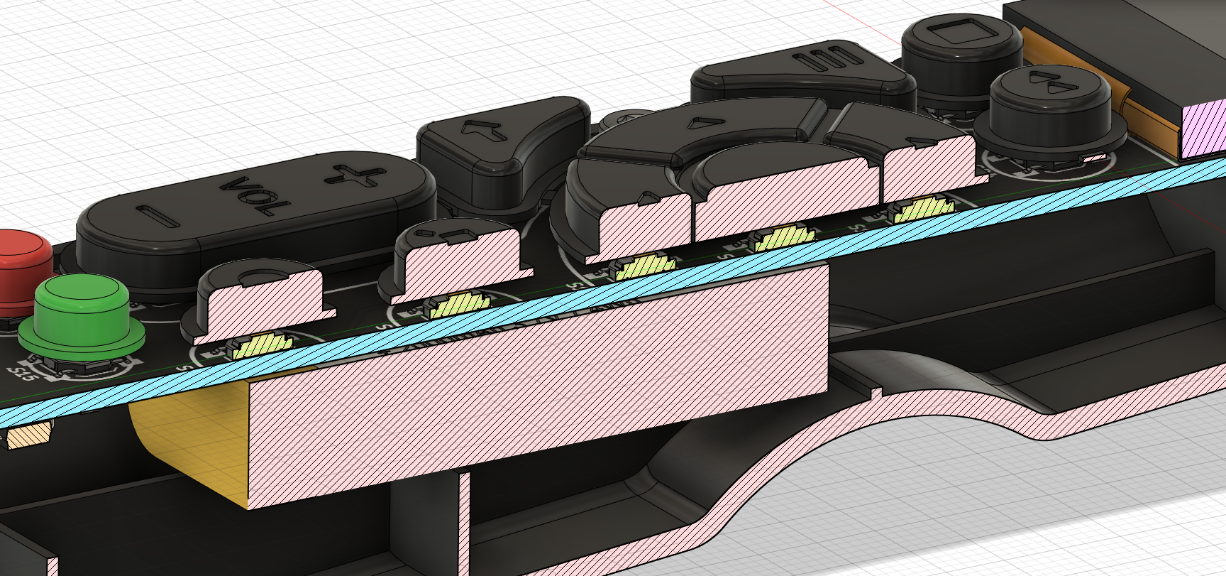
Most commercial remotes use silicone keypads but due to the cost of the required molds, this is impractical for DIY projects. I decided to use regular tactile switches and 3D printed button caps instead. I tried to keep the labels simple, so they could be embossed into the button’s surface. With a 0.4 mm nozzle, these came out fine on my printer.
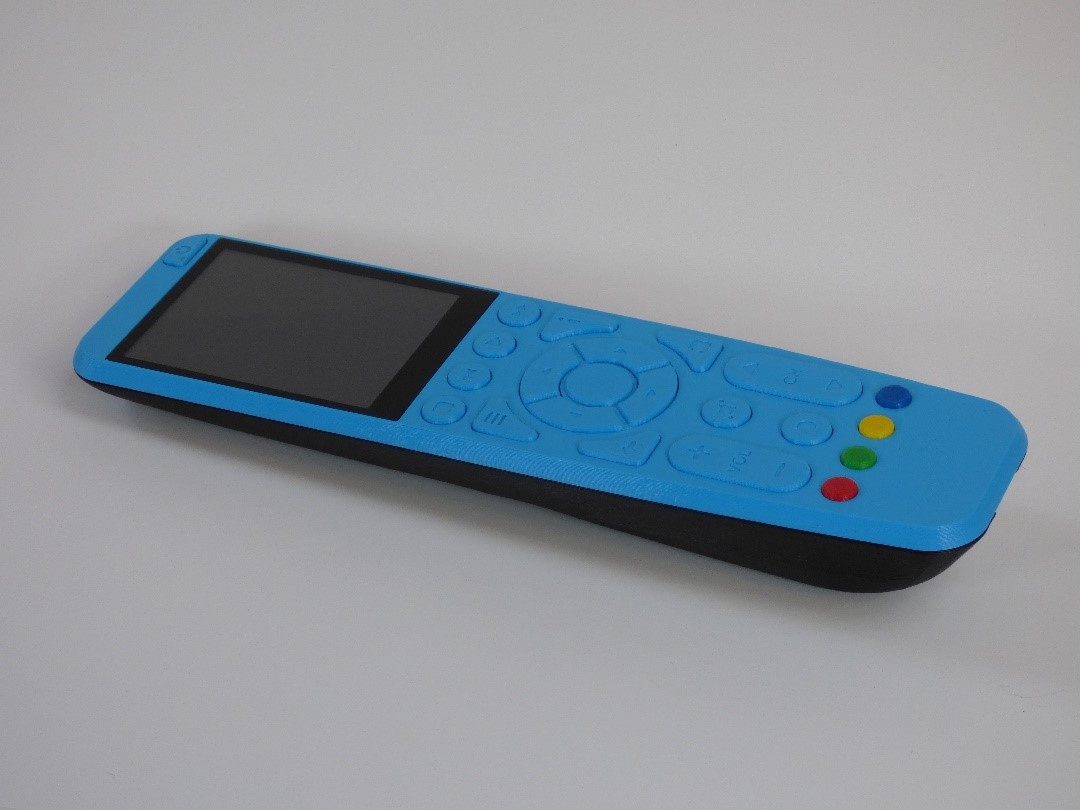
For the printed parts, I used matte black PETG filament from ColorFabb and Anthrazit PETG from Dasfilament. I also experimented with a flashier color theme using Colorfabb’s light blue NGEN filament. As the front cover is only snapped into place, it is easily replaceable.
Discussions
Become a Hackaday.io Member
Create an account to leave a comment. Already have an account? Log In.