 Jorisclayton
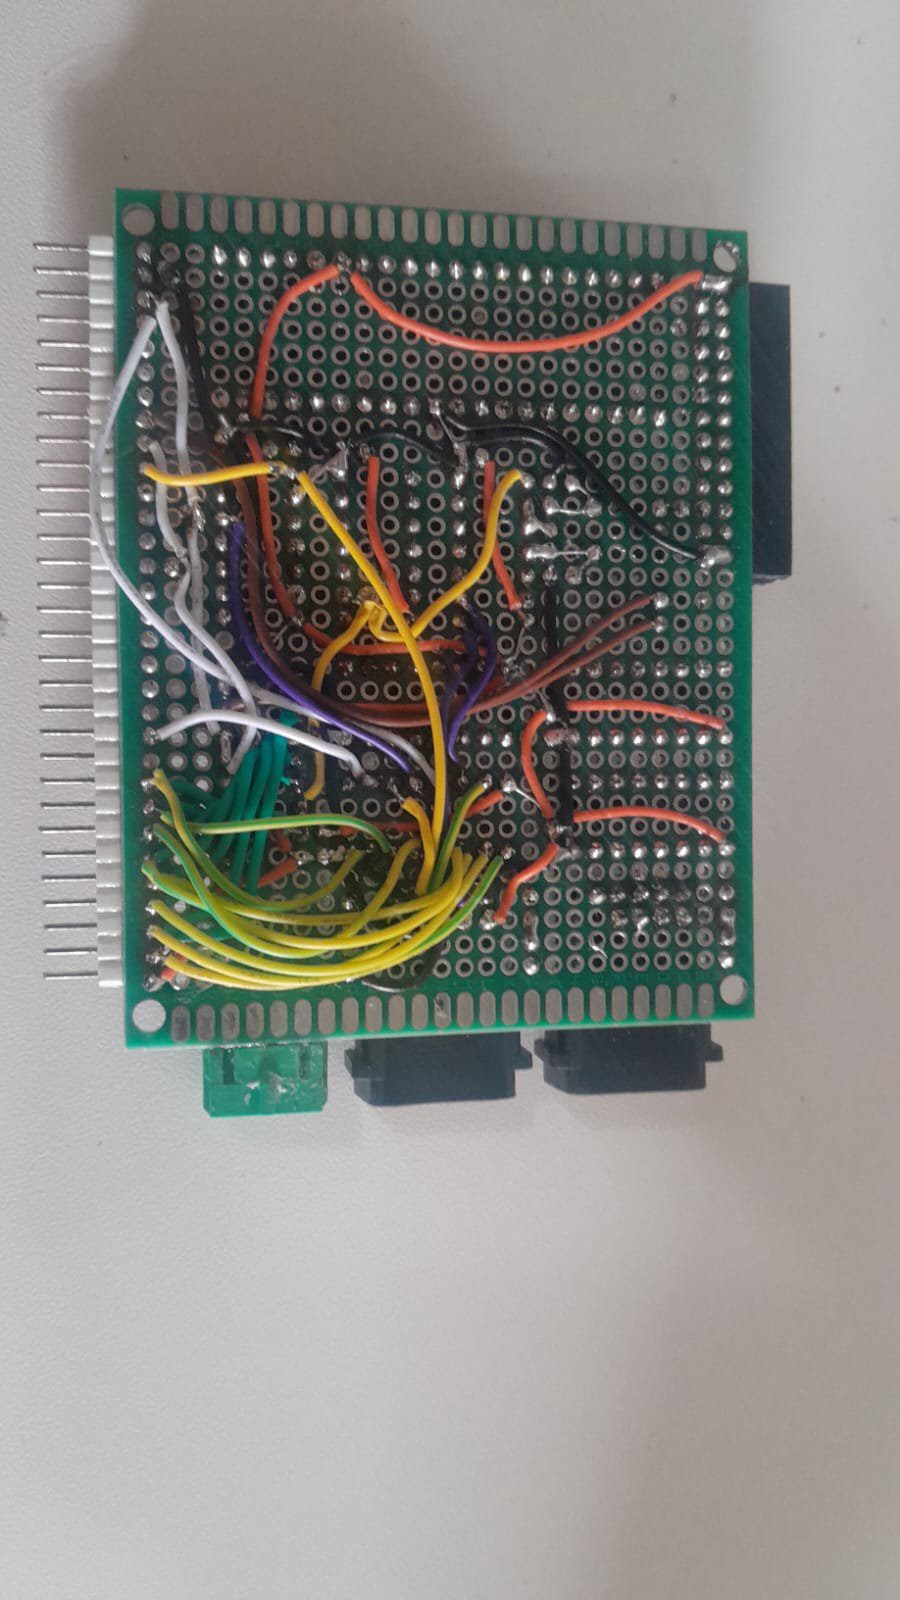
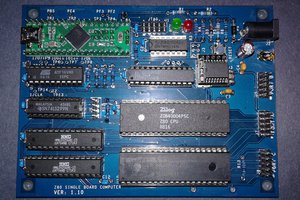
- Main Board - The Motherboard: It's contains the Z80 processor running at 4 MHz, 32K ROM and 64K RAM (two 65256 with 32K each), the Z80 SIO chip witch interfaces the serial up to 19200 baud rate by a RS2323 adapter, the clock generators for the Z80 CPU, and the Z80 SIO, the I/O decoder with a 74HC154, this one supports up to 16 I/Os, the LM7805 regulator, three expansions slots with 31 2.54mm pins each one, a 10 LEDs bar that help to monitore some CPU control pins and a simple reset circuit. I can easily modify the baud by selecting from 2400 to 19200 in the dipswitch and the CPU crystal clock can be exchanged by hands;
- Expansion Slot 0 - The VDP: This board is basically a TMS9918 VDP, 16K RAM and some glue logic to uses a 62256 instead of multiple 4116 SRAMs chips. This board also provides the connections for stereo audio and power to a small RCA monitor that I have here and has it's own 5 volts regulator;
- Expansion Slot 1 - The CF card: This one is a Compact Flash card interface to allow the computer to run CP/M and provides much more space than the 32K ROM, Its also has a 10 LEDs bar that is mapped to I/O 0x00h and acts as a status monitor. In the future, I want to wire up the seccond PATA connector to be able to connect a IDE cable and a hard drive directly to the computer in addition to the CF card;
- Expansion Slot 2 - The Keyboard and Controllers interface: This board is on development yet, its will provide a PS/2 keyboard interface directly for the computer and two SNES compatible controllers interfaces to play some games like the colecovision library. I would like to turn it indeppendent from my computer terminal, using this board to interface the keyboard and the CP/M to uses the VDP as a terminal;
- Display: It's not more than a simple 4,3 inch display that works with RCA video that I modified a little to add a sound output with one PAM8403 amplifier and two speakers opering on mono;
- Frame: A 3D printed frame that I make on Fuzion360 to match with the boards and add some structure sopport to then.
0%
0%
The Homebrew Handwired Z80 Computer - H2Z80
A 64K Z80 computher that you cand build by yourself only with perfboards, wires and some components
Become a Hackaday.io member
Already have an account? Log in.
Just one more thing
To make the experience fit your profile, pick a username and tell us what interests you.
Pick an awesome username
hackaday.io/
Your profile's URL: hackaday.io/username. Max 25 alphanumeric characters.
Pick a few interests
Projects that share your interests
People that share your interests


 Scott
Scott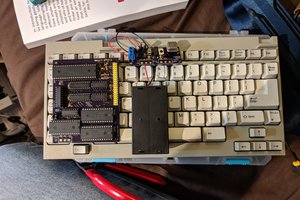
 Kyle Isom
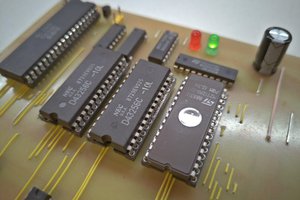
 Marek Więcek
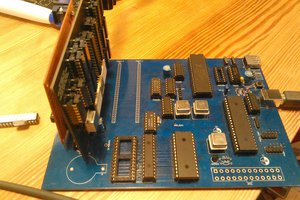
 Dylan Brophy
Check out Small Computer Central SC131.