-
Making Shirts With Cricut: A Guide to Get Started
14 hours ago • 0 comments![]()
Undoubtedly, using the Cricut machine is fun. But what about making shirts with Cricut? Obviously, it is easy. I am a professional crafter, and I own a mid-level crafting business. I love to experiment with several DIY projects, and shirts are one of them. If you are a great fan of handmade crafts and want to create shirts of your choice, I can help you with the right steps.
In the post right here, I will share with you all the crafters how to make shirts that everyone will praise. Yes, you get it right. By reading through this blog, you will get to know everything that revolves around creating shirts while using a Cricut machine. Dive deep into it and find the steps to design and make shirts with Cricut iron-on vinyl.
Why Make Shirts With a Cricut Machine?
Once you get to your Cricut machine, the first thing that comes into your mind is why make shirts when you have a Cricut. A beginner as well as an experienced crafter can find it easy and fun to create a design, iron the design onto the shirts, and more. There are other reasons, too. Find them below.
- Cricut shirt-making machine helps create the shirts exactly the way you want.
- Shirt-making is a cool crafting project that even a person without crafting experience can do.
- When you choose to create designs with your Cricut, the design will last longer than expected.
- These are ideal for clubs, holidays, and parties.
- You can start a side business.
Materials You Will Need for Making Shirts With Cricut
Did you make up your mind to make shirts with a Cricut machine? Well, first gather these materials and then enter into the tutorial.
- Plain shirt. You can use cotton or cotton blends
- Cricut everyday iron-on vinyl
- StandardGrip Cricut mat
- Cricut machine. You can use Cricut Maker Setup, Cricut Explore Air 2, or Joy.
- Cricut Design Space software
- Iron
How to Make Shirts With Cricut: 7 Easy-to-Follow Steps
There are three basic steps involved in the process of creating eye-catching shirts. In this section, I will explain all the steps thoroughly. Understand them and then follow them carefully and properly.
Step 1: Designing a Shirt
The first part of getting started with creating a shirt is making a design of your choice. Follow the below-mentioned steps to create an excellent design.
- The first thing to do is open the Cricut Design Space app.
- Once you are there, tap on the Start a New Project option.
- After that, move to the left-hand menu.
- Now, select the Template option that is present there.
- Alternatively, you can skip the template option.
- Then, select the Image option and add your predesigned image.
- Insert the design you want properly.
- Next, add the shape or text you want to include in the project.
This way, you can finalize the design you want to have in your shirt project. One thing you need to note is that if you want to get printed iron-on vinyl elements in similar colors, move to the layer menu and make changes.
Step 2: Resizing Your Shirt Design
The next step in making shirts with Cricut is to use the right size for the design. Look at the step-by-step instructions below to determine the appropriate size for the design.
- In this step, you will need to determine the placement of the iron-on elements.
- If you are satisfied, look at all the elements.
- After that, select all the elements available.
- Finally, resize the design based on your choice.
Step 3: Cutting Out the Design
After the design is resized, the following step you need to move on is cutting out your design. To do this, here are step-by-step instructions.
- If you find that the design is nice, tap on Select All.
- After that, hit the Attach option.
- Next, you will need to click Make It. You can find it at the top-right of the app.
- When the next screen appears, make sure to choose Mirror.
- On the following screen, press Continue.
- Move to your Cricut machine and set the Dial to Custom.
- Following this, enter the Cricut Design Space screen....
-
How to Make Shirts With Cricut: Creating From Scratch
05/14/2024 at 10:31 • 0 comments
how to make shirts with cricut How to make shirts with Cricut? I assume this is the sort of question you might be looking for answers to, right? Don’t worry—take a deep breath and say Thank God😁! Yes, because god has landed you on the right page!
Making shirts with Cricut is always fun for me. Even though I have made hundreds of projects to date, personalized shirts are still my favorite. I am kind of obsessed with them! But WHY??????? Because I always create them for someone I love, they are always a gift. And I like to give something handmade.
Okay, I have already explained the stepwise methods for making shirts with Cricut.com/setup. The following project is easy to create using any Cricut model. Now, let’s get started without any further ado!
What Supplies Are Required to Create a Shirt With Cricut?
Okay, so what do you need to make shirts with a Cricut? Since I am going to make a shirt for my mom on her 49th birthday, I needed some supplies. So, before you learn how to make shirts with Cricut, let’s have a look at the materials you will need to gather.
- Weeding tools
- Cricut LightGrip mat, or you can also use an older standard mat (green), which is less sticky. Ensure the mat is clean.
- EasyPress machine or household iron
- EasyPress mat or towel to keep it under the heat source
- Teflon sheets or protective sheets, e.g., wax paper
- Laptop or computer (MacBook or Windows computer) for using the Cricut software app
How to Make Shirts With Cricut: 5 Easy Steps
Once you have gathered the materials or supplies to make shirts, you can learn how to use Cricut for shirts. I will walk you through the steps one by one so that they aren’t too confusing for you. So, are you ready to start? If so, let’s start!
Step 1: Create a Shirt Design on the Cricut App
Probably the most challenging thing I’ve found was deciding which design to create. The more complex it is, the more time-consuming it will be. Therefore, I chose a text-based simple design. Everyone can create it in no time. Want to see what it is? It is “Blessed MAMA.”
In order to create it, you have to follow the steps I’ve described below:
- Launch a Cricut Design Space app on your computer and hit the New Project tab.
- In order to add text, click on the Text button on the left side.
- You can add the texts that you like and modify them accordingly. However, I have typed “Blessed” and “Mama” in two separate boxes.
- Then, select the font style you like and then weld them together using the Weld tool.
- After that, you must attach them so that Cricut will cut exactly as it is.
- Now, Save your text design and click Make It in the top right corner.
Step 2: Cut the Vinyl Using Your Cricut Machine
Now, it’s time to cut vinyl. Okay, fine, but are we forgetting something? Oh yes, it’s the MIRROR setting! We must mirror our vinyl design before cutting, especially when it is text.
For symmetrical designs, it's okay if you don’t mirror the design.
To mirror the text, you must return to the Cricut app (After clicking the Make It button) and enable the Mirror toggle button. Enabling this option will flip over your entire text or image.
Step 3: Settings for HTV or Iron-On-Vinyl
For Cricut Explore Air or Cricut Explore Air 2 Setup users, they need to turn the wheel to iron-on.
One thing I have noticed is that I get the best results when I turn the wheel to Custom and then select the material from the drop-down menu.
However, if you are using everyday iron-on vinyl, you will see this setting on Popular Materials, and you just have to click on it.
On the other hand, I prefer to select Search all materials if I am using specialty iron-on vinyl. So, from the drop-down menu, just select iron-on vinyl.
Step 4: Place HTV or Vinyl on a Cricut Mat
Placing vinyl is not something that you just grab and place on the mat. There is a shiny and dull side to your vinyl. You have to be extra careful when placing...
Read more » -
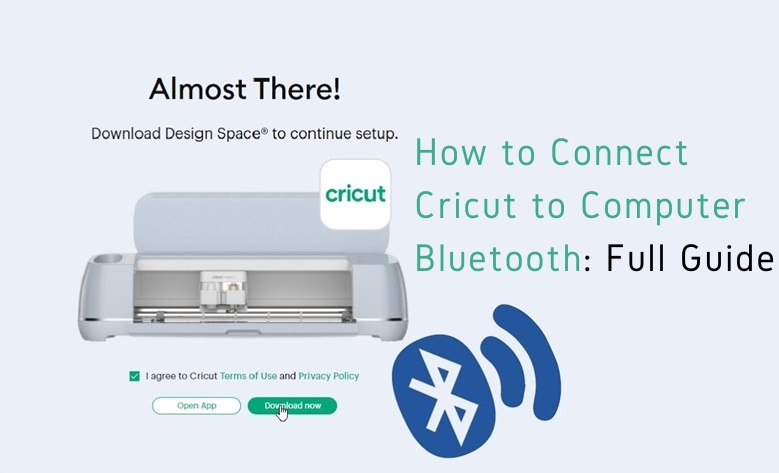
How to Connect Cricut to Computer Bluetooth: Full Guide
05/01/2024 at 10:35 • 0 comments![]()
Connect Cricut to computer Bluetooth using the simplest steps described in this blog. Yes, you heard that right! I am very confident about the steps written in my blogs. This confidence comes from a year of experience as a crafter. I still remember the day I got my first Cricut new machine setup and Mac together. Connecting my Cricut to my Mac seems challenging as I was not used to using my Mac. So, I just took a USB cable that came with my Cricut, plugged it, and started using it.
Day passed, and finally, when I became a pro-Mac user, I connected my Cricut to Bluetooth. Gradually, I also got some new Cricut models and learned all the setup methods, including pairing and setting up the machine. Just like that, I am going to teach you how to connect Cricut to Bluetooth. Let’s dive into it to learn more.
System Requirements to Connect Cricut to Computer Bluetooth
Why are system requirements important? Well, it might not be very important for connecting purposes because it has nothing to do with your Windows operating system until it has a Bluetooth feature. But what is the benefit of connecting to a device that can be used further with your Cricut software app? Yes, in order to run the Cricut app on our computer, you will need a compatible device. To do this, you have to check your software as well as hardware. Let’s check it below:
For Windows
- Operating System - Windows 10 or later (64-bit)
- RAM - Minimum 4 GB
- Disk - 2 GB free
- CPU - Intel Dual Core or equivalent to AMD processor
- Display - Minimum 1024px x 768px screen resolution
- Connection Options - A USB port or Bluetooth
For Mac
- Operating System - macOS 11 or later
- CPU - 1.83 GHz
- RAM - Minimum 4 GB
- Display - Minimum 1024px x 768px screen resolution
- Connection Options - A USB port or Bluetooth
- Disk - 2 GB
Connect Cricut to Computer Bluetooth (Windows)
When connecting a Cricut machine to a computer wirelessly, you have to ensure that your computer is capable of running the Cricut software. Although every computer with Bluetooth features can not hinder you from establishing a connection, you should always pay attention to system requirements. To know the system’s needs, you can go to Cricut’s official website. Once you are sure that your device is compatible, start following the steps below:
To learn how to connect Cricut to Bluetooth, first decide where you want to place your Cricut machine. This is a must before connecting it to your Windows PC. The distance between the PC and Cricut should be no more than 15 feet. Once you have placed Cricut correctly, follow the steps:
- Head to the Start menu icon and choose a gear-like icon that is Settings.
- Next, you will need to select the option Devices.
- After that, verify if your Bluetooth is ON.
- Then, select the Add Bluetooth or other device.
- Once done, you will have to select the Bluetooth option.
- Now, wait for a while and let your computer find your Cricut cutting machine.
- As you find it in the available list, select the model to pair your devices.
Connect Cricut to Computer Bluetooth (Mac)
In order to connect Cricut to a computer using Bluetooth to the Mac computer. You have to ensure the proper placement of your computer and Cricut. In other words, you have to place them near each other. Once done, follow the steps below to connect:
- Then, you have to check whether your Mac is turned on or off.
- Afterward, turn the Mac computer on if it is off.
- Then, go to the Apple menu and choose the System Preferences option.
- Here, you need to discover the Bluetooth option on your Mac.
- Next, when you have Bluetooth on, find your available Cricut models.
- Select the machine from the available list.
- Lastly, you will be connected to your Mac.
Finally, you have learned to connect Cricut to computer Bluetooth. Now, connect your Cricut and begin your Cricut machine setup hassle-free.
FAQs
Which MacBook is best suited for a Cricut machine?
In my opinion, the Apple MacBook...
Read more »


 Mukesh Sankhla
 Dave Pedu
 jon.knutton
 Mike Rigsby
 Alan Cyr
 Angkan Gayen
 Elliot
 Dave Ehnebuske
 electronicsworkshops
 RIUM+ (Mike Ando)
 K+
K+ Andrea Console
 Sagar 001
 Paweł Skórka
 Marius Taciuc
 dearuserhron