 M. Bindhammer
*** UPDATE ***
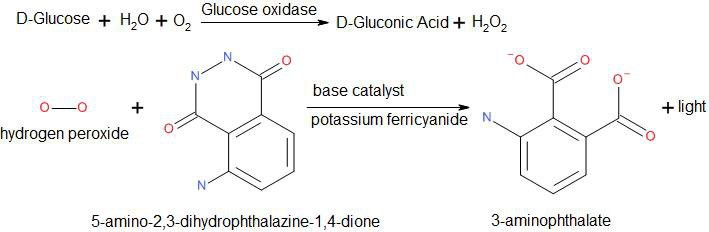
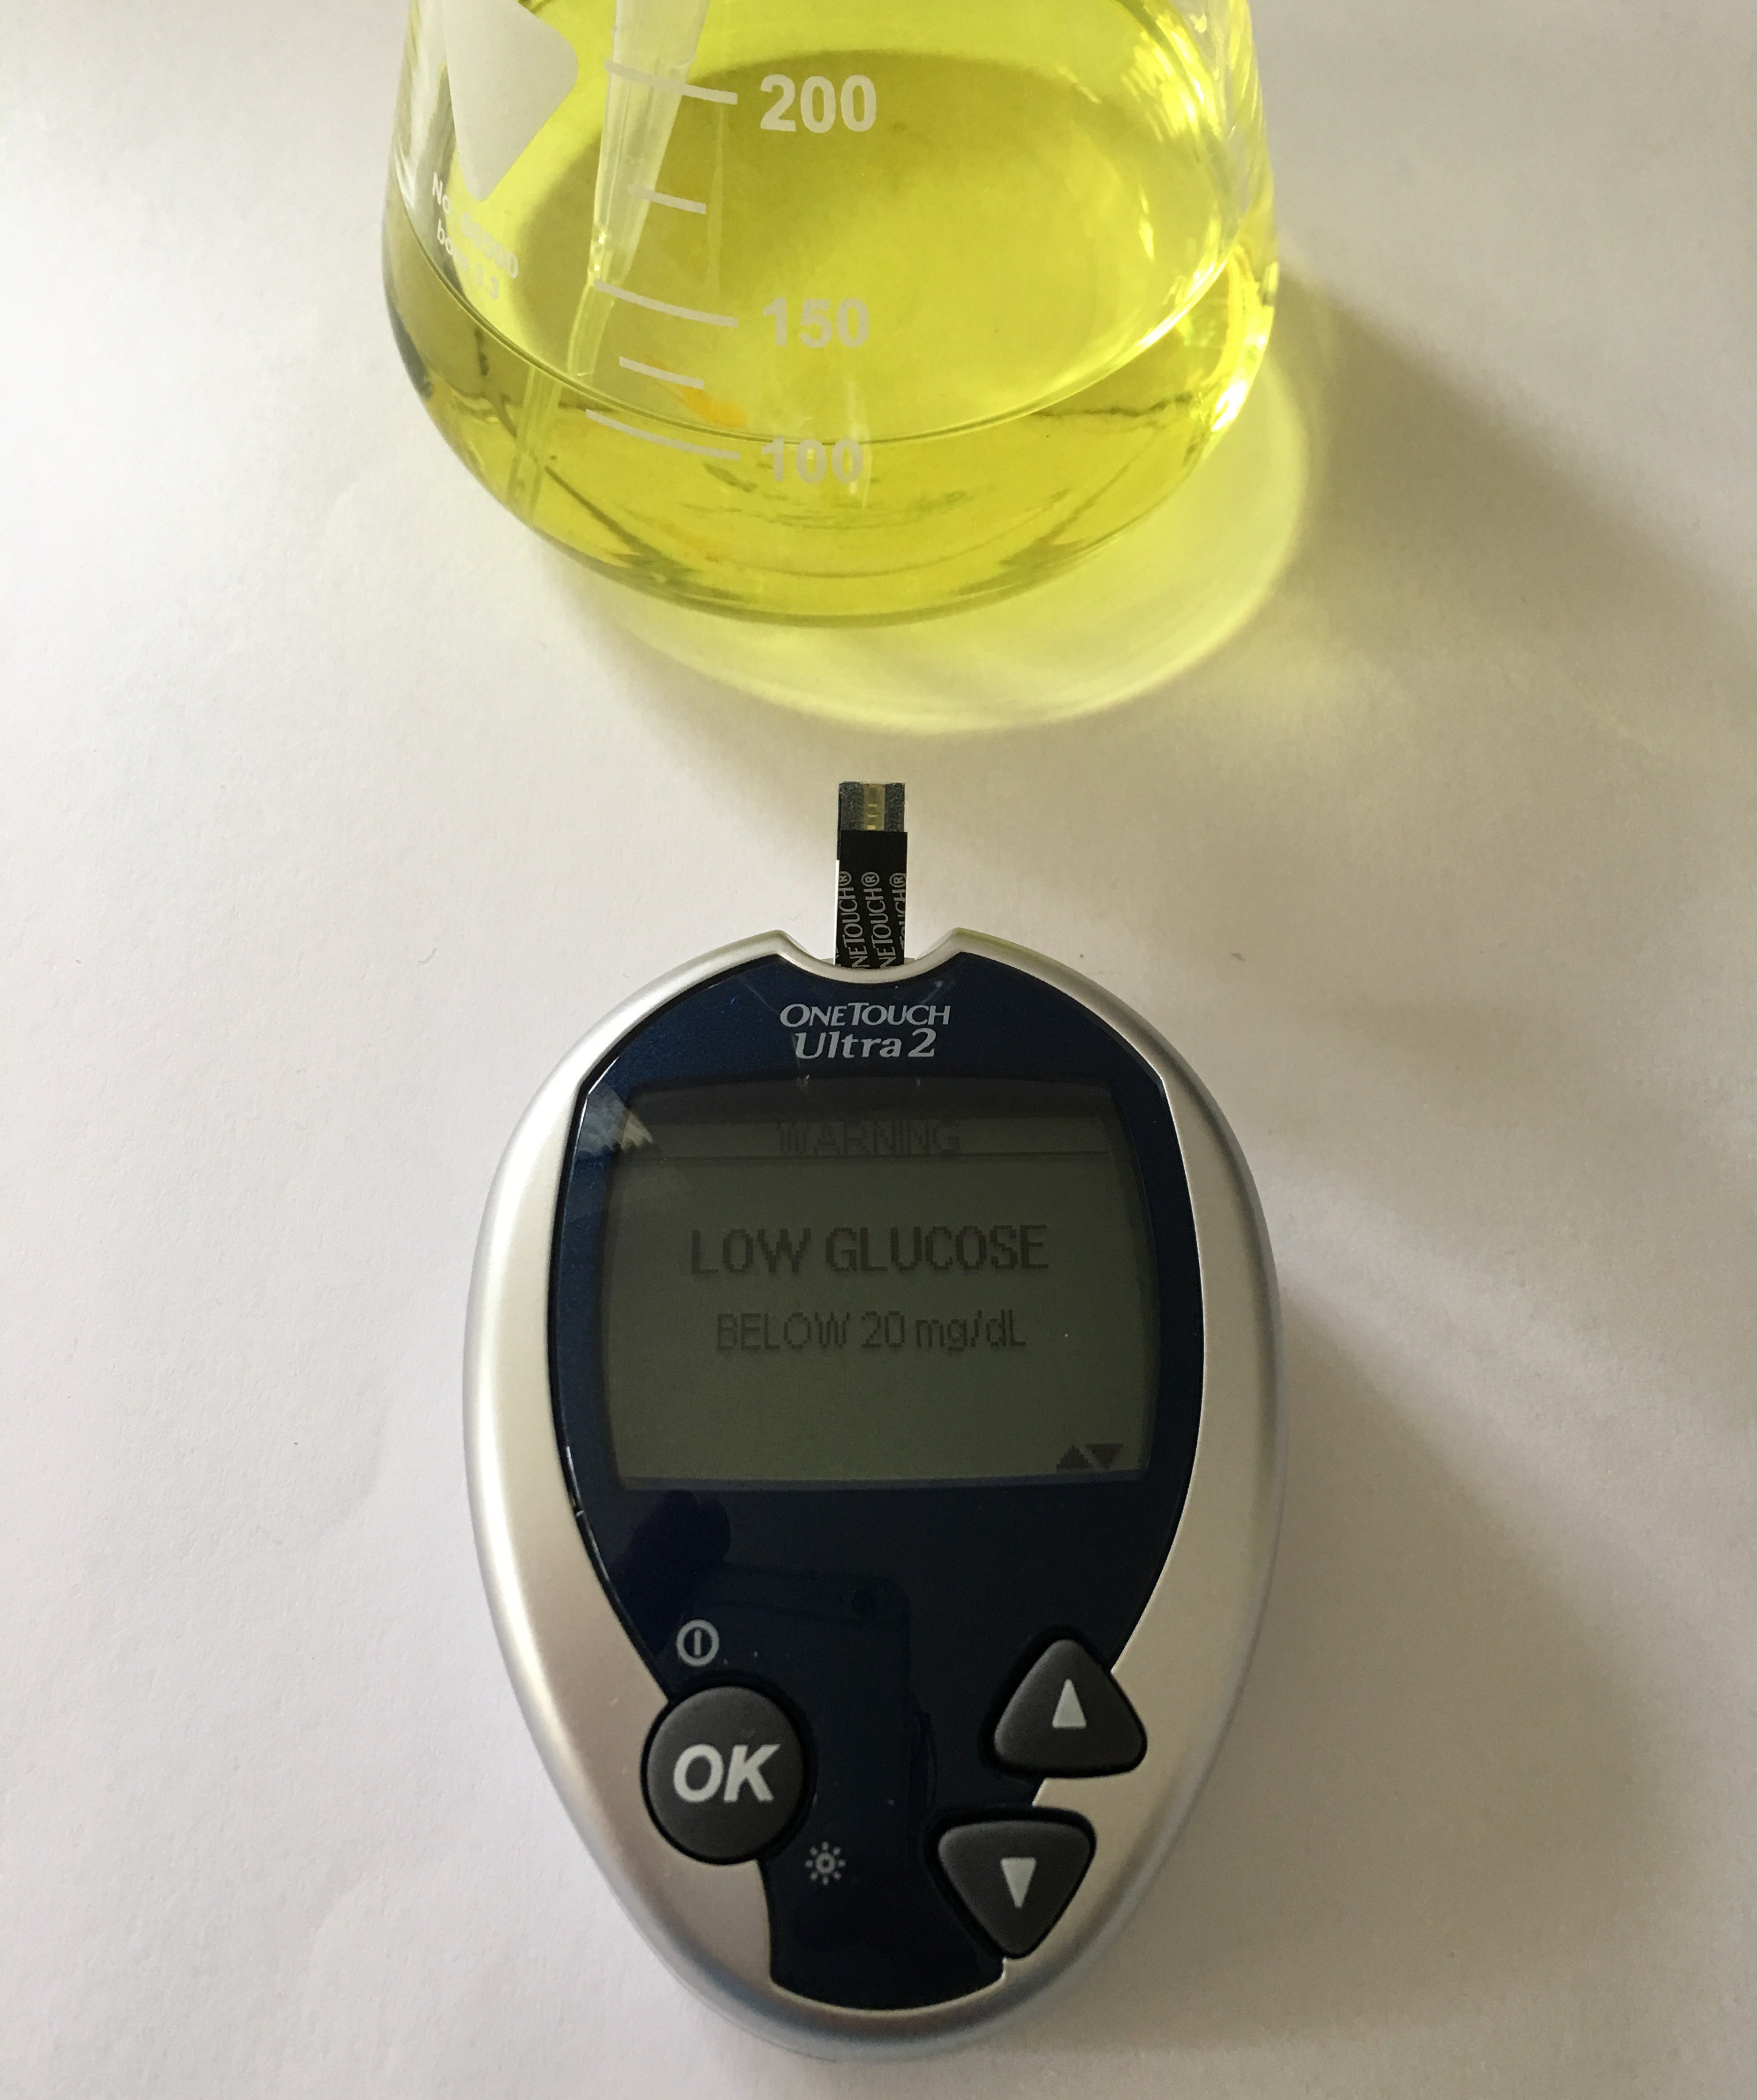
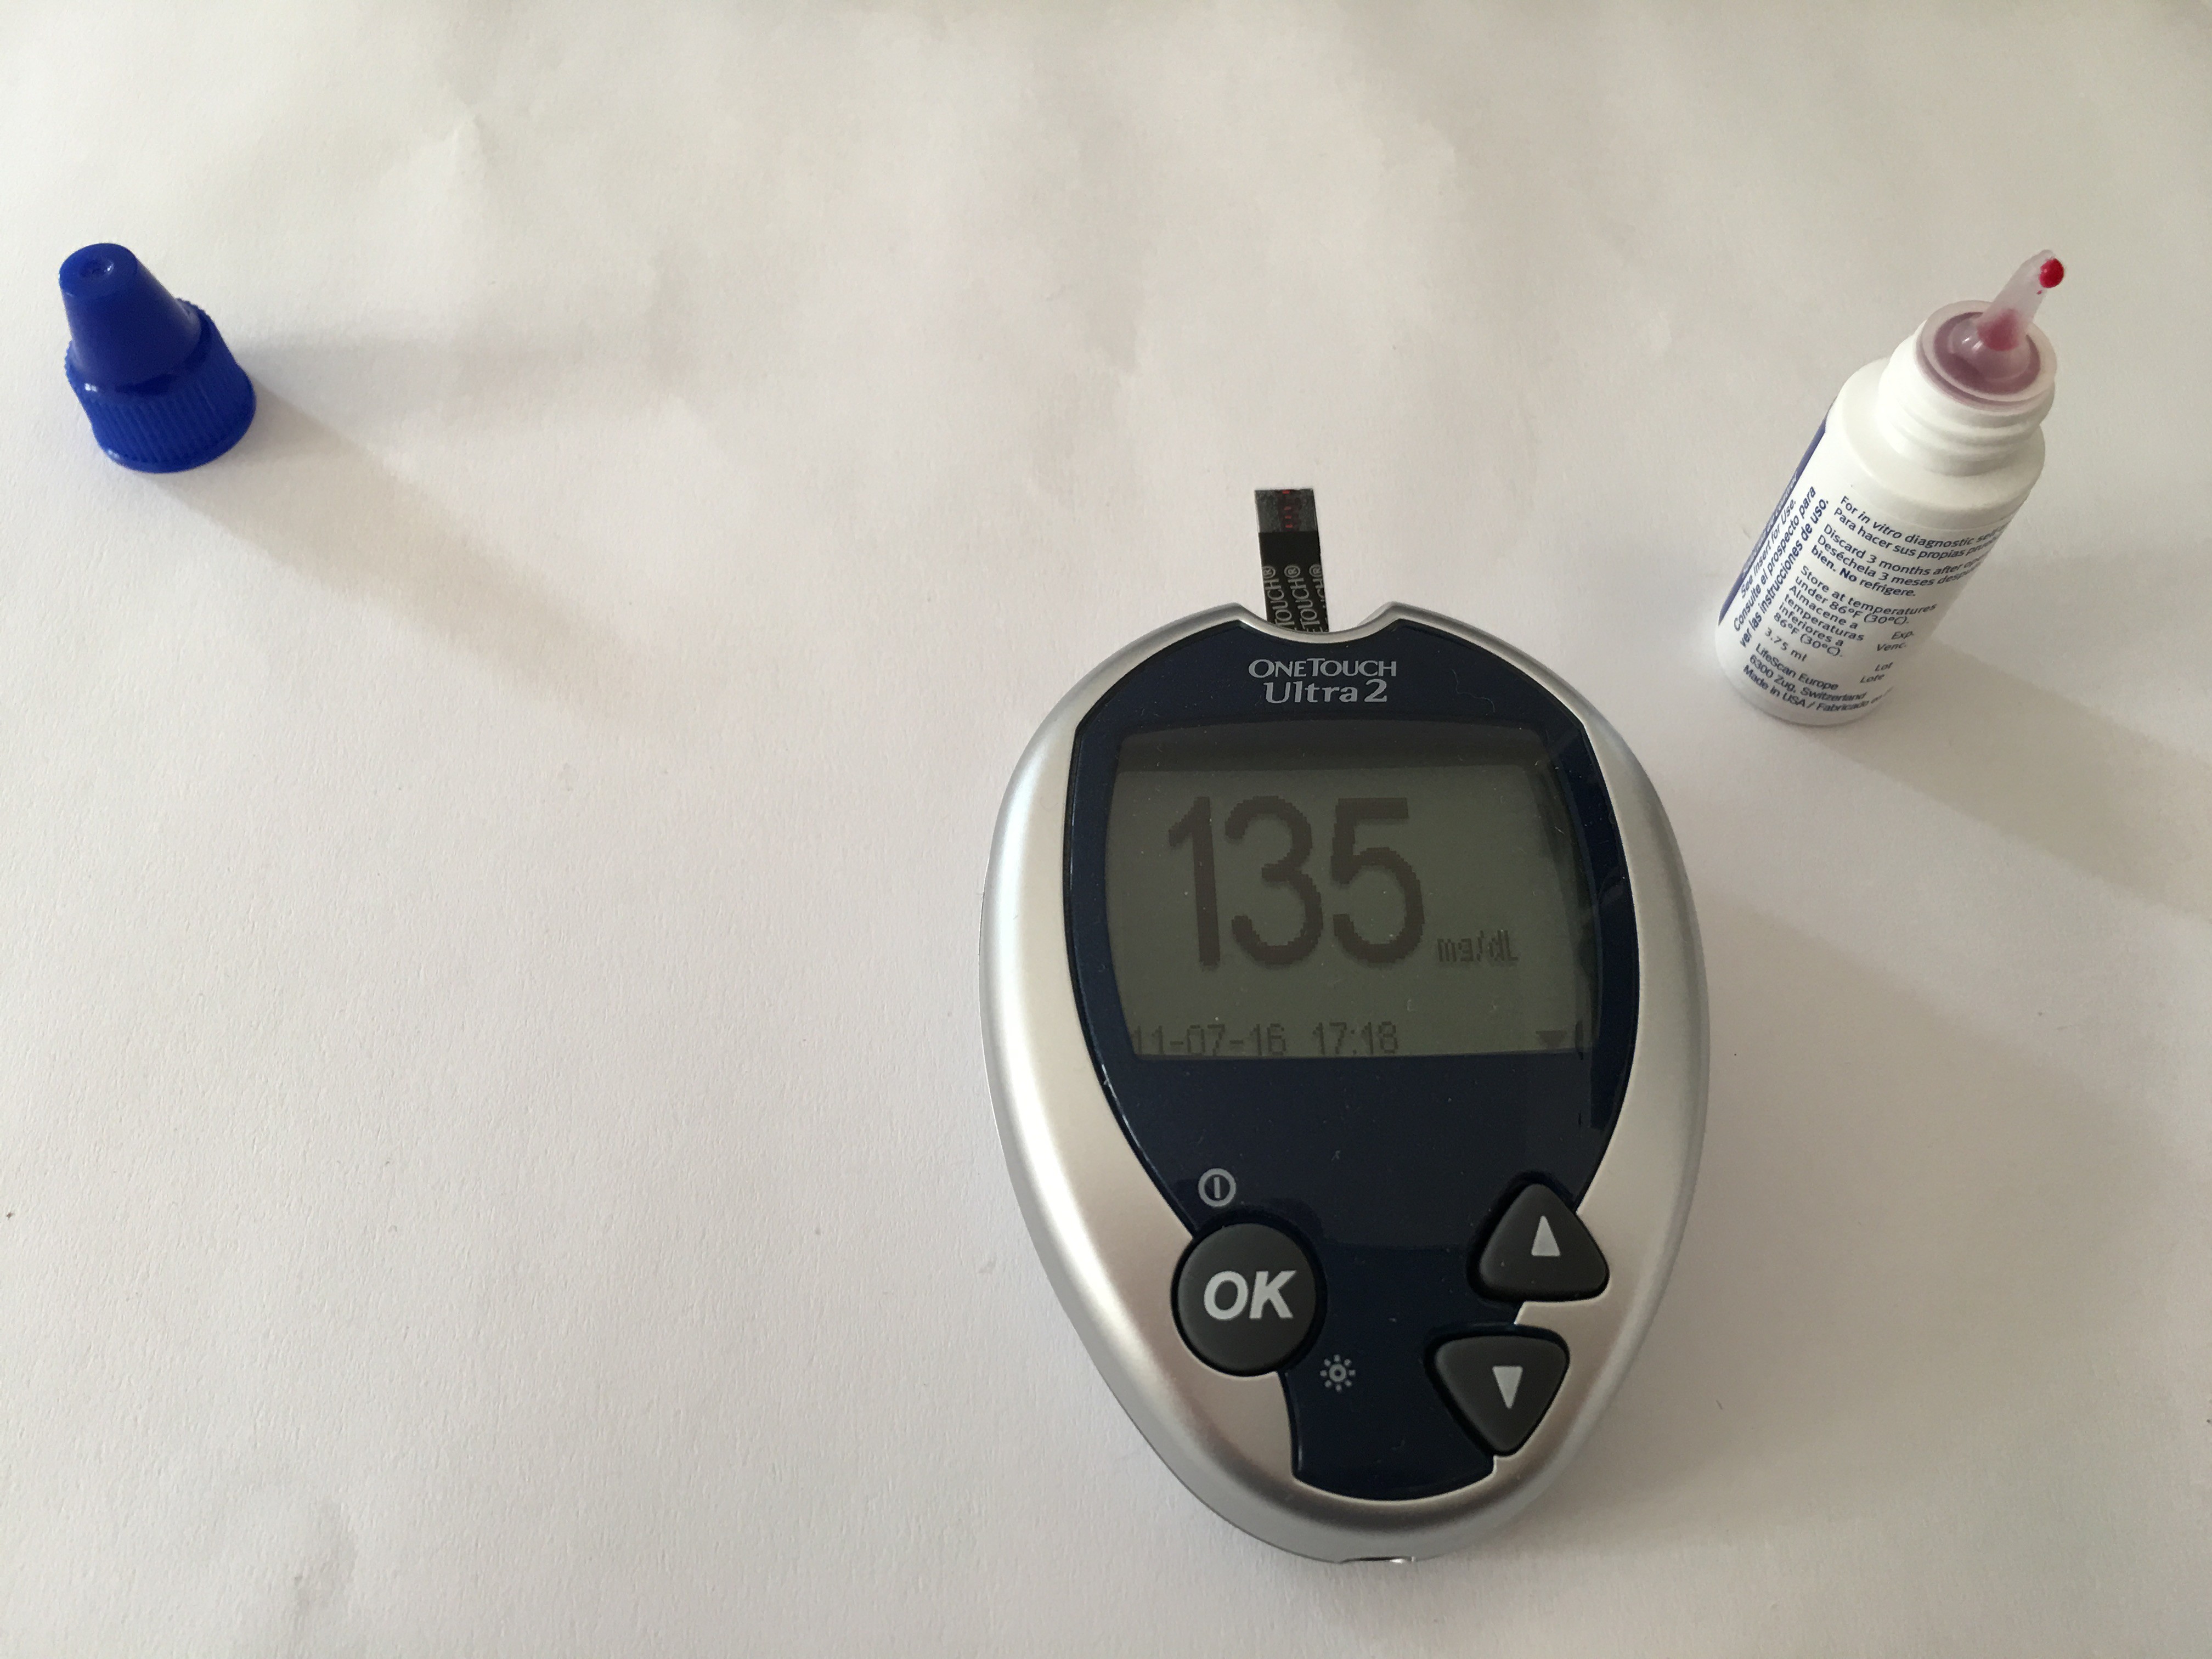
Now that glucose oxidase is available from bakeries and wineries, an open-source glucose test strip has become possible. Here are the first two experiments I conducted with glucose oxidase:
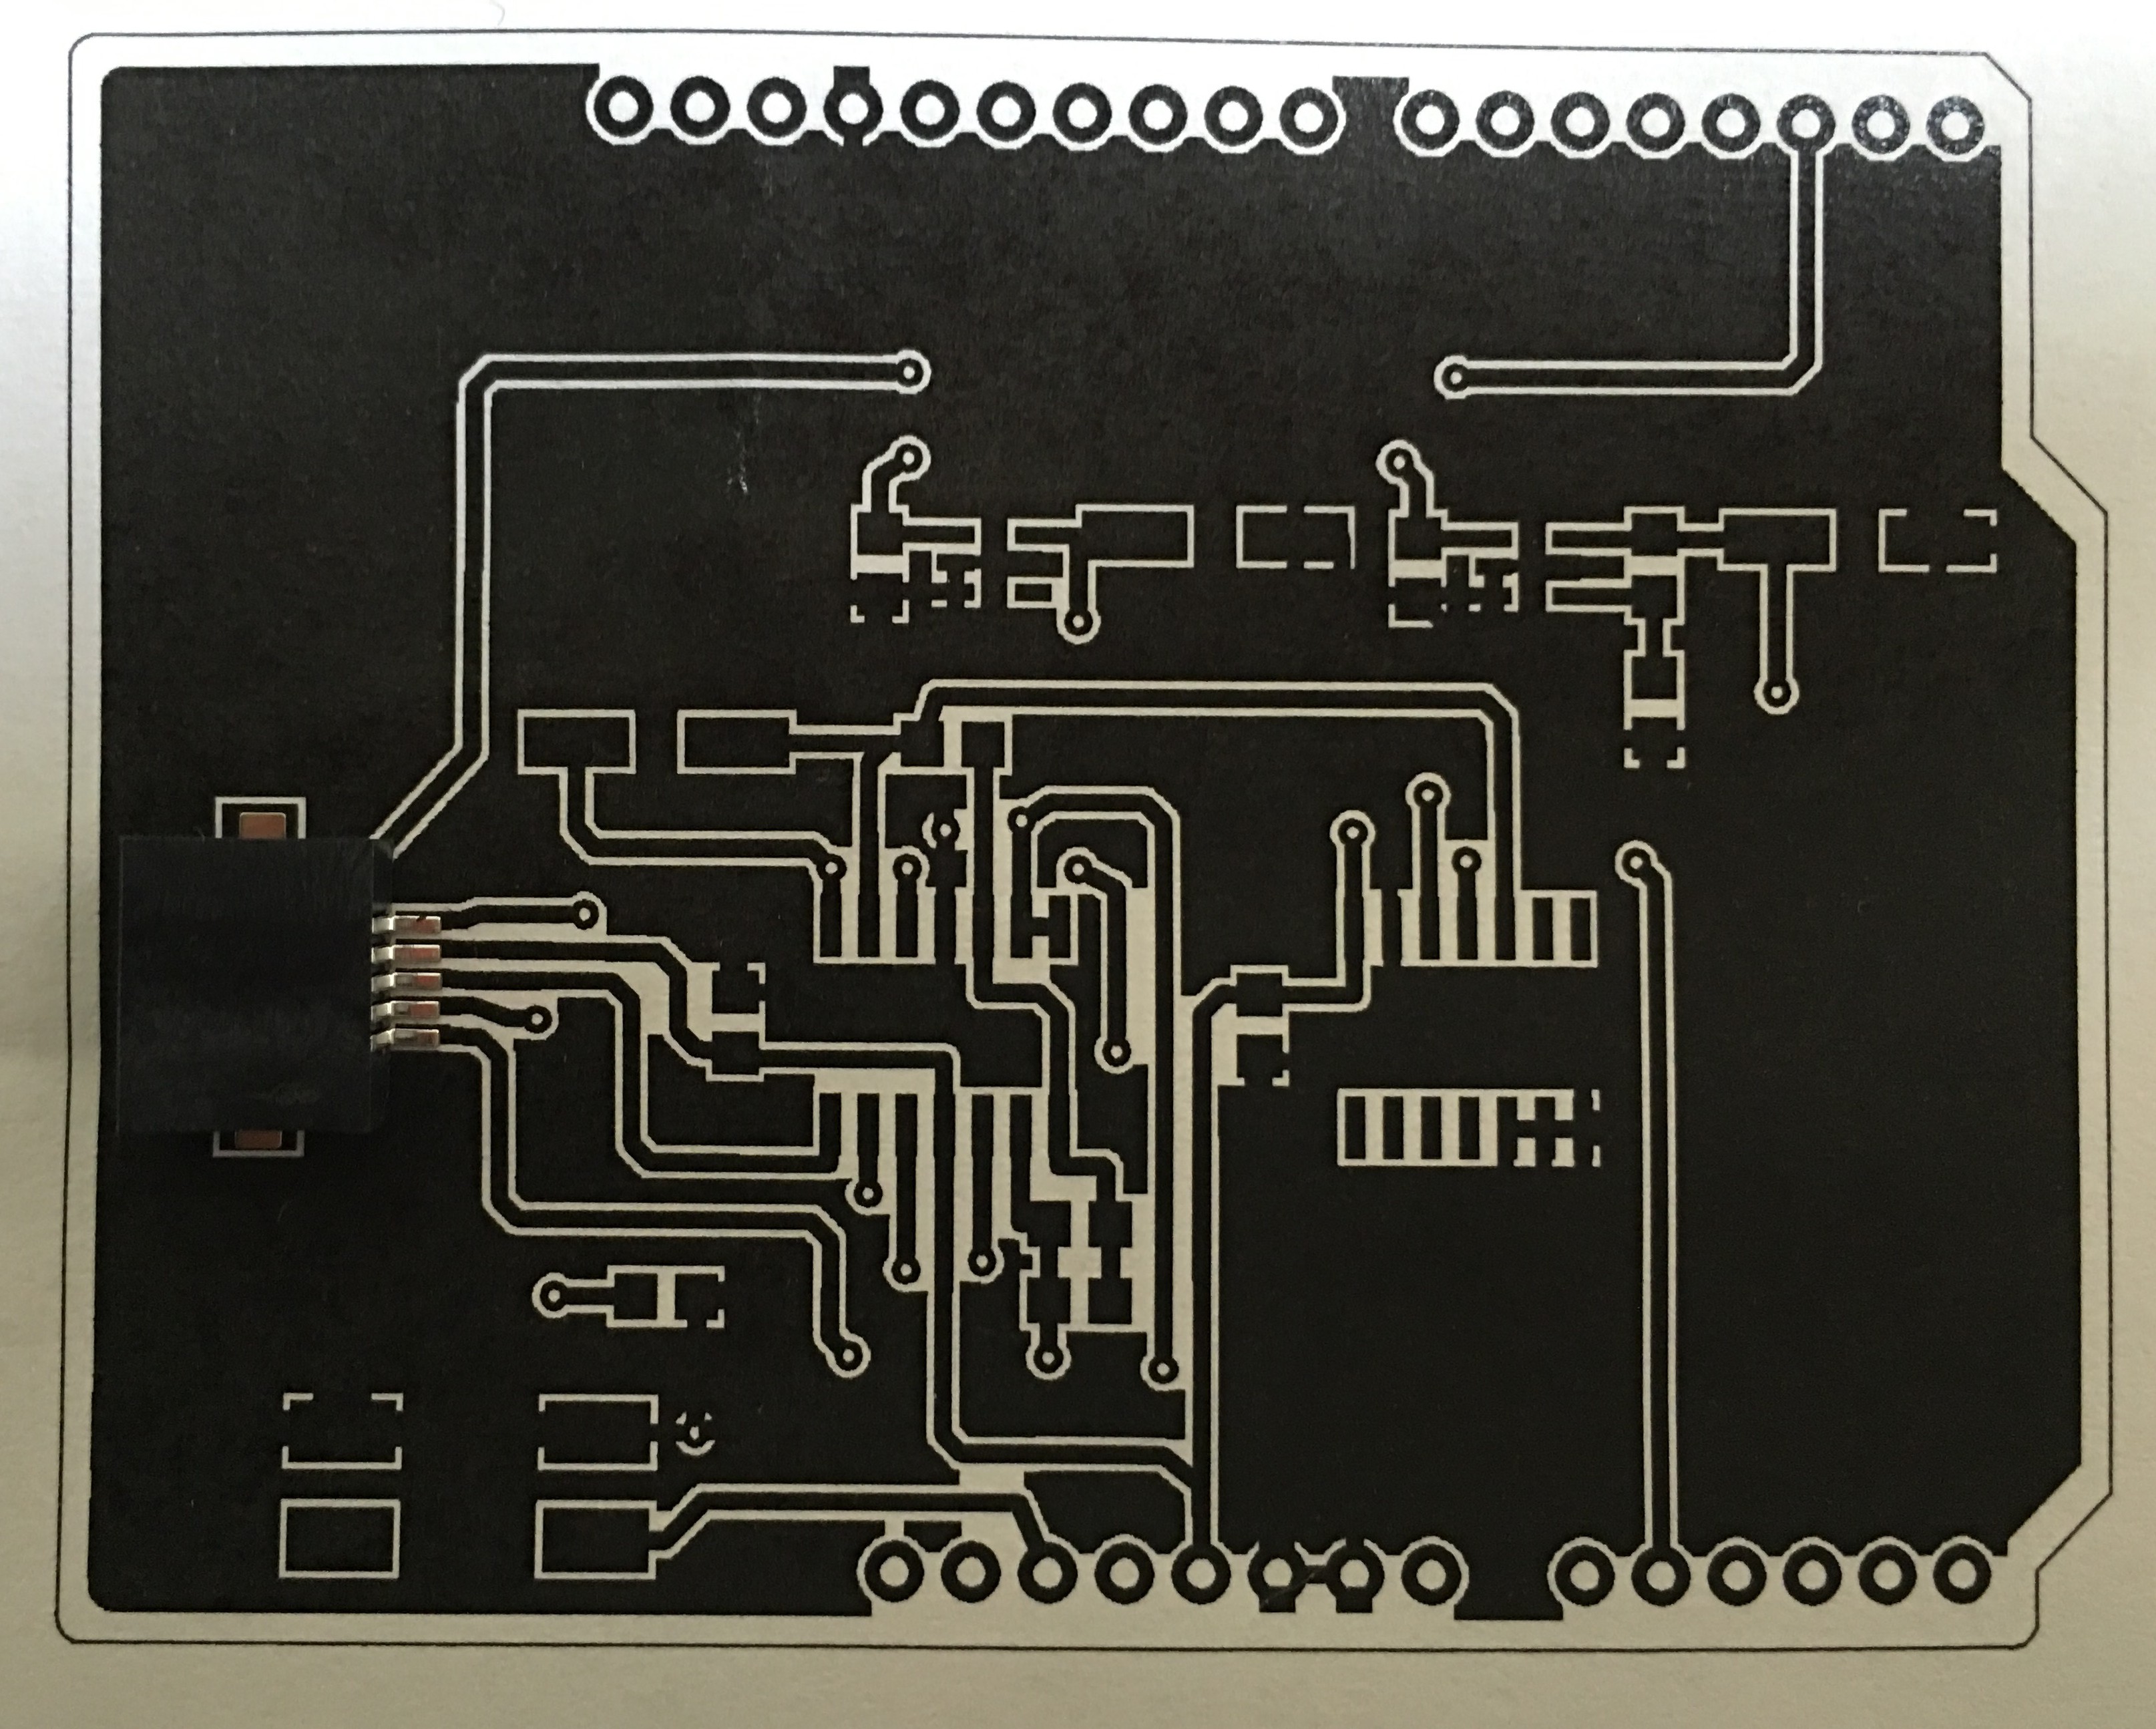
The working electrode, counter electrode, and reference electrode of the One Touch Ultra test strips consist of conductive black ink, presumably a binder, and graphite. The carrier material consists of acrylonitrile-butadiene-styrene.
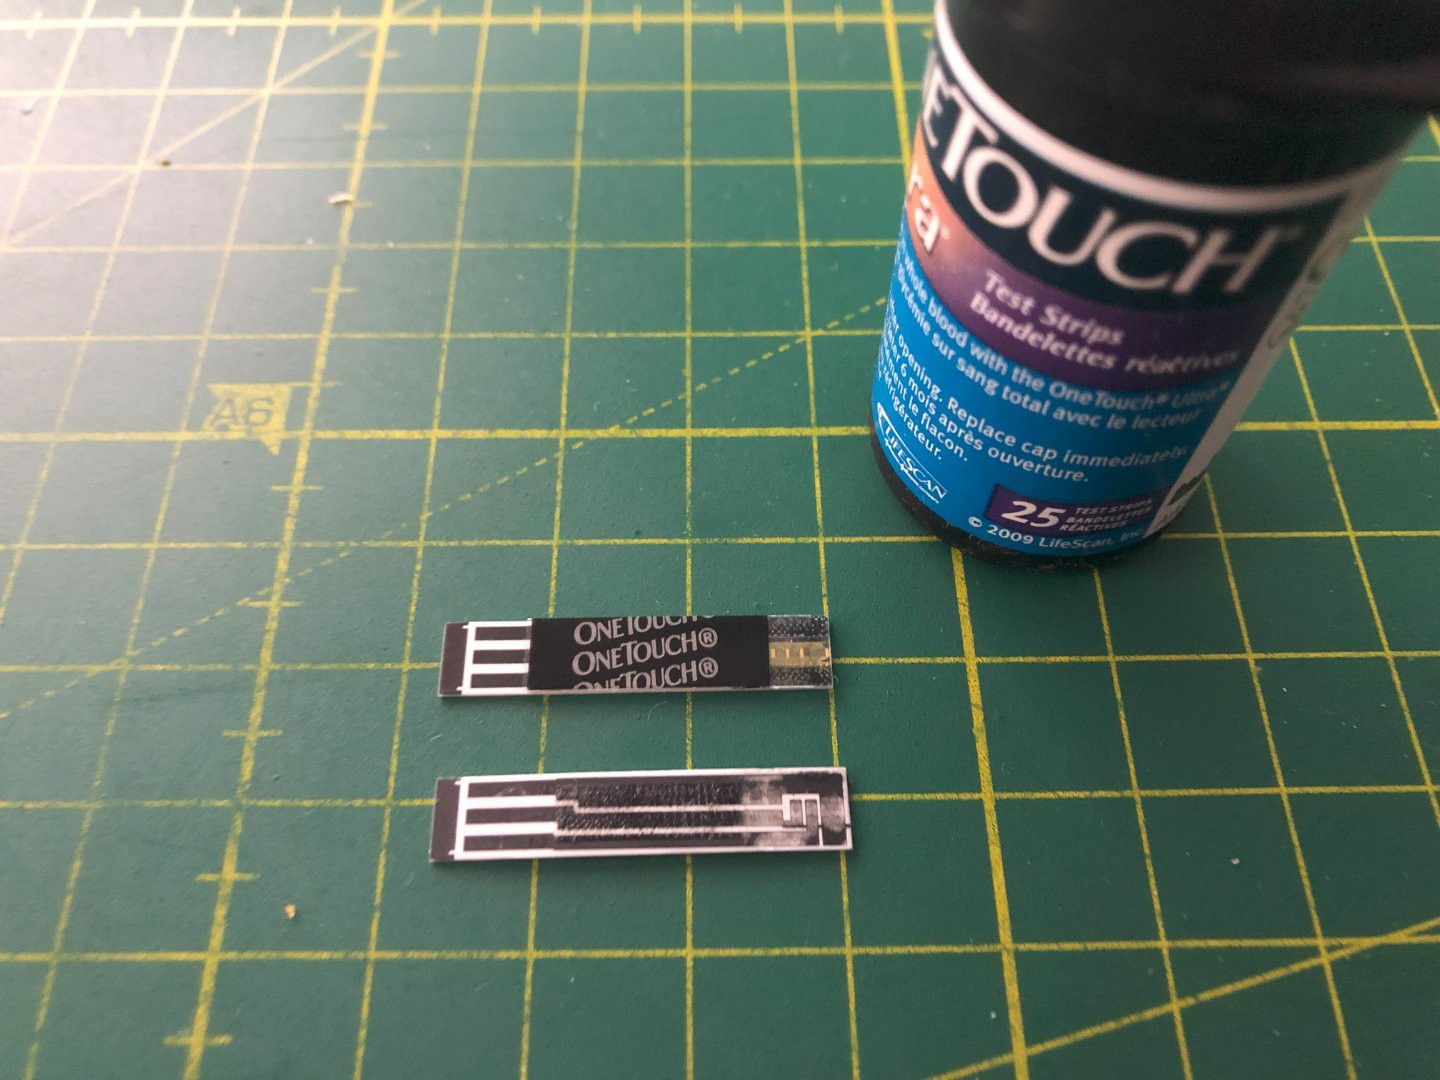
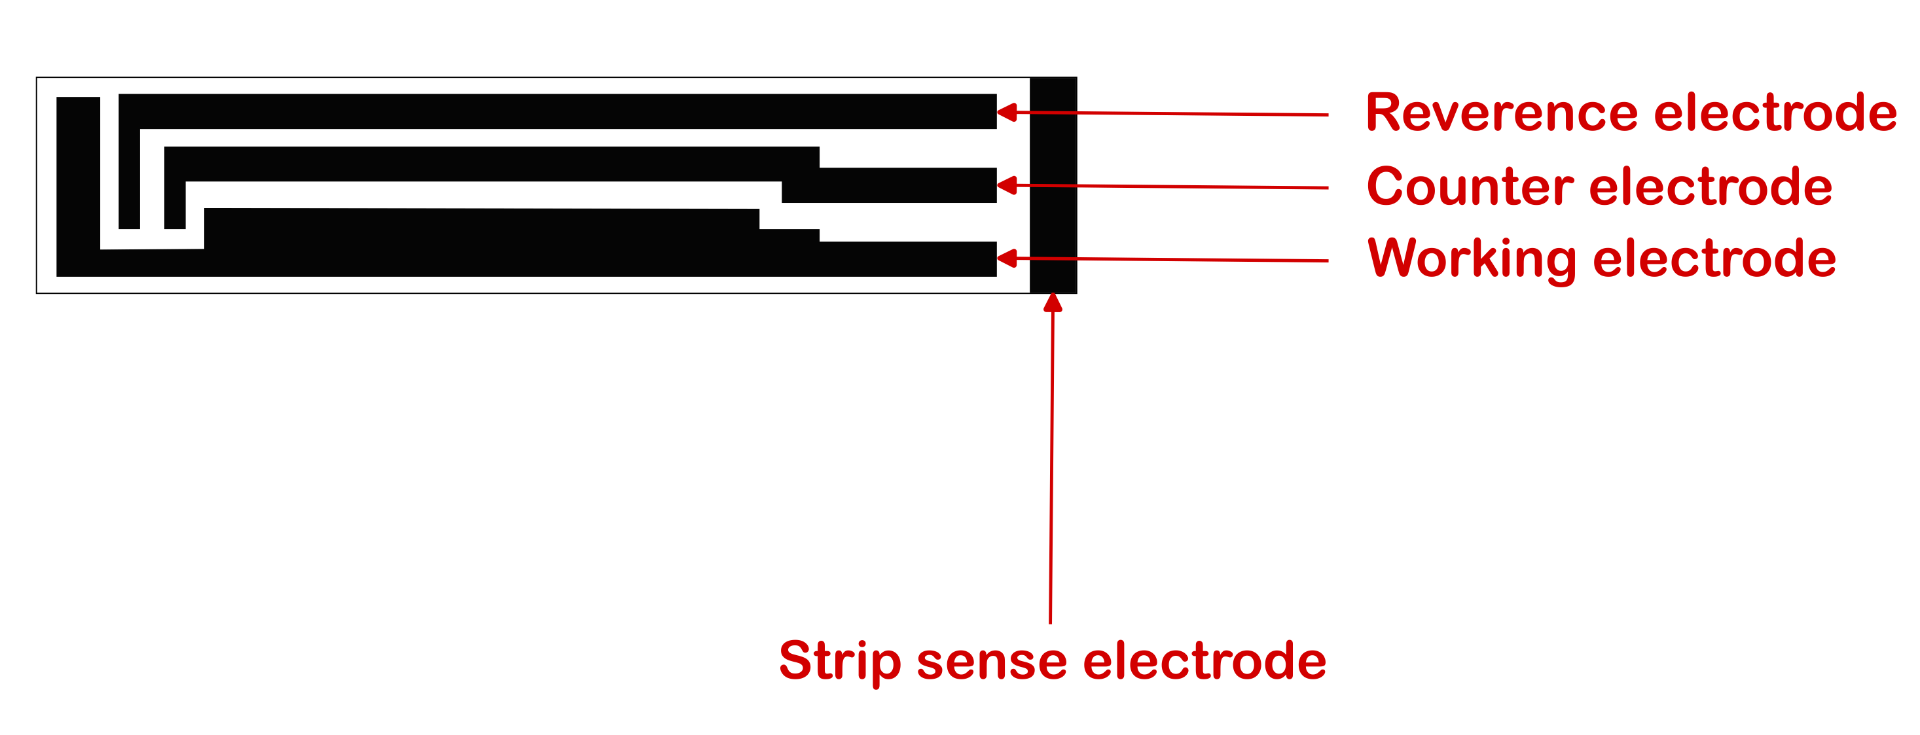
Such test strips could easily be produced using a laser-cut stencil. Such stencils are often used to apply solder paste when assembling PCBs. 1:1 representation of the electrodes on the test strip:
Introduction
Such test strips could easily be produced using a laser-cut stencil. Such stencils are often used to apply solder paste when assembling circuit boards. 1:1 representation of the electrodes on the test strip:
Diabetes is a serious disease that affects nearly 400 million people worldwide and is the 8th leading cause of death. Blood glucose meters play a very important role in managing diabetes as they provide the patient with the ability to monitor their blood glucose levels from home and at any time of the day. The pharmacy provides a large number of blood glucose meters and accompanying test strips. Typically, the patients insert one of the disposable test strips into the meter, prick their finger, load a droplet of blood into the test strip, wait a few seconds, and get an instant reading of the current blood glucose level.
Basic principle of operation
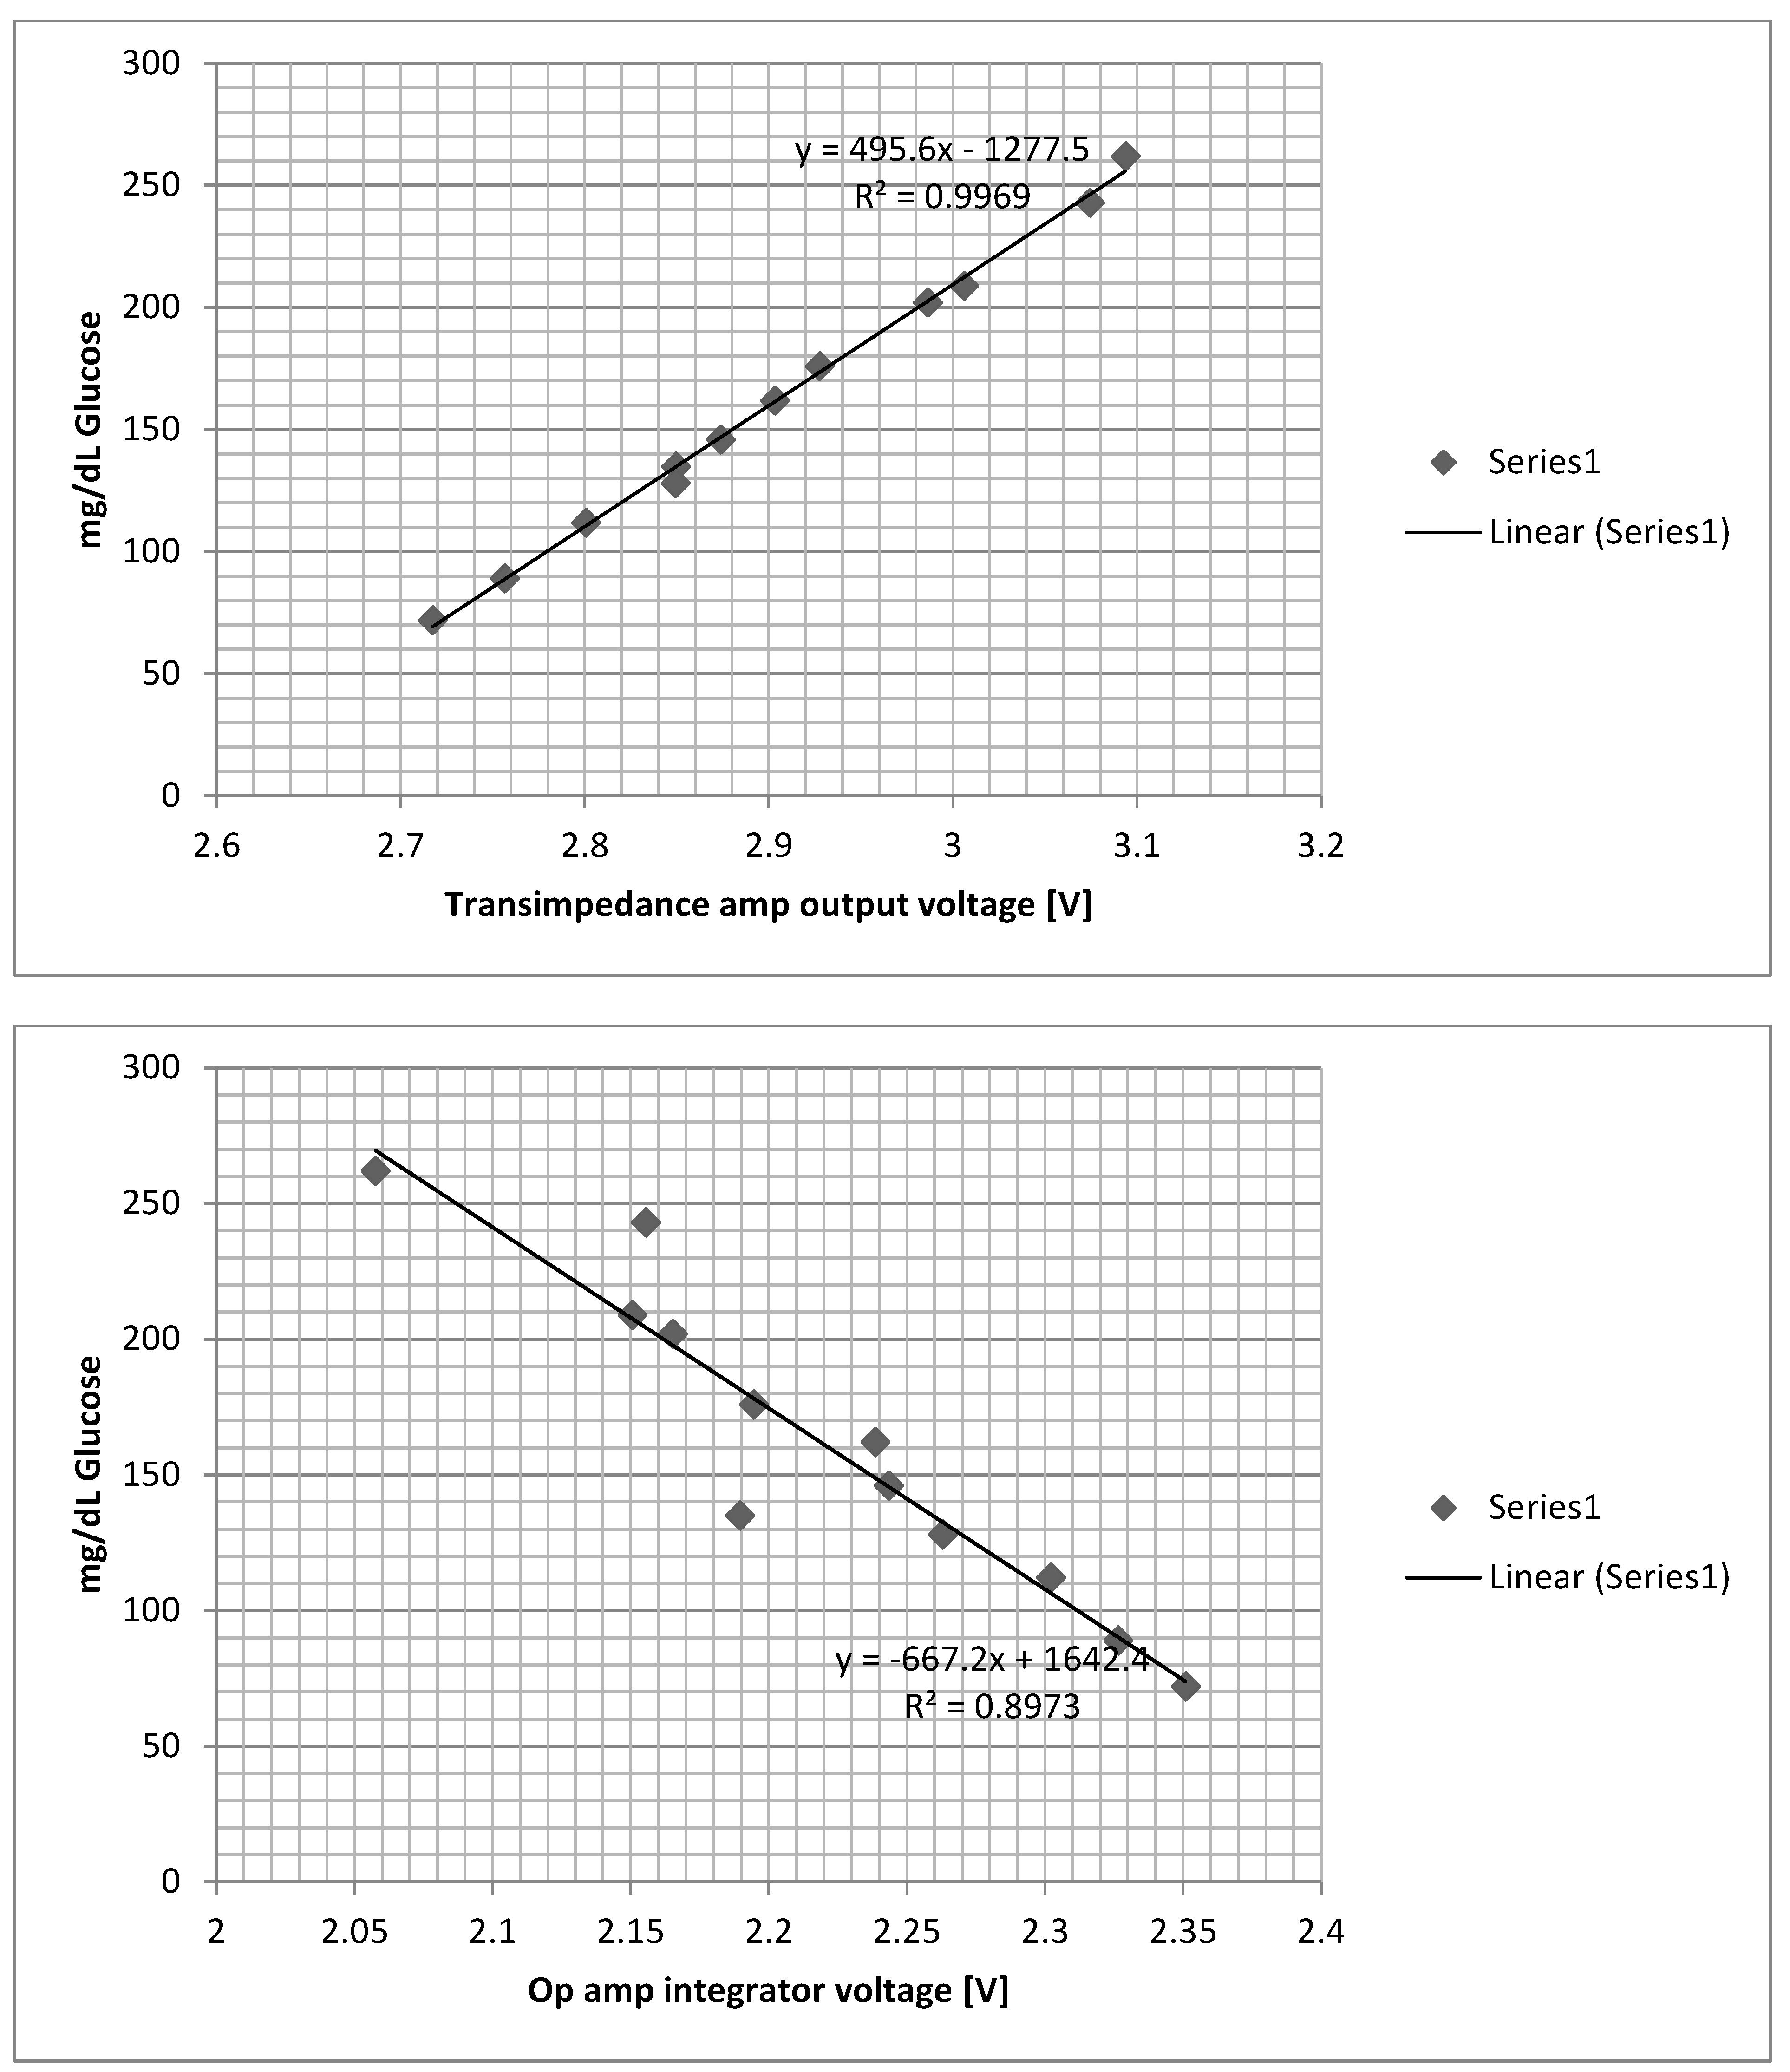
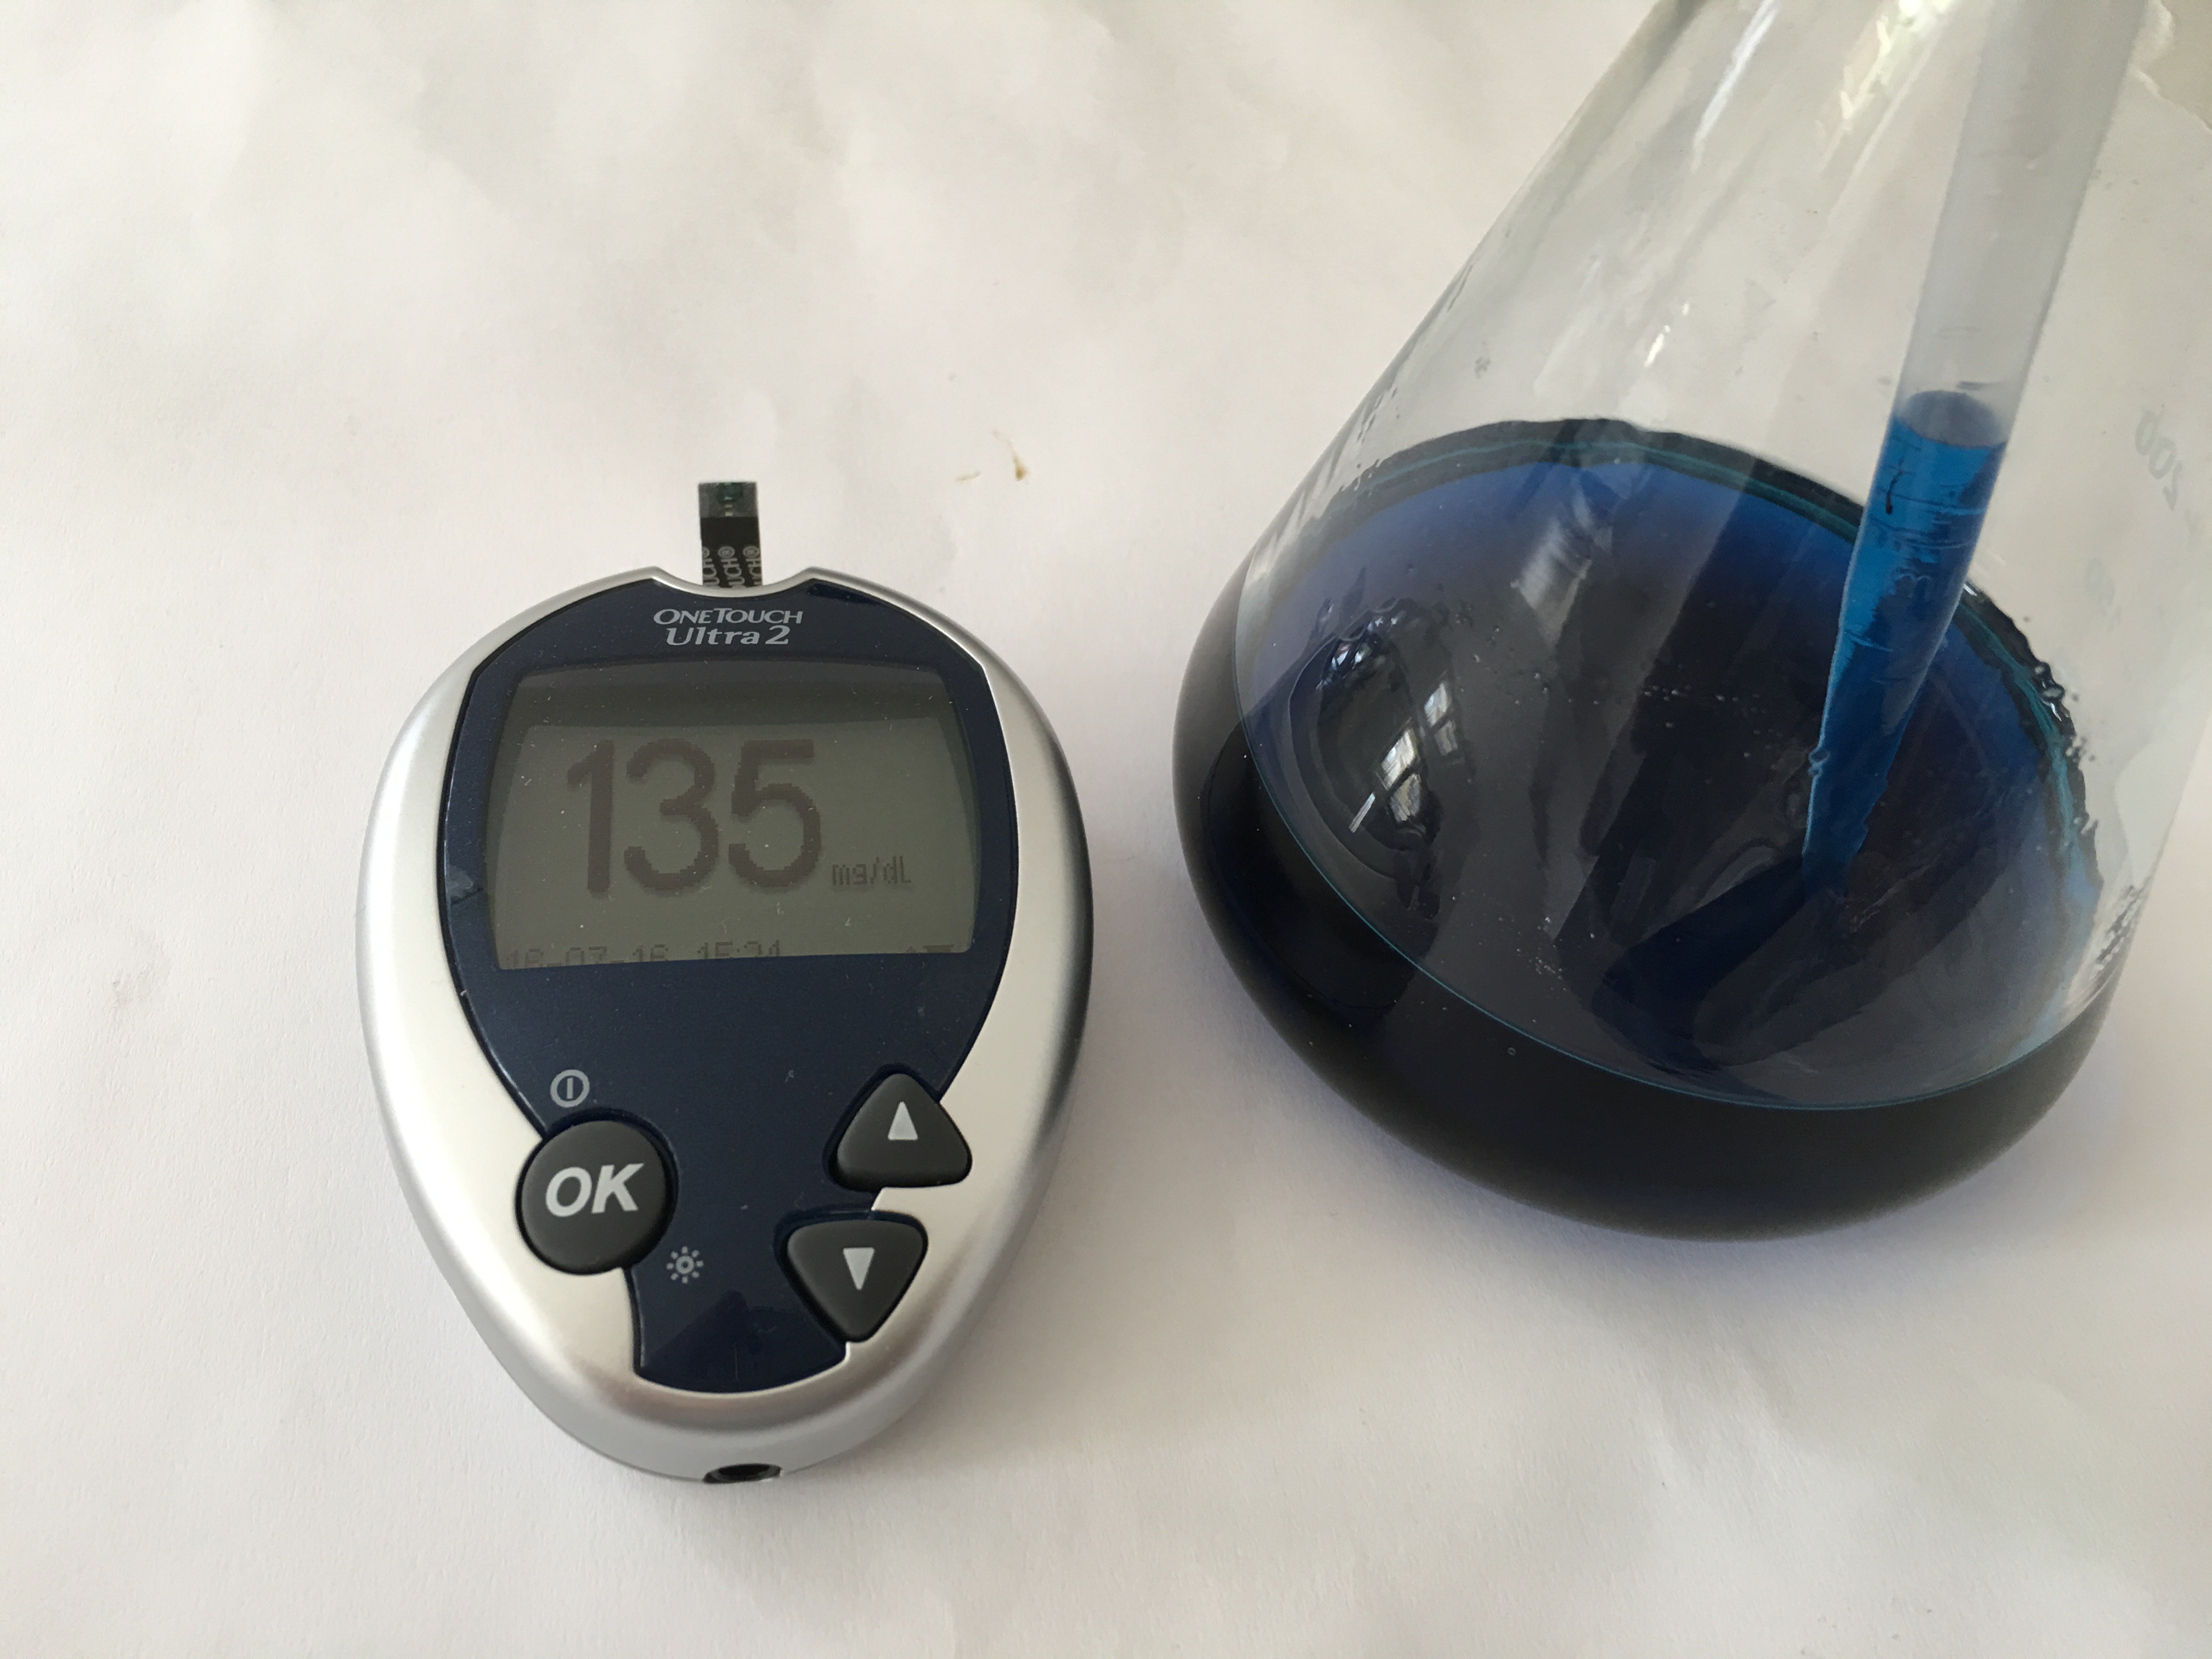
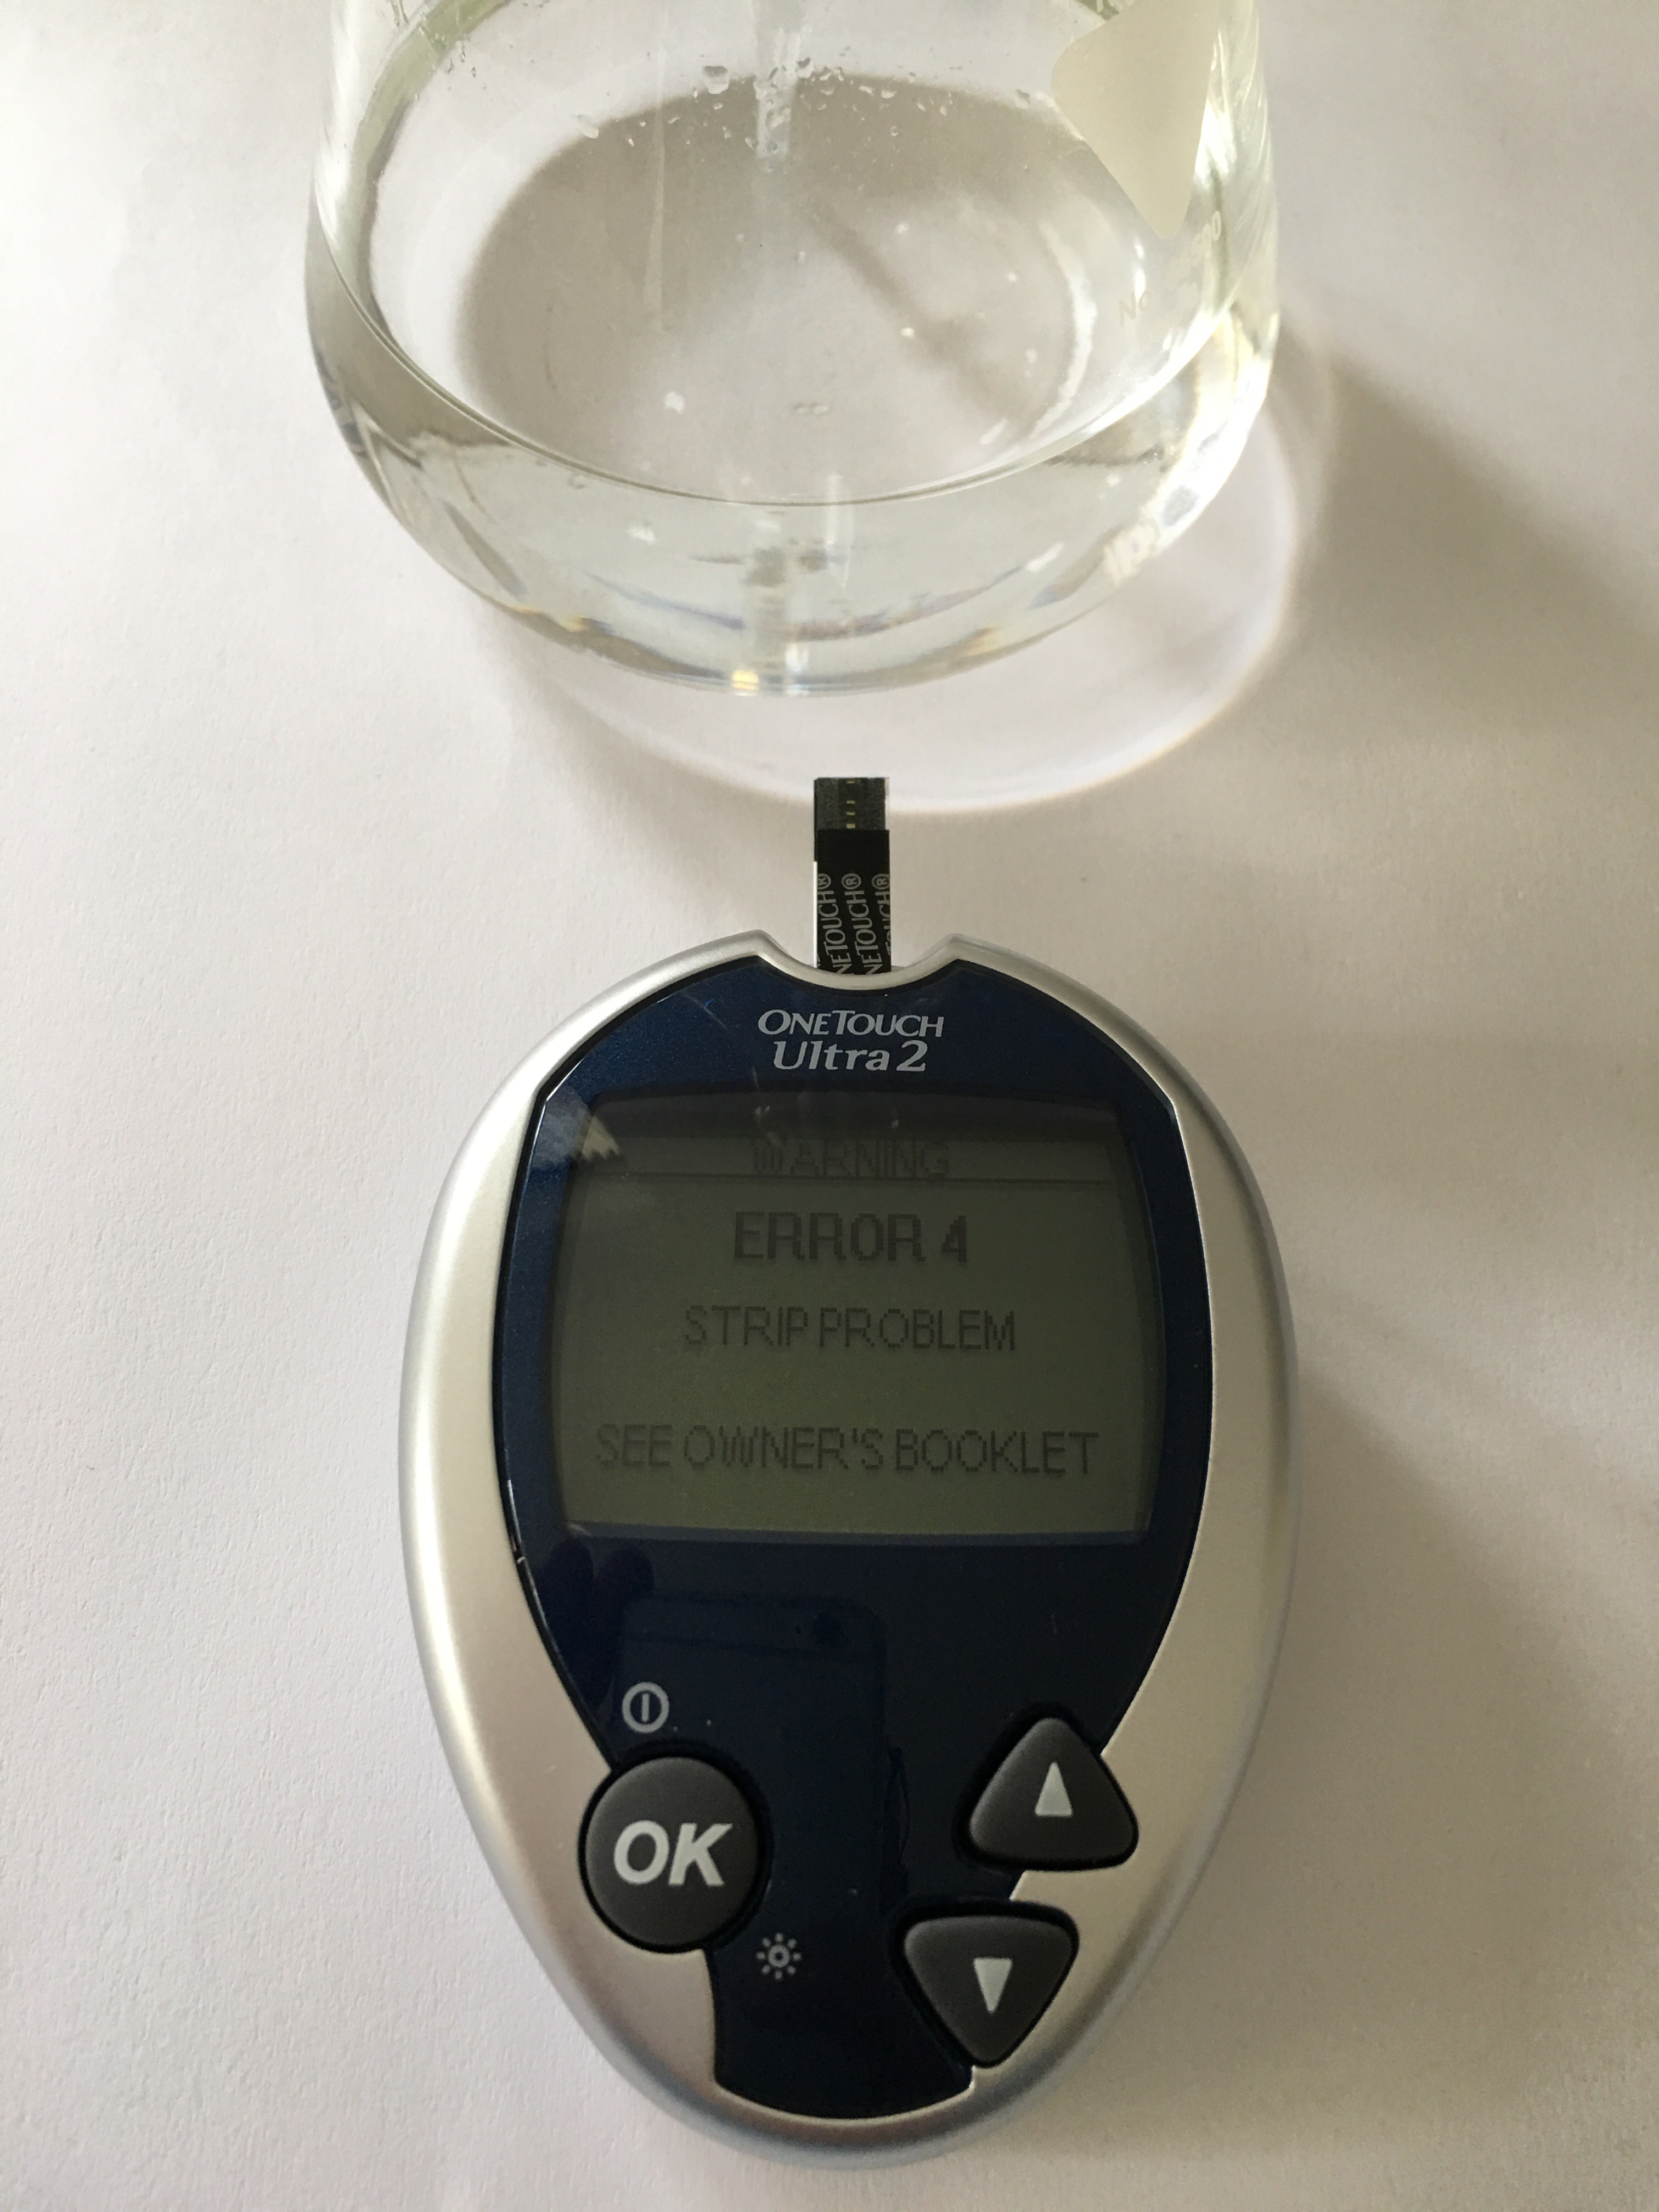
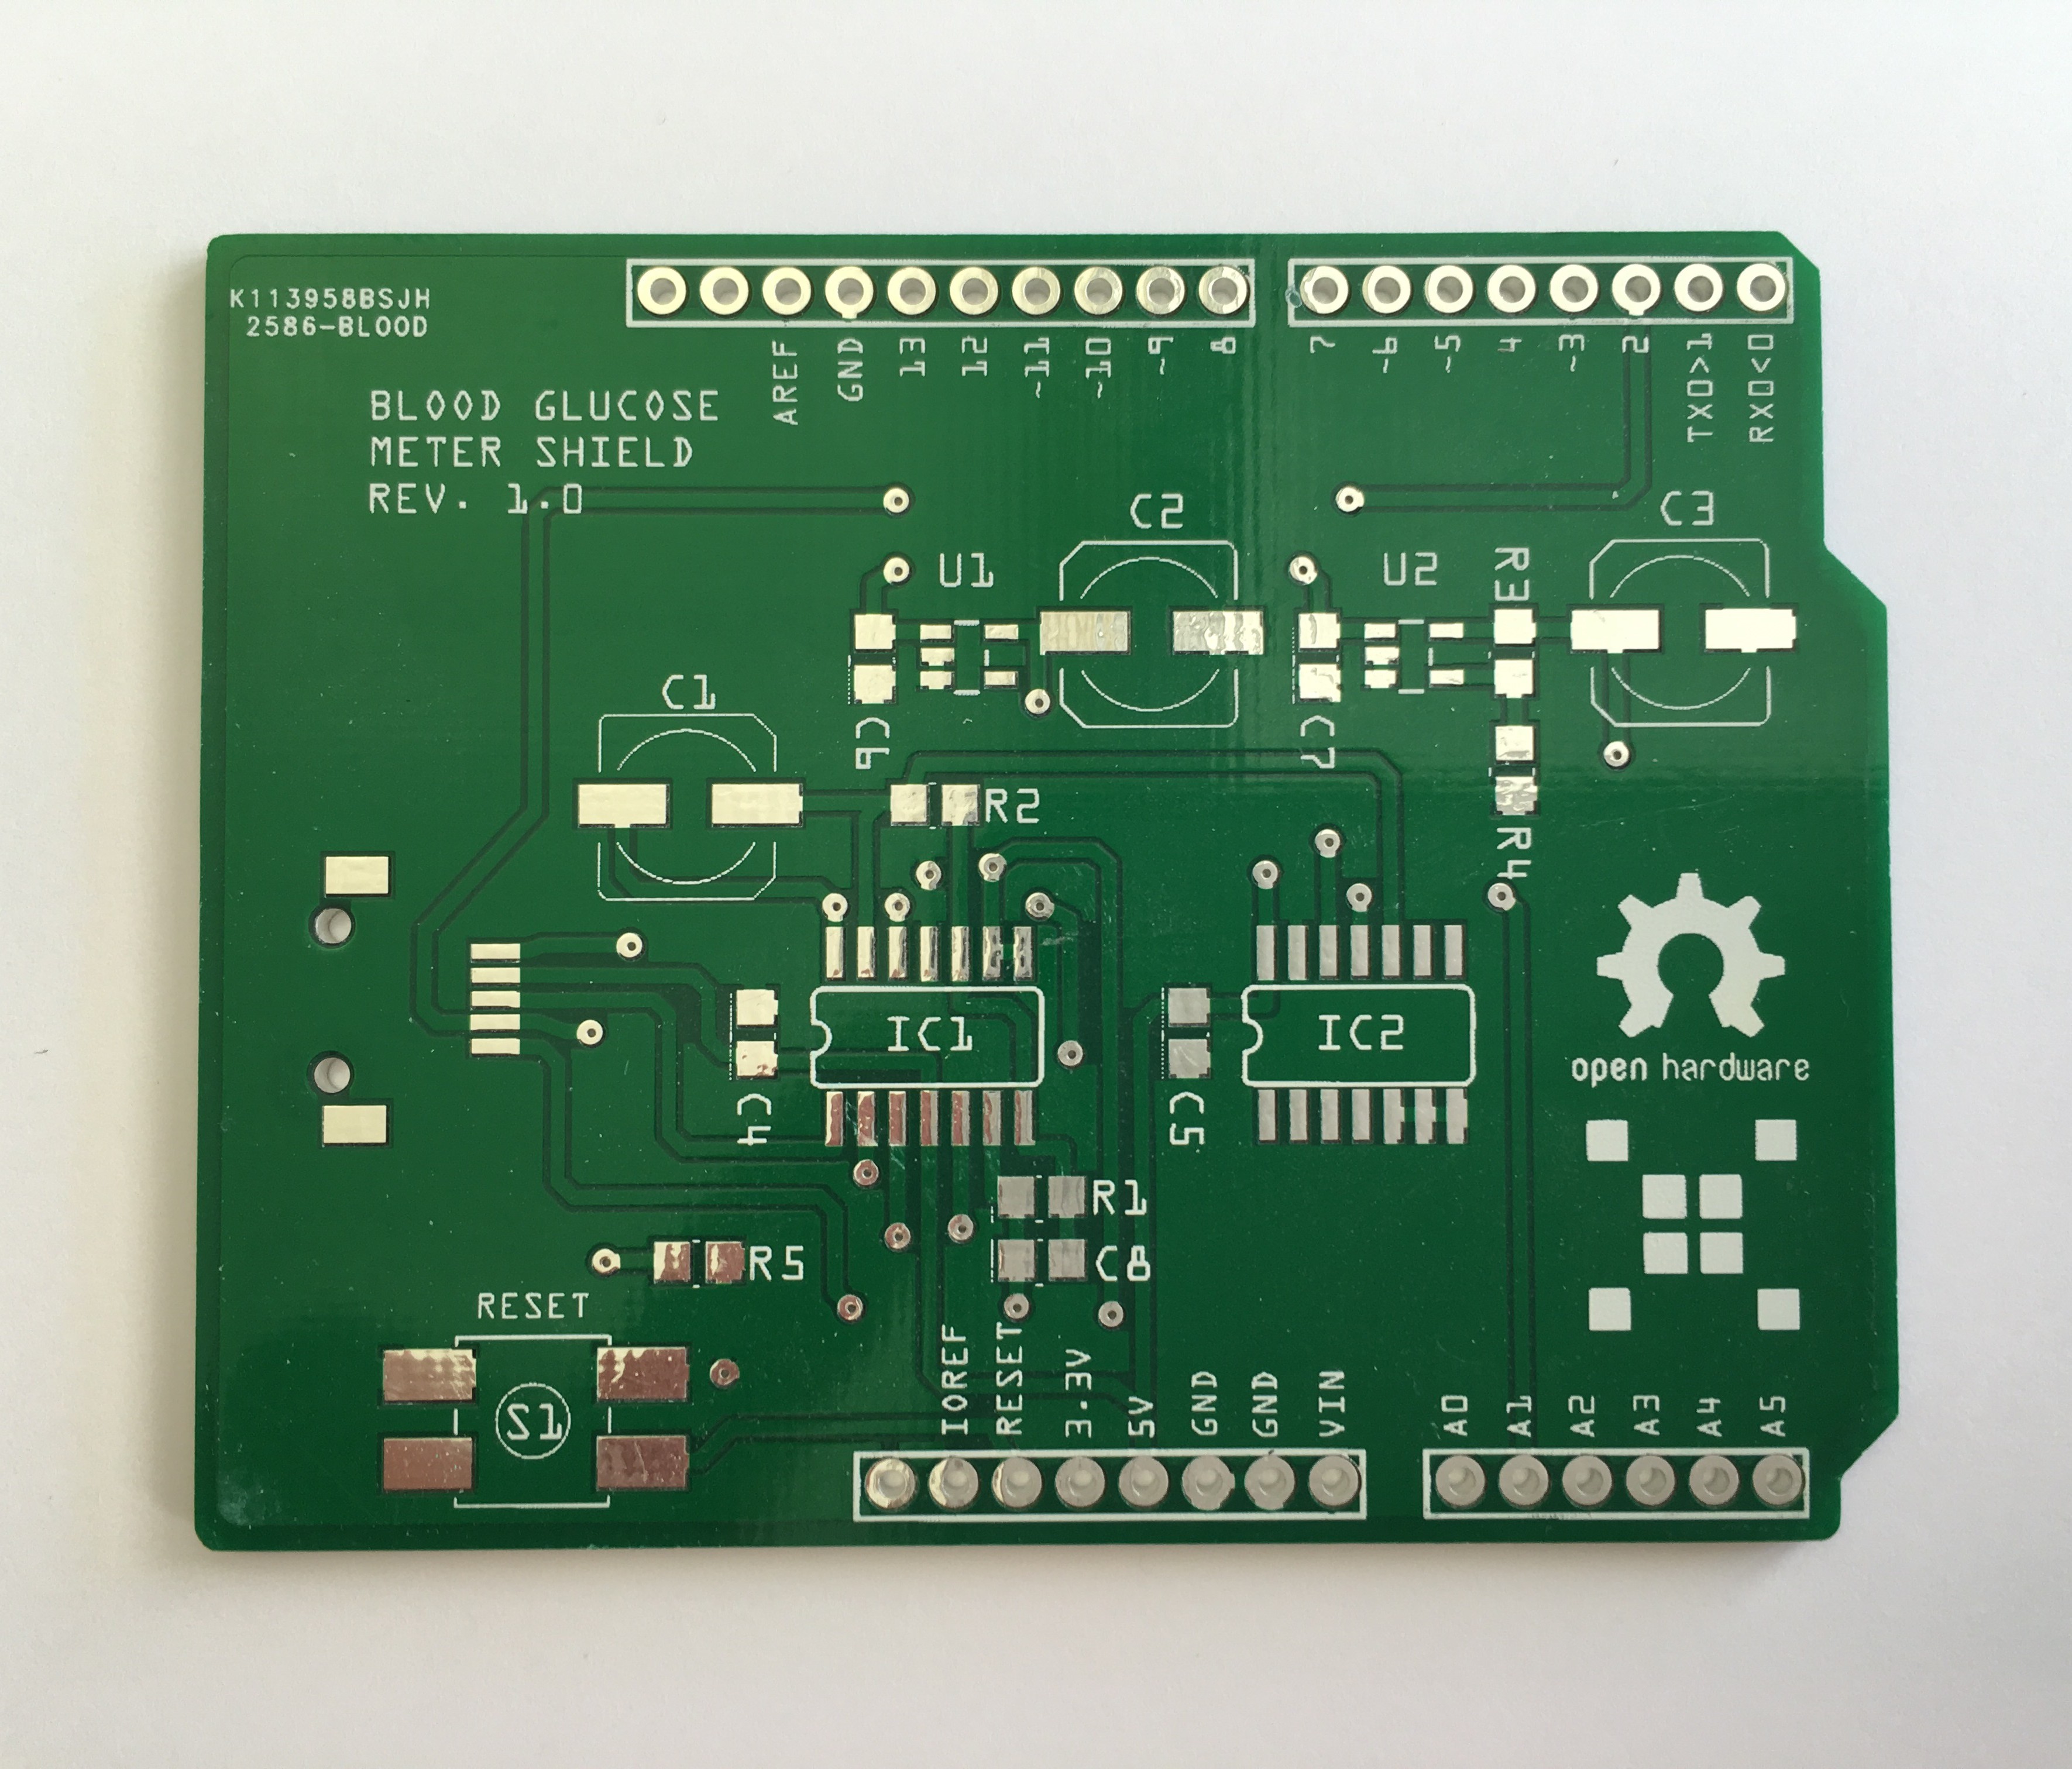
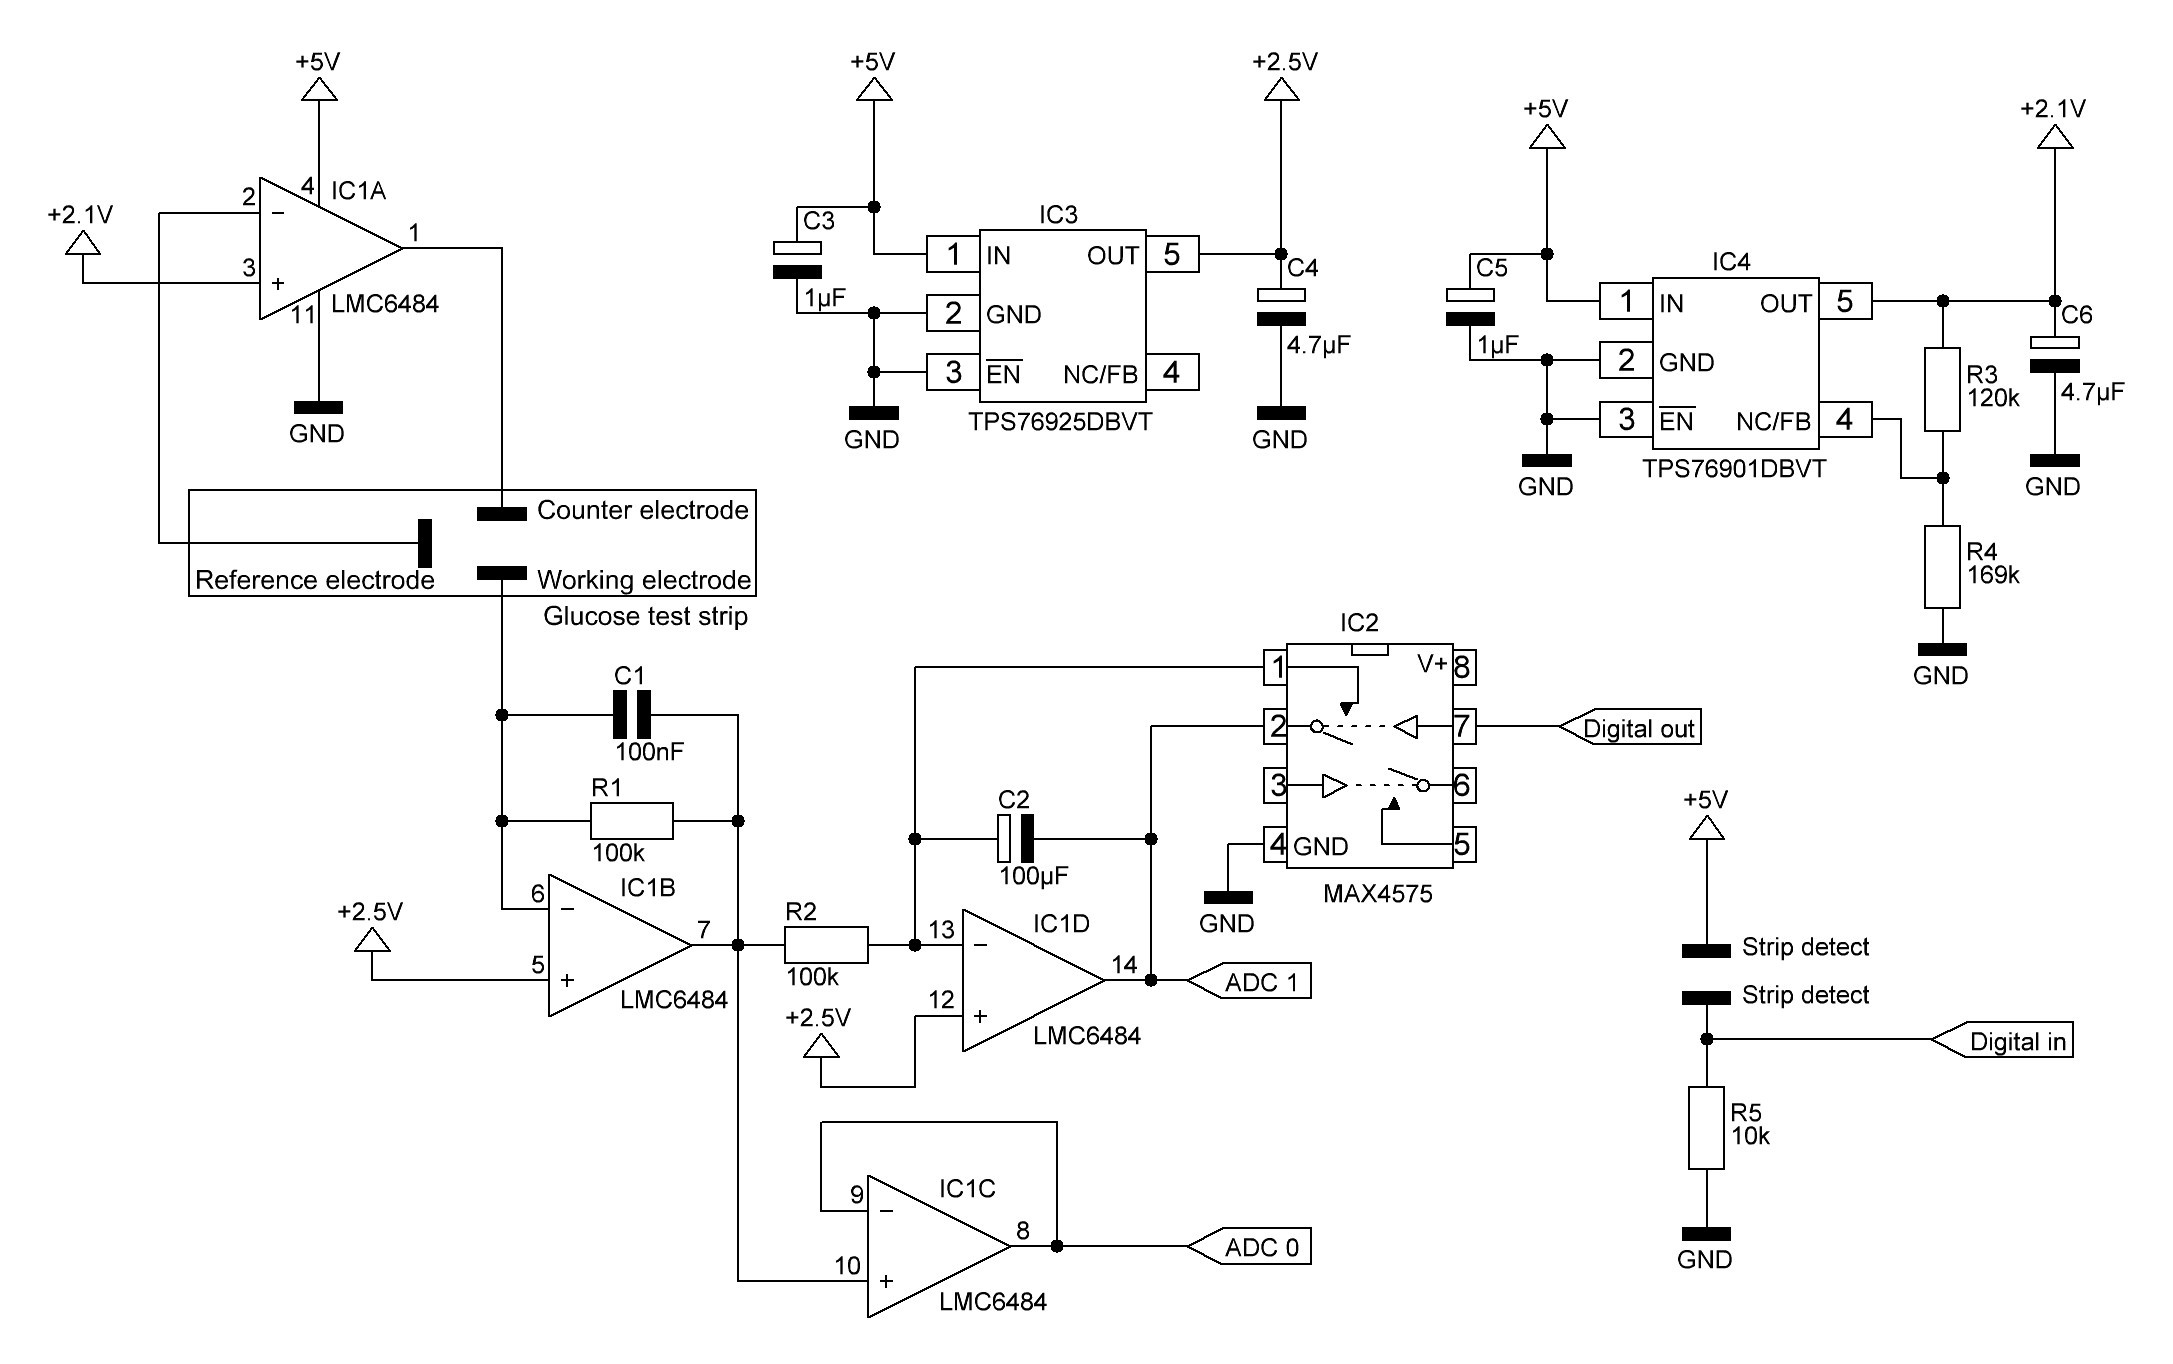
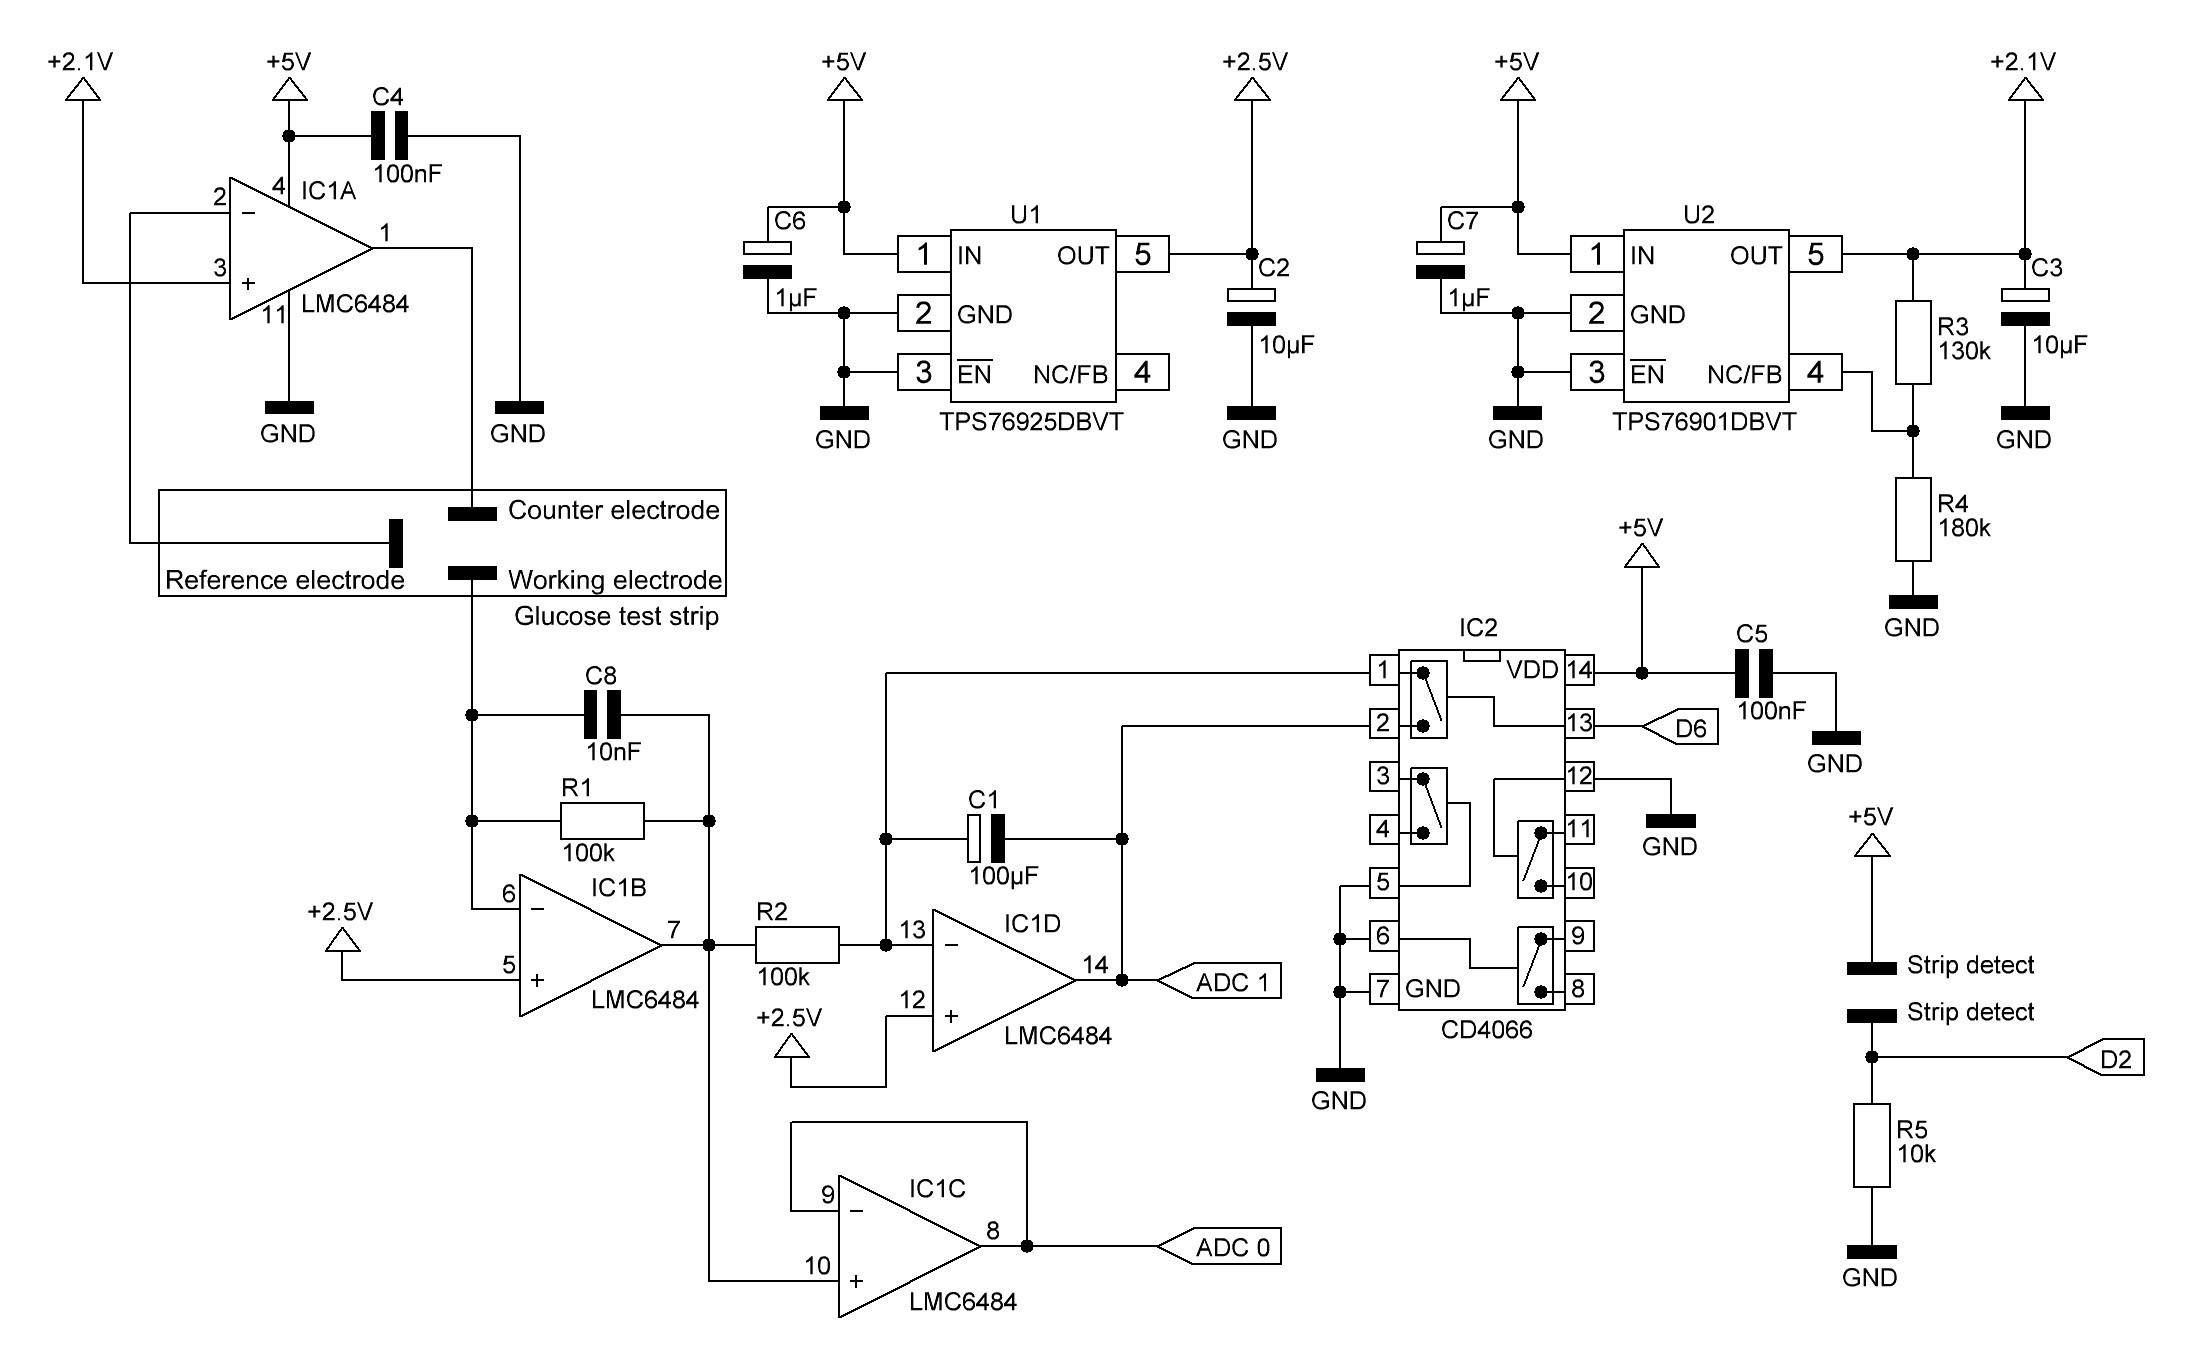
Usually, three electrodes are printed into the test strips: a reference electrode, a counter electrode, and a working electrode. A fixed voltage is applied and the resulting current after the blood is loaded is monitored. The current response is then related to the glucose concentration through calibration. Since test strips may vary from batch to batch, some models require the user to manually enter a code found on the vial of test strips or on a chip that comes with the test strip. By entering the coding or chip into the glucose meter, the meter will be calibrated to that batch of test strips. One Touch, the brand of test strips we will primarily use, has standardized their test strips around a single code number, so that, once set, there is no need to further change the code in their older meters, and in some of their newer meters, there is no way to change the code. Figure 1 shows the One Touch Ultra test strip connections.
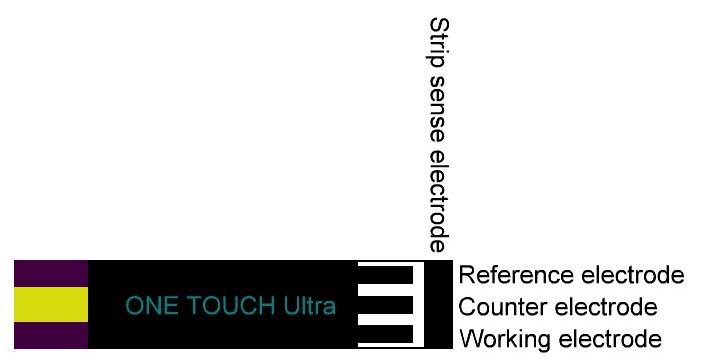
Figure 1, One Touch Ultra test strip connections
Typically the electrodes are coated such that an enzymatic chemical reaction occurs at the electrode surface and this reaction dictates the resulting current. The details of the electrochemistry can be quite complex. Since commercial strips are used, the details are somewhat unknown as the companies do not release detailed data about their particular test strips' operation. Some devices apparently watch the current after a short initial transient (the current will level out to some degree) and then report the current after a fixed time. Another principle looks at the total amount of reaction that has occurred and thus integrates the current with respect to time to obtain the total amount of chemical reaction that has occurred. Our glucose meter will make two measurements to determine which relates more strongly to the glucose level: one is the current after a fixed time and the other is the total integrated current.
License
This project is released under the MIT license.


 Radu Motisan
 sushisongren
 Quinn
Quinn
 chris
chris
cccccc