 Ken Meyer
It'll be a couple days until I know if I made it into the final round of the Hackaday Prize competition, but in the mean time, I've made some great progress toward a better scale.
I've been very unimpressed with the temperature sensitivity of the cheap postal scale, especially when I had much better results with the $160 Adams postal scale, so I've always wanted to mount my own load cell on a simple frame. However, I really don't think wood will be strong enough to handle the 400+ pound load, especially considering transient loads when heavy boxes are heaved onto the hive, and given that the load cell is mounted top and bottom on a cantilevered 1" square.
My plan has always been to get a metal plate welded into a steel frame of square tubing, but that involves either a few weeks of learning basic welding or begging for friends to help. Somehow I saw a reference to OpenBeam, a kickstarter open-source aluminum extrusion system, and I picked up the pieces I'd need to build a frame for my scale!
Here's the frame with the aluminum plate slotted nicely into the extrusion and supported on all sides. I originally tried an H configuration, but found it to be awfully twisty so I added additional cross pieces at the top and bottom of the H. The extrusion isn't exactly cheap, but it gives me a lot of flexibility in prototyping (for example, quickly and easily adding extra bracing) that I wouldn't have if I had jumped straight to a welded piece.
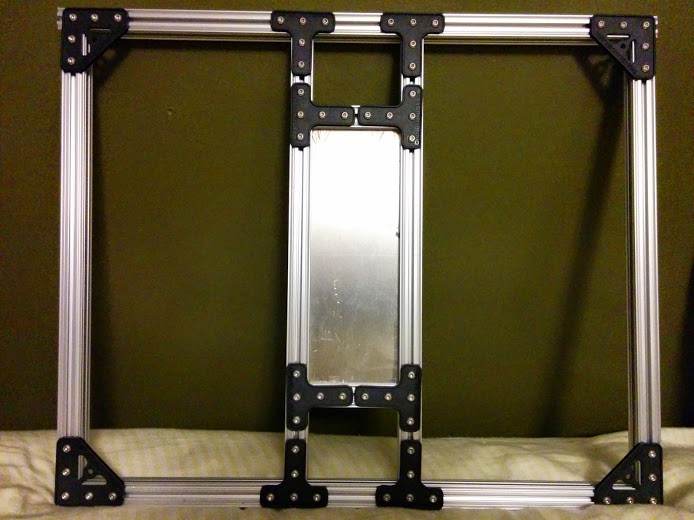
I had the 1/8" aluminum plate machined for me to the right dimensions from http://OnlineMetals.com. As is often the case, I don't really have the right tools for machining easily available to me, and they (along with other machining services) make life a LOT easier for this kind of prototyping!
I still need to pop 4 holes in the aluminum for mounting the load cell, bolt together the second frame (one above, one below the load cell) then it'll be ready to test it out. Here's the load cells I'm using. The aluminum plate is sized to be about 1" wider than the load cell, and the width was tweaked to 2.65" to match the length of those precut small pieces I got on Amazon.com.
I also quickly ordered some regulators from Digikey to increase the excitation voltage. I'm bumping the 3.3V up to 12V, then using a 10V voltage reference to drive the load cell. I'm still worried about drift between the HX711 and the voltage reference adding to the error, but in a final design, I'll need to test out a few designs. Off hand, I'll probably try using temperature-stable resistors in a voltage divider (as long as any temperature variation is consistant, I should be able to remove it in software), try a 5V reference that can be used directly in the MCP3551 22bit ADC.
In short, while I might have a system running very soon, I've got months of testing to find the best configuration before I really settle on a design (at which point, some brilliant EE will likely jump in and show me how it really SHOULD be done) but I'm very close to deploying a system that actually collects data!
Discussions
Become a Hackaday.io Member
Create an account to leave a comment. Already have an account? Log In.