 Mike Hendricks
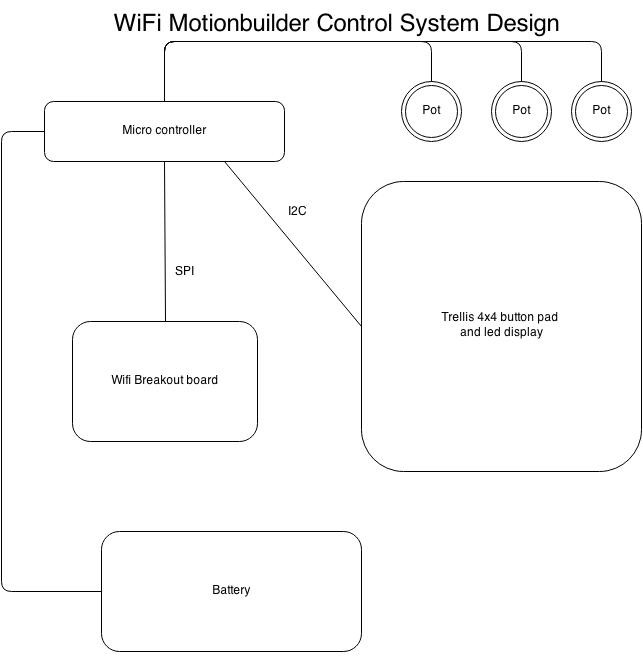
I wanted to create a wireless remote control allowing a user to be anywhere in the mocap stage and be able to play, pause, start and stop recording, switch cameras, and control camera settings.
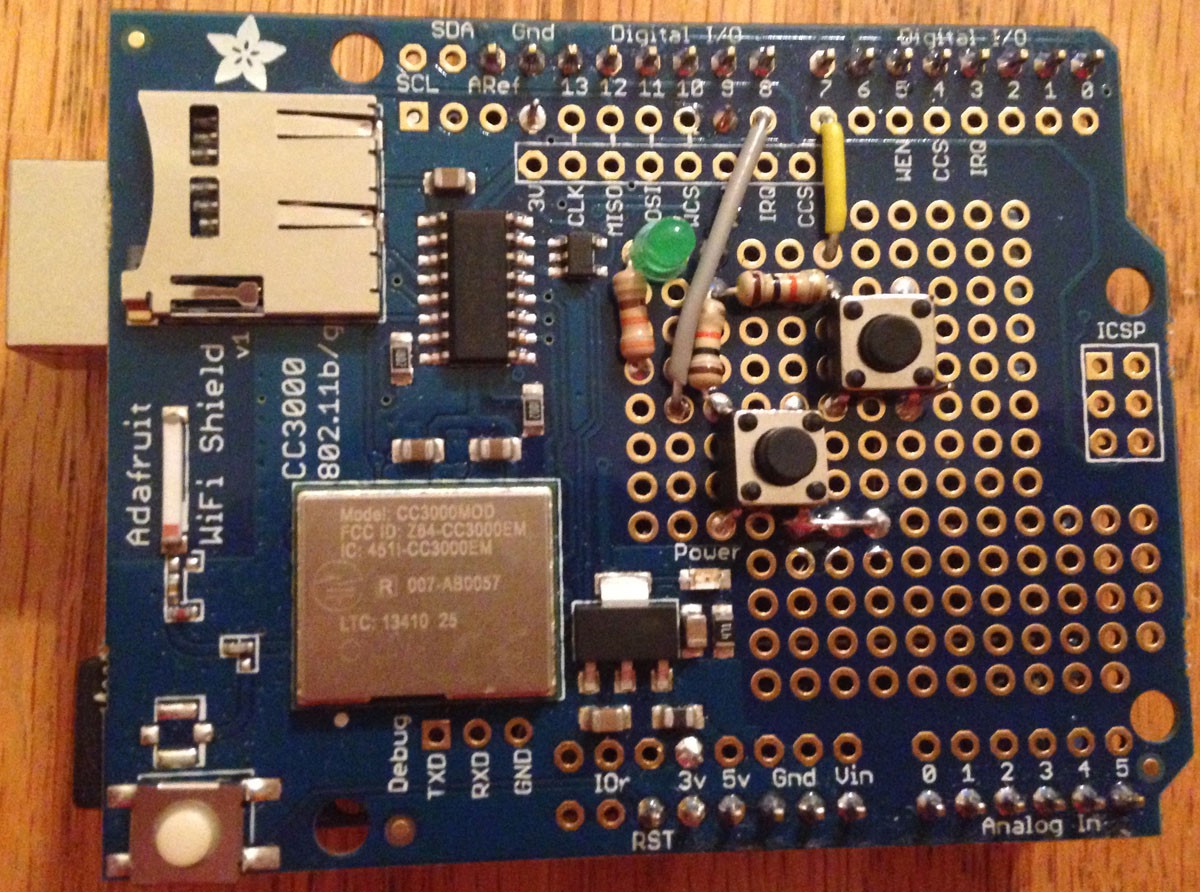
I used an Arduino Micro without headers for my control board. I used the “Adafruit CC3000 Wifi breakout board with uFL connector” and “2.4GHz Dipole Swivel Antenna with RP-SMA - 2dBi” and “RP-SMA to uFL” for the antenna, but I probably could have gotten away with the built in ceramic antenna on the breakout board.
I modified the ChatServer example provided by Adafruit to use for my arduino code. Pressing the trellis buttons sends “dn##” and releasing the button sends “up##” where ## is the number padded index of the trellis button. In my case a value of 00-15. In the future I will probably drop the number padding because I can easily parse the string in python..
Adjusting the pot sends “pA#”, “pB#”, or “pC#”, where # is the current value of the pot without number padding.
To pass the button presses to Motionbuilder I wrote a python script that uses telnetlib. telnetlib blocked the Motionbuilder user interface and my attempts to use a QThread kept causing Motionbuilder to crash. I ended up creating a standalone python script executed by subprocess.Popen. It connects to the arduino telnet server, listens for input. When it receives a button press or pot value change it sends the command to Motionbuilder by Motionbuilder’s telnet interface.
The MoBoReceiver class in Motionbuilder receives the input passed to it by the external script, parses it using regex and calls the appropriate function calls to make Motionbuilder switch cameras, adjust FOV, etc.
The Arduino Micro doesn’t have enough flash memory to store the WiFi lib, trellis lib and the mdns library I found https://learn.adafruit.com/wifi-candy-bowl/multicast-dns, so to make sure I could connect to the arduino if I didn’t have access to the wireless dns server, I used the trellis’s leds to display the ip address in binary. The first led represents 1, second is 2, third is 4, … 8th is 128. To display each octet I used the last 4 buttons. I didn’t take the time to reverse the button order, so the first button on the last row is octet 4, the second is octet 3, etc. To make it easier to translate the binary display data into a usable ip address, I created a PySide dialog. We ended up getting a wireless router dedicated to this project, so I ended up registering the arduino so it always got the same ip address.

Kevin modified the 3d printable case provided by Adafruit. He extended one side to to hold the pots, create a place to hold the arduino, which doesn’t have much room for mounts and place to attach the antenna. We left room for a 9 volt battery. The 9 volt battery didn’t last long(just like the entire internet told me it would), so I ended up duct taping a usb battery pack to the back of the case. I was able to pick up a 1500mvh one at Ross Dress for less for $10.
If I do another version of this project, I would like to get a Spark to replace the Arduino and CC3000. I also would consider using two Arduino micros with xbee’s using one of the micros as a human interface device so the python script wouldn't be necessary and you wouldn't need a WiFi network.. I got the external antenna to make sure I didn’t run into signal issues on the stage, but after testing the on chip ceramic antenna available with the CC3300 would have sufficed.

 PixJuan
 ronald
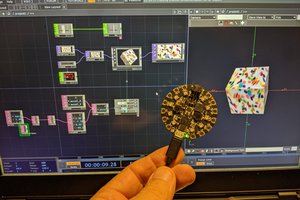
 Jerry Isdale