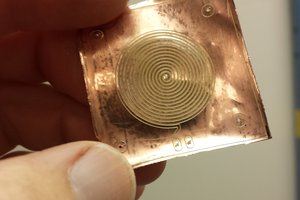
This project will describe a method of creating one off PCBs using a UV laser attached to a cnc machine, craft cutter/plotter or even maybe a 3d printer...
Basically, there's two approaches... One is good strictly for one offs, and the other is good if you need to reproduce the board a couple times...
Method A: (this method is still under test and I am looking for better materials to use on top of the photoresist to allow for easier removal) Apply photoresist film to a blank PCB.. Apply a layer of contact paper or vinyl to the top of the photoresist....(preferably black) Use cnc, etc.. to cut the circuit pattern from the vinyl, peel off the traces and pads, etc to expose the photoresist film underneath... expose the board/photoresist and develop, etch, etc....
Method B: Apply photoresist film to a blank PCB... Apply a layer of vinyl or contact paper to a plate of glass from a picture frame or whatever... Use the laser attached to the cnc, etc. to cut the circuit pattern from the contact paper/vinyl on the glass... Peel the traces and pads, etc. from the vinyl so you can see through the parts that you want to be copper... (make sure it's a mirrored image i.e. flipped) place the pcb with the photoresist layer on the pcb touching the vinyl layer on the glass and line them up... then expose the photoresist in the UV Oven and etch, etc...
This whole process is still under development so I might change this up a bit but this is the starting point... I'm working more on the Tonerless PCB Etch Resist (Direct to PCB Method) and the Long Life Glass UV PCB Template as well as the DIY UV Exposure 'oven' for PCB etching and masks for the moment... The long life glass uv pcb template project is similar to this one, but focused more on creating many many copies of the same boards...
 fl@C@
fl@C@
 fruchti
 Lithium ION
 chris.coulston