Close
0%
0%

Kitchen Work Table

Replacing a folding table with a counter-height work table

Similar projects worth following
In my kitchen, I've got an old plastic folding table which is supposedly my work-table. But it's too short (only 24" tall) , so I don't do any work on it and it just attracts clutter. Paging through Instructables the other day I found a 'simple' table made from a glue-up of 1x12 panels, a frame of 1x3 to hold the top and a lower shelf, and stair balusters as table-legs.

When it's done, the expected tabletop is going to be 24x48, and I scored some 39" stair balusters, so it'll be a nice above-counter-height table.

I'm a bit concerned that the balusters (which are only 2x2) aren't going to be strong enough to hold up this size of a table. I'm prepared to go back to the store and buy another two balusters to make this a six-leg table if it's too spindly.

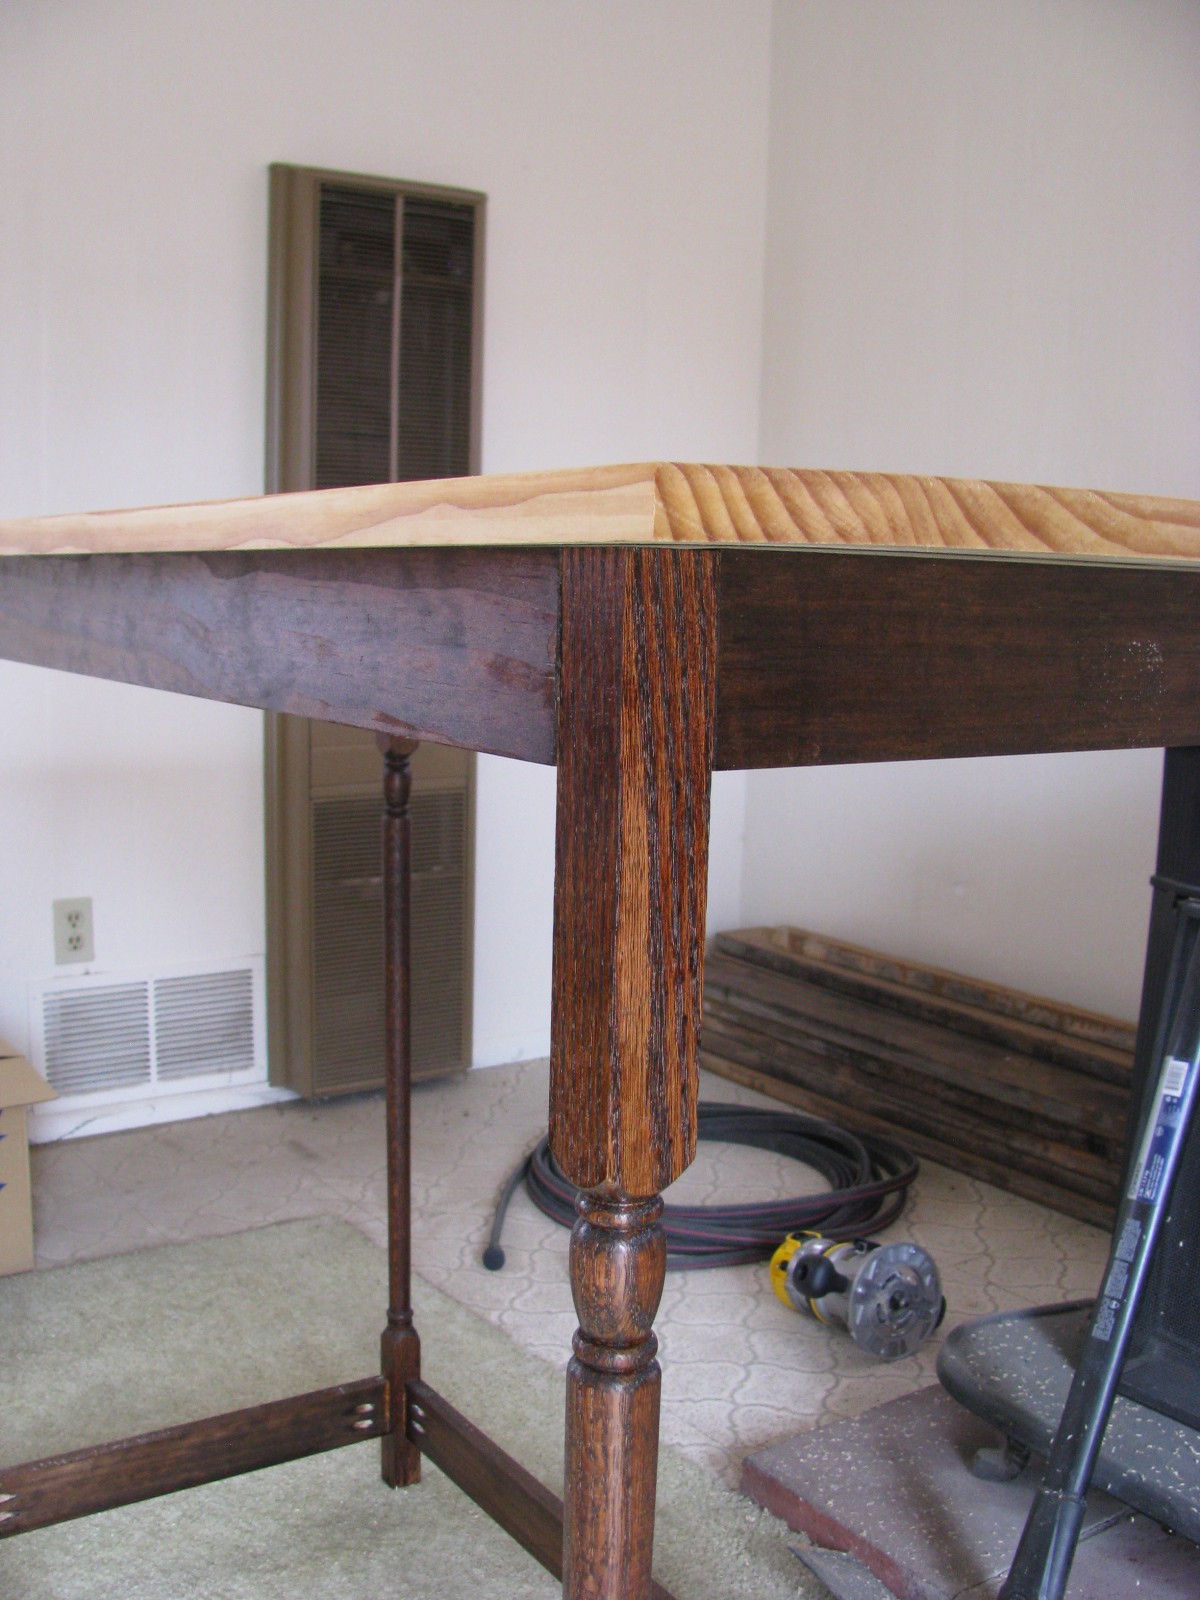
The table is complete, and in use in the kitchen. It is probably a bit too tall, and if I make another one I'll go with the shorter balusters after all.

In general, I'm happy with it, and I look forward to making more functional objects. Or finishing other functional object projects I've already started...

Finish Notes:

The shellac melts slightly under warm items, so coffee mugs, bowls of soup, and the like stick to the tabletop. Room-temperature items such as the cutting board and the knife block and such do not stick

  • 1 × Jigsaw
  • 1 × Miter Saw
  • 1 × Pocket-hole Jig
  • 1 × Router
  • 1 × Cordless Drill

  • Finishing Moves

    Geoff Nicholson08/24/2015 at 21:54 0 comments

    Taking an inordinate time between glue-up and final product, I finally managed to get the finishing done. You might be able to tell in the photo below that my shoddy joinery is on display on pretty much every corner due to using the wrong tools and being a bit hasty in my assembly. You can also see how dark the Red Oak stain turned out being, but I think I can live with it. The top is rubbed down with plain Linseed oil.

    I finished the base and aprons seperate, and then attached the top. Purists are going to give me grief for my home-brewed attachment brackets, as I screwed the table to the long aprons, rather than the short ones... and I screwed it to the straight onto the top. With luck, since my brackets are also wood, the whole thing will move with itself and won't go all hair-raisingly splitty. We have so much humidity (a mean of 29%) that I don't think this is as bad as, say, Illinois.

    You'll see the router in the background, and I put a 1/4" roundover on the top edge to give the table some edge definition. Since this is a worktable, I didn't want a rough-edge to poke me in the gut every time I leant-in to knead some dough and this should accomplish this. I had thought I might want to bullnose it, but decided against it, not wanting to have to flip the whole table over again to get the bottom edge.

    I then sanded the top smooth again, and took out some of the roughness that the router left in the edge. I tried to get more of the look of the glued-up joint in the middle of the tabletop to come out, but I wasn't able to get the joint to fade as I had expected. But since it felt smooth, I figured it was pretty good.

    The finish for the top is simple Boiled Linseed oil. Just pour it on, spread it around, wait a bit, and then wipe it off. Simple, Clean look, and emenently durable. If, and when, I ding the tabletop, I can daub more oil in to the dent and go on with life, confident that the top is sealed.

    Based on some reading, however, I might want to top that with some Shellac, as BLO is generally not food-safe.

  • Joinery is Hard, Pocket Screws are Cheating

    Geoff Nicholson08/24/2015 at 20:35 0 comments

    Many woodworkers opine on Pocket Screws: cheating, simple, easy, weak, strong, cheap, effective. All of these are true, and so this post will only go into how easy pocket holing is... and why it may not be right for your project.

    Using pocket-holesGlue Up
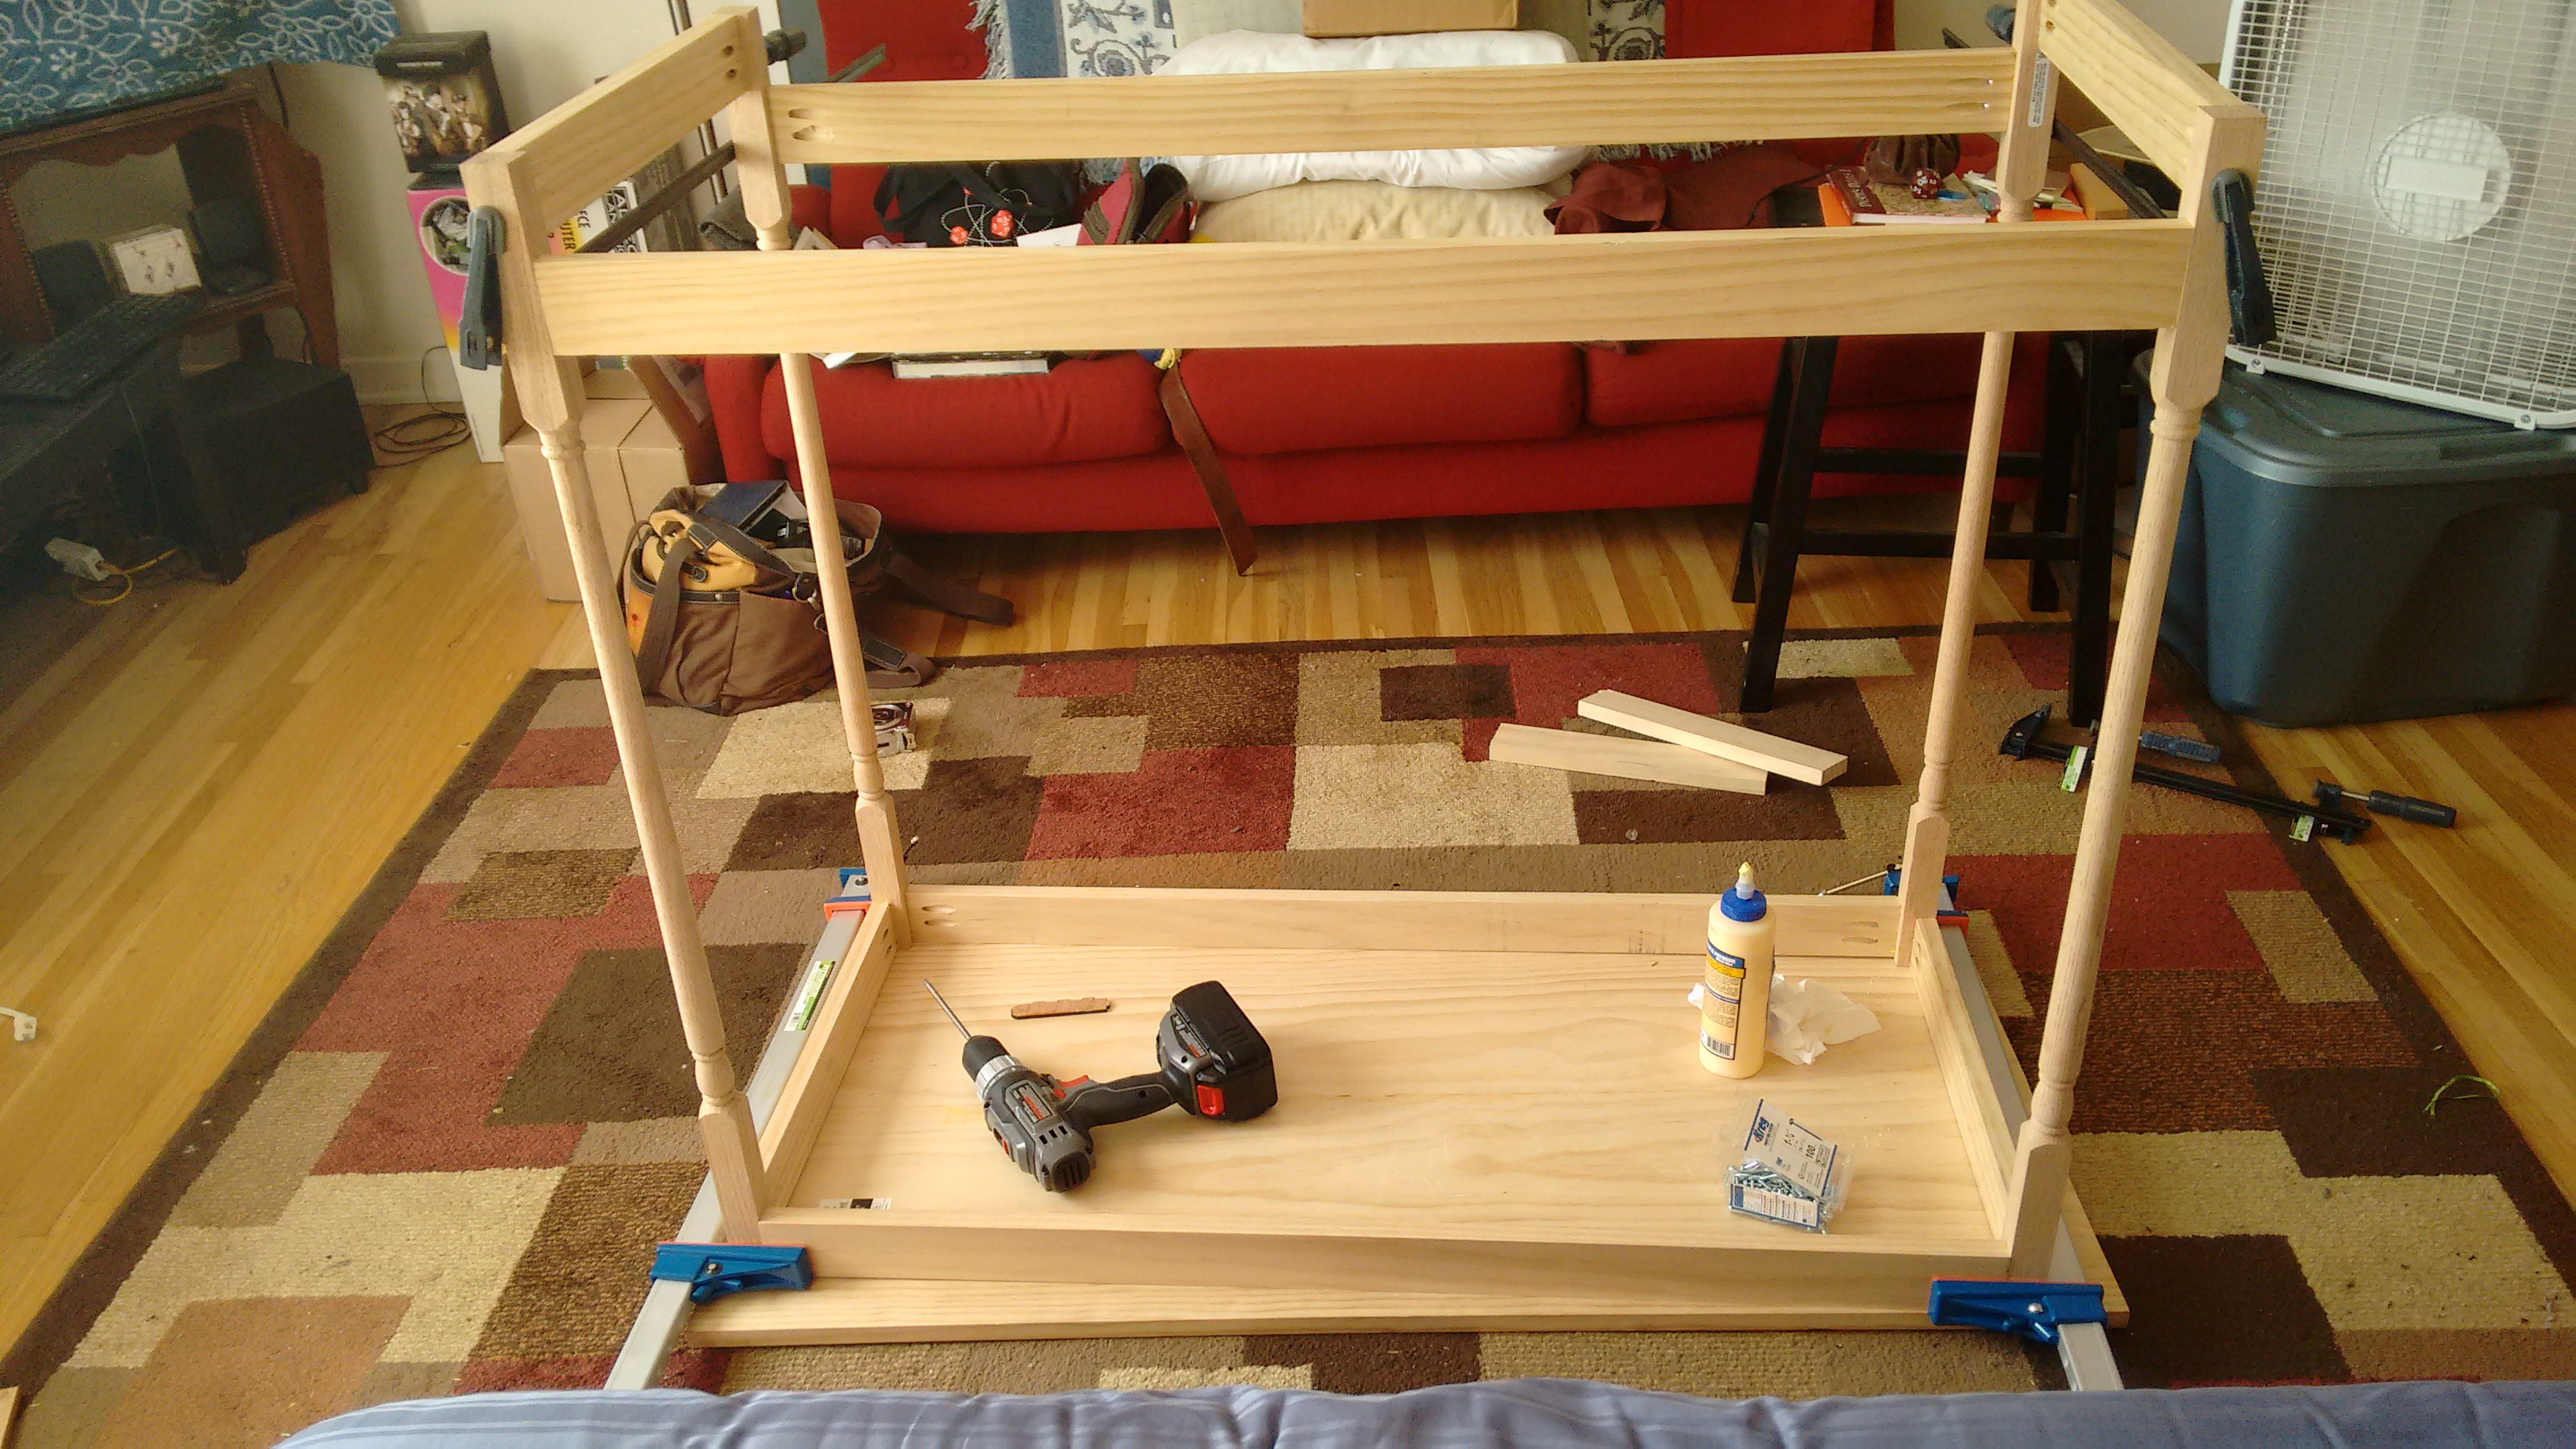
, I was able to go from a pile of lumber to an actual, recognizable table in under two hours. That was exhilarating and awesome... and introduced some unintentional errors. One of my aprons was just a SMIDGE off during glue-up, and I had to unscrew it, clean it, and then glue it back up again. And that's where the hardware comes in.
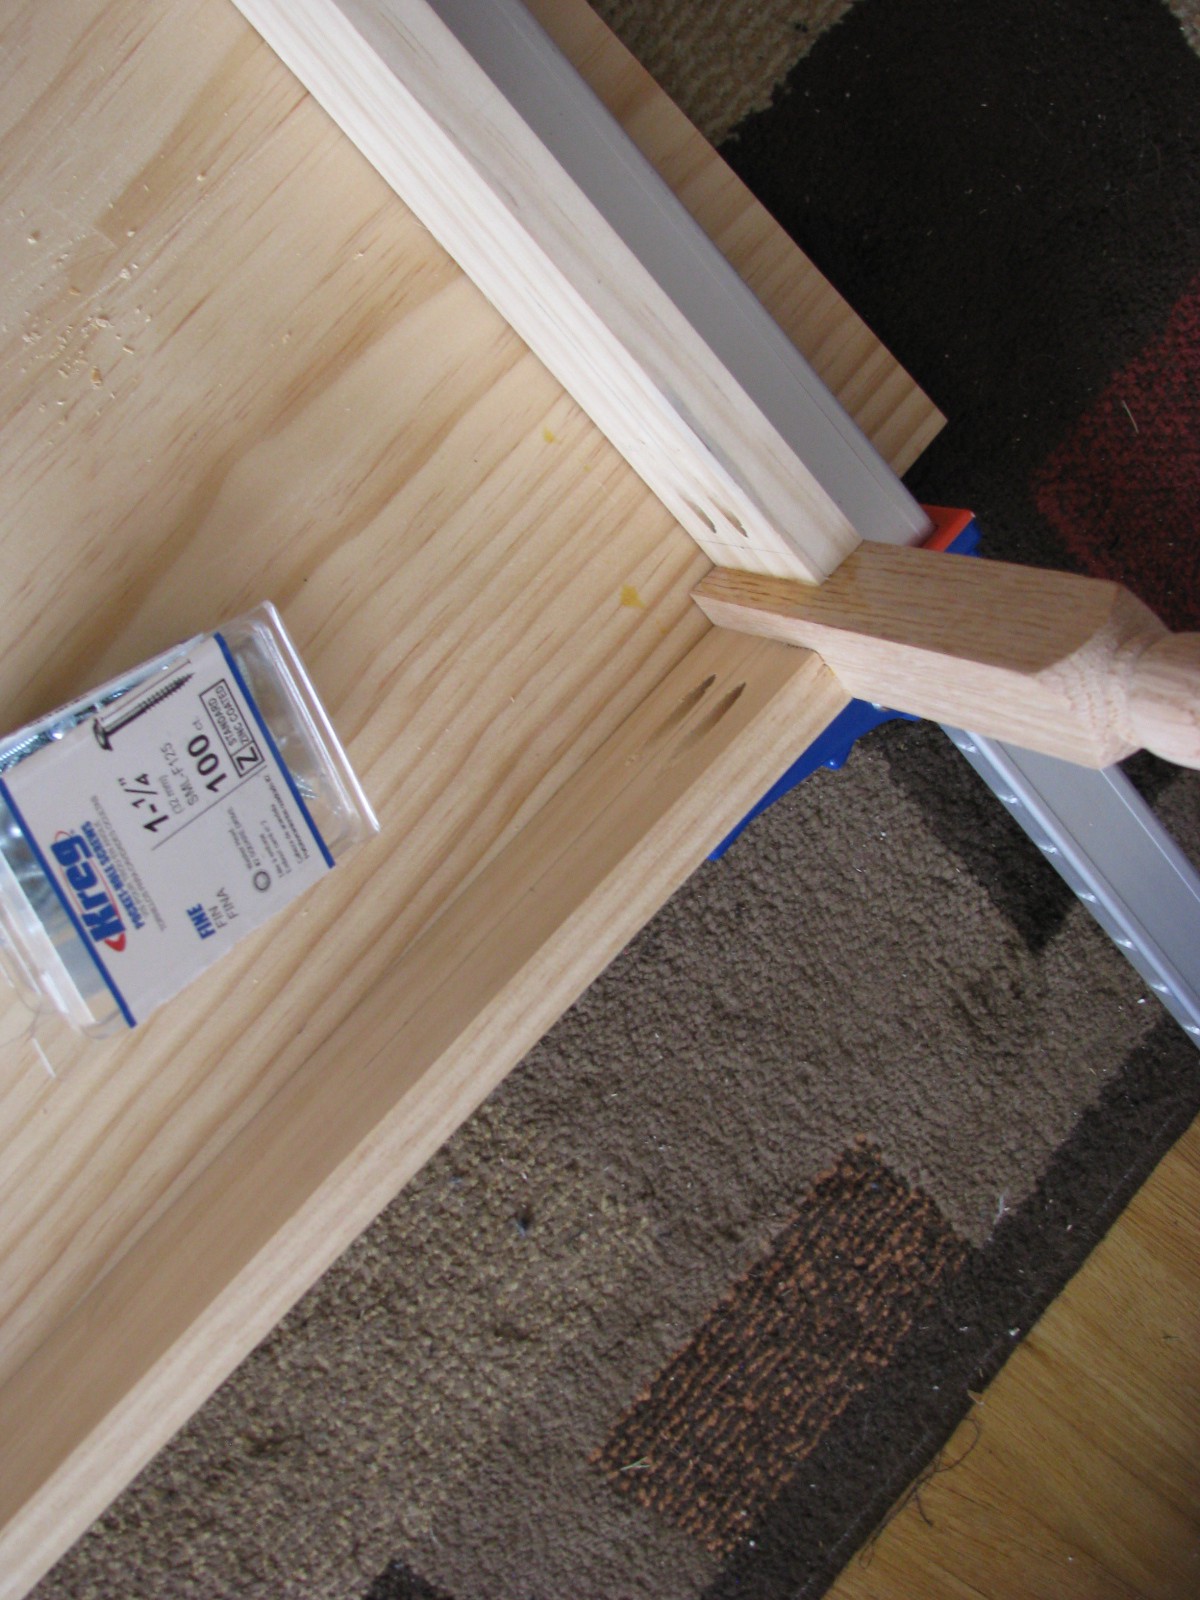
    Pocket screws seem to be sold exclusively by KREG, and to get the most out of them, you have to use some extra hardware, also sold by Kreg (namely their face-clamps and pin-clamps)In Process.

    Pictured here is my emergency-purchase of more pocket screws than I will ever need, in a format I will probably hardly ever use (the fine kind, for use screwing into hardwoods). Since my design used 32 screws, and the 'demo' packet comes with ten, I had to go out and buy more screws (frustrating) which really aren't any good for any other uses.

    Oh well, enough whinging. I did assemble a table, so now it's time for finishing. Since the aprons and tabletop are pine, but the legs are oak, I opted for 'Red Oak' stain...

  • Dryfitting

    Geoff Nicholson07/07/2015 at 20:18 0 comments

    Took all the parts down to Quelab to utilize their larger clamping area (as well as to borrow the tablesaw to fix an error in the tabletop.

    While there, I drilled pocket-holes into each of the stringers for ease of assembly, and broke out the planes to fix any rough-spots in my glueup.

  • First Cuts

    Geoff Nicholson06/22/2015 at 17:16 0 comments

    Bought the wood this weekend, and got the majority of the cuts done in the afternoon, and started the glue up. Rather than using 1x6 and ripping them down to 1x3 (as I don't have access to the tablesaw at the hackerspace right now) I just bought 1x3. Probably paid more than I ought to, but it's worth it to have a project finished, rather than finished cheaply.

    After making an error in cutting (measure three times, apparently), the two top panels are .5in off from each other, but the short piece is the desired 48in so I'll trim that off later. An additional cutting-error later on cutting the side rails (there is such a thing as saw kerf) I had to cut a fifth side-rail.

    Now that all the cuts are done, it's time to start planning joints (getting the rails hooked onto the uprights) and how we're going to be attaching the table to the frame...

View all 4 project logs

Enjoy this project?

Share

Discussions

phil5f45t wrote 03/19/2022 at 12:54 point

Good to see this feature. I need help to integrate it with my portable table saw which I'm using in my garage.

  Are you sure? yes | no

Øystein wrote 12/09/2016 at 13:16 point

Nice table! Going to try joinery myself soon. Hope it goes well. 

  Are you sure? yes | no

Similar Projects

Does this project spark your interest?

Become a member to follow this project and never miss any updates