Close
0%
0%

"Chad" - The NFC Voting System

Using NFC NTAG203 tags as voting tokens

Similar projects worth following
The goal of the project is to develop a standalone voting kiosk that uses UID from NTAG203 nfc tags to allow a user to vote only one time. This is implemented in two steps:

1. UID from all possible voting tags are read in and dumped to a C header file which is then flashed to the microcontroller's program memory

2. In voting mode a tag's UID is checked against the array in program memory. If found, the index is checked from a bit-packed array in EEPROM for persistent storage of which tags have and have not been used to cast a ballot.

I was under a tight time constraint for this project. I had about 16 days to ship the complete rig (under best-case shipping conditions). I ended up getting it finished in just 11 days!

​The Origins

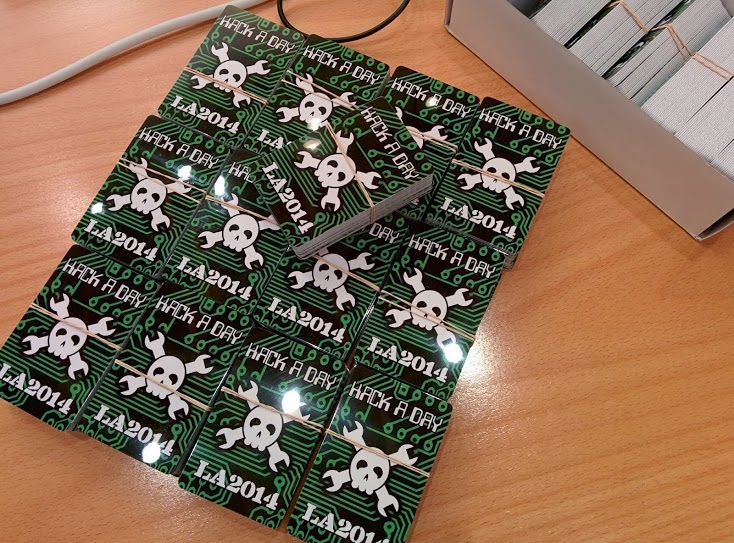
When we decided to throw a party in LA (which became know as ​The Gathering) I wanted it to be more than just free t-shirts and beer. Laser Graffiti popped to mind and I was glad that Ben was willing ​to take the lead on that project. ​But I figured there should be more; something that people could take home with them. I had under one month to pull it together so custom PCBs would be a stretch. The idea for NFC tags sprouted up mainly because we don't see them in very many hacks. Why? After all, the tech is pretty cool. I discovered it's because there aren't any easily found hardware libraries that are NFC standard compliant. More on this in a bit. Here's an image of the 500 custom printed cards I ordered for The Gathering.

Voting

What do you do to make the NFC tags you're handing out even cooler? Embed stuff on them that is awesome. Well, that was the plan. Now you've got something on the card, but if you can't use it at the party why are we handing them out? We were already using this event to judge interest in having a larger Hardware Hacking event in the area. Using the cards to vote on the overall theme of that future even seemed perfect. I ordered an NFC reader and some test tags (printing was going to take several weeks) to get to work.

Library Failure


In my mind I figured I'd study the specification and datasheet for the PN532 card reader and write my own library. After an hour of trying to control the reader with my Bus Pirate I realized this was a good way to spend months on a project when all i had was a couple of weeks (sixteen days to be specific). I switched to getting a proof-of-concept put together using an Arduino and ​known code from the good folks at SeeedStudio by way of our friends at Adafruit. Had I know that ElecFreaks was using the code examples from these other two companies I would have order from them instead just to support their open source efforts. Oh well, next order!​

The Library can read the hardware Unique ID from the NTAG203 hardware, but that's it. It can't read or write a data payload to the cards. It does support the Mifare cards, which I understand are a deprecated protocol and not standards compliant (which is why I opted to order NTAG203 instead).

This is a huge issue that the Hackaday community should address. I know that ​libnfc supports these tags. So porting the code to a manufacturer-agnostic microcontroller library should be fairly trivial given enough time! At some point I'll put out a call on Hackaday to do this, and offer up free cards and shirts to readers who want to work as a team toward open sourcing such a project.

Changing the Plan

It would have been cooler to have unique data on each card. I was thinking of a hex query string at the end of a URL which would provide a unique invite and a fairly robust anti-voting-fraud option. But that was when I thought I could program all of the cards quickly with the hardware I was using (pull a unique query string from EEPROM for each card write, use the query string as the voting token identifier). Here's ​the build log where I was thinking about that, and ​another before I received the NTAG203 test tags in the mail.

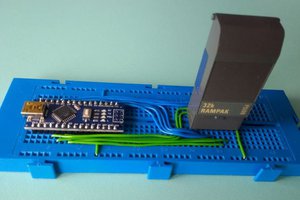
To get around this I hacked my own project before I even built anything. As I mentioned previously, the cards have a UID which is a feature from their RFID origins.​ ​I coded a proof-of-concept that read the 7-byte UID and printed it to the terminal. Later, this was turned into a jumper-enabled mode that prints the UIDs as a C header file. When the 500 cards arrived it only took me about 10 minutes to scan all of them, save the output as a header file, and write it back to the Arduino as a lookup table to ensure that each card could be used just once for voting.

To save space in EEPROM I used a bit-packed array to track the tokens. When the card is read, the lookup table is searched...

Read more »

  • 3 × LEDs
  • 1 × PN532 based NFC reader/writer Used in SPI mode
  • 1 × Arduino duemilanove
  • 1 × HD44780 Character LCD 20 characters wide, 4 line, backlit
  • 500 × NTAG203 Type NFC tags (voting tokens) Custom printed for The Gathering

View all 7 components

  • Labels and Out the Door

    Mike Szczys01/11/2014 at 00:12 0 comments


    Here's the test. The LEDs are waaaaay too bright. I sanded the clear domes on them down which helped a bit. This LCD display doesn't ahve the best visibility, but it looks better in person than shown above.

    This is the final picture I took before removing the base and bubble-wrapping it for shipping to The Gathering in LA. I heard today that the package arrived which is great. I should have no problem fixing anything that might have broken. If it had been lost in shipping that would be a different story.

  • Soldering Complete

    Mike Szczys01/10/2014 at 22:44 0 comments

    So here's the deal. One of my prejudices against Arduino is that it's an expensive board to leave with a project. But this is kind of a one-time thing so I was happy to find the Seeed Studio protoype shield for like $7.95 at the local Radio Shack. What I didn't bank on is the shield is larger than the Arduino footprint. No worried, I grabbed my tin snips and hacked off the left side of the board (beveled teh corners to get around the LCD mounting hardware).

    From there it was just a matter of point-to-point soldering. I did the LCD first since there are mutliple voltage and ground connections for that one. From there it was pretty simple to finish up the rest of the wiring. This did end up taking around two hours. But mostly because I was trying to be nice and neat with my cable routing.

    I used the header sockets that came with the prototyping shield as a connector for the LCD and NFC reader. I just bend over the PCB mount tails and soldered the wires directly to them.

    Not bad, of course I forgot to clean the fingerprints off of the LCD screen and underside of the acrylic before I got this far. I can't get a cotton swab in between there so I'll just have to deal with that imperfection.

    Here it is attached to the base. I did fire it up after soldering each component just to make sure I didn't hook anything up wrong. I just need to tweak the firmware. The dial adjusts the LEDs reverse of what it should. I'm not certain if this was a mistake in wiring the rotary encoder, or the LEDs, but it's an easy fix.

  • Let's build this thing

    Mike Szczys01/10/2014 at 22:28 0 comments

    Mechanical assembly always takes longer than I think it will. I figured one evening would be all it takes to build this thing, but by the time I figured out the size of the acrylic, cut a wood base for it, tested the layout of the components, then drilled and mounted everything I had run out of time.

    I reclaimed a chunk of protoboard for the Piezo. The IC breakout board on the left will be used for the rotary encoder. In this image you can see the three holes at the bottom of the acrylic for screwing it to he wooden base (there's a 15 degree bevel on that piece of wood).

    Much later in the evening I have everything mounted using nylon stand-offs (easy to cut with a utility knife and cheap at the hardware store) and 40-4 machine screws, washers, lock washers, and nuts. My hardware store only sells this stuff in stainless so it's a bit more expensive but still worth it to source them just down the street.

    You have to look closely to see the 3 LEDs. Radio Shack sells some plastic grommets for a 1/4" hole that the 5mm LEDs just snap into. Off to bed, soldering will happen tomorrow (full disclosure, I'm writing this up after the fact as build mode was all consuming of my time).

  • Prototype and Firmware Complete

    Mike Szczys01/03/2014 at 23:33 0 comments

    I'm happy to report that I have finished the hardware prototype and have the first full version of the firmware done.

    That turns out to be a lot of wires. From left to right is the PN532 NFC reader, Arduino, and breadboard. On the breadboard form bottom to top is the 20x4 character LCD (not the pretty pink trimpot), rotary encoder, piezo buzzer, and three LEDs.

    The firmware is close to done. I need to do some more output for the utility functions (scanning tags before the voting begins, etc.). But for now it recognizes tags from a header file of pre-approved UIDs. It will let you vote just one, notating the activity in the EEPROM so that you can't vote twice. "Chad" will also reject a tag that is not in the header file, and a tag that is not an NTAG203 format.

    This is the first in-depth project I've done with Arduino (I'm more of a bare-metal guy). I must say, they are useful. Having the no-nonsense terminal interface is really nice. I did find the EEPROM libraries to be a joke. They only have functions to read and write bytes. That's probably to get around the need to cast pointer types, but I just ended up using hte AVR-GCC library and got what I needed (reading and writing uint16_t for the ballout counts).

    I probably wouldn't have included sound if I had been programming bare-metal. The Tone library is super simple. But then again, I'm sure there are C piezo libraries out there I've just never looked for one.

  • Full Proof of Concept

    Mike Szczys12/31/2013 at 17:09 0 comments

    Days until deadline: 13

    I have had a few productive nights of coding and now have a working proof of concept. After arriving home from holiday at in-laws house I was happy to see the NTAG203 samples I had ordered had arrived while I was gone. This is the tag format that will be used in the final project.

    Alas, I could find no libraries capable of writing the tags using the PN532 based hardware. And I don't have the time write one myself (maybe I do but fear of missing the deadline prevents me from starting that journey). But there is another solution which came as a shower thought (if you can't figure out your project go take a shower and it'll probably come to you!).

    I can't read or write the NDEF messages using the libraries I have availalbe, but I can read the unique hardware identification (UID) of each tag. With this in hand I wrote a program that has a few different user options:

    • Read UID of any tag that is scanned to the reader and dump the 7-byte value to the serial terminal in a C header format.

    • Flash the complete C header file back to the chip as a PROGMEM array

    • When voting, check scanned UID against this array. If found, check against a bit-packed array using the index of the UID. The bit-patcked array is stored in 64 bytes of EEPROM (512 possible voting tokens) as a 0 if this tag has not yet been used as a voting token. It is then stored as a 1 once a vote has been cast. This technique prevents multiple voting

    I have implemented all of this as described. Not it's just a matter of a simple physical build: adding an LCD to display instructions and the vote totals, adding a knob to select the different voting options, adding LEDs to indicate which option is currently selected, adding a piezo for audible feedback, and actually building the physical device. This is an afternoon of work at most. Yay!

  • MiFare Write/Read Success

    Mike Szczys12/29/2013 at 02:47 0 comments

    Days until deadline: 16

    I still don't have the correct tag in hand yet (ntag203). But today I was able to write an NDEF formatted message to the MiFare Classic tag that came witdh the NFC reader. This was all thanks to the Seeed Studio PN532 library which includes the NDEF library which https://github.com/don/NDEF.

    I also took the time to write a Python script that is able to generate the unique strings. It also formats these as a C header file to be stored in PROGMEM of an Arduino. These is also a test sketch to make sure this is working with the Arduino. This is available at the GitHub repo.

  • PN532 Reader

    Mike Szczys12/28/2013 at 03:03 0 comments

    Project deadline is 17 days away.

    The ElecFreaks PN532 based NFC reader arrived today. Had I realized that all their software samples are derived from the Adafruit board I would have ordered that one to support the open source effort (sorry Phil and Limor).

    Right off the bat I gave this a try with and Arduino and it worked like a champ. The reader shipped with a Mifare Classic 1K tag which works with this reader. The tags I plan to use are ntag203, because the mifare classic cards don't work with Nexus phones (I understand the ntag203 is the most widely compatible).

    The plan is/was to use an STM32 ARM chip --- in preparation for this I connected my Bus Pirate with the reader in I2C mode. After more than an hour of nothing I hooked it up in SPI mode and still more of nothing. I then pulled out an FTDI adapter and tried to drive the reader with libnfc. Again, nothing. This is very frustrating. At this point I probably need to focus on making the Arduino proof-of-concept work for my needs just to ensure I can make my deadline.

    TODO:

    - Make an NDEF test write (use: https://github.com/don/Ndef)

    - Figure out how to use a script (Python?) to push NDEF strings to the Arduino for writing

  • Dev Tools

    Mike Szczys12/26/2013 at 20:32 0 comments

    I'm exploring the STM32 F3 for this project:

    Linux Setup

    - Toolchain: GNU Tools for ARM

    - Bare metal template

    - OpenOCD Git repo: git://git.code.sf.net/p/openocd/code

    Texane Repo:

    - sudo cp 49-stlinkv2.rules /etc/udev/rules.d/.

    - sudo restart udev


View all 8 project logs

  • 1
    Step 1

    Grab the code from this Github. You need to uncomment the uniqueSet array and index tracker in the code for the first time your compile the firmware. Compile and upload to the Arduino.

  • 2
    Step 2

    Use the git install method to add Seeed Studio NFC library: https://github.com/Seeed-Studio/PN532

  • 3
    Step 3

    Reset the ballot count (and records of which tokens have voted) by shorting pin3 to ground and pressing reset.

View all 8 instructions

Enjoy this project?

Share

Discussions

prashanth-flash wrote 10/16/2016 at 19:24 point

Need some help please!

  Are you sure? yes | no

hackhead79 wrote 04/02/2014 at 22:14 point
Pretty nifty project and looks like NFC is really fun technology to play with! :)

  Are you sure? yes | no

erenemre wrote 01/22/2014 at 17:21 point
It was fun to vote using this little guy!

  Are you sure? yes | no

James Hobson wrote 01/12/2014 at 17:06 point
Looks great!

  Are you sure? yes | no

Similar Projects

Does this project spark your interest?

Become a member to follow this project and never miss any updates