Close
0%
0%

Starfleet Communicator Badge

Bluetooth connected communicator for your chest.

Similar projects worth following

This project won't have too many moving parts. Although our first intent was to get a BLE chipset and integrate it with some basic hardware to make the badge live, it turns out the chips we were looking at supported data only and weren't going to work for audio communications.

So we punted and picked up a Jabra earplug to hack and add to the badge. To get it done, we need to extract the electronics, build a small amplifier for the speaker and design the badge to be 3D printed.

  • 1 × Jabra Bluetooth earplug. Model BT2040 The model number is from the circuit board. It's pretty small, the speaker and mike are both soldered on and it's powered by one AAA battery. The switch is also pretty conveniently placed for close by smacking the badge.
  • 1 × 3D printed shell We started with a shell from Thingiverse and removed material from the back to allow us to mount the hardware.
  • 1 × speaker P/N tbd
  • 1 × PN2222 transistor for the speaker amplifier
  • 1 × 100 ohm resistor for the speaker amplifier

View all 10 components

  • Putting it together

    Tampa Hackerspace04/30/2014 at 04:10 0 comments

    Soldering the amplifier circuit, dead bug style.

    1. Solder the speaker output of the Bluetooth headset to the 100 Ohm resistor. Cut the heat shrink tube to cover,
    2. Solder the resistor now to pin 2 of the Transistor
    3. Solder pin 3 of the Transistor to the Power connection on the Bluetooth (make sure to add your shrink tubing first).
    4. Solder the positive side of the speaker to Pin1 of the Transistor (make sure to add your shrink tubing first).
    5. Solder the Speaker ground to the Bluetooth ground (again, be sure to add your shrink tubing).
    6. Check your solder connections, then shrink the tube.
    7. bundle your wiring and place it into your 3D printed shell. Note that you might need to dremel the back of the 3D printed shell in order to adjust it make it snug.
    8. Test to make sure you have communication, then use a glue gun to set it.
    9. Insert the battery and test again. You will hold the button for approx. 2 seconds. Then set your secondary Bluetooth device to pair. ***note: to get the battery to stay, we recommend just hot gluing the battery in***

  • Amped Up

    Tampa Hackerspace04/30/2014 at 02:16 0 comments

    Knowing we need to amplify the signals for the speaker, we built a small Darlington amp using transistors. It wasn't terribly great. The voltage loss was high and we didn't get a usable amount of audio. We are not yet happy with the final results of the speaker volume so are now researching a flat piezo speaker to see if that will produce better results. From there, we plan to then miniaturize the speaker, which will require a change in the driver circuit.

  • Reprint

    Tampa Hackerspace04/30/2014 at 02:13 0 comments

    I can't say I'm thrilled with how Slic3r built the support under the badge. I snapped a razor trying to get it out. I decided to reprint and deepen the design to make it taller so the badge won't stick out so far from your chest. Once it was done, I took a dremel to the back to remove the extra ABS and then used a 3/16" bit in the drill press to drill an access hole for the single button on the BT device.

  • Measure twice, cut once.

    Tampa Hackerspace04/28/2014 at 21:19 0 comments

    Working on the badge dimensions, I took a digital caliper and measured a few bits on the earpiece. It's roughly 46.51 x 16.09 mm and shaped like a surfboard. The narrow end is about 5.14mm tall while the other is about 12.38mm. The microphone is encased in rubber. It's about 12.90 x 16.26mm and 7.30mm deep. I decided to mount it at the top of badge where it's behind the face and not visible. Depth will be fine because the battery is deeper.

    I'm not much of a CAD kind of guy so I fired up Tinkercad and imported the STL I found. I carved out a few boxes and then rounded the corners with four ovals of the proper dimension. I then subtracted this from the back of the badge making sure none of the negative space popped out to the front. I then carved out the space for the microphone and a 1.2 mm groove for wires between the main circuit board and the mike. Not sure yet about speaker placement. 

    I'm now printing the updated badge to test fit the components.

  • Hacking the earplug

    Tampa Hackerspace04/28/2014 at 21:11 0 comments

    Getting a seriously late start because we didn't get the bluetooth hardware until Friday, 4/25. I sat down on Sunday and pried apart the case. I then printed the badge I located at http://www.thingiverse.com/thing:34902 at 150%.

View all 5 project logs

  • 1
    Step 1

    Print the shell. We obtained the original design from Thingiverse and then removed material from the back to mount the Bluetooth device and microphone. The current version can be found on github at https://github.com/TampaHackerspace/3D-Print-and-Model/tree/master/STNG%20Communicator

    We printed the shell using ABS. To obtain a more finished look, try an acetone bath to smooth the surface. Once the acetone has completely evaporated and the badge is completely dry, apply metallic paint to the visible surface.

  • 2
    Step 2

    Solder the amplifier circuit, dead bug style.

    1. Solder the speaker output of the Bluetooth headset to the 100 Ohm resistor. Cut the heat shrink tube to cover,
    2. Solder the resistor now to pin 2 of the Transistor
    3. Solder pin 3 of the Transistor to the Power connection on the Bluetooth (make sure to add your shrink tubing first).
    4. Solder the positive side of the speaker to Pin1 of the Transistor (make sure to add your shrink tubing first).
    5. Solder the Speaker ground to the Bluetooth ground (again, be sure to add your shrink tubing).
    6. Check your solder connections, then shrink the tube.
  • 3
    Step 3

    Assemble the badge

    1. bundle your wiring and place it into your 3D printed shell. Note that you might need to dremel the back of the 3D printed shell in order to adjust it make it snug.
    2. Test to make sure you have communication, then use a glue gun to set it.
    3. Insert the battery and test again. You will hold the button for approx. 2 seconds. Then set your secondary Bluetooth device to pair. ***note: to get the battery to stay, we recommend just hot gluing the battery in***

View all 3 instructions

Enjoy this project?

Share

Discussions

greenaum wrote 10/30/2015 at 14:15 point

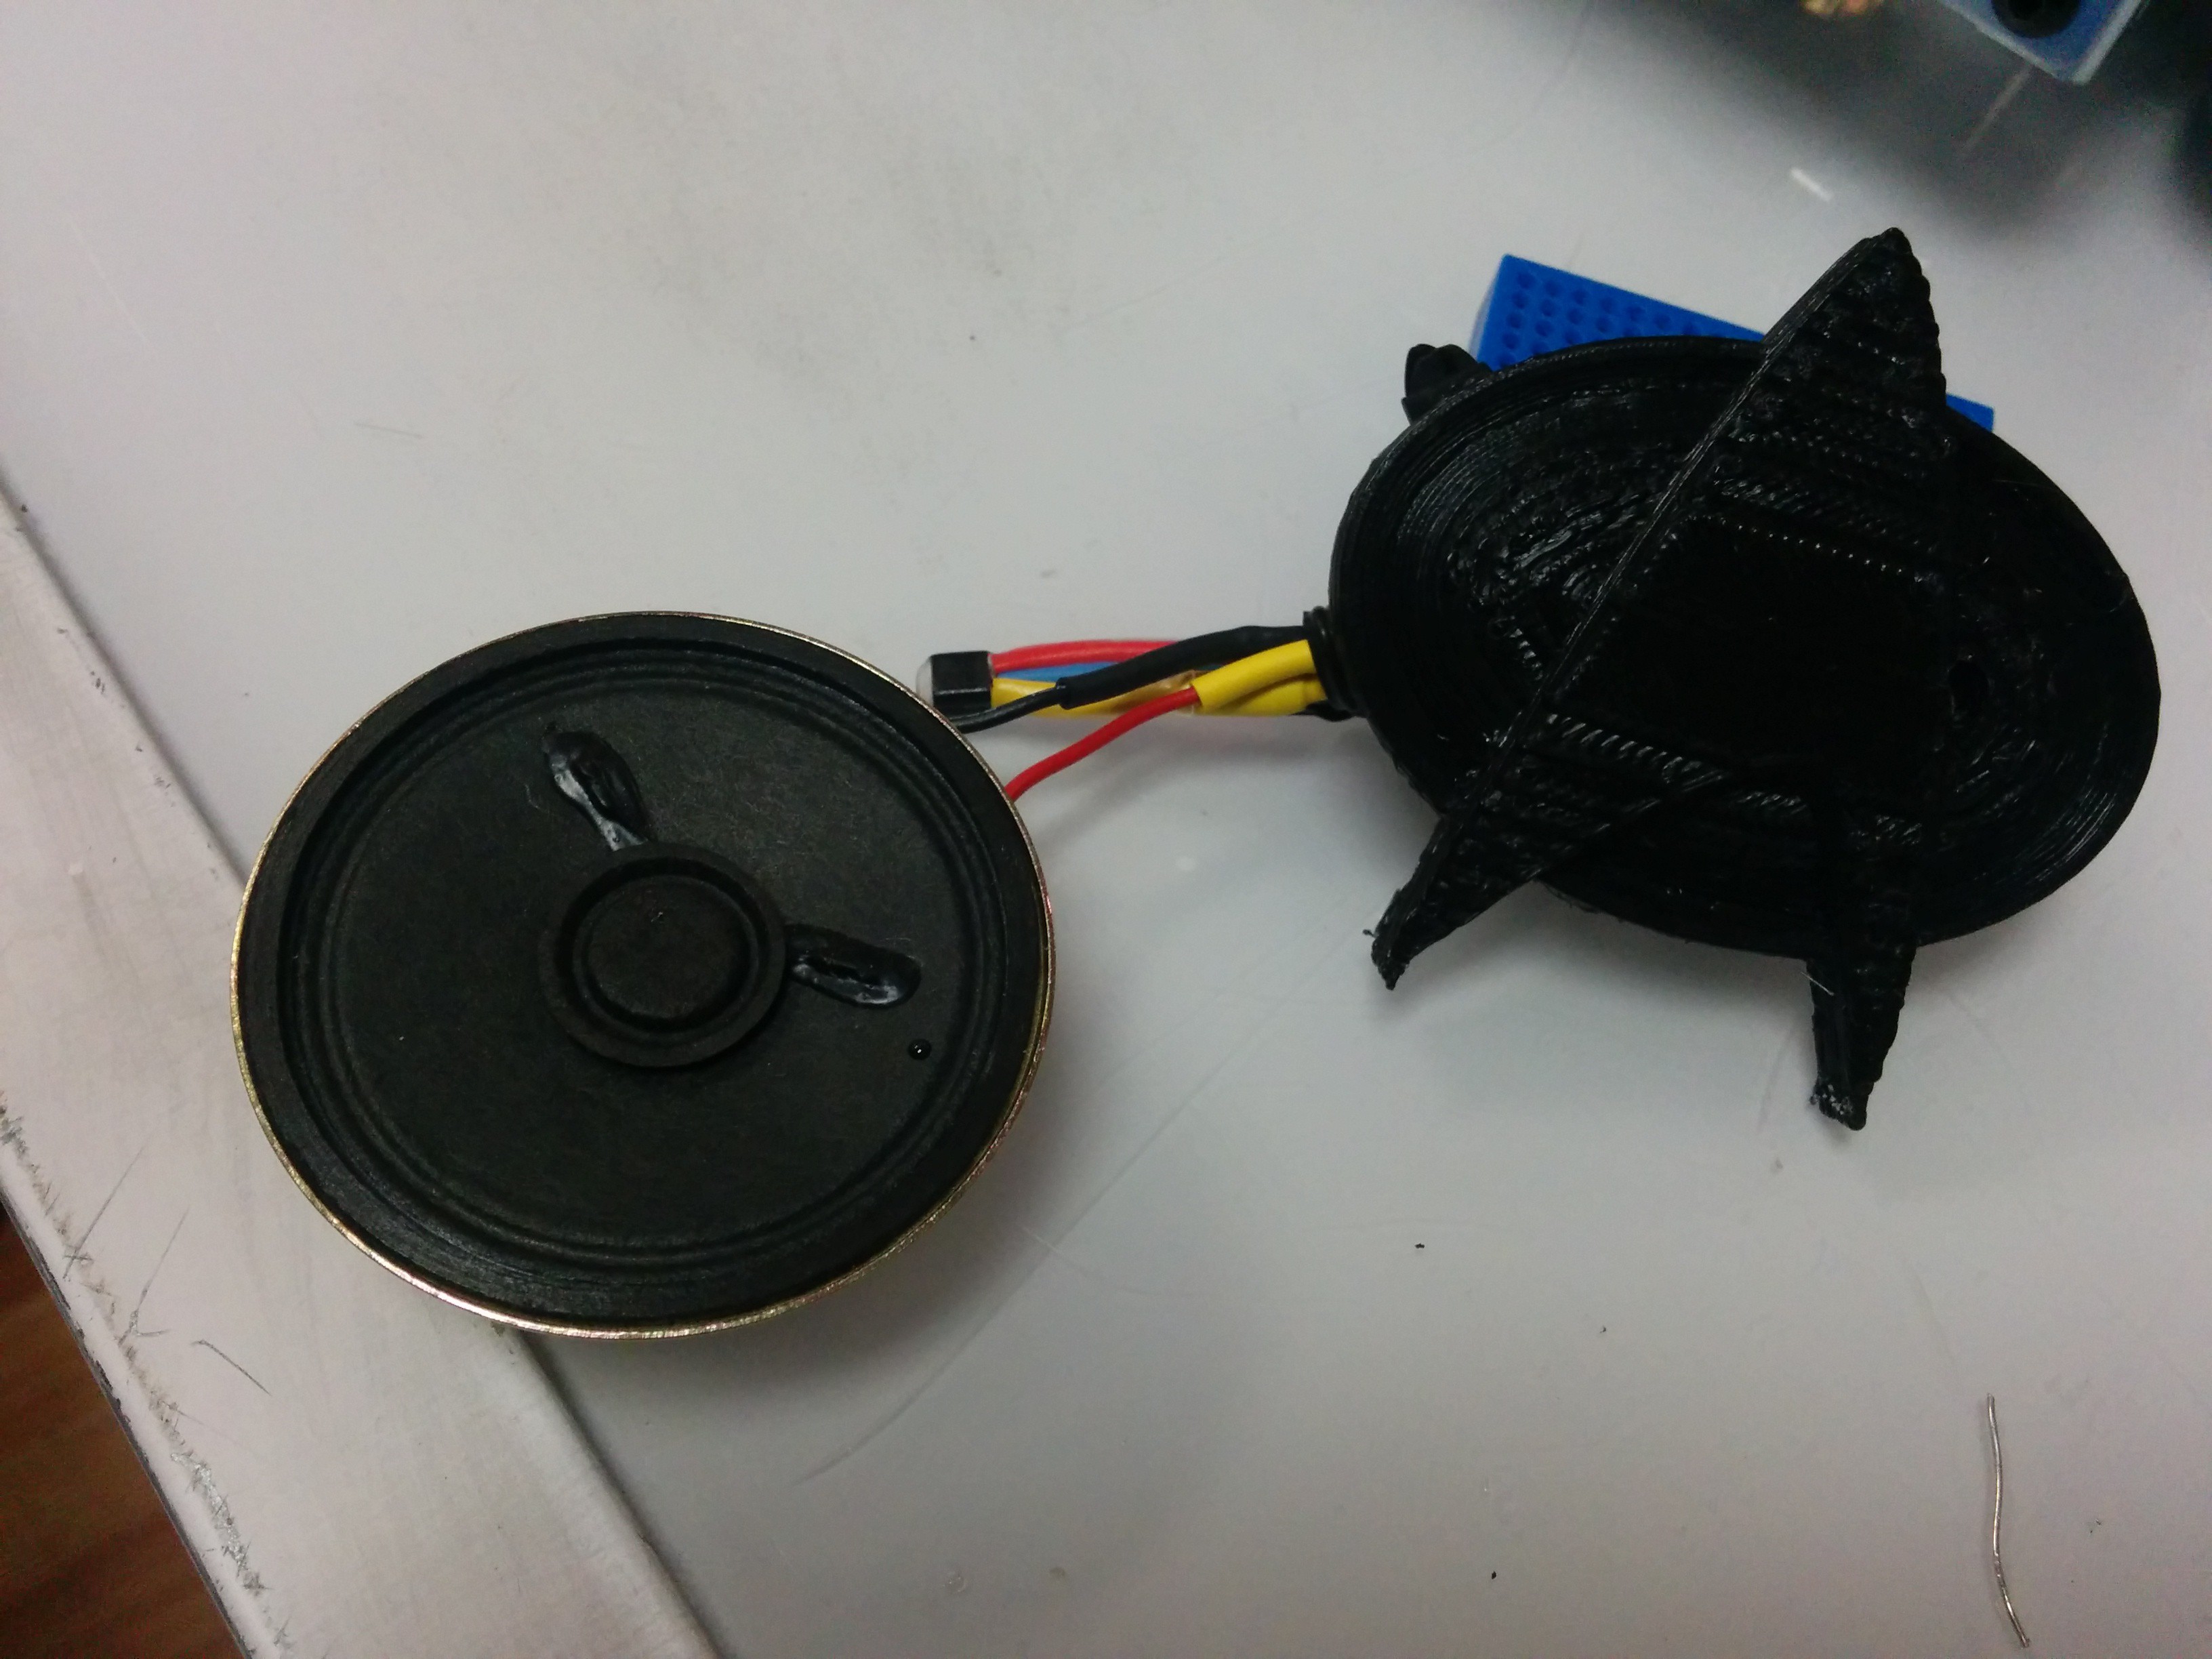
That amplifier circuit is not how it's done, no good for audio. Best bet is copy a design from somewhere else, or else just buy a premade amp. The LM386 is an 8-pin chip that provides nearly everything you need to produce around a watt from 6V, or less from a lower voltage. It's quite old, and there's newer amp chips available, perhaps one of those would be good. 

  Are you sure? yes | no

Dr.Droopy Nayhey wrote 05/09/2014 at 04:38 point
Awesome, i NEED THIS!! I have one of the first kids TNG badges i got from ebay like 13 years ago, I wish it looked 1/4 as cool as this!

Peace and long life!

  Are you sure? yes | no

Jake wrote 05/02/2014 at 07:38 point
Can't wait to see this!

  Are you sure? yes | no

Tampa Hackerspace wrote 04/28/2014 at 04:19 point
We suffered some delays waiting for the bluetooth gear to arrive. It finally showed Friday. I made some progress this weekend and will post tomorrow.

  Are you sure? yes | no

Stevieo wrote 04/28/2014 at 03:50 point
So, is this project actually being worked on? Would love to see some info!

  Are you sure? yes | no

hllhll wrote 04/24/2014 at 19:58 point
That is so awesome, I'v always wanted one of these!

  Are you sure? yes | no

ziPRR wrote 04/24/2014 at 13:56 point
As soon as you're done, sell me one. :D

  Are you sure? yes | no

DusteD wrote 04/24/2014 at 11:35 point
Looking forward to seeing this in action :)

  Are you sure? yes | no

Mike Szczys wrote 04/23/2014 at 14:39 point
No details whatsoever? C'mon.... we want to see the awesome!

  Are you sure? yes | no

Does this project spark your interest?

Become a member to follow this project and never miss any updates