 jperez208
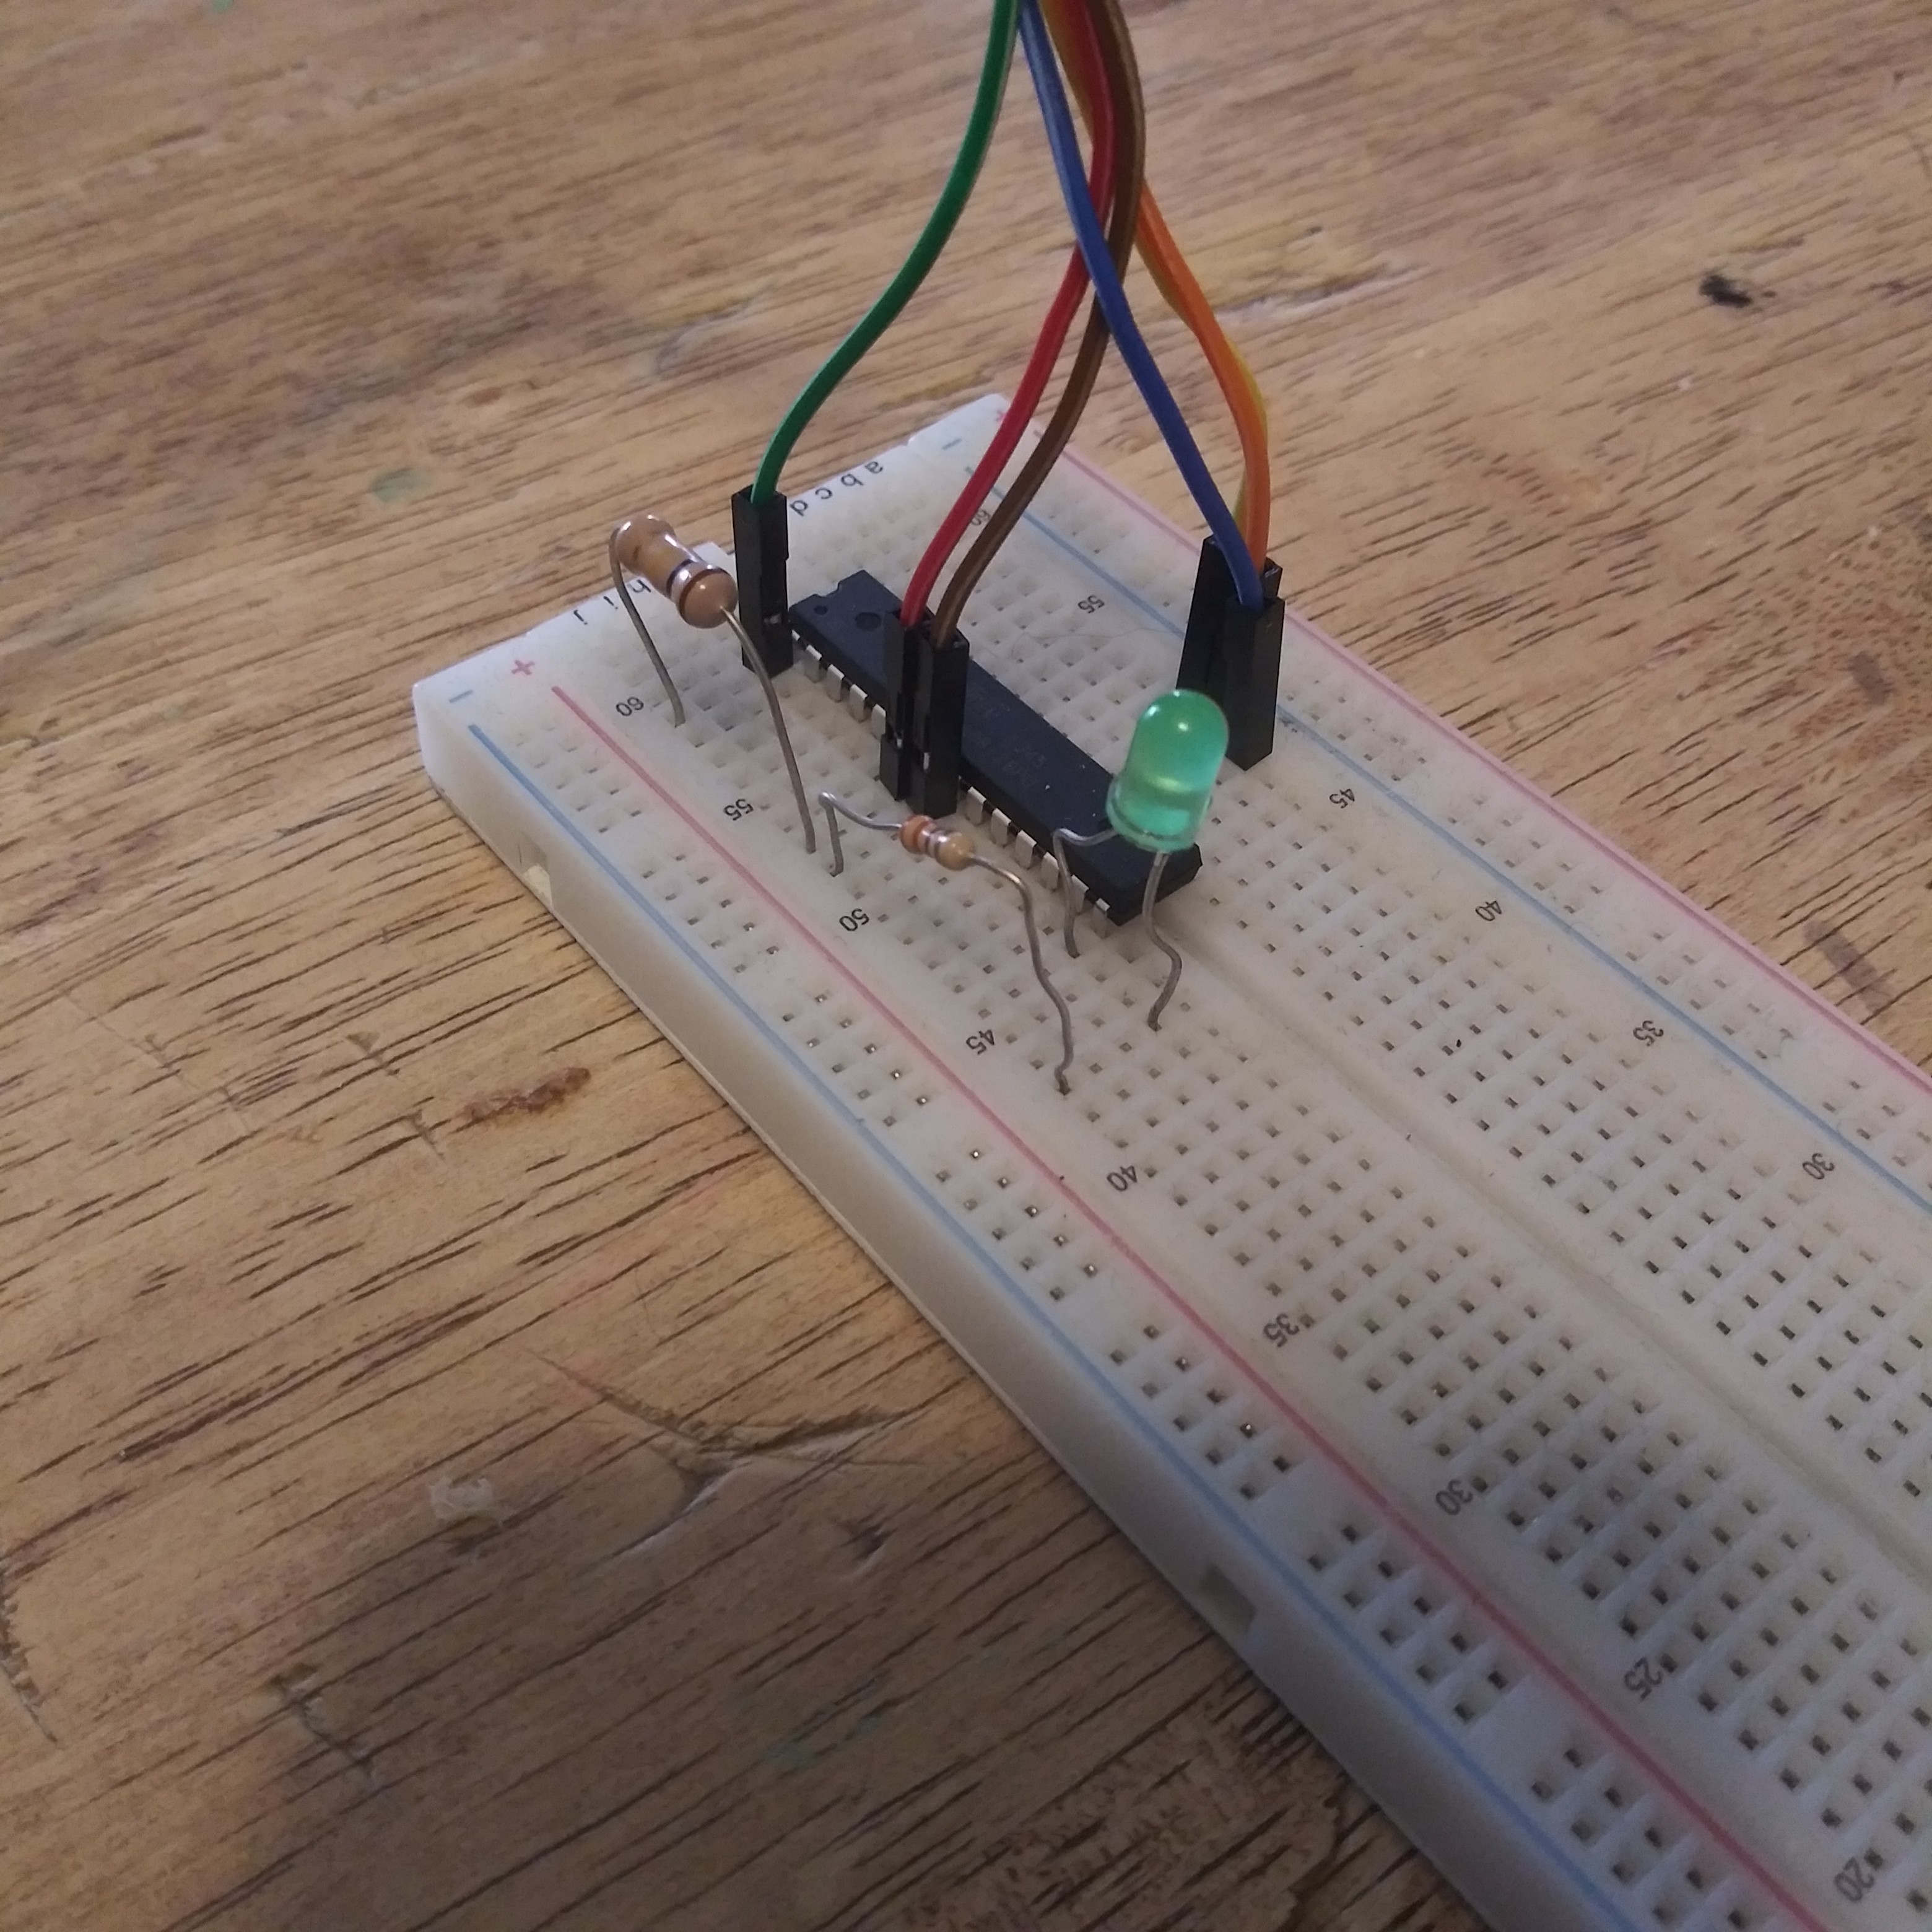
So by now we've done alot of work and still haven't done any actually programming. But dont worry, we are about to get started. First lets connect a LED and 330ohm resistor to the PORTB.0 Pin.
Open up BASCOM and start a new project/file. It may already be open with a blank page and ready to start typing. First we need to write some parameters that the compiler will use. Its a little much information for some one who has never programmed before but luckily there is a shortcut for this.
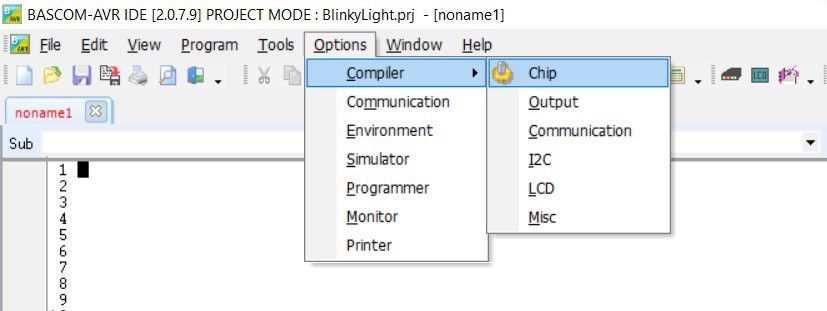
First click options=>compiler=>chip
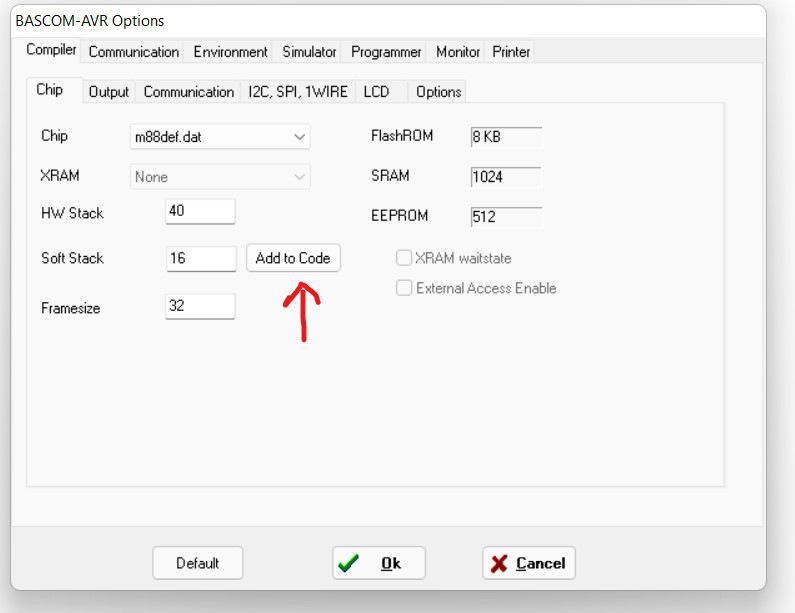
Under chip, find your microcontroller under the drop down menu. These will be slightly cryptic with labels like 2313.dat or m8def.dat. Find the one that most closely matches your microcontroller. Since I am using a Atmega88, I choose m88def.dat. Next click add to code and hit cancel. This code (or similar) should appear at the top of your screen.
$Regfile="m88def.dat" ' specify the used microcontroller
$crystal = 4000000 ' used crystal frequency
$hwstack = 40 ' default use 40 for the hardware stack
$swstack = 16 ' default use 16 for the SW stack
$framesize = 32 ' default use 32 for the frame space
Next lets type add some code to blink a LED:
' BlinkyLight.bas
$Regfile="m88def.dat" ' specify the used microcontroller
$crystal = 4000000 ' used crystal frequency
$hwstack = 40 ' default use 40 for the hardware stack
$swstack = 16 ' default use 16 for the SW stack
$framesize = 32 ' default use 32 for the frame space
Config Portb = output 'Sets Portb as output
_On alias 1 'Alias is used to rename certain values to names that maybe easier to read
_Off alias 0 'later on in the program.
LED Alias PORTB.0
Begin: 'Label to start program.
LED = _On 'Turns LED on. Since there was an alias used
'this could also be written as PORTB.0 = 1
Waitms 100 'Wait for 100milliseconds. This time is calculated by the $crystal label in the
'header but the actual hardware clock on your MCU will determine the actual 'blinkrate
LED = _Off 'Turns the led off. Could also be written as PORTB.0 = 0
Waitms 100 'Wait for another 100ms
Goto Begin 'Go back to the label "Begin"
'When programming in basic, its a good idea to keep line numbers on.
'The command goto can be used to either find a label in a program
'i.e. GOTO BEGIN or can be used to find a specific line i.e GOTO 16
'Using labels is preferred because if you add code later
'it will move your line numbers around making your goto command point to the
'wrong line
I know alot may have been thrown out there for a first program but it'll all start to make sense as you progress and practice. The apostrophes are comment lines. Anything after that mark tells the compiler to ignore that information. This is usually used so the programmer can make notes for either themselves or whoever is looking at the code later. Now that we have some code written, lets get it to the microcontroller.
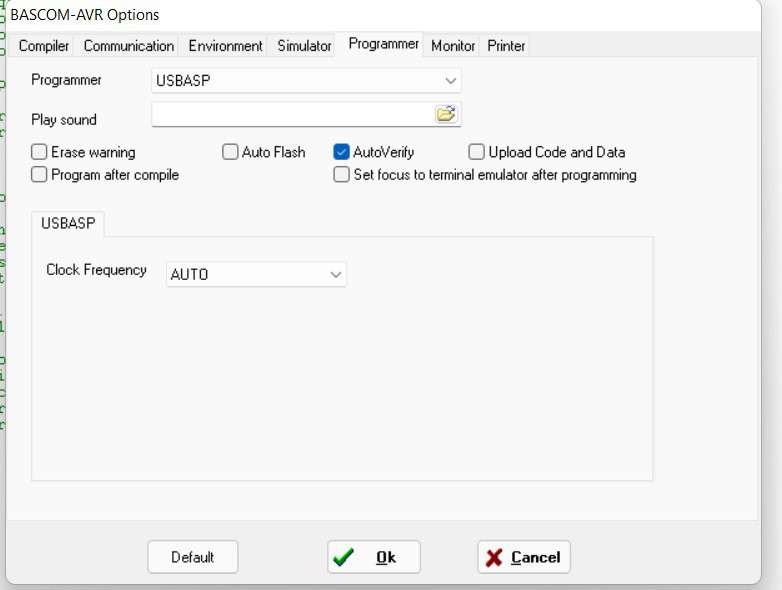
First lets make sure we are set up and ready to send the program.
Go to Options=>Programmer and make sure USBasp is selected
Next, lets compile. Compiling will turn out code into something that the microcontroller can actually use. To compile go to Program => Compile. You can also hit F7 as a shortcut.
This is generate a few new files in the folder where you saved your program originally. For right now, we dont need to worry about what they are doing or what they are for.
Next we will go to Program=> Send to chip. This may bring up a second screen that will have alot of somewhat meaningless but very important information for the programmer. Dont touch or change anything here. Find the little green chip and select it.
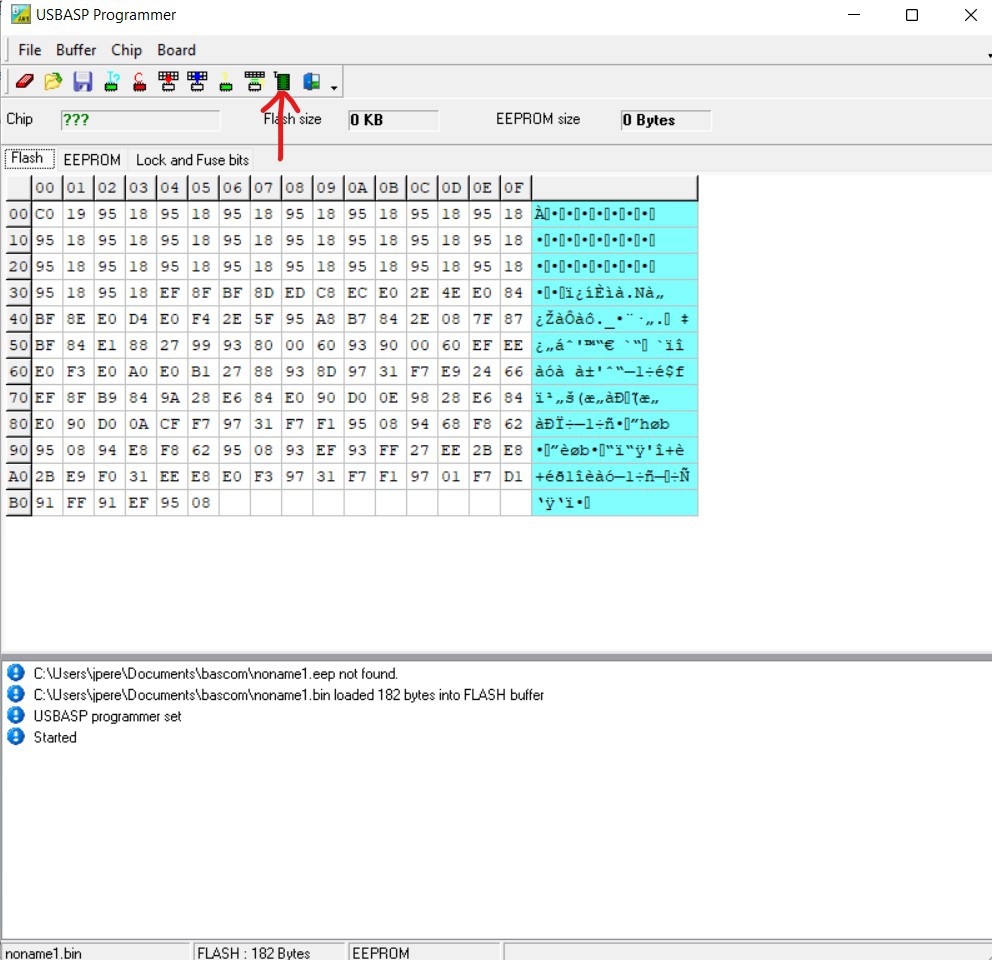
If all goes well, you should get a confirmation that it was successfully sent to the chip and your led should start to blink.
Discussions
Become a Hackaday.io Member
Create an account to leave a comment. Already have an account? Log In.