-
How Zener Diodes are Different From Other Diode Types
12/19/2021 at 21:44 • 0 commentsCircuitry is required for the operation of electrical gadgets in your home. These electronic circuits are constructed in such a manner that current flows in the proper path for each of their functions. Due to the various functions that electricity performs, regulating the passage of power could be difficult. This is the place diodes then come into play. In this article, we would be discussing how zener diodes are different from other diode types.
Diode
Two levels of semiconductor substance, a P-type layer and an N-type layer, are joined to produce a diode. PN Junction is the name given to the connection made by combining these strata. Since holes make up a large portion of charge transfer in a P-type layer, it is known as a positive layer. Since electrons are the predominant transporters in the N-type layer, it could as well be regarded as a Negative type layer.
Whenever a diode is forward biased, it doesn't begin conducting immediately; instead, it begins to conduct once a certain forward voltage has been reached. This forward voltage is referred to as the diode's knee voltage. Knee voltage varies depending on the semiconductor substrate; it is 0.3V for germanium and 0.7V for silicon.
The depletion zone expands whenever the diode is reverse biased. The depletion region's thickness, on the other hand, diminishes as the forward bias voltage rises. As a result, in a reversed biased condition, the depletion zone prevents current from flowing through it.
The minority carriers, on the other hand, could travel in reversed biased mode and generate a modest electricity in the diode. It depends on temperature; suppose that somehow the reverse voltage surpasses a certain amount, the temperature rises, and the minority carriers expand rapidly, causing the diode to burst.
As a result, it's suggested that a standard PN junction diode be utilized exclusively in forward biased mode.
Zener Diode
Diodes are utilized to permit the flow of current unidirectionally via a circuit. Zener diodes working on the other hand differs from other diode types wherein whenever they are connected in a reverse path in a circuit, in a way that the charge travels via another route in a diode, they allow a little leakage of electric charge flow. This kind of charge travels to the earth to stop it from having an effect on other areas of the circuit and also stopping the diode from destroying itself.
You could begin a conversion between AC and DC by utilizing diodes like Zener diode. Alternating current undergoes alterations between travelling unidirectionally as well as in the other direction while direct current only travels unidirectionally. Majority of those electrical setups feature bridge rectifiers or rectifier diodes.
AC current could be converted to DC current with the aid of rectifiers only if they permit the unidirectional flow of either positive or negative current via it or by the conversion of AC current cycle from one path and through the other. Rectifiers permit the conversion of DC power supplies which carry current across lengthy paths to the alternating current power that’s discovered in the majority of household equipment.
Major Distinctions Between Diode and Zener Diode
- The electric charge’s path which the gadget permits makes a huge distinction between a diode and a zener diode. A diode conducts in one direction while a zener diode conducts two directions in forward biased and also in reverse biased.
- The doping attributes of a diode and a zener diode vary from one another. The zener diode is a highly doped diode, as it’s also utilized in reverse bias conditions, while the conventional diode is not highly doped as it allows current only in forward breakdown condition.
- A zener diode’s breakdown voltage is relatively lower than that of a conventional diode whose breakdown voltage is relatively higher.
- The conventional diode is incapable of operating in a reversed biased mode whilst a zener diode is capable of operating...
-
Types of Transistors in Detail
12/16/2021 at 21:42 • 0 commentsTransistors are active components that can be found throughout circuit boards. They're employed as switching devices as well as amplifiers. They're employed as amplifiers in low level and high level circuits, frequency phases, oscillators, enhancers, sensors, and any circuit that requires a purpose. They're utilized as buttons in electronic systems. There are tons of distinct varieties of semiconductors since there are dozens of distinct producers across the globe who create semiconductors. Low, medium, and high-power transistors are available for use with low and high frequencies, as well as super high current and/or high voltages. This article explains the different types of transistors.
What is a Transistor
![]()
The transistor is a piece of electrical components. A p and n-type semiconductor is utilized in creating it. The structure is termed transistors whenever a semiconductor is positioned in the middle of two semiconductors of similar type. A semiconductor transistor can be defined as a serial connection of two diodes. A transistor is a gadget responsible for controlling the passage of current or electricity and serves as a pushbutton or gateway for electrical impulses.
Types of Transistors
BJTs and FETs are 2 different types of transistors.
Bipolar Junction Transistor (BJT)
BJTs are composed of three areas: the base, collector, and emitter. Aside from FETs, BJTs are currently regulated gadgets. A little electricity flowing from the emitter to the collector area of the transistor generates a considerably bigger amount of electricity to start flowing from the base to the emitter. NPN and PNP are the two main types of bipolar junction transistors. An NPN transistor is a transistor wherein electrons make up the bulk of the charge carriers.
![]()
Most electricity flowing via a transistor is formed by electrons moving from the emitter to the collector. The other sorts of charges, holes, make up a small percentage of the total. PNP transistors are polar opposite of NPN transistors. Most electricity carriers holes in PNP transistors. PNP and NPN are the 2 varieties of BJT transistors.
PNP Transistor
![]()
This transistor has 2 p-type semiconductor substances and it's yet another form of BJT. A small n-type semiconductor substrate separates these substances. Most current carriers within those transistors were holes, whilst the remainder were electrons.
The arrows sign throughout this transistor represents the normal electric charge. The electric charge flows from the emitter end to the collector end in this transistor. When the base end is pulled to LOW in comparison to the emitter end, the transistor would then get turned on. Here is a diagram of a PNP transistor featuring a sign.
NPN Transistor
![]()
NPN is a variety of BJT that consists of 2 n-type semiconductor substances separated by small p-type semiconductor layers. Most current carriers inside an NPN transistor are electrons, while the remainder are holed. The electric movement inside the transistor's base end is formed by electrons moving from the emitter to the collector end.
Inside a transistor, a small electricity delivery at the base end could result in a large electric flow from the emitter to the collector. Because electron mobility is greater than hole mobility, NPN transistors are currently the most widely utilized BJTs.
Field Effect Transistor
A gate, source, and drain are the three areas that comprise an FET. Bipolar transistors, sometimes known as FETs, are voltage regulated electronics. A voltage applied to the transistor's gate regulates movement of electricity from the source to the drain. FETs feature extremely high input impedances, ranging from a few mega ohms to far too much higher figures.
![]()
Because of their high input impedance, they only receive a little amount of current. As a result, FETs and MOSFETs both drain extremely minimal current from the power supply of...
Read more -
ATmega328 - The Backbone of Arduino Platform
12/16/2021 at 16:07 • 0 commentsThe Arduino Uno is a type of ATmega328-based microprocessor board, and Uno is an Italian word meaning "one." The Arduino Uno moniker was chosen to commemorate the imminent launch of the Arduino Uno Board 1.0, a microprocessor board. Digital input/output pins-14, a power jack, analog I/ps-6, ceramics resonator-A16 MHz, a Universal Serial Bus connection, a reset button, and an ICSP header are all included on this PCB. By linking this PCB to the PC, all of these could assist the microprocessor for future functioning. An AC to DC adapter, a Universal Serial Bus connection, or a battery could all be utilized for powering this board. What an ATmega328 is, pin setup, characteristics and applications are all covered in this article.
What is Arduino Uno ATmega328?
![]()
The ATmega328 seems to be a single-chip microprocessor designed by Atmel that's part of the megaAVR series. It has a Harvard-style structure using an eight-bit RISC processing core. Arduino Pro Mini, Nano, Due, Mega, and Leonardo are a few of the Arduino Uno ATmega328 boards available.
Features of Arduino Uno Board
These are some of the characteristics of the Arduino Uno ATmega328 Microcontroller:
5V is the operational voltage.
The suggested input voltage would be between 7 and 12 volts.
The input voltage varies between 6 and 20 volts.
There are fourteen digital I/O pins and six analog I/O pins. For 3.3V, the power for every I/O pin is 40 mA DC. The current drawn by the pin is 50 milliamperes.
A total of 32 Kilobyte of flash memory is available.
SRAM has a capacity of 2 Kilobyte.
Clock Speed is 16 MHz
Electronically Erasable Programmable Read Only Memory is 1 Kilobyte.
Physical Characteristics
The height and breadth of Arduino boards are the most important physical qualities. Its PCB is 2.7" X 2.1" in height and breadth, although the power jack and Universal Serial Bus connector would go beyond this dimension. Alternatively, the casing featuring the screw holes could be utilized when mounting the board to the surface.
Pinout for the Arduino Uno
![]()
Power pins, analog pins, ATmegs328, ICSP header, RST button, power Light Emitting Diode, digital pins, test Light Emitting Diode 13, Transmitter/Receiver pins, Universal Serial Bus interface, and an outside power source may all be found on the Arduino Uno board. The following is an overview of the Arduino UNO board:
Power Supply: The Arduino Uno could be powered using either a USB connection or an outside power supply. A battery or an AC to DC adapter are the most common outside power supplies. The Arduino Uno could be linked to the adapters by inserting it into the Arduino board's power port. Likewise, the battery traces could be linked to the POWER linker's Voltage input and Ground pins. The recommended voltage variety is from 7 to 12V.
Input and Output (I&O): Through the assistance of routines such as pinMode(), digitalWrite(), and Digital Read(), the Arduino Uno's fourteen digital pins could be utilized as input and output ().
iPins 1 (Transmitter) and 0 (Receiver) (Serial): They're utilized for sending and receiving Transmitter-Transistor Logic serial data, and are linked to the ATmega8U2 Universal Serial Bus to Transmitter-Transistor Logic Serial chips corresponding pins.
Pin 2 & Pin 3 (External Interrupts): External pins could be utilized in triggering interrupts whenever a minimum level or modification in values is detected.
Pin-13 (LED): This pin could be utilized in connecting the built-in Light Emitting Diode (digital pin). Anytime the pin is LOW, the LED is enabled like the HIGH-value pin.
Analog Reference Voltage: This Voltage is for analog i/ps featuring analogReference().
RST pin: It is utilized when resetting the microprocessor.
Memory: This Atmega328 Arduino microprocessor has 32 Kilobyte of flash memory to store codes, 2 Kilobyte of SRAM, and 1 Kilobyte of Electronically Erasable Programmable Read Only Memory.
Communication: Universal...
Read more -
How Semiconductors have Revolutionized the World?
12/16/2021 at 15:33 • 0 commentsIn a simplified way, semiconductor materials have an electronic conductance which lies halfway among that of a conductor (like copper) as well as that of insulators (like silicon).
They are excellent parts of electrical gadgets like transistors, diodes, and embedded processors because their resistance decreases as their temperature rises. These are all essential parts of today's electronics and mobile gadgets, and semiconductors have transformed our universe in this regard.
In this essay, we would delve deeper into this influence while also considering what's forthcoming in semiconductor innovation.
What Are Semiconductors?
It's critical to comprehend what semiconductors are. Materials are divided into 3 groups whenever it relates to transporting electricity: conductors, insulators, and semiconductors. A conductor is something like a copper wire in an apartment's walls or a pair of earphones that could quickly transport electrically. Electrical conduction is prevented by insulators such as rubber or ceramic.
![]()
Semiconductor materials are in the center of the spectrum. They could behave as insulators in certain situations. They take on the role of conductors under the supervision of others. Heat is a decisive consideration for numerous people, as semiconductors become more conducting as their temperature increases. Engineers could also utilize superconductivity, which enhances their conductance as temperatures fall, in certain utilizations.
A Brief History of Semiconductor Applications
Although semiconductors are a relatively new innovation, this digitalization traces back to 1874, when the rectifier — a gadget that converts AC and DC electricity into one another — was invented.
![]()
Electrical researchers didn't realize the possible uses for this device till 1947, after Bell Laboratories trademarked the contact point transistor. For their efforts, the individuals engaged with this discovery were awarded the Nobel Prize in Physics.
During the 1950s, semiconductors were found in transistor radios and other consumer electronics. They gradually moved to embedded chips towards the ending of the 1990s.
For calculators like those built by Texas Instruments, they gained popularity. This innovation also triggered a harsh calculator battle that persisted for the majority of the 1970s, as firms such as Texas Instruments, Casio, Sharp, Hewlett-Packard, and others competed to be the alpha dog in the mobile computer industry.
In the 1980s, engineers developed the large-scale integrated circuit (LSI), followed by the very large-scale integrated (VLSI) and ultra-large-scale integrated (ULSI) in the 1990s and 2000s. Semiconductors are part of nearly every technology that the average person uses today. Computers, smartphones and modern appliances wouldn’t function without semiconductors — or at least, they wouldn’t be as compact and functional as they are today.
How Have Semiconductors Transformed Our Lives in the Past and Present?
The world's largest first microcomputer (like the ENIAC) was developed in 1946, marking the beginning of the semiconductor era. This monstrosity weighs in over 30 tons, had over 100,000 parts, and used 200Kilowatt of power whenever you're utilizing it.
Another of the primary concerns was the usage of vacuum tubes, which absorbed a huge amount of energy and would malfunction frequently, requiring the PC to be serviced on a frequent basis.
The study discovered that transistors lowered the amount of power needed to operate the PC's electrical systems; nevertheless, the chips in issue required numerous capacitors, resistors, and transistors, all of which must be linked via soldered wires.
During this point, Jack Kilby discovered that all of these parts can be put on an individual block of semiconductor materials, eliminating the necessity for extra cables and connectors.
Due to that, the world's earliest embedded microchip, presently called semiconductor microchip, was conceived,...
Read more -
Top 5 Best IoT Project Ideas For Beginners
11/17/2021 at 04:13 • 0 commentsWe are living in an amazing technology and digital insurgency era. We have seen a dramatic shift in the world around us in only a decade. We now see AI-powered intelligent assistants, automated vehicles, surgery robots, smart cancer sensor devices, and the IoT, owing to the latest developments in Data Science (IoT). As a result, if you are a rookie, the remarkable thing you could perform is to brainstorm authentic ideas for an IoT project.
Why Build IoT Projects
It is essential for prospective software engineers to design their projects when pursuing a career in the field. The greatest method to polish your talents and turn your theoretical insight into practical exploration is by working on actual projects. You will attain more information as you explore various IoT projects.
IoT is a key 21st-century phenomenon. Who would have guessed that one day we are going to be capable of accessing technology that allowed us to link commonplace gadgets to a consolidated and desegregated network and operate them from any part of the world?
IoT is a term referring to a system of interconnected devices featuring detectors and intelligent software to allow data to be exchanged amidst them via the Internet. IoT, on the other hand, is not for regular domestic gadgets; it may also be used in connecting advanced technological items and networks. The most astounding fact is that everything is done by using very little human interference.
You would not only be capable of testing your capabilities and limitations while you build on IoT projects, you would also earn exposure that could help you advance your profession. IoT has also enabled rapid prototyping too easily, as now you can design IoT projects at home. As the IoT starts attaining traction in the present-day period, academics and technology fanatics are eager to start investing in the creation of cutting-edge IoT projects.
Top Embedded Projects in IoT Technology
This collection of IoT project ideas is created for people who are new to IoT. These projects will help you in getting started and equip you with the necessary tools you ought to possess to thrive in your profession. There are many IoT Embedded modules are also available i.e. Arduino YUN, Raspberry Pi 4, Beaglebone etc. So, with no more delays, let us discuss an IoT project that could help you reinforce your foundation and progress up the ladder.
1. Intelligent Agriculture System
Working on an intelligent agriculture system is amongst the finest ways to begin probing IoT projects. As its name implies, the goal of this Internet of Things-based project is to construct an intelligent agricultural device that is capable of conducting and even overseeing a variety of farm chores. For example, you could use your mobile device to arrange the device to automatically water a plot of farmland and spray fertilizers or pesticides on your farm produce.
Not only that, but it is also capable of tracking soil moisture. As a result of the improved system's ability to undertake basic farming activities, farmers or agriculturists may aim at more labor-intensive farming tasks.
2. Intelligent Garage Door
Yes, IoT technology is capable of being utilized to oversee and utilize the door to your garage. The Internet of Things-enabled intelligent garage door removes the desire for hefty key trinkets. The only thing you must do is set up and connect your mobile device to your house's IoT system, and you will succeed to open and close the door to your garage using some button presses.
It has laser and voice instructions, an intelligent warning system, and IFTTT connectivity, which enables you to develop custom Google Assistant instructions. The intelligent notification feature may send out actual warnings whenever anyone locks or unlocks your door.
3. Weather Reporting System
It is intended to make broadcasting weather variables online as simple as possible. It is among the top...
Read more -
Getting Started with Arduino YUN
11/16/2021 at 22:24 • 0 commentsArduino YUN is an integrated development board that combines the functionality of two boards into one unit. It allows Arduino to communicate with WiFi, Bluetooth, and ZigBee protocols. It can be used to build IoT projects with sensors and actuators. The Arduino YUN is a microcontroller board designed especially for IoT.
It's based on the popular Intel® Quark SoC X1000 application processor, running at 160 MHz and including 1 GB of RAM. It features Ethernet, WiFi, Bluetooth low energy (BLE), and an onboard SD card slot. That means you can get started without any additional hardware!
The Arduino YUN runs completely free software on its open-source Linux distribution. The board can be programmed in C++ or Arduino sketches with direct access to Linux APIs using the standard libraries within the official Arduino IDE or using NodeMCU firmware.
The Arduino YUN has a large, breadboard-friendly form factor which makes it easy to plug into a breadboard. However, it also features a USB host port and micro-USB port for advanced users who want to add custom hardware. Arduino YUN provides more connectivity and power, thus helping you to build innovative and complex projects. It supports more protocols than the normal Arduino Uno.
What is the difference between normal Arduino Uno and Arduino Yun?
Arduino Uno is a microcontroller board based on ATmega32u4. It has an ATMEGA328P core with 16MHz CPU speed. The programming language it supports is C/C++. It can control a maximum of 32 digital inputs with a 5V tolerant logic level which means that the voltage rating of digital inputs cannot be more than 5V.
On the other hand, Arduino YUN has a newer ATMEGA32U4 core with 16MHz CPU speed and full support for the Arduino programming language (both C/C++ and JavaScript). It has 32 digital inputs with a 5V tolerant logic level that means that the voltage rating of digital inputs cannot be more than 5V.
What is a connector header?
A connector header is a type of connector provided by a microcontroller board. It connects the pins of the microcontroller to other electronic circuits, making it easier for those circuits to know what signals are being received from the microcontroller. When you purchase Arduino YUN, there are two headers provided as follows: * 3.3V pin header, which gives the power supply to Arduino YUN * GND pin header, which provides ground connections for Arduino YUN.
What is a level shifter and what is its purpose?
A level shifter is a device that connects two circuits with different logic levels. In general, microcontrollers run at lower voltage levels while many sensors and other external devices work at higher voltage levels. In this situation, a level shifter can connect these two circuits to make them work together without damaging any components in them.
What is an RTC time clock? Why do we need it?
A real-time clock (RTC) is a real-time clock included in Arduino YUN which keeps track of the date and time even when Arduino YUN is not powered on. You can use the date and time information to generate alarms, trigger events, or other applications.
Can I use Arduino YUN with Arduino IDE?
Yes. It has an ATMEGA32u4 microcontroller running at 16MHz which works with the Arduino programming language (both C/C++ and JavaScript). You can upload code to it using the standard basic Arduino IDE. It's compatible with ESP8266 firmware libraries. That means you can use the Arduino IDE to program it normally. Arduino YUN has a built-in Ethernet, Serial ports, USB host port, Micro-USB port, and UART pins which are all available on the header. All of these options allow you to easily interface with other building blocks. This will allow you to program it directly in Lua language using the popular NodeMCU platform.
Can I use Arduino YUN with Android or iOS?
Yes. Arduino YUN module has a JTAG interface that allows you to upload sketches to it directly from your computer for programming in C/C++...
Read more -
Different Types of Raspberry Pi Boards
11/16/2021 at 22:15 • 0 commentsWhat is a Raspberry Pi Board?
The Raspberry Pi board is a credit card-sized device that was developed in the United Kingdom to promote computer science education. This device is developed by Raspberry Pi. Its objective is to develop an education system mainly related to the field of computer science for children and adults. The Raspberry Pi board acts like a mini-computer that is completely based on the LINUX operating system.
Raspberry Pi Board is available in the market at low size and low cost. The Raspberry Pi board is currently popular for uses such as robotics. If we talk about its connectivity, then you can plug it into the TV and along with it, it can also be plugged into the computer monitor as per the requirement. Connecting this device with a mouse and keyboard is also very easy. Whether you are a student or an old man, all of you can easily write programming languages like Python and Scratch with the help of this device.
The Raspberry Pi board is primarily capable of browsing the Internet and playing HD video or non-HD video. Along with this, with its help, we can easily make typing, gaming, and spreadsheets. If we talk about its projects, then with the help of it we can easily complete Weather Station, IR camera, Digital Project, Music Machine and other Raspberry Pi projects.
It can improve hardware programming and other programming skills mainly in colleges, schools, and higher education departments. If we compare it with desktop or laptop, then we will find that its speed is less than desktop or laptop. Although its price in the market is low.
Different Types of Raspberry Pi Board Models
Raspberry Pi boards are normally used in IoT Systems and Real-Time Embedded Systems. The different types of Raspberry Pi Board models are as follows;
- Raspberry Pi Zero W
- Raspberry Pi 1 Model B
- Raspberry Pi 2 Model B
- Raspberry Pi 3 Model A+
- Raspberry Pi 4 Model B
Raspberry Pi Zero W
Raspberry Pi Zero W is a member of the Pi Zero family. As the name suggests, the cheapest and smallest package of Raspberry Pi Foundation is Raspberry Pi Zero W. If we talk about the features of Raspberry Pi Zero W, then it provides all other features except features like HDMI, camera I/O, and micro USB, standard GPIO and SD card. In fact, it gives the feel of a small computer.
If we talk about its size, then its size is special compared to other types of Raspberry Pi Boards. Because it comes with additional Bluetooth connectivity and wireless LAN as compared to others. Apart from this, a micro SD card is installed with the operating system in it. It comes with a micro USB power supply as well as a camera cable. However, instead of the USB A port, USB Micro B has been used as the input. The next Raspberry Pi Boards in this series were developed to overcome the lack of Wi-Fi, direct USB ports and other peripherals.
Raspberry Pi 1 Model B
The Raspberry Pi 1 Model B is an important version of the Raspberry Pi family, offering 4 USB 2.0 ports instead of 4. The old friction-fit SD card socket was replaced with a nicer push-push micro SD version. In fact, this version of the Raspberry Pi uses a different form factor than the other versions.
If we talk about the audio quality of Raspberry Pi 1 Model B, then it provides better audio quality than other versions. It has the USB connector aligned with the edge of the board and uses a 3.5 mm jack for video. It has more GPIO pins than the earlier version. Where earlier 26 pins were used, now its number has been increased to 40. If you look at the power consumption, the power consumption in the Raspberry Pi 1 Model B has been changed from switching regulators to linear regulators from 0.5 watts to 1 watt.
Raspberry Pi 2 Model B
The Raspberry Pi 2 Model B is the second-generation member of the Raspberry Pi family. Its biggest feature is that it has been given the facility of 1GB RAM with 900MHz quad-core ARM Cortex-A7 CPU. Along with this, 100 Base Ethernet, 4 USB ports,...
Read more -
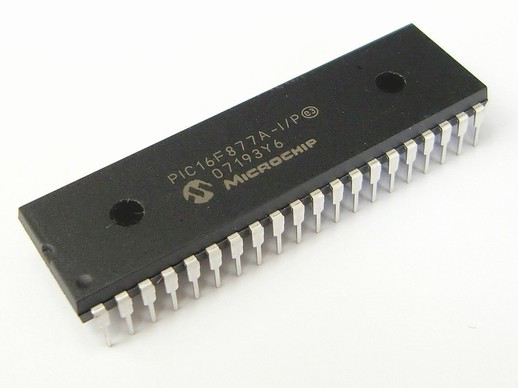
Getting Started With PIC16F877a
11/16/2021 at 22:08 • 0 commentsPIC16F877a is a low-power microcontroller device in the 16-pin family of PIC® microcontrollers. It features an enhanced instruction set, greater program space and data memory space than its predecessor, and on-chip peripherals to simplify system design–all in a package requiring only three external components.
PIC16F877a microcontroller has 8 KB of internal EEPROM, 512 bytes of RAM, and 4 KB of flash memory. It provides 14 digital I/O pins, 8 analog input pins, a UART interface for serial communication, and a full-duplex asynchronous hardware serial interface that supports RS-485. The PIC16F877a is an improved version from PIC16F876A with an extended number of input/output lines.
PIC16F877a is an 8-bit microcontroller but has a 16-bit program counter, 16-bit stack pointer, and 16-bit data pointers which makes it look like a 16- bit machine. Approximately 20% faster than PIC16F876A, PIC16F877a has more input/output ports with improved peripheral features.
PIC16F877a is available in the 44 pin TQFP package. It can be programmed using an MPSIM simulator or MPLAB IDE. The instruction set of PIC16F877a is similar to PIC16C84 but without some special instructions intended for LCD modules. The low-power features of PIC16F877a include:
Unlike the other modules, the instructions in this module are executed as fast as possible. To keep program execution time as short as possible, instructions associated with EEPROM and RAM accesses have been given a higher priority over those associated with input/output ports. This results in a maximum instruction execution time of 4 cycles.
The first part of an assembly program is always a RESET instruction which initializes the microcontroller by clearing all the registers and initializing memory pointers.
On power-up, PIC16F877a clears all the I/O ports and memory locations. It then jumps to location 00FFh in internal program memory from where it picks up the first instruction. The following code shows the reset sequence in the case of PIC16F877a:
The assembler directives are used for special purposes in assembly language programs. These directives are inserted into the program by writing a comment which starts with an asterisk (*) and a letter for each directive, with spaces separating words.
What are some of the enhancements to the PIC16F877a processor?
PIC16F877a is a third-generation PIC microcontroller that offers advantages in speed, space, and power consumption over its predecessors. Designers will enjoy the enhanced instruction set–there are more than 30 new features provided for this chip. For example, new instructions allow programmers to access the internal RAM without accessing external memory, and new bit manipulations can be used to "byte-shift" or "bitwise OR" data while shifting data only one bit at a time. PGER capability has been enhanced with additional bit manipulation instructions that also operate on bytes or words rather than bits.
What peripheral functions are included on the PIC16F877a?
The PIC16F877a has a full complement of built-in peripherals, including a 12-bit analog-to-digital converter (ADC), 5-bit digital to analog converter (DAC), real-time clock (RTC), two hardware timers, and a watchdog timer. Programmable features such as input capture, output compare a serial port, 8-to-16 converter, real-time interrupt and gate array, 10-bit digital comparator, and timer/counter are also included.
The PIC16F877a processor has an on-chip memory consisting of internal program memory (Code), data memory (Data), and EEPROM. Internal program memory is only readable by the PIC target machine. The program structures located in the Data memory must be written to EEPROM before they can be read by the target machine. The data structures placed in the internal program memory are located at addresses 0000h to 0004h; all other data structures are located at addresses...
Read more -
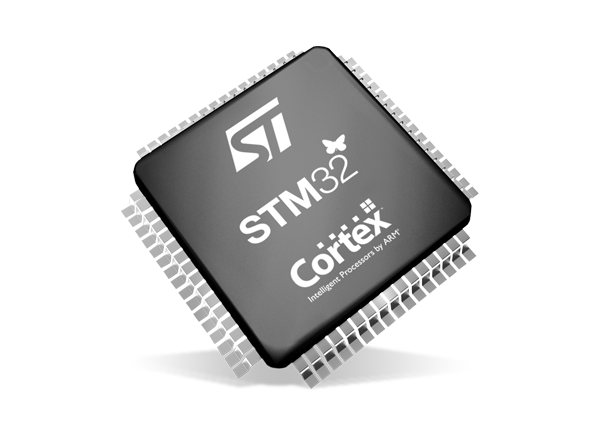
Introduction to STM32
11/16/2021 at 05:23 • 0 commentsThe STM32 processor is a family of 32-bit microcontrollers based on the Arm Cortex-M processor. The first member of this series was introduced in early 2008.
In January 2009, an agreement was signed between STMicroelectronics and ARM to co-develop the next generation of microcontrollers within the ARM Cortex architecture. STMicroelectronics would be responsible for the development of the ARM Cortex-M3 core, while ARM would be responsible for the development of both the high-performance (PowerVR SGX540) and low cost (ARM Cortex M0) cores.
STMicroelectronics develops parts using its intellectual property (IP), whereas ARM develops parts using its IP, as well as licensed IP to other suppliers.
The STM32 implements the ARM Cortex-M3 CPU. The Cortex-M3 is an extension of the M-class cores, implementing a superscalar, variable pipeline length CPU. Due to its superscalar design, the Cortex-M3 can achieve high code execution frequencies and throughputs while attaining low power consumption compared to other microcontrollers within its class. The STM32 implements a full 32-bit memory addressing scheme and uses the DSP instruction set extension.
STMicroelectronics has developed its branch to the ARM Cortex-M architecture called STeP (ST Microelectronics Products). The STM32 is based on this variant. The main differences between the STeP and the regular ARM Cortex-M architecture are:
STMicroelectronics has developed several devices with STM32 processors, for various markets and applications. These devices contain not only the processor but also an entire embedded system: peripherals (timers, I/O, power supply, etc.), memory (ROM, RAM), boot Flash, and evaluation board to ease development.
The STM32 family includes 512 KB to 2 MB of Flash memory and up to 256 KB of SRAM. This family also includes several peripherals such as DACs, ADCs, timers, and UARTs. The STM32 family is available in two package options: plastic Ball Grid Array (BGA) and TSSOP. In addition to the standard members of the family, there are also several MEMS device variants, such as the LSM6DS0, which includes a 3 axis accelerometer and a 3 axis gyroscope.
STMicroelectronics provides free software which supports the STM32 for development in C languages (C/C++), assembly languages (ASM) and graphical development environments (Eclipse-based), called the STM32Cube.
What are the different versions?
The STM32F103x series is a single-chip microcontroller CPU based on the ARM Cortex-M3 CPU up to 72 MHz clock frequency, with 512 KB Flash memory and 128 KB SRAM. The STM32F103x has 32 general-purpose I/O pins, 2x12-bit ADC, 1 USART, 3 SPI modules, fast comparator or DAC.
In addition to the STM32F103x core, the STM32F103RBT6 variant implements a Bluetooth Low-Energy (BLE) transceiver and a secure element. The STM32F103RBT6 implements a Cortex-M0 CPU with 128KB Flash memory and 32KB SRAM for cryptographic applications.
The STM32F103C8T6 is a compact variant, with an 8MHz MCU core, 512 KB Flash memory, and 128 KB SRAM.
The STM32F107x series is a single-chip microcontroller CPU based on the ARM Cortex-M7 processor running at 72MHz clock frequency. This series incorporates 1 MB Flash memory and 256 KB SRAM. The STM32F107x has 56 general-purpose I/O pins, 6x12 bits ADC, 2 USARTs, 2 CAN modules.
The STM32F107T6 variant implements a Cortex-M0 CPU with 128KB Flash memory and 32KB SRAM for cryptographic applications.
Why is STM32 so popular?
STM32 is a preferred choice for many products – from mobile phones, tablets, and digital cameras to automobile entertainment systems, medical equipment, and industrial applications – due to its attractive combination of performance, power efficiency, low cost, and small size. STM32 Nucleo 64 series is too popular among embedded developers.
Because STM32 microcontrollers offer a combination of features that are particularly well suited to applications in the automotive electronics field, the family has become the preferred...
Read more -
Introduction to ESP32
11/15/2021 at 10:24 • 0 commentsFor those new to the microprocessors and integrated systems world, Arduino is a terrific place to kick off. Having your personal collection of a large number of inexpensive detectors and modules, you may create a variety of tasks, both for fun and for profit.
As technology progressed, the latest project concepts and applications emerged, one of which is the IoT. It is a framework that connects a number of "items" or gadgets to the internet with the purpose of exchanging data.
IoT tasks in the DIY sector are primarily centered on Home Automation and Smart Home utilizations, but corporate and manufacturing IoT tasks include significantly more advanced execution of different technologies. The crucial point to remember from this quick introduction is that any IoT craft, irrespective of if it's a little hobbyist initiative or a huge industrial one, requires Internet access.
Despite ESP8266 being an excellent alternative for incorporating Wi-Fi connections into your designs, ESP32 is an amazing selection for whenever you plan on building a comprehensive system with Wi-Fi, Bluetooth, DAC, and a variety of other capabilities.
What is ESP32?
Espressif Systems launched the ESP32, an affordable SoC microprocessor. Tensilica's 32-bit Xtensa LX6 Microchip featuring embedded Wi-Fi and Bluetooth is the microchip that succeeds the ESP8266 SoC. You could see it on the market in both single and dual core varieties.
The ESP32 features some built-in RF parts like a Power Amplifier, an LNA, an Antenna Switch, Filters, and an RF Balun. With this, the process involved in creating hardware for ESP32 is very simple because only some peripheral parts are required.
Something else you are to always remember is that it was developed with TSMC's ultra-low-power 40 nm technology. Utilizing ESP32 for the purpose of creating battery-operated products such as wearable technologies, audio equipment, baby monitoring devices, smartwatches, and so on ought to be quite simple.
Features of ESP32
It could be challenging to incorporate every feature in this guide because it has way more features compared to ESP8266. Due to that fact, some of the most significant ESP32 specifications were compiled. However, you are strongly advised to check out the Datasheet to get a comprehensive collection of specifications.
- LX6 32-bit microchip, dual or single-core, alongside a clock frequency of about 240 MHz.
- SRAM: 520 KB, ROM: 448 KB, and RTC SRAM: 16 KB
- Both Bluetooth 4.2, as well as the Bluetooth Low Energy (BLE) standards, are supported.
- There are 34 GPIOs that could be programmed.
- There are 18 12-bit Successive Approximation Register Analog to Digital Converters routes and 2 8-bit Digital to Analog Converter routes available.
- 4 x Serial Peripheral Interface, 2 x I2C, 2 x I2S, and 3 x Universal Asynchronous Receiver-Transmitter are the serial connectors.
- Physical network communication with Ethernet MAC (needs an additional PHY attached).
- A Secure Digital/ Secure Digital Input Output/ MultiMediaCard host bus adapter and one SDIO/SPI slave controller
- PWM for motors and LEDs with about 16 channels
- Encryption of the boot sector and the flash memory
- Advanced Encryption Standard, Hash (Secure Hash Algorithm 2), Rivest-Shamir-Adleman, Elliptic Curve Cryptography, and Random Number Generation cryptographic hardware speed
Pinout of ESP32 Board
Try taking a glance at the wiring design for the ESP32 Development Board. In this section of this article, we have attached an illustration of the pinout for the ESP Board's 30 pin version.
Different Approaches to Programming
A decent part of hardware would be completely user-friendly supposing there was a method to start programming it by utilizing multiple approaches. Not unexpectedly, this board is compatible with numerous kinds of programming environments.
Here is a list that comprises of the popularly utilized programming paradigms:
- Arduino Integrated Development Environment
- PlatformIO Integrated Development...