-
OSHWA: How We Made the Open Hardware Summit All Virtual in Less Than a Week
03/20/2020 at 13:39 • 0 commentsFrom OSHWA president Michael Weinberg:
![Screen-Shot-2020-03-17-at-3.40.05-PM]()
How We Made the Open Hardware Summit All Virtual in Less Than a Week
First, thank you again to everyone – speakers, participants, and sponsors – for a fantastic 10th anniversary Open Hardware Summit. We knew the 10th anniversary Summit would be one for the ages, although we didn’t quite expect it to be because it became the first virtual Summit.
Thanks to the timing of the Summit, the 10th anniversary Summit ended up being many people’s first virtual summit of the Covid-19 era (that includes the organizers). Unfortunately it looks like it is unlikely to be the last. In the hopes of helping event organizers struggling with the same challenges, this blog post outlines the decisions we made and the steps we took to make it happen.Quick Context
The Open Hardware Summit is an annual gathering of the open source hardware community held by the Open Source Hardware Association (OSHWA). This year OSHWA partnered with the Engelberg Center on Innovation Law & Policy at NYU Law to host the event in New York City. The event usually brings together hundreds of community members and speakers from around the world. It was scheduled for March 13, 2020.
While the situation has been evolving for some time, as recently as March 5th (8 days before the Summit) we thought that holding a reduced in-person version of the event was the right decision. By March 8 (5 days before the Summit) that was no longer tenable and we announced that the Summit was going all virtual. That was the right decision, but what does going all virtual mean?Priorities
We had two major priorities for the virtual Summit:- Online streaming video of all of the speakers and panels.
- A community space for discussions and coming together.
Video
The live stream of the Summit had to be both accessible to our viewers and easy to join for our speakers and panelists. After considering some options and consulting with experts in our community (huge thank you to Phil Torrone at Adafruit for the guidance), we concluded that a combination of YouTube and StreamYard would be the best option.
YouTube worked for our community because it is easily accessible on a wide range of platforms in most of the world. That meant that just about everyone would be able to see the Summit from wherever they were.
StreamYard made it easy to manage the backend. Speakers could join a virtual green room before their talk and our technical testing the day before the Summit made it clear that it was easy for them to share their slide presentations as well. One of the members of the Summit team was able to easily add and remove people (and their screens) to the live feed, along with stills and slides for introductions, sponsors, and everything else.
Read moreCommunity Space
We also looked at a number of options for online discussions. We decided that a discord server would be the best option for the open source hardware community. Discord allowed us to open the space to anyone who wanted to join, while at the same time giving us moderation control over the discussion (huge thank you for Lenore Edman from Evil Mad Scientist Laboratories for jumping in as a moderator). Many community members were already comfortable with discord, which was also a bonus.
We also decided to use discord for a version of Q&A for the speakers. One option would have been to try and integrate video questions from the audience into the live stream. That would have been technically possible with StreamYard (probably…), but it seemed like an unnecessary logistical complication for the organizers. As an alternative we decided to set up separate discord channels for each of the speakers. That allowed the speakers to end their talk and move to their discord channel for further discussions.
One unexpected and welcome development was that the discord server grew into a larger... -
How to join the virtual Open Hardware Summit
03/12/2020 at 09:21 • 0 comments![]()
Due to the COVID-19 virus, the Open Hardware Summit has been moved from NYC to cyberspace!
2020.oshwa.org
- The livestream link will be updated here on the day of the Summit (13th March 2020). The event will be running in EST (New York) time zone.
- For Q&A/discussions, please join the OHS discord server: https://discord.gg/38C57Uf
- Follow OHSummit on Twitter and use hashtag #ohs2020Virtual
- The link to sign up for OSHWA email updates: http://eepurl.com/gVRYVz
- The link for the open hardware survey: https://nyu.qualtrics.com/jfe/form/SV_cGDMjnMBVtDqHXL
- The link to 2021 tickets: https://www.eventbrite.com/e/open-hardware-summit-2021-tickets-99408361084
-
Open Hardware Summit 2020 schedule
02/18/2020 at 12:09 • 0 comments![]()
Here is the exciting schedule for the Open Hardware Summit on March 13th in NYC:
![]()
![]()
Be sure to buy tickets before they are sold out!
![]()
-
KiCon 2020 announced!
02/05/2020 at 11:33 • 0 comments![]()
After a successful first year of KiCon in 2019 in Chicago, it will change venues to CERN, a major contributor to the KiCad project!
KiCon 2020: A KiCad conference at CERN, September 11th-13th, 2020
More details soon! If you’re interested in being involved, the following email addresses can be used to contact the right people about this event:
- Sponsorship: sponsors@kicad-kicon.com
- Media: media@kicad-kicon.com
- All other inquiries: help@kicad-kicon.com
-
First prototype assembled
01/28/2020 at 04:21 • 0 comments@Alex Camilo has placed components and reflow soldered the first prototype board!
![]()
He will attempt to burn the boatloader tomorrow using a j-link:
https://learn.adafruit.com/circuitpython-on-the-nrf52/nrf52840-bootloader
-
Open Hardware Summit is 8 weeks away!
01/13/2020 at 11:56 • 0 comments![]()
Join us for the Open Hardware Summit on March 13th in New York City:
It will be the 10th anniversary and @Sophi Kravitz will be giving a keynote. More speakers will be announced soon!
Tickets are on sale now:
https://www.eventbrite.com/e/open-hardware-summit-2020-special-edition-10th-anniversary-tickets-65367109785 -
KiCad teardop plugin and flexible PCBs
12/26/2019 at 15:32 • 0 comments![]()
Thanks to @Anool Mahidharia for posting on Hackaday about KiCad plugins. I decided to try out the Teardrop plugin by NilujePerchut:
![]()
This action plugin adds and deletes teardrops to a PCB.
This implementation uses zones instead of arcs. This allows to comply with DRC rules by simply rebuild all zones. You can also modify their shape by simply modifying the zone outline (like any other zone). Teardrops created with this script use a specific priority (0x4242) to be recognized as teardrops.Here is the result of my first experiment to use the Teardrop plugin on a flexible PCB to reduce the mechanical stress of flexing the trace:
![]()
The board is available as an OSH Park shared project and the KiCad design files are on GitHub.
The author of the plugin was very responsive to GitHub issues and I was able to get better results on my next flex design which is currently being manufactured:
![]()
My flex “business card” will fold over a coin cell battery to light a 0603 LED.
Curious how the plugin works? It creates zones next to the vias and pads. Here are the two teardrop zones that connect traces to a via:
Warning: you need create a schematic and generate a netlist before starting the PCB layout. Otherwise the the zones the plugin creates won’t be filled:
You also need to be careful that there is not copper on the same layer too close to the zone. For example, the text was too close to the teardrop zone on this via, so I moved the text down and the zone now fills correctly:
An open GitHub issue is that the teardrop zone does not align perfectly for SMD pads that are not circles (like rectangles, squares, rounded rectangles). The work around I used was to move the zone after it is filled to align with my SMD pad:
I hope you have fun with this plugin and leave a comment if you use it your own design!
UPDATE: I joined Adafruit Show-n-Tell to talk about flex PCBs and the teardrop plugin at 10 min 51 sec mark
-
Hackaday Supercon badge boots Linux using SDRAM cartridge
12/20/2019 at 17:16 • 2 commentsUPDATE: Here is my presentation from Berlin Hack 'n Tell on how support for the Hackaday badge was added to LiteX including a look at the Python source code in the pull requests:![]()
UPDATE: This is a recording of Linux booting on the badge:
https://asciinema.org/a/293450
![]()
Jacob Creedon designed an a cartridge board that adds 32MB of SDRAM to the Hackaday Supercon badge. Michael Welling just assembled a version of the PCB made with the OSH Park “After Dark” black FR-4 service:
![]()
![]()
The addition of SDRAM provides enough memory to boot Linux on a RISC-V soft-core in the ECP5 FPGA on the badge. Here’s a screenshot of Linux running:
![]()
Read more about “Team Linux on Badge” in this Hackaday post:
![]()
A Fantastic Frontier Of FPGA Flexibility Found In The 2019 Supercon Badge
And finally, receiving the biggest applause was Linux-on-Badge: this team used all the badge hacking tricks in the book. The hardware component was a 32 MiB SDRAM cartridge by [Jacob Creedon]. The default badge SOC FPGA bitstream was entirely replaced in order to support a minimalist Linux. Much of the development was done on [Michael Welling]’s computer, guided by the precedence of a LiteX project putting Linux on the Radiona ULX3S. This is a true success story of Supercon collaboration as the team (including [Drew Fustini], [Tim Ansell], [Sean Cross], and many others) came together and worked late into nights, drawing from the massive body of collective expertise of the community.
Watch the demo during the Badge Hacking ceremony (jump to 17m 35s):
Resources:
- KiCad design files are available on GitHub: jcreedon/dram-cart
- Modification to LiteX for the FPGA to use the SDRAM: mwelling/litex-boards
- Shared project on OSH Park: Hackaday Supercon badge SDRAM cartridge
-
CircuitPython in a small factor with CircuitBrains Deluxe
12/16/2019 at 17:16 • 0 commentsKevin Neubauer has designed a System-on-Module (SoM) to run Circuit Python:
![]()
I love Adafruit’s CircuitPython product line. The ability to just plug your board into USB, make code changes, and see them take effect in real-time is amazing. However, when it comes to finishing up a CircuitPython project, I felt limited in choice for a small form-factor, streamlined board. I always ended up creating my own boards. The overhead in doing this was huge though. You have to make sure your design has proper power, decoupling, and clock. Then you source all of the parts. After that you lay out the PCB and have it fabricated. When the PCB and parts arrive, you have to deal with finicky small-pitch surface mount assembly. Finally, you need to download the sources for the UF2 bootloader and CircuitPython and define your board, compile, and flash. This makes what should be a small project pretty time consuming and tedious!
-
Open Hardware Summit 2020 badge brainstorm
11/16/2019 at 00:32 • 0 commentsWORK IN PROGRESS
- Wrist form factor like Chaos Camp watch?
https://firmware.card10.badge.events.ccc.de/index.html
- SparkFun Artemis... software support not ready? talk to Owen?
- lessons learned: must have USB
- use a usb-to-serial?
- CP2102 https://www.digikey.com/product-detail/en/silicon-labs/CP2102-GMR/336-1160-1-ND/3672615
- discussion with Nate and Michael and Drew:
- wristwatch with sparkfun artemis
- GPS, vibration motor, small IPS LCD
- supercon meeting
- maybe not use artemis
- wireless uC ideas: ESP32, Rigado... Nordic NRF52840
- do we really need wireless? if not, then STM32 or SAMD
- Nordic NRF52840 is well supported by adafruit
- GPS useful? not really since indoors... BLE beacons might be more practicle
- Idea: reuse the card10 design
- note: here is a way to use stock wristband watch stuff
https://www.youtube.com/watch?v=Uib8nUV1JEg&feature=youtu.be&t=2010
- wristband from sparkfun: https://www.sparkfun.com/products/11734
MUST HAVE:
- USB programmable (either builtin or usb-to-serial)
- Accel/IMU 6DoF of 3DoF
If throw on a 6dof e-compass we can get the magnetometer too:
https://www.digikey.com/product-detail/en/stmicroelectronics/LSM303AGRTR/497-16527-1-ND/6006105- Arduino library compatible
- Display LCD or OLED - source from Digi Key? if from China, remember Chinese New Year
... or e-paper (Pervasive Display on DigiKey)
... flexible epaper?
- note: DOOM guy SAO has: High DPI ST7789 1.3" 240x240 LCD Screen
https://hackaday.io/project/164346-andxor-dc27-badge/log/165849-dc27-doom-sao-hurt-me-plenty
- ST7789 1.3" 240x240 LCD possible on DigiKey?
- V1.69bis standard SAO connector (have them on the wristband -- use flex?)
- POWER?
- LiPo from Sparkfun
- note: card10 has 200mAh
NICE TO HAVE:
- MicroPython or CircuitPython
- note: Python may drain power on the NRF52840 (ask tannewt)
- BLE that works
SUMMARY: Nordic 82540 might be the best choice
There is a module from Rigado that Andy Sowa has used:
SOURCING CONCERNS:
- LCD 240x240
- Vibration motor
- watch strap / mount
-
KiCad conference comes to Chicago in April
01/04/2019 at 10:56 • 0 commentsChris Gammell writes on the Contextual Electronics about the first ever user focused KiCad conference, which is happening April 26th and 27th 2019 in Chicago (USA):
KiCon 2019
As you may know, KiCad is a very big part of CE. We use it in every design we showcase on the CE site. We’re hoping that some of you will decide to take your learnings and share them at KiCon 2019. We’re looking for speakers to give talks about how they are using KiCad in their jobs, businesses and schooling. Or just how you use it for fun! Please apply to give a talk here! There are no requirements on how advanced you are as a user, so talks could be something like, “My perspective on getting started in KiCad”.
Please also consider attending! We’ll also have the opportunity to give feedback to developers and help brainstorm what else is needed for KiCad. Not only that, but we’ll be able to interact with other KiCad users and share tips and tricks. We’re also planning a layout contest and other fun interactive activities.
Not able to make it? Please help spread the word about KiCon! (Example tweet here, though any promotion is appreciated) In return, we promise to record and share the talks from the conference so you can view them later.
And finally, if your company has the means, please consider supporting KiCon as a sponsor. -
Badge add-on adapter for Wii controllers
11/21/2018 at 17:29 • 0 commentsShared project by Rob Rehr (@mediumrehr) to connect Wii controllers to #badgelife add-on header:
Wii_SAO_gerbers
![Screenshot from 2018-11-20 11-20-48]()
-
2018 Open Hardware Summit talks on YouTube
11/19/2018 at 17:53 • 0 comments -
Open Source Hardware Association board nominations now open
10/30/2018 at 16:57 • 0 commentsThe Open Source Hardware Association (OSHWA) 2018-2020 Board Nominations are now open
OSHWA is looking for 6 new faces to join the board of directors for the Open Source Hardware Association. The nominee form is for self-nominations only.
Please fill out the nominee form (deactivated Nov. 4th) to become a nominee or forward the link to someone you want to nominate. Do not fill out the form for someone else. The purpose of this form is to tell voting members why you want to serve on the OSHWA board. We will be publish the nominees and their answers on Nov. 5th. Board members hold a 2-year position.
Once board members have been chosen by the community, the board will appoint a President, VP, and Secretary. Board responsibilities include fundraising, advising on goals and direction, and carry out compliance with the organizations purposes and bylaws. See the board member agreement to get a sense of the responsibilities. Board members are expected to adhere to the board attendance policy and come prepared having read the board packet. Board members are expected to spend 5-10 hours of time per month on OSHWA. Nominees can submit questions to info@oshwa.org. Nominations will be open until Nov. 4th.
Member voting will take place Nov. 8-12. Want to vote in the election? Become a member! Please note that only individuals can vote, corporate members cannot -
Open House at Advanced Assembly on Oct. 25th
10/22/2018 at 17:03 • 0 comments![Screenshot from 2018-10-17 13-55-33.png]()
If you’re in the Denver area, come meet our new assembly partner: Advanced Assembly!
They’re having an open house:
- When: Thursday, October 25th, 3:30 – 6:30 PM
- Where: 20100 E. 32nd Parkway, Suite 225, Aurora, CO 80016
Join us for pizza, beer and tours of our newly remodeled, high-tech facility as we celebrate 14 years in business. Bring your co-workers too!
![Screenshot from 2018-10-17 19-57-14.png]()
-
OHS18 badge: accelerometer demo, adapter board, Tindie listing
10/20/2018 at 16:19 • 0 commentsUpdates for the 2018 Open Hardware Summit badge project:
![]()
MicroPython demo app for the Accelerometer
Want to use the KX122-1037 Accelerometer (datasheet) on the 2018 Open Hardware Summit badge?
![]()
USB-to-Serial adapter board
This adapter board to connects a USB-to-serial cable to the 2018 Open Hardware Summit badge.
![]()
Extra badges being sold on Tindie
The extra badges from the Summit are being sold here on Tindie as a fundraiser for the Ada Lovelace Fellowship which provides travel assistance to the Open Hardware Summit. All sales revenue will be 100% donated to the Open Source Hardware Association (OSHWA) for this purpose.
-
Open House at Advanced Assembly on Oct. 25th
10/18/2018 at 01:58 • 0 comments![Screenshot from 2018-10-17 13-55-33.png]()
If you’re in the Denver area, come meet our new assembly partner: Advanced Assembly!
They’re having an open house:
- When: Thursday, October 25th, 3:30 – 6:30 PM
- Where: 20100 E. 32nd Parkway, Suite 225, Aurora, CO 80016
Join us for pizza, beer and tours of our newly remodeled, high-tech facility as we celebrate 14 years in business. Bring your co-workers too!
-
Micropower Micro Logger
10/11/2018 at 16:58 • 1 comment![]()
A set-and-forget I2C/digital datalogger from Jan on Hackaday.io
micropower micrologger [mPmL]
This is a logical development from my first and second logger projects. The idea is simple: The logger needs to be small enough to fit inside small spaces, e.g. a bee hive.
With the press off a button it starts/stops logging. The casing can be as simple as shrink tubing! -
Open Hardware Summit: video recording of talks
10/07/2018 at 18:00 • 0 commentsThe annual Open Hardware Summit took place on September 27th at MIT, and all the exciting and insightful presentation were live streamed to YouTube!
The live stream is broken into morning session and afternoon session.
9:00 AM Door Open! 10:00 Opening Remarks: Michael Weinberg, OSHWA President 10:15 Eric Von Hippel: Economics of Open Hardware 10:45 AM Surya Mattu: Approaching adversarial research 11:00 Oluwatobi Oyinlola: Hyperloop: The rLoop Journey 11:20 Sara Chipps: C++ API for Kids 11:35 Robin Getz: Open Source Software Defined Radio 11:55 Evan Raskob: Livecoding 3D printing: experiments in live computational sculpting 12:10 Adam Benzion: How to build a huge open source community (without being a total sellout). Mario Gómez : Building Resilience With Public Institutions and Open Hardware
1:45 PM Neil Gershenfeld: How To Make (almost) Anything 2:20 PM Joseph Apuzzo: MicroPython on ESP32 and LoBo 2:45 PM Jodi Clark: OpenCosplay, Teaching the Next Generation 3:00 PM SURPRISE SPEAKER YA’ALL 3:45 PM Tarek Loubani: Gaza tourniquet: Making lifesaving medical devices under fire 4:00 PM Stephanie Valencia: Creating a more accessible future with OSH 4:15 PM Amitabh Shrivastava: Programmable-Air 4:30 PM Ted Hayes: How to Put A Neural Network on an Arduino and Why 4:45 PM Closing Remarks: Alicia Gibb, OSHWA Director If you enjoyed these talks, please consider joining the Open Source Hardware Association (OSWHA)!
And follow Open Hardware Summit on Twitter for update on 2019 – we’ll be in China!
-
Open Hardware Summit badge: Magic 8-Ball app
10/04/2018 at 23:58 • 0 comments![]()
Thanks to @Steve Pomeroy for creating this MicroPython demo app for the Open Hardware Summit badge:
ohs18apps/magic8ball.py
![]()
This Python file can be transferred to Open Hardware Summit badge using the FTP server built into the MicroPython firmware.
![]()
Visit this gallery for more photos and screenshots. Join this project on Hackaday.io if you are interested in participating in the development.
![]()
![]()
-
Hardware Happy Hour (3H) Chicago is Wednesday, October 10th
10/04/2018 at 22:32 • 0 commentsThe next Hardware Happy Hour (3H) Chicago is Wednesday, October 10th, at Haymarket Pub!
This group is based upon the idea that you are interested in hanging out and discussing hardware. Please bring a piece of hardware to show off or talk about. Are you interested in hardware, but you haven’t built anything yet? Show off software you have built! Or come prepared to talk about the projects you want to build.
There are no organized talks, it’s literally a show and tell at a bar or restaurant. In case you missed it two paragraphs ago, bring hardware. Seriously, just bring anything to talk about![]()
-
Building Radical Haptics
09/19/2018 at 17:55 • 0 commentsThis weekend at World Maker Faire New York:
Building Radical Haptics by Noah Feehan
LOCATION: Zone 3 in Make: Electronics by Digi-Key
TIME: Saturday, September 22, 2:30 pm – 2:45 pm
Add weird, changeable textures to your next project with the WEFT electrovibration library and dev board.
We’ll go over the fundamentals behind the texture effect, how the circuit is built, and how best to design textures and electrodes for working with this radical haptics technology.
WEFT project website -
Bring-A-Hack New York this Friday night
09/17/2018 at 08:42 • 0 commentsThis Friday evening before Maker Faire New York:
![https_cdn.evbuc.comimages48896823300236254471original]()
#BringAHack New York with BeagleBoard.org before Maker Faire
To celebrate our 10 year anniversary and our love of cool hardware hacks, join us for a #BringAHack event in the Big Apple! Join BeagleBoard.org for a casual evening of drinks, snacks and hacks at the Leaf Bar the night before Maker Faire New York.
DATE AND TIME
Fri, Sep 21, 2018, 9:00 PM –
Sat, Sep 22, 2018, 1:00 AM EDT
LOCATION
Leaf Bar & Lounge
133-42 39th Ave, Roof
Queens, NY 11354
-
Micro TV-B-Gone
07/18/2018 at 20:03 • 0 commentsFrom Nicholas Junker on Hackaday.io
Micro TV-B-Gone
The Micro TV-B-Gone is based off of Adafruit’s original TV-B-Gone kit, except made to be as small as possible, using an LIR-2032 coin cell.
I based this project off of the Adafruit TV-B-Gone kit. I wanted to start getting into using surface mount components on my projects, and seeing as the TV-B-Gone was my first foray into soldering, I figured that it would be a great project to work on.
The device takes a rechargeable LIR-2032 battery, and is activated pressing the single button on top. It will run through all TV power codes, and then go into a low power mode, waiting for the next button press. The battery will last around 40 full cycles, before being reduced down to 3.5 volts -
The 100th Dorkbot SF is tonight (June 27)
06/27/2018 at 15:26 • 0 commentsThe 100th Dorkbot SF is TONIGHT, June 27th, at DNA Lounge in San Francisco!
Come to the 100th #dorkbotsf #dbsf100 at DNA – see Heather Gold Evo Heyning Julian Cash Chris Korda presentations, comedy, free pizza while they last! If you’re into AI, interactive immersive media, light painting and a cool synthesizer for pottery come celebrate with us!
Did you know that OSH Park grew out of the Dorkbot PDX (Portland) meetup?
-
Linear PCB Motor
06/12/2018 at 20:32 • 0 comments![]()
Open Source Linear Actuator from Carl Bugeja on Hackaday.io:
Inspired from my pcb motor project, this project is aimed to make a very thin low-torque linear pcb actuator.
The coils of this motors are made from 5/5mil coreless pcb windings. A 3d-printed rig with magnets is used to slide across the pcb and is actuated by the winding’s magnetic field.
All design files for this project are also open source\ -
Open Source Turtle Robot Kit
06/12/2018 at 06:20 • 0 commentsBradley Ramsey writes on the Tindie blog about this robotics kit from The Maker’s Box:
Open Source Turtle Robot Kit Teaches Beginners & Creates Beautiful Art
The Open Source Turtle Robot (OSTR) was created as the basis for a two-day workshop where high school students could gain hands-on experience with engineering concepts. The finished robot even creates interesting pieces of art via pen plotting with Turtle graphics.
The project is Arduino compatible for ease of programming and powered by 4 AA batteries to make it cost effective. Stepper motors were chosen for accurate motion, and the parts were 3D printed for easy customization.
-
Teardown hardware hacking restrospective
06/05/2018 at 16:57 • 0 commentsCrowdSupply shares a look back at Teardown hardware hacking con last month in Portland:
Teardown Retrospective
Whew, Teardown 2018 is over! Over 150 attendees from ten states and three countries were treated to a whirlwind of talks, workshops, presentations, and demos of all manner of unique, amazing, beautiful hardware projects, from art works to industry-changing technology. Held over three-days, May 11-13, in Portland, Oregon, we were lucky enough to partner with Pacific Northwest College of Art’s Make+Think+Code program, who let us use their spectacular main building, a renovated 100-year-old Federal Post Office. From Friday to Sunday, the event featured:
- 35 talks on topics ranging from DIY artificial intelligence to how to move a 2 ½ ton electron microscope.
- 16 workshops where participants got hands-on experience doing things like creating a self-portrait on a PCB and learning how to send secret messages with blinking lights.
- Delicious, locally produced food and drink from Portland area providers.
- After-hours fun with food, music, and Legos.
![teardown-pcb-portrait-workshop_jpg_project-body]()
Teardown PCB portrait workshop by Andrew Sowa. In between events, attendees were entertained by the form, light, sound, and, in one case, mustaches from seven different interactive installations, including a sculpture that illuminated using your own heartbeat and a couple of rogue “payphones” that actually received calls throughout the event. Naturally, we also had robot sumo wrestling.
After hours, we enjoyed eating, drinking, scheming, and laughing while taking in the view at Autodesk’s amazing new office building and their rooftop deck, sharing Chinese food at Crowd Supply’s new headquarters and our rooftop deck, searching for (and finding!) a new hackerspace deep under Portland’s bridges, and feeding quarters into our favorite vintage arcade games, among other things.
Of course, the very best parts of Teardown were simply the result of having a great group of people together at the same time and place. Whether over lunch or after a workshop, the air was always thick with the exchange of knowledge and ideas. Seeing so many creative people come together to share ideas, designs, and projects openly with each other was a beautiful thing to behold. The future of open source hardware looks bright – it’s a great time to be a hacker, maker, and creator.
Going into it, we didn’t really know what to expect from Teardown. Coming out of it, we’re sure of one thing: we’re definitely going to do this again. If you attended Teardown, thanks for sharing your time and talents to make it such a great event. Within the next few days, you will receive a survey to gather your feedback. If you weren’t able to attend, or missed a particular talk you wanted to see, keep an eye on Teardown updates as we post video recordings of many of the sessions.
We can’t wait for next year (though we might need a day or three to recover from this year). The future looks bright for Teardown -
Apply TODAY to speak at Open Hardware Summit!
05/30/2018 at 18:01 • 0 commentsThe Open Hardware Summit is at MIT on September 27th. We always look forward to the presentations and love to hear about the projects that people are working on. Please consider submitting a talk:
Submissions are due by 30 May 2018 at 11:59pm PST.
Notification of accepted proposals will happen by email in June.
Please submit ALL submissions via this form.
All submissions will be reviewed by several reviewers from the community and OSHWA board. Submissions are double blind with the exception of invited keynotes.
All presentations will take place September 27 2018 between 9am and 5pm at MIT in Cambridge, MA, USA
Expected duration for talks is between 10 and 20 minutes, depending on the number and quality of submissions. All talks to be plenary (i.e. presented to the entire summit audience).
Talk submissions primarily containing marketing for a product, non-profit, or company, will not be accepted. However, talks that share knowledge and insight derived from work on commercial products or organizations are welcome. -
Hardware meetup tonight in SF
05/17/2018 at 19:51 • 0 commentsHardware Developers Didactic Galactic (HDDG) is tonight at SupplyFrame in San Francisco featuring talks by Roy Jui Liang Hung, Tanya Fish (Pimoroni) and Jason Kridner (BeagleBoard.org Foundation):
![DdK_YJcVMAAd3oi]() This HDDG should be an awesome crowd as makers from all over are in the SF Bay Area this weekend for Maker Faire.
This HDDG should be an awesome crowd as makers from all over are in the SF Bay Area this weekend for Maker Faire.HDDG 30: Pre-Maker Faire Roundup!
Thursday, May 17, 2018, 6:30 PM
Supplyframe / Hackaday San Francisco Office 500 3rd Street, Suite 230 San Francisco, CA
(look for Drew Fustini in purple)
Can’t make it? SupplyFrame will have LIVE STREAM starting at approximately 7:00pm US PDT:
Enjoy delicious food (that is unlikely to be pizza) and beverages while listening to fascinating technical talks by these crazy and creative engineers.
Tanya Fish – Explaining Electronics to the Unitiated Roy Jui Liang Hung – Mastering Animal Mechanics with the 3D Printer Jason Kridner – Simplifying Hardware Design with System-in-Package Tech
-
Bring-A-Hack is Sunday, May 20th, at BJs in San Mateo
05/15/2018 at 21:51 • 0 comments#bringahack Bay Area is this Sunday evening, May 20th! Please join us for this wonderful tradition that Jeri Ellsworth started:
Sunday evening, May 20th, at BJ’s in San Mateo, 6pm to 12am
2206 Bridgepoint Parkway San Mateo, CA 94404 650-931-2990
-
Dorkbot PDX is tonight at Crtl-H PDX hackerspace
05/14/2018 at 16:54 • 0 commentsDidn’t get enough hardware hacking fun at Teardown this past weekend, tonight is Dorkbot PDX at Ctrl-H PDX hackerspace!
![dorkbot_logo]()
DorkbotPDX
people doing strange things with electricity
The address for Ctrl-H is:
7608 N Interstate Portland, OR 97217
Check out the Meetup event page for more information and look for our Drew Fustini
in purple!
Part hackathon, part geek social, these biweekly meetings are a time for you to come join others for insight, inspiration or just insanity.
Bring your toys for others to see, or come see what others have been painstakingly chipping away at in their spare time.
Whether it’s code or chips, hacking of all sorts is encouraged. But we also like to hear your crazy ideas, so please come join us and bring your willingness to share your brilliance.
We’ll be the kids with all the coolest stuff on the table. Hope to see you there.
p.s. This event is open to everyone, dork or robot. No ^H membership is required to attend. -
Teardown hardware hacking con starts today in Portland
05/11/2018 at 18:01 • 0 commentsTeardown hardware hacking con starts today in Portland! Follow @oshpark on Twitter for updates and look for our Drew Fustini in purple. Check out the sessions page to see all the exciting people that will be presenting and running workshops!
![teardown-collage-02_png_project-tile (1)]()
Recent Updates
Bring Your Electronic Waste to Teardown!
Hebocon Robot Sumo Call for Participation
Nadya Peek, OSH Park, Early Bird Passes, and CFP Extension
Andrew “bunnie” Huang to keynote Teardown
![]()
-
Chicago Northside Mini Maker Faire this Saturday, May 5th
04/30/2018 at 17:31 • 0 commentsWe are proud to be a sponsor of Chicago Northside Mini Maker Faire 2018 this Saturday, May 5th, at Carl Schurz High School:
![Screenshot from 2018-04-30 10-50-34.png]()
Chicago Northside Mini Maker Faire
the first and largest officially licensed Maker Faire in the Chicagoland area. We are a local, grassroots celebration of the Do-It-Yourself (DIY) spirit in Chicago, focusing on education across all ages and social groups. Our makers represent a mix of beginners and experts, hobbyists and professionals, groups and individuals, and all ages, backgrounds, and interests. With a shoestring budget and only a dream, our inaugural Mini Maker Faire in April, 2012 was a smashing success thanks to the 50+ makers who shared their talents in 3D printing, robotics, jewelry making, and urban farming, just to name a few. Now with close to 100 makers, we’re still growing. Come experience it for yourself!
Tickets are free to the public.
![cns.jpg]()
-
Ada Lovelace Fellowship deadline is April 30th
04/29/2018 at 16:58 • 0 commentsThe application deadline is Monday, April 30th, for the Ada Lovelace Fellowship to attend the 2018 Open Hardware Summit:
![30576304890_f4bcf49df9_z (1)]()
Ada Lovelace Fellowship
The Ada Lovelace Fellowship was founded in 2013 prior to the annual Open Hardware Summit at MIT by Summit Chair Addie Wagenknecht and OSHWA Director Alicia Gibb as a way to encourage women, LGBTA+ and/or other minorities in open technology and culture to actively participate and foster a more diverse community within open source.
For the sixth year, we are excited to offer up to ten Open Hardware Fellowships to members of the community which includes a $500 travel stipend and entrance to the Open Hardware Summit.
By offering the annual travel and summit conference assistance to community members, the Open Source Hardware Association hopes we as a community can encourage more women, LGBTA+ and/or people of color to participate in open source. We have many strong leaders and speakers in our field and we personally want to continue the trend upward -
KiCad crash course this weekend
04/25/2018 at 16:40 • 0 commentsLearn how to design boards in KiCad this Saturday, April 28th, with Michael Welling:
One day KiCad Crash Course
We’ve asked Michael Welling of Qwerty Embedded Design to come to Reno to drop some knowledge on KiCad, an open source and multi-platform schematic capture and PCB layout tool. Michael uses KiCad for some of his famous designs such as LoFive, PocketBone, and BaconBits. Space is limited and you should have some basic electronics and CAD skills under your belt already to make the most of this unique opportunity.
This event will be recorded and live-streamed to the GroupGets YouTube channel
Time:9:30am – 12:30pm
Break
2:00pm – 5:00pmWhat to Bring:
If you would like to follow along bring a Laptop with KiCad installed
Links:
Syllabus (https://bit.ly/2Fhjvgk)
KiCad EDA (http://kicad-pcb.org/)
Michael Welling (https://www.linkedin.com/in/mwelling/)
Qwerty Embedded Design (https://groupgets.com/manufacturers/qwerty-embedded-design)
LoFive (https://github.com/mwelling/lofive)
PocketBone (https://github.com/mwelling/pocketbone-kicad)
BaconBits (https://www.hackster.io/mwelling/baconbits-f09ee9)
-
KiCad Crash Course in Reno
04/11/2018 at 16:47 • 0 commentsInterested in learning how to design boards in KiCad? Check out this upcoming 1-day class with @Michael Welling in Reno, Nevada (USA) or watch it online:
One day KiCad Crash Course
We’ve asked Michael Welling of Qwerty Embedded Design to come to Reno to drop some knowledge on KiCad, an open source and multi-platform schematic capture and PCB layout tool. Michael uses KiCad for some of his famous designs such as LoFive, PocketBone, and BaconBits. Space is limited and you should have some basic electronics and CAD skills under your belt already to make the most of this unique opportunity.
This event will be recorded and live-streamed to the GroupGets YouTube channel.
-
Applications Open: Ada Lovelace Fellowships For 2018 Open Hardware Summit
04/08/2018 at 03:09 • 0 commentsFrom Christopher Wang on the Hackaday blog:
Ada Lovelace Fellowships For 2018 Open Hardware Summit
The Open Source Hardware Association is now accepting applications for the Ada Lovelace fellowship which provides free admission to the Open Hardware Summit and a $500 travel stipend. One of OSHWA’s goals is to foster a more diverse community within open source. As part of this, Ada Lovelace Fellowships are open to women, LGBTA+, and people of color. There are a total of 10 fellowships available and applications are due by April 30th. The Open Hardware Summit will be held on September 27th at MIT.
![Screenshot from 2018-04-07 21-57-01]()
The fellowship program, founded by Addie Wagenknecht and Alicia Gibb in 2013, builds on the ideal that Open Hardware is one way to reduce the barriers associated in access to technology. Removing some of the financial barriers associated with attending the Summit will help to ensure more people of diverse backgrounds are involved in shaping the Open Hardware world. In addition to the talks shared at the gathering, over the last several year OSWHA has been evolving the Open Hardware definition and an Open Hardware certification.
-
Teardown: a new hardware conference by CrowdSupply
04/04/2018 at 20:36 • 0 commentsCrowdSupply is organizing a new hardware con named Teardown in Portland on the weekend of May 11th – 13th:
Teardown 2018
A party for hacking, discovering, and sharing hardware
Teardown is an event put on by Crowd Supply in association with Make+Think+Code @ PNCA. You can think of Teardown as live-action Crowd Supply, but with fewer cardboard boxes and packing peanuts. We’ll be bringing together hardware aficionados from around the world to celebrate, inspect, create, and, of course, tear down hardware.
There will be long-time Crowd Supply creators and backers, as well as people we’re meeting for the first time. There will be hardware, art, food, drink, puzzles, workshops, tutorials, talks, music, field trips, and friends. Most of all, there will be ideas and projects to explore and inspire. We hope you’ll be there too!Latest update: Andrew “bunnie” Huang to keynote Teardown
Please considering submitting a proposal like a talk, workshop, demo or installation:
Teardown 2018: Call for proposals
-
MSI Chicago Mini Maker Faire tomorrow (March 31st)
03/30/2018 at 18:22 • 0 comments![]()
Tomorrow, Saturday March 31st, at the Museum of Science and Industry in Chicago:
MSI Chicago Mini Maker Faire
On Saturday, March 31 we're keeping our doors open from 9:30 a.m. to 9 p.m. as we host the MSI Chicago Mini Maker Faire! Join some of the most fascinating, curious people—from engineers and artists, to scientists and crafters—in a celebration of local maker culture. Learn how to become an innovator yourself by speaking one-on-one with makers, and leave inspired and ready to invent.
Look for our Drew Fustini in purple!
-
Hardware Happy Hour (3H) Chicago on Wednesday, March 28th
03/28/2018 at 18:30 • 0 comments![]()
Hardware Happy Hour (3H) Chicago is TONIGHT (Wednesday, March 28th)! Come hang out with Drew Fustini, @Chris Gammell, @Andrew Sowa and many more at Haymarket (737 W Randolph St)
![]()
-
Midwest RepRap Festival (MRRF) is this weekend
03/22/2018 at 19:14 • 0 comments![11]() The world’s biggest open source hardware 3-D printer festival is this weekend in Goshen, Indiana (USA):
The world’s biggest open source hardware 3-D printer festival is this weekend in Goshen, Indiana (USA):2018 Midwest RepRap Festival (MRRF)
Friday, March 23, 2018 at 3:00 PM – Sunday, March 25, 2018 at 6:00 PM (EDT)
What is MRRF? It’s the worlds largest celebration of open source 3D printing with over 1,000 people from around the globe attending in 2017. If you are a hobbyists, enthusiast or any level of user of 3D printing then come on out and enjoy the weekend with others. Not sure what 3D printing is or want to learn more about it? Perfect! Come out and see what it’s all about.
Hackaday has a great recap of MRRF last year:
The Midwest RepRap Festival Spectacular
Check out the MRRF newsletter for the latest details and follow MRRF on Twitter. And look for our Drew Fustini this weekend who will, of coruse, be wearing purple and carrying lots of OSH Park coupons to share!
-
World Create Day in Portland this Saturday
03/16/2018 at 16:16 • 0 comments![Screenshot from 2018-03-15 11-56-33.png]() Hackaday World Create Day is this Saturday, March 17th, in many cities around the world including Portland at Ctrl-H PDX Hackerspace:
Hackaday World Create Day is this Saturday, March 17th, in many cities around the world including Portland at Ctrl-H PDX Hackerspace:![]()
![]()
-
Embedded Linux workshop coming to Pasadena and Portland
03/07/2018 at 15:59 • 0 commentsEmbedded Apprentice Linux Engineer (E-ALE) is a series of 9 seminars over 3 days at existing Embedded Linux conferences:
Are you an Embedded Engineer who is transitioning to using Linux? Attend seminars on how to start with using Linux for Embedded Applications. The Embedded Apprentice Linux Engineer program provides a place at existing Embedded conferences where you can get your questions answered.
Embedded Apprentice Linux Engineer Hands on Workshops at SCALE 16x in Pasadena from Thursday, March 8th to Saturday, March 10th:
Embedded Apprentice Linux Engineer track at The Linux Foundation’s Embedded Linux Conference in Portland from Monday, March 12 to Wednesday, March 14:
![]()
-
Projects with awesome of PCB artwork
03/02/2018 at 19:08 • 0 comments![]()
Here's a list of some project with great PCB artwork:
Pure art boards:
Full Panel PCB Paintinghttps://hackaday.io/page/3353-full-panel-pcb-painting-fabricated
http://blog.oshpark.com/2017/06/26/pcb-artwork-in-2017/
Hand-drawn PCB Artwork
http://blog.oshpark.com/2017/04/06/pcb-paintings/
Making Braille Signs out of PCBs
https://blog.oshpark.com/2017/11/02/making-braille-signs-out-of-pcbs/
PCB lapel pin
http://blog.oshpark.com/2017/07/05/building-a-pcb-lapel/
Full panel PCB sign by Andrew Sowa
https://www.instagram.com/p/BcGrEupBJQi/
Lumen Electronic Jewelry
http://blog.oshpark.com/2016/10/31/lumen-electronic-jewelry/
Creating the Benchoff Nickel
http://blog.oshpark.com/2017/03/30/creating-the-benchoff-nickel/
PCB Paintings Facebook group
https://www.facebook.com/pcbpaintings/
PCB Painting Art Nouveau
http://blog.oshpark.com/2017/02/12/pcb-painting-art-nouveau/
Convert Inkscape SVG drawings to KiCad footprints
http://blog.oshpark.com/2017/01/08/convert-inkscape-svg-drawings-to-kicad-footprints/
Functional boards with awesome art/layouts:
OSHWi Octopus Badge by Gustavo Reynaga
http://blog.oshpark.com/2017/12/24/oshwi-octopus-badge-by-gustavo-reynaga/
Trammell Hudson PCB art soldering badge
https://twitter.com/oshpark/status/885169000619159553/photo/1
Minifigure Atmel SAMD21 Board
http://blog.oshpark.com/2016/11/09/minifigure-atmel-samd21-board/
https://oshpark.com/shared_projects/QveMnbke
Cyborg Ring by @zakqwy of neurotinker
http://blog.oshpark.com/2018/02/09/cyborg-ring/
Glowbugs by @JasMoH and reverse mount LEDs
https://hackaday.io/project/28155-silly-pcb-designs/log/71997-glowbugs
OSH Park PCB Crown
https://tekdemo.github.io/pcb-crown/
https://tekdemo.github.io/pcb-crown/images/2014-05-18%2019.55.57.jpg
http://blog.oshpark.com/2016/07/23/lessons-in-3d-circuits/
PCB Art With 4 Layer Boards
https://tekdemo.github.io/2014/09/18/PCB-art-with-4-layer-boards.html
https://tekdemo.github.io/images/no-know-coin//2014-07-01%2022.05.31.jpg
Brain board for Sarah Petkus' Noodle robot
https://pbs.twimg.com/media/CRjjlwWUAAEAKpD.jpg:large http://blog.oshpark.com/2017/04/30/robotic-arts-noodle-is-gettin-bean-feet/
https://roboticarts.wordpress.com/2015/10/24/the-walking-noodle/
Heart-shaped Flashlight PCB
http://blog.oshpark.com/2017/03/28/heart-shaped-flashlight-pcb/
Snowbot
http://blog.oshpark.com/2017/02/21/snowbot/
Trixel Interactive LED Kit
http://blog.oshpark.com/2017/04/04/trixel-interactive-led-kit/
4CHord MIDI
-
iceRadio SDR project
02/28/2018 at 01:18 • 0 commentsSoftware Defined Radio (SDR) project by Eric Brombaugh:
![iceRadio.jpg]()
iceRadio
This is a test prototype for experimenting with Software Defined Radio (SDR). It is composed of several boards that are described in detail elsewhere on this site:
- VHF Tuner – 20MHz – 1200MHz VHF/UHF downconverter.
- RXADC Board – 40MSPS 14-bit ADC for capturing HF-band RF signals.
- STM32F303 and ice5 Board – MCU and FPGA which implement the digital receiver.
- I2S DAC PMOD – Used for stereo audio output of demodulated signals.
Tuner
RF input from the antenna can optionally be tuned down from VHF/UHF frequncies to an IF frequency in the HF range before passing to the ADC.ADC
Raw HF or downconverted VHF at an IF of 5MHz is digitized to 14-bit resolution. The maximum input signal allowed without exceeing the range of the ADC puts the 0dBfs point of this system at -10dBm in 50 ohms. The ADC runs at 40MSPS with a resolution of 10 bits, providing approximately 60dB of dynamic range and 20MHz of bandwidth which places the quantization noise floor at about -70dBm.FPGA
From the ADC, data passes into the FPGA. This is an iCE5LP4k part which provides 20 4kb RAM blocks and 4 16×16 MAC blocks which are essential for the DSP required for the downconversion. In the FPGA the ADC data is pre-processed to a sample rate appropriate for the MCU. Figure 2 below shows the primary components of the FPGA design.The C and Verilog source code is available on GitHub:
emeb/iceRadio
-
Save with our Medium Run discount
02/21/2018 at 18:23 • 0 commentsNeed 100 square inches or more?
Our 2 Layer Medium Run service is $1 per square inch and ships in 15 calendar days or fewer:
![DDCg02YXsAI-nV7]()
2 Layer Medium Run Service
$1 per square inch, 100 square inch minimum. You can have as many different designs as you want, as long as each design is ordered in a multiple of 10 boards.
For example, if you had two different 5 square inch designs, you could order 10 of each for a total cost of $100.
100 inches is just the minimum order. You can order as much as you’d like beyond that.
Turn Times
Fabrication time can vary for medium run orders, but boards will ship in 15 calendar days or fewer.
Medium Run orders cannot be expedited. For faster fabrications options, you may be interested in our 2 Layer Service or even faster 2 Layer Super Swift Service.
You can get a quote, approve a design, and pay for an order at OSH Park.
2 Layer PCB Specs
Quick Specs
- 6 mil (0.1524mm) minimum trace width
- 6 mil (0.1524mm) minimum trace spacing
- 10 mil (0.2540mm) minimum drill
- 5 mil (0.127mm) annular ring
- PCB thickness of 1.6mm (.063”)
- 1oz copper on both sides (1.4mil, 35um)
Detailed Specs
- ENIG (gold) finish for superior soldering and environmental resistance.
- Solder resist and silkscreen on both sides.
- Minimum 15 mil (0.3810mm) keepout distance from traces to the board edge.
- PCB substrate is FR4 (170 Tg).
- PCB substrate is compatible with a lead-free process.
- The boards themselves are also lead free and RoHS compliant.
- PCB Substrate dielectric constant of 4.6 at 1MHz.
- Minimum 4 mil soldermask web.
- Maximum soldermask expansion, retraction, or shift is 3mil.
- Minimum 100 mil (2.54mm) width on internal cutouts. See our Slots page for further information.
- Manufactured in the United States.
- Castellations are allowed, but not officially supported.
- Non-plated slots smaller than 100 mil (2.54mm) are not officially supported.
- Plated slots and smaller slots are possible, but not officially supported. See our Slots page for more.
-
Optimizing the 5v to 170v Nixie Tube Power Supply Design
02/21/2018 at 18:03 • 0 commentsFrom Mark Smith on the Surf ‘n Circuits blog:
Optimizing the 5v to 170v Nixie Tube Power Supply Design
![]()
A few years ago, while managing the power management product line at work, I started an initiative with the development team to optimize new products by achieving ESE. ESE stands for Equations = Simulations = Experimentation. The idea is centered on the engineering goal of product design to verify that the systems design equations match the simulation results and ultimately the experimental results.
When these three items match, not only do you understand a system, but you have the best chance to optimize a better solution. I’ll have to say that in today’s mad dash to get new products out the door, achieving ESE is not always possible. But to break through the ordinary and have a chance for the extraordinary, I would say this is a requirement. Since this power supply is just a fun design for an upcoming nixie tube clock project of mine, I have the time to achieve ESE.The updated schematic, BOM, Kicad Layout, and design files are located at Github:
surfncircuits has shared the board on OSH Park:
NixieSupply5vto160vDCMBoost_Rev2_1804
Here is a quick video showing six IN-4 Nixie tubes being powered by a 5v iPhone charger:
-
Miasma: Classic Dual Voice Eurorack Synthesizer Module
02/18/2018 at 02:02 • 0 commentsMiasma is a pure analog oscillator module based on the Curtis CEM3340 chips used in legendary ’80s synths, with new & innovative signal patching:
![Screenshot from 2018-02-17 12-51-02.png]()
Miasma: Classic Dual Voice Eurorack Synthesizer Module
We designed the Miasma Voltage Controlled Oscillator (VCO) to bring that classic ’80s synthesizer sound back to Eurorack modular systems. We just couldn’t find any currently available oscillators with the sound textures and capabilities that we wanted, so we had to design our own; and now you get to own one as well.
There are many unique capabilities built into Miasma that you won’t find in any other oscillator module, like the built-in patching and cross modulation structures that make Miasma so flexible in your rack. However, it’s all about the sound – so let’s start with some Miasma audio samples, before we go into the technical details of how we make that sound possible (best listening with Headphones!)
-
Dock for Onion Omega2
02/15/2018 at 19:14 • 0 commentsValerio Backslashnew has designed a small dock for the Onion Omega 2 and 2+:
My Omega 2/2+ dock\new
I needed the smallest dock i could do, that featured:
- Ethernet
- Type A USB host
- Micro USB for power
It has an onboard linear voltage regulation (i didn’t bother going with a switching one for such low power), magnetics integrated in the RJ45 connector to save space, USB host ESD protection (diode array), USB host PTC fuse.
On the left side there is the RJ45 connector and nothing on the back side of the board, so that you can easily access the MicroSD card on the Omega 2+.
On the right side (the antenna side of the omega) you have the USB type A connector, facing outwards, and the microusb connector for power, facing inwards.The project is open source (CC-BY-SA 4.0), and the KiCad schematics, board layout and the other files are available on GitHub:
5N44P/omega-dock-new
5N44P has shared the board on OSH Park:
omega-dock-new.kicad_pcb
![d9fc59e0f065521992ed510307a3f2bd.png]()
-
Magnetic Imager Tile v3.0
02/13/2018 at 19:01 • 0 commentsBrian Benchoff writes in the latest Hackaday Links about @peter jansen:
A while ago, jansen [Peter Jansen], the guy who built a tricorder and a laser-cut CT scanner, made a magnetic camera. This Hall Effect camera is a camera for magnetism instead of light. Now, this camera has been fully built and vastly improved. He’s capturing ‘frames’ of magnetism in a spinning fan at 2000 Hz (or FPS, terminology kind of breaks down here), and it’s beautiful.
-
Cyborg Ring
02/09/2018 at 19:46 • 1 commentWe are thrilled with this adventurous project by @zakqwy:
![3687361516059943194]()
Cyborg Ring
cordwood + smt + jewelry + blinkies + zinc-air batteries
This project evolved from Splinter, the SMT cordwood project I did last summer/fall. The ring is powered by tiny size 10 hearing aide batteries which should give 4-6 weeks of intermittent use, once I come up with a design that doesn’t break after a few days of wear and update the firmware to put the ATtinyx5 to sleep. The first rev (labelled ‘blink-ring’) used deep red 650nm LEDs. Searching for particular component lengths gave me an excuse to use strange 0508 resistors. And somehow, this is my first Charlieplexing project. Yaay novelty soldering! -
Micro:Boy – Arcade games for the Micro:bit
02/06/2018 at 18:17 • 0 comments@ɖҿϝիɟթվ created this project to play arcade games on the Micro:bit:
Micro:Boy
The Micro:bit is a pretty decent platform for teaching kids to program, but you can’t really make arcade-style games for it. You only have two buttons and a 5×5 display. Perhaps enough for a very small snake game, but that’s pretty much it. That’s why I started working on #PewPew FeatherWing as an alternative platform, but at some point I started wondering if it’s really impossible to do it on the micro:bit.
When the most recent version of micropython got the ability to use any pins for I2C, I realized that I can finally connect a display easily. I could use a HT16K33 and a 8×8 LED matrix like on the PewPew, but I decided to try something else — a monochrome OLED display, similar to the one used on many Arduino-based game consoles
-
Normal schedule during Lunar New Year 2018
02/02/2018 at 15:29 • 5 commentsHappy Lunar New Year!
We would like to let our customers know that all OSH Park boards are manufactured in the United States, and we
Shipping Information and Turnaround Times
There are two periods of time to think about when making your order:
- Fabrication time between when you place your order and when we receive boards from the fab.
- Shipping time between when we ship and when the post office delivers your order to you.
![]()
-
SparkleCon this weekend in L.A.
01/24/2018 at 19:45 • 0 commentsDo you like Science, Technology, Art, and Hacking? SparkleCon is this weekend at 23b hackerspace in the Los Angeles area:
![]()
SparkleCon
SparkleCon is a two day event where people from all walks of life come to share and participate in art, science, computers, security, and hacking. It has been hosted at 23b Hackerspace since 2013 and as attendance has grown over the years so has the extremeness of the events contents. Come and enjoy things like 3D body scanning, lock picking, coding, 3D printing, large Tesla coils, and nuclear fusion.
-
Reverse Engineering Meetup this Wednesday
01/08/2018 at 18:27 • 0 commentsThe Mountain View Reverse Engineering Meetup will be meeting at Giovanni’s New York Pizzeria in Sunnyvale, CA this Wednesday, January 10th:
![]()
We have the side room (ie including TV) reserved for talks.
7:00-7:10: mingle
7:10-7:50: “Reverse Engineering Midway Zeus” by Philip B
7:50:-8:00: mingle
8:00-8:20: “Using open source tools to reverse engineer and modify UEFI bioses” by Matt M
8:20-9:00: mingleLook for Drew Fustini in purple! He learned of this meetup from the Unnamed Reverse Engineering Podcast hosted by Jen Costillo and @Alvaro Prieto. Check out the latest episode:
Unnamed Reverse Engineering Podcast #7: Candy Coated
![height_250_width_250_RevEngCastLogoNew]()
Share this:
-
LED Ring
01/06/2018 at 05:13 • 2 comments@Jens Hauke designed this charlieplexed 20 LED blinker controlled by an ATTiny45 for the Hackaday Coin Cell Challenge:
![156251514462780263]() LED Ring
LED RingThis is a small blinky with 20 LEDs powered by one CR2032 coin cell and with an ATTiny45 brain. The firmware is written in plain C and compiled with the avr-gcc toolchain. The PCB is a two layer design made with KiCad.
Space efficient daisychained LED placing with shared anode/cathode soldering pads.
Firmware and gerbers are available on GitHub:
jensh/attiny-20led-ring
Here is a video of the LED in action:
-
HDDG 26: Amateur Radio and Robot Overlords
01/03/2018 at 00:20 • 0 comments![]()
The next Hardware Developers Didactic Galactic is on Thursday, January 11th, at SupplyFrame’s San Francisco office:
- Mo McBirney: The Iron Giants: Automation in Manufacturing
- Kenneth Finnegan: Amateur Radio and Their Internet of Things
![]()
-
Google Android Things Meetup
12/29/2017 at 18:34 • 0 commentsHackster.io is organizing a Google Android Things Meetup in San Francisco on Thursday, January 18th:
Android Things Meetup (with Google)
Thursday, Jan 18, 2018, 6:00 PM
HAX, 479 Jessie Street San Francisco, CA
Google and Hackster have teamed up to host a night dedicated to Google’s Android Things in downtown San Francisco.
Be sure to register on the Eventbrite page:
Google Android Things Meetup
Have you ever wanted to design and develop your own products? Android Things lets you build professional, mass-market products on a trusted platform without previous knowledge of embedded system design. With an easy-to-use software development platform based on Android Studio and access to the Android SDK you’ll be on your way to developing the next big IoT product.
Wayne Piekarski of Google will be speaking at the meetup and gave this presentation earlier this year at Google I/O:
From Prototype to Production Devices with Android Things (Google I/O '17)
-
Sarah Petkus On Building A Cartoon To Go To Mars
12/28/2017 at 17:26 • 0 comments@Benchoff writes about @spetku and her Noodle Feet robot:
![]()
Sarah Petkus On Building A Cartoon To Go To Mars
Sarah Petkus is a robot mom (which means she’s the mother to a robot, not that Sarah herself is a robot, at least as far as we’re aware), whose child, Noodle Feet, is a character in Sarah’s graphic novel Gravity Road. Unlike every other robot on the planet, Noodle Feet is a content-based robot. Instead of robotic arms welding car panels together or 3D printers squiring out goo, Noodle Feet isn’t a robot built for a specific function. Noodle Feet’s design is derived from his personality in his graphic novel. In the graphic novel, Noodle Feet tastes with his feet, clambers over rocks, and explores his surroundings. That’s what the real-life version of Noodle Feet must do, and that means building the hardware to do just that.
Sarah has been working on Noodle Feet for about two years now, and last year she presented a talk about tasting feet and salivating toes. It’s odd, yes, but it is a fantastic exploration of what can be done with robotics.
This year, Sarah had the opportunity to be an artist in residence at ESA, where Noodle Feet could at least test out his dream of living on Mars. There, Noodle Feet played around in the ESA’s Mars yard, where he made friends with a copy of the ExoMars rover.Since we last checked out the design of Noodle Feet, Sarah has put a lot of work into what her progeny actually does. Last year, Noodle Feet came out with fancy, grippy, retractable toes designed to clamber over rocks and extraterrestrial environments. In the year since Noodle Feet has gotten a few upgrades.
The first such upgrade is a giving module. Noodle Feet, for reasons unexplained in Sarah’s talk, like to hand out beans. The giving module is a cybernetic addition to Noodle Feet’s exoskeleton meant to dispense small trinkets in his wake. This module is designed somewhat like an Archimedes screw that scoops beans up and poops them out as Noodle Feet travels along the terrain.![]()
Another Noodle module that has seen an upgrade from last year is the salivation module. Yes, Noodle Feet salivates and leaves a wake of sticky goo behind him. Salivating implies tasting, and this year Sarah has figured out a way to give Noodle another sense. Sarah took a spool of litmus paper and calibrated a color sensor to detect acidity. It’s a reasonable stand-in for a sense of sourness, but it is a sense of sourness.
Noodle is still growing, and Sarah is exploring what it means for a robot to go through puberty. There’s still a lot of parts to build for Noodle, and you can check out the entire build log over on Sarah’s development blog -
Snowbot
12/26/2017 at 08:25 • 0 commentsA holiday project by Dan Hienzsch (@rheingoldheavy) to build a little Snowbot with an adjustable speed larson scanner for an eye:
![2999791454992848983.jpg]()
The Snowbot has three major subsystems: Power and Timer and Display.
Power Subsystem
The power subsystem uses a 3.7V LiPO battery boosted to 5V with an SC4503 boost converter to power the fully analog circuit. It requires a set of passive components in order to generate the higher voltage.Timer Subsystem
The timer subsystem is comprised of a 555 IC that generates a clock signal. The speed of the clock is adjusted by twisting the potentiometer (the nose of the snowbot). The clock signal ticks through the outputs of a CD4017 decade counter, lighting each LED in sequence, then moving back through them again.Display Subsystem
The display subsystem involves taking the output of the CD4017, and directing it to six red LEDs in the form of a larson scanner. In addition to lighting the LED, the current also charges a 22uF capacitor through a diode. When the output moves to the next LED, the cap discharges through a 2.2K resistor (part of a resistor network), fading the LED out gracefully. -
OSHWi Octopus Badge by Gustavo Reynaga
12/24/2017 at 01:26 • 0 commentsAlex Glow of Hackster.io takes a look at the OSHWi octopus badge designed by Gustavo Reynaga:
The design files and source code are available on GitHub:
hulkco/oshwi_2017
GReynaga has shared the board on OSH Park:
001_Hackster_Rev1.kicad_pcb
Oshwi Badge HACKSTER Version Rev 1
-
Upcoming hardware meetups in SF Bay Area
12/04/2017 at 02:41 • 1 commentFrom Brian Benchoff on the Hackaday blog:
Next week we’ll be at a few awesome hardware meetups around the Bay Area, and we want you to head out and join us.
![]()
Silicon Valley Hardware Meetup – Reboot!
Wednesday, Dec 6, 2017, 6:30 PM
Evil Mad Scientist 1285 Forgewood Avenue Sunnyvale, CA
![]()
HDDG 25 – Electronics in Chunks
Thursday, Dec 7, 2017, 6:30 PM
Supplyframe SF Office 500 3rd St STE230 San Francisco, CA
Look for Drew Fustini in purple at both of these events!
![Drew Fustini Drew Fustini]()
-
Reflowduino: Circuit Board Assembly for Everyone
12/02/2017 at 01:15 • 0 comments@Timothy Woo has launched a Indiegogo campaign to manufacture his open-source, Arduino-compatible, wireless PCB reflow oven controller:
Reflowduino: Circuit Board Assembly for Everyone!
Reflowduino is the first completely open-source, Arduino-compatible reflow oven controller of its kind that enables practically anyone to assemble their own beautiful circuit boards at home!
Reflowduino comes loaded with features, all in a compact Arduino-compatible package, with full documentation, example code, demo app, and comprehensive wiki on Github.Reflowduino is designed to be extremely easy to use! The general concept is to switch the power of the appliance on or off with a solid-state relay as shown below, measuring the temperature by placing the thermocouple tip inside the oven during the whole process.
If nothing else, please share this campaign to your friends, family, and anyone who might be interested on social media! Remember that every view counts for me, and I’m depending on you to make this happen!
![arynyhrvcfd87k9omiwx]()
-
LTE NB-IoT Shield for Arduino
11/23/2017 at 02:55 • 2 comments![]()
LTE NB-IoT Shield for Arduino by @Timothy Woo
This open-source LTE shield uses SIMCOM’s SIM7000-series modules with the latest LTE CAT-M technology to allow Arduino users to painlessly connect their low-power IoT devices with the next-generation cellular technology!
NB-IoT is also available for many countries (but sadly not in the USA yet) simply by swapping out to a different SIM7000 module version. Luckily SIMCOM made it super easy to integrate this module because most of the AT commands are identical to previous version, and Adafruit has a wonderful library for their FONA 2G and 3G products. Check it out and help make this happen!
You can view the latest code and design files here on my Github page: https://github.com/botletics/NB-IoT-Shield. Note: The hardware works great but software is still under development! I plan on launching an Indiegogo campaign when I get a fully-working prototype, so stay tuned for updates!
-
Vectrex cartridge board
11/22/2017 at 06:34 • 0 commentsRetro gaming project by @Frank Buss
![9109901511267007275]()
Vectrex cartridge
This is my first version of a PCB for building a Vectrex cartridge. I used this for my Kickstarter project for the Bloxorz game. The PCB was manufactured by @oshpark , you can order your board here.
It fits in this 3D printed case from Thingiverse (you can order it here in my Shapeways shop), or in one of the nice new injection molded cartridge shells from Sean Kelly
Frank has launched a Kickstarter campaign:
Bloxorz for Vectrex, PC, Mac, iOS and Android
A puzzle game for the Vectrex, including a version with Vectrex graphics for PC, Mac, iOS and Android
FrankBuss has shared the board on OSH Park:
vectrex.brd
-
NeuroBytes: Electronic Neuron Simulators
11/21/2017 at 17:28 • 0 commentsFrom Brian Benchoff on the Hackaday blog:
Real-Life Electronic Neurons
NeruroBytes is not a strange platform for neural nets. It’s physical neurons, rendered in PCBs and Molex connectors. Now, finally, it’s a Kickstarter project, and one of the more exciting educational electronic projects we’ve ever seen.
Regular Hackaday readers should be very familiar with NeuroBytes. It began as a project for the Hackaday Prize all the way back in 2015. There, it was recognized as a finalist for the Best Product,
Since then, the team behind NeuroBytes have received an NHS grant, they’re certified Open Source Hardware through OSHWA, and there are now enough NeuroBytes to recreate the connectome of a flatworm. It’s doubtful the team actually has enough patience to recreate the brain of even the simplest organism, but is already an impressive feat.
The highlights of the NeuroBytes Kickstarter include seven different types of neurons for different sensory systems, kits to test the patellar reflex, and what is probably most interesting to the Hackaday crowd, a Braitenberg Vehicle chassis, meant to test the ideas set forth in Valentino Braitenberg’s book, Vehicles: Experiments in Synthetic Psychology. If that book doesn’t sound familiar, BEAM robots probably do; that’s where the idea for BEAM robots came from.
-
Tiny ESP32 WROVER pSRAM board
11/15/2017 at 06:35 • 0 commentsTiny ESP32 board from the Kilobyte store on Tindie with optional battery header and pSRAM:
Tiny ESP32 WROVER pSRAM board
It’s a little ESP32 Board. Perfect for controlling or sensing stuff in the real world and sync it to the internet! Despite that it features the ESP32 WROVER Module. This means it got 4MB FLASH and 4MB RAM. That’s an absolute incredible amount of RAM. I honestly have no clue for what I will ever need 4MB in my embedded Projects.
Why did you make it?
I wanted a small ESP32 Board with the pSRAM and which works and doesn’t eat your whole time to get it working and find it’s issues and quirks.
I’ve used the CP2102 Serial converter because this is the one, which works the best way to program the ESP32. Even Espressif uses this serial converter on their own dev boards.What makes it special?
It’s propably the smallest ESP32 Board with pSRAM. Despite the size it’s ideal for battery operation. It uses under 200uA in Deep Sleep mode! -
2017 Hackaday Supercon: see you this weekend!
11/09/2017 at 17:58 • 0 commentsKelly, Dan, Chris and Drew are excited to be traveling to Pasadena this weekend for Hackaday Supercon. Look for us in purple!
If you aren’t able to attend and still want to be able to hack on the badge, then you can order one from Tindie:
2017 Hackaday Superconference Badge
![2017-11-07T23:21:24.010Z-camera-demo-viewfinder.jpg]()
Follow Hackaday on YouTube or on Facebook as two days of live streaming talks begin this Saturday morning. -
Reflowduino: Open Source Reflow Oven Controller
11/08/2017 at 07:44 • 0 commentsDan Maloney writes on Hackaday about Timothy Woo’s Reflowduino:
Hackaday Prize Entry: Reflowduino, the Open Source Reflow Oven Controller
Face it — you want a reflow oven. Even the steadiest hands and best eyes only yield “meh” results with a manual iron on SMD boards, and forget about being able to scale up to production. But what controller should you use when you build your oven, and what features should it support? Don’t worry…
Dubbed the Reflowduino for obvious reasons, Timothy Woo’s Hackaday Prize entry has everything you need in a reflow oven controller, and a few things you never knew you needed.
-
BeagleLogic Standalone
11/01/2017 at 17:12 • 0 commentsKumar Abhishek has announced on his blog a project that he has been working on the past four months:
![beaglelogic-standalone-top (1)]()
Announcing: BeagleLogic Standalone
BeagleLogic Standalone is a specialized version of the BeagleBone which is intended to be used a logic analyzer based on BeagleLogic.
This logic analyzer has networking capabilities (10/100/1000Mbps Ethernet); it can be used to used to debug circuits remotely. And as it is a full-featured Linux computer, you can run the sigrok set of tools directly on the BeagleLogic Standalone board (they come preinstalled in the BeagleLogic system image), or on your host PC. It has 16 channels and can sample up to 1.5 seconds of data at the maximum sample rate, which is 100MSamples/sec (3 seconds of data if using only the first 8 channels).
I designed and 3D printed a snug fit “open” case for the BeagleLogic standalone board. I’ve written more about it in a Hackaday.io project log.
BeagleLogic Standalone is one of the 20 finalists in the Best Product round of the Hackaday Prize. The results are awaited on the 11th of November. It’s been a great journey taking BeagleLogic standalone from a concept to a prototype and giving a glimpse as to what it could be as a finished product and the experience I gained during the process is invaluable, and I wish to thank Hackaday for providing me with this opportunity.
If enough people sign up, I plan on organizing a group buy for BeagleLogic Standalone boards. If you want to get one, please do not hesitate and sign up here.
The documentation for the board is available at standalone.beaglelogic.net. You can also follow the project on Hackaday.io here -
Building Braille signage with PCBs
11/01/2017 at 16:53 • 0 commentsFrom John Baichtal over on the Hackaday blog:
![]()
Making Braille Signs out of PCBs
[jg] recently passed some damaged Braille signs and took on the challenge of repairing them. Informed by his recent work on PCB lapel pins, [jg] immediately thought of using circuit boards for this project. He’d noticed that round solder pads made for uniform hills of solder, and this reminded him of the bumps in Braille.
![]()
He began by reading up on the standards of the Braille Authority of North America, which stipulates a dot height of 0.6mm. He loaded up the PharmaBraille font system and laid it out the dots in photoshop, then and imported it into KiCad and laid out the boards. When the PCBs had arrived from OSH Park, [jg] soldering up the pads (lead free, but of course) to see if he could get the hills to 0.6mm. He’s experimenting with different methods of melting the solder to try to get more even result
-
µGame by Radomir Dopieralski
10/30/2017 at 22:07 • 0 commentsRadomir Dopieralski has created handheld game console programmable with (Micro/Circuit)Python:
µGame
A small game console directly programmable in Python. I always wanted to make this, and after my work on #PewPew FeatherWing I finally decided that I’m ready.
The first version may be a bit of a stretch — I tried to make it as small as possible, fitting in the 5x5cm limit of PCB manufacturers, so that it will be cheap to make the PCBs. Using the cheap ST7735 TFT display, and a cheap ATSAMD21E chip. I also tried to put all the components on one side of the board, but failed with that — the power and reset switch had to go on the back, as well as the buzzer
-
Particle Electron Carrier for Outdoor IoT Applications
10/26/2017 at 23:28 • 0 commentsChip McClelland designed this Particle Electron carrier board to enhance the reliability and capabilities his outdoor IoT project:
Particle Electron Carrier for Outdoor IoT Applications
I have been building IoT sensors for outdoor use for a few years now. Most of my focus has been on helping local parks better count and report the cars, bikers, joggers and hikers which use their facilities each day. By giving them an accurate and automatic way to measure park utilization, They can save significant labor costs, get a more complete count and facilitate reporting. My hope is that this work will show how important our parks are and help preserve and even expand funding for these vital community resources.
Longer term, I also want to collect environmental and health data with these devices and I realized that a general purpose enhancement to the Particle Electron would be useful in all manner of applications that I – or the community – might dream up. This project, developed in collaboration with the Particle community (see Team link) is open source and available to anyone who can wants to deploy IoT devices where there is no WiFi or utility power.
These carriers have proved to be very reliable and have survived 6 months so far in the North Carolina Summer. I have started working on a Solar Implementation and have some ideas for future improvement. Please let me know if this is helpful and if you have any comments or suggestions that could help improve the carrier.
chipmc has shared the board on OSH Park:
Electron Carrier Board v2.2
-
Rotary Encoder with I2C Interface and RGB Lighting
10/25/2017 at 19:38 • 0 commentsFrom Jeremy S. Cook on the Tindie blog:
![encoder (1).jpg]()
Rotary Encoder with I2C Interface and RGB Lighting
Makernet Knob’s makes the point that “Rotary encoders are cool but hard to wire into your projects.” Having wired up a custom input device for my computer using an encoder, I can attest to both of these statements. In my case, it took me quite a bit of time simply to figure out how each encoder pin was used!
To help alleviate complicated wiring issues, this custom knob features a built-in I2C interface, which allows several (even hundereds) of knobs to be chained together without issue. Additionally, the top of the encoder can be depressed as a pushbutton, and it even has an RGB LED integrated inside of it to give you feedback right on the knob
-
Maker Faire Orlando soldering kit
10/19/2017 at 11:29 • 0 commentsWe are proud to be a sponsor of this Maker Faire Orlando soldering kit:
![]()
Advanced soldering training at Maker Faire Orlando
For the past six years at Maker Faire Orlando, members of FamiLab have taught attendees how to solder with a cool little Makey pin with 2 self-flashing LEDs. We’ve been asked for more advanced soldering training, and we responded with the addition of a PIC-microcontroller-based board twinkling several LEDs, and with a switch that can be used to change the LED display pattern.
We opted to design the board such that it can be used as a pendant on a necklace (lanyard) or as a keychain (especially for those of you who like large keychains). The design is a scalloped 2.7″ circle with LEDs on the outside circle, and a hole at the top for a keyring. Batteries are on the back of the board.
Resources
- Assembly instructions: MFO-SK-Instruction-Sheet-v04
- Base assembly code: main.asm
-
Maker Faire Orlando this weekend
10/18/2017 at 16:41 • 0 comments![]()
This weekend, October 21st & 22nd, is Maker Faire Orlando!
![Screenshot from 2017-10-17 22-22-56]()
Maker Faire Orlando is a non-profit, community-organized, family-friendly celebration featuring local do-it-yourself science, art, rockets, robots, crafts, technology, music, hands-on-activities, and more. It’s an event where people show what they are making and share what they are learning.
The individuals behind these exhibits are known as “Makers” and they range from tech enthusiasts to crafters to homesteaders to scientists to garage tinkerers. They are of all ages and backgrounds. The aim of Maker Faire is to entertain, inform, connect and grow this community.We’ve been busy prepping the Central Florida Fairgrounds & Expo Halls for Maker Faire Orlando 2017! Now you can check out the official program or mobile apps (iOS, Android) for information about Maker Faire including featured exhibits, hands-on workshops, and schedules for Combat Robots and Power Racing.
Look for Drew in purple!
![PCBWay&OSHPark-2 (1)]()
-
SAMD21G Sensor Board with Color OLED
10/18/2017 at 04:14 • 0 commentsAssembly instructions on Mike Rankin’s blog:
SAMD21G Sensor Board with Color Oled
Design files and source are available on GitHub:
mike-rankin/SAMD21G18A_Sensor_Board_with_Color_Oled
This Sensor Board is yet another variation of another one on my site. It is not for sale with no real purpose in mind but the design files to make your own are here. The project was created as design challenge. My full time job is pcb design work and as a hobby I enjoy experimenting with new design ideas.
This was one of the more challenging designs I’ve worked on in a while. A few times I’d given up on routing it. Evan using four routing layers I found it tough. The idea was to hide the bezel of the display behind the board but have sensor components on that same board. It would look something like a little tiny television with all the components around the edges.
This latest revision has fixed a few issues I found on previous versions but the design idea can possibly help others in some way. Full credit goes to Adafruit for publishing the Feather M0 design files along with the bootloader. I used the Feather design to create the schematic for my board.
-
Maker Faire Denver and SparkFun AVC this weekend
10/13/2017 at 15:29 • 0 comments -
Open Source Hardware Licensing
10/12/2017 at 05:04 • 0 commentsMichael Weinberg of the Open Source Hardware Association (OSHWA) published this blog post for the 2017 Open Hardware Summit last week in Denver:
A Quick and Dirty Guide to Open Source Hardware Licensing
Open source hardware isn’t that easy. It is actually a mix of a bunch of different elements covered by a bunch of different types of IP. That means that you are probably going to need to pick a few types of licenses for a few different parts of your hardware.
OSHWA is working on building a tool to make this easier to figure out, but in the meantime I wanted to throw up a quick post setting up a bit of a framework. This framework is largely based on the work that Ryan Lawson and Adam Alperowicz did as students at the NYU Technology Law and Policy Clinic, although all errors are entirely mine.The videos from ORConf 2017 are now online including this talk about hardware licensing:
The CERN OHL v2 and copyleft licences for HDL
-
Doti: Desktop Jacquard Loom by Pamela Liou
10/09/2017 at 09:20 • 0 comments![]()
Pamela Liou gave the 2017 Open Hardware Summit keynote last Thursday in Denver (skip to the 6 minute mark):
Pamela spoke about her desktop loom project:
Doti: The Desktop Jacquard Loom
![]()
-
Open Hardware Summit is Thursday!
09/30/2017 at 06:48 • 0 commentsWe are proud to sponsor the 2017 Open Hardware Summit next Thursday, October 5th, in Denver at the McNichols Civic Center!
There is an exciting schedule of speakers! Big thanks to the OHS17 team for all their hard work. Drew, Kelly and Laen are excited to be there (in purple of course).
Please note that this event follows the Summit on Thursday:
Women Who Hack Dinner and Drinks: open to woman id-ing members of the community, must RSVP by Sept 28th. Hosted by Sophi Kravitz of HackaDay and OHS Chair Addie Wagenknecht.
Can't wait for OHS17? Check out these recordings from OHS16 in Portland:
-
ThinkPad modded with Black Magic Probe
09/21/2017 at 07:22 • 1 commentZach Fredin of NeuroTinker designed this derivative of the Black Magic Probe to replace the fingerprint reader on his ThinkPad X220 laptop:
![7739161505336901338.png]()
TP-BMP
A PCB-layout-only remix of 1BitSquared/Black Sphere Technologies’ excellent Black Magic Probe v2.1. Designed to replace the fingerprint reader in the palm rest on some Thinkpads, because when have you _not_ needed an ARM debugger with a built-in UART port?
Runs stock firmware and grabs USB from the fingerprint reader’s FFC connector (well… +5VDC from the touchpad). Not tested on anything other than my X220 (but it seems to work!). Cable harnesses get stuffed in the o’l ExpressCard slot for storage.![2860331505338542627 https://hackaday.io/project/27272-tp-bmp]()
-
LoFive now on GroupGets
09/06/2017 at 20:47 • 0 commentsLoFive RISC-V dev board designed by @Michael Welling now on GroupGets:
![]()
LoFive is a small board based on the SiFive Freedom E310 open source SoC
![]()
Specifications
- MCU – SiFive Freedom E310 (FE310) 32-bit RV32IMAC processor @ up to 320+ MHz (1.61 DMIPS/MHz)
- Storage - 128-Mbit SPI flash (ISSI IS25LP128)
- Expansion - 2x 14-pin headers with JTAG, GPIO, PWM, SPI, UART, 5V, 3.3V and GND
- Misc - 1x reset button, 16 MHz crystal
- Power Supply - 5V via pin 1 on header; Operating Voltage: 3.3 V and 1.8 V
- Dimensions - 38 x 18 mm (estimated)
- License - CERN Open Hardware Licence v1.2
![]()
Resources -
Battman Battery Management System
08/31/2017 at 17:57 • 0 commentsFrom Raphael Chang:
Battman Battery Management System
As part of the fully custom electric longboard I am building, I designed a battery management system (BMS) for a 12 cell lithium ion battery pack. The BMS, named “Battman”, is meant to monitor both Lithium Polymer cells (LiPo) and Lithium Iron Phosphate cells (LiFePo4), and it can protect the batteries against undervoltage, overvoltage, overcurrent, and overtemperature.
It also has an integrated charging circuit that can perform constant current/constant voltage charging of the cells up to 6A, while performing balancing of the cells at 100mA. In addition, it functions as the main power switch of the longboard system, and includes a precharge circuit to limit inrush currents. Finally, the BMS does current measurements for coulomb counting, and performs state-of-charge calculations.
The project is shared in these GitHub repos:
- Hardware: battman-hardware
- Firmware: battman-firmware
- Software: battman-dashboard
Andrius has shared the board on OSH Park:
Battman lithium ion battery management system
-
LoFive: tiny RISC-V microcontroller board
08/30/2017 at 15:18 • 0 comments![]()
@Michael Welling has created a small breadboard friendly development board using the SiFive FE310 RISC-V instruction set:
LoFive
![8951281503969734650]()
Here is the LoFive compared compared to the Teensy 3.2:
The KiCad design files are available on GitHub:
mwelling/lofive
![1521541503969734446]()
mwelling has shared the board on OSH Park:
-
Arduino Based TV Remote Project
08/28/2017 at 06:00 • 0 comments![svsGk1j.gif]()
Arduino Based TV Remote Project
A couple years ago my TV remote broke. I had used one of those universal remote phone apps as an alternative for a while, but that just got really frustrating. Without the tactile feel of buttons it was too easy to press wrong buttons on my smart phone; accidentally pressing mute, stop or changing the channel / input, etc.
I considered just ordering a cheap replacement remote off of Ebay for a few dollars but part of me wanted to take advantage of the situation and make one from scratch using the atmega328p chip used on the famous Arduino Uno. I had been tinkering with the atmega chip quite a bit at the time and was also exploring the process of designing circuit boards using cad software.
I loved the idea of designing a circuit board from scratch & filling it with circuits. This seemed like the perfect project for me – being able to use my beloved arduino chip, design and populate a circuit board with circuits & fashion some kind of project case (altoids tin) to put it all in. I went for it.
-
Help @gamaral's Cancer Treatment
08/17/2017 at 03:39 • 0 comments![]()
If you've enjoyed @gamaral's electronics projects here (such as Canon DSLR WiFimote, Raspberry Pi PSU, Marshmallow Game Console) and on YouTube or when he co-hosts TWiT's FLOSS Weekly, then please consider giving to his cancer treatment fund:
Gamaral's Cancer Treatment
![]()
I've unfortunately had to flip the bill for my two past surgeries and my on going cancer treatment... and as you can imagine, I'm running out of cash.
If you like my content and/or have found my published projects interesting or useful, please consider sending me some spare change and I'll be ever so grateful. -
Hardware Happy Hour (3H) Chicago tomorrow!
08/14/2017 at 19:19 • 0 commentsTomorrow night, August 15th, is Hardware Happy Hour (3H) Chicago!
Join @Drew Fustini, @Andrew Sowa, @Chris Gammell and more at St. Lou’s Assembly (664 West Lake Street):
![]()
-
Mr. Runner
08/12/2017 at 18:40 • 0 comments@Alex Martin is creating a four legged robot with a running bound gait:
Mr. Runner
The aim of this project is to lower the barrier of entry into dynamic robotics. After seeing Boston Dynamic’s Wildcat I became interested in working on something similar, but was disappointed with what the hobbiest scene had to offer. They all used static locomotion. I wanted it to feel alive!
I hope that if people can see that this style of robotics is reproducible with basic development skills, it will attract a wider range of people to legged robots than just those who want to see a vaguely spider looking device re-implement the same kinematic equations over and over again.
The approach is based on the work of Fumiya Iida and Rolf Pfiefer at the University of Zurich in the mid 2000’s. Dr. Pfeifer is well known in the field of embodied cognitive science, and these experiments were an attempt to generate movement in quadruped robots based on those principles.
-
POV Fidget Spinner
08/12/2017 at 06:57 • 0 commentsFrom MakersBox on Instructables:
Programmable POV Fidget Spinner
Fidget spinners are fun, and you can find one at about any check-out counter for just a few bucks these days, but what if you could build your own? And it had LEDs? And you could program it to say or show whatever you wanted? If that sounds geeky cool, THIS IS THE PROJECT FOR YOU.
I’ve always been interested in using blinking LEDs to get kids interested in programming. The most simple project with an Arduino microcontroller is to blink an LED on and off. Then you get them to see how fast an LED can blink before it looks like it is on continuously (about 12 millisecond intervals). Then you shake the LED back and forth and you can see it blink again! This phenomena is call “persistence of vision” (POV) and is how this project works. It can lead to discussions of both how the eye works and how incredibly fast computers are.
This project uses a programmable 8-bit microcontroller, eight LEDs, and a coin cell. It spins using a standard skateboard bearing, and uses a Hall-effect sensor and a magnet to determine rotation. It is made using beginner-friendly through-hole parts and can be programmed using the Arduino programming environment.
MakersBox has shared the board on OSH Park:
Geek Spinner 0.1
-
Asset Tracker
08/06/2017 at 19:13 • 0 comments@Kris Winer designed this is a small 4-layer PCB for remote logging of absolute position and orientation:
Asset Tracker
STM32L433-based board with CAM M8Q concurrent GNSS, EM7180 + MPU9250 + MS5637 for absolute orientation, and an ESP8285 for wifi connectivity.
The board uses an STM32L433 Cortex M4F host programmable via the USB connector using the Arduino IDE and an Arduino core created by Thomas Roell . The absolute position engine is a UBLOX CAM M8Q concurrent GNSS module connected to the STM32L433 via UART. The CAM M8Q uses a chip antenna so no external wire or patch antenna is required resulting in a very convenient device package. The pcb is an integral part of the CAM M8Q antenna and the pcb has been sized to meet the minimum ground-plane size recommendations (20 mm x 45 mm).
The absolute orientation engine uses the MPU9250 accel/gyro/magnetometer IMU sensor plus the MS5637 barometer as slaves to an EM7180 motion co-processor that sends quaternions and drift-stabilized altitude to the host via I2C.
There is an Arduino library and sketch available on GitHub:
kriswiner/AssetTracker
PeskyProducts has shared the board on OSH Park:
AssetTracker.v02c
-
2oz Copper 0.8mm Thickness PCBs
08/03/2017 at 18:50 • 0 commentsThis is a special stackup intended for a variety of high-power and low weight circuit designs. This service features a 0.032″ (0.8mm) thick PCB, and includes 2oz (2.8mil, 70um) copper. That’s half the thickness of our standard boards, and with twice the copper!
2 Layer 2oz copper 0.8mm thickness PCBs
![]()
@GravitasTechnol tweeted:
Half-height PCBs from OSHPark will allow us to measure mag fields in tight gaps.
![CmOy0FOWEAEqIFb.jpg:large.jpg]()
-
Michael Ossmann’s RF design rules
08/03/2017 at 07:23 • 0 commentsHackRF creator Michael Ossmann presented his simple RF design rules at a past Hackaday Superconference:
The video of Ossmann’s talk is well worth watching:
He shows how to calculate the width of RF traces in order to match impedance [18:54]:
This is the current 4 layer board stackup for OSH Park:
-
3D Scanner HAT for Raspberry Pi
08/02/2017 at 16:17 • 0 commentsFrom @Jonathan Cohen on @Tindie:
3D Scanner HAT for Raspberry Pi
3D Scanner HAT expansion board interface for Raspberry Pi running FreeLSS on the PICLOP ATLAS FreeLSS
I wanted to make a custom interface for use with the open-source 3D Scanning software, FreeLSS. I was very impressed with the Arduino-based Ciclop scanner and the Raspberry Pi-based Atlas Scanner. Several FreeLSS users merged the two scanner platforms, creating the PiCLOP 3D Scanner. However, there were few changes to the basic PCB design used for the scanner. I wanted to integrate the hardware functionality into a Raspberry Pi HAT format, with the inclusion of extra features for expandability — and who knows, other uses !
What makes it special?
- Conforms to the Pi Foundation specification for HATs !
- 5V power design (only a single voltage) allowing for Pololu low-voltage stepper driver carrier.
- Connections for up to two independent soft-PWM controlled LED light sources.
- I2C interface for OLED displays and light intensity sensors, e.g. TSL2561 or TSL2591.
- Serial communication breakout for console support.
- Additional GPIO signal breakouts for other sensors and devices.
- User-programmable EEPROM ! for auto-configuration and device overlays.
- Standard DC power connector for up to 5V 4A power supply and connections for power switch.
- Over-current protection by poly re-settable fuse.
-
4CHord MIDI
07/28/2017 at 07:44 • 0 commentsFrom @Sven Gregori:
the USB MIDI keyboard dedicated to play all the four chord songs, from Adele via Green Day and Red Hot Chilli Peppers to U2 and Weezer. Thanks to MIDI, you can be any instrument – and all of them at once. Yay!
Built around an AVR ATmega328 and Objective Development’s V-USB library, 4chord MIDI acts as a regular USB MIDI instrument. It supports playback in every key and five different playback modes:
- simple triad chord (root, third, fifth)
- triad chord + third + fifth + third as quarter notes
- triad chord + third + fifth + octave as quarter notes
- root note + third + fifth + third as quarter notes
- root note + third + fifth + octave as quarter notes
Here is the board in action:
-
SSD1306 1.3″ OLED SPI breakout board
07/26/2017 at 16:00 • 2 commentsRene van der Meer designed this breakout board for a bare OLED display:
SSD1306 1.3″ OLED SPI breakout board
I’ve been playing with cheap OLED display breakouts for years, incorporating complete boards into my projects – an easy, but bulky solution. Now that I’ve had some practice designing circuits and PCBs, it’s time for my next challenge: soldering the display FPCs directly to my own boards.
I designed this board to try out a minimal circuit before integrating it into any larger projects, and to figure out the best way to solder flexible circuits to my boards. Since all of my new microcontroller-powered board designs only require 3.3 V, I haven’t added any 5 V tolerant level shifting. What’s left is a bare minimum circuit to drive a Solomon Systech SSD1306 using SPI at 3.3 V.
golemparts has shared the board on OSH Park:
SSD1306 SPI Breakout v1.0 A
-
Automated Pool Controller
07/23/2017 at 18:44 • 0 commentsJerad Jacob designed this board to monitor and control a swimming pool:
Here-Be-Dragons/Pool-Controller
Cloud-based pump speed, solar collector controls, and temperature monitoring for your pool with SmartThings and Alexa integration
Timer Control of a Hayward Tristar VS Pump and Hayward GL-235 Solar Pool Controller
osmosis has shared the project on OSH Park:
-
Want to try flex?
07/14/2017 at 16:08 • 0 comments We’re looking for a variety of flex designs to test. The specs will be the same as our normal 2 layer service but on Kapton:
- 6 mil minimum trace width
- 6 mil minimum trace spacing
- 10 mil minimum drill
- 5 mil annular ring
Please send us an email with “flex” in the subject:
-
1Bitsy 1UP handheld game console
07/14/2017 at 02:18 • 1 comment@Piotr Esden-Tempski of 1BitSquared on Hackaday.io:
1Bitsy 1UP
1Bitsy 1UP is a retro inspired handheld game console, the design is based on the 1Bitsy STM32F415RGT6 ARM Cortex-M4F 168MHz 192kb RAM and 1MB Flash micro controller. 2.8″ TFT with capacitive touch, SDCard Reader and a few other components.
The display used is a TFT LCD with I2C CapTouch and ILI9341 driver. (should be compatible with the display sold by Adafruit on their breakouts as well as the buydisplay.com 2.8″ tft with CapTouch sensor)
The most basic design consists of:
- 1Bitsy STM32F415RGT6 (168MHz, 192kb RAM, 1MB Flash)
- 240×320 2.8″ TFT with capacitive touch and PWM backlight control
- D-Pad, ABXY, Start, Select buttons
- DAC audio out to headphones. (speakers optional)
- SDCard connected over SDIO interface
The hardware design files and firmware source code are available on GitHub:
1bitsy/1bitsy-1up
-
Dooba.io open source MP3 player
07/12/2017 at 20:09 • 0 commentsMP3 player design from Dooba.io:
Shiva: MP3 player for the masses
Based on the ioNode, Aecho and Nomad modules, the Shiva allows browsing & playing MP3 files stored on any FAT-formatted MicroSD card with audio quality up to 128Kbps.
The actual Shiva board itself is quite simple, featuring an MCP23008 from Microchip for reading the 7 buttons, a DM3D-SF MicroSD card socket from Hirose and a 128×64 OLED display from Adafruit.
To keep everything neatly together I needed an enclosure. Being lucky enough to own a half-decent 3D printer I decided to keep things minimal but functional. Who needs glue and screws when you can go for a press-fit case?
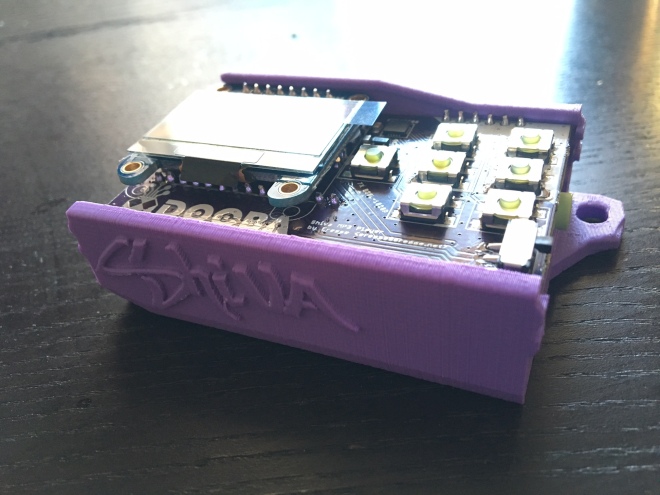 The code for the Shiva MP3 player is available in the Dooba Firmware SDK under /src/shiva. Schematic and board are available in the Dooba Hardware collection.
 -
ATXMega32E5 adapted for a breadboard
07/11/2017 at 17:36 • 0 commentsFrom @Nick Sayer of Geppetto Electronics on Tindie:
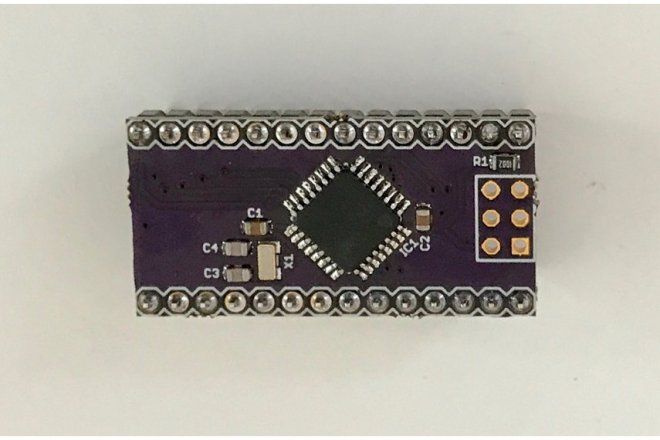
ATXMega32E5 breakout board
The ATXMega32E5 is the next step up for those experienced with the AVR series of microcontrollers from Microchip (formerly Atmel). They use the same compilers and libraries as the rest of the AVR 8- and 16-bit families, but they can run at 32 MHz and have an amazingly powerful set of internal peripherals that can take your projects to the next level and beyond.
For prototyping, however, the disadvantage is that the XMega chips are not available as through-hole parts. That’s where this breakout board comes into play.
nsayer has shared the board on OSH Park:
ATXMega_E5 breakout v1.0
-
B-uOSD: small and simple battery voltage OSD
07/08/2017 at 17:17 • 0 commentsnppc has shared this small and simple on-screen display (OSD) for monitoring battery voltage:
B-uOSD
Visit the GitHub repo for more information on the project:
nppc/B-uOSD
-
Building a PCB lapel pin
07/06/2017 at 18:49 • 0 commentsJinGen Lim created this beautiful project:
Building a PCB lapel
I had little experience with fabric, but building a lapel out of PCB seemed like something that might just work. PCBs are typically built with extremely high tolerances for its copper and mask layers and still acceptably accurate for the silkscreen.
-
KiCad footprint for Nokia 5110 LCD
06/30/2017 at 18:08 • 0 comments@Sven Gregori created a KiCad component and footprint for the Nokia 5110 LCD and created this breakout board to test it:
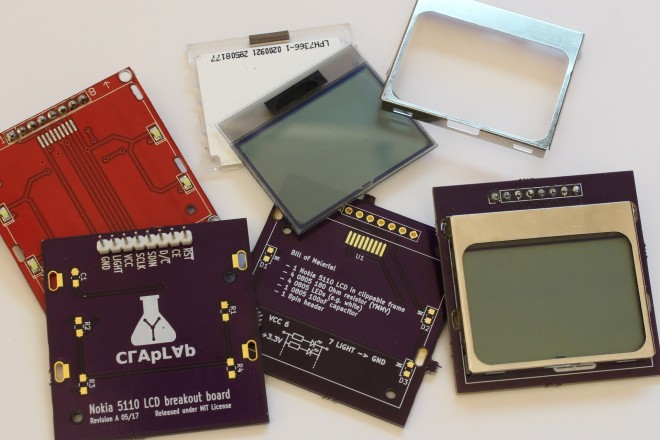
Yet another Nokia 5110 LCD breakout board
I just shamelessly measured all there was to measure and created my own KiCad PCB footprint, along with a schematic component.
Once done, I needed a way to verify it would actually work and fit the LCD, so despite how pointless it is, I created my own breakout board as proof of concept and ordered it from OSH Park.The Nokia 5110/3310 LCD component and footprint are available on GitHub
kicad-libs
sgreg has shared the breakout board on OSH Park:
Nokia 5110 LCD Breakout Board Rev.A
-
555 Piano
06/29/2017 at 05:02 • 0 comments@Alexander Ryzhkov created a small 555 timer-based piano:
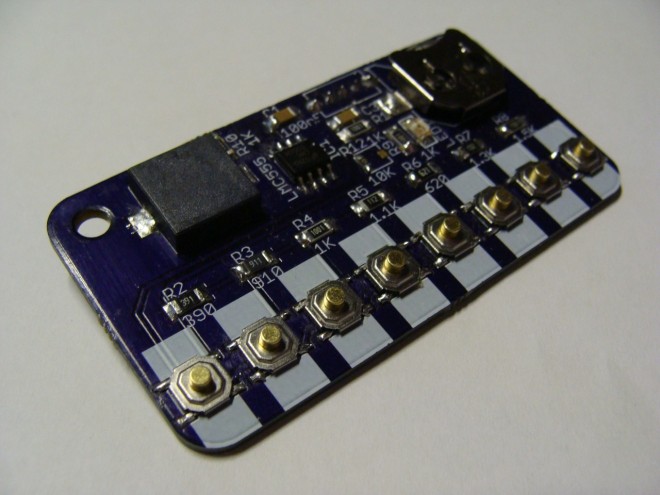
555 piano
Main goal of this project has been creating pretty designed 555 based piano in small form-factor. Many 555 piano are using 9V battery for supply. I use CMOS timer and for timer need only 3V supply.
The design files are available on GitHub
ChirnoTech/555Piano
Here is a video of the board in action:
openidev has shared the board on OSH Park:
piano.toplayer.zip
-
PCB Artwork in 2017
06/27/2017 at 17:59 • 0 commentsBrian Benchoff wrote on Hackaday about the amazing PCB artwork that he’s seen so far in 2017:
Hackaday Links: June 11, 2017
PCB art is getting better and better every year. This year, though, is knocking it out of the park. In March, Andrew Sowa turned me into money.
More recently, Trammell Hudson has explored the layers of OSH Park soldermask and silk to create a masterpiece.
Now, we’re moving up to full-blown art. Blake Ramsdell worked with OSH Park to create a full panel of art in gold, fiberglass, soldermask, and silkscreen. It’s 22×16 inches, and it’s fantastic.
David I. Herman just created a Facebook group for PCB paintings.
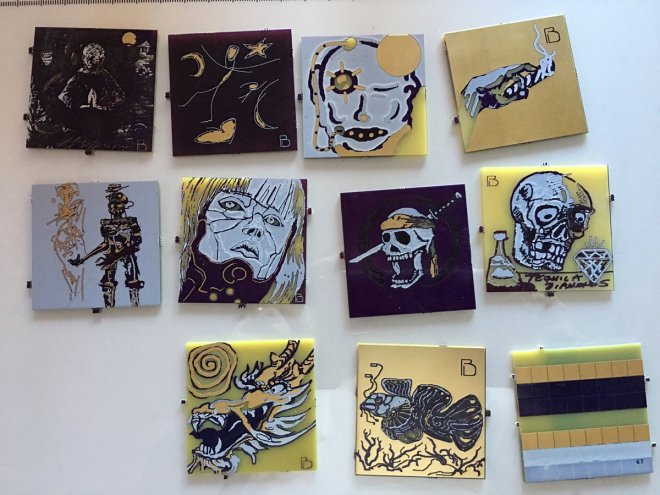
-
“Ye Olde Nowt” Raspberry Pi Game Console
06/23/2017 at 16:31 • 0 commentsWe're excited about this Raspberry Pi project from @Radomir Dopieralski:
Ye Olde Nowt
Yet another pi zero retro handheld game console.
Quantity Component name 1 Raspberry Pi Zero 1 1.5″ SSD1351 Display Module 2 Small SMD Speakers 2 33nF SMD Capacitor 2 1µF SMD Capacitor 2 150kΩ SMD Resistor 2 270kΩ SMD Resistor 6 Buttons 6 90° Buttons 1 ZeroLiPO 1 1S LiPo Battery -
Friday Hack Chat: Perfect Purple PCBs
06/23/2017 at 05:39 • 0 commentsWe’re doing a Hack Chat today (Friday June 23rd) at 12:00 pm US PDT!

Friday Hack Chat: Perfect Purple PCBs
Every Friday, we gather ’round the hot air gun over on Hackaday.io, invite some cool people over, and get them to talk about what they do. This is the Hack Chat. It’s become a tradition, and already we’ve had a ton of awesome people walk through our doors.
This week, we’re inviting [Drew Fustini] and [Dan Sheadel] to talk about what OSH Park does, how they became the first place that comes to mind when you need a PCB. They’ll explain why the boards are purple, environmental regulations for PCB manufacturing in the US, shared projects and tips and tricks for creating the perfect board. -
MorseCard: A Tiny Telegraph Station
06/22/2017 at 04:55 • 1 commentFrom Alex Wulff on Hackster.io:
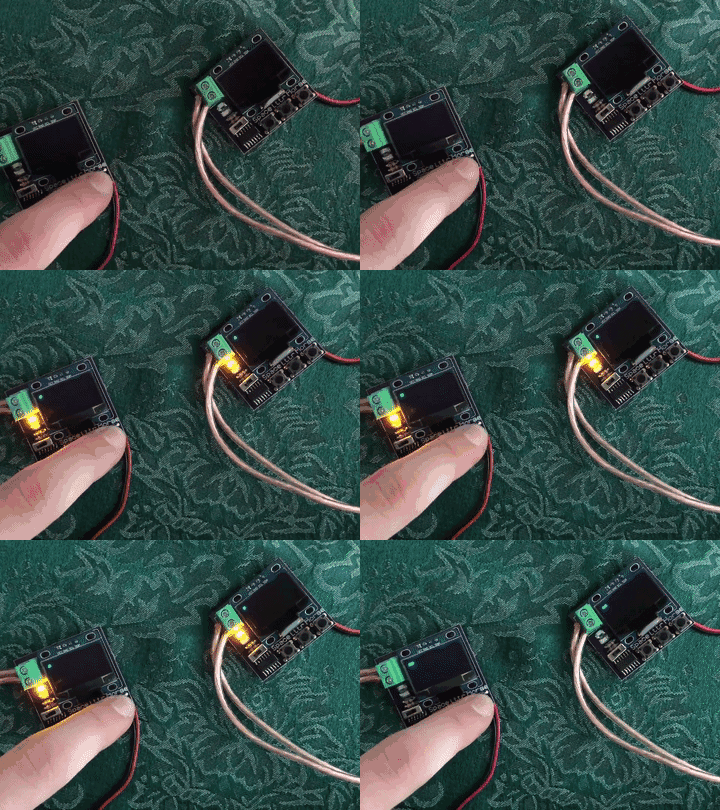
MorseCard – A Tiny Telegraph Station
This small PCB lets you learn Morse code and communicate with friends. Set up a telegraph network in your very own home!
The source code is shared on GitHub:
AlexFWulff/MorseCard
AlexWulff has shared the project on OSH Park:
MorseCard LiPo
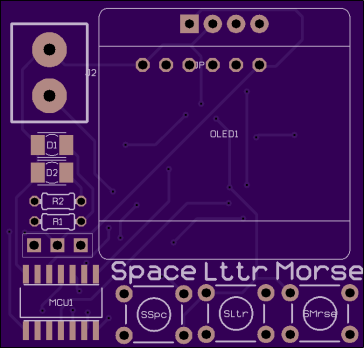
-
Hardware Happy Hour (3H) Chicago for June 2017
06/17/2017 at 23:26 • 0 commentsHardware Happy Hour (3H) Chicago was excellent this past Tuesday at Saint Lou’s!
Sebastian Gajate was in town all the way from Argentina and presented The Amp Hour host @Chris Gammell with his own fútbol jersey!
Thanks to @Andrew Sowa for bringing his camera and taking the above shot and many more wonderful photos. Bart Dring brought his latest CNC build: a drawing robot based on Line-us.
Here the draw bot in action:
Brian Rutkowski’s impressive LED spinner project was a crowd pleaser!
Watch more of the dazzling LEDs in this video:
The adorable Simula robot by Jamie Laing was another favorite:
Simula made several new friends:
We were excited to get a look at the purple PCB inside:
Andrew Sowa showed the results of his technique in KiCad for converting photos into PCB artwork
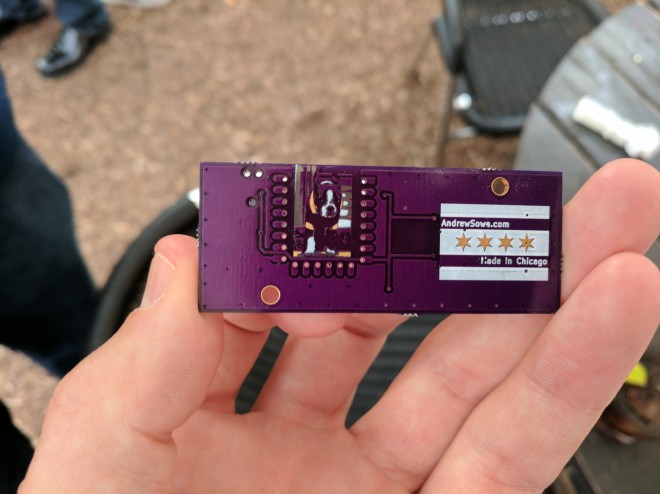
We were excited to meet Jose Ignacio Romero who had designed the Low Power Continuity Tester for the One Square Inch contest on Hackaday.io last year. He brought many projects to share including this color memory LCD board:Peter Zieba of Analytics Lounge community lab demonstrated XRF (X-ray fluorescence)!
View more photos in these galleries:
-
OSH Park sponsors the FOSSi Foundation
06/15/2017 at 02:35 • 0 commentsThe Free and Open Source Silicon (FOSSi) Foundation fosters open source semiconductor design and we’re proud to have become a sponsor! Julius Baxter writes on the FOSSi Foundation blog:

OSH Park sponsors the FOSSi Foundation
We are pleased to announce that OSH Park, the purveyors of perfect purple PCBs, have become sponsors of the FOSSi Foundation’s activities. We are very grateful for their support and would like to recognize this by listing them on our Sponsors page at the Bronze tier.
We are actively looking for sponsors for the Foundation, if you’re interested in learning more about our activities and why we are looking for sponsorship, then please visit our sponsorship page and for more, see our detailed sponsorship proposal document.More information on the FOSSi Foundation:
Inspired by the success of open source software, the Foundation will help bring about IP and tools of comparable quality to proprietary offerings, and which are developed according to an open source model by a highly collaborative and inclusive community. The FOSSi Foundation will address the issues the field currently faces; fragmentation, legal uncertainty, design quality, and high barriers to entry.
FOSSi has launched LibreCores:
gateway to free and open source digital designs and other components that you can use and re-use in your digital designs.
FOSSi also organizes the ORConf:
We’re pleased to announce that ORConf 2017 will be held between September 8th and September 10th in Hebden Bridge in the UK.
Past talks are on the FOSSi Foundation’s YouTube channel such as this introduction from last year (jump to 1:59):
-
Hardware Happy Hour tonight in Chicago
06/13/2017 at 18:23 • 0 commentsHardware Happy Hour (3H) Chicago is 6:30pm tonight at St. Lou’s Assemblywith @Chris Gammell, @Andrew Sowa, @Drew Fustini and more!

June 3H Meetup
Just because we'll be talking hardware and electronics doesn't mean we can't do it on a patio on a summer evening, right?
Join us for a Hardware Happy Hour on Tuesday June 13th! We'll be at St Lou's Assembly on the back patio.
You've had a few months, so hopefully you have a new project you can bring and show off! If not, you have about 2 weeks to finish one to bring it with you. Hope to see you all there, please feel free to invite others!
We'll also be joined by Sebastian Gajate (@SGTECH) who will be in town from Argentina, doing a nerd tour of the midwest/east coast. Stop by and say hi and hear about the hardware culture in South America.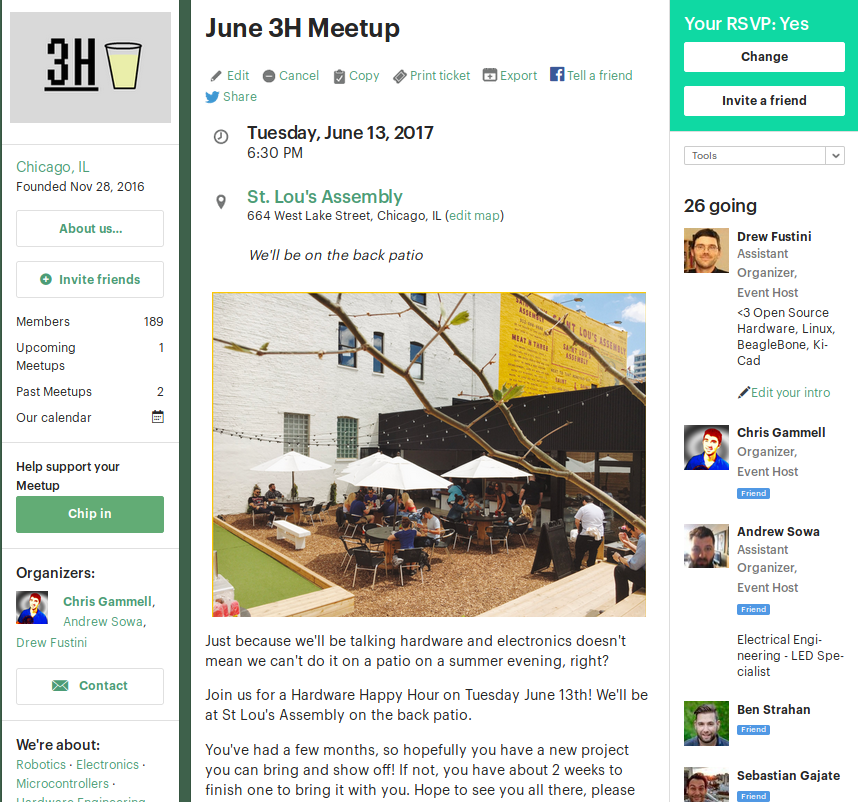
-
Apertus SMT workshop at Maker Faire Berlin
06/10/2017 at 11:45 • 0 comments The Apertus° open source cinema team will be running a Surface Mount Technology (SMT) workshop at Maker Faire Berlin this weekend in their AXIOM booth #121:

Surface Mount Technology (SMT) Workshop
In the course of attending a lot of fairs and exhibitions, we’ve noticed that our cameras and components attract the attention of people from all walks of life. We’ve found that despite our reassurances, people discovering the world of Open Hardware tend to doubt their capabilities where soldering tiny components by hand is concerned.
This is why we hold Surface Mount Technology workshops – so that with a little confidence, the right tools and some initial guidance from members of our team, anyone can have great fun learning to make their own PCBs. The workshops are very popular and we have visitors designing pendants and earrings with colour LEDs and blinking patterns – which always creates a buzzing atmosphere.
apertus has shared the boards on OSH Park:
ART Base
ART Tear
ART Star
ART Diamond
-
An “Unfortunate” SMD Project
06/08/2017 at 20:46 • 0 commentsFrom @MakersBox:
An “Unfortunate” SMD Project
If you like happy, easy to build projects, this is not for you. This is only for people who like to grind their teeth and pull out hair.
Here’s a video of the board in operation:
-
LiFePO4wered/Pi+
06/07/2017 at 14:57 • 0 comments@Patrick Van Oosterwijck created this board to power the Raspberry Pi with a LiFePO4 battery:
LiFePO4wered/Pi+
Many IoT and other projects are based on the Raspberry Pi, but usually little thought is given to the power supply. Most project use generic cell phone adapters or USB power banks, which is fine for one-off projects where the duct taped parts and cabling don’t matter and it’s expected that SD cards will die because power was removed with the Pi running.
But when you need reliable non-stop operation for your prototypes, or you’re ready to turn your project into a good looking product, or you want to use different power sources such as solar, it’s time to look for a serious power manager for your Pi.
Built on the solid foundation of the #LiFePO4wered/Pi, this project provides Pi bootup and shutdown management based on button or touch, input voltage, battery voltage and time, all while making sure the Pi always performs a clean shutdown before power is removed.
-
Hardware Happy Hour (3H) Chicago for June 2017
06/07/2017 at 01:57 • 0 commentsThe next Hardware Happy Hour (3H) Chicago is Tuesday, June 13th, 6:30pm at St. Lou’s Assembly:

June 3H Meetup
Tuesday, Jun 13, 2017, 6:30 PM
St. Lou’s Assembly
664 West Lake Street Chicago, ILJust because we’ll be talking hardware and electronics doesn’t mean we can’t do it on a patio on a summer evening, right?Join us for a Hardware Happy Hour on Tuesday June 13th! We’ll be at St Lou’s Assembly on the back patio.You’ve had a few months, so hopefully you have a new project you can bring and show off! If not, you have about 2 weeks to …
Here’s some photos from the previous meetups:
-
Design a Raspberry Pi add-on board with KiCad
06/05/2017 at 09:30 • 0 commentsLearn how to design a simple add-on board for Raspberry Pi with KiCad in 20 minutes with this new tutorial from Chris Gammell of Contextual Electronics:
Shine On You Crazy KiCad
This course shows how to make a custom but very simple piece of electronics for the Raspberry Pi platform. The primary purpose is to get users building something in KiCad as fast as possible.
The free course contains four videos:
Designing a PCB in KiCad in 20 minutes
Buying Components
Assembling a simple circuit board with SMD components
Writing code, blinking an LED with a Raspberry Pi
ChrisGammell has shared the board on OSH Park:
Shine
-
Open Panzer Sound Card
06/04/2017 at 09:02 • 0 commentsOpen Panzer Sound Card
The Open Panzer Sound Card is a work in progress with the goal of bringing inexpensive, high quality, and open source sound functionality to RC models but especially to tanks using the Tank Control Board (TCB).
The board is actually made up of two components. First, an off-the-shelf PJRC Teensy 3.2 is used as the onboard processor. The Teensy is then plugged into a socket on our custom carrier board that adds a Micro SD card slot (max 32 GB), an additional 16 MB of flash memory, an LM48310 2.6 watt audio amplifier, and headers for external connections.Resources
- GitHub Page
- A discussion thread on the development of this card can be found on the Open Panzer Forum.
- Eagle Board and Schematic (zip)
- Printable Schematic (pdf)
- Bill of Materials – PDF – Excel
-
BeagleBone FPGA cape and Google Summer of Code
06/02/2017 at 21:05 • 0 commentsFrom the @BeagleBoard Foundation blog:
Google Summer of Code project videos
Watch the introduction videos from our Google Summer of Code 2017 students including BeagleWire software support by Patryk Mężydło
Checkout project page more information on the cape:
BeagleWire
The BeagleWire is an FPGA(Lattice iCE40HX4k) development platform that has been designed for use with BeagleBone boards.
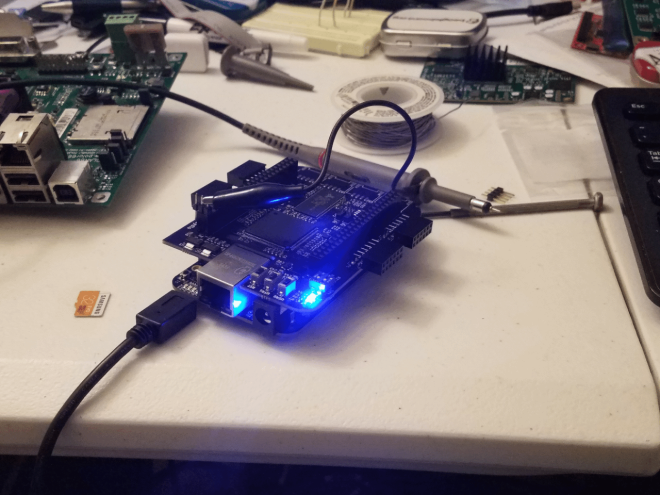 @Michael Welling has shared the board on OSH Park:
BeagleWire
-
I/O Expander for LED Arcade Buttons
05/30/2017 at 18:34 • 0 commentsTeensy creator Paul Stoffregen has shared a new project on OSH Park:
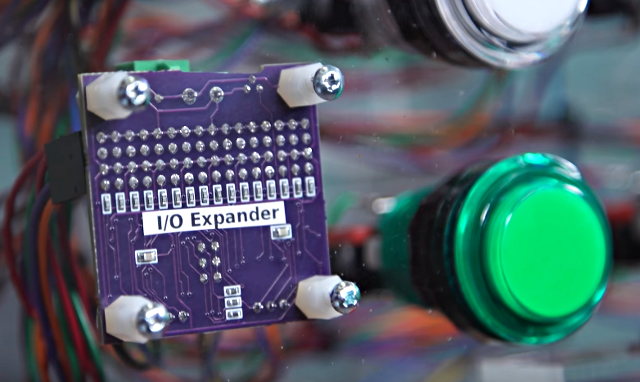
I/O Expander for LED Arcade Buttons
The Monolith Synth Project needed to use a large number of these LED lit arcade buttons.
Dimming of the LEDs was required. Initially I considered using this Adafruit 16 Channel PWM board. But the LEDs in these buttons have integrated resistors which require 12 volts, so 16 transistor circuits and another board for reading the switches would have also been needed.It uses the same PCA9685 chip for 12 bit PWM control on every LED, with mosfet drivers to handle 12V outputs, and also a MCP23017 chip to read the buttons. Every button has a discrete 1K pullup resistor (rather than using the higher impedance on-chip pullups) to help with use in the same cable bundles cross coupling to 12V PWM signals.
Monolith Synth
Four of these boards where used in the Monolith Synth project:
The project is featured in this Tested video:
-
Photos of Bring-A-Hack after Maker Faire Bay Area 2017
05/27/2017 at 15:31 • 3 commentsThanks to everyone that came to Bring-A-Hack last weekend after Maker Faire Bay Area!
Here is a gallery of photos:
Bring-A-Hack after Maker Faire Bay Area 2017
People were quite impressed by this soldering handiwork by Mike Szczys of Hackaday. Mike also did a great job tweeting about all the wonderful hacks such as this care-free robot.
Follow #bringahack on Twitter to see more!
-
SupplyFrame Hardware Developers meetup before Maker Faire
05/11/2017 at 16:46 • 0 commentsWe’re excited that there will be a SupplyFrame Hardware Developers meetup next Thursday before Maker Faire Bay Area weekend:
Sensing Expansion
Thursday, May 18, 2017, 6:30 PM
Supplyframe SF Office, 500 3rd St STE230 San Francisco, CA
We’re having another meetup, this one right before the Bay Area Maker Faire weekend. That means we’ll have a mix of familiar and new faces at the event. We have some familiar and impressive speakers, as always.This month we’re pleased to welcome Jonathan Foote. He is a recovering scientist, tinkerer, and creative technologist with decades of hands…
-
Hackaday+Tindie Maker Faire Meetup
05/11/2017 at 03:38 • 0 commentsWe had a great time last year and recommend folks at Maker Faire Bay Area 2017 come to this Saturday night meetup hosted by Hackaday and Tindie:
The 4th Annual Hackaday x Tindie MFBA Meetup at O’Neill’s Irish Pub
34 South B Street, San Mateo, CA 94401
It’s Maker Faire Bay Area time of year again and we’re holding our 4th annual Hackaday and Tindie MFBA Meetup!
After a ridiculously fun Saturday at Maker Faire, carry on the festivities with us at O’Neill’s in San Mateo on Saturday night from 7pm.
Bring your finest blinky, flashy, IoT, hacks, wearables, or other techy items for us to paw. Bonus points if you bring your #HackadayPrize project for us to get super excited about.
We can’t wait to see you there or at the faire.
Space is limited, so get your foot in the door early. 21 or over only. Please bring ID. -
Mesh networking for sensor grids
05/09/2017 at 18:52 • 0 commentsMesh networking board by Daniel on Hackaday.io:
Low-power mesh networking for small sensor grids
Tiny MQTT-interoperable broadcast mesh networking with simple radios
This project is a low-resource mesh networking stack and mote with battery-powered routers based on state synchronization. The target is for the stack to use less than 2kb SRAM. Nodes use low power listening and an adaptive gossip protocol to synchronize key/values pairs with each other without relying on explicit routing or per-node addressing.
For example, a light might transmit (/lamp, {“state”:”on”}) to the mesh. Write (/lamp, {“state”:”off”}) to the mesh, and the lamp application will notice. The powerful but simple state synchronization primitive allows you to update the state of the mesh to update the world, and update the state of the world to express the same on the mesh. Trivially bridged to a private MQTT server and managed with off-the-shelf MQTT applications.
The design files and source code are available on Bitbucket:
dholth/mesh
-
EEEmu SPI
05/06/2017 at 03:45 • 0 comments@blecky's latest project is an EEPROM/Flash emulator with a fun name:

EEEmu SPI
The EEEmu SPI emulates any Serial Peripheral Interface Bus EEPROM or Flash memory chipsets up to an interface speed of 25MHz. It also supports any supply and interface voltage between 1.8 to 5 Volts and can be configured to support even the largest of memory sizes.
This repository contains configurations for all the currently supported EEPROM and Flash chips for the EEEmu SPI:
EEEmu/Supported-Devices
-
From Proof of Concept to Prototype
05/03/2017 at 15:35 • 0 comments
From the Rebooting Electronics blog by Steve Mayze:
From Proof of Concept to Prototype
In the last entry for the Timed LED Lighting Controller, I realised that there are no working examples of an I²C driver for the ATtiny20. I then had to work through the data sheet to implement my own. With that done, I could then start on the application firmware and get the board really working. So this is where my proof of concept becomes the prototype.
-
SAMD21G18A Sensor Board with Color OLED
05/03/2017 at 01:33 • 0 comments SAMD21G18A Sensor Board with Color LED by Mike Rankin. The design files are source code available on GitHub:
SAMD21G18A_Sensor_Board_with_Color_Oled

Here’s a video of the board:
-
Teensy 3.6 DIY Reference Board
04/27/2017 at 16:57 • 0 commentsShared project from Teensy creator @Paul Stoffregen:
Teensy 3.6 DIY Reference Board
A known good reference board for testing the MKL04 chip when building a DIY Teensy 3.6. Refer to this table for the differences between Teensy 3.6 and other models. The soldering friendly LQFP package (at least more friendly than BGA) is used on this board.
Parts Placement DiagramBill Of Materials1 MK66FX1M0VLQ18 1 IC_MKL04Z32_TQFP32 1 USB A Connector 1 USB Mini B Connector 1 Micro SD Socket 1 MCP1825S Voltage Regulator 1 TPD3S014 USB Power Switch 1 Crystal, 16 MHz 1 Crystal, 32.768 kHz 3 Diode, Schottky, B120 1 Capacitor, 100uF, 6.3V 4 Capacitor, 4.7uF 10 Capacitor, 0.1uF 1 Resistor, 100K 2 Resistor, 470 2 Resistor, 220 2 Resistor, 33 1 Pushbutton 2 Test Point, Black -
#BringAHack after Maker Faire Bay Area 2017
04/25/2017 at 23:42 • 0 commentsJoin us for #BringAHack at BJ’s after Maker Faire on May 21st!2206 Bridgepointe Pkwy, San Mateo, CA 94404
Sunday, May 21st, 6pm to closing
-
EEPROM Programmer Arduino Shield
04/24/2017 at 17:10 • 0 commentsFrom the The Oddbloke Geek Blog, an EEPROM programmer shield designed for Arduino Mega:
Simple EEPROM Programmer … revisited
Some time ago, I wrote about my DIY EEPROM programmer driven by an Arduino Mega. It’s a very simple, low-tech project … but has attracted a consistently-high number of visitors to the site and is something I use several times a week.
Share this: -
Castellated Edges
04/22/2017 at 06:09 • 1 commentCastellations are small plated edges, typically used for making circuit boards into small PCB modules. These are often seen on wireless modules, such as the ESP8266-12E.
While we don’t offer full support for castellations, they can be fabricated if you don’t mind a few minutes of rework and verification of the PCBs.
Design Considerations
It’s helpful to include a fallback hole near the edge. The ESP8266-12E boards, are a great example here. The extra via allows easy connecting of wires for rework, and makes it easy to salvage a module if the fabricated PCB doesn’t turn out perfectly.
 ESP2866-12E, available at Adafruit.com
Indicating in the design file
Castellations are simple to call out in most design tools. Simply include a via on the PCB, so the board outline goes through it.
However, due to our panelization process, the castellated vias must be indicated with round pads for copper and stop mask. The pads must also not extend more than 40 mil from the board edge. Square pads or pads that extend far beyond the edge will be trimmed, and the via will not be plated.
It’s also helpful to use a 10 mil wide line for the board outline. With our milling tolerance of 5 mil, this provides a good visual indicator of where the physical board edge might be. The fabricated edge can be anywhere within that line. This is very helpful for fine-pitch castellations with smaller holes.
 Callout as seen in a design tool
Rectangular castellations can be made by using vias with round pads as noted above, and adding overlapping rectangular SMD pads. Since these pads are inside the board outline, they will not be trimmed, and will provide additional area for soldering (see below for example).
Cleaning up the final boards
We make a best-effort to minimize support tabs on castellated edges, but it sometimes happens. In these cases, you’ll need to file the tab off of your edge.
Additionally, the via plating may not be fully removed during the milling process. In some cases it’s smashed next to the edge, where it can cause unwanted connectivity between vias. In others, it’s smashed inside the via, where it will prevent good solder flow. A fine point file or hobby knife will help remove excess plating.
 An unreworked castellated PCB, with visible plating stubs
 Another version, with tabs on castellated edge and modifications for rectangular pads
-
Manual assembly of KiCad PocketBone
04/20/2017 at 06:18 • 1 comment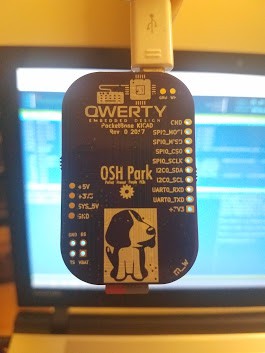 Success! Manual assembly of the KiCad-designed PocketBone by @Michael Welling with the Octavo Systems OSD3358 SiP (System-in-Package):
BGA achievement unlocked
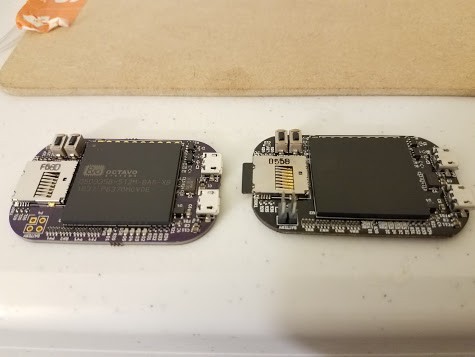
Michael used vacuum pickup tool to manually place the components:
 He then used Reflowster to reflow the solder paste:
Here is a video of the reflow process:
Check out the Hackaday.io project for more info:
Pocketbone KiCAD

The KiCad design files are available in the GitHub repo:
mwelling/pocketbone-kicad
mwelling has shared the board on OSH Park:
PocketBone KiCAD (OSHPark Edition)
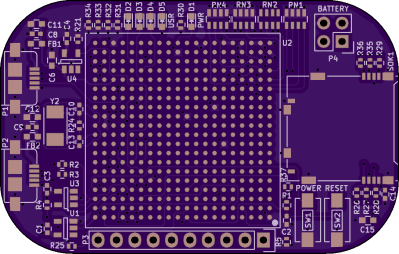
-
SIS-2 Universal Remote Receiver
04/19/2017 at 16:45 • 0 commentsJeremy Cook writes on the Tindie blog about this IR receiver board by Atomsofttech:
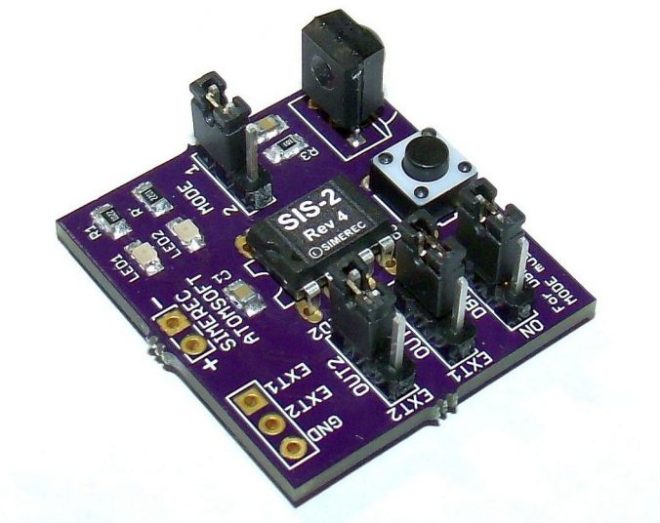
SIS-2 Universal Remote Receiver
When you think of a “universal remote,” you generally picture an infrared (IR) emitter that can be setup to control your TV, AV receiver, and any other number of devices that work using IR signals. On the other hand, what’s to keep someone from doing the opposite, and having a universal receiver that can be programmed to accept codes from a remote that you just have lying around?
Watch the receiver board in action:
-
USB Packet Snooping
04/18/2017 at 15:40 • 0 commentsFrom K.C. Lee on Hackaday.io:
USB Packet Snooping
A low cost hardware dongle for capturing and analyzing Full Speed (12Mbps) traffic using ARM microcontroller
The board has been shared project by FPGA-Computer on OSH Park:
USB Snoop.brd
-
Servo Shield for OpenMV
04/18/2017 at 02:57 • 0 commentsRadomir Dopieralski created this PCA9685-based servo shield for the OpenMV machine vision board:
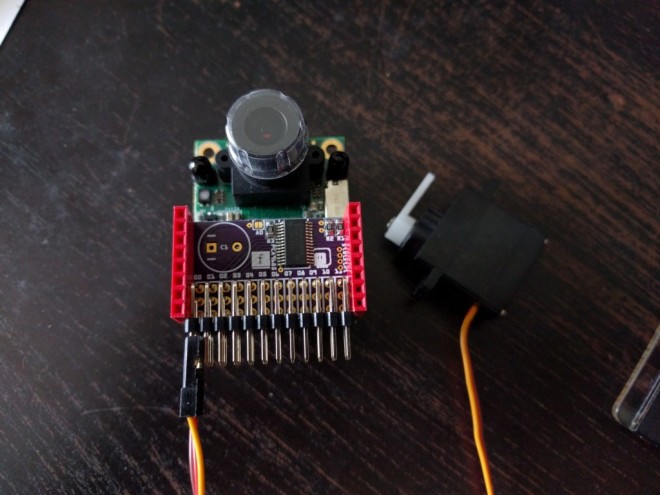
Servo Shield for OpenMV
OpenMV has a couple of pins that you can use for connecting servos (for example, if you want to mount it on a pan-and-tilt base), but you can’t use those if you also want to use the WiFi shield or any other shield that uses up a lot of pins. Practically the only pins left to use are the I²C ones
deshipu has shared the board on OSH Park:
OpenMV Servo Shield -
High-speed ADC pHAT for Raspberry Pi
04/15/2017 at 14:34 • 0 comments@kelu124 designed this board to add high-speed analog inputs to the Raspberry Pi:
20Msps+ ADC RaspberryPi extension
We haven’t tapped yet into the full potential of the Raspberry Pi in terms of ADC. Some have shown that the first gen of Raspberry could go to 10Msps [..] My take is that the new Raspberry Pi’s can surely go above. And I want to try it, either with this old CA3306E or with more recent kick-ass ADCs.
The design files are available on GitHub:
kelu124/bomanz
-
Flash Memory Adapter for Game Boy
04/14/2017 at 17:38 • 2 commentsJ.Rodrigo created this adapter board make it easier to flash a Game Boy cartridge:
Flash Memory Adapter for some Game Boy Cartridges
You only need to solder 3 or 4 wires and the adapter board to an old cartridge, PCB adapter boards are manufactured on OSH park to ensure the best quality of castellations.
Compatible Cartridges:- DMG-A02-01: MBC5 + ROM (256/512/1024 KB) + RAM (32KB) + Battery
- DMG-A06-01: MBC5 + ROM (256/512/1024 KB) + RAM (8KB) + Battery
- DMG-A07-01: MBC5 + ROM (256/512/1024 KB)
JRodrigo has shared the board on OSH Park:
Flash Memory Adapter for Game Boy -
Crazy Circuits launches on Kickstarter
04/13/2017 at 17:01 • 1 commentFrom Brown Dog Gadgets in Milwaukee:
Crazy Circuits: Unique STEM Projects Delivered Monthly
Create fun STEM and STEAM electronics projects with parts delivered to your door.
Crazy Circuits is a non-soldering electronic learning platform that allows people to create circuits from almost any material they can imagine. Crazy Circuits are designed to pop onto LEGO™ bricks, enabling your LEGO™ creations to shine, move, and make noise. Use Crazy Circuits to construct paper crafts with conductive tape, use conductive thread for sewing, and create art with conductive inks and paints. You can even program sketches with Arduino compatible Crazy Circuits boards. No matter what you want to build, Crazy Circuits brings it all together.
-
3D Printed USB Connector
04/13/2017 at 02:46 • 0 comments@chmod775 designed this simple 3D Printed USB Connector compatible with PCBs from OSH Park:
3D Printed USB Connector
I’ve made this 3D USB Connector because I want to remove the chunky and complex standard metal USB Connector from my new upcoming project.
The design it’s made to be simple and with the height reference from the OSHP ark PCB’s.
-
Biomed Shield for Arduino 101
04/11/2017 at 17:15 • 0 commentsFrom @Orlando Hoilett of Calvary Engineering:
 Biomed Shield for Arduino 101
A sweet Arduino shield with a ton of cool sensors for physiological parameters such as heart rate and breathing rate
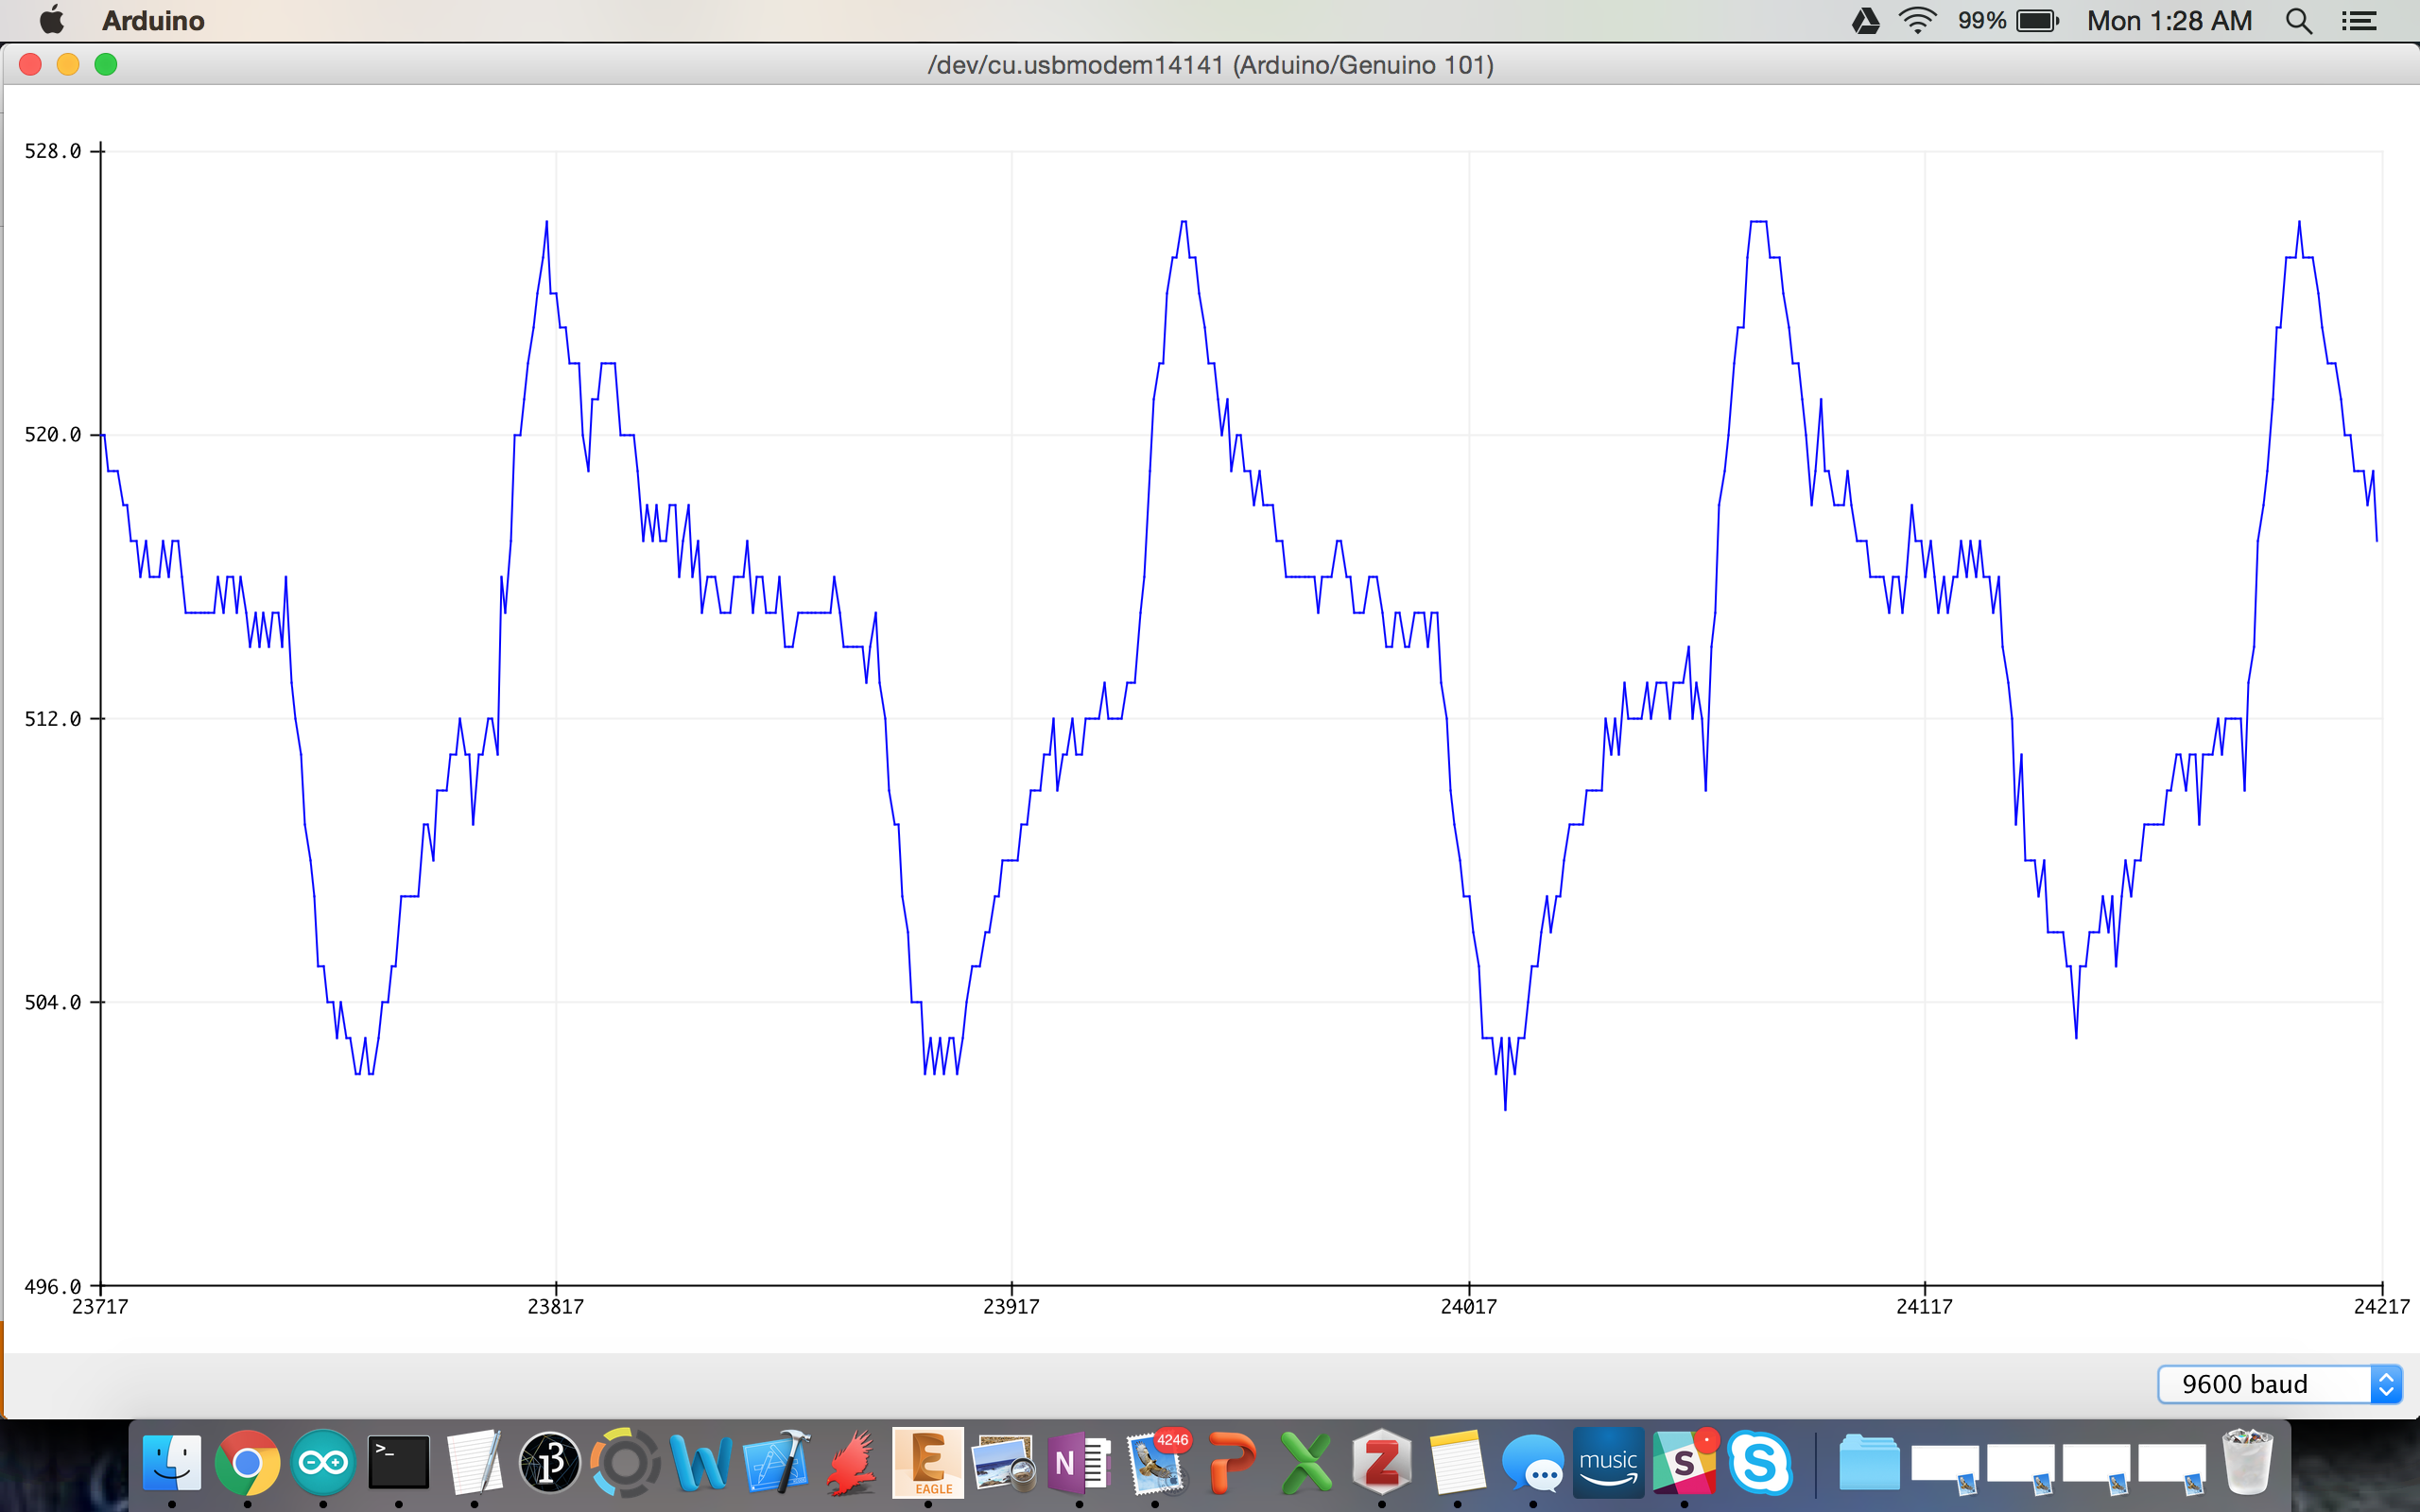
The features include:
- Heart Rate Monitoring with the MAX30101
- Pulse Oximeter with the MAX30101
- Electrocardiogram, Electromyogram, and Electrooculogram with our Super Simple EXG Circuit
- Bioimpedance with the AD5934
- Body Temperature with the MLX90614
- Ambient Light with a CdS Photocell
- Ambient Temperature with a Thermistor
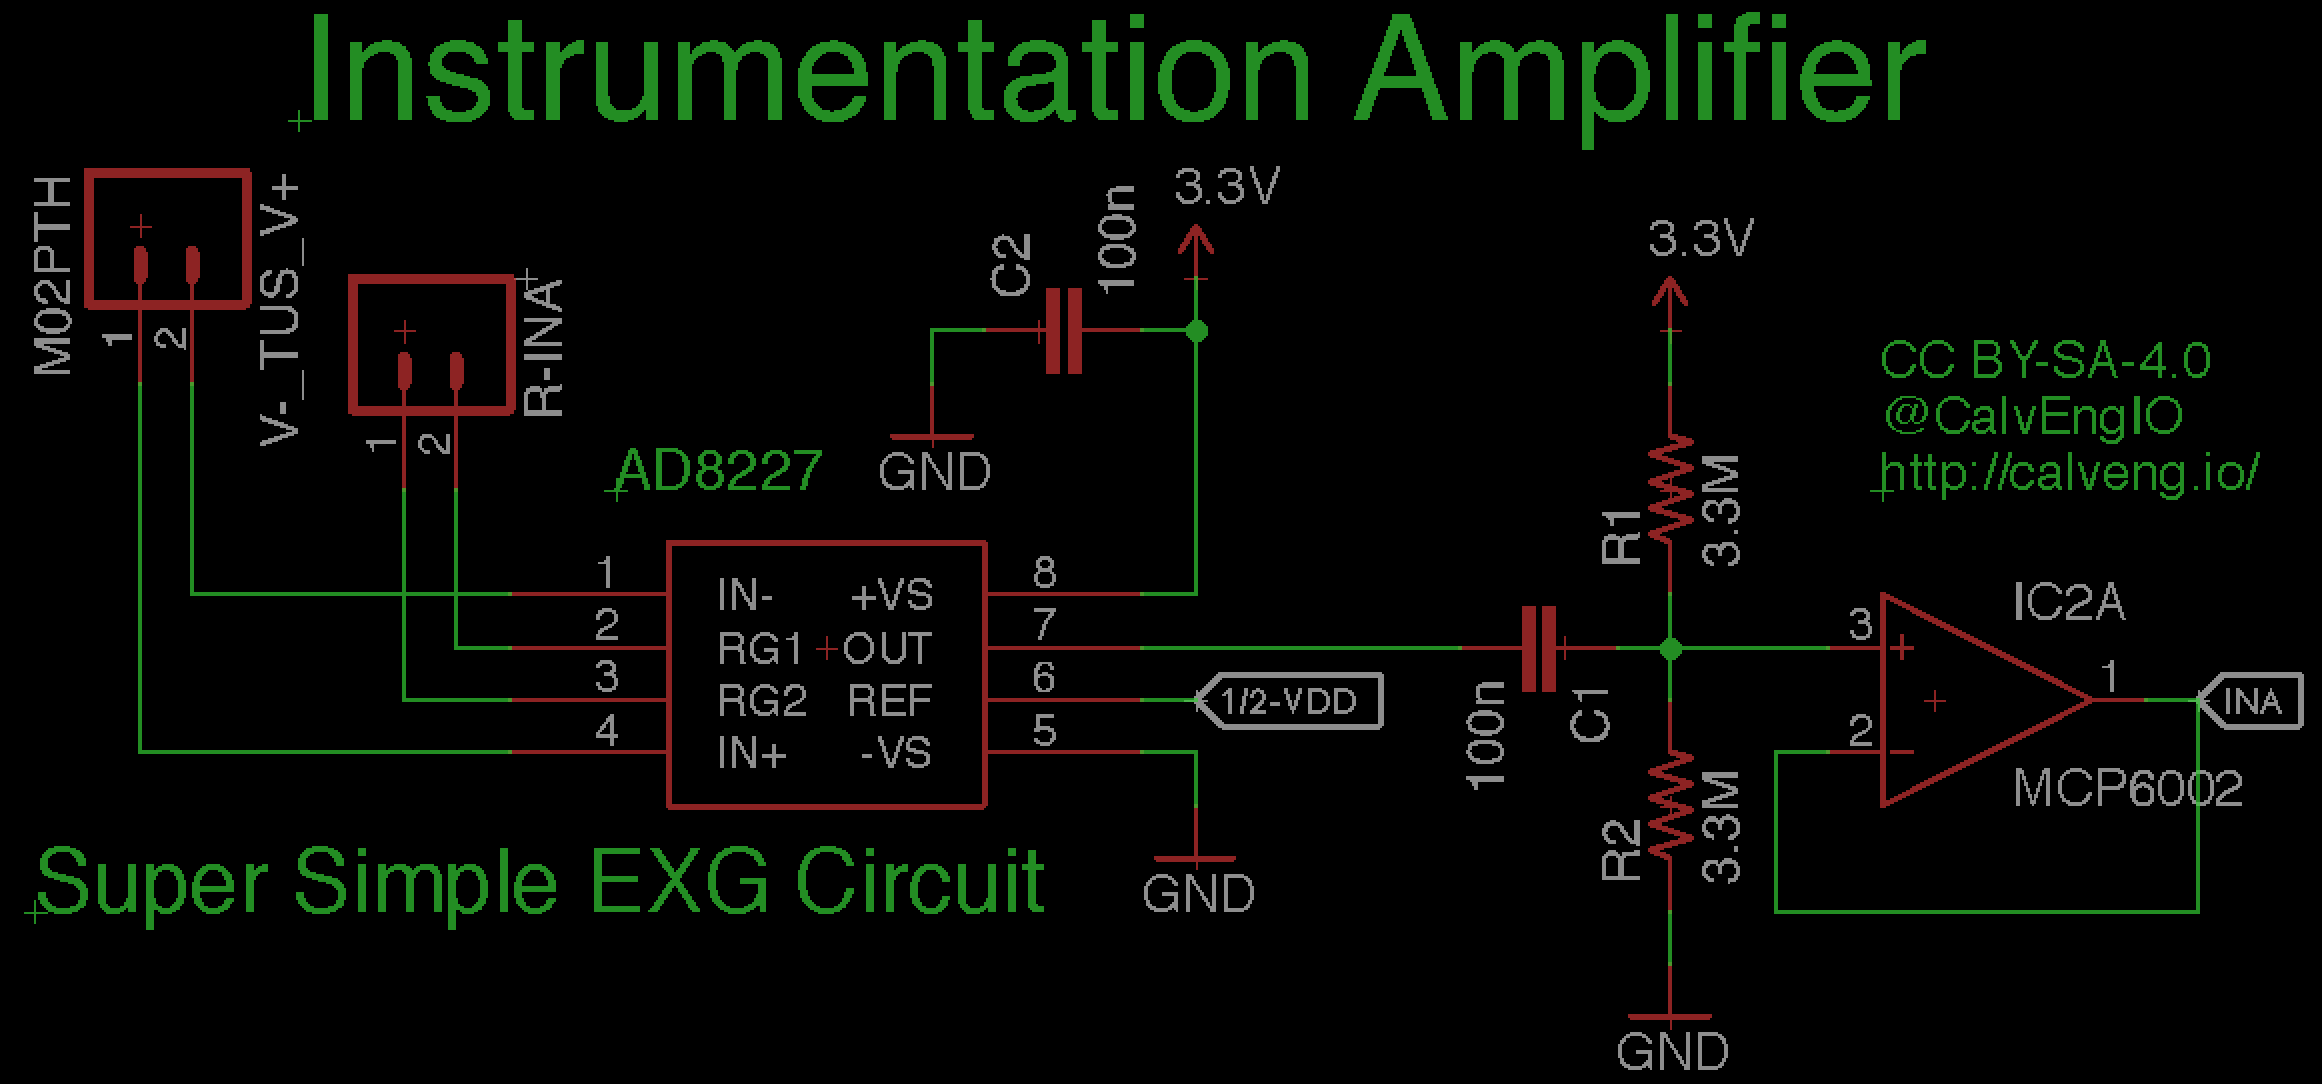
The design files and source code are available on GitHub:
CalvEngIO/BiomedShield
-
Build a Synthesizer with Darcy Neal in Chicago
04/08/2017 at 16:05 • 0 commentsDarcy Neal will lead a workshop in Chicago on building your own synthesizer:
Build a Synthesizer with artist Darcy Neal
Saturday, Apr 15, 2017, 2:00 PM
Pumping Station: One
3519 North Elston Avenue Chicago, ILWe’ll learn about some of the building blocks of creating a synthesizer using the 4046 VCO and the classic 40106 CMOS ICs. The 4046 is a well documented and powerful IC that can be turned into a modular synth voice with just a few added components. Participants will learn to solder together their own prototyping PCB, build a circuit on a breadboard from a schematic, experiment with sensors, and learn the basics about how to produce custom circuit boards using design software like Kicad and Fritzing. No experience is necessary, but basic electronic knowledge or a strong interest in synths will be helpful.
-
E-Paper Breakout Board for Teensy
04/07/2017 at 23:13 • 0 commentsBreakout board designed in KiCad to connect Pervasive Displays 2.15" E-Paper (E2215CS062) to Teensy 3.2 or Teensy LC. Based Teensy E-Paper Shield by @jarek319 in EAGLE.
The goal is to create a name badge that can be worn at conferences and Maker Faires. This board was the first step to verify the KiCad schematic and KiCad footprints work. More information will be posted as the badge project progresses.
OSH Park shared project
KiCad PCB design files:
- repo: pdp7/kicad-teensy-epaper
- commit: 54458f4
- requires KiCad library wickerlib by Jenner Hanni of Wickerbox Electronics for the 34-position FPC connector that the e-paper display plugs into:
Bill of Materials (BoM)
Source Code
- uses EPD215 Arduino Library by Jarek Lupinski for his E-paper Teensy Shield
- requires pinout modification:
- EpaperQuoteDisplay.ino
EPD215 epaper( 17, 16, 14, 15, 13, 11 );
Photos
Video
Related: Jarek's ePaper Teensy shield
- OSH Park shared project: Teensy e-Paper shield
- My repo of Jarek's design files: TeensyEpaperShield
-
PT8211 Audio Shield for Teensy
04/06/2017 at 18:10 • 0 commentsNew OSH Park shared project from @Paul Stoffregen:
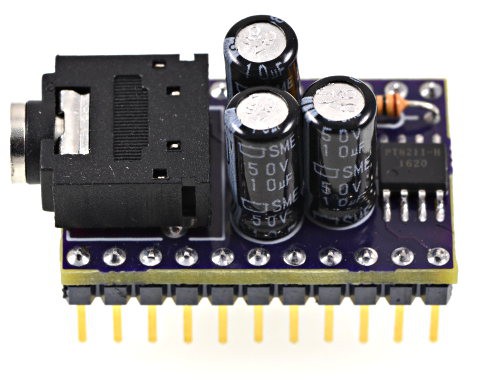
PT8211 Audio Shield
PT8211 is an inexpensive 16 bit stereo DAC.
This small breakout board connects the PT8211 to Teensy 3.2, Teensy 3.5 or Teensy 3.6.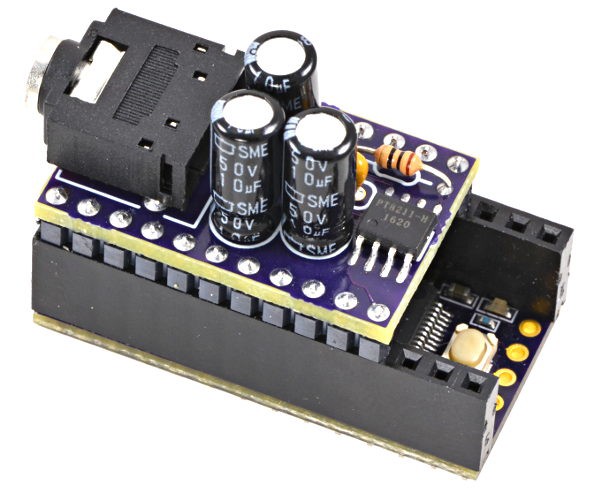
-
Rotary Encoder Breakout with Pull-up Resistors
04/05/2017 at 19:14 • 0 commentsThis breakout board designed in KiCad makes it easy to put a rotary encoder and pull-up resistors on a breadboard. (Thanks to Enrico for the idea to add pull-up resistors).
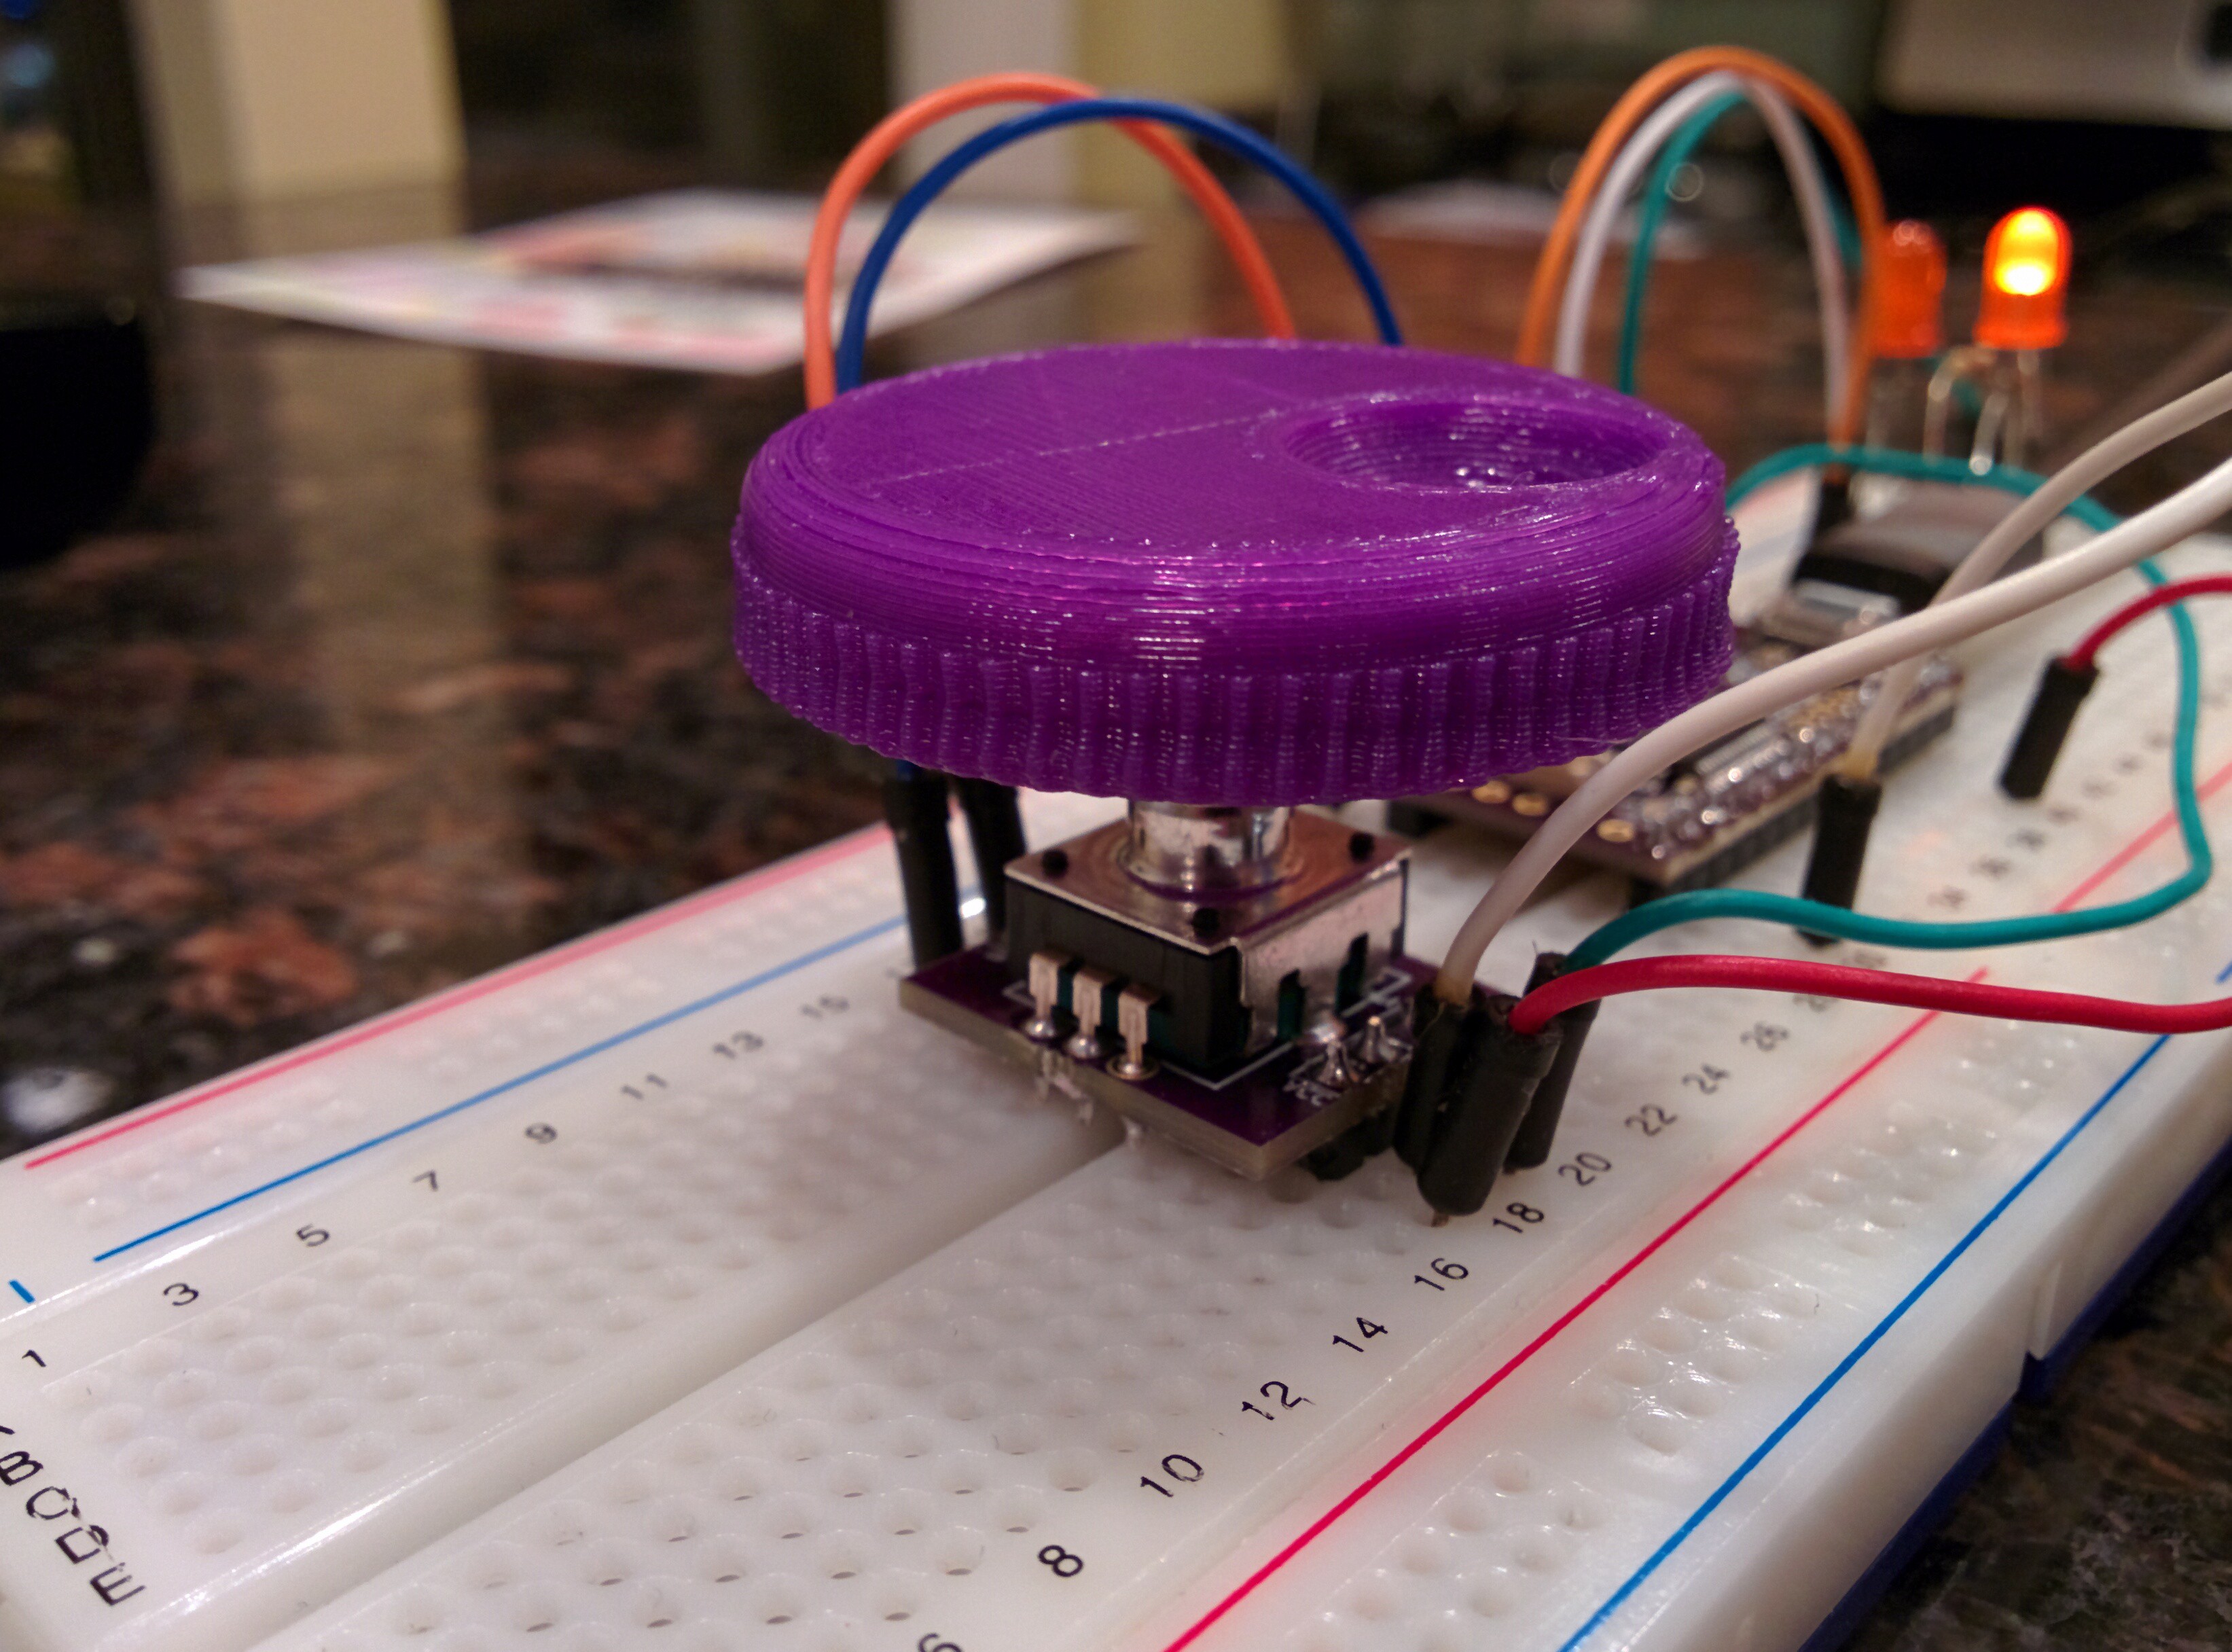
The footprints on the back are meant for 1206 SMD resistors.
I choose 1K Ohm resistors, marked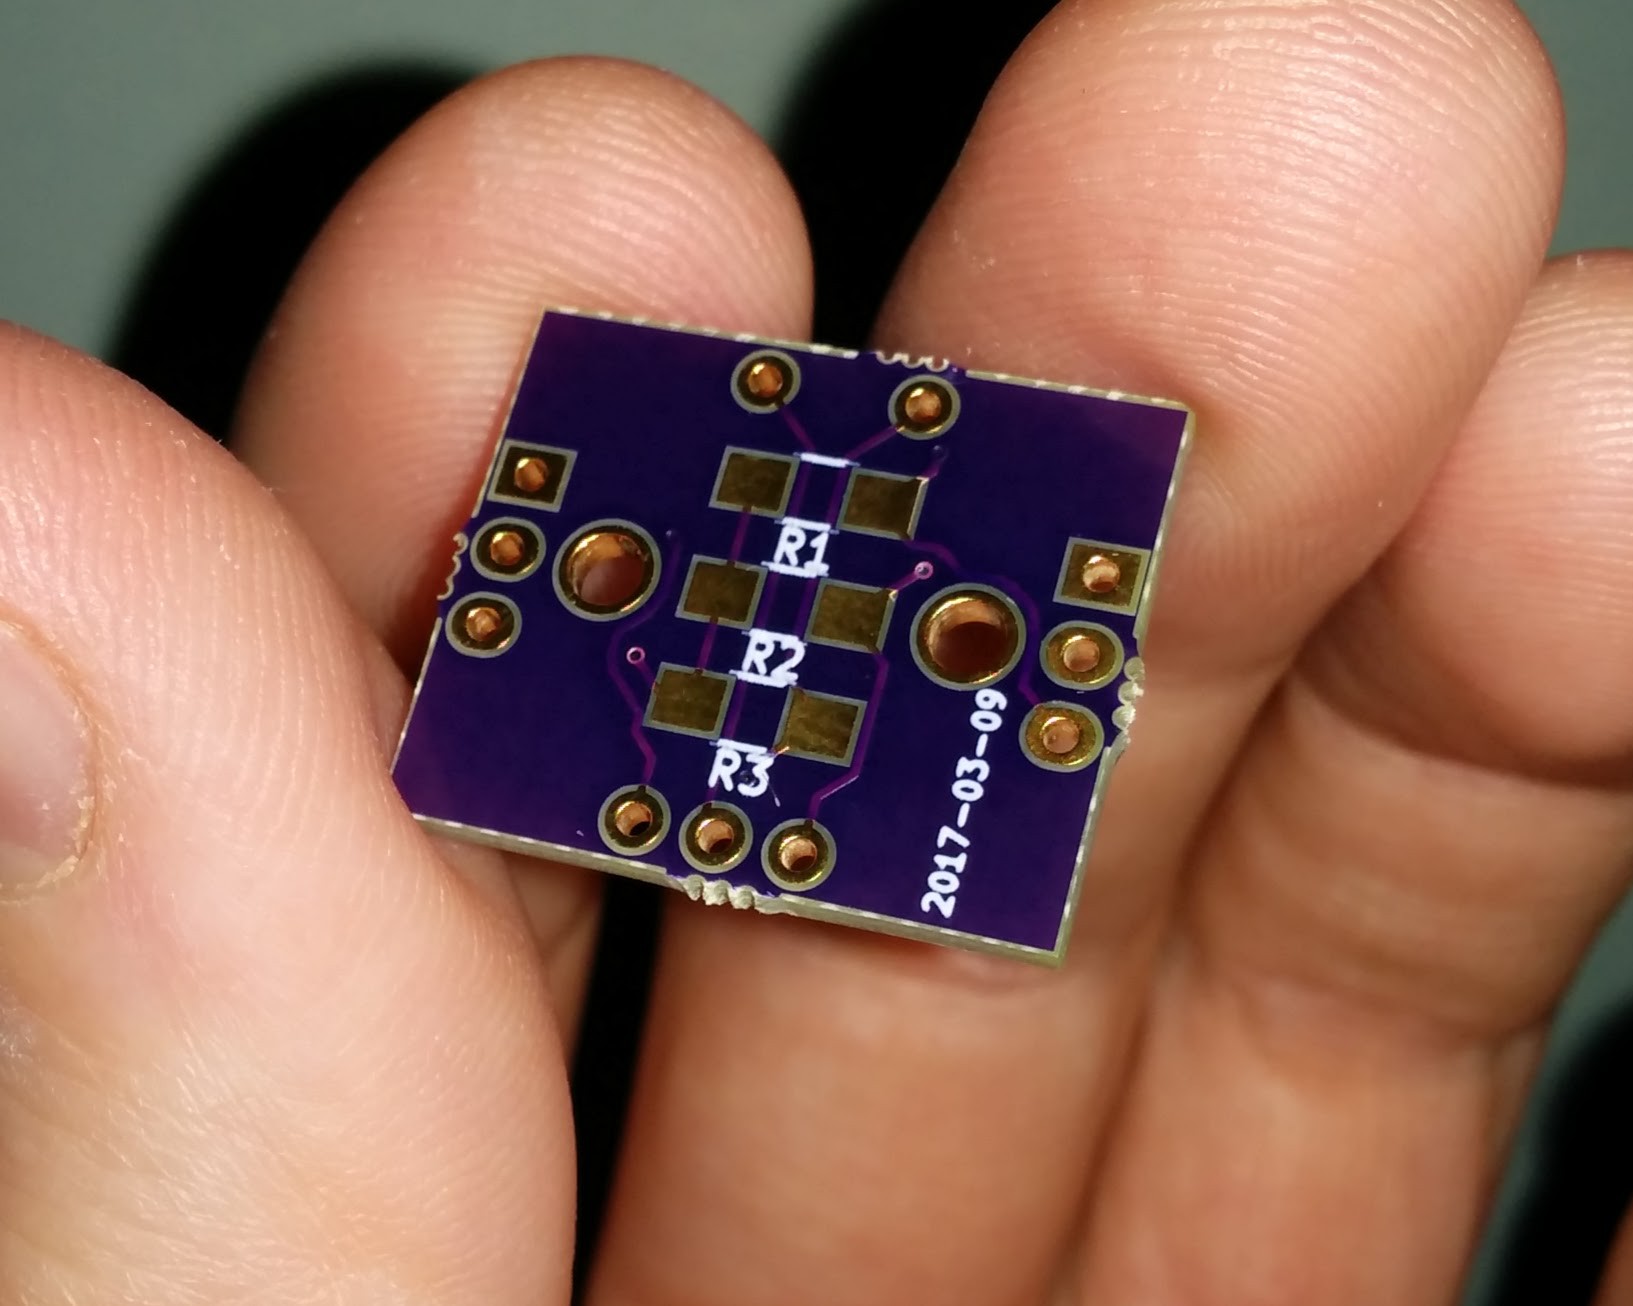
102, when I assembled this board.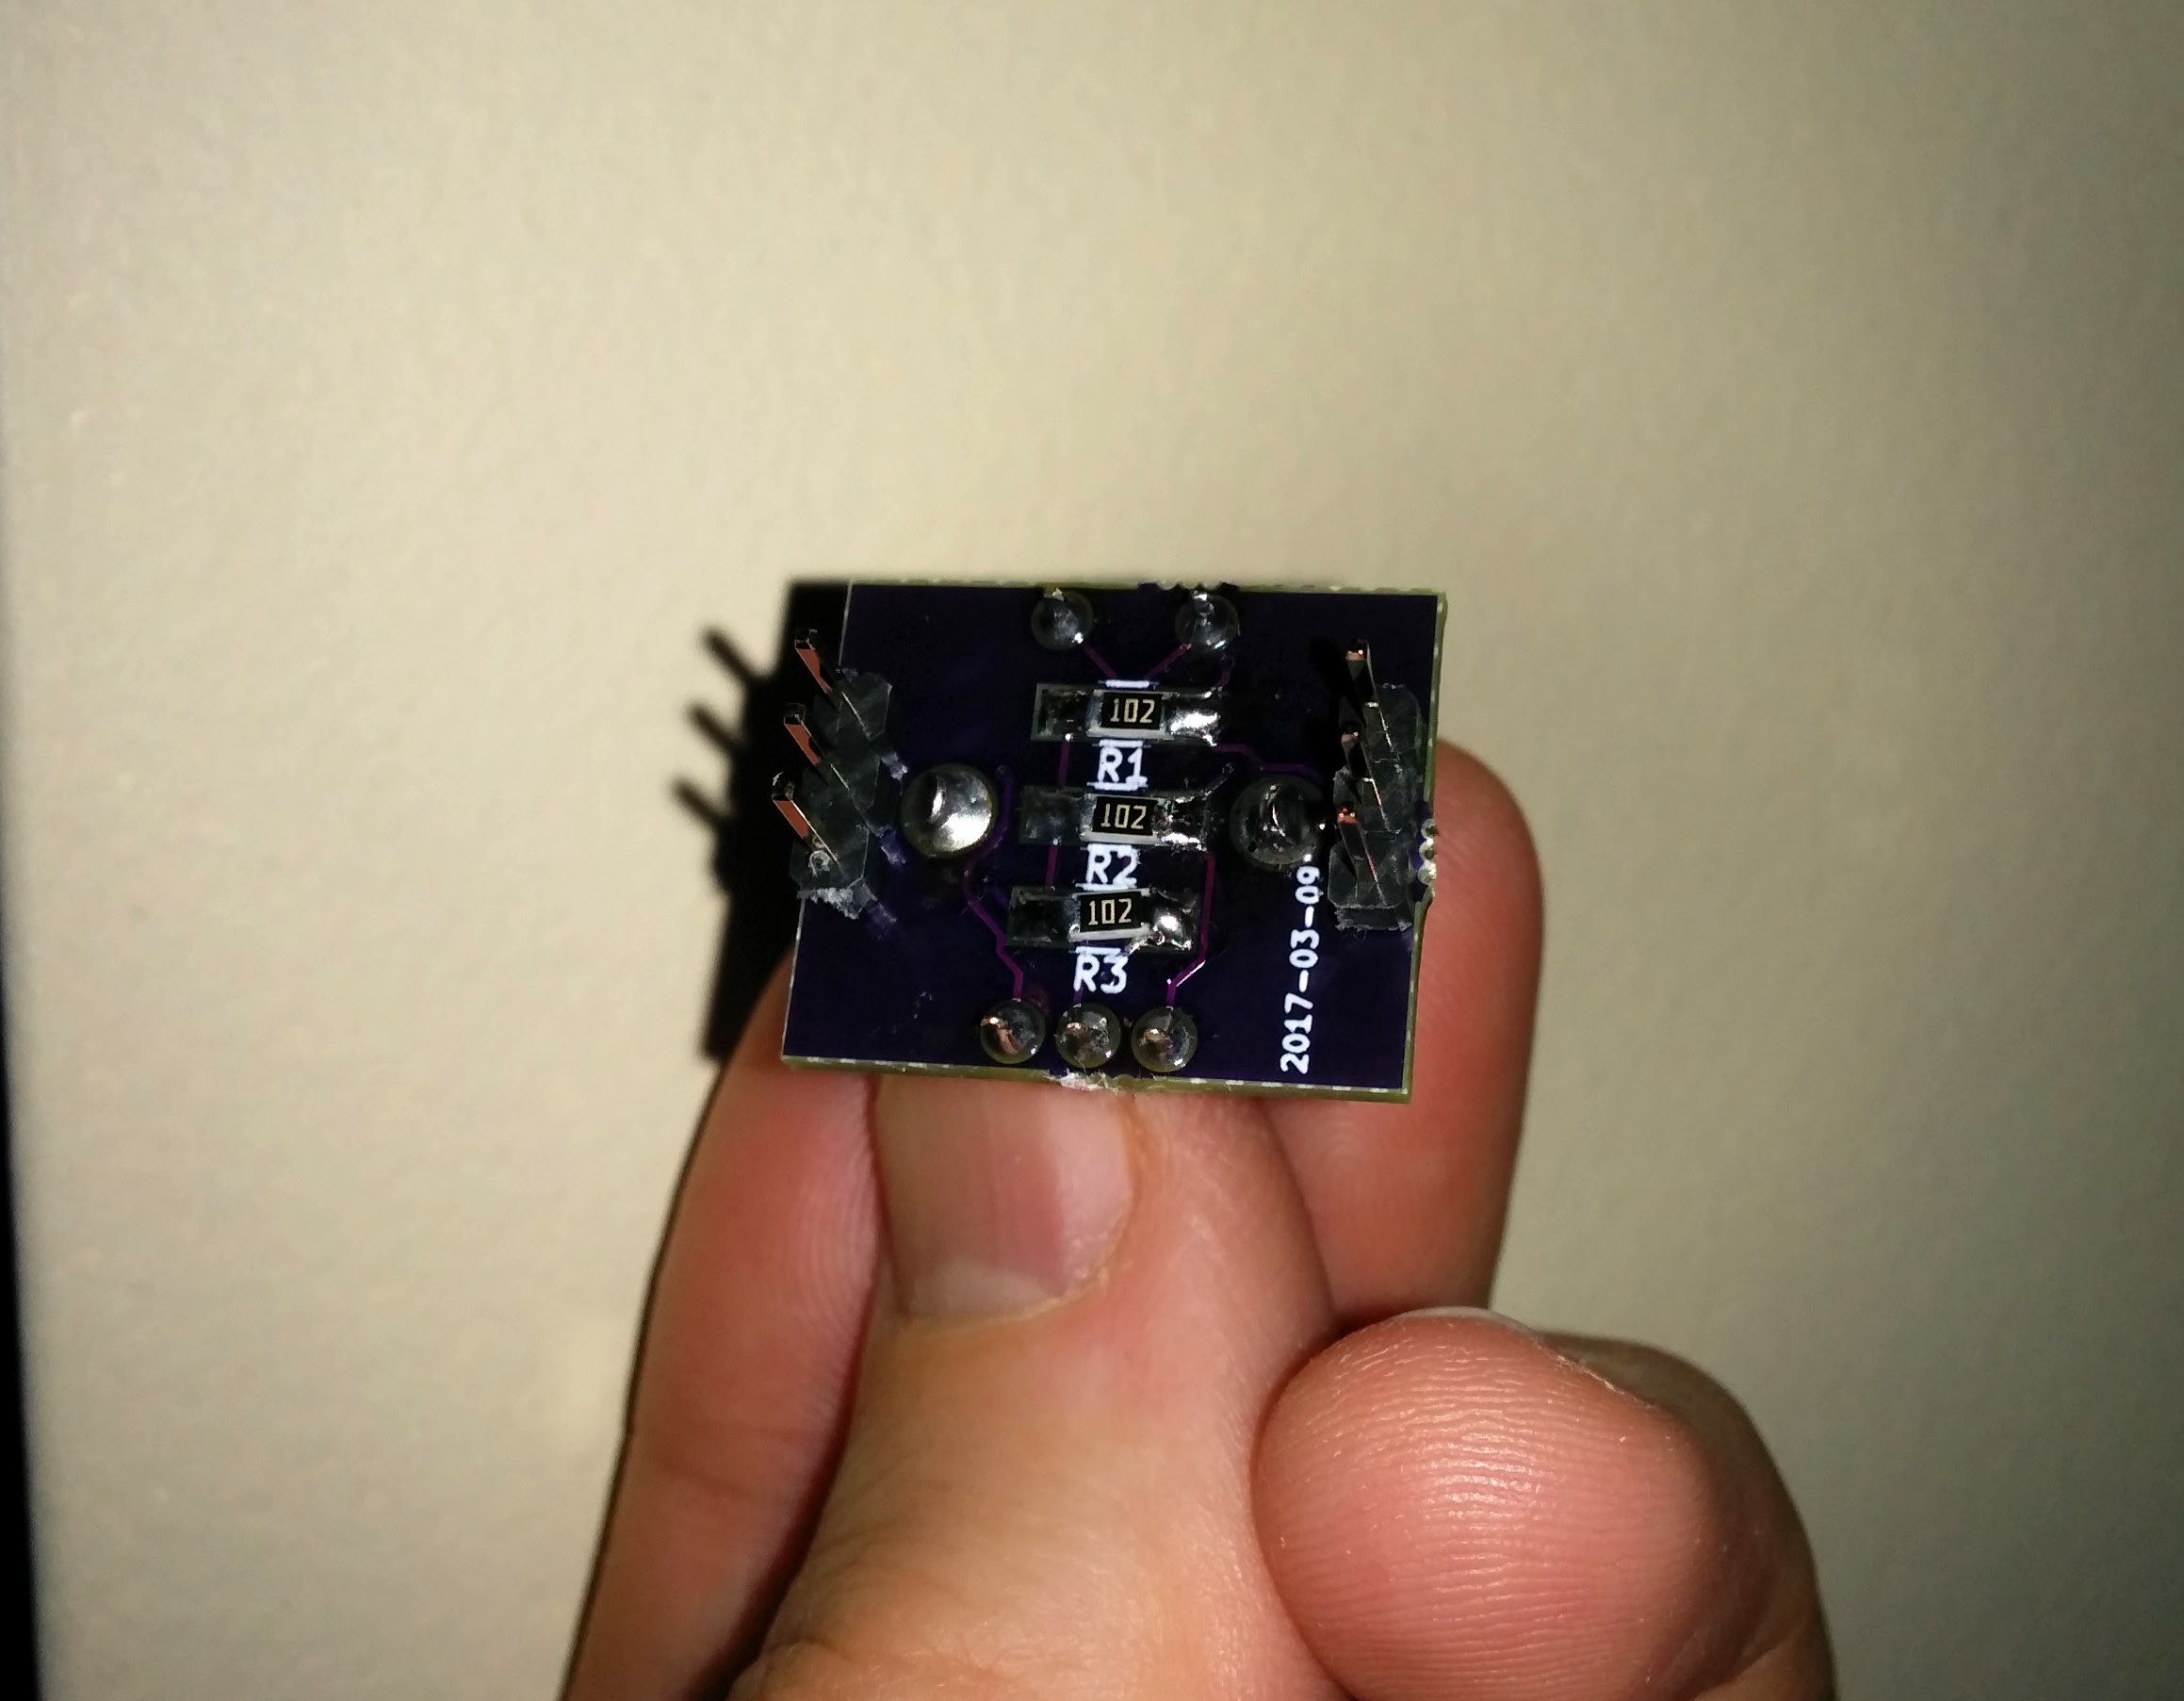
Additional photos are available in the GitHub repo’s images directory and in a Google Photos gallery.
Here is the OSH Park shared project for the board:
Rotary Encoder Breakout with Pull-ups
The KiCad design files are available on GitHub:
I used this KiCad symbol and footprint by Mike Cousins for a Sparkfun rotary encoder
I’ve verified that these rotary encoders fit:
I wrote this Arduino sketch to run on the Teensy 3.2. The brightness of one LED is controlled by the rotary encoder knob. The other LED is turns on when the rotary encoder knob is pressed down:
Here’s a video of the breakout board being used with a Bourns PEC12R-4220F-S0024 and Teensy 3.2:
-
Trixel Interactive LED Kit
04/04/2017 at 12:34 • 0 commentsArkadi designed this interactive LED kit:
Trixel LED
Create your own interactive Light elements by soldering basic shapes, such as triangle, square, pentagon and hexagon to create an interactive LED sculpture.
Here’s a video of the Trixel LED boards in action:
The design files are available on GitHub:
arkadiraf/Trixel-LED
Arkadi_Raf has shared the boards on OSH Park:
Pentagon LED Square LEDTriangle LED -
Pidgeon 1 Sub-GHz Radio
04/03/2017 at 19:10 • 0 commentsPidgeon 1 on Crowd Supply is a sub-GHz radio with 500 mW transmission power, RS485 networking interface and a STM32F0 microcontroller:

Crowd Supply: Pidgeon 1
No more restrictions from high level software! Access the lowest level of digital radio transmission with this programmable sub-GHz wireless module.
Hardware Specifications:
- Radio – CC1120 + CC1190
- Controller – STM32F051K6
- FTDI USB interface – FT234XD-R
- RS485 interface – LTC2850IDD
- Buck converter – RT8010GQW
- SMA connector for antenna
-
Musical Toothbrush by Joe Grand
03/31/2017 at 17:49 • 0 commentsHackaday wrote about a nifty hack by Joe Grand:
[Joe Grand’s] Toothbrush Plays Music That Doesn’t Suck
It’s not too exciting that [Joe Grand] has a toothbrush that plays music inside your head. That’s actually a trick that the manufacturer pulled off. It’s that [Joe] gave his toothbrush an SD card slot for music that doesn’t suck. The victim donor hardware for this project is a toothbrush meant for kids called Tooth Tunes.…
Joe published full documentation for the project on his website:
The PCB is shared on OSH Park:
Tooth Tunes Hack
Joe describes the project in this video:
Hear the toothbrush in action:
-
Heart-shaped Flashlight PCB
03/29/2017 at 19:12 • 2 commentsUri Shaked designed this heart-shaped flashlight PCB for his girlfriend’s birthday:
The design files are available on GitHub:
urish/heart-ariella
-
Micro size flight controller
03/28/2017 at 17:27 • 0 commentsvladisenko designed this micro size flight controller board for Eachine E010 frame:
vladisenko/EachiWhoop
- Processor: STM32F103CB
- Gyro: MPU6500
- Receiver: Flysky AFHDS
- Weight: 1.44 grams
- Voltage: 1S Lipo battery input
- Firmware: patched Betaflight
Vladisenko has shared the board on OSH Park:
EachiWhoop -
14-bit 80MSPS ADC for SDR experiments
03/24/2017 at 14:17 • 0 commentsEric Brombaugh designed this ADC board for RF signals:
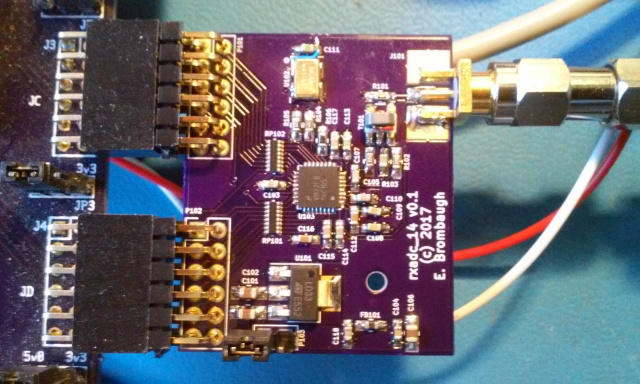
RXADC_14 Pmod
This is an ADC designed for use in digitizing RF signals with up to 40MHz bandwidth and 80dB SNR. The form-factor is compatible with a dual-connector Digilent Pmod so that it can be used with commonly available FPGA development boards to build a variety Software-Defined radio functions.
Features:- ADC14C105 14-bit 105MSPS RXADC.
- Onboard 3.3V Regulator (5V input)
- Filtered Analog 3.3V Supply
- Onboard 80MHz clock oscillator
- Digilent-compatible 2-connector Pmod interface
- 50-ohm SMA input – 2.5Vpp ~= 0dBfs
emeb has shared the board on OSH Park:
14-bit 80MSPS ADC for SDR experiments -
Creating the Benchoff Nickel
03/23/2017 at 18:57 • 0 comments Andrew Sowa writes about the PCB he designed in KiCad to surprise @Benchoff last weekend at the Hackaday Unconference in Chicago:
Creating the Benchoff Nickel
I thought of making the Benchoff nickel after I saw Brian's Hackaday,io profile. He has a hi-res image of the center a Benchoff Buck which is well suited to being converted to a PCB. There is only a few colors and they have sharp edges. Bitmap2Component in Kicad, can easily detect these transitions and convert them into a footprint file. With the help of a text editor, I was able to manually layer everything into one complete image.
-
Ada Lovelace Fellowship for Open Hardware Summit
03/22/2017 at 17:07 • 0 commentsWe are excited for the 2017 Open Hardware Summit this Fall in Denver, and we’re pleased to see the Ada Lovelace Fellowship is now open for applications:

Ada Lovelace Fellowship Applications Now Open
The Ada Lovelace Fellowship encourages women, LGBTA+, and/or other minorities in the open technology movement to both participate and nurture an incredible, diverse community within open source.
For the fifth year running, we are ecstatic to offer TEN (10) Open Hardware Fellowships to members of the community. This includes travel assistance and entrance to the 2017 open Hardware Summit!
We are at an exciting point in time for open source and hope to encourage everyone, no matter their walk in life, to embrace and participate in this incredible movement! -
Star Trek Communicator Badge
03/21/2017 at 15:55 • 0 commentsJoe Crop is a creating a real life version of this famous sci-fi device:
Star Trek Communicator Badge
In the true spirit of Star Trek, this communicator badge is completely autonomous, while fitting in the form factor of an original badge
Star Trek was known for dreaming up technology that was deemed nearly impossible given the limitations of the technology for the day. Having a small badge that could send audio across vast distances seemed out of the realm of possibility during the late 1980’s. This project’s aim is to use modern technology to provide nearly all the features of visionary tech
joecrop has shared the board on OSH Park:
Star Trek Communicator v2p1 -
Hall Sensor Preamp
03/20/2017 at 21:05 • 0 commentsPiotr Zapart designed this board to overcome range issues when using traditional 300 degree potentiometers or Hall sensors as rotational angle to voltage converters:
Hall Preamp/Analog axis calibrator
The idea was to create a device that will perform an axis calibration, usually done in digital domain, but before sampling the signal in the ADC, still in analog domain, using it’s advantageous infinite resolution

the main function of this device is to:
- Buffer the analog output signal coming from a potentiometer or another rotary angle to voltage converter like ie. Hall sensors.
- Filter out the high band noise and limit the bandwidth to an usable range only, protect the input against voltage spikes.
- Match the output voltage range of the source (pot/hall sensor) with the input range of the ADC, thus making the most of the available ADC resolution.
- Linearize the hall sensor output signal response by amplyfing it’s most linear region to the full scale ADC input range.
The board is shared on OSH Park:
HALL Preamp
-
Smaller version of GameBoy Zero
03/19/2017 at 12:53 • 1 comment@moosepr designed this small and simple GameBoy-style device using the Raspberry Pi Zero:
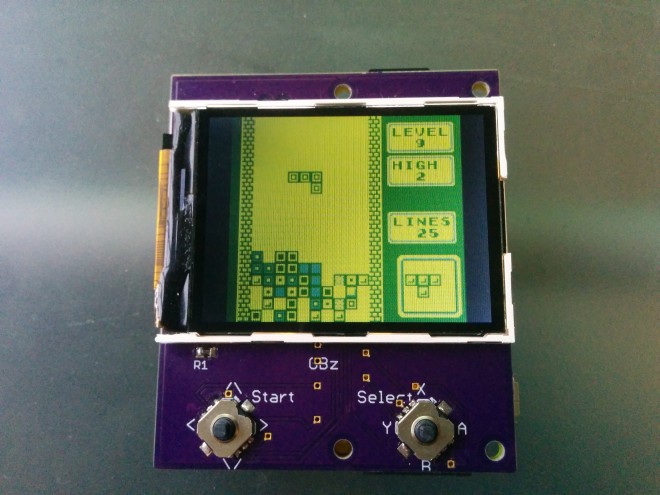
GameBoy Zero, but smaller!
I’m not overly fond of ‘rats nest’ wires, and I have a bit of an obsession with making things as small as possible, so this is what I came up with.
Tis just an ILI9341 screen, a Pi Zero, 2 navi switches (5 way), and a battery (with charge/protect circuit)petay has shared the board on OSH Park:
GBzHere the board is in action:
-
How to Design a Cheap Plant Watering Sensor
03/12/2017 at 11:38 • 0 commentsThis is the third part of the meta-tutorial, where I talk about designing a cheap plant watering sensor. If you did not already read the first and second part, please do it now. These parts contain a lot information which lead to this point of the tutorial. The second part ended with step 14, designing a first prototype PCB.
via How to Design a Cheap Plant Watering Sensor (Part 3) — Lucky Resistor
-
USB Interruptor
03/11/2017 at 13:46 • 0 commentsTeensy creator Paul Stoffregen designed this board to momentarily disconnect a USB device:
USB Interruptor
This simple board plugs inline with a USB cable. It always passes the 5V power and normally passes the USB data signals. But when you press the button, the USB data signals are momentarily disconnected.
For the last few months I’ve been developing a USB Host Library for powerful but complex EHCI USB port in Teensy 3.6 [..] Reaching over to physically unplug the USB cable gets old quickly! Really, really old, both hands off my keyboard… right when trying to focus [..] I made this handy little board with a proper USB 2.0 high speed mux chip. The control signal is just 3.3V logic, so I might even wire it up to something to automate the process.
PaulStoffregen has shared the board on OSH Park:
USB Interruptor
-
New OSHWA forum powered by Discourse
03/09/2017 at 19:18 • 0 commentskellbot writes on the Open Source Hardware Association (OSHWA) blog:
The OSHWA Forums: Now Powered by Discourse
We are very pleased to announce that our new community forums are up and running. The discussion forums are powered by Discourse, which is easy to use, easy to maintain, and open source.
Among other new features, Discourse offers the ability to follow and reply to topics via email. This was one of the biggest reasons we decided to migrate our forums from their old home on bbPress. We’re hoping this will breathe some life into what has otherwise been an admittedly dormant part of the site.
-
Versatile ATtiny Programming Adapter
03/08/2017 at 22:33 • 0 commentsLucky Resistor designed this programming adapter for ATtiny13 and similar chips:
A Versatile ATtiny Programming Adapter
As mentioned in my article about designing a cheap plant watering sensor, I built a small adapter which can be used to pre-program the ATtiny13A. This is necessary, because once soldered on the board, I only have a debugWire interface, which has to be enabled first.
The adapter has a small 50mil JTAG header, where the Atmel ICE can be connected with the board. There is also room for a USB mini jack, which is used to power the MCU while programming. A small on-off switch is used to power the MCU and a LED is placed as indicator to see if the MCU has power.
One of the DIL/ZIF adapters is mounted on top of the female headers. Most of the adapters for SO-8, SO-14 and SO-16 will work with this board.To make the board more versatile, I added a number of jumpers and solder points. By default, the adapter is connecting to the right pins for the ATtiny13A, but you can cut these routes and solder wires onto the board to implement any kind of connection you like.
The design files are available on GitHub:
LuckyResistor/ATtinyAdapter
LuckyResistor has shared the board on OSH Park:
ATtiny Adapter
-
ESP8266 Pogo Jig Programming Board
03/07/2017 at 18:45 • 0 commentsWe like the novel orientation of pogo pins that @Wing Tang Wong used in this board design:
ESP8266 Pogo Jig Programming BoardUpcycles D1 Mini Wemos board to create a USB connected ESP8266 Pogo pin jig
This is a board designed to take a WeMos D1 Mini board(with the ESP module removed) and use it as a USB interface with built-in reset/flash functionality for bare ESP8266 modules similar to the ESP-12 units.
The design files are available on GitHub:
ESP8266 Programming D1 Mini Pogo Jig V1 -
Embedded Linux talks at SCaLE 15x
03/04/2017 at 20:42 • 0 commentsSouthern California Linux Expo (SCaLE) had a track yesterday on Embedded Linux and video of the talks are on YouTube: Room 104 Friday Mar. 03 – SCaLE 15x
The video is a recording of the entire day of Room 104 so refer to the Friday schedule for information on the individual talks:
- Linux: the 1st second (after power on)
- Alison Chaiken
- 10:00am to 11:00am
- Groking the Linux SPI Subsystem
- Matt Porter
- 11:30am to 12:30pm
- [Lunch Break]
- Introduction to SoC+FPGA
- Marek Vašut
- 1:30pm to 2:30pm
- Introduction to USB
- Alan Ott
- 3:00pm to 4:00pm
- Getting off the grid, and onto the mesh!
- William Turner
- 4:30pm to 5:30pm
- Linux: the 1st second (after power on)
-
2017 Open Hardware Summit
03/02/2017 at 01:57 • 1 comment
The 2017 Open Hardware Summit will be held on October 5th in Denver, Colorado:
The 2017 Open Hardware Summit is the annual gathering of the OSHWA organization and open hardware community. We are a 501c3 not for profit. Our goal of the Open Hardware Summit and Community is to create an inclusive welcoming environment to empower people in all stages of discovering open source.
Tickets are on sale now through Eventbrite:
The Summit is seeking submissions for talks from individuals and groups working with open hardware and related areas. Topics of interest for the summit include, but are not limited to:
- Digital fabrication
- Wearables, e-textiles, and fashion tech
- Quantified-self hardware
- Means of supporting collaboration and community interaction
- On demand and low volume manufacturing
- Distributed development and its relationship to physical goods
- Software design tools (CAD / CAM)
- DIY technology
- Ways of sharing
- Robotics
- Business models
- Competition and collaboration
- Sustainability of open hardware products (e.g. how to unmake things)
- Industrial design
- Open hardware in the enterprise
- Specific product domains: e.g. science, agriculture, communications, medicine
- Legal and intellectual property implications of open-source hardware
- Open hardware in education
- Addressing the gender imbalance or other types of under-representation in the open hardware community
- Art
- Life Hacking
For the 4th year, the Summit is offering up to ten Open Hardware Fellowships to members of the community which includes a $500 travel stipend:
The Ada Lovelace Fellowship was founded in 2013 prior to the annual Open Hardware Summit at MIT by Summit Chair Addie Wagenknecht and OSHWA Director Alicia Gibb as a way to encourage women, LGTBA+ and/or other minorities in open technology and culture to actively participate and foster a more diverse community within open source.
-
DTV Tuner Breakout for SDR
03/01/2017 at 09:15 • 0 commentsEric Brombaugh designed this breakout board for the Rafael Microelectronics R820T2 Advanced Digital TV Silicon Tuner chip:
R820T2 Breakout
This is the same chip used in most all of the RTL-SDR dongles, as well as the Airspy and numerous other radios. The chip is a versatile front-end with reasonable sensitivity and wide tuning range.
The design presented here is almost an exact implementation of the Mfg’s suggested demo design from the datasheet, implemented on the OSHpark 4-layer PCB process and provides a simple 4-pin interface with power, ground and I2C bus for controlling the tuner. A broad-band RF input and 10MHz IF output are provided on SMA connectors.
The breakout PCB design and STM32F0 firmware for the Rafael R820T2 tuner chip are shared on GitHub:
emeb/r820t2
emeb has shared project on OSH Park:
r820t2_breakout v0.1 -
ISL12022M RTC breakout board
02/28/2017 at 06:48 • 0 commentsFrom the Pluxx’s Magitech Golem Parts Emporium blog:
ISL12022M RTC breakout board
This is a breakout board for the Intersil ISL12022M real-time clock, with optional I²C pull-ups and a CR1225 backup battery. The circuit is based on the design recommended by Intersil, with a few tweaks. It’s the second board I’ve designed so far.
golemparts has shared the project on OSH Park:
ISL12022M RTC Breakout v1.0 A
-
eMMC to SD Card Adapter
02/16/2017 at 19:30 • 0 commentsFrom the Intelligent Toasters blog:
Retro CPC Dongle – Part 18
I’ve been working on, replacing the NAND raw flash with an eMMC chip on the CPC2.0 board.
I wrote about raw flash and the challenges of writing a flash translation later in part 16 of this series. After some research, I concluded that the eMMC interface looked exactly like the much more common SDCard interface, albeit that the interface can be run with an 8-bit width. SDCards are limited to 4 bits by the physical pin count. Taking a gamble I created a board to test this new eMMC chip. I created a fake SDCard!
This fake card allowed me to check very quickly if my assumptions were correct both at a hardware and a firmware level. I wanted to be sure that it was possible to interface the eMMC via 4 bits, rather than the full 8 bits and be sure the firmware instructions were the same between these two technologies.
Intelligent-Toasters has shared the board on OSH Park:
emmc.zip
-
SparkFun Rotary Encoder Breakout Board
02/16/2017 at 19:26 • 0 commentsI designed this simple breakout board in KiCad to make it easier to put a rotary encoder on a breadboard. The KiCad symbol and footprint for the SparkFun rotary encoder was created by mcous on GitHub. I used an updated version with corrected pin numbering.
Bill of Materials:
- SparkFun Rotary Encoder (COM-09117)
- 1x3 0.1" Male Header
- 1x2 0.1" Male Heade
The design files are available on GitHub:
pdp7/rotary-encoder-breakout
The board is shared on OSH Park:
SparkFun Rotary Encoder Breadboard Adapter -
KiCad at FOSDEM 2017
02/15/2017 at 18:49 • 0 commentsKiCad project leader Wayne Stambaugh talked at FOSDEM 2017 about KiCad’s current status and future roadmap:
KiCad Project Status
Wayne’s slides are available on Google Drive:
Tomasz Wlostowski of CERN talks about the SPICE integration that was added to KiCad in 2016:
Integrated Spice Simulation
Maciej Sumiński walked through the KiCad source code:
Diving into the KiCad source code
PDF of the slides is available for download:

-
Open Hardware Summit 2017 in Denver
02/13/2017 at 22:05 • 0 commentsThe Open Hardware Association announced today that the Open Hardware Summit 2017 will be in Denver on October 5th!

We hope to see you all there!
-
IceZero FPGA Board for Raspberry Pi
02/12/2017 at 13:05 • 1 commentBlack Mesa Labs created this board that adds a Lattice FPGA to a Raspberry Pi:
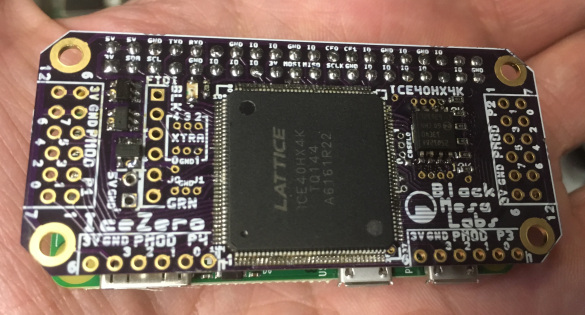
IceZero FPGA Board for RaspPi
BML has been very much enchanted with the Lattice FPGA boards for Raspberry Pi, IcoBoard , BlackIce and IceHat. The IceZero board is a BML creation that attempts to combine the best features of all 3 boards into a single design.
IceZero features common with other designs
- Fully Open-Source Hardware and Software Design.
- Lattice ICE40HX4K FPGA that supports Clifford Wolf’s Project IceStorm tool chain.
- Interfaces to Raspberry Pi 2×20 GPIO Header for both power and bus interfaces.
- PROM programmable directly from Rasp Pi, no JTAG programmer required.
- External SRAM, supporting soft CPU core designs ( code execution ).
- Extra large SPI PROM, supporting soft CPU core designs ( code storage ).
- Industry standard PMOD expansion headers
IceZero features that are BML specific
- Mesa Bus Protocol 32 MHz SPI link between CPU and FPGA.
- 2-Layer PCB design. Orderable via OSH-Park or Gerbers for Downloading.
- FTDI 1×6 USB Serial Cable header for use with PC instead of Pi ( or as a soft CPU debug Trace Port ).
- Single Pi UART plumbed to FPGA for muxing to multiple external serial devices.
BlackMesaLabs has shared the board on OSH Park:
bml_ice_zero_19_02.zip
BML IceZero Lattice ICE40 FPGA for RaspPi
-
Learn, Teach and Make with the Tinusaur
02/10/2017 at 21:02 • 1 comment@Neven Boyanov has launched a new Tinusaur campaign on IndieGoGo:
Learn, Teach and Make with the Tinusaur
Small microcontroller board that could run Arduino and help you learn, teach others and make thing

The Tinusaur is powered by the Atmel ATtiny85 microcontroller
We want to bring the cost down to $3 for the basic “lite” boards and allow more people to be able to get them.
-
Analog CPU Gauge
02/08/2017 at 07:37 • 1 comment@Adam Fabio created this analog gauge to show your computer’s CPU utilization:
Analog CPU Gauge
The goal of this project was to build an analog gauge to display computer CPU utilization. I’ve always been fond of classic analog gauges. Most CPU Gauges are either digital on screen displays, or implemented with an LCD mounted in a drive bay
The goal of this project was to build an analog gauge to display computer CPU utilization. I’ve always been fond of classic analog gauges. Most CPU Gauges are either digital on screen displays, or implemented with an LCD mounted in a drive bay.
I’d always wanted a CPU gauge for my computer. Ok, and a bandwidth gauge for my router. You name it, I want a nice analog gauge for it. It always seemed a bit silly to use an true galvanometer based analog gauge for signals that are inherently digital.
The board is available on Tindie:
Analog Gauge Stepper Breakout BoardTiny stepper motors for analog gauges and the like!
-
Cypress FX2LP High-Speed USB Controller
02/07/2017 at 18:54 • 0 comments@Yin Zhong designed this dev board for Cypress FX2LP microcontroller:
μ-68013: a High Speed USB2.0 MCU breakout
Cypress’s FX2LP (CY7C6801x) is one of the smallest footprint MCUs that offer a high-speed USB (480 Mbit/s) device peripheral with built-in PHY (many others lack the PHY!). It contains a 8051 core for bookkeeping and setting up data streams through its hardware multiplexed parallel FIFO interface to/from an external processor, be it MCU, DSP, or FPGA/CPLD.
This is a breadboard-friendly minimal system PCB for CY7C68013 in QFN56 package. It integrates 3.3 V power supply, core clock, reset circuit/button, and I2C EEPROM (the MCU does not have built-in flash). It breaks out all IO pins through 2 rows x 20 pins 0.1″ pitch headers with 0.7″ row spacing.summivox has shared the board on OSH Park:
20170112-0057 CY7C68013-v1.0.zip
-
VederPSU
02/03/2017 at 20:18 • 0 comments -
Super Swift for less in 2017
02/01/2017 at 22:52 • 0 commentsOur holiday special is here to stay – choose our fast-turn super swift service for only an additional $5/sqin!

2 Layer Super Swift Service
Need 2-layer boards in a hurry? Our Super Swift Service has the same quality you know and love, with an even faster turn time of 5 business days.
Pricing
In order to make the Super Swift Service more accessible to makers, hobbyists, and small businesses, we’ve reduced the price of the swift service from a flat fee per design to $10 per square inch, which includes three copies of your design. For the vast majority of orders, this should be a MUCH better deal.
For example, a 2 square inch board would cost $20 and you’d get three copies of your board. This includes our Free Shipping option, although expedited shipping options are available.
Turn Times
Orders are sent to fabrication daily, and will ship within 5 business days days.
You can get a quote, approve a design, and pay for an order at OSH Park.
Super Swift Service is not available for Medium Run or Four Layer orders.
As a special bonus, orders placed before 11AM US/Pacific on Monday will ship by Friday of that week.
90% of the time, orders placed before 11AM US/Pacific will ship in 3 business days, but we only guarantee 5 business day shipping.
Specs
- 6 mil minimum trace width
- 6 mil minimum trace spacing
- 13 mil minimum drill
- 7 mil annular ring
- PCB thickness of 1.6mm (.063”)
- 1oz copper on both sides (1.4mil, 35um)
Image source: Wikipedia
-
Wemos D1 Mini X-Pad Shield
02/01/2017 at 21:24 • 0 comments@Radomir Dopieralski designed this board to add buttons and a small joystick to the WeMos D1 Mini:
D1 Mini X-Pad Shield
This shield for the D1 Mini ESP8266-based development board adds a joystick and three buttons, so that you can implement menus or games on your device easily.
deshipu has shared the board on OSH Park:
D1 Mini X-Pad
-
How to include bitmap logos on silkscreen
01/31/2017 at 18:14 • 0 commentsWe advise generating logos with a dots per inch (DPI) of less than 400 and a corresponding pixel height of 2.5 mil to be sure the logo will be included and printed correctly.
Background
Eagle’s “import-bmp.ulp” script and other bitmap converters often render a logo as a very high-DPI image, consisting of thousands of tiny pixels. In many cases, the image is around 10,000 DPI, corresponding to pixels smaller than one mil in height.
Our process is not properly equipped to handle features of that size, so we cannot guarantee that they’ll be printed correctly on the final board. The maximum DPI we can correctly process is 500 DPI, corresponding to pixels of 2 mil or larger. Images at a higher DPI may be be printed on the board incorrectly, or omitted entirely. Due to the complexities of bitmaps through fabrication, we advise keeping images to a DPI of under 400 and a corresponding pixel height of 2.5 mil.
If the imported bitmaps fails to appear on the website, or no silkscreen appears at all, then look below for possible resolutions. If you’ve verified that your board is under 500 DPI (preferably under 400), then try uploading the gerber files. Eagle can be very slow to render complex images, which results in our server giving up on that layer.
Note for other design tools
While this guide is geared toward Eagle, the general principles apply equally to any other bitmap converters. In some cases, the design tool may not be particularly helpful in detecting these errors. In those cases, we suggest using GerbV to examine the gerber files for possible line width and polygon height issues.
Detecting problems inside Eagle
After importing an image, you’ll want to select the Move tool, then right click on one of the imported objects, and select the Properties option.
Inside the Properties window, you’ll see the Height. Since the fab can operate at up to 500 DPI, the corresponding Height property would be 2 mil or larger. If you have a Height of less than 2 mil, then the imported image may not work correctly.
Correcting the issue inside Eagle:
There are several methods of correcting the issue inside Eagle, and the ideal method depends on the complexity of the image, the source format, and the importance of the image being printed correctly.
Option 1: Ignore the issue, and submit the gerbers.
If the image is non-critical, or the other methods seem too complicated, this is usually an acceptable solution. While we cannot guarantee high-DPI bitmaps will be printed correctly, the fabs usually will print them correctly. However, if you’re unlucky, then the image might be partially printed, or omitted entirely.
For this option, it’s advised to generate your own gerbers instead of submitting the BRD file. Eagle can be very slow to render imported bitmaps, and our server may time out and result in an error message or a missing layer.
Option 2: Trace the image using the built in tools.
This is the option suggested by Eagle when you first run the Import Bitmap script, and is typically easy to do on simplistic images and text.
Using the Wire, and Polygon tools, trace the image using the imported layers as a reference. Note, that due to how Eagle generates Polygons, you’ll want to set the Width property of any Polygons to 2 or 3 mils. If the Width property is lower than 2 mil, then Eagle will produce the same problematic gerbers that you’re trying to avoid.
For reference, the following text contains the suggestions from the import-BMP script.
This ULP generates a SCRIPT file that draws rectangles of successional pixels with identical color.
Read more
These rectangles serve as templates in order to draw the image with EAGLE commands like POLYGON, WIRE, CIRCLE, TEXT.
Please note: If the generated rectangles are smaller than the half of the resolution of the output device, (depending on the scale factor: screen: pixel, printer: diameter of the laser beam or ink jet dropplet), it is not possible to display the result. Therefore use the EAGLE commands mentioned above to reduce... -
Making a USB DAC and Headphone Amp
01/30/2017 at 17:47 • 0 commentsYin Zhong designed this solution to use high-end studio headphones with his computer:
Making Myself a USB DAC + Headphone Amp
I need a DAC for my AKG K702. However, the more I looked at commercially available a.k.a. “audiophile” products, the more snake oil I smell. So even before I ordered my CEntrance DACPort Slim, I was already looking into how I can reinventing the wheel
I use OSHPark for prototyping PCBs. I decided to use their 4-layer FR-408 stackup simply for an un-broken ground layer. Turns out that the analog signals can easily fit on the top layer, so I allocated the power layer to the negative rail, and the bottom layer to positive rails.
The DAC + Filter module works! It produces reasonably clean line-level audio signal as expected.
-
Protosnap
01/27/2017 at 19:48 • 0 commentsWe’re huge fans of Sparkfun’s old school ProtoSnap kits. These include a small support tab with traces running between different sections of the board. They’re great for kit designs, allowing for both immediate out-of-box functionality, and eventual customization.
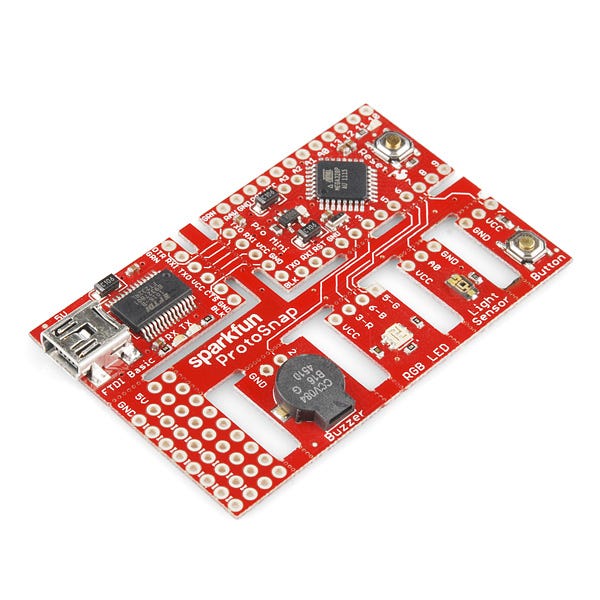
Due to our shipping and panelization process, this type of board is not fully supported, but can be fabricated with careful consideration and experimentation.
Design Considerations
These designs are almost always unique, since the number of shapes, sizes, and orientation varies wildly. The design also may need adjusting based on the intended user.
in orientation, intended usage, and shape. As a result, a bit of experimentation is always going to be required. However, here’s a few design tips to get things going.
- Always ensure that after snapping, you can connect the boards together easily. A small header pinout near the tab works most of the time, but some designs might work best with a special connector.
- Tab width is critical. If the tab is too narrow, it will not hold the board together well. Too wide, and it becomes difficult to break apart. 3–5 trace/hole pairs works best.
- Hole size / pitch. The best tabs have between 20–30 mil of material between the holes. A hole size of 25 mil generates pretty good tabs.
- Design permitting, having multiple tabs with 2–3 holes is better than one huge tab with 6 or more connections.
- Adding traces on both top and bottom of a tab is likely to result in difficult snapping. Consider instead using more tabs, or adding instructions to score the traces.
- Tab and board placement: Remember that your users has to remove these! If the boards are badly positioned, the tabs aren’t “snapped” as much as they are “twisted”. This can result in unusual failures.
Designing for Failures
Since these typically are for kits, the most likely failure that will occur is a pulled up trace. This is when the trace on the two boards doesn’t break, and starts pulling up traces inside your layout. Not good. Fortunately, the design can account for this in several ways.
Any of these techniques will generate a “stress concentration point” for a pulled up trace. This will cause a the trace to tear in a well-defined place, ensuring that it won’t affect your board.
The simplest one simply having vias near the tab, as seen on the sparkfun board above. A ripped up trace will usually break at the edge of the via pad.
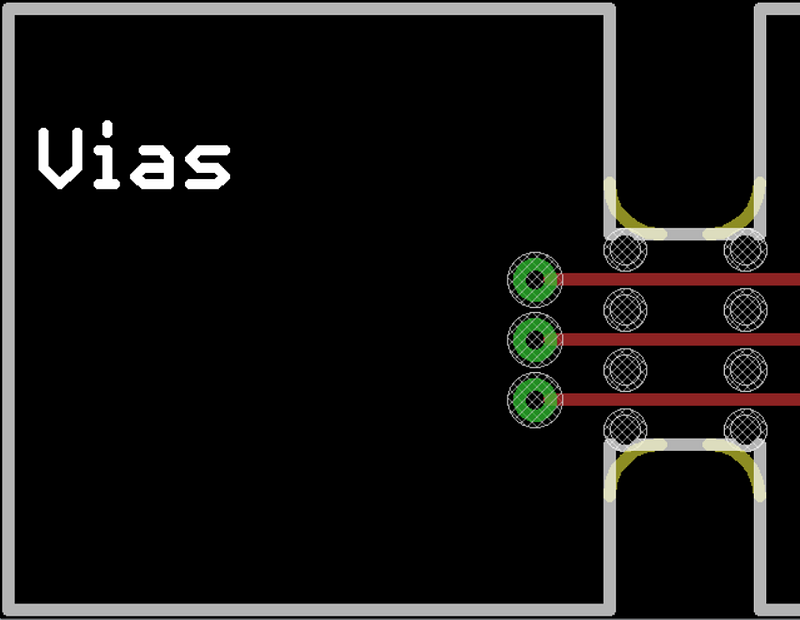
Another option is to actually narrow the trace near the board edge. This takes up less space than a via, but still provides a good weak point in a desirable location. However, make sure you don’t go too far below the design rules!
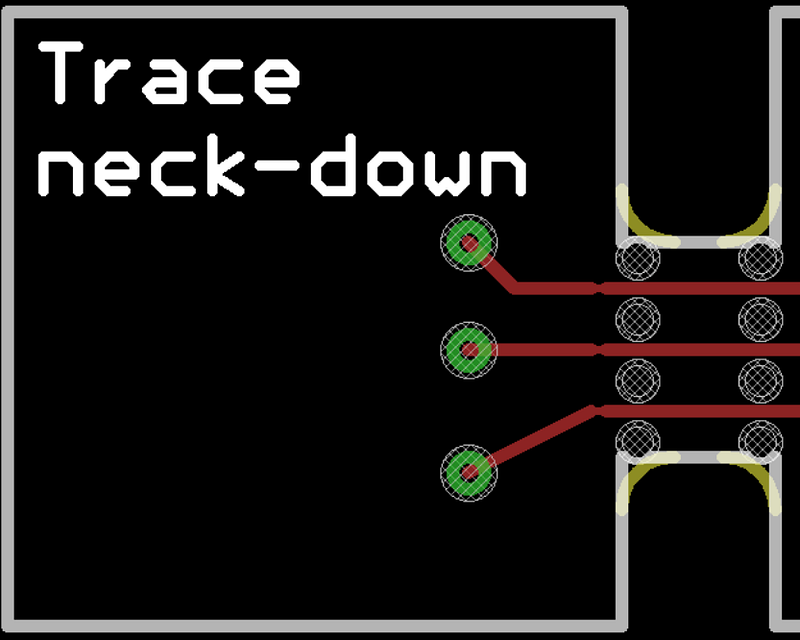
The last option is less ideal, but may suit certain layouts. Simply jog the trace, creating a 90* bend or two.
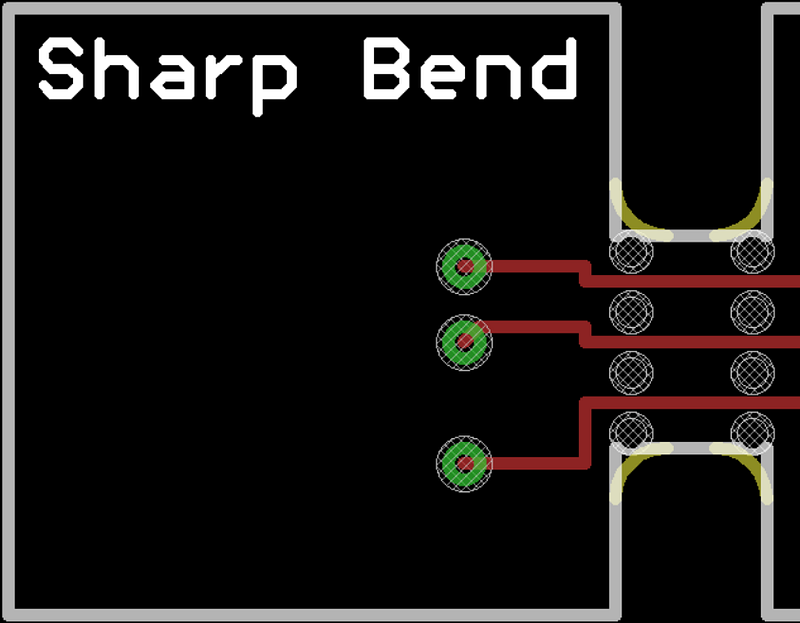
Indicating on the design
Here’s the measurements on our typical support tabs. Your design may require different configurations, so these are a rough guideline.
Typical tabs have the following features
- 20–25 mil drill hits
- 20–25 mil between the edge of the drilled holes
- roughly a 40 mil drill pitch
- 2–5 holes per tab (3–4 recommended)
- Holes tangent to the original board outlines
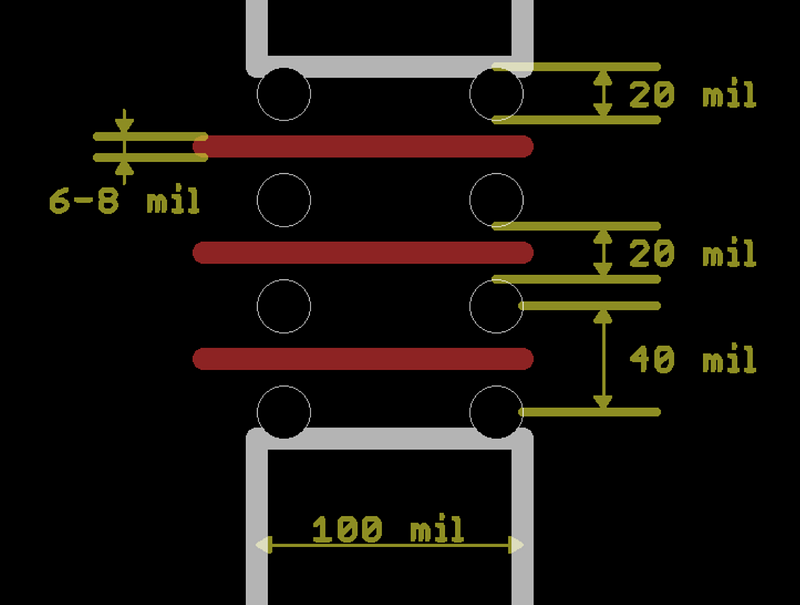
Note, the milling tool will add a 34 mil corner radius on the tabs. As a result, you can place the outermost holes tangent to the tab edge.
Failure modes (and how to cope)
- Pulled up traces? Need to add a break closer to the edge, or score the board before snapping. Try to handle this on a design revision before a full kit.
See our Tips and Tricks page for more
-
thingSoC "Grovey" on Crowd Supply
01/26/2017 at 20:22 • 0 commentsthingSoC is an Open Source socket system for IoT development and has just launched a new Crowdy Supply campaign:
thingSoC “Grovey”
Build any IoT or Networked device you can imagine!
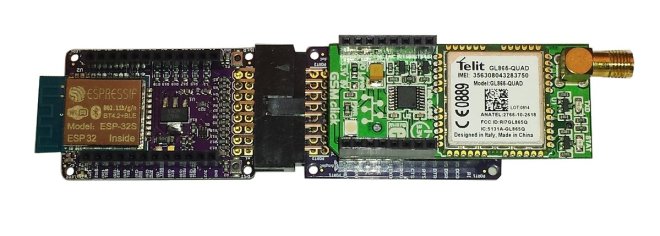
The thingSoC Grovey! platform gives you the freedom to choose from hundreds of existing sensors, actuators, and radios to quickly create new electronic systems, in plug together configurations that were not possible before. Easily mix together different CPUs, Radios, and Peripherals, like Servos, Motors, Relays, Sound and Lights, and then program them in your choice of Integrated Development Environments (IDE).
The thingSoC Grovey! series combines access to the Seeedstudio Grove system, and the Mikrobus “Click” system, to give you the widest selection of radios, sensors, and actuators available today.
The thingSoC Grovey Series files are available on GitHub:
- TSOC_Teensy3x: Teensy3.x Adapter for the Grove System
- TSOC_GROVEY_ONE: Model “Uno” Arduino Clone for the Grove System
- TSOC_GROVEY_FOUR: Model “Four” PSoC4 mini for the Grove System
- TSOC_GROVEY_WIFI: ESP8266 Wi-Fi Adapter for the Grove System
- TSOC_GROVEY_I2CHUB: I2C Hub/Switch for the Grove System
- TSOC_GROVEY_GPIO: SX1509 GPIO for the Grove System
- TSOC_GROVEY_UART: USB to UART for the Grove System
-
Normal schedule during Lunar New Year 2017
01/25/2017 at 20:10 • 5 comments All of our boards are manufactured in the United States and we
 Shipping Information and Turnaround Times
There are two periods of time to think about when making your order:
- Fabrication time between when you place your order and when we receive boards from the fab.
- Shipping time between when we ship and when the post office delivers your order to you.
-
iceRadio Software Defined Radio (SDR) board
01/24/2017 at 23:46 • 0 commentsFrom the Hackaday blog:
Ice, Ice, Radio Uses FPGA
Building a software defined radio (SDR) involves many trades offs. But one of the most fundamental is should you use an FPGA or a CPU to do the processing. Of course, if you are piping data to a PC, the answer is probably a CPU. But if you are doing the whole system, it is a vexing choice.
The FPGA can handle lots of data all at one time but is somewhat more difficult to develop and modify. CPUs using software are flexible–especially for coding user interfaces, networking connections, and the like) but don’t always have enough horsepower to cope with signal processing tasks (and, yes, it depends on the CPU).
[Eric Brombaugh] sidestepped that trade off. He used a board with both an ARM processor and an ICE FPGA at the heart of his SDR design. He uses three custom boards: one is the CPU/FPGA board, another is a 10-bit converter that can sample at 40 MSPS (sufficient to decode to 20 MHz), and an I2S DAC to produce audio. Each board has its own page linked from the main project.Z
The iceRadio project page has additional details:
- RXADC Board – 40MSPS 10-bit ADC for capturing HF-band RF signals.
- STM32F303 and ice5 Board – MCU and FPGA which implement the digital receiver.
- I2S DAC PMOD – Used for stereo audio output of demodulated signals.
Design files and source code are available on GitHub:
emeb/iceRadio
-
Surface-Mount Edge Connectors
01/24/2017 at 02:28 • 0 commentsFacelessTech designed this small board to act as a surface-mount edge connector:
SMD edge connectors
So you want to joint two boards together, You decide to use through hole female and male 2.54 pitch headers. Normally you would use through hole than ether have a 90 degree headers or just bend them over. For years this is how I did it, I would have to make sure I made sure the holes were just the right distance from the edge of the board.
The KiCad design files are available on GitHub:
facelessloser/smd_edge_connectors
-
Tiny SCSI Emulator
01/21/2017 at 00:58 • 0 comments@David Kuder designed a SCSI device emulator with a Teensy 3.5 & NCR 5380:
Tiny SCSI Emulator
SCSI target emulator based on the Teensy 3.5 (Kinetis MK64FX MCU) and classic NCR 5380 SCSI PHY. Supports multiple targets (Device IDs), LUNs, and device types. 3.2″ x 1.6″ footprint, optionally uses or provides bus termination power. 64×48 pixel OLED status display.
The design files and source code are available on BitBucket:
tinyscsiemulator
-
Tiny CW Capacitive Touch Paddle
01/18/2017 at 18:12 • 0 commentsEdgar implemented capacitive touch sensing using an ATTiny4 to create a touch paddle for Morse code:
Tiny CW Capacitive Touch Paddle
Like many no-code operators, after being on the air for a while, I developed an interest and appreciation for Morse Code [..] I purchased a cheap paddle, but I found the clicking noise a little bit annoying.
The goal of this project was to create a single PCB with an ATTiny4 AVR, a battery, transistors and a 3.5mm connector jack. The paddle is designed to have exposed conductive material in order to read the capacitive touch.
The under 1kB binary code worked well and without error. This made me wonder how small I could make this code. After optimizing the code, I managed to shrink it to under 512 bytes.
-
Mocking your board to minimize risk
01/17/2017 at 18:10 • 3 commentsFrom the Rebooting Electronics blog:
 “Mocking” – Minimising Risk
The goal is to have as few spins of the board as possible and the process of mocking the board was a huge help
-
Upgrade for cheap TP4056 Li-Ion charger board
01/14/2017 at 02:04 • 0 comments@Robert designed this upgrade for a cheap TP4056 Li-Ion charger board:
 TP4056 3V3 load share addon board
I wanted to have a load sharing for my future battery operated project with the ability to charge the battery. There is a load of cheap TP4056 boards from China. None of them has the load sharing or voltage regulator on board so I made my own addon board.
Smrtokvitek has shared the board on OSH Park:
3V3 load share for TP4056 v1.1
-
Upgrade for cheap TP4056 Li-Ion charger board
01/14/2017 at 02:04 • 0 comments@Robert designed this upgrade for a cheap TP4056 Li-Ion charger board:
 TP4056 3V3 load share addon board
I wanted to have a load sharing for my future battery operated project with the ability to charge the battery. There is a load of cheap TP4056 boards from China. None of them has the load sharing or voltage regulator on board so I made my own addon board.
Smrtokvitek has shared the board on OSH Park:
3V3 load share for TP4056 v1.1
-
USB-to-1-wire Interface
01/12/2017 at 19:32 • 0 commentsAlan Mitchell designed this board to interface 1-wire sensors to a Raspberry Pi computer:
USB-to-1-wire Interface
This board is part of Alan’s Raspberry Pi data collection system:
Mini-Monitor
The Mini-Monitor software is data acquisition software that runs on a Raspberry Pi computer. It is designed to post the collected data to the BMON web-based sensor reading database and analysis software, but the software can be modified to post to other Internet databases. The Mini-Monitor software has the ability to collect data from a number of different sources
-
Virtual Ground
01/11/2017 at 19:07 • 0 commentsJakub Polonský of Kaktus Circuits designed this linear virtual ground with OPA548:
Virtual Ground
Virtual ground, also called “rail-splitter”, is a device that creates a midpoint, whose voltage is (plus + minus)/2 and is capable of both sinking and sourcing current.
kaktus has shared the board on OSH Park:
Virtual ground 3.1
-
Quad Voltage Reference
01/10/2017 at 20:20 • 0 commentsBarbouri has updated his voltage reference board design:
Quad Voltage Reference
This is my version 2 board update, which incorporates supply voltage regulation, over-current protection, and trimmer for the 5.000 volt reference all on the same board.
The new board uses a LM2937IMPX-10, which is a positive linear voltage regulator IC with a 10V output at 400mA in a SOT-223-4 package.
Barbouri has shared project the project on OSH Park:
Vref-4 Version 2.0 ext Pwr

-
Convert Inkscape SVG drawings to KiCad footprints
01/09/2017 at 21:15 • 0 commentsThanks to facelesstech for tweeting this design tip:
svg2mod by mtl is a small program to convert Inkscape SVG drawings to KiCad footprint module files:

SVG graphics in KiCad (svg2mod)
There didn’t seem to be a good way to get vector graphics into Pcbnew, so I wrote a small utility that uses an existing SVG library to read files, and then writes them out as KiCad modules.
The project is hosted on GitHub:
mtl/svg2mod
It uses cjlano’s python SVG parser and drawing module to interpret drawings and approximate curves using straight line segments. Module files can be output in KiCad’s legacy or s-expression (i.e., pretty) formats. Horizontally mirrored modules are automatically generated for use on the back of a 2-layer PCB.
-
GlowSaber
01/06/2017 at 18:46 • 0 commentsCarlos Vadillo and Bx Dawes created the GlowSaber project to help kids in Alameda learn about physics, engineering and programming:
Building the GlowSaber main board
All the logic, sound and light effects of the GlowSaber are performed by a small microprocessor board. In this tutorial I will explain, step by step how to put together the main board of a GlowSaber.
One premise that I had while designing the GlowSaber was that I should be able to build all of it with tools that I already have. That limited the materials I could choose to those that I could cut, drill and glue with just the basic tools:
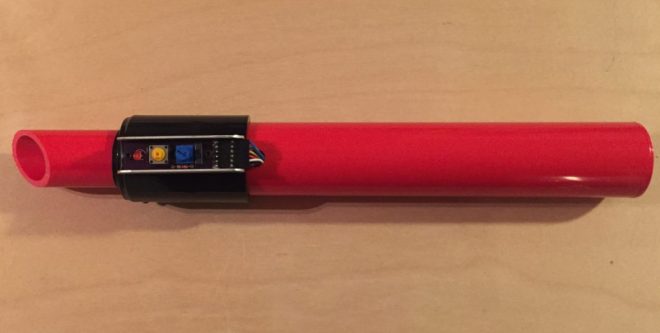
The GlowSaber uses a Vollong 3 watts RGB LED. It is very bright and more than enough to light the length of the blade. When designing the GlowSaber I found that I needed a way to connect the LED to the main PCB and I designed a LED break out
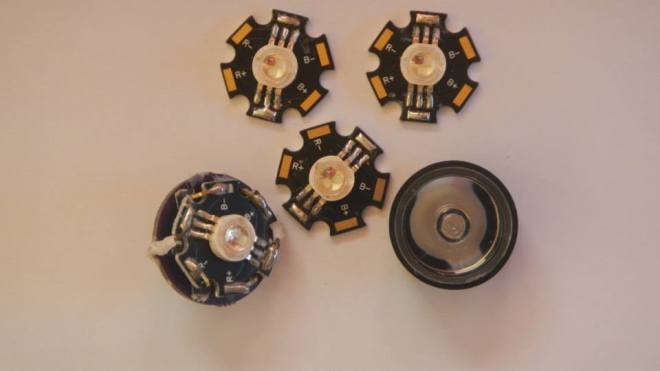
How to use a potentiometer to change the behavior
The GlowSaber has a switch assembly, that controls the on/off functions. It also has a LED to show that the GlowSaber is ready to start, and finally has a small 1 kΩ potentiometer. The following is a schematic of the switch assembly:
cvadillo has shared the board on OSH Park:
GlowSaber -
Tilt activated LED watch
01/05/2017 at 14:55 • 0 comments@askoog89 saw a major flaw with many LED watches – you have to press a button to see the time:
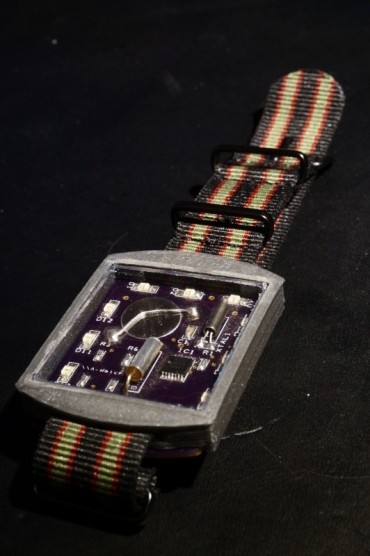
A Watch
I tried fix that problem by using a tilt switch to active the LED showing the time when tilt your arm to look at the watch
The watch uses the low power MSP430G2211 MCU from Texas instruments to control the LED and mesure the time with the help of a 32kHz watch cristal. The MCU sleeps most of the time only waking up ones a second to count up the time and check if the tilt switch is active. To show the time the watch uses 12 charlieplexed orange LEDs.
-
GPS Clock by Nick Sayer
01/04/2017 at 18:27 • 0 comments@Nick Sayer created this simple desk clock that gets time from GPS:
GPS Clock
GPS is best known as a ubiquitous, accurate poitioning system (obvious from the name), but the way it actually works requires distributing hyper-accurate time information. This makes it possible (and, actually, pretty easy) to make a clock that you never have to set as long as it gets good GPS reception.
Yes, this is way overkill… but GPS is getting so cheap that you might as well. The source code is available on GitHub:
nsayer/GPS_clock
Nick has hacked together a tenth digit for the clock:
Here is a video of the GPS clock in slow motion:
-
Acrylic Solenoid Engine
01/04/2017 at 05:44 • 0 commentsExtreme Electronics designed this easy-to-build solenoid engine:
Acrylic Solenoid Engine
I’ve always loved solenoid engines. The first one I built was many,many years ago out of Mechano. Many others have followed since, But they always ran badly and only for a short while as the accuracy of the construction medium was poor. I am not a metal worker, making a “proper” engine out of cast pieces is out of my (and many other peoples) capabilities.
With modern laser cutting it is easy to make accurate components, it is relatively cheap and fairly quick.
So the Acrylic Solenoid Engine came into beingThe initial driver is using a small PIC 12F675 and and an IR detector to give me pulse timing information from the solenoid. I went the IR sensor route rather than a mechanical switch so there was no rubbing parts that could wear as acrylic is rather soft. To get a good timing signal aluminum foil is placed on one side of the flywheel to give a good reflection back to the IR emitter receiver pair on the PCB.
-
Drinkro the Synchro Bartender
12/31/2016 at 19:34 • 0 commentsSynchro Labs created this project to demonstrate the use of the Synchro mobile app platform with custom hardware:
Drinkro Cocktail Robot
based on a Raspberry Pi 3 Model B and a custom-designed hardware board used to control four DC liquid peristaltic pump motors using two L293D dual H-bridge ICs
Hardware design files are available on GitHub:
SynchroLabs/DrinkroHardware
Video of Drinkro in action:
-
Arduino-programmable ARM Cortex M4F Boards
12/30/2016 at 21:05 • 0 comments@Kris Winer of Pesky Products designed these easy-to-program, high-performance and low-power dev boards:
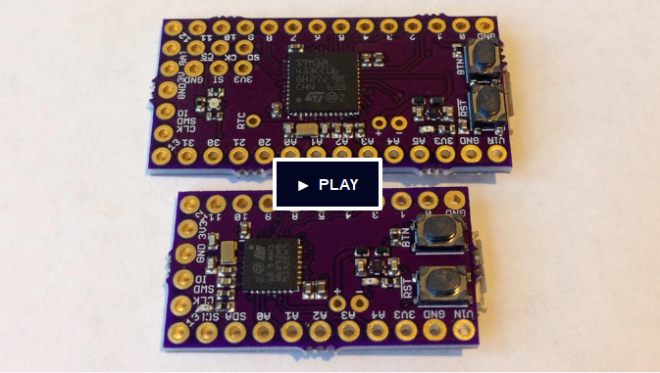 Arduino-programmable Cortex M4F Development Boards
Program an STM32L4 Cortex M4F with the Arduino IDE via USB
Technical specifications of the Butterfly and Ladybug STM32L4 dev boards:
- Microcontroller: STM32L4 ARM Cortex M4F
- Clock speed: 1, 2, 4, 8, 16, 24, 32, 48, 64, 80 MHz
- Operating voltage: 3.3V
- I/O pin limits: most pins 5.0 V tolerant, 20 mA
- Digital I/O pins: 22, with 11 PWM (Butterfly), 13, with 10 PWM (Ladybug)
- Analog input pins: 6 (Butterfly), 5 (Ladybug), 12-bit ADC channels
- Analog output pins: 2 12-bit DAC
- RTC: 1 ppm accuracy
- Flash memory: 256 KB
- SRAM: 64 KB
- Voltage regulator: 3.3-5.5V input / 3.3V, 150 mA output
New Butterfly and Ladybug add-on boardsTo the left is an MPU9250 accel/gyro/magnetometer motion sensor and the BME280 pressure/humidity/temperature sensor
To the right is an ESP8266 wifi-enabled add-on board for Butterfly
Ladybug environmental data loggerReading the BME280 and VEML6040 sensors at 0.5 Hz and outputting pressure, temperature, humidity, altitude, RGB light intensity and RTC time and date to the Sharp memory display
Simple designs make hardware customization easyFlight Controller:
STM32L432 receives quaternions from the EM7180, which itself is master to the motion and pressure sensors, GNSS data from the CAM M8Q, then processes and packages the data and sends it to the ESP8285 via UART bridge for transmission to a hand-held controller
Industrial Diagnostics:
uses an STM32L433 as master to several slave sensors to detect and process signals from industrial equipment and report to a remote server via blue tooth
-
Open-V and YoPuzzle at RISC-V Workshop
12/30/2016 at 01:30 • 0 commentsElkim Roa of OnchipUIS presented recently at the 5th RISC-V Workshop on the latest news of the Open-V open silicon microcontroller and their YoPuzzle educational platform:
YoPuzzle: A mRISC V development platform for next generationsSlides from the his talk:

Live Demos Over the Internet
You can now program real Open-V dev boards from anywhere in the world and see the results on a live video feed! Here’s our first demo – blinking the dev board LEDs.
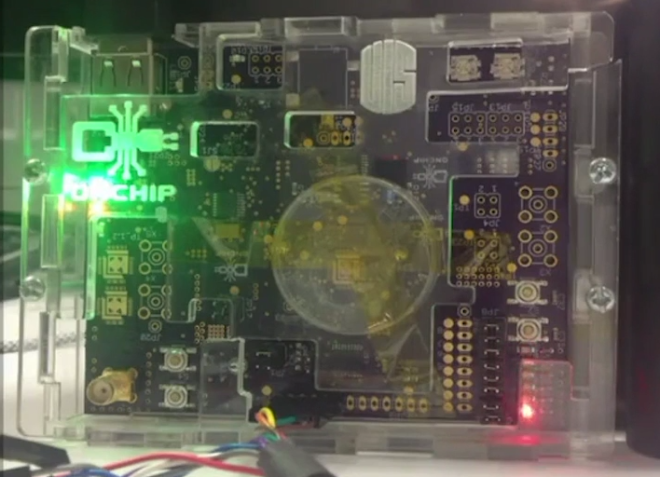 Go to http://onchip.uis.edu/ to remotely program the demo board:
 -
Electro Pet plays Santa
12/23/2016 at 21:12 • 0 commentsElectro_pet by Facelesstech
I got inspiration for this project from the petduino. The petduino is a great project to get kids into coding and electronics. I thought I would have a go and see if I could add some more features to it. Also my daughter was really interested in the 8×8 led matrix
Hardware walkthrough video:
Video of Santa hat and breathalyzer hat for the Electro Pet:
Design files and source code are available on GitHub:
facelessloser/electro_pet
facelessloser has shared boards on OSH Park:
electro_pet
santa_hat_rev_b
-
Black Mesa Labs: Logic Analyzer for $22
12/21/2016 at 18:29 • 0 commentsSUMP2 – 96 MSPS Logic Analyzer for $22
Black Mesa Labs has an ongoing mission to develop easy to use and fully capable open-source hardware and software tools that make engineering electronics easier
Video of SUMP2 logic analyzer:
BlackMesaLabs has shared an adapter board on OSH Park:
sump2_5vto3v_dip_01.zip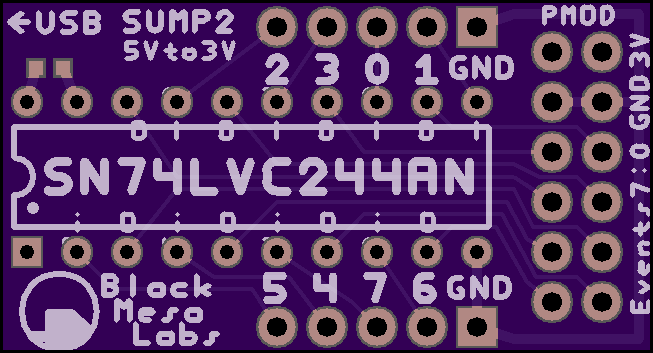
5V Input Adapter for the $22 SUMP2 iCEstick 96 MSPS LogicAnalyzer
-
WiFi Security Swiss Army Knife
12/21/2016 at 00:12 • 0 comments@Daniel Grießhaber created this convenient tool to test your WiFi Security against attackers:
ESPTool
Demonstrate how easy it is to crack a WiFi Password or jam your WiFi so you can’t access the internet. Designed for education and self-tests.
ESPTool has the following hardware:
- SSD1306 based OLED Display, connected via I2C
- microSD Card Socket connected over the SPI interface
- 3 general purpose buttons
- ESP8266-12E Module
- TPS63031 Buck-/Boost-Converter with an input range from 1.8V – 5.5V
- MCP73831 Single-Cell LiPo Charger Chip
- CP2012 USB to UART converter Chip
The design files and source code are available on GitHub:
dangrie158/ESPTool
-
reDOT: Tiny 5x7 LED Matrix
12/19/2016 at 23:51 • 0 comments -
I2C Temperature Sensor Board
12/16/2016 at 18:51 • 0 commentsnickjkl created this breakout board to free up some breadboard space:
I2C temperature sensor board
contains two I2C temperature sensors: a TC74 and a DS1631 because only one temperature sensor is never enough
KiCad design files and MSP430 Energia sketch example are available on GitHub:
nickjkl/I2CTempsensor
-
MIDI2DMX: control DJ lighting with MIDI
12/16/2016 at 01:05 • 0 commentsJesse Mejia developed this project to control DJ lights and LEDs from any software or hardware that can transmit MIDI:
MIDI2DMX
Teensy driven DJ light and LED control via MIDI
The design files and source code are available on GitHub:
jmej/MIDI2DMX
Here it is in action:
-
Super Swift Holiday Special
12/15/2016 at 01:38 • 0 commentsWe’re offering our fast-turn super swift service for only an additional $5/sqin until New Year’s!

2 Layer Super Swift Service
Need 2-layer boards in a hurry? Our Super Swift Service has the same quality you know and love, with an even faster turn time of 5 business days.
Pricing
Happy Holidays! Until Jan 1st, we’re reducing the price of to $10 per square inch, which includes three copies of your design.
For example, a 2 square inch board would cost $20 and you’d get three copies of your board. This includes our Free Shipping option, although expedited shipping options are available.
Starting Jan 1st, the price will return to the normal rate of $89 + $5 per square inch.
Turn Times
Orders are sent to fabrication daily, and will ship within 5 business days days.
You can get a quote, approve a design, and pay for an order at OSH Park.
Super Swift Service is not available for Medium Run or Four Layer orders.
As a special bonus, orders placed before 11AM on Monday will ship by Friday of that week.
Note for international orders: In most cases, it will cost less and arrive faster if you order on the standard 2 layer service with expedited shipping.
2 Layer Specs
- 6 mil minimum trace width
- 6 mil minimum trace spacing
- 13 mil minimum drill
- 7 mil annular ring
- PCB thickness of 1.6mm (.063”)
- 1oz copper on both sides (1.4mil, 35um)
-
Raspberry Pi IR receiver + IR transmitter + RTC
12/10/2016 at 03:40 • 0 commentsCombo board for the Raspberry Pi with IR receiver and transmitter along with Real-Time Clock and coin cell battery:
Raspberry Pi IR receiver + IR transmitter + RTCI needed an IR receiver for my Raspberry Pi which I use as an internet TV receiver [..] Solution: make my own.
kentauta has shared the board on OSH Park:
Raspberry Pi IR receiver + IR transmitter + RTC -
Smart Racer: control RC car from your smartphone
12/07/2016 at 21:18 • 0 commentsSarunas designed this RC receiver replacement which uses a smart phone as remote controller via WiFi or Bluetooth:
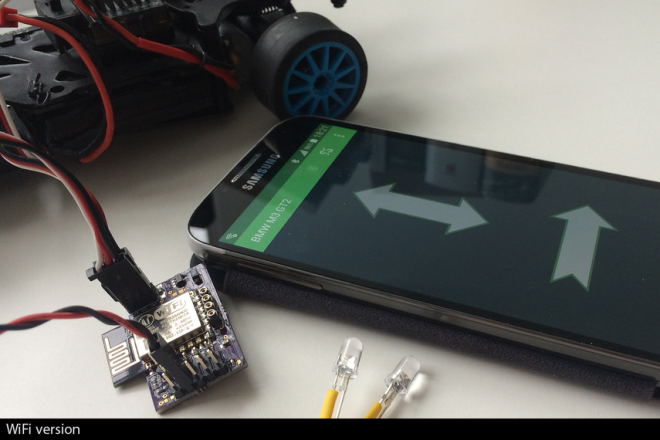 Smart Racer
Why not control your RC car with smart phone?
Features include:
- Control RC car from Android phone or iPhone
- Control RC servo and ESC
- Control 5 Leds
- Drive RC car up to 70m away
- Drives Brushed and Brushless motors
- Works with 1:10 and 1:18 models
- Powered directly from ESC power
- Control using REST API
- Connection lost cut off
The design files and source code are available on GitHub:
drme/ble-rc
Here’s the Smart Racer in action:
-
Parallel port interface for FPGA board
12/05/2016 at 23:16 • 0 commentsMachinekit is a platform for machine control applications. It is based on LinuxCNC and can drive mills, lathes, 3D printers, laser cutters and more.
Machinekit can run on an Altera SoC which combines a hard silicon ARM core with a FPGA. Charles Steinkuehler has been working with the DE0-Nano development board from Terasic. MachineKit runs on the ARM core with the FPGA configured as a MesaNet card:
DE0-Nano_Soc and the DB25 interface board
Charles designed a DB25 connected interface board, with pin-outs matching the P2 and P3 headers on a 5i25
cdsteinkuehler has shared the board on OSH Park:
DE0-Nano_DB25 V1.0
Mesanet DB25 daughter-card adapter for Terasic DE0-Nano development board
-
Christmas Tree ornament
12/03/2016 at 01:29 • 1 comment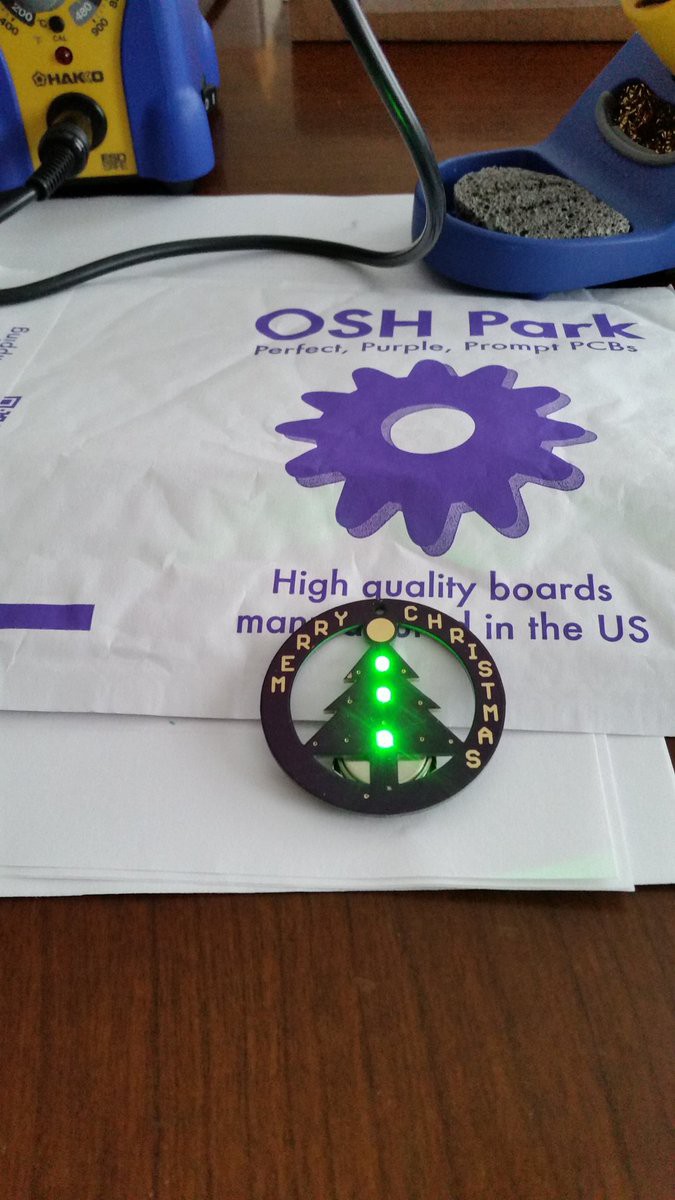
We were excited to see this tweet from Josh Talbot (@sparkineer):
Merry Christmas ornament! Thanks #oshpark. Design files at https://bitbucket.org/sparkineer/pcb-tree-ornament …
1:17 PM - 2 Dec 2016The EAGLE design files are shared on BitBucket:
PCB Tree Ornament
The board has been shared on OSH Park:
Merry Christmas ornament

-
Hardware Happy Hour in Chicago
12/01/2016 at 00:50 • 6 commentsThe first meeting of Hardware Happy Hour (3H) Chicago is Tuesday, December 6th, with @Chris Gammell of The Amp Hour and Contextual Electronics. Our Drew Fustini will be there along with Andrew Sowa and many more:
First 3H Chicago Event!
Tuesday, Dec 6, 2016, 6:30 PM
Haymarket, 737 W Randolph St, Chicago, IL
This group is based upon the idea that you are interested in hanging out and discussing hardware. So we’re having our first meetup! Please bring a piece of hardware to show off or talk about. Are you interested in hardware, but you haven’t built anything yet? Show off software you have built! Or come prepared to talk about the projects you want to...
-
BFuse: Electronic Fuse for Breadboard
11/30/2016 at 20:37 • 0 commentsJakub Polonský created this solution to make breadboard prototyping safer for components:
BFuse – Electronic Fuse for Breadboardadjustable and programmable electronic fuse especially designed for breadboards – a breadboard fuse, or BFuse
The trip current can be set from 50 mA to 1 A but it can measure current up to 6 A [..] It has reverse polarity protection (by P-FET), transient voltage suppressors both on its input and output and two LEDs for indication
Set current and actual current can be compared using ATTiny’s built-in comparator or sampled by the ATTiny’s ADC. Then, the microprocessor controls a P-FET switch that opens or closes the power supply
-
Low power Arduino Pro Mini board
11/24/2016 at 01:14 • 0 comments @Max.Kcreated this Arduino Pro Mini compatible development board for low power applications:
LP Mini
ideal for data logging over extended periods of time [..] can run for months or even years on a coin cell
Hardware- Microcontroller: Atmega328p with Arduino bootloader
- Real Time Clock: MCP79410
- Voltage Regulator: MCP1700
- FDN340P MOSFET
- 2.8 µA current consumption in sleep mode
- Compatible to the Arduino Pro Mini (except for pin 2 and 10)
- A real time clock keeps the time and is used to wake the Atmega from sleep mode
- Sleep current is reduced by using a more efficient voltage regulator
- A simple Mosfet is used to turn external devices on and off if the IO pins cannot provide enough current
-
The First Open Source RISC-V Microcontroller
11/23/2016 at 05:46 • 0 comments
Hackaday reports that OnChip launched a Crowd Supply campaign:
mRISC-V: The First Open Source RISC-V Microcontroller
Now, this is finally changing. OnChip, a startup from a group of doctoral students at the Universidad Industrial de Santander in Colombia, have been working on mRISC-V, an open 32-bit microcontroller based on the RISC-V instruction set [..]
Open-V Chip Specifications
- Package
- QFN-32
- No other packages are planned for the first run
- Processor
- RISC-V ISA version 2.1
- 1.2 V operation
- Memory
- 8 KB SRAM
- Clock
- 32 KHz – 160 MHz
- Two PLLs, user-tunable with muxers and frequency dividers
- includes all clocking and bias circuitry
- Analog Signals
- Two 10-bit ADC channels, each running at up to 10 MS/s
- Two 12-bit DAC channels
- Timers
- One general-purpose 16-bit timer
- One 16-bit watch dog timer (WDT)
- General Purpose Input/Ouput
- 16 programmable GPIO pins
- two external interrupts
- Interfaces
- SDIO port (e.g., microSD)
- Two SPI ports
- I2C
- UART
- Programming and Testing
- Built-in debug module for use with gdb and JTAG
- Programmable PRBS-31/15/7 generator and checker for interconnect testing
- Compatible with the Arduino IDE
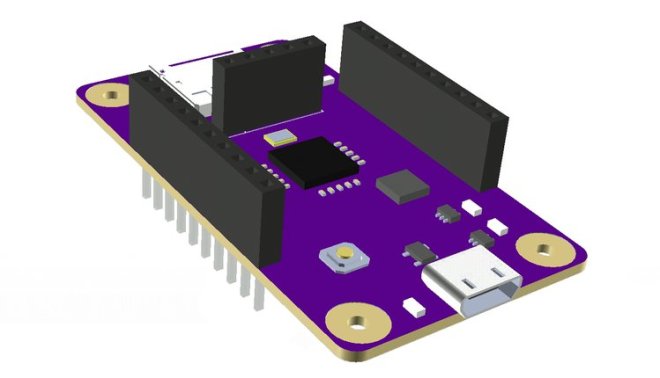
Open-V Dev Board Specifications
The dev board comes completely assembled.
- USB 2.0 controller
- 1.2 V and 3.3 V voltage regulators
- Clock reference
- Breadboard-compatible breakout header pins
- microSD receptacle
- Micro USB connector (power and data)
- JTAG connector
- 32 KB EEPROM
- 32-pin QFN Open-V microcontroller
- Dimensions: 55 mm x 30 mm (excluding USB receptacle)
- Package
-
1Bitsy: "Firmware development with the lights on"
11/22/2016 at 18:36 • 0 commentsPiotr Esden-Tempski of 1Bitsquared created this Open Source and Open Hardware debuggable ARM development platform:
1Bitsy
Firmware development with the lights on
Design files and source code are shared on GitHub:
1bitsy-hardware
Small breadboard friendly STM32 (eventually other mcu’s too) eval boards with exposed JTAG and SWD for the use with Black Magic Probe and others!
1bitsy-examples
-
FYI - No Shipping this Thursday and Friday
11/22/2016 at 18:09 • 0 commentsPlease note that there will be no shipping this Thursday, November 24th, and Friday, November 25th, due to U.S. Thanksgiving holiday.
Happy Thanksgiving!
Please email support@oshpark.com with any questions.
-
MightyWatt Kit: 70W Electronic Load for Arduino
11/22/2016 at 00:15 • 0 commentsJakub Polonský of Kaktus Circuits created this programmable electronic load that sits on top of an Arduino:
The MightyWatt: a 70W Electronic Load Kit
Electronic loads are used to draw power from a source at either a constant current or a constant voltage. This comes in useful for things like battery discharge testing or making sure that PCB you designed can actually power those motors without releasing the all important magic smoke.
The kit is sold on Tindie:
MightyWatt turns your Arduino Uno R3, Arduino Zero (M0/M0 Pro) or Arduino Due into an electronic load capable of dissipating 70 Watts in a very small form factor. Ideal for testing power supplies, batteries, fuel cells or power amplifiers.
Design files and source are shared on GitHub:
kaktus85/MightyWatt
-
Gathering for Open Science Hardware
11/18/2016 at 02:05 • 0 comments The Gathering for Open Science Hardware (GOSH) is new annual conference for those building and using Open Source Hardware (OSHW) for scientific research:
The GOSH movement seeks to reduce barriers between diverse creators and users of scientific tools to support the pursuit and growth of knowledge.
GOSH 2016 took place at CERN last March with an excellent keynote by Javier SerranoOpen Hardware at CERN – a quick introduction
Video of talks at GOSH 2016:
- GOSH 2016 Day 1 part 1: Grand Challenges
- GOSH 2016 Day 1 part 2: Grand Challenges
- GOSH 2016 Day 2: Denisa Kera
You can apply to attend GOSH 2017, 22-25 March 2017 at the Innovation Centre at Pontificia Universidad Católica de Chile in Santiago, Chile:
GOSH 2017 Application Form
-
Arduino Pro Trinket bubble display
11/16/2016 at 23:42 • 2 comments@davedarko wrote in his LED displays on Arduinos – a collection project log on hackaday.io:
Arduino Pro Trinket – bubble display
With 4 of HP QDSP-6064 bubble displays in a drawer I felt ready to do something with them and the “Clocks for Social Good” – call on hackaday.com finally got me going
The design files are available on GitHub:
TrinketProShield_display
davedarko has shared the board on OSH Park:
ProTrinket Bubble Display shield
-
GlowSaber: Building an ATmega328 uploader
11/15/2016 at 18:05 • 0 comments
Carlos of GlowSaber wrote a great blog post on how we built an AVR programmer shield:Building an ATmega328 uploader
As I learned more about Arduino, I realized that it is possible to redesign the GlowSaber around the ATmega328 chip [..] I designed an Arduino Shield that can be used to burn the bootloader and upload programs to an ATmega328 chip.
Here’s a example of an ATmega328 in a custom board:
cvadillo shared the board on OSH Park:
Arduino ISP Breakout shared project
-
FixieTube Clock
11/14/2016 at 20:13 • 0 comments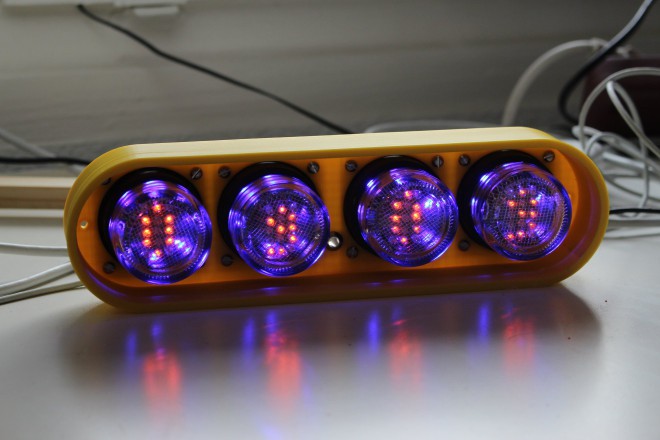
@davedarko's mum gave him some small jam jars and it inspired him to design this clock:
FixieTube clock
30ml jam jars hopefully turned into beautiful LED displays – nixietube like looking without the higher voltage fuzz – fake LED nixietubes
The design files and source code are available on GitHub:
davedarko/FixieTubes
Here’s a video of the clock in action:
-
Minifigure Atmel SAMD21 Board
11/11/2016 at 21:19 • 1 commentBenjamin Shockley designed this adorable Atmel SAMD21 dev board in the shape of Lego mini-figures!
This circuit board was designed as a fun project for a SAMD21E microcontroller based development board. The circuit design follows the recommended design from the SAMD Datasheet.
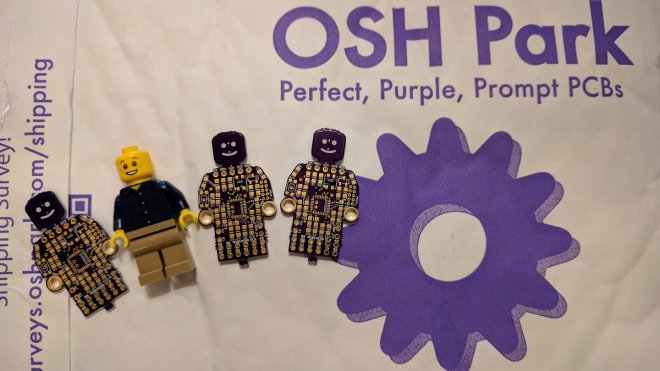 The design files are shared on GitHub:
bwshockley/Minifigure-SAMD21E
bwshockley has shared the board on OSH Park:
Minifigure SAMD21 Board
-
SMD Edge Connectors
10/27/2016 at 12:21 • 0 commentsFrom the Facelesstech blog:
SMD edge connectors
Normally you would use through hole then either have a 90 degree headers or just bend them over. [..] I had a brain wave, why don’t I lie the header down flat on the board and solder it to a SMD pad
The design files are available on GitHub:
smd_edge_connectors
-
MicroUSB powered ESP8266 OLED Board
10/26/2016 at 02:15 • 0 comments
Mike Rankin created this board with a tiny OLED display controlled by an ESP8266:
MicroUSB powered ESP8266 OLED Boar
I created this design as a challenge to make a design under 1″ x 1″ in size.
The hardware is an ESP-01 ESP8266 Wifi module, linear power supply, microUSB connector and a few oled display parts.
The design files and source code are available on GitHub:
ESP8266_OLED
Here is a video of the assembly and operation:
miker has shared the board on OSH Park:
ESP8266 OLED Board Rev3
-
OpenFixture Takes the Pain Out of Pogo Pins
10/24/2016 at 19:00 • 0 commentsHackaday reports:
OpenFixture Takes the Pain Out of Pogo Pins
[Elliot] wrote in with his OpenFixture model for OpenSCAD. It’s awesome because it takes a small problem, that nonetheless could consume an entire day, and solves it neatly. And that problem is making jigs to test assembled electrical products: a PCB test fixture.
In the PCB design software, you simply note down the locations of the test points and feed these into the OpenSCAD model. [Elliot] shows you exactly how to do it using KiCAD. There are a few more parameters of the model that you can tweak to match your particulars, but you should have a DXF outline for a test jig in short order. Cut that out, assemble, and test.
-
OnChip Open Source RISC-V microcontroller at ORCONF 2016
10/23/2016 at 05:58 • 0 commentsORCONF 2016 was held earlier this month in Bologna, Italy:
ORCONF is an open source digital design and embedded systems conference, covering areas of electronics from the transistor level up to Linux user space and beyond. Expect presentations and discussion on free and open source IP projects, implementations on FPGA and in silicon, verification, EDA tools, licensing and embedded software, to name a few.
Begun as the annual OpenRISC developers and users conference, it has become a broad open source digital design-oriented event and is supported by FOSSi – the Free and Open Source Silicon Foundation.
Elkim Roa spoke about OnChip, an Open Source silicon microcontroller, designed by his research group at UIS (Universidad Industrial de Santander):
Fully-tested 32-bit RISC-V microcontroller in 130nm
The slides are available as PDF on GitHub:
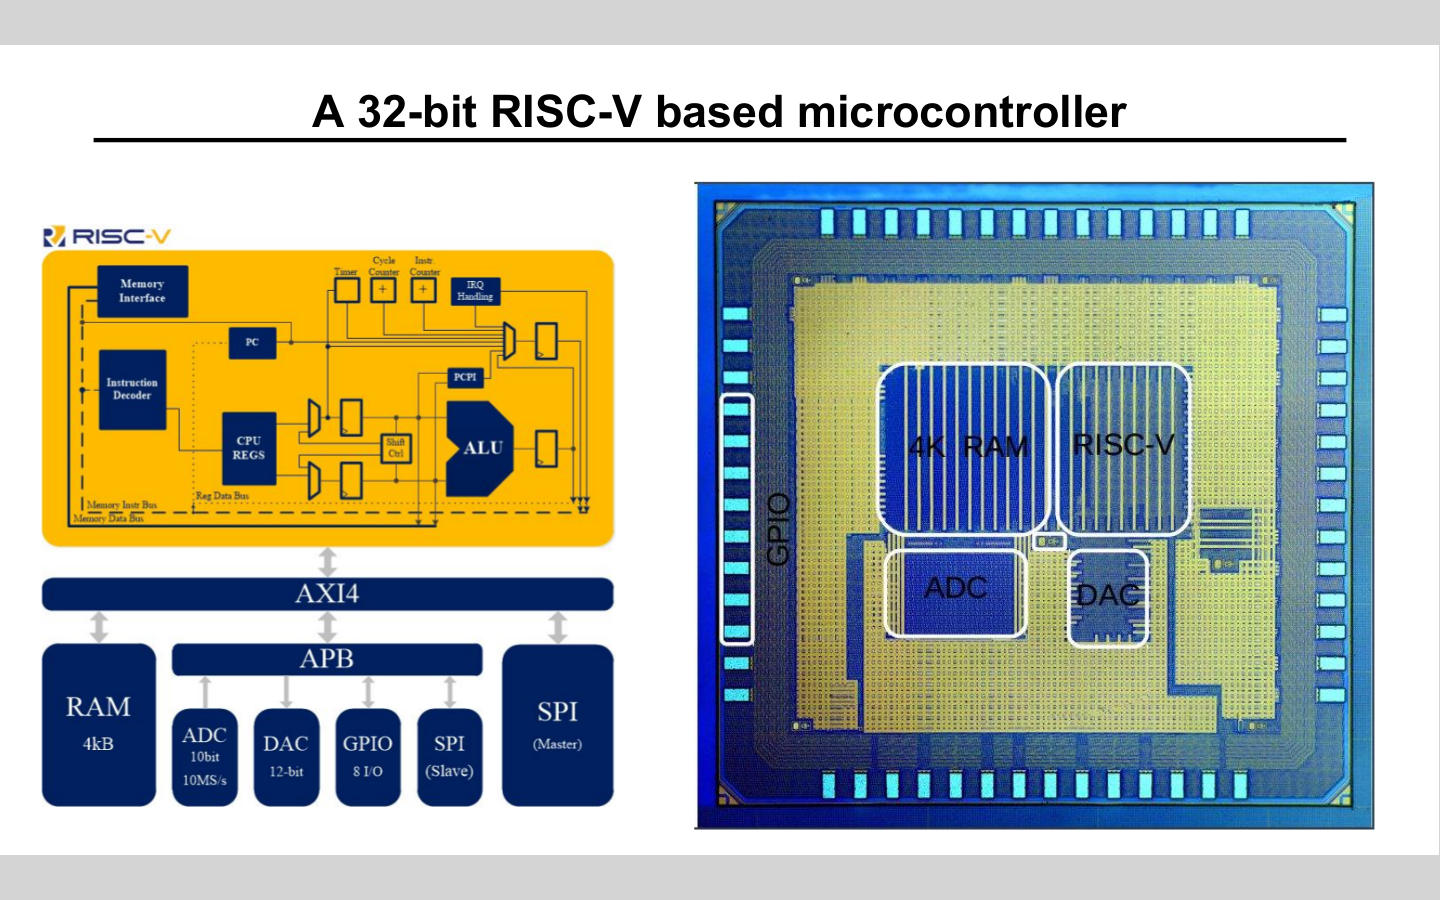
OnChipUIS has several repos on GitHub related to the project including:
mrisc: A 32-bit Microcontroller featuring a RISC-V core
-
The Spark Gap talks Open Hardware Summit
10/21/2016 at 20:31 • 0 commentsWe’re big fans of podcasts about electronics and embedded systems like The Amp Hour, embedded.fm and The Spark Gap podcast. (Please let us know in the comments of other shows we should check out)
In the latest Spark Gap episode, Karl and Corey talk about their trip to Portland for the 2016 Open Hardware Summit:
The Spark Gap Podcast – Episode 49

Our favorite past episodes include the two-episode discussion of PCB design:
We also enjoyed when Karl and Corey were joined by James Lewis of Kemet Electronics to talk about capacitors.
-
Color OLED board with ESP8266 WiFi
10/20/2016 at 22:40 • 0 comments
Mike Rankin created this adorably small WiFi-connected color OLED board:
ESP8266 Color OLED
I’ve been keeping an eye on the SSD1331 library to see if it would eventually work with the ESP8266 wifi modules. I noticed the support for it appeared one day with the Adafruit library so I tried it out on my Adafruit Hazzah and success!
Video of the board in action:
miker has shared the board on OSH Park:
ESP8266-12E_0.95_Color_Oled_Rev1
-
PiAQ: Open Source Indoor Air Quality Sensor
10/19/2016 at 18:41 • 0 comments
National Association of Realtors’ CRT Labs in Chicago has developed a Raspberry Pi HAT to make information about the air people are breathing more accessible:
The PiAQ
Open Source Indoor Air Quality Sensor for the Raspberry Pi
Measurement Points:
- Temperature (SHT31)
- Relative Humidity (SHT31)
- VOC (Volatile Organic Compounds) (IAQ Core)
- Derived CO2 (IAQ Core)
- Barometric Pressure (MPL3115A2)
- Light Intensity (TSL2561)
- CO Concentration (MiCS-4154)
- NO2 Concentration (MiCS-4154)
- Sound Intensity (ADMP401)
Connectivity:
- FSK (RFM69HW 433/915MHz)
- WiFi (Particle Photon)
- Cellular (Particle Electron) (Coming soon)
- LoRa (Coming Soon)
Authors and Contributors
- Akram Ali (@AKstudios)
- David Conroy (@dconroy)
- Christopher Coté (@entone)
Schematics and Eagle CAD Files are on GitHub:
NationalAssociationOfRealtors/PiAQ
CRTLabs has shared the board on OSH Park:
PiAQ HAT
-
ATtiny Keychain Arcade
10/18/2016 at 18:23 • 1 comment
Ilya Titov created this adorable, tiny keychain arcade kit:
ATtiny Arcade keychain game kit
ATtiny Arcade is a little game made using Atmel Attiny85 microcontroller and an OLED screen. The kit is a great hobby project that requires assembly with a soldering iron.
- Atmel Attiny85 microchip
- DIP8 socket for the Attiny85
- 2x pushbuttons
- 2x pullup resistors
- SSD1306 OLED screen 128×64 pixels
- CR2032 battery holder
- Piezo buzzer
- Purple PCB manufactured by OSH Park
- FDM ABS 3D printed case
Available games:
- Breakout
- Oroboros
- UFO Escape
-
Optical Convert Channels
10/18/2016 at 18:10 • 0 comments
One of our favorite hardware hackers, Joe Grand, has shared slides and hardware designs from his recent B-Sides PDX talk:
Optical Covert Channels
Data exfiltration from a device is usually achieved over the network, via hardware implant, or by manipulating the characteristics of an internal electronic component. Optical covert channels transmit data using visible light in a method undetectable to the human eye.
Joe demonstrates using an optical receiver to capture data transmitted through a LED:
joegrand has shared the receiver boards on OSH Park:
OpticSpy Digital (Rev. A)
digital version using Everlight PLR135/T9 Fiber Optic Receiver
OpticSpy Analog (Rev. A)
analog version based on Maxim Integrated’s AN1117 application note:
-
Look What Showed Up For Bring-A-Hack
10/16/2016 at 08:10 • 0 commentsHackaday was in Portland last weekend for the Open Hardware Summit. I did a brief recap earlier this week but this post has been on my mind the entire time. The night before the summit, OSH Park (the Purveyors of Perfect Purple PCBs which we all know and love) hosted a Bring-A-Hack at their headquarters. [Laen]…
via Look What Showed Up For Bring-A-Hack At OSH Park — Hackaday
-
Open Hardware Summit 2016: afternoon sessions
10/14/2016 at 17:57 • 0 comments[see previous blog post for morning sessions]
Video recordings of Session 3 and Session 4 of Open Hardware Summit 2016 in Portland:
OSHWA certification
Alicia Gibb and Michael Weinberg
[Session 3: seek to 0 hr 16 min]
Note – the recording is missing these talks:
- Steve Hodges: micro:bit Open Source Physical Computing Platform for CS Education
- Dan Seal: Rise of Open Hardware in Education
- Sakshi Srivastava
Creating an open factory among factories
Eric Pan
[Session 4: starts at the beginning]
Space the Final Frontier of Open Hardware
Aaron Baker and Andrew Greenberg
[Session 4: seek to 0 hr 19 min]
Beyond microchips: infrastructure, norms and feedback for open classical instruments
David Perry
[Session 4: seek to 0 hr 35 min]
Open Source Hardware in our National Parks
Rianne Trujillo
[Session 4: seek to 0 hr 51 min]
Open and Good Enough Manufacturing Solutions
Luka Mustafa
[Session 4: seek to 1 hr 5 min]
Gallery of slides from the above talks:
Related post:
Open Hardware Summit 2016: morning sessions
-
Open Hardware Summit 2016: morning sessions
10/13/2016 at 06:09 • 0 comments
Video recordings of Session 1 and Session 2 of Open Hardware Summit 2016 in Portland:
Programming is Forgetting
Allison Parrish
“Embedis” dictionary server for embedded systems
Tom Moxon and David Turnbull
OpenMV: From Hack-A-Day Fail of the Week to Success
Kwabena Agyeman
Open vs. Collaborative: Lessons from Linux and Google
Jason Krinder
Caroline Sinders
Free/Libre/Open Source Marketing
Harris Kenny
[Part 1: seek to 2 hr 52 min of Session 1]
Open Source Hardware at Intel: Moving the Mountain
Tracey Erway
Designing an ecosystem to drive an open source hardware project
Shigeru Kobayashi and Genta Kondo
Bilal Ghalib
Open Source Hardware Medical Instrumentation
Ashwin Whitchurch
What’s up with My Grandma? Open Hardware and Motor FunctionJustyna Ausareny
[seek to 1 hr 23 min] note: the talk is truncated
Gallery of slides from the above talks:
Related post:
Open Hardware Summit 2016: afternoon sessions
-
Atmel SAMD21 sensor board giveaway
10/12/2016 at 17:17 • 0 comments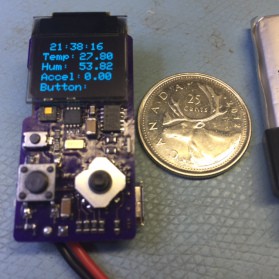
SAMD21 giveaway
What:
I’d like to give away one SAMD21 logger/sensor board to someone, wherever in the world you are.
Why:
I’m a hardware guy, not a programmer. I’ve had fun designing this project and wrote simple code to verifying everything works. There is enough hardware and sketch space available to create a pretty cool logger project. Just let me know at @mikerankin what projects you’ve worked on in the past and what you would like to create with this design. If I like your idea then you can have this prototype. The only catch is that your code written using the Arduino IDE will be posted to my git site to share with others -
onChip: Open Source Microcontroller
10/11/2016 at 20:31 • 0 comments
A Completely Open Microcontroller on Hackaday: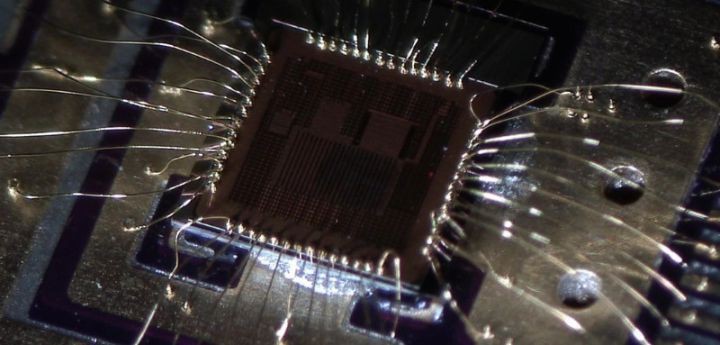
An annotated mRISCV die imageI don’t know about you, but the idea of an Arduino-class microprocessor board which uses completely open silicon is a pretty attractive prospect to us. That’s exactly [onchipUIS]’s stated goal. They’re part of a research group at the Universidad Industrial de Santander and have designed and taped out …
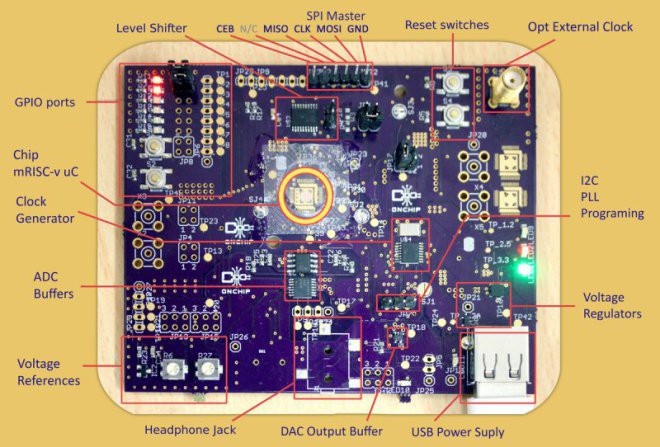
Not only have onchipUIS successfully bonded their chip, but they’ve done so using a chip on board process where the die is directly bonded to a PCB. They used OSHPark boards and described the process on Twitter.
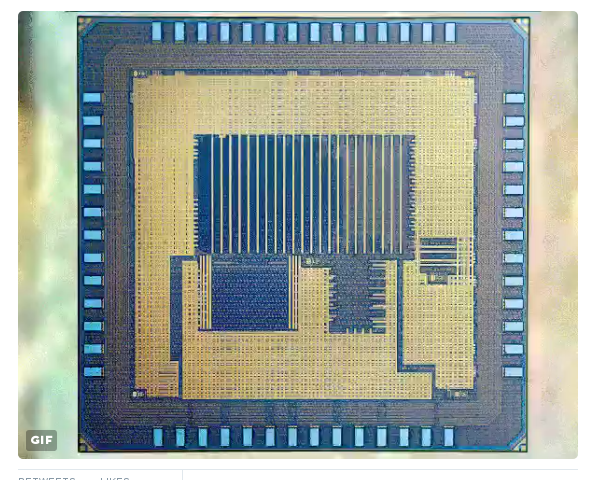
-
#BringAHack to OSH Park tomorrow
10/05/2016 at 15:38 • 0 comments
Please join us tomorrow night on Open Hardware Summit eve for a delightful mix of #BringAHack and open house!
When: Thursday, October 6th. 6 PM to Midnight.
Where: 311 B Ave, Lake Oswego, OR 97034
Refreshments will be served. No problem if you won’t be able to bring a “hack”. There will still be plenty of interesting things to experience!
Uber From Crystal Ballroom (Downtown Portland):Public Transit From Crystal Ballroom (Downtown Portland):
-
Zorg Door Bomb replica
10/05/2016 at 02:27 • 1 commentKevin Rye recreated this replica from a favorite movie:
It’s the Zorg Door Bomb!
The Fifth Element is one of my all-time favorite movies. I watched it again the other day and as soon as I saw Zorg’s Door bomb, I said to myself, “I’m so building that!”
-
Open Hardware Summit #BringAHack at OSH Park
09/27/2016 at 19:33 • 0 comments
Please join us on Open Hardware Summit eve for a delightful mix of #BringAHack and open house!
When: Thursday, October 6th. 6 PM to Midnight.
Where: 311 B Ave, Lake Oswego, OR 97034

Refreshments will be served. No problem if you won’t be able to bring a “hack”. There will still be plenty of interesting things to experience!
Uber From Crystal Ballroom (Downtown Portland):Public Transit From Crystal Ballroom (Downtown Portland):
-
Teensy Mitutoyo Interface
09/23/2016 at 19:29 • 0 commentsCatherine Holloway created this board to interface Mitutoyo dial indicators with a Teensy:
 Teensy Mitutoyo Interface
Mitutoyo dial indicators can measure small displacements down to micron levels. I use them to calibrate motors used in quantum optics experiments, where every micron is several femtoseconds in the life of a photon.
The design files and source code are available on GitHub:
/teensy-mitutoyo-interfaceCatherineH shared the board on OSH Park:
-
Atmel SAMD21G Sensor Board
09/22/2016 at 05:40 • 0 commentsMike Rankin created this tiny sensor board with an ARM Cortex M0+ microcontroller and OLED display:
0miker0’s Blog: SAMD21G Sensor Board
It’s pretty tiny so a 4 layer board made the whole job easier. The top and bottom are pretty much dedicated for components, layer1 are tracks and power traces, layer2 is a ground plane. Mixing up an internal plane and routing layer was interesting.
The hardware consists of:
- SAMD21G18A processor (used in the Adafruit Feather)
- HDC1080DMBT temperature/humidity sensor
- ADXL345B accelerometer
- DS1340U RTC
- MCP73833 LiPo battery charger
- MicroSD card connector
- Navigation Button and pushbutton
- 0.66″ mono oled display
- Micro USB connector for charging and uploading new sketches
The design files and source code are available on GitHub:
mike-rankin/SAMD21G18A_Sensor_Board
miker has shared the board on OSH Park:
SAMD21G18A_Sensor_Board_Rev1
-
USBuddy: USB Development Tool
09/20/2016 at 17:19 • 0 commentsKaktus Circuits created this board to analyze USB devices:
Tindie Blog: USBuddy
Easily tap into the USB signals coming and going while the device is still connected to the bus [..] monitors power consumption [..] handy for reverse engineering devices without having to take the device apart
The assembled board can be purchased on Tindie. The hardware design files have be shared on GitHub:
kaktus85/USBuddy
-
OSH Park is hiring: Customer Support Engineer
09/19/2016 at 23:45 • 0 comments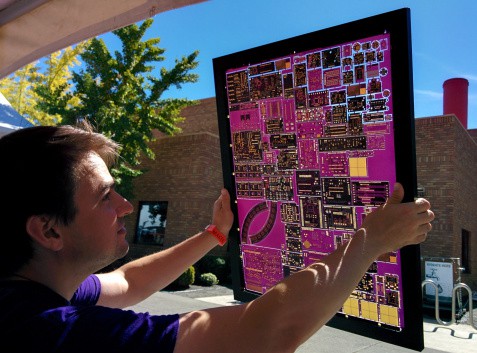 OSH Park is looking for a part-time Customer Support Engineer to
help our customers navigate our website, order from our service, and
learn about designing circuit boards for manufacturing. We’re a small
company and we offer high quality manufacturing in the USA by combining many small printed circuit board designs onto batch panels.
We see hundreds of orders a week so this is a great opportunity to see how engineering design meets the cold hard reality of manufacturing. We also offer paid time to work on your own Open Hardware projects.
Our office is in Oregon but our support team works from home so you should expect to work independently, manage your own work schedule, use Slack to keep in touch, and join us for biweekly remote meetings using Google Hangouts.
You must be:
- Familiar with the Linux command line and able to remotely access a Linux server.
- Fluent in English, which means that you have solid spelling and grammar skills without relying on a spell check. We only provide customer service by email, so we need someone with excellent reading comprehension and attention to detail.
- Curious about and/or experienced with the Maker community, printed circuit boards, and hardware design.
- Able to be a teacher and mentor, answering the same repetitive questions with compassion and empathy each time, since many of our customers are hobbyists or students who are new to designing hardware and we’re here to support them.
- Willing to install EAGLE and KiCad, two common CAD tools, and get comfortable using them.
We would love you to have an engineering or manufacturing background, have designed circuit boards yourself, or have experience in customer service, but none of those are necessary. We’re happy to teach you if you’re willing to learn.
If this sounds like you, then please email us at jobs@oshpark.com
Note: U.S. Residents only

-
Teensy WiFi Weather Logger
09/05/2016 at 09:15 • 0 commentsTeensy-based weather badge that logs humidity and temperature to Adafruit.io via WiFi:

Teensy WiFi Weather Logger
Bill of Materials
- Teensy 3.2, OSH Park Edition
- ESP-01 (ESP8266 SoC)
- Adafruit I2C OLED (128×32)
- Adafruit I2C BME280 (temp/hum/press)
- 10K Ohm through-hole resistor
The Kicad design files and Arduino source code are hosted on GitHub:
teensy-wifi-weather-logger
The sensor data is logged to Adafruit.io via ESP8266’s WiFi connection:
Adafruit.io Dashboard
Adafruit.io feeds
Video of establishing WiFi connection and logging weather data:
-
LiDAR Rangerfinder Teensy Hat
09/03/2016 at 01:57 • 0 commentsOSH Park engineer Jenner Hanni posted on Wickerbox Electronics about his LiDAR project for the Teensy 3.2:
LCD-LiDAR-SD Teensy Hat
Teensy 3.2 daughter board to display the results of aLiDAR-Lite rangefinder on an LCD screen, with three buttons, two LEDs, and a micro-SD card for datalogging.
The KiCad hardware design files and Arduino source code are hosted on GitHub:
wickerbox/Teensy-Hats/LCD-LiDAR-SD-Hat
Jenner has shared his board on OSH Park:
LCD-LiDAR-SD Teensy Hat v1.0
-
RPUadapt Arduino shield
09/02/2016 at 15:49 • 0 commentsShield for Remote MCU Node on RPU Bus
RPUadpt is a shield for multi-drop serial communication of MCU boards (Irrigate7, PPUno, PuseDAQ). Serial lines are differential pairs. It has Full Duplex RS422 (RX/TX) and out of band Half Duplex RS485 bus manager that may (TBD) help with serial bootloaders (optiboot and xboot) in a multi-drop system.
epccs has shared the EAGLE board on OSH Park:
14226^3: RPUadpt
-
DIY Vector Network Analyzer
08/30/2016 at 15:48 • 0 commentsWhat to do when a piece of test equipment is too expensive? Henrik Forstén decided to design and build his own:
Cheap homemade 30 MHz – 6 GHz vector network analyzer
Vector network analyzer (VNA) are used to measure scattering parameters of high frequency circuits
Since I can’t afford even a used VNA I decided to make one myself with a budget of 200€, tenth of what they cost used and about 1/100 of what they cost new
The design files and source code are available on GitHub:
Ttl/vna
-
Teensy e-Paper Shield
08/29/2016 at 22:20 • 0 commentsJarek Lupinski (@jarek319) created a Teensy 3.x shield for e-paper displays:
Teensy E-Paper Adapter Board
E-Paper is not a simple display to drive. With manual temperature compensation, onboard power regulation requiring external capacitors, and setting up a step-up circuit, there are many factors to consider when working with this display, with the large benefit of not requiring any power to maintain its image once written.
I have created the simplest possible circuit necessary to drive the Pervasive Displays E2215CS062 , available from your favorite distributor. Certain parts from the reference design were substituted with US-available equivalents with assistance from the Pervasive Displays engineering team.
-
PDX Maker Week
08/25/2016 at 17:02 • 0 commentsWe’re very excited for the PDX Maker Week on September 10th to 17th in Portland!
Please join us at our OSH Park headquarters for an open house on:
Friday, September 16th, 6pm-12am
OSH Park, 311 B Ave, Suite B
Lake Oswego, OR 97034Map:

Uber from Downtown Portland:
-
Capacitive touch with Teensy
08/24/2016 at 22:23 • 0 commentsThe Teensy 3 and Teensy LC have several pins that can be used as capacitive touch inputs. I designed this board in KiCad to experiment with cap touch buttons:
Teensy LC cap touch demo
I used the CAPSENSE_CIRCLE component and footprint from the Wickerlib KiCad library to create the cap touch buttons:
Bill of Materials:
GitHub
- Repo: teensy-touch
- File: teensy-touch.kicad_pcb
- Commit: 5fb2f44 connect GND pin for OLED to GND plane
-
SHARP Memory LCD and Teensy LC
08/24/2016 at 07:25 • 0 commentsDrew Fustini created this board in KiCad to try out a SHARP memory display with the Teensy LC:
Bill of Materials:
Design Files
- GitHub repo: memory-display
- File: memory-display.kicad_pcb
- Commit: f6cf2c4
Shared Project:
SHARP memory display and Teensy LC -
Join us on Open Hardware Summit eve!
08/23/2016 at 18:35 • 0 commentsWe're very excited for the Open Hardware Summit 2016 on Friday, October 7th, here in our hometown of Portland!
Please join us at our OSH Park headquarters on OHS 2016 eve. We'd love it if you Bring-a-Hack, but either way, all are welcome for a grand time!
Thursday, October 6th, 6pm-12am
OSH Park
311 B Ave, Suite B
Lake Oswego, OR 97034Refreshments will be served

Uber:
From Crystal Ballroom (Downtown Portland):
From Portland International Airport (PDX):
Public Transit:
From Crystal Ballroom (Downtown Portland):

From Portland International Airport (PDX):

-
SHARP Memory LCD with ESP8266
08/20/2016 at 05:06 • 0 commentsPierre Muth has created a battery powered remote display for logging station:
 Wireless remote LCD
This tests using the famous ESP8622 and low consumption Sharp Memory LCD. Is it possible to have a compact remote display battery powered?
Muth has shared the board on OSH Park:
ESP8266 and Sharp memory LCD -
GadgetBox - "No more Shield Stacking!"
08/18/2016 at 19:12 • 0 commentsJack Gassett wants to enable rapid prototyping of new projects:
GadgetBox
GadgetBox is an IoT project built around a case that allows you to connect 4 eCogs (think mini Shields) without stacking or sharing pins!
The hardware design files are on GitHub:
GadgetFactory/Gadget-Box
Here’s a video the GadgetBox prototype:
-
How to build a Raspberry Pi robot
08/12/2016 at 20:44 • 0 comments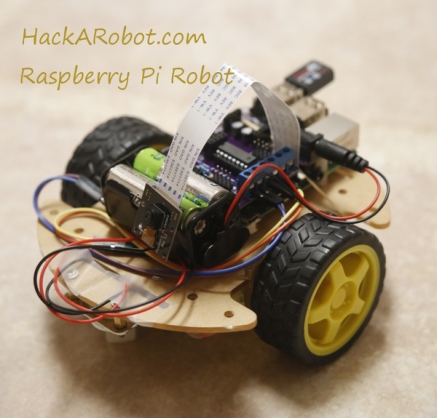
How to build a Raspberry Pi RobotLast year, I built a robot based on Raspberry Pi and gave a demo on the Pi Day in Computer History Museum. I thought that it might be helpful to someone if I share how I built it.
Features:
- L293D motor drives for two 6V DC motors
- Video streaming to laptop/cell phone from Raspberry Pi over wifi
- Python script controls the robot through VNC
- Headers for ultrasonic distance sensors
- Headers for gyroscope and acceleromenter
- Headers for 2.4GHz RF module
- Pin headers for GPS
- Extension for other I2C sensors
- Power jack for batteries (5-6V)
funnyvale shared the board on OSH Park:
RP
-
ESP8266 OLED Board
08/10/2016 at 19:25 • 0 comments
MicroUSB-powered ESP8266 OLED Board (omiker0’s Blog)I created this design as a challenge to make a design under 1″ x 1″ in size.
ESP8266 Oled Board Rev3
by miker
-
myStorm: rapid FPGA dev system
08/09/2016 at 17:16 • 0 comments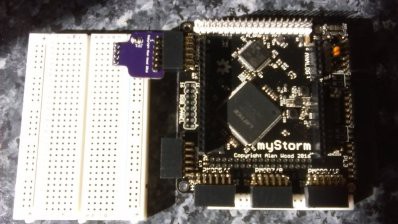
The Storm Expands — Folknology Labs
In order for myStorm to have practical use as a rapid FPGA development system we need to support many peripherals commonly used in modern digital electronics, inputs, outputs and patches.
Folknology has shared the boards on OSH Park:
pmod-breadboard
Pmod-Proto
-
6LoWPAN Linux Gateway
08/09/2016 at 17:14 • 0 commentsDIY Linux Computer and 6LoWPAN Gatewaysmall, OpenWRT-capable Linux computer [..] designed around an Atmel AT91SAM9G25 400 MHz CPU, and added some memory, Ethernet, and a CC2520 radio chip to handle the wireless side. It’s all done on a four-layer board, and hotplate/skillet reflowed
jop shared the board on OSH Park:
Blixten GW R2 -
Raspberry Pi Zero WiFi without USB
08/03/2016 at 20:34 • 0 comments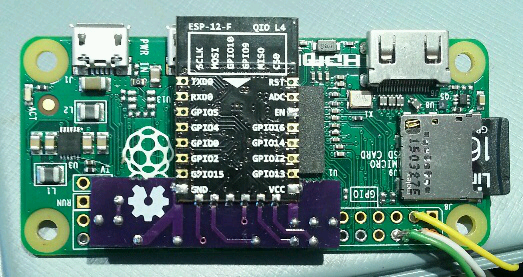
@mincepi added WiFi to the Raspberry Pi Zero without using USB:
pi2wifi
$5 WiFi for the Pi Zero without using USB
More information is on the creators website:
mince pi
mincepi has shared the board on OSH Park:
pi2wifi-v1.0
-
TCPoke and the Internet of Pokemon
08/03/2016 at 04:12 • 0 commentsPepijn de Vos created this method to trade and battle Pokemon over the Internet:
TCPoke
a collection of projects that allow you to connect your Game Boy to the internet and trade or battle with the first and second generation Pokemon games
KiCad design files of Teensy 2.0 shield for a Game Link Cable:
tcpoke_shieldArduino sketch runs on Teensy 2.0 and talks to a Game Boy via raw HID mode:
tcpoke_teensyTCPoke shield kit is sold on Tindie:
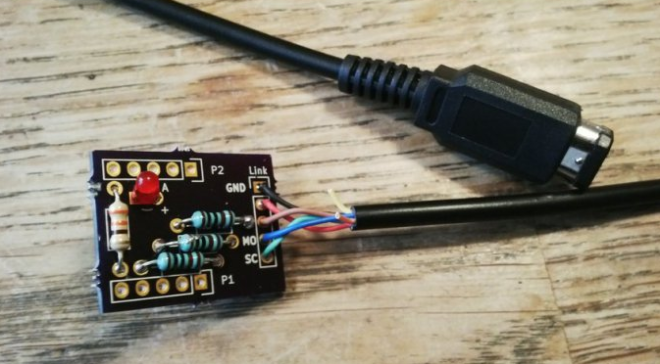
-
Eye of Toast
08/03/2016 at 03:37 • 0 comments
Sarah Petkus wrote on her Robotic Arts blog about toaster hacking:
Eye of Toast
I would like you to meet my toaster. The toaster is an old character of mine who has survived through subtle reference in the things I draw and build. Nothing I make is about the toaster, but the toaster is about everything I make. He’s my chrome totem.
Here is a brief progress report on the surgery of toaster! He will soon have eyes!
-
OpenPanzer ESC Scout
08/03/2016 at 03:18 • 0 comments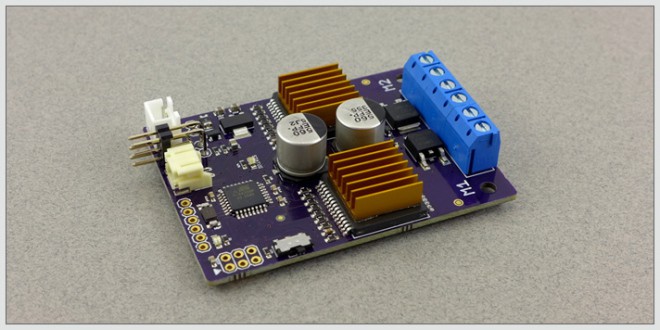
OpenPanzer.org Scout ESC
Dual brushed motor controller that accepts both TTL serial and RC inputs. The onboard processor is an ATmega 328 and can be programmed with the Arduino IDE
The bill of materials and EAGLE design files are available on the Open Panzer Downloads page. Source code is available on GitHub:
OpenPanzerProject/Scout-ESC
OpenPanzer has shared the board on OSH Park:
Open Panzer Scout ESC
-
Wow. Such Purple.
07/26/2016 at 03:35 • 3 comments
Through hole resistor breakout board. Such uses!
Shared project by SyncChannelBlog
Through-hole resistor breakout board. The large resistor footprint accepts up to a 1 Watt resistor. The 2-pin header accepts standard 0.1" breakaway header pins.
Much OSH Park, don’t you think? -
Programmable Voltage Reference
07/25/2016 at 21:41 • 0 comments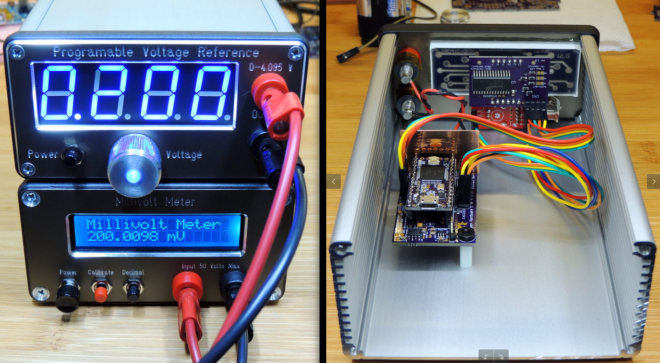 Barbouri created a programmable voltage reference with the Teensy 3.2:
A precision programmable voltage reference circuit capable of 0.001 to 4.095 volt output in 1 mV steps with an accuracy of 100 uV.
Barbouri has shared the board on OSH Park:
Programmable Voltage Reference V2.13


-
Lesson in 3D Circuits
07/25/2016 at 20:37 • 0 commentsOSH Park engineer Dan Sheadel created this LED crown entirely from PCBs:
PCB Crown::Project Info
The design files and source code are hosted on GitHub:
tekdemo/PCB-Crown
Dan shares lessons learned from his first venture into designing 3D circuits:
PCB Crown::Lessons Learned
- Avoid having structural components carry signals
- Castellations work, but mind the placement.
- If at all possible, make each component easily testable and self contained
- Don’t try to dual-purpose a component lead as a signal wire.
- Watch your line termination
- Put all connected parts on the same design
- Hobby Iron vs Soldering Iron: Not the same.
- Make a jig, or at least a good assembly guide
-
16 LED shift register module
07/21/2016 at 20:27 • 0 commentstardate create this 16 LED SMD board with shift register interface, based on project 3 from the KiCad like a Pro course from Tech Explorations:
#179 LEDx16Module
Schematic:

Shared project:
LEDx16 Module 1.0.1
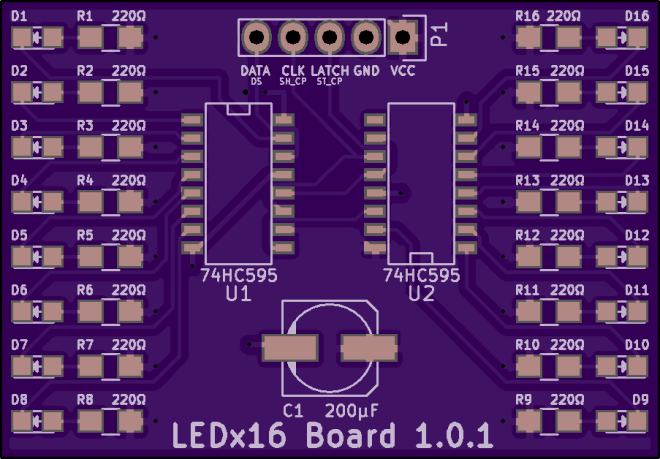
-
HF Differential Probe
07/21/2016 at 07:43 • 0 comments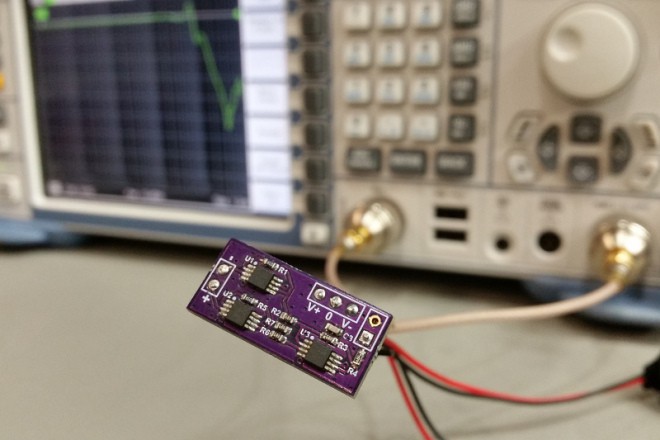
Steven Merrifield created this oscilloscope probe board:
HF Differential ProbeHere is a basic high frequency differential probe ideal for monitoring signals such as RS-485, CAN, MIL-STD-1553 and so on
sjm has shared the board on OSH Park:
HF Differential Probe -
GPS RF Front-end Board
07/18/2016 at 21:22 • 0 comments[Written by OSH Park engineer Jenner Hanni on Wickerbox Electronics]
Portland State University’s Maseeh College of Engineering and Computer Science runs an innovation program that awards small thousand-dollar grants to students working on interesting projects. In 2011 there were a handful of GPS-related projects that needed a way to work directly with the raw I/Q data coming from the GPS satellites before any processing or correlating had been done.
Background
Commercial off-the-shelf GPS receivers are cheap and ubiquitous but they don’t expose that data. One of my mentors, Andrew Greenberg, developed an open source GPS receiver for his Masters thesis (PDF) in 2005 and suggested I take a look at doing the same thing with current hardware. I said I would if he would help, so together we built a board, built a revision, and are in the process of figuring out what modifications will be needed for a third.
The board isn’t a full GPS receiver. Instead, it’s an “RF front end” board that has a MAX2769 Universal GPS Receiver chip to read the GPS signals and pass them out over something that looks a lot like SPI but isn’t. We chose to place an STM32F407 microcontroller running the ChibiOS embedded operating system on the board to support streaming the data out over Ethernet and USB. We exposed the raw pins over a header between the MAX2769 and STM32F407 to allow a user to skip the microcontroller entirely. We also included an SD card to log the data.
The board does not currently support a battery so it must be powered over USB or Ethernet at all times.
This project is open hardware and software licensed under the 3-clause BSD license and maintained on the Portland State Aerospace Society’s Github account. You can find the bill of materials and Eagle schematics at psas/gps-rf-board and the software as part ofpsas/stm32.
It’s been a big group effort in the push to get it talking; Andrew, K, Theo, and Kenny at least have helped out with software and modwire soldering, and I might have missed someone.
Board Layout OverviewThe board has four layers and was ordered from OSH Park.
Power
We can power the board from Rocketnet Ethernet (up to 20V) or over USB (about 5V) so we used an LMZ12001 switching regulator with an input voltage range from 4.5V to 20V to output 3.3V for the digital side of the board. We then used two ultra-low noise MAX8510 LDO linear regulators to provide 2.85V on separate digital and analog supply lines for the RF side of the board.
GPSThe MAX2769 is a tiny 28-pin universal GPS Receiver with a 1.4dB noise figure. The datasheet says we don’t need external SAW filters but we used them anyway. The chip has two LNA inputs and the eval kit is set up for to support both passive and active antennas. We used the MAX2769 Eval Kit as a reference but it was a particularly difficult schematic to work with.
Our board has a single antenna attachment point with a couple of optional circuits that the user chooses by where you populate capacitors and resistors. Option #1 is whether or not to have an LNA1 and its ANTBIAS-pin power circuit. Option #2 is whether to put into LNA1 or LNA2 on the chip.
Output
We use a 100-pin ARM Cortex-M3 STM32F407 running the Portland State Aerospace Society’s version of ChibiOS to program the MAX2769 and to support USB, Ethernet, and an SD card. We also break out raw data signals at pin test points.
Ethernet requires the Portland State Aerospace Society’s Rocketnet connector for programming, data streaming, and power.
A micro-USB connector is available for programming, data streaming, and power.
The micro-SD card is available for data logging.
The serial breakout is two 1×11 0.1” headers which we also used for debug. We ran traces between the two breakouts because we were unsure about some of the pinouts from the MAX2769 and wanted to be sure we could cut traces and easily run modwire.
Build
This is the board installed on the avionics module that carries the flight computer, sensor packages, and battery...
Read more -
ESP8285 Dev Board
07/18/2016 at 18:53 • 1 comment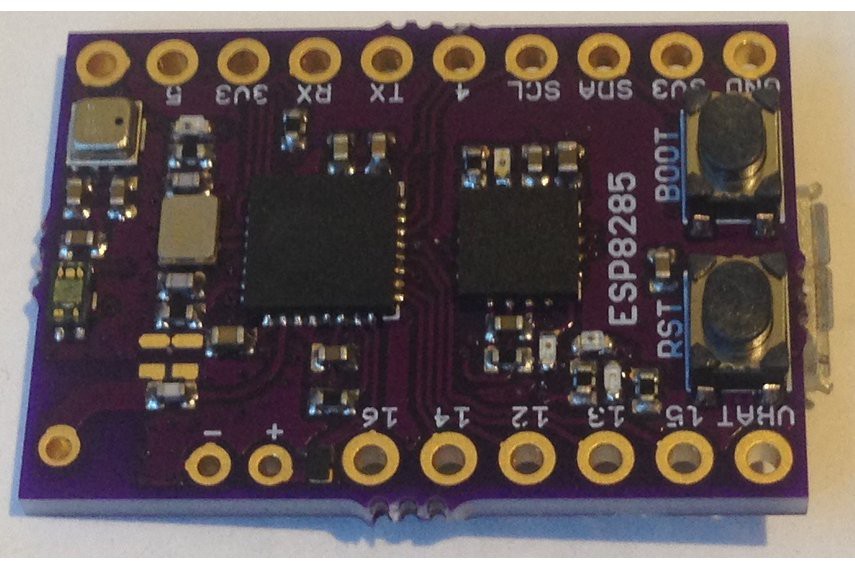
Kris Winer writes on Maker.io about his new design:
ESP8285 Development Board
This is a small development board for the ESP8285 (ESP8266 plus 1 Mbyte embedded SPI flash memory) which includes an FTDIFT230X USB-to-serial converter so Arduino programs can be flashed via the USB Micro-B connector. The board has a MAX1555LiPo battery charger, a 3.3 V MIC5528 LDO supplying 500 mA for plenty of power, has reset and boot buttons for easy programming, has a blue led on GPIO15, green led for power on, red led for charging indication, and yellow and orange leds for RX/TX.
Available for $24.95 on Tindie.
PeskyProducts has shared the board on OSH Park:
ESP8285DevBoard.v01
-
RGB LED panel controller using MSP432
07/17/2016 at 13:07 • 0 commentsJohn Boyd created simple controller for RGB LED panels with the Texas Instruments MSP432 ARM microcontroller:
MSP432 RGB LED Panel ControllerI have managed to get it working without issue at 60 FPS [..] I think I could push to above 100 FPS.
The challenging part of this project was designing the firmware in a way to leverage all of the MSP432 peripherals to reduce the computational requirements for the CPU.
The hardware design files and firmware source code are hosted on GitHub:
MSP432-RGB-LED-Panel-Controller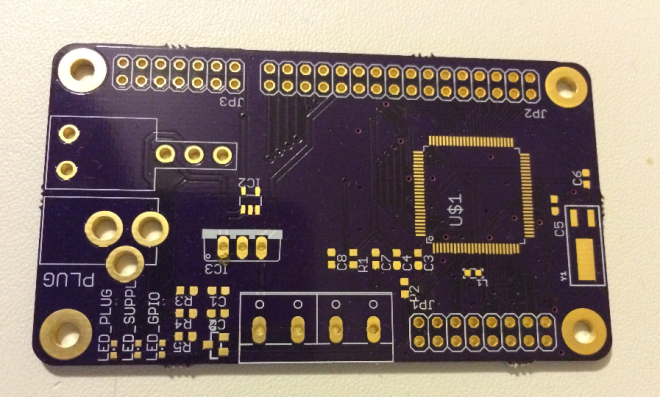
-
STM32F303 + ice5 Development Board
07/06/2016 at 18:31 • 0 commentsEric Brombaugh designed this board which pairs ARM Cortex M4 processor with a Lattice FPGA:
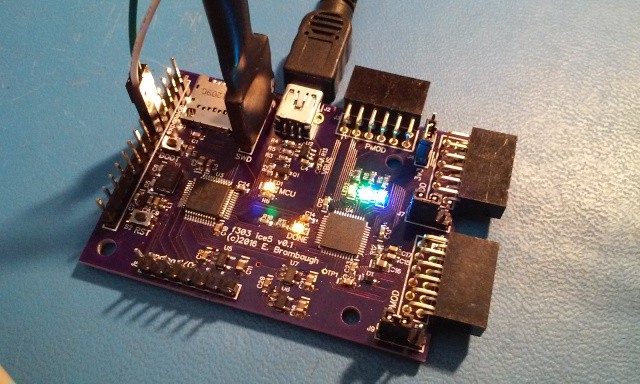
STM32F303 + ice5 Development Board
USB, Micro SD, PMOD and GPIO interfaces allow development of complex projects in control and signal processing.
- STM32F303CCT6 microcontroller:
- 32-bit ARM Cortex-M4F CPU rated for 72MHz clock
- 48kB SRAM, 256kB Flash
- 10 Timers
- 3x SPI, 2x I2S, 2x I2C, 3x USART
- 1x CAN, 1x USB Device
- 37 GPIO pins (20 5V tolerant)
- 4x 12-bit SAR ADC, 2x 12-bit DACs
- 7 Analog Comparators, 4 Op-Amps
- Lattice iCE5LP4K-SG48 FPGA:
- 3520 LUTs
- 4 Multiplier/Accumulate blocks
- 20x 4kb RAMs
- OTP Non-volatile configuration memory
- 1 PLL, 2x I2C cores, 2x SPI cores
The microcontroller firmware and FPGA hardware source is hosted on GitHub:
emeb/f303_ice5
emeb has shared the board on OSH Park:
f303_ice5
- STM32F303CCT6 microcontroller:
-
Roomba Virtual Wall
07/06/2016 at 02:24 • 0 comments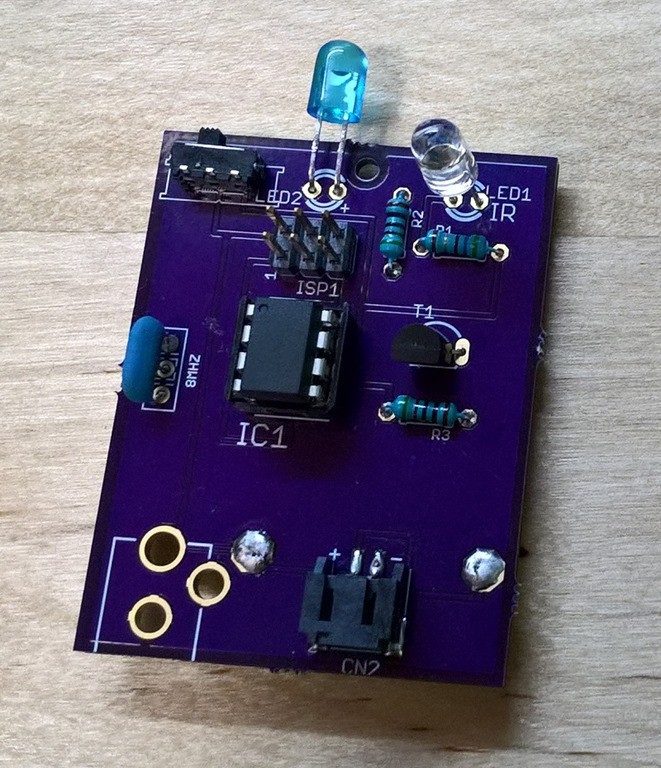
Peter Dunshee created this board with an Atmel ATTiny85 to transmit a virtual wall signal for an iRobot Roomba:
Petezah: Virtual Wall
This design files and source code are hosted on GitHub:
Petezah/roomba_wall_v2
Petezah has shared the board on OSH Park:
Roomba Virtual Wall v2 – rev A
-
Arduino Theremin Shield
07/01/2016 at 06:01 • 0 commentsOSH Park engineer Jenner Hanni posted on Wickerbox Electronics about his Arduino Theremin project:
This is a sort of false theremin that turns the distance between your hand and the rangefinder into notes. There are three cap sense pads you can touch to change the key, and the program remembers your most recent song so you can choose to play it back.
The KiCad schematic and layout, along with the the Arduino code, have been released on Github under the CERN Open Hardware v1.2 License:
Jenner shared the board on OSH Park:
Arduino Theremin v1.3 -
2oz copper, 0.8mm thickness PCB service
06/30/2016 at 22:33 • 0 comments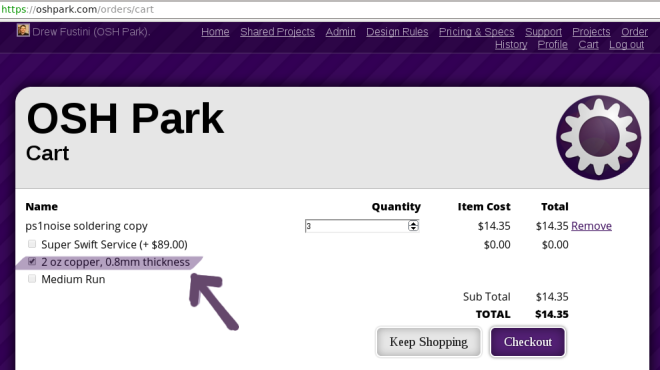
2 Layer 2oz copper 0.8mm thickness PCB Service
A special stackup intended for a variety of high-power and low weight circuit designs. This service features a 0.032″ (0.8mm) thick PCB, and includes 2oz (2.8mil, 70um) copper. That’s half the thickness of our standard boards, and with twice the copper!
Half-height PCBs from OSHPark will allow us to measure mag fields in tight gaps.
-
LoRaWAN FeatherWing for Adafruit Feather
06/29/2016 at 04:42 • 0 commentsDan Watson has designed a new FeatherWing that adds the MicroChip RN2483/RN2903 LoRaWAN module toAdafruit Feather:
LoRaWAN FeatherWing for Adafruit FeatherHelp your Feather fly into the IoT clouds with this awesome LoRaWAN module from MicroChip.
SyncChannel / LoRaWAN_FeatherWing
SyncChannelBlog has shared the board on OSH Park:
LoRaWAN FeatherWing -
GPS disciplined 10 MHz reference clock
06/27/2016 at 21:59 • 0 comments@Nick Sayer created this GPS disciplined high precision oscillator to generate a very accurate 10 MHz square wave:
GPS Disciplined xCXOThe basic design of the project centers around either aVCTCXO – a Voltage Controlled Temperature Compensated Crystal Oscillator or a VCOCXO – a Voltage Controlled Oven Controlled Crystal Oscillator.
nsayer shared the newest version of the board on OSH Park:
FE-5680A GPS Discipline Module v1.6.3Geppetto Electronics sells the module on Tindie:
GPS Disciplined xCXOA GPS disciplined 10 MHz frequency standard – ±1 ppb or ±0.1 ppb
-
Micro Numitron Clock
06/25/2016 at 06:26 • 0 commentsJeremy g. on hackaday.io created this tiny retro clock:
Micro NumiTron clockSuper tiny, Micro clock using a Numitron as its display. Running off a 400mAh lipo battery.
The assembled version is available on Tindie: NumiClock Mini
-
DIP Protoboard for C.H.I.P.
06/24/2016 at 05:22 • 0 commentsElectrical Engineer Jenner Hanni (of OSH Park and Wickerbox Electronics) designed a protoboard DIP for the Next Thing Co. C.H.I.P. (“The World’s First Nine Dollar Computer”):
DIP Protoboard for C.H.I.P.for when you need something more durable than a breadboard
The KiCad schematic and layout are available at the Github repo. The project is released as Open Hardware under the CERN Open Hardware v1.2 License.
This project was created using the CHIP DIP KiCad template from Wickerlib. The protoboard holes are connected where indicated by exposed copper, for easier wire routing and soldering.
DIP Protoboard for CHIP Jenner has shared the board on OSH Park:
$17.50 for a set of three
Bill of MaterialsFor a non-stackable version, you can just use two standard 0.1” (2.54mm) pitch 1×40 headers, each snapped in half.
For a stackable version, you can use two of these extra-tall 2×20 female headers from Adafruit. The connectors are from the Samtec SSQ family so you could shop around for other distributors, but Adafruit has by far the best price for this particular component.
LicenseThis project is released under the CERN Open Hardware v1.2 License.
-
Retro Watch with Bubble Display
06/22/2016 at 23:33 • 3 comments
RetroWatch Rafael Riber created a retro watch with HP QDSP-6064 Bubble display like 1970’s HP calculators:
The display is controlled by an Atmel ATMega328P-AU MCU with Arduino code, and the time is kept by a Maxim DS3231 Real-Time Clock module, that stays connected to the LiPo battery at all times, keeping time even when the microcontroller and display are not powered.
RafaelRiber shared the board on OSH Park:
Retro|Watch -
Omniwheel Robot Laser Tag
06/21/2016 at 23:36 • 0 commentsDan Fisher created this Atmel ATMEGA328P-based controller board to mash-up laser tag and battle bots:
Battlebots – laser tag style!
This is my version of a control board for this project from Make Magazine. It uses dual H-bridges ICs (SN754410) to drive each motor (channels are doubled for up to 2A continuous current per motor, 4A peak for very short times). Power LED. Also 8 LEDs run by a 74LS595 shift register for “blinky” fun! Photoresistor allows for a laser hit to be detected and affect the omnibot.
fisher0251 has shared the board on OSH Park:
Omnibot control board, Rev. A
-
Wow. Such PCB.
06/21/2016 at 18:23 • 1 comment Wow such PCB — regendrogenbogen
the pawprint fits a component in a SOT23 package. I just soldered some 2N7002 N channel FETs onto the PCBs as you can see below.
Wow. Such PCB. Many Gold.

-
Raspberry Pi adapter for LED Strip
06/20/2016 at 20:53 • 0 commentsHenner Zeller created the Spixels project to control 16 LED strips at once from a Raspberry Pi:
SpixelsThe Spixels library and PCB to control SPI-type LED strips was originally developed for the Noisebridge Flaschen-Taschen project, but broken out as separate project because it is independently useful for many other LED strip applications.
hzeller shared the board on OSH Park:
Spixels – 16 SPI LED Strip Raspberry Pi Adapter
-
ESP8266 WiFi Weather Sensor
06/18/2016 at 18:59 • 0 comments
Malte Pöggel created a tiny weather station based on the ESP8266:
ESP8266 WiFi Weather Sensor
Push the measured temperature, humidity, pressure and battery voltage to the cloud or local servers in defined intervals. Configuration is done by using a simple web browser.
MalteP has shared the board on OSH Park:
ESP8266 WiFi Weather Sensor (Ver. 2)
-
Teensy LiPo Charger
06/18/2016 at 16:24 • 0 commentsPesky Products created this convenient way to power Teensy 3.x from a LiPo battery :
LiPo battery charger add-on for Teensy 3.1
This is an “appallingly small” add-on shield for Teensy 3.1 [..] The heart of the board is the MAX1555 battery management chip by Maxim Integrated.
PeskyProducts has shared the board on OSH Park:
LiPoChargerTeensy3.1.V01
-
BeagleLogic turns BeagleBone into Logic Analyzer
06/18/2016 at 01:52 • 0 commentsmobilewill was looking for a logic analyzer and found this BeagleBone-based solutions:
Quest for a Logic Analzyer
The BeagleLogic is a logic analyzer based on the Beaglebone created by Kumar Abhishek, a semi-finalist of the Hackaday Prize Best Product 2015.
The BeagleLogic features:
- 100MSPS
- 14 Channels
- Web Interface
What makes the BeagleLogic special is it uses the BeagleBone PRUs which are basically 200Mhz microcontrollers attached to the ARM CPU with shared memory. This is one thing that sets the BeagleBone apart from other SBCs.
Additional BeagleLogic resources:
The cape is shared on OSH Park:
BeagleLogic Cape v1.1
-
Se7eduino: ARM Cortex M7 Dev Board
06/17/2016 at 03:28 • 0 commentsjeff has designed a board for an Atmel microcontroller with the ARM Cortext M7 core:
SE7EDUINO
Small Atmel SAM S70 based dev board. Similar to the Arduino Due, except super-mega-turbocharge
The board features:
- 300 MHz ARM Cortex-M7
- 2MB flash
- 384k RAM
- 480 Mbps high-speed USB
- MicroSD card
- Battery Charger
jaw has shared the project on GitHub:
 se7eduino/2015-05
-
Native Kicad upload
06/08/2016 at 03:41 • 0 commentsContinuing with our goal to simplify Open Source Hardware fabrication, we’re very pleased announce that we’re finally able to accept direct uploads of KiCad PCB design files on OSH Park!
For designers, this means that you can place an order without going through the plot process, worrying about drill formats, or fiddling with CAM settings.
For the community, this means ordering files designed with KiCad got a lot easier. Now there’s no need to install KiCad to generate gerber files, or deal with a zip full of gerbers that might not be set up for us.
For users who still prefer to generate gerbers, we have good news for you too. We’ve improved our file detection, so there’s no need to rename the files on our behalf. Check out our Kicad docs for more information on generating gerbers if you run into trouble.
We’d also like to extend a word of gratitude to the developers for their continued efforts to improve KiCad. In the last few months, they’ve added too many features to count, including the scripting architecture. A special shoutout to Adam Wolf of Wayne and Layne in particular, for his support of these feautures!
Want to learn Kicad? Checkout Getting to Blinky with Kicad 4.0
-
Custom Cherry MX keypad
06/07/2016 at 23:21 • 0 commentsDan Watson created an Arduino-compatible Cherry MX keypad with an Atmel ATmega32U4 microcontroller:
Custom Cherry MX Keypad
The design files and source code are shared on GitHub:
CherryMX_KeypadSyncChannelBlog has shared the board on OSH Park:
Cherry MX Keypad
-
CAN Bus simulator on the Raspberry Pi
06/07/2016 at 18:50 • 0 commentsJulien Vanier created this CAN bus simulator on the Raspberry Pi to help develop and test the Carloop open-source car adapter:
CAN Simulator
used to transmit and receive messages simulating OBD-II communications and regular vehicle messages
The simulator consists of:
- MCP2515 standalone CAN controller connects to Raspberry Pi over the SPI bus
- TJA1049 CAN transceiver translate logic levels for high speed CAN
- 5V to 12V step up regulator to provide 12V on ODB connector
- Off-the-shelf OBD cable and connector
- Simulator program on the Raspberry Pi
jvanier shared the board on OSH Park:
CAN-Simulator v1

-
SubPos Positioning System
06/03/2016 at 18:38 • 0 commentsSubPos Positioning System
SubPos is an indoor positioning system that can be used in various environments such as metro lines, shopping malls, carparks, art galleries or even conference centers; essentially anywhere GPS doesn’t penetrate. It could also be integrated into an array of IoT enabled devices, from access points to Wi-Fi enabled light-bulbs.
SubPos Nodes transmit encoded information in a standard Wi-Fi beacon frame which is then used for position trilateration:
The Nodes provide a pre-calibrated device that is easy to configure and can be dotted about with ease:
- USB power connector
- USB to UART
- USB firmware updates
- Frequency shifting
- Secure (generates raw beacon frames)
The hardware files and firmware is available on GitHub:
SubPos Node Gerber Files and Firmware
blecky has shared the board on OSH Park:
SubPos
SubPos Receiver
The source code for a receiver module which works with the ESP module:

Tested on Arduino and the Teensy 3.2 as well as Energia and the Launchpad Tiva
SubPos Ranger
Blecky is now working on an extended ranging system based on 802.15.4 for use with the SubPos Positioning System:
-
Drive RGB LED Matrix from Raspberry Pi
06/02/2016 at 04:18 • 0 commentsxfrings created this 3.3V to 5V level converter to drive a RGB LED Matrix from a Raspberry Pi:
RGBMatrixHat
The design files and source code are available on GitHub:
RGB-MatrixDriver
The RGB LED Matrices are large scale panels which are the ones which are used on video walls (for example in Times Square or on the faces of skyscrapers). Essentially these are ordered rows of RGB LEDs with no driving logic or controllers on them what-so-ever. All driving and control logic needs to be implemented externally.
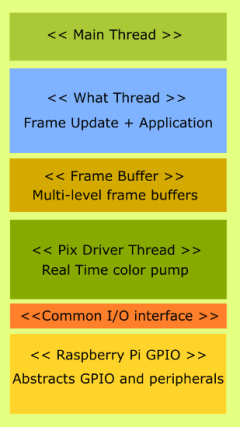
-
USBanana UART
06/02/2016 at 04:15 • 0 commentsregendrogenbogen created this breakout board for the MCP2200 USB to UART bridge from Microchip:
USBanana UART
I made this board because the FTDI chip is quite expensive and the MCP2200 can be acquired for a significantly lower price or even as a sample.
-
Dorkbot PDX on Monday
05/28/2016 at 07:25 • 0 commentsDorkbotPDX – People doing strange things with electricity
Part hackathon, part geek social, these biweekly meetings are a time for you to come join others for insight, inspiration or just insanity. Bring your toys for others to see, or come see what others have been painstakingly chipping away at in their spare time.
When: Monday, May 30, 7:00pm – 11:00pm
Location: Ctrl-H Hackerspace
7608 North Interstate Avenue, Portland, OR
We have roughly 1200 square feet of general purpose area for both large events and individual use including a lounge with board games, configurable workspaces, power strips, internet, projectors and a DIY Arcade Machine just for fun.
-
BICODER Sensor Box
05/27/2016 at 17:30 • 0 commentsAlex Hiam created a sensor box with the LPC824 microcontroller:
BICORDER
I put this project together for the OSH Park Bring A Hack meetup at the 2016 Bay Area Maker Faire. It’s Tricorder inspired, but can’t quite sense everything, so the name “Bicorder” seemed fitting.
The project currently has:
- 3-axis magnetometer
- relative humidity / temperature sensor
- infrared range finder
- 128×32 pixel monochrome LCD
- live plot of temperature (in Celsius)
- live plot of relative humidity
- live plot of magnetic field (Z-axis) in uTesla
- compass display (using the mag X and Y)
- distance readout in cm
The source code is on GitHub:
/BicorderAlex leveraged his ARM microcontoller board:
MoonLander board -
Monster 6502 at #BringAHack
05/27/2016 at 05:19 • 0 comments Thanks to everyone that came to #BringAHack last night after Maker Faire Bay Area 2016! We had a fantastic time checking out everyone’s imaginative projects.
 Laen loved the silk screen surprise from Windell Oskay of Evil Mad Scientist:
 And we loved the Monster 6502 by Eric of TubeTime.us:
 -
Open Source Hardware Month
05/26/2016 at 09:08 • 0 comments
Alicia Gibb, executive director of the Open Source Hardware Association (OSHWA), announced today that the month of October this year will be Open Source Hardware Month:
Coming soon! First ever certification for open hardware
Open Source Hardware Month will host three significant events in an effort to bring greater clarity to theopen source hardware definition, invite more people to contribute to the movement, and provide education about how to publish a project or product as open source hardware. These events include the Open Hardware Summit, an open source hardware certification, and a series of documentation days.
The Open Hardware Summit in Portland, Oregon will be on October 7, 2016. Tickets are for sale, and there is still time to be a speaker or a sponsor.
OSHWA will launch the Open Source Hardware certification at the Summit:
Users will self-certify compliance in order to use the certification logos. Self-certification will give creators the right to use the OSHWA open source hardware certification logo. As part of the self-certification process, creators will agree to subject themselves to penalties for non-compliance. OSHWA will be responsible for enforcing those penalties.
-
#BringAHack tonight after Maker Faire Bay Area
05/22/2016 at 17:38 • 0 commentsJoin us tonight at BJ’s from 7:00pm to 12:00am for the unofficial Maker Faire Bay Area tradition:
#BringAHack
If you are going to Maker Faire Bay Area today, then be sure checkout these talks:
Getting Started with KiCad: Open Source Electronic Design SoftwareSunday, May 22, 11:00am on the Make: Electronics stage
Designing Circuit ClassicsSunday, May 22, 3:30pm at Center Stage
Also look for in the main expo hall near vintage computing area:
Also in the main expo hall nearby vintage computing area is the amazing Dis-integrated Circuits booth with the Monster 6502:
Finally, we were very excited to see this VKS board prototype with the new Octavo OSD33558 System-in-Package (“Beaglebone on a Chip”). The SiP is a 400-ball BGA containing ARM SoC, DDR RAM, power management and even 140 passives. It’s large 1.27mm ball pitch allowed Hunyue Yau to make his board using our 4-layer service.
-
Maker Faire Bay Area 2016
05/21/2016 at 21:48 • 0 commentsOSH Park is at Maker Faire Bay Area! Laen, Dan and Drew are scouring the fairgrounds to see awesome projects makers have built with purple PCBs. Please let us know on Twitter, Facebook or Google+ if you’re here at Maker Faire, too!
 We’ll be at these evening events and hope to see you too:
- The 3rd Annual Hackaday MFBA Meetup
- Sat, May 21, 2016 at 7:00 PM – San Mateo, CA
- #BringAHack dinner at BJ’s
- Sun, May 22, 7:00pm – San Mateo, CA
We are excited to attend these two talks at Maker Faire:
Getting Started with KiCad: Open Source Electronic Design SoftwareSunday, May 22, 11:00am on the Make: Electronics stage
At Wayne and Layne, we use KiCad to make our printed circuit boards. We’ve been helping make KiCad better. There have been a lot of changes in the past year! From outside the project, it can be difficult to see where the project is going, so we will discuss recent and upcoming improvements.
Designing Circuit ClassicsSunday, May 22, 3:30pm at Center Stage
A walk through the process of bringing Forrest Mims’ classic drawn circuit designs to life. This talk will cover both the art of building hardware true to the vision of his books, and the practical aspects of creating a strong aesthetic and bringing graphics into the hardware world.
Here’s some of the awesome makers and projects we’ve spotted so far at Maker Faire:
Rocket Dept has terrific Learn to Solder kits in lovely purple ‘n gold, located in the main expo hall. They debuted a new kit called Hue which is big adjustable RGB LED:
PocketNC is showing off their new FR4 Machine Shield which is made entirely from one of our PCB panels (we can do white for orders of 1,000+ sq inches). Find them in Redwood Hall (a.k.a. Maker Pro building) next to PancakeBot:
Nick Sayer of Geppetto Electronics has brought Toast-R-Reflow controller and many other boards to Maker Faire. He’s next to Rocket Dept. in the Main Expo hall.
- The 3rd Annual Hackaday MFBA Meetup
-
Tiny line following PCB brush bot
05/17/2016 at 02:29 • 1 commentExterme Electronics has created a tiny line following brush bot for a Scout group Electronics badge:
Black Line Follower robot – the BLF bug
cheap as possible and easy to build for kids 10-14 as part of a short electronics course
Project details:
Extreme-Electronics shared the board on OSH Park:
BLF Bug
-
Teensy LC - OSH Park edition!
05/14/2016 at 01:35 • 0 commentsTeensy-LC (Low Cost) by Paul Stoffregen is a powerful 32 bit microcontroller board, with a rich set of hardware peripherals, at a very affordable price:
Teensy LC – OSH Park Edition $11.29 USD
Teensy-LC delivers an impressive collection of capabilities to make modern electronic projects simpler. It features an ARM Cortex-M0+ processor at 48 MHz, 62K Flash, 8K RAM, 12 bit analog input & output, hardware Serial, SPI & I2C, USB, and a total of 27 I/O pins:
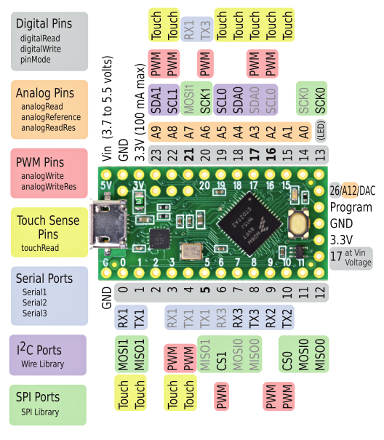 Teensy-LC maintains the same form-factor as Teensy 3.2, with most pins offering similar peripheral features:
- Real Hardware Serial
- Efficient USB Communication
- Hardware Timers
- Analog Input & Output at 12 Bit Resolution
- 5 Volt Buffer For WS2812/NeoPixel LED Projects

Compared With Teensy 3.2:
Some features of Teensy 3.2 simply aren’t available at this lower price point.
- The I/O pins are not 5V tolerant.
- The maximum speed is only 48 MHz, and the Cortex-M0+ omits M4’s special math instructions.
- CAN bus is not available.
- Teensy-LC has only 4 lightweight DMA channels, rather than 16 fully featured channels.
- Serial1 & Serial2 have only standard buffers, not FIFOs.
- Fewer hardware timers are available
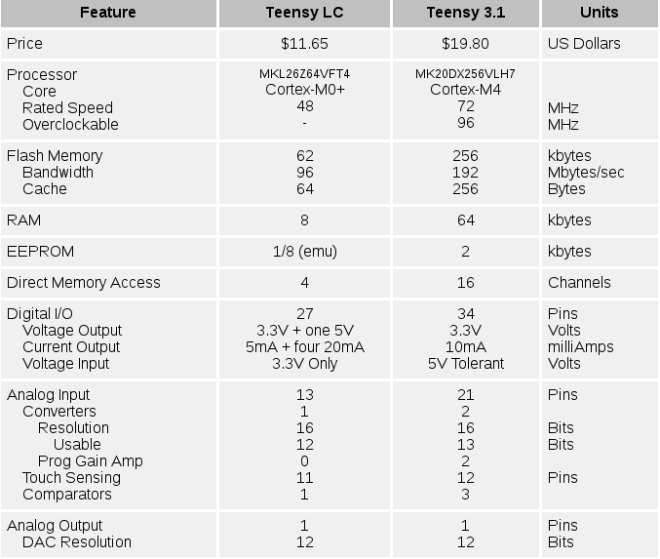
-
PICTIL: remake of TIL311 display
05/12/2016 at 17:54 • 2 comments
Yann Guidon (YGDES) and Alex (al1) have remade of the classic TIL311 hex LED display with a microcontroller:
PICTIL
The TIL311 is a nice but expensive, obsolete, power-hungry hexadecimal display. The size of the PCB is the same and […] the pin mapping is similar. The PIC16F527 is […] cheap and exactly the right number of IOs.
The firmware source code and hardware design files are on Bitbucket:
_al1/pictil
LKR has shared the board on OSH Park:
PICTIL rev2
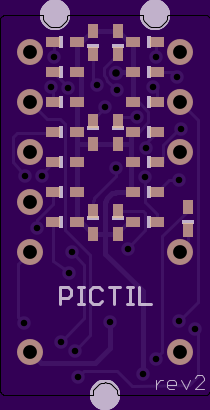
-
Making Music: new beginner challenge on Reddit
05/11/2016 at 20:24 • 0 commentsFollowing the exciting An Unconventional Clock contest, a new Beginner contest has been announced on /r/diyelectronics:
Making Music
Make something with electronics that makes music!
The rules include these constraints:
- Sound must come from the project itself
- Do not amplify or change sound from another device
- No music signal can be used as input to be processed
- Human input like knobs or buttons is OK
One winner will be decided by community vote, and one by the judge. Each winner will be awarded a $30 gift code for OSH Park.
Deadline to enter is July 12th. Winners will be announced on July 21st.
-
Toast-R-Reflow
05/10/2016 at 16:16 • 0 commentsToast-R-Reflow
It seems like a right of passage for makers that progress to surface mount work: building your own oven (or other appliance) to do reflow soldering.
The design consists of a power board and a controller.
- Each channel of the power switcher is a basic opto-isolated triac circuit
- MOC-3020 opto-isolated driver triac
- BTA-20 power triac.
- Controller monitors oven temperature and controls the heating elements
- Thermocouple measures the temperature of the oven interior
- PID controller makes oven temperature arrive at a setpoint without overshoot, undershoot or instability.
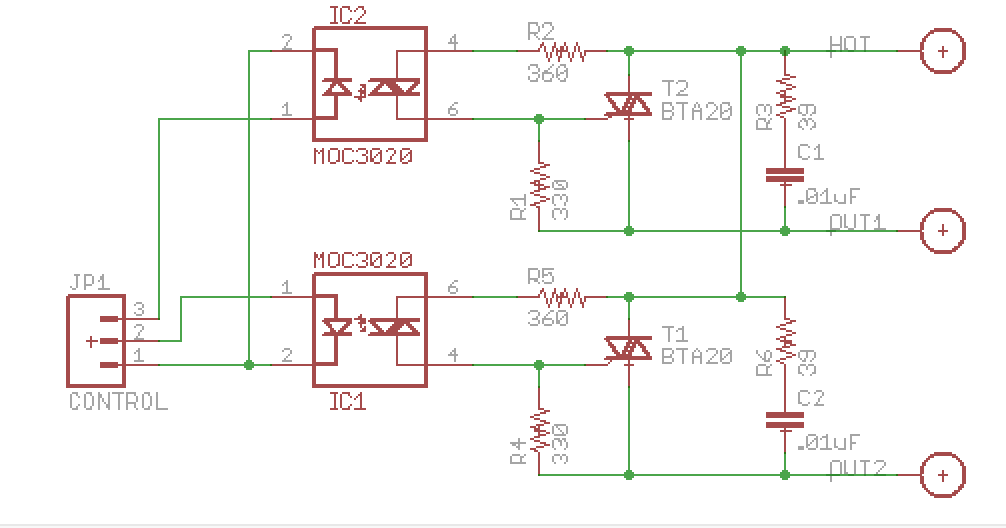
The firmware is availble in this GitHub repo:
nsayer/Toast-R-Reflow
nsayer has shared the boards on OSH Park:
Controller & LCD backpack (ATtiny84)
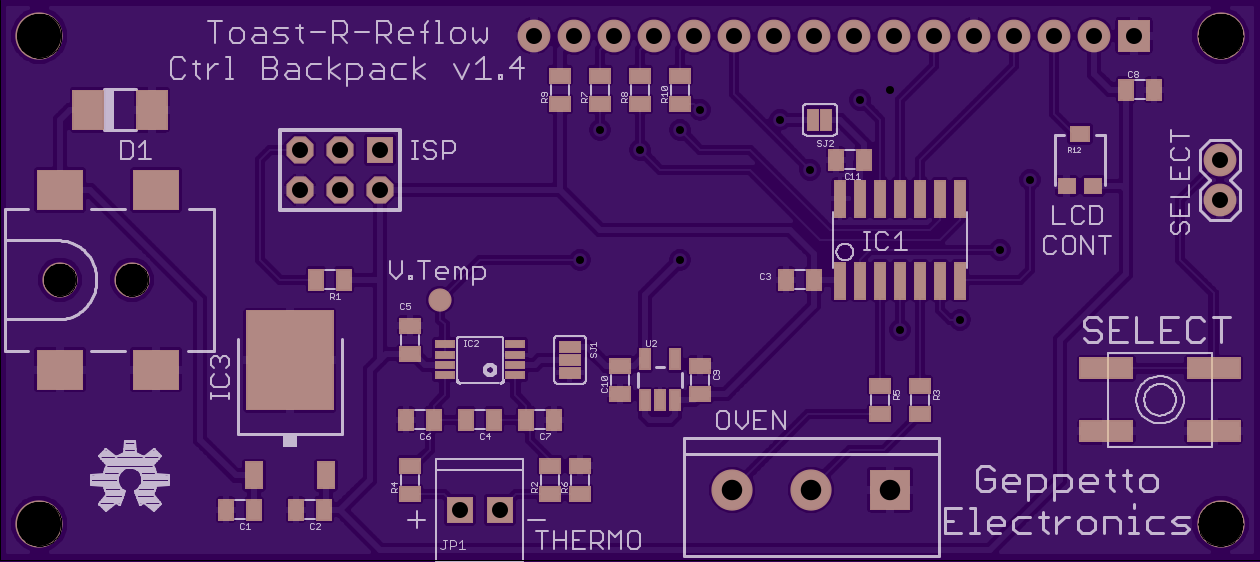
This variant has an ATTiny84 and an AD8495 analog thermocouple amplifier. It’s cheaper than the model II controller, but the flash is full, so there’s no room for more features.

Controller & LCD backpack (ATMega328)
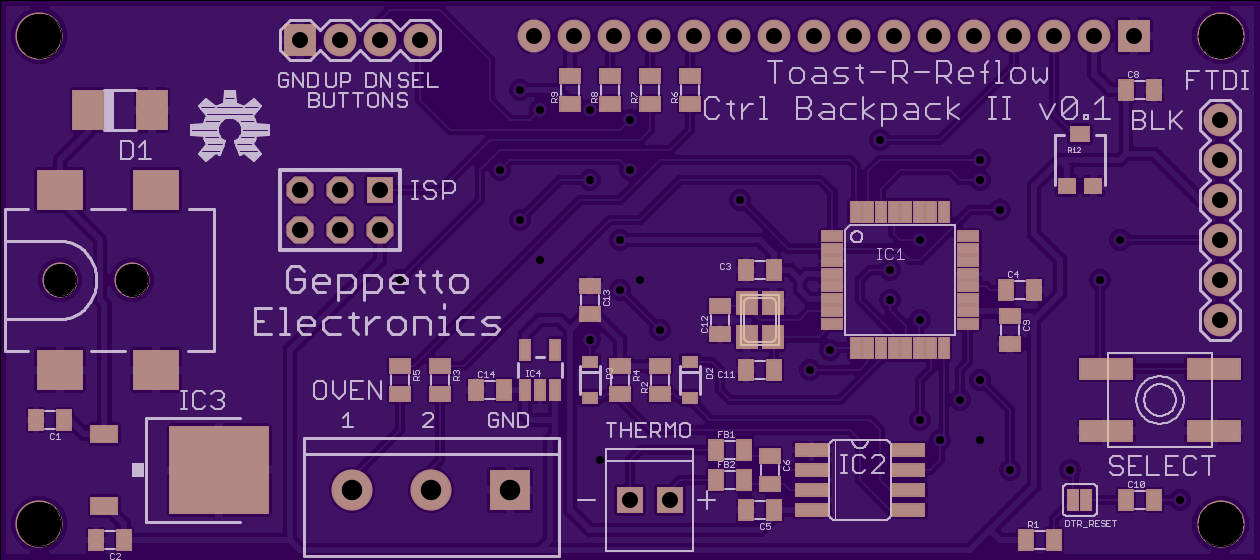
This variant uses an ATMega328P controller and a MAX31855 thermocouple amplifier. It’s more expensive than the model I controller, but there’s lots of room for more features in the flash, it has connections for 3 buttons instead of just 1 and an FTDI serial port
Nick’s Tindie store offers the following kits:
- power board
- Model I controller (ATTiny84/AD8495)
- Model II controller (ATMega328P/MAX31855 variant)
- Each channel of the power switcher is a basic opto-isolated triac circuit
-
Queso DIP for C.H.I.P.
05/09/2016 at 22:42 • 0 commentsWhat goes good with chips? That’s right, dip!
aughter boards (e.g. shields, capes, etc) for Next Thing Co’s C.H.I.P. are called DIPs. Kolja Windeler (JKW) has been prolific in creating Open Source Hardware DIPs including this board that adds 4 USB ports:
Queso DIP
The C.H.I.P. is a great board, a tiny linux computer that fits on your palm. It has one USB outlet and requires a pretty stable 5V supply that can deliver up to 1.1A.
The QUESO attacks theses two drawbacks: It is a hyper active 4-port-USB-HUB. Instead of a passive hub or an active hub the Queso will be hyper-active and provide power TO the C.H.I.P.
Queso DIP offers these features:- Sits on top of your C.H.I.P. with the same footprint
- Keeps all C.H.I.P. pins untouched
- Optional on-board regulator provides stable 5V with up to 3A current from 7-28V DC (e.g. run your C.H.I.P. on the 12V from your car)
Hardware design files are on Github:
/CHIP_QUESOVisit the Next Thing Co forum for more information:
-
SnapNsew Soft Circuit Kit
05/07/2016 at 07:47 • 0 comments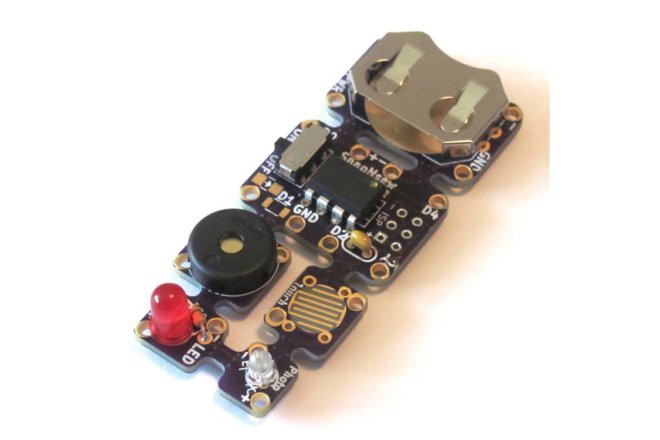
Makersbox created SnapNsew as an easy to assemble, low-cost microcontoller board with 2 input and 2 outputs:
Snap the pieces apart and easily sew them into a soft circuit project or wire them into a project.
MakersBox shared the board on OSH Park:
The original version was an Instructable tutorial.
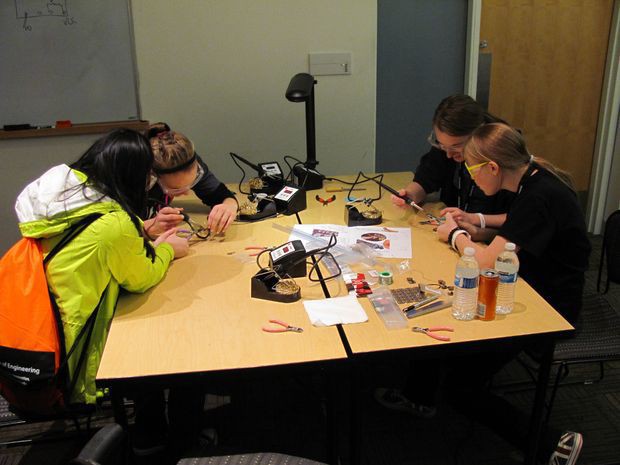
Video of assembly from the Instructable:
-
Getting to Blinky with Kicad 4.0
05/06/2016 at 23:32 • 1 commentChis Gammell of Contextual Electronics and The Amp Hour teaches Kicad beginners how to design a simple board in this new video series:
Getting To Blinky 4.0
 KiCad 4.0 introduced different methods of library management and workflow from the 2013 release which the original Getting To Blinky used:
We decided to re-do the Getting To Blinky series […] the software being out of sync has started to affect learners’ ability to really get going with KiCad and building electronics.
There are 3 new videos from the original series:
We enjoyed seeing purple pop-up several times!
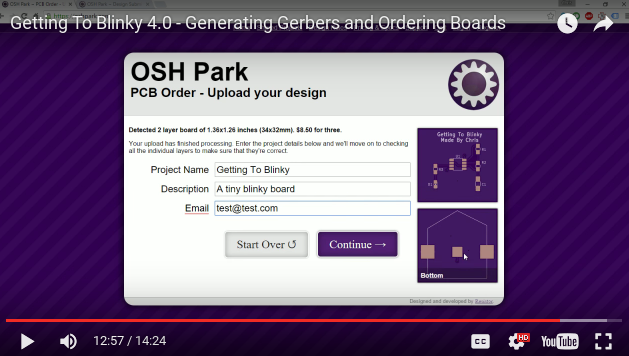
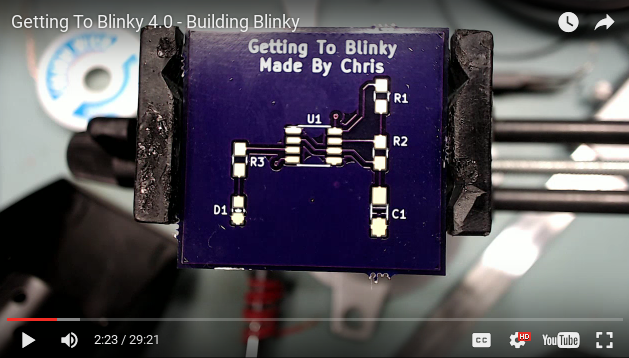
-
Choose next beginner challenge on Reddit
05/06/2016 at 05:09 • 3 comments
We loved the winners of An Unconventional Clock contest and are excited /r/diyelectronics is planning a new beginner challenge:
Choose the topic of the next beginner challenge!
Now, we are looking for topics for the next beginner challenge. If you have an idea, please let everyone know, or respond to others’ ideas. This is a community thing, so the topic of the contest will of course be decided by you as well!
Here are some initial ideas:
- Powerful ATtiny
- What is the most powerful system you can make, controlled by an ATtiny?
- Renewable energy
- Make the most creative system to get energy for a circuit from wind, solar or another form of renewable energy!
- Attractive Circuits
- PCB’s are inherently beautiful to people who are interested in electronics, but can you make a really attractive circuit? Think along the lines of combining different materials in a PCB, or go homemade with perfboard and wires.
- Powerful ATtiny
-
Educational TTL
05/04/2016 at 16:44 • 0 commentsAlexander Shabarshin is designing of inexpensive boards to teach basic digital electronics like logic gates, flip-flops and registers:
Educational TTL
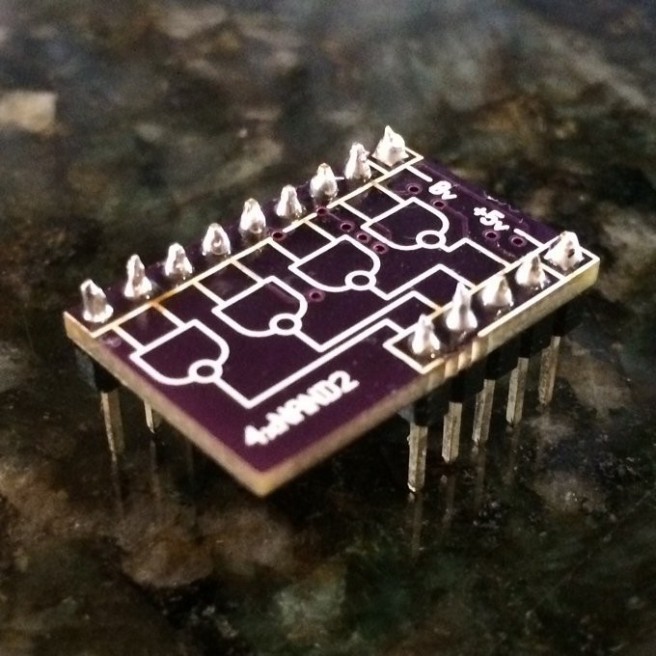
Alexander created a Four 4 NAND Gate board with a 7400 chip in SOIC package mounted on the bottom.
He is now trying a different approach that eliminates the need for a breadboard:
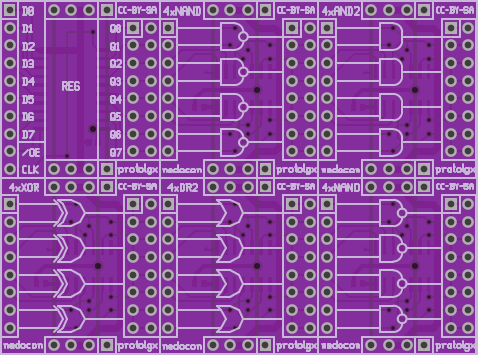
Follow the project on Hackaday.io for further updates
-
Teensy Modular Add-on Boards
05/03/2016 at 23:08 • 0 commentsKris Winer of Pesky Products is creating modular add-on boards for the Teensy 3.x:
 Modular Teensy Project
The intent is to gain 10-DoF motion sensing capability using open-source Madgwick/Mahony sensor fusion in a very small package
One of these 9-axis motion sensors:
- Invensense’s MPU9250
- ST Microelectronics’ LSM9DS0
- Bosch’s BMX-055
is coupled with one of these altimeters/pressure sensors:
- Freescale’s MPL3115A2
- Measurement Specialties’ MS5637
 Kris writes that the modular approach allows other capabilities such as Bluetooth Smart, LiPo battery charging, and motor control boards to be added to the same Teensy to provide flexible configurations tailored to specific applications
-
Black Magic Probe
05/03/2016 at 18:30 • 0 commentsBlacksphere created a debugging tool for
Black Magic Probe
See what is going on ‘inside’ an application running on an embedded microprocessor while it executes.
Currently supported ARM Cortex-M based processor families:
- STM32
- LM3S
- LPC11xx
Black Magic Probe is Open Source Hardware and Open Source firmware:
blacksphere/blackmagicMore details from the project’s wiki:
- Control and examine the state of the target microprocessor using a JTAG or Serial Wire debugging port and on-chip debug logic provided by the microprocessor
- Probe connects to a host computer using a standard USB interface
- Control exactly what happens using the GNU source level debugging software, GDB
- Works with Windows, Linux and Mac environments
-
I2C adapter for retro bubble displays
04/27/2016 at 17:37 • 0 commentsPesky Products created this nifty breakout board:
Retro bubble displays in a convenient I2C package
These HP QDSP-6064 bubble displays have a cool retro look right out of the seventies. More practically, they allow compact numerical displays and, coupled with the HT16K33 LED driver chip, 16 digits can be displayed with only two I2C wires, power and ground. That’s a lot of display without taking up a lot of GPIO pins.
The design offers several advantages:
- no external current-limiting resistors with the HT16K33 chip
- power the display board with 3.3V or 5V
- only 4 wires to control up to 8 x 4 four-digit displays
- 8 boards can be independently addressed via solder jumpers
- small footprint at 1.46″ x 1.51″b
Arduino code to display integer and floating point numbers on the bubble display:
kriswiner/HT16K33_Display_Driver
PeskyProducts shared the board on OSH Park:
BubbleDisplayFrontPack.v02x
-
Teensy addressable LED shield
04/26/2016 at 17:44 • 0 commentsCharles Lakins created this shield for Teensy 3.x which can control addressable RGB LEDs (WS28xx):
Hackaday.io: Teensy v3.1 – FrSky S.Port & WS28xx Led Shield
The shield also enables data logging of Smart Port Sensors: FrSky S-Port telemetry library.
Video of the shield controlling RGB LEDs:
3D-printed Neopixel Triplet holds WS2812B modules connected with 6-pin silicone wire:
irun4fundotca has shared the board on OSH Park:
-
Now testing .kicad_pcb uploads to OSH Park!
04/24/2016 at 08:27 • 0 comments
We're very pleased announce that we're finally able to direct uploads of kicad_pcb files on OSH Park!
This means that you can place an order without going through the plot process, worrying about drill formats, or fiddling with CAM settings. It also means new users can simply grab your design files and ordering without worrying about installing Kicad at all.
We aspire to follow Kicad's expected community conventions. For the most part, we're honoring whatever was set in the user's Plot settings for the last CAM generation, outside of some manufacturing related ones. On the other hand, since the only way to save plot settings is by plotting, we've set a few obvious options to defaults:
- Plot outline on all layers, which is disabled.
- Subtract silk from Mask, which is enabled. This will be done anyway during fabrication.
- Via tenting is left as the user set. That should default to "tented" on new files.
- Plot Invisible Text, which is disabled. This could be configured to user specified, but is probably a good debate topic.
Some of the more obvious CAM aspects are handled. We'll detect the layer stackup, and generate all copper layers in the correct order. If your stackup fails to be detected or appears incorrect, please let us know!
We also have one deviation from the normal Kicad plot routine: Before plotting gerbers, we update all fill zones. This helps protect against the odd case where minor via or trace tweaks results in stale ground planes causing shorts, or if a ground pour is added but never filled.
There's still some known UI issues which are being resolved, most notably blank layers generate a "removing blank layer filename.kicad_pcb", rather than the correct layer name.
NOTE: visit Kicad.info for further discussion
-
OSH Park services and shipping
04/24/2016 at 07:46 • 0 comments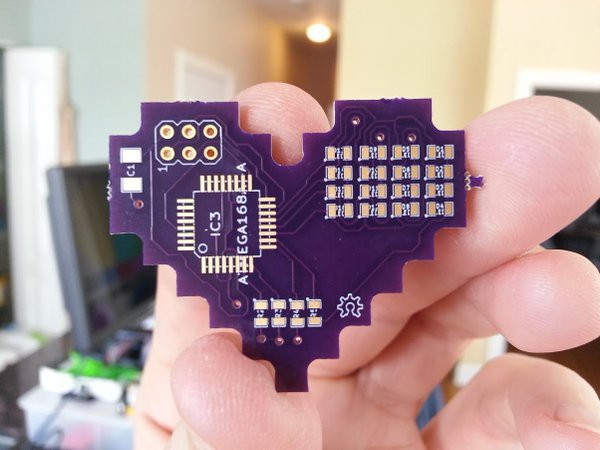
Fabrication Services
OSH Park is a community printed circuit board (PCB) order that brings you high quality, lead-free boards which are manufactured in the United States and shipped for free to anywhere in the world.
We offer purple soldermask over bare copper (SMOBC) and an ENIG (Electroless Nickel Immersion Gold) finish.
Full stackups and design rules are linked under Services below.
Please email us at support@oshpark.com with questions!
Two Layer Boards
All two-layer boards ship with FR4 substrate, purple mask over bare copper, and ENIG (immersion gold) finish.
Minimum design rules are 6 mil trace clearance, 6 mil trace width, 13 mil drill size, and 7 mil annular ring.
Service Cost Time To Ship Board Thickness Copper Weight Prototype $5/sq-in for a set of three boards 12 Calendar Days 63mil (1.6mm) 1 oz Super Swift $5/sq inch for three + $89 Swift Fee 5 Business Days 63mil (1.6mm) 1 oz 2oz 0.8mm $5/sq-in for a set of three boards 2-3 weeks 32mil (0.8mm) 2 oz Medium Run $1/sq inch. 150 sq inch minimum. 2-3 Weeks 63mil (1.6mm) 1 oz One-sided boards can be ordered on any of our 2 Layer services.
Four Layer Boards
All 4 layer boards ship with FR408 substrate, purple mask over bare copper, and ENIG (immersion gold) finish.
Minimum design rules are 5 mil trace clearance, 5 mil trace width, 10 mil drill size, and 4 mil annular ring.
We do not support blind or buried vias.
Service Cost Time To Ship Board Thickness Copper Weight Prototype $10/sq inch for a set of three boards 2-3 Weeks 63mil (1.6mm) 1 oz outer
1/2oz innerMedium Run $2/sq inch. 150 sq inch minimum. 3-4 Weeks 63mil (1.6mm) 1 oz outer
1/2oz innerShipping Information and Turnaround Times
There are two periods of time to think about when making your order:
- Fabrication time between when you place your order and when we receive boards from the fab.
- Shipping time between when we ship and when the post office delivers your order to you.
All PCBs ship from Lake Oswego, Oregon, and are fully manufactured in the United States.
Fabrication Times
Turnaround times range from 5 business days to 3-4 weeks, depending on which service you select.
Please see our Services page for options.
Shipping Times
Domestic US Orders
International ordersService Typical Shipping Times Tracking Cost  USPS First Class
1-5 business days Yes $0  USPS Priority
2-3 business days Yes $5  USPS Express
1-2 business days Yes $20  UPS Ground
Typically 1-7 business days. Yes Varies  UPS Second Day Air
Delivery by the end of the second business day Yes Varies  UPS Next Day Air
Delivery by the end of next business day Yes Varies
Combining Orders for Expedited ShippingService Typical Shipping Times Tracking Cost International First Class Varies between 3 days and 3 weeks, depending on destination country. This option may be delayed by your country’s Customs Service.
Due to variability of shipping times, this option is not advised for time-critical packages. For those packages, we suggest an expedited shipping option.
75% of orders are delivered in under 2 weeks.
90% of orders are delivered in under 3 weeks.No $0  USPS Priority
6-10 days
This option may be delayed by Customs.Partial (Only inside US) $25  USPS Express
3-7 days
This option may be delayed by Customs, although it’s typically short.Yes $50  UPS Expedited
Delivery in two business days to Canada.
Delivery in two or three business days to Mexico.
Delivery in three or four days to Europe.
Delivery in four or five days to Asia and Latin America.Yes Varies  UPS Express Saver
Delivery by the end of next business day to Canada.
Two business day delivery to Europe and Latin America.
Two or three business days to Asia.Yes Varies During checkout, the selected shipping method will be used for all items in your cart. This includes orders that will be shipped at different times, such as ones containing a mix of 2 layer, 4 layer, or Super Swift boards.
For items purchased at different times (and with different order numbes), we cannot guarantee combined shipping. However, our system will automatically try to combine them into the fastest selected parcel type, as long as they’re shipped...
Read more -
PCB Order Pre-flight Checklist
04/23/2016 at 00:58 • 0 comments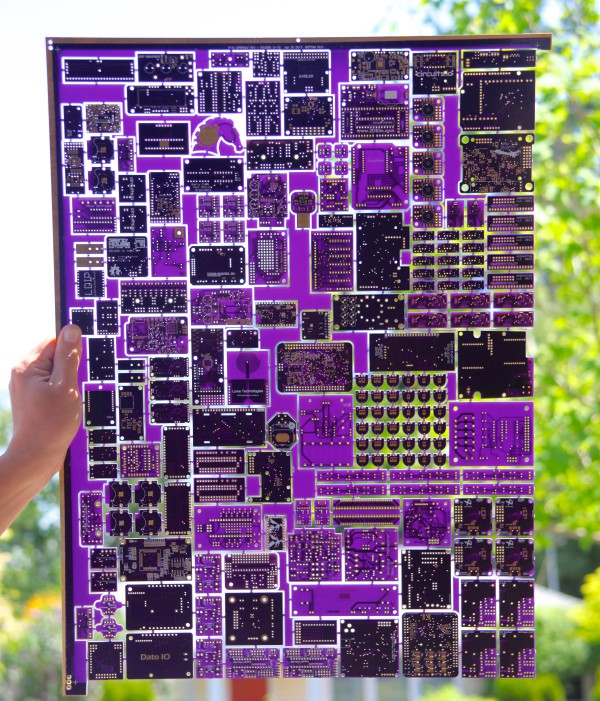
Excited about the new board design?
Great! So are we!
If you get through all these steps and are still having trouble, or just have questions, feel free to contact support@oshpark.com.
Check your Design Rules and Specs
- The design rules, stackup, and specifications depend on your chosen fabrication service.
- Run your DRC tool. We don’t perform any design rule checking on our end!
- EAGLE users can load our design rules files
Preparing the design for fabrication
- Preparing the board outline
- If you have any internal cutouts or slots, you’ll want to verify that your design tool generates them how we expect.
- Preparing a bitmap or logo
Preparing the manufacturing files for submission
- It’s often a good idea to take a look at our Design Tool Help section.
- Run the DRC checker one more time. You can’t use this tool too often!
- EAGLE users can usually upload the .BRD file directly to oshpark.com
- Generate the gerbers
- Our Design Tool Help has tips for generating gerbers from design tools
- Preparing the drills file
- There’s a lot of odd drill formats, so this tends to be the most problematic file. Our Design Tool Help section will have specific tips for your tool.
- Verify the gerbers using a compatible gerber viewer program, such as gerbv.
- If you have a 4 layer board, convert all the internal layers to positive layers.
- Remove Alignment points
- Supported Naming Pattern
- Finally, upload the gerbers in a .zip file to oshpark.com.
-
Design Tool Help for over 20 CAD packages
04/22/2016 at 23:56 • 2 comments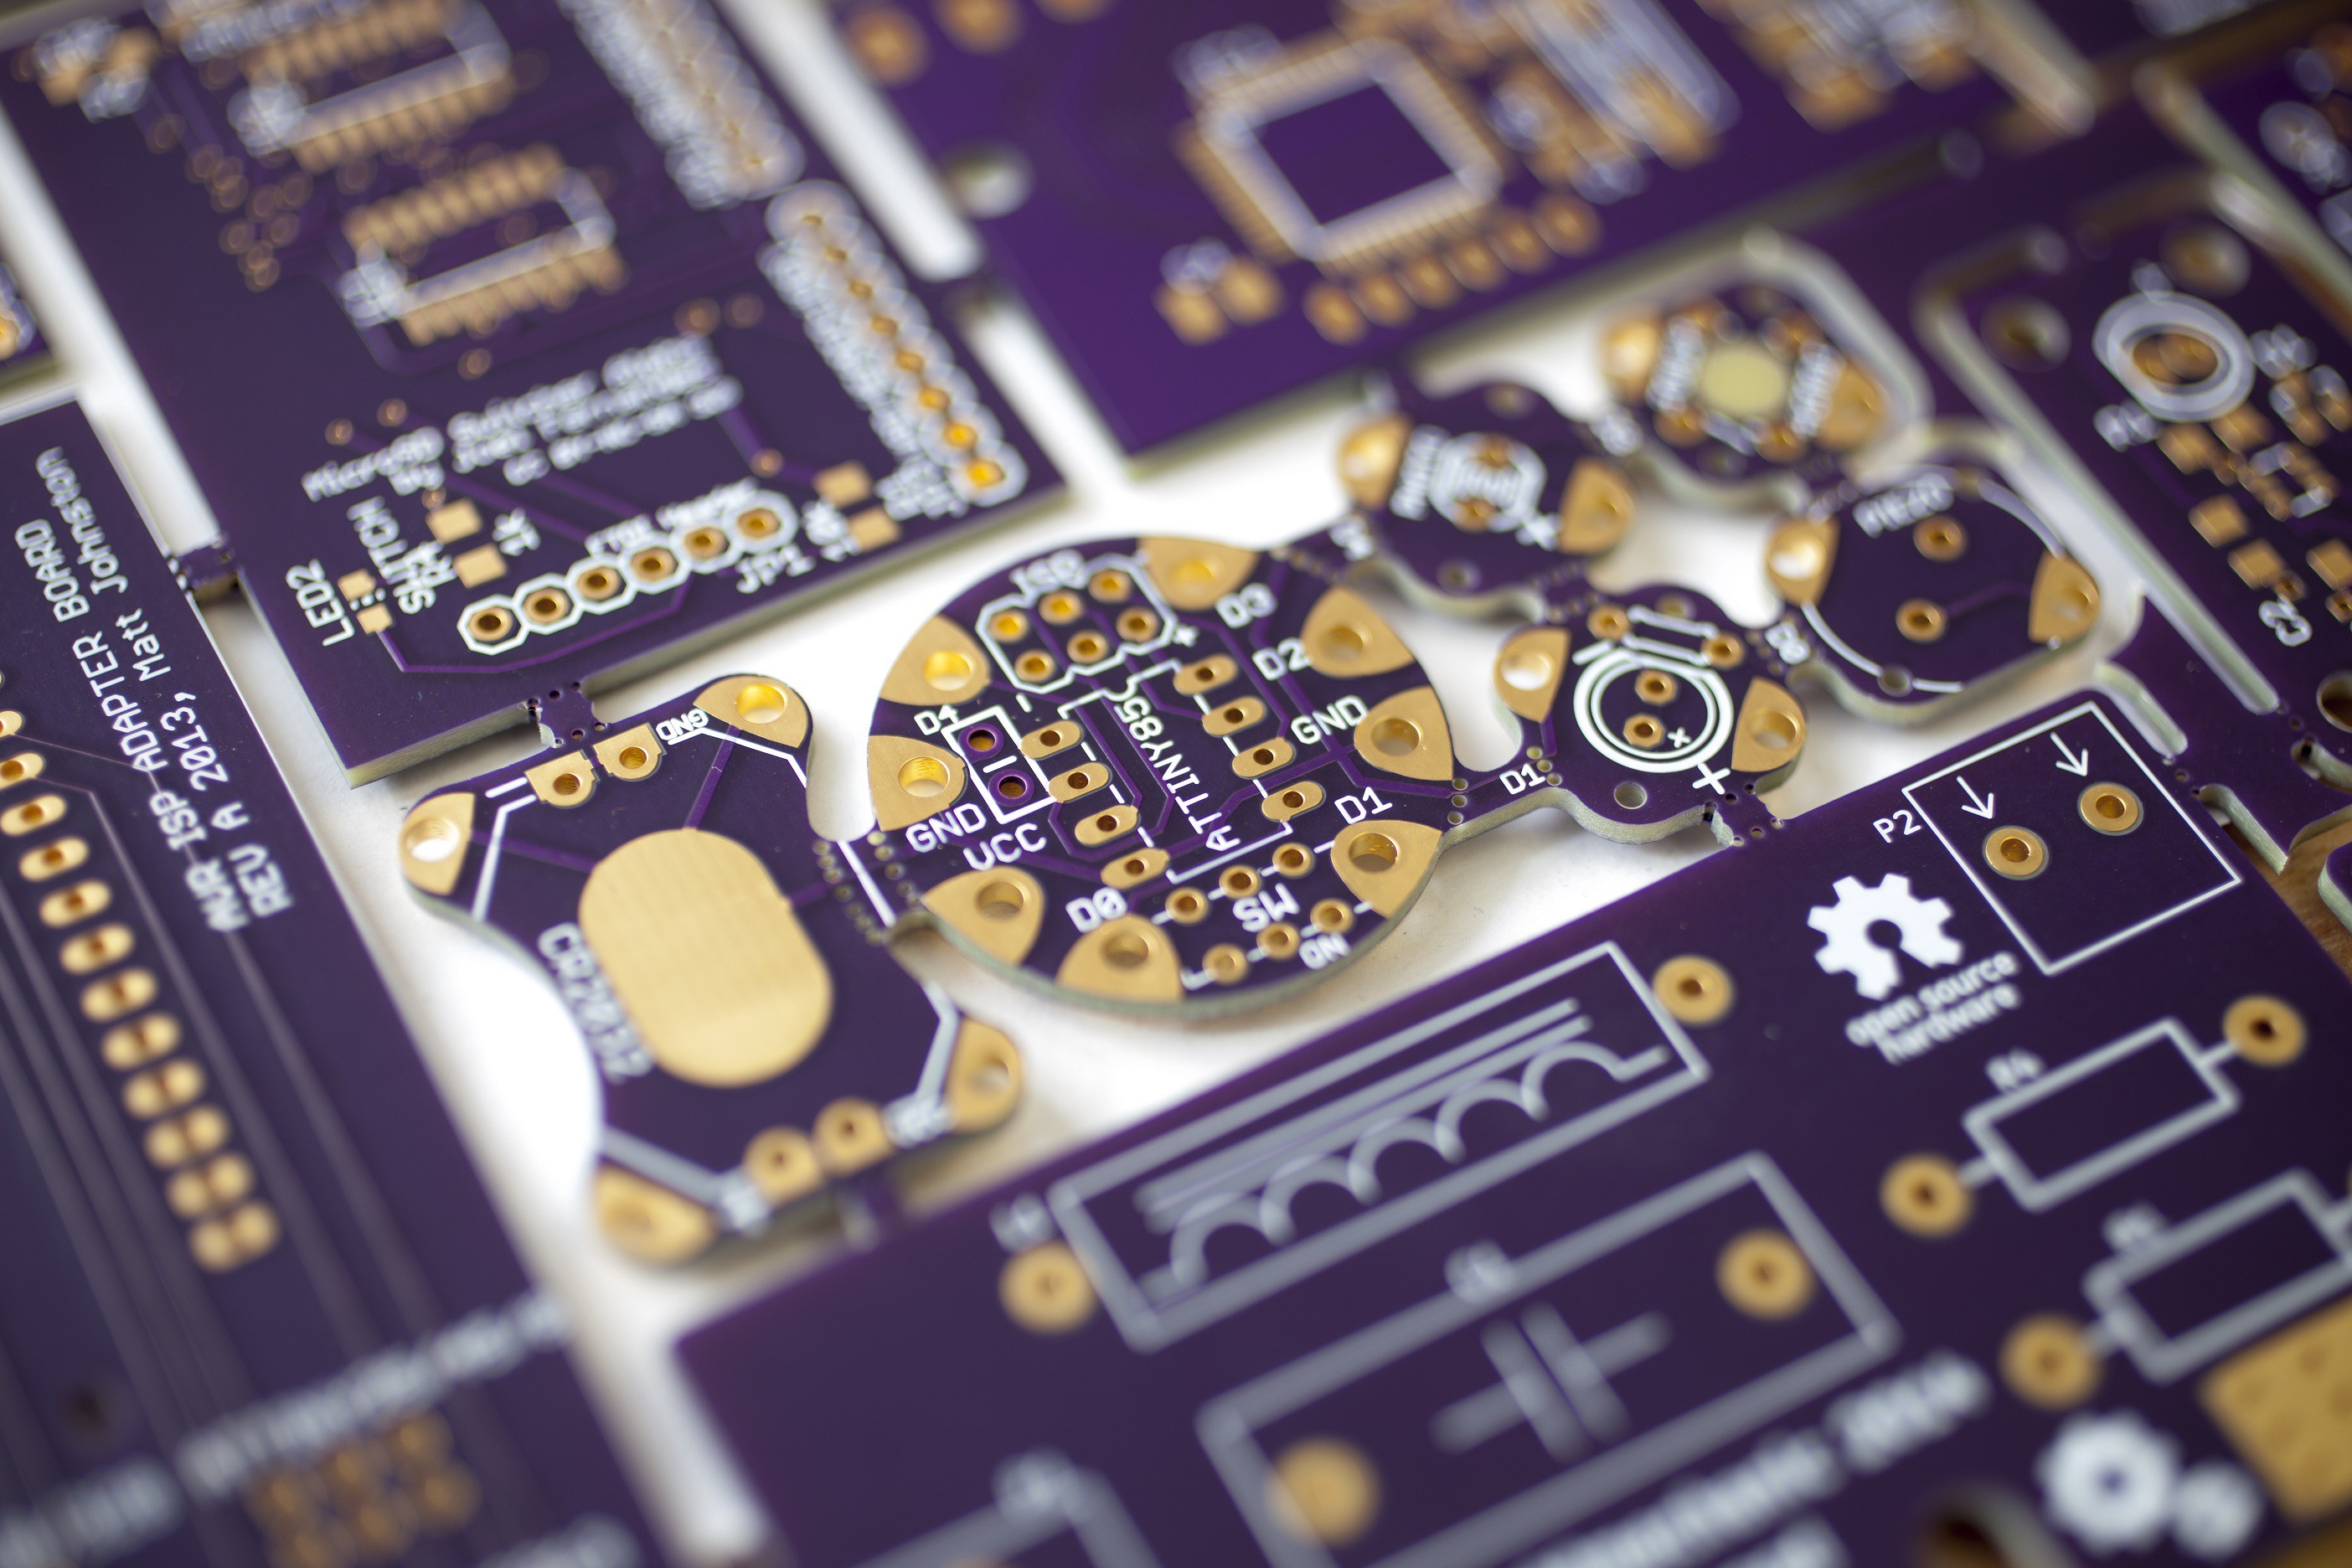
Having trouble uploading?
Curious about what we want from your design files?
Here are some help pages for using common CAD packages with OSH Park:
- Altium CircuitMaker
- Altium Designer
- Cadence Allegro (OrCAD)
- Copper Connection
- DesignSpark
- DipTrace
- Eagle
- Easy-PC
- FreePCB
- Fritzing
- GerbV
- KiCAD
- Mentor Graphics PADS
- Protel 99 SE
- Proteus ARES
- Ranger
- Sprint
- Tango
- Traxmaker 2000
- NI Ultiboard
- Upverter
Running into something unusual? Can’t figure it out?
We can help! Send your files to support@oshpark.com, and we’ll get everything in order.
You might also take a look at our more general errors relating to submitting orders.
-
Star Simpson launches Circuit Classics
04/22/2016 at 07:25 • 0 comments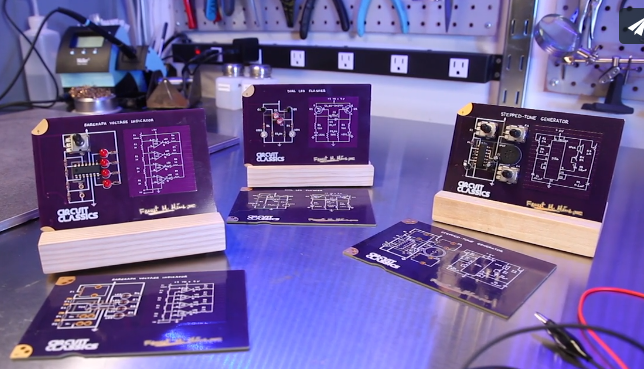
We’re very excited that Star Simpson has now launched Circuit Classics on Crowd Supply!
Exquisite printed circuit boards that bring to life Forrest Mims’ vintage designs from “Getting Started in Electronics.”
Forrest M. Mims III is a trusted name in the electronics world for good reason: his charming and engaging texts have drawn millions of people into the world of electronics for the first time. I am bringing some of those hand-drawn circuits projects to life by creating an exquisitely designed series of finely crafted and highly detailed boards.
Our past blog posts about Star and Circuit Classics:
-
Winners of An Unconventional Clock contest
04/20/2016 at 19:55 • 0 comments
Congratulations to the winners of An Unconventional Clock contest in /r/diyelectronics on reddit!
Winner of Community vote:
Steam Punk owl clocks by Kurt Schaefer
With 20 votes total, this comprehensive build combines electronics, woodworking and using plexiglass to simulate Nixie tubes in a clock with a bunch of added features.
Be sure to check out Kurt’s detailed blog about the design and construction:
Plexitube Owl Clock
position an LED at the edge of a piece of acrylic that has a pattern laser-etched into its surface, and the LED lights up the pattern. Long ago I’d realized that a stack of 10 laser-etched digits with an LED to light up each digit might have the same visual charm as a Nixi Tube
Winner of Jury vote:
Persistence of Vision Clock by mr_stivo
We appreciated the innovative idea and the finished look the project has. Moreover, the documentation was great and it looked awesome in the demo video.
-
Buck Regulator Olympics
04/20/2016 at 19:29 • 0 comments
Buck Regulator Olympics is the current advanced contest in /r/diyelectronics on reddit:
"The goal is to build a switching buck DC-DC converter from discrete components that can step down a fairly common input voltage to another common output voltage--in this case, 3.3V."
-
One Square Inch projects on OSH Park
04/20/2016 at 02:16 • 0 commentsWe are honored to see many of the One Square Inch entries used OSH Park to create their boards. Here’s a few:quadcopter in one inch
- "itsy-bitsy teeny-weeny fully autonomous quadcopter"
- OSH Park shared project: minicopter/201510.1
Micro Word Clock
- "Displaying the time on 8×8 pixels"
- OSH Park shared project: MicroWordClock v2
Square Inch USB Sound Card
- Small audio interface for adding a digital channel to an analog mixer
- OSH Park shared project: SIUSBSC
Key Pass
- Keychain USB multiple password manager/generator/injector
- OSH Park shared project: Key Pass
-
2 Layer Half-Height Double-Copper
04/20/2016 at 02:04 • 0 comments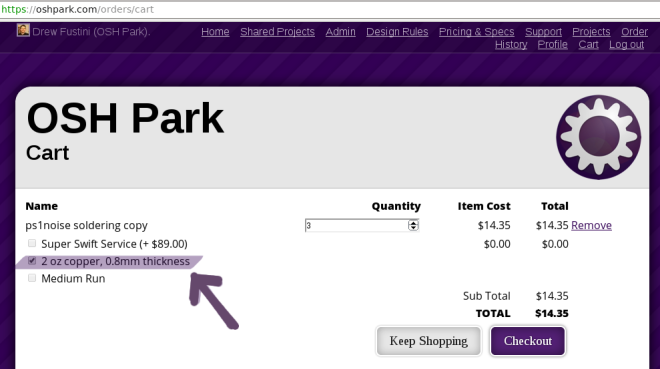
OSH Park is pleased to offer a new PCB option:
2 Layer Half-Height Double-Copper
A special stackup intended for a variety of high-power and low weight circuit designs. This service features a 0.032″ (0.8mm) thick PCB, and includes 2oz (2.8mil, 70um) copper. That’s half the thickness of our standard boards, and with twice the copper!
Pricing
$5 per square inch, which includes three copies of your design. For example, a 2 square inch board would cost $10 and you’d get three copies of your board. You can order as many copies as you want, as long as they’re in multiples of three.
Turn Times
Orders are sent to fabrication every two weeks, and have a turn time from the fab of one week.
You can get a quote, approve a design, and pay for an order at OSH Park.




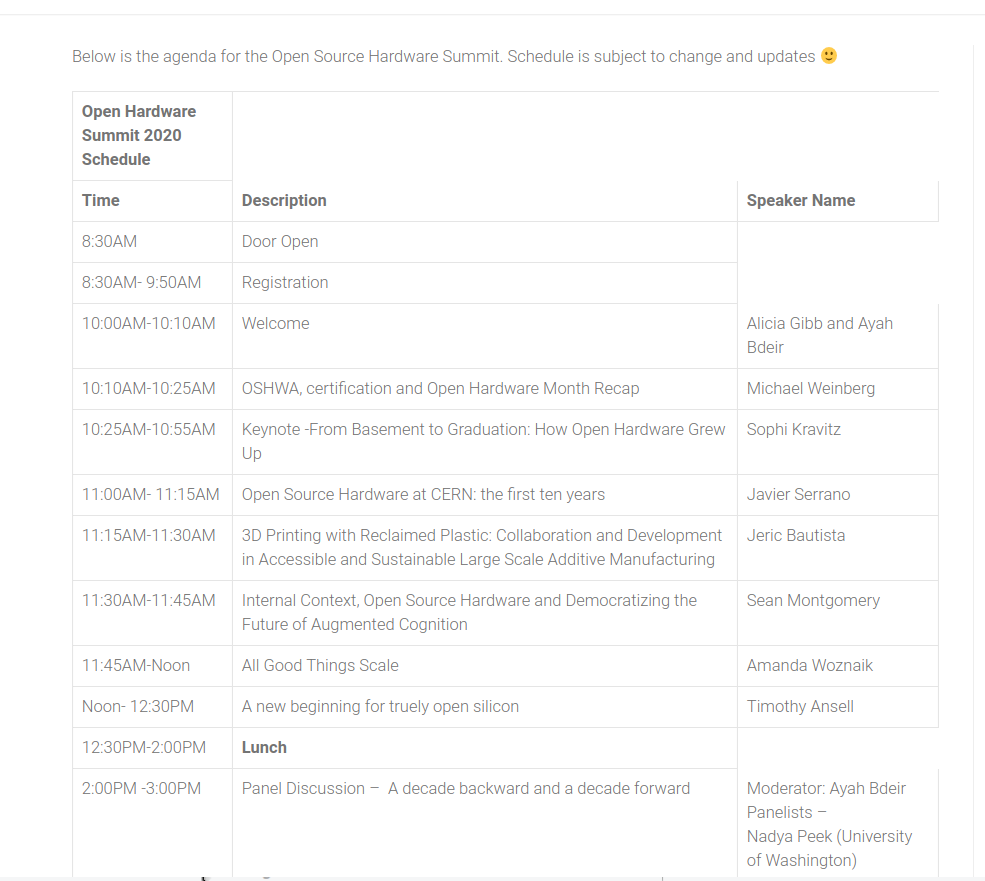


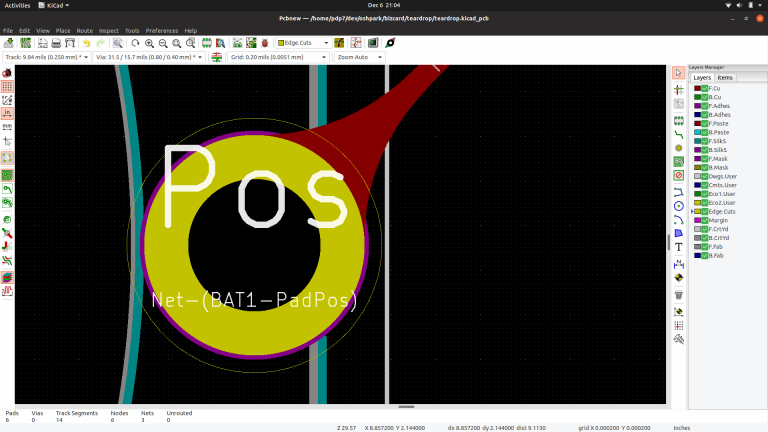
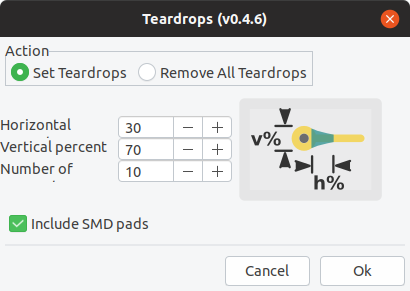
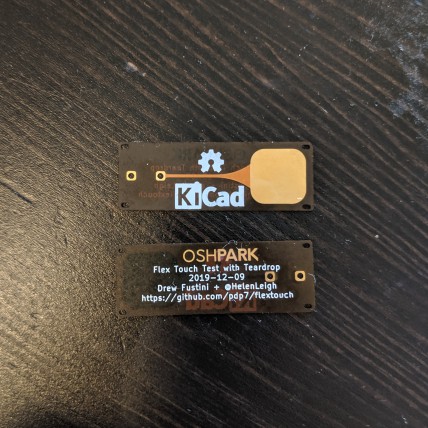
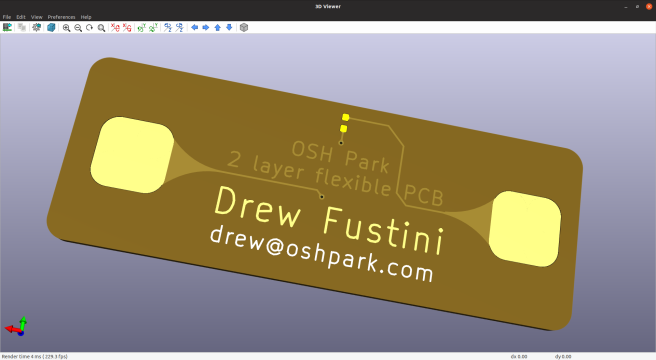


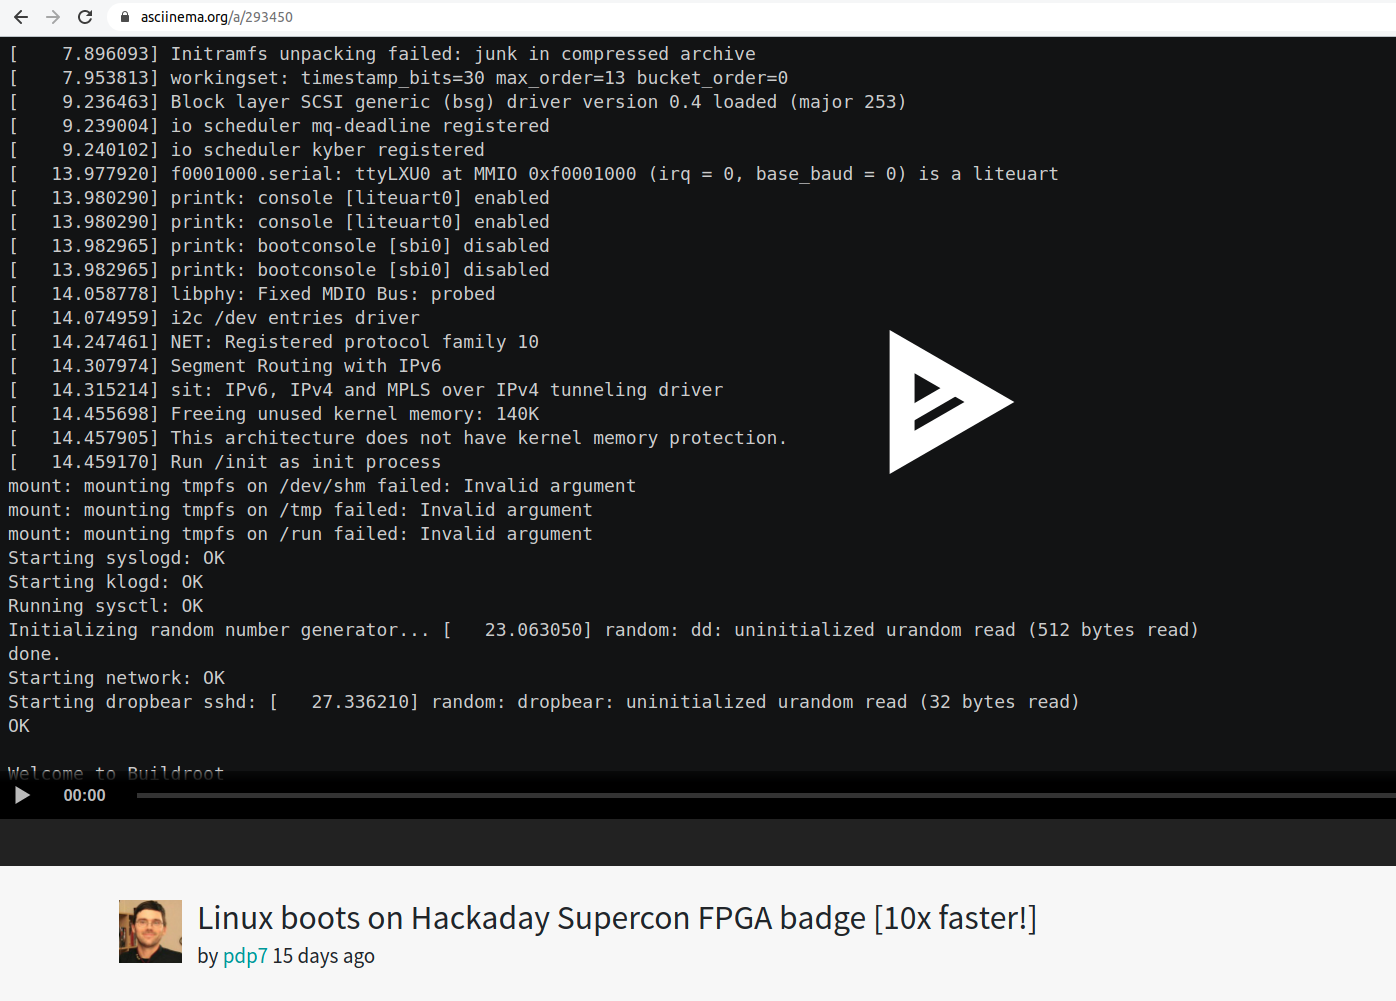
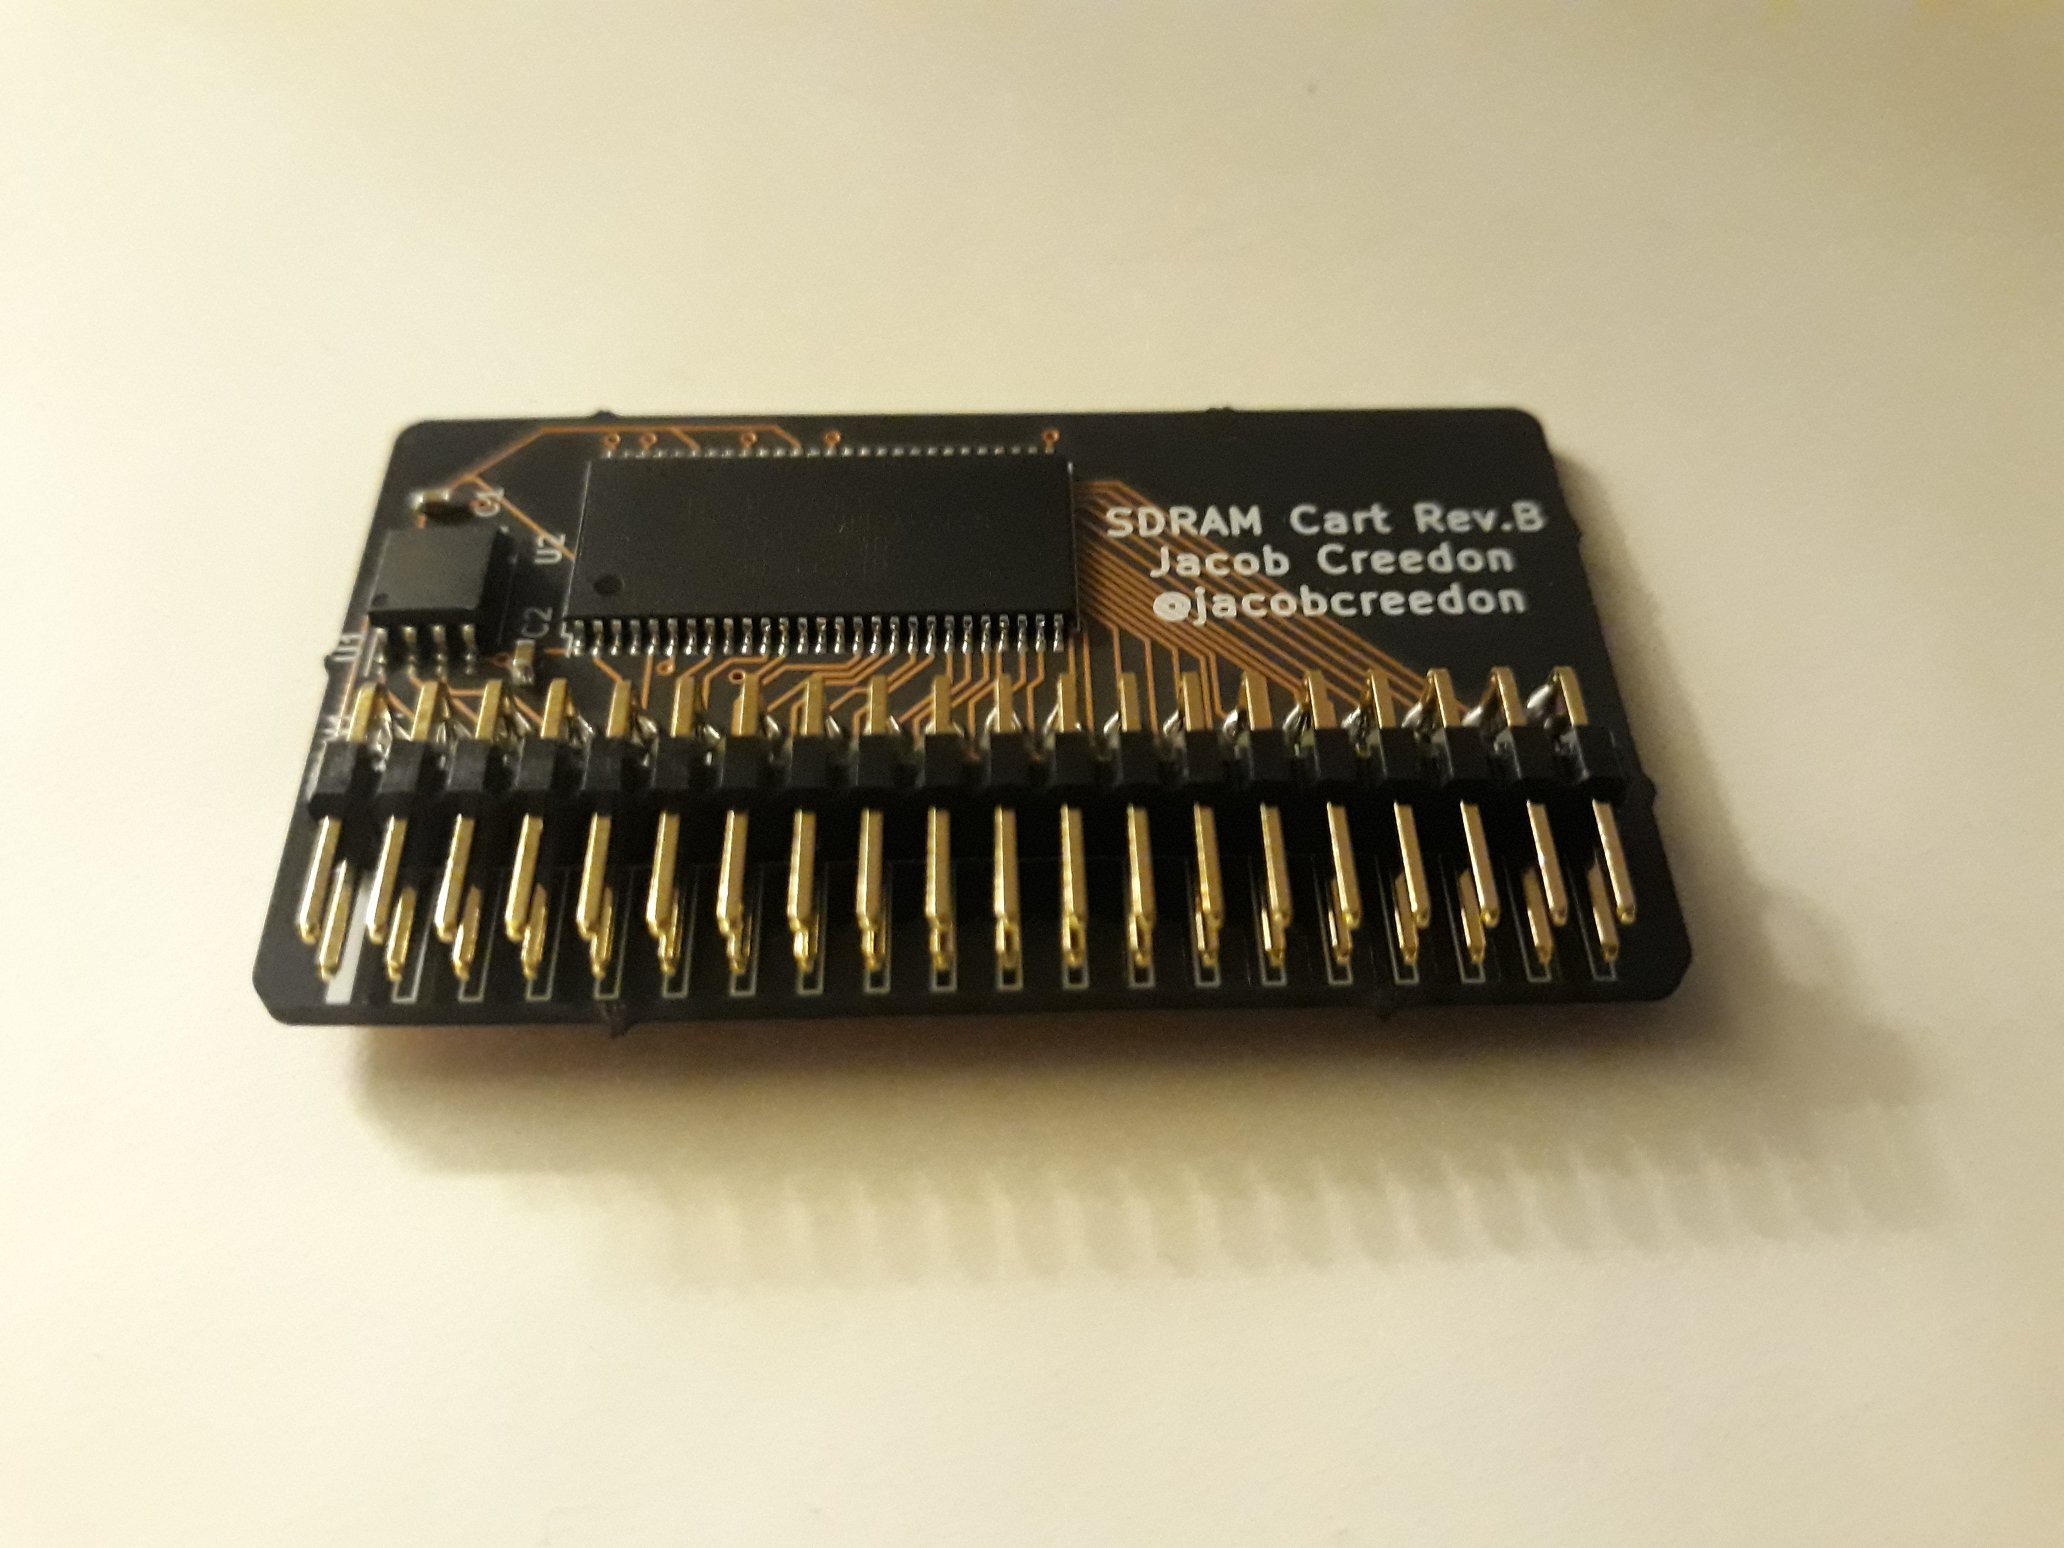
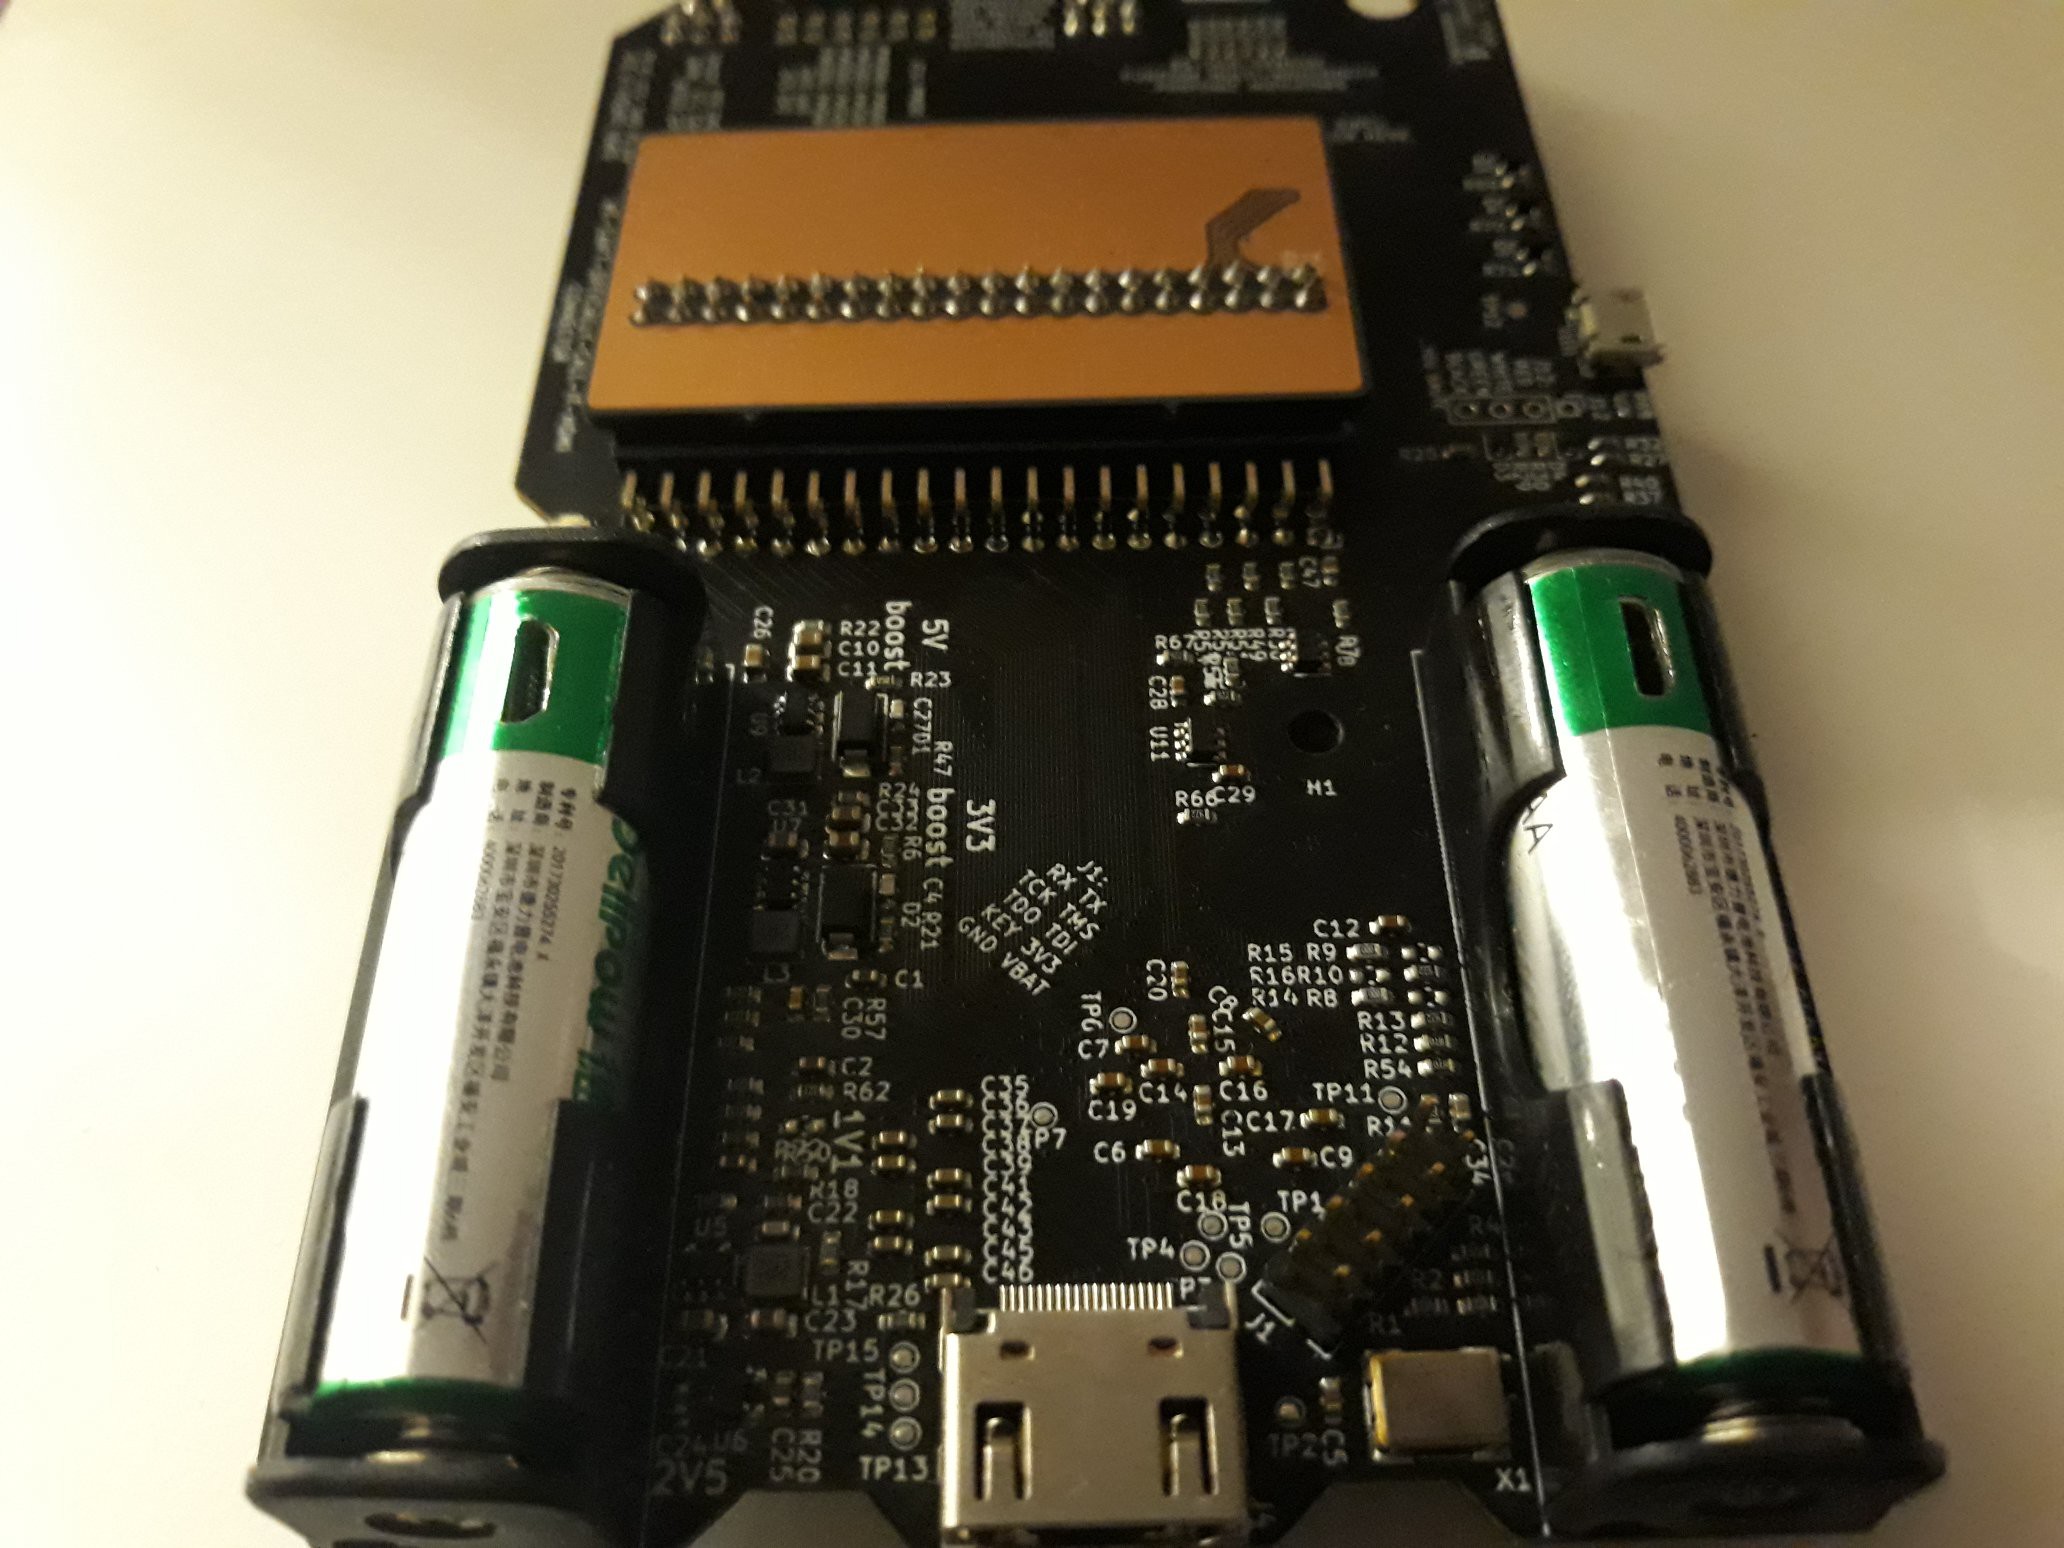
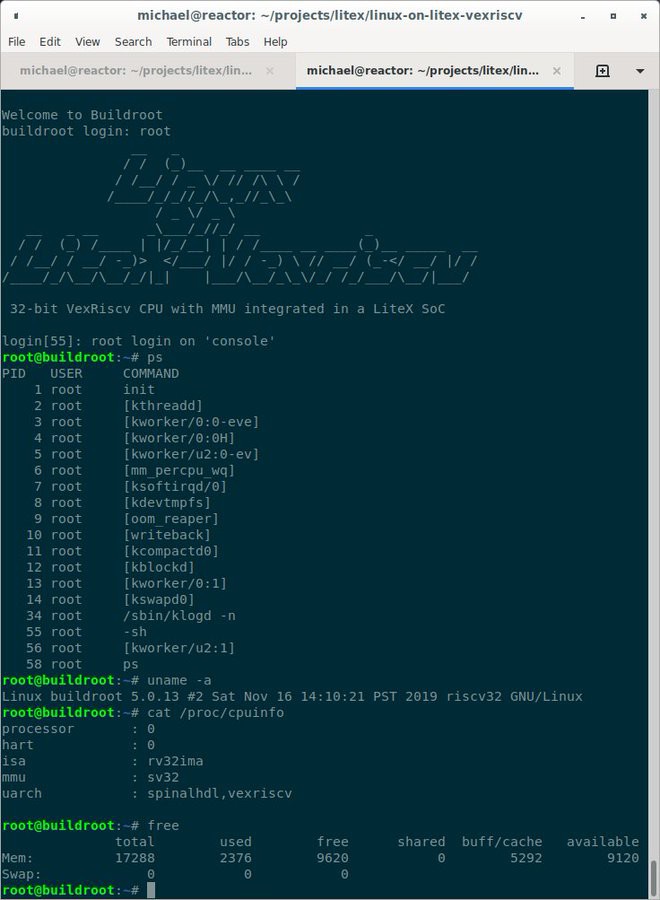
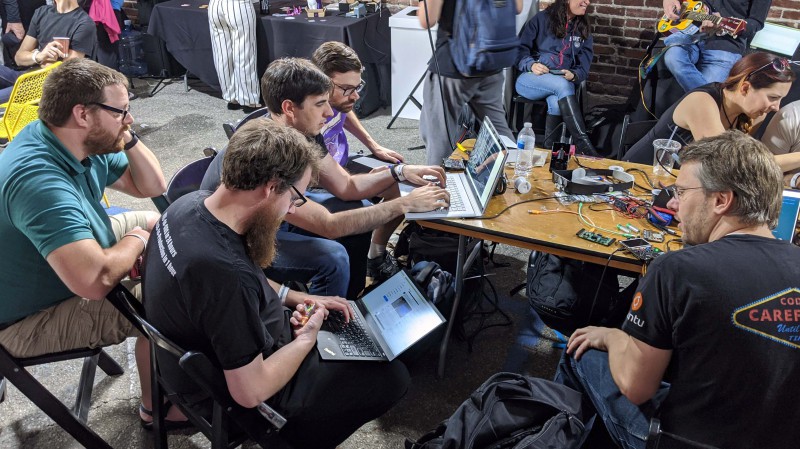
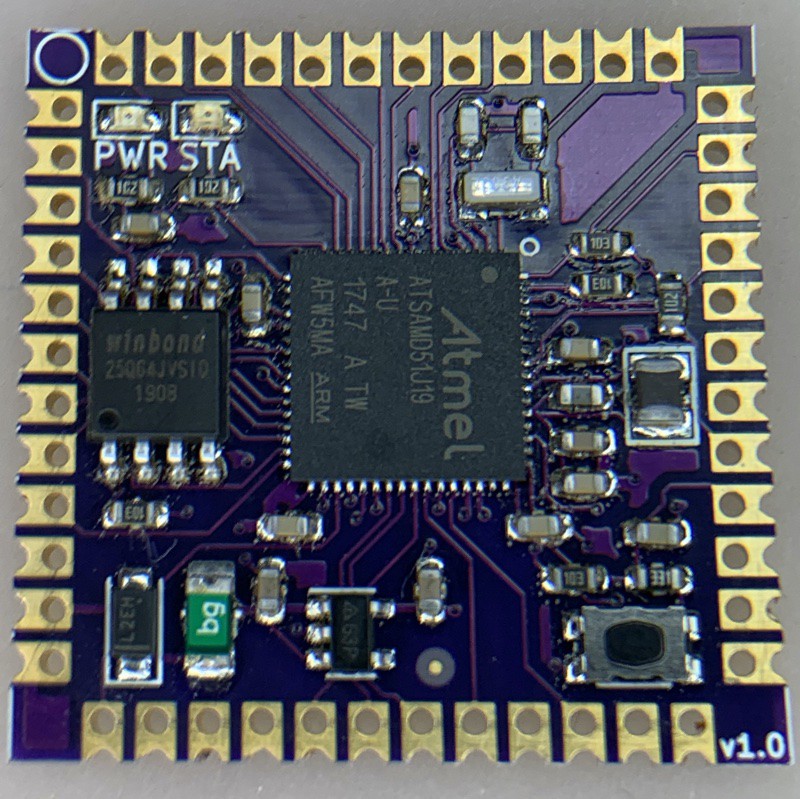




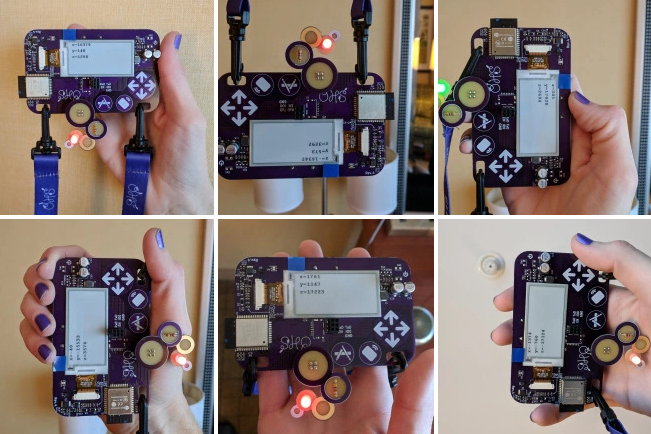
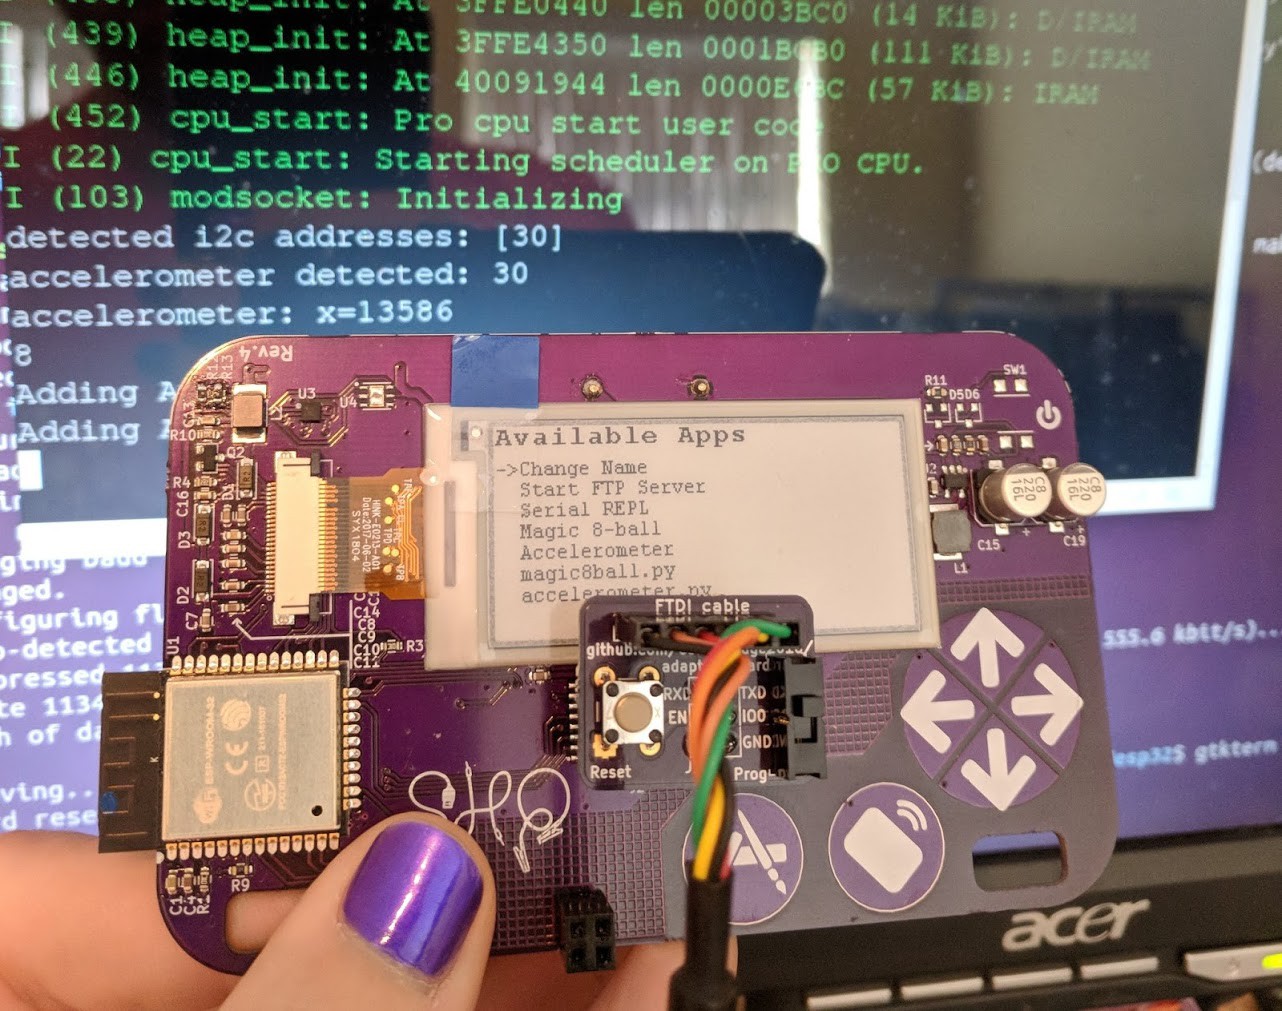
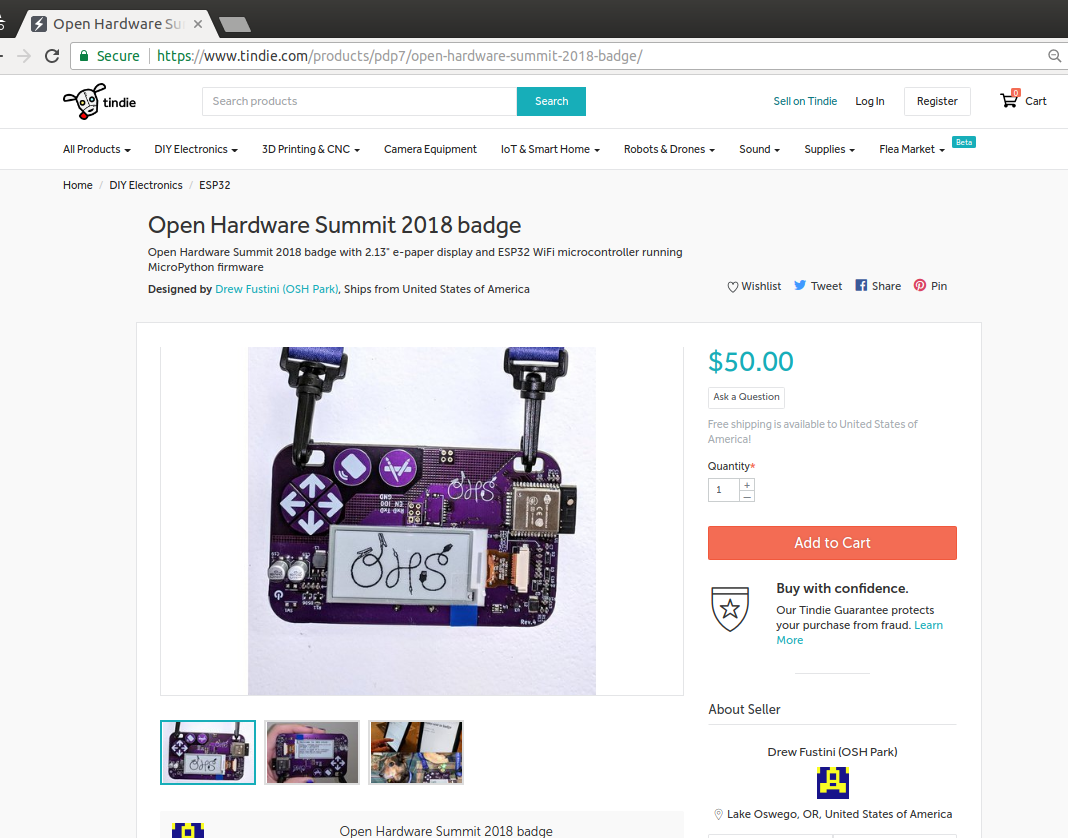
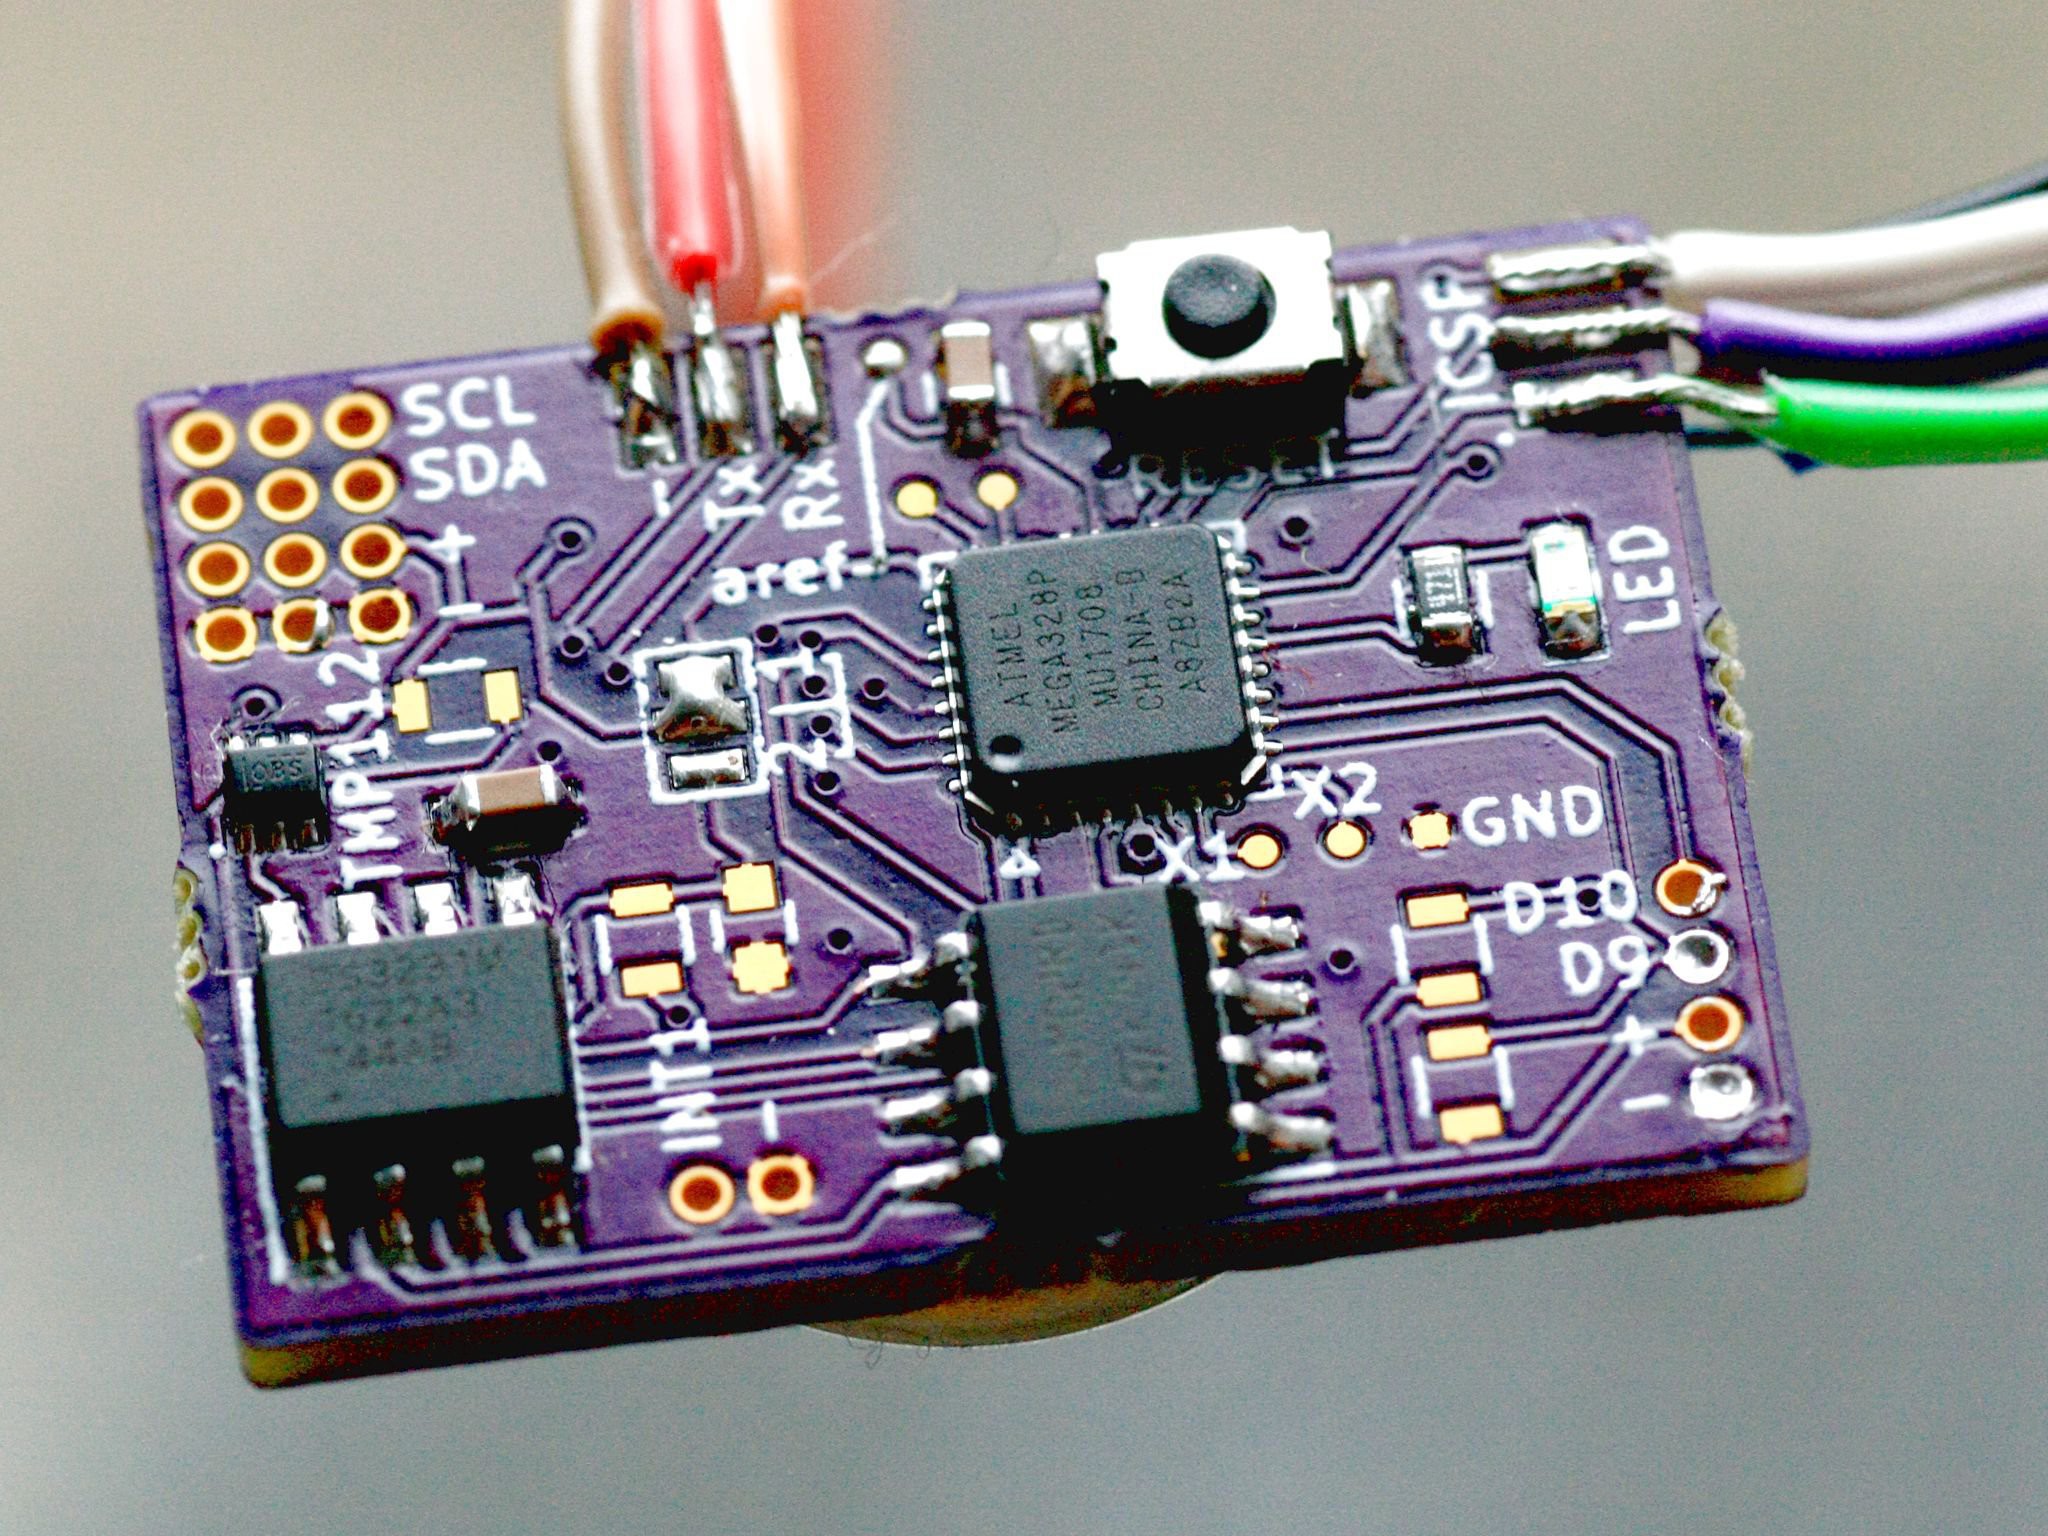

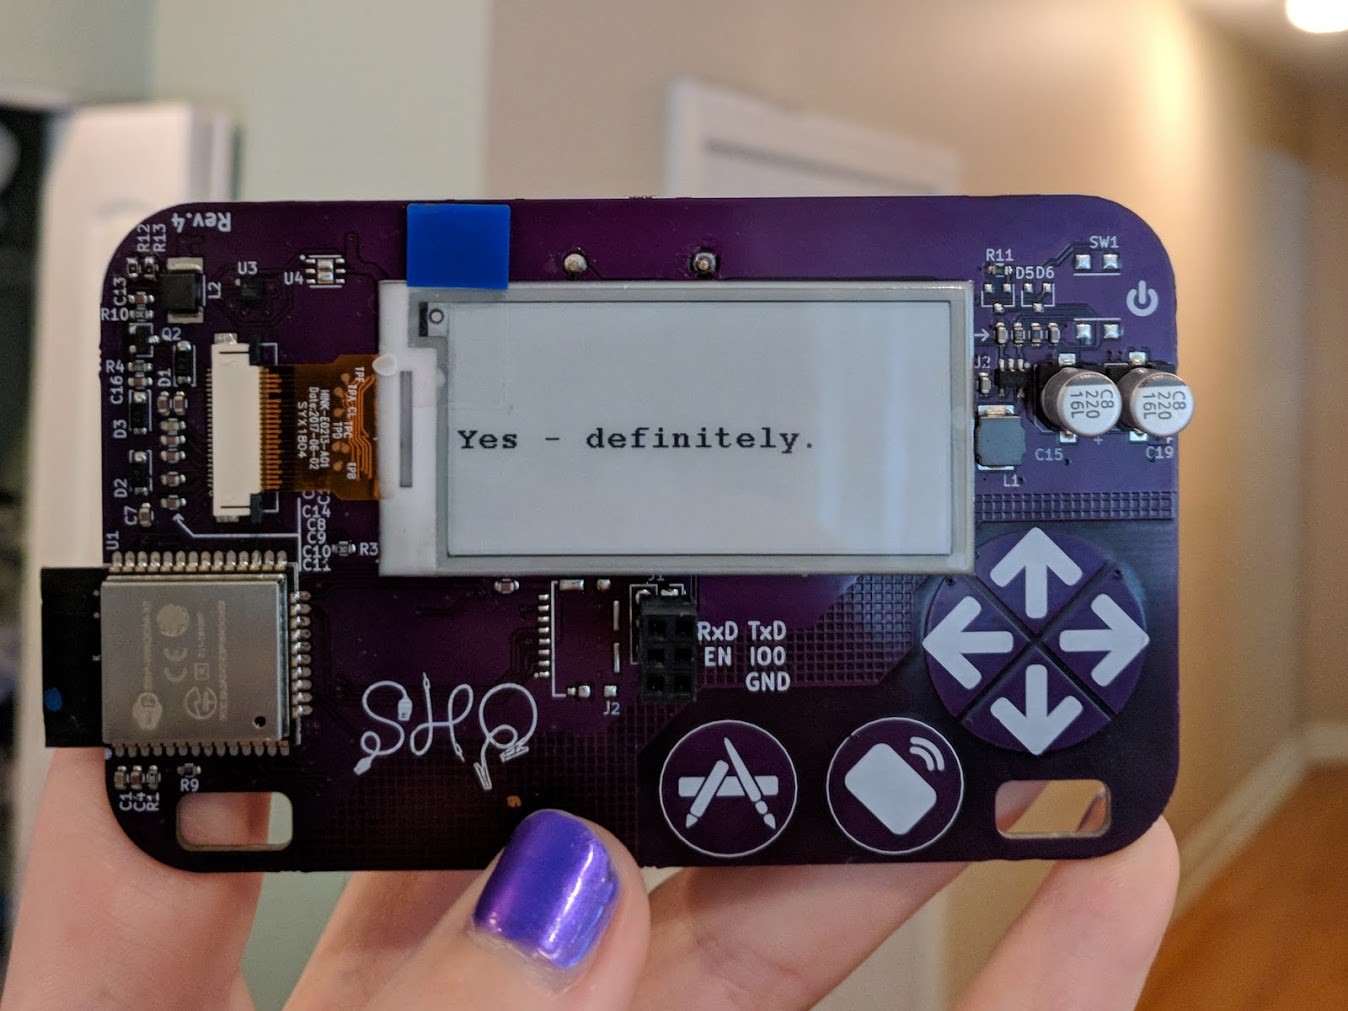
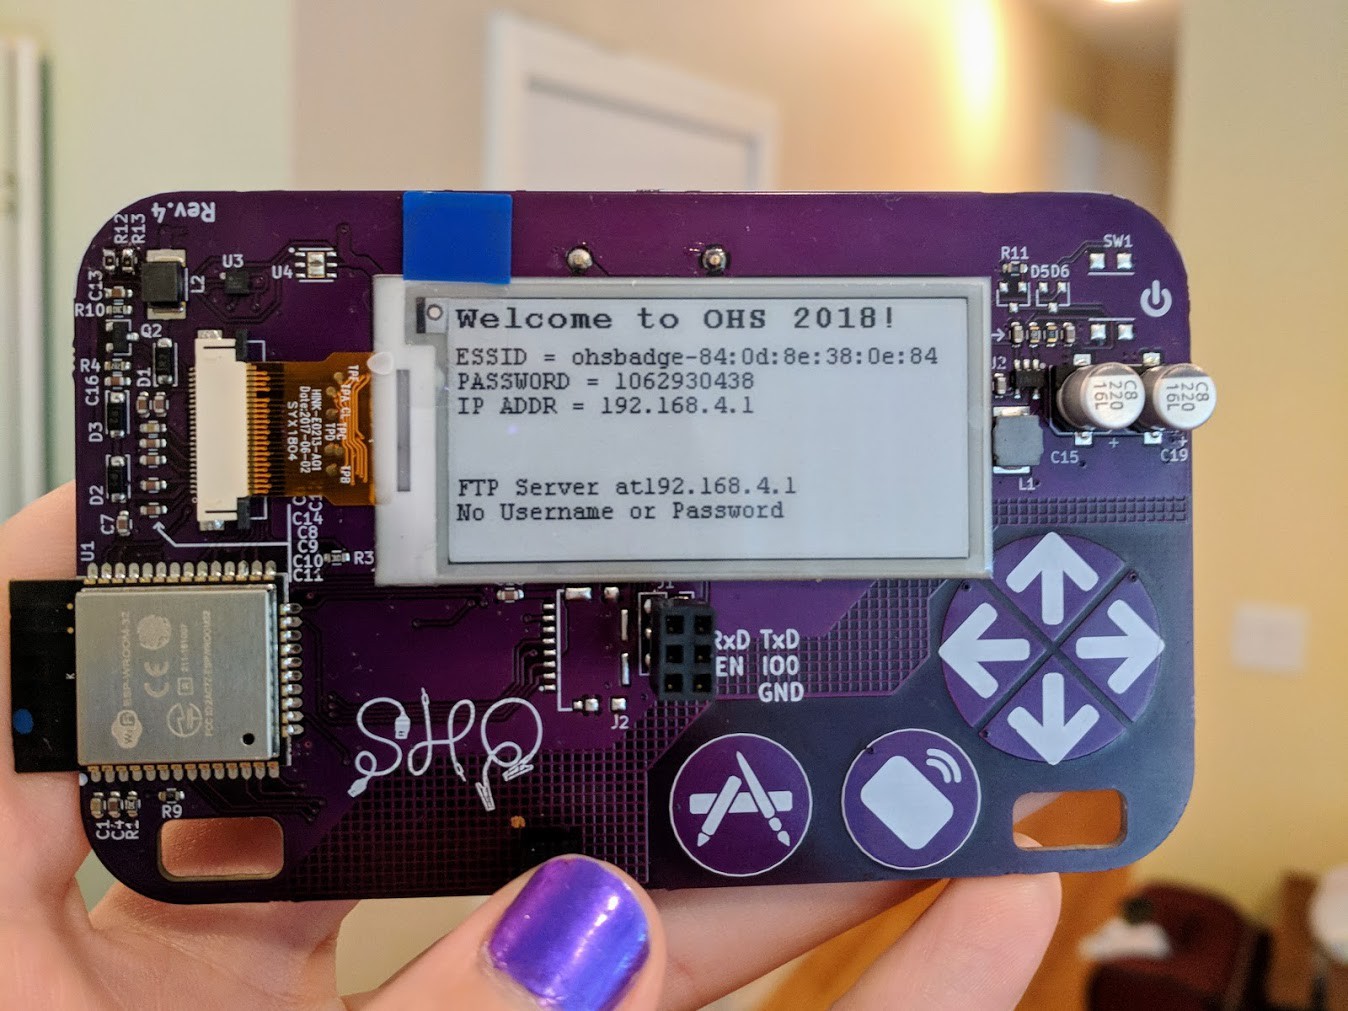
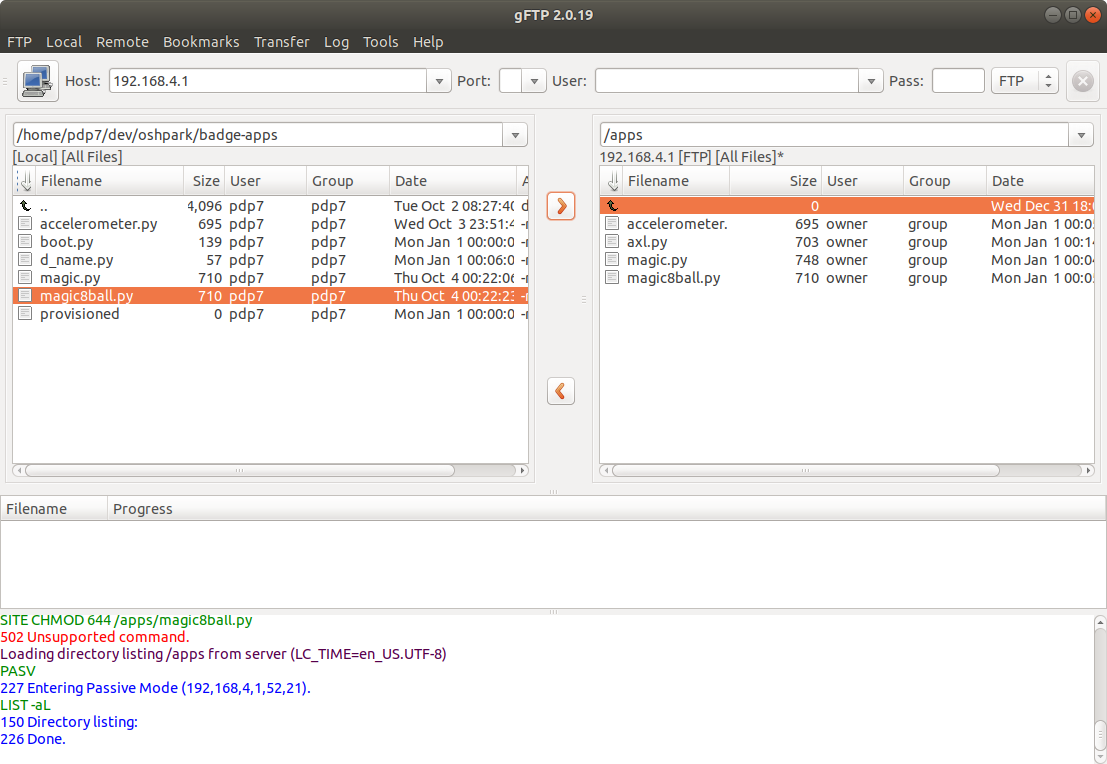
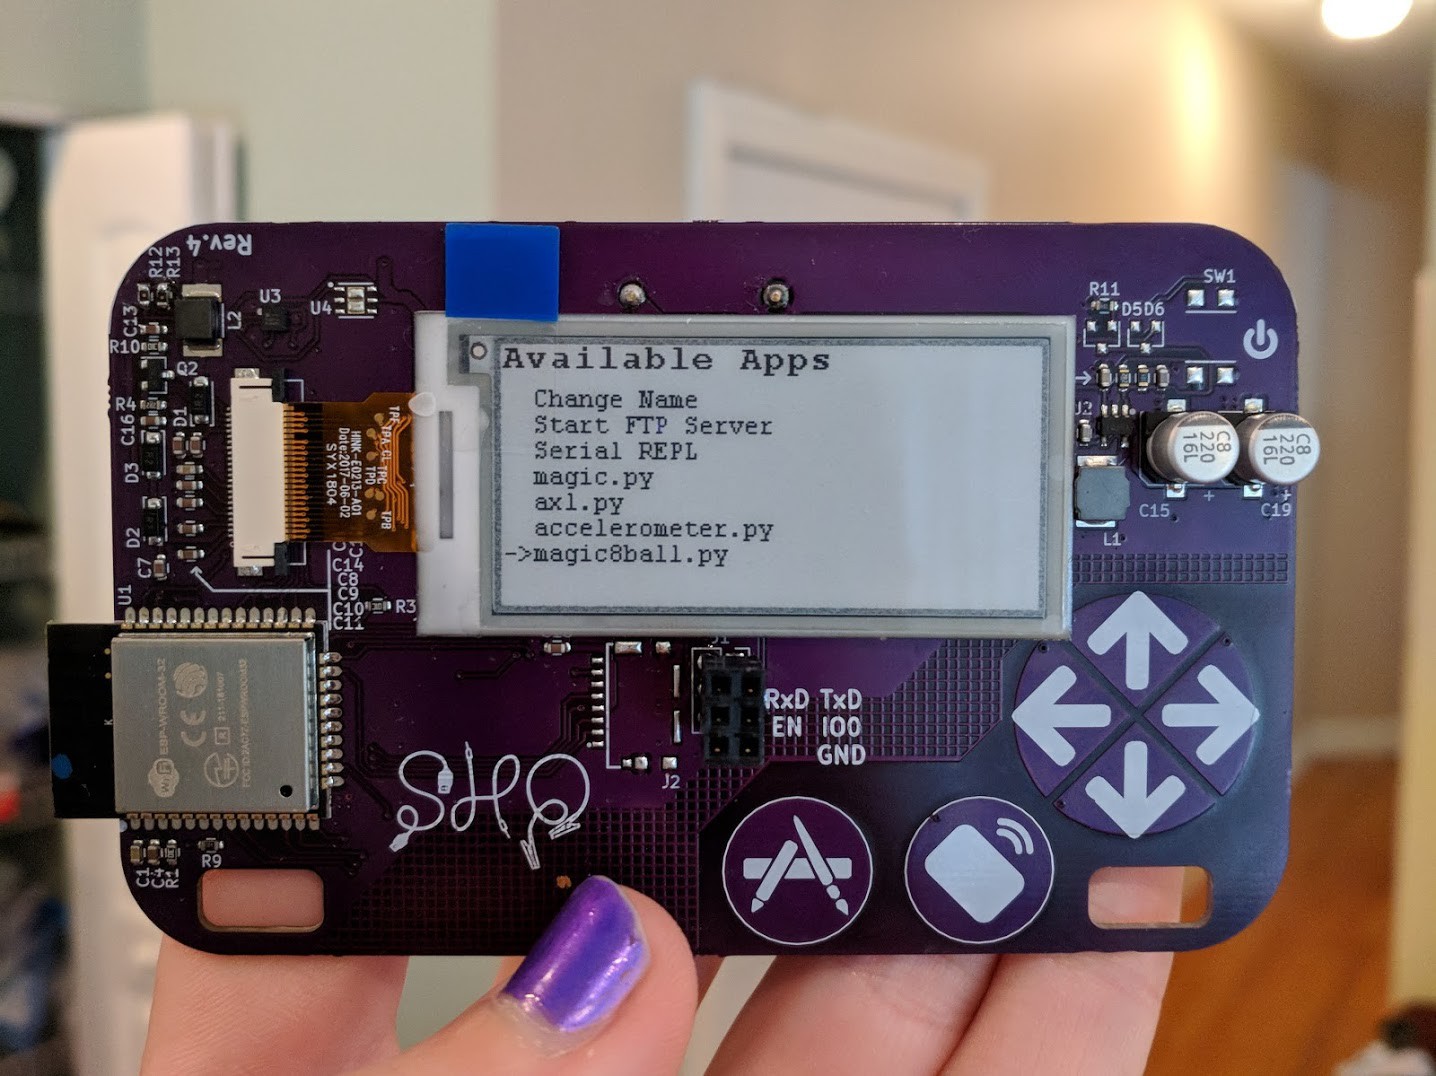
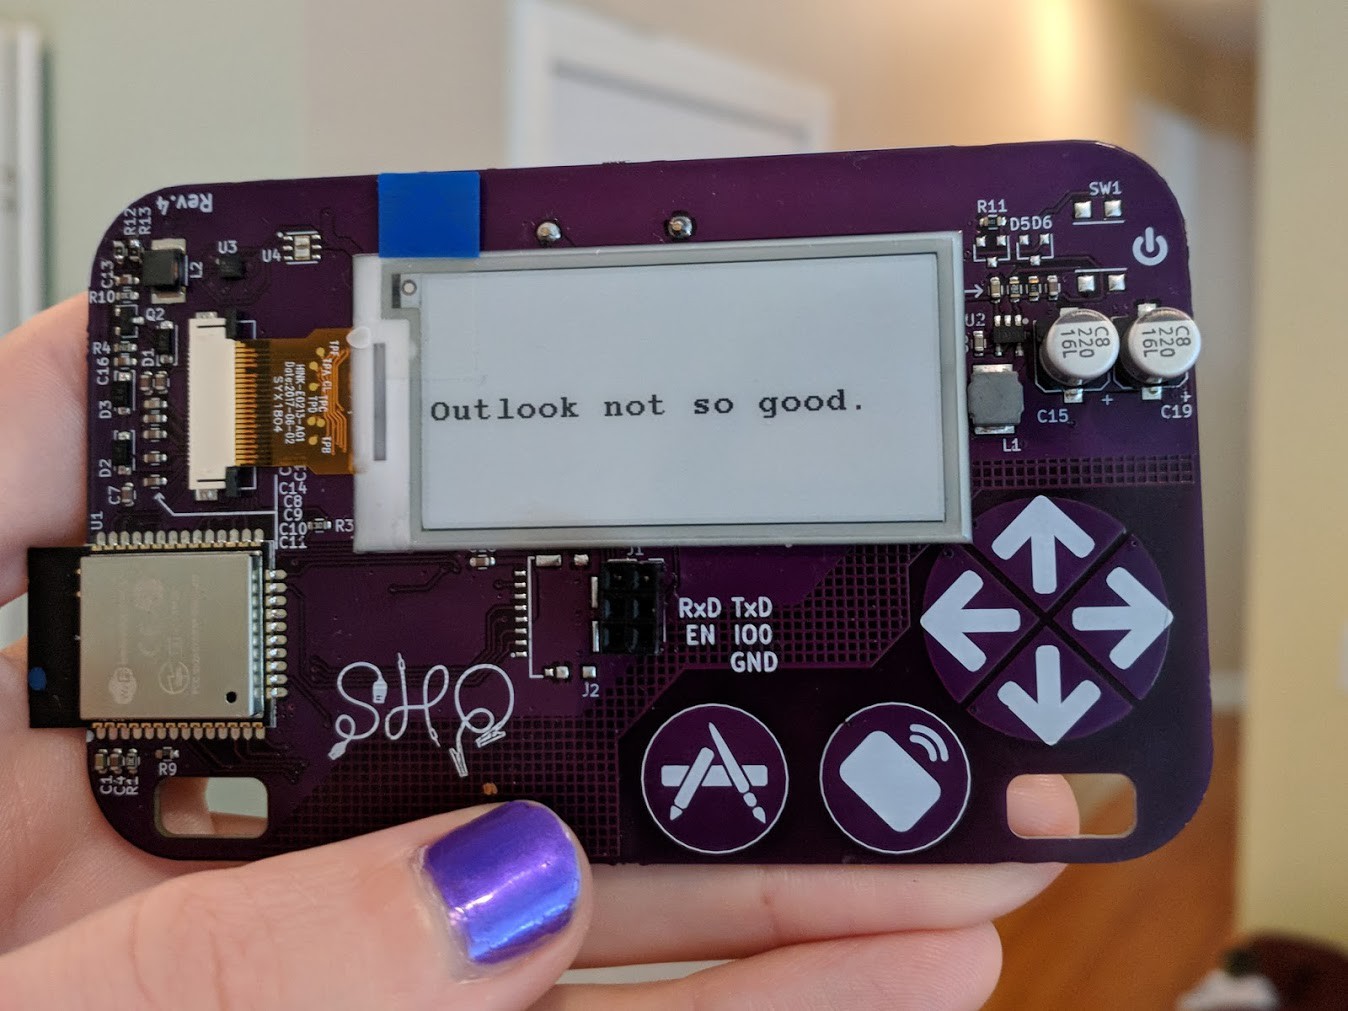


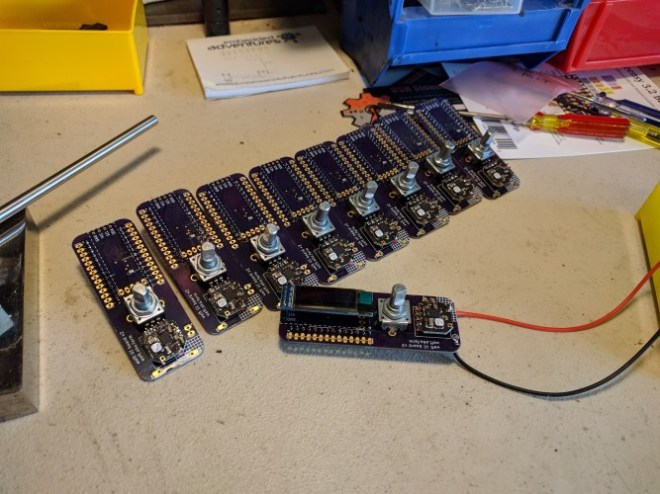


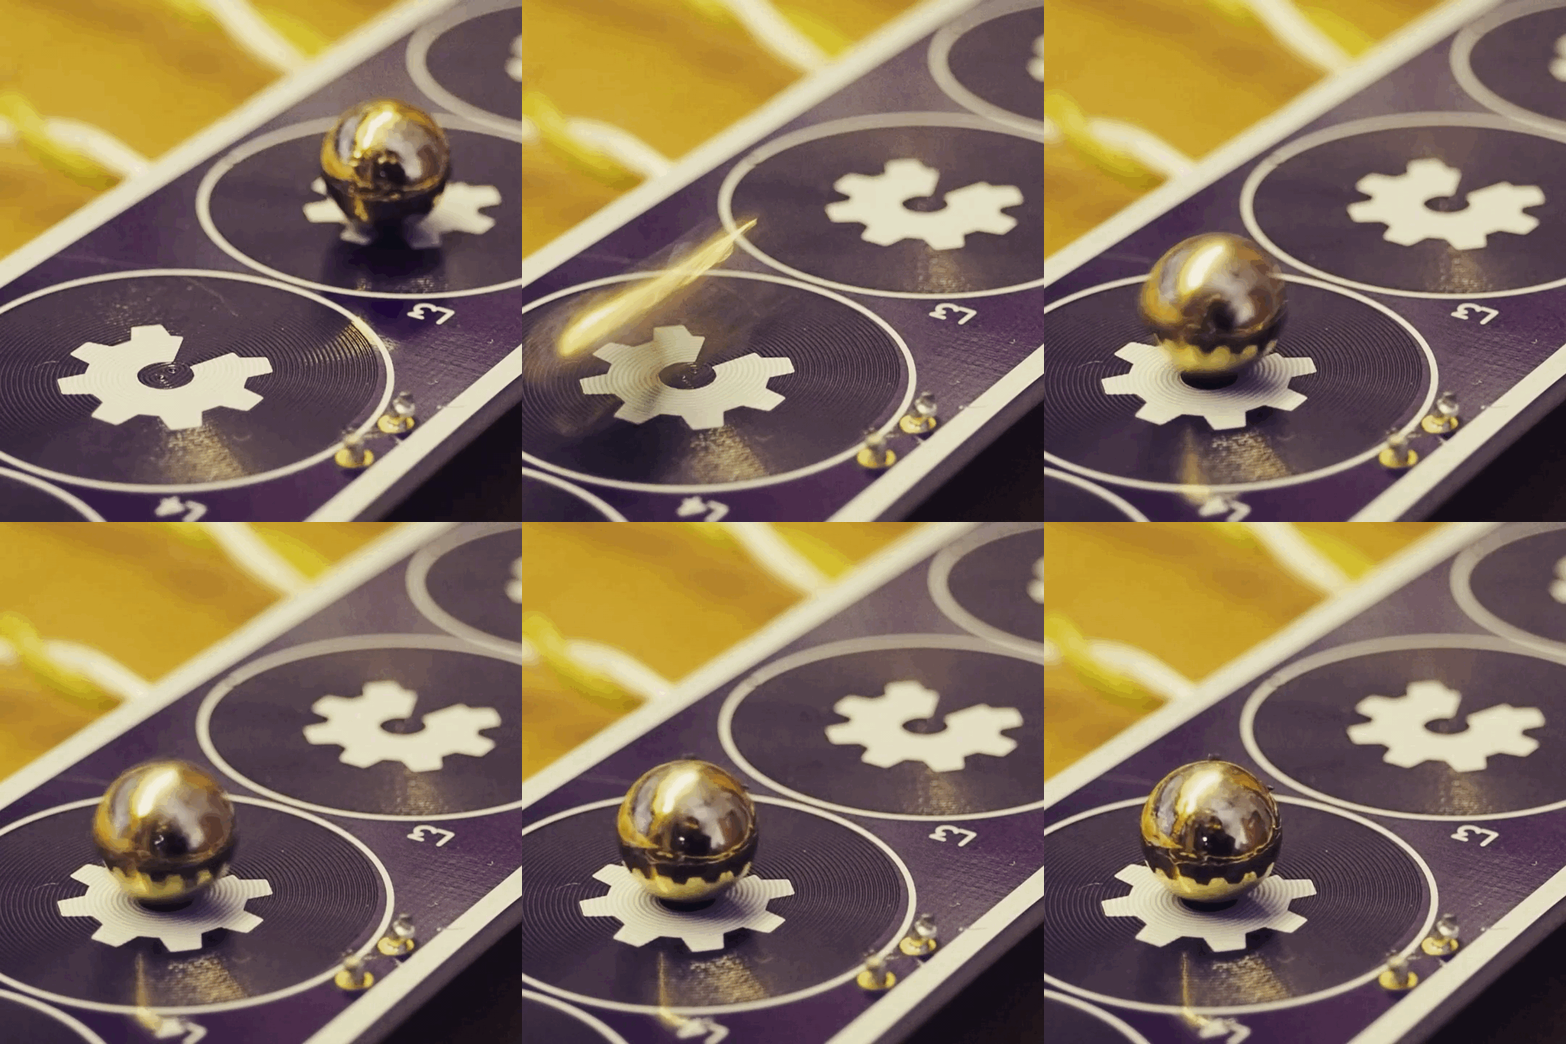










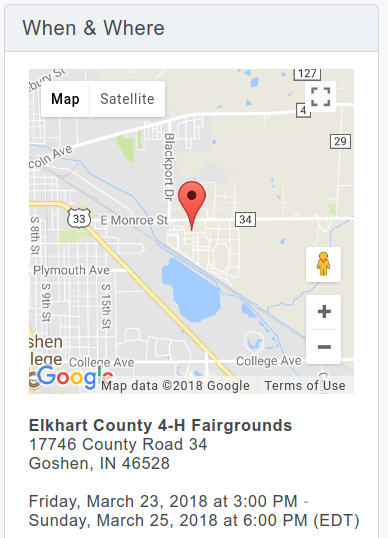
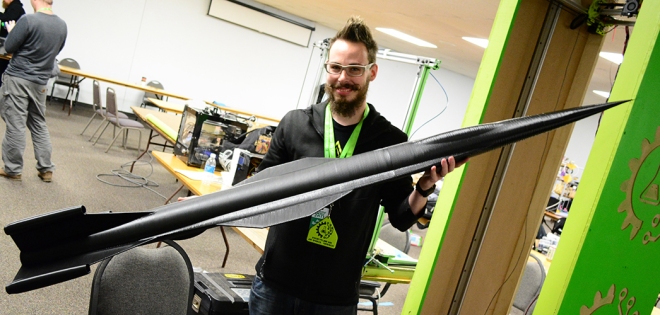


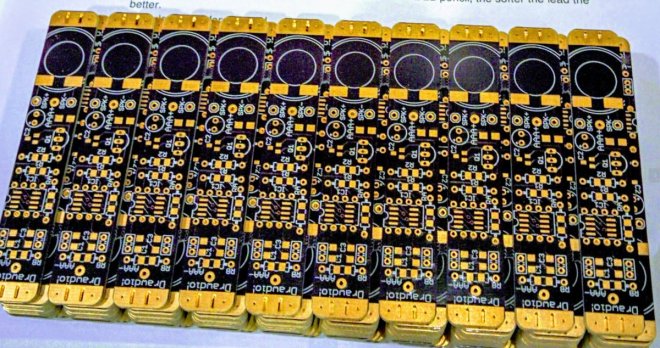


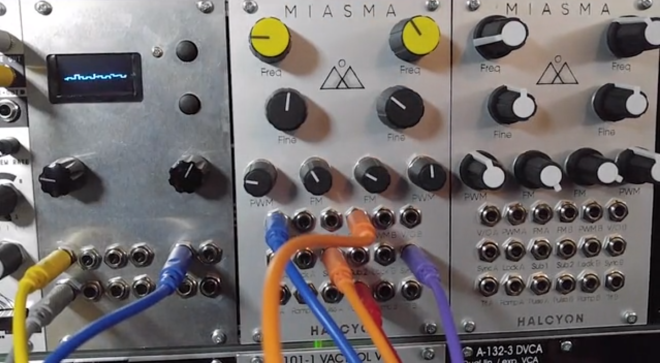

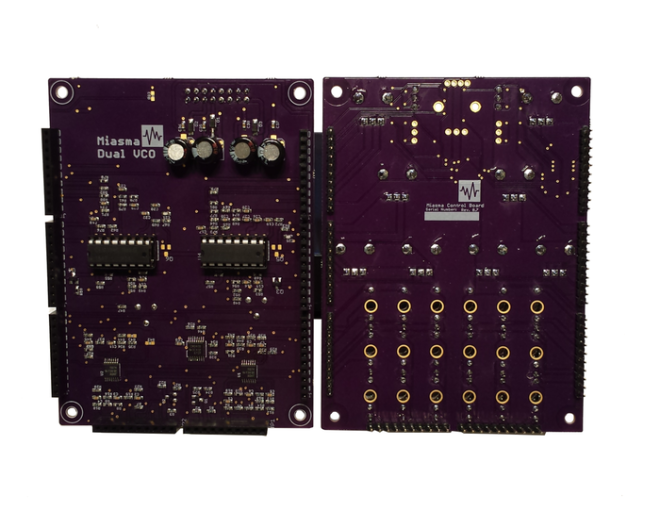
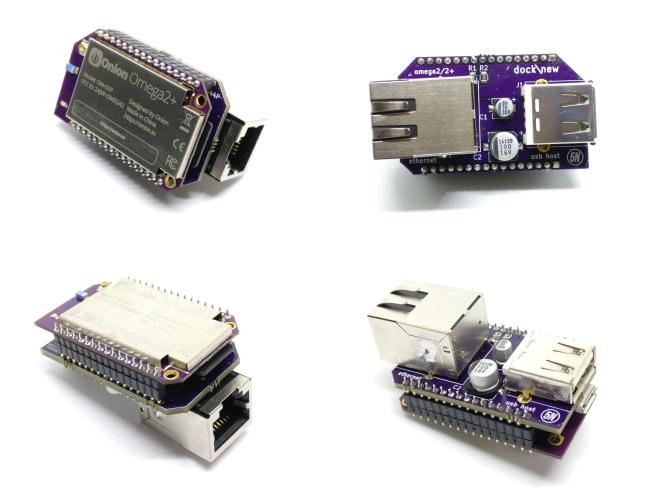

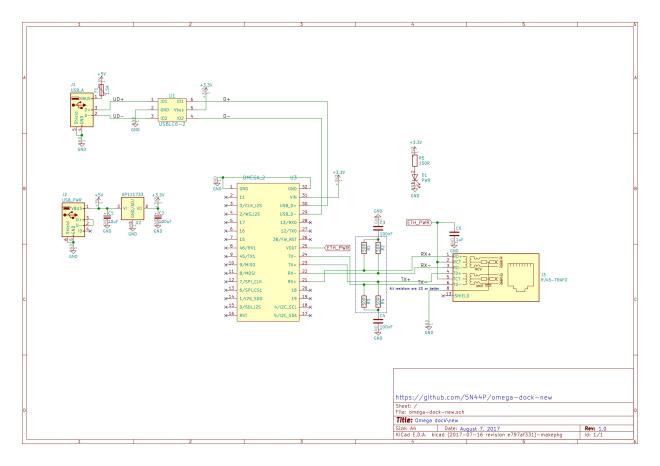


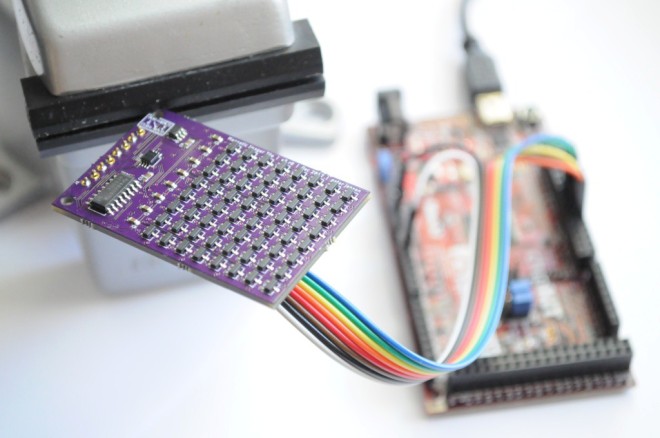

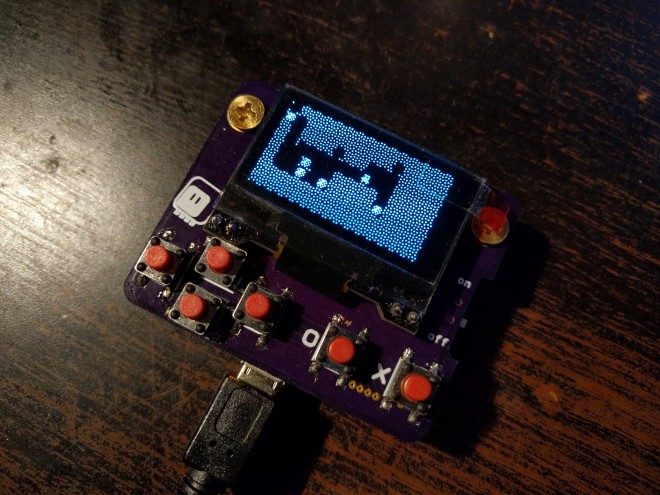
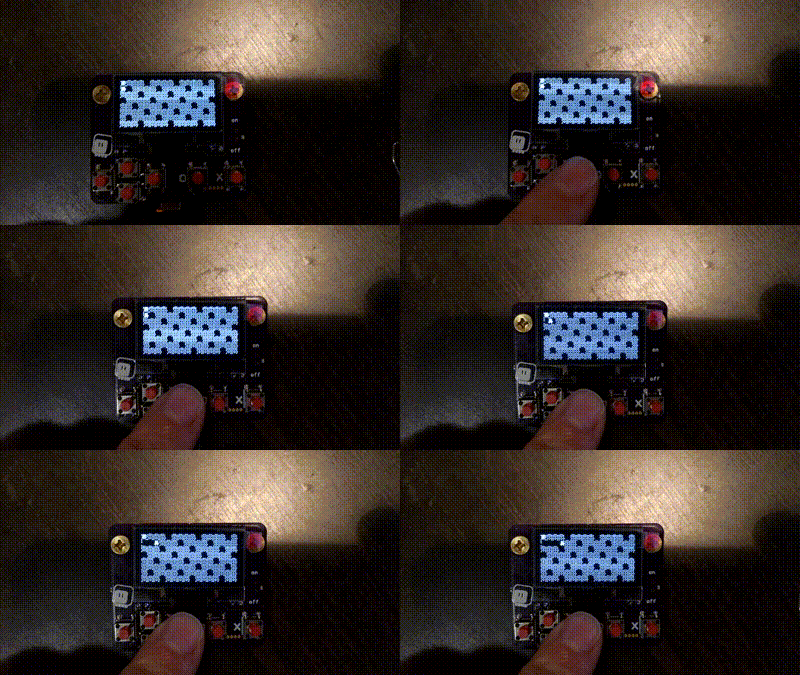



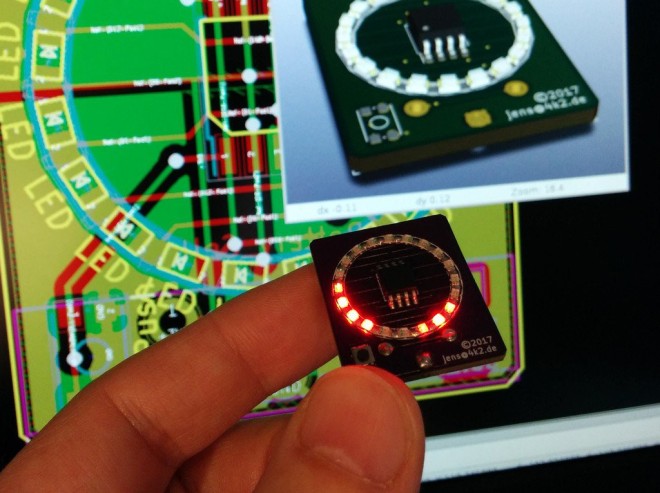


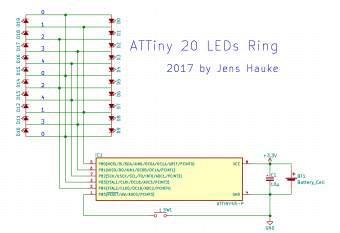


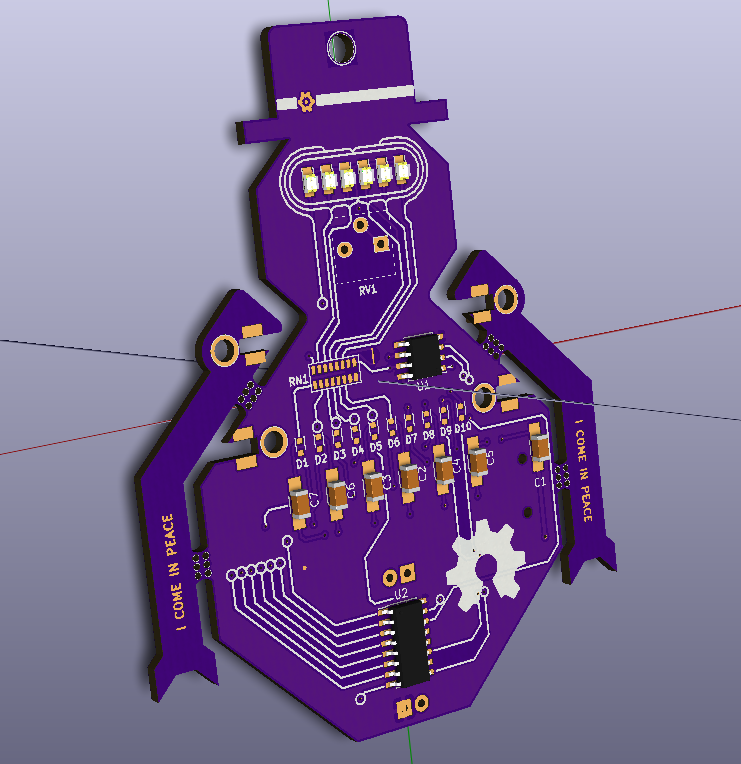

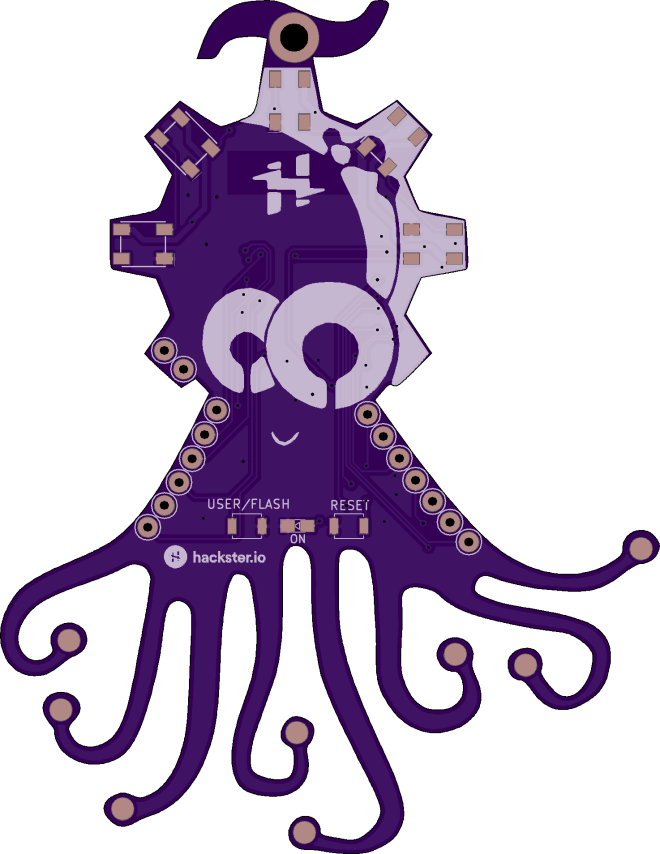


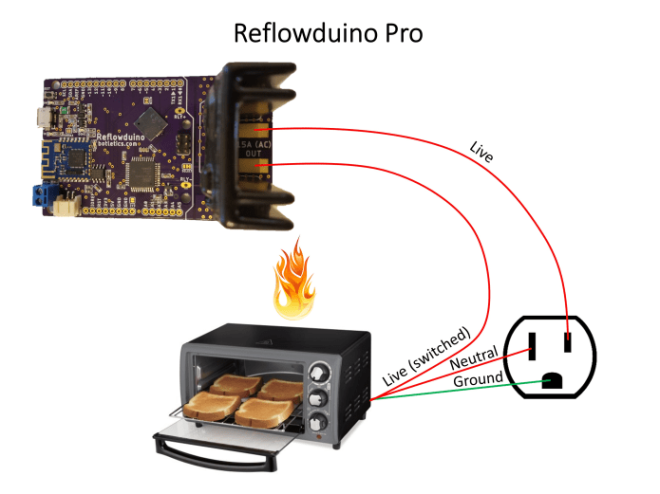


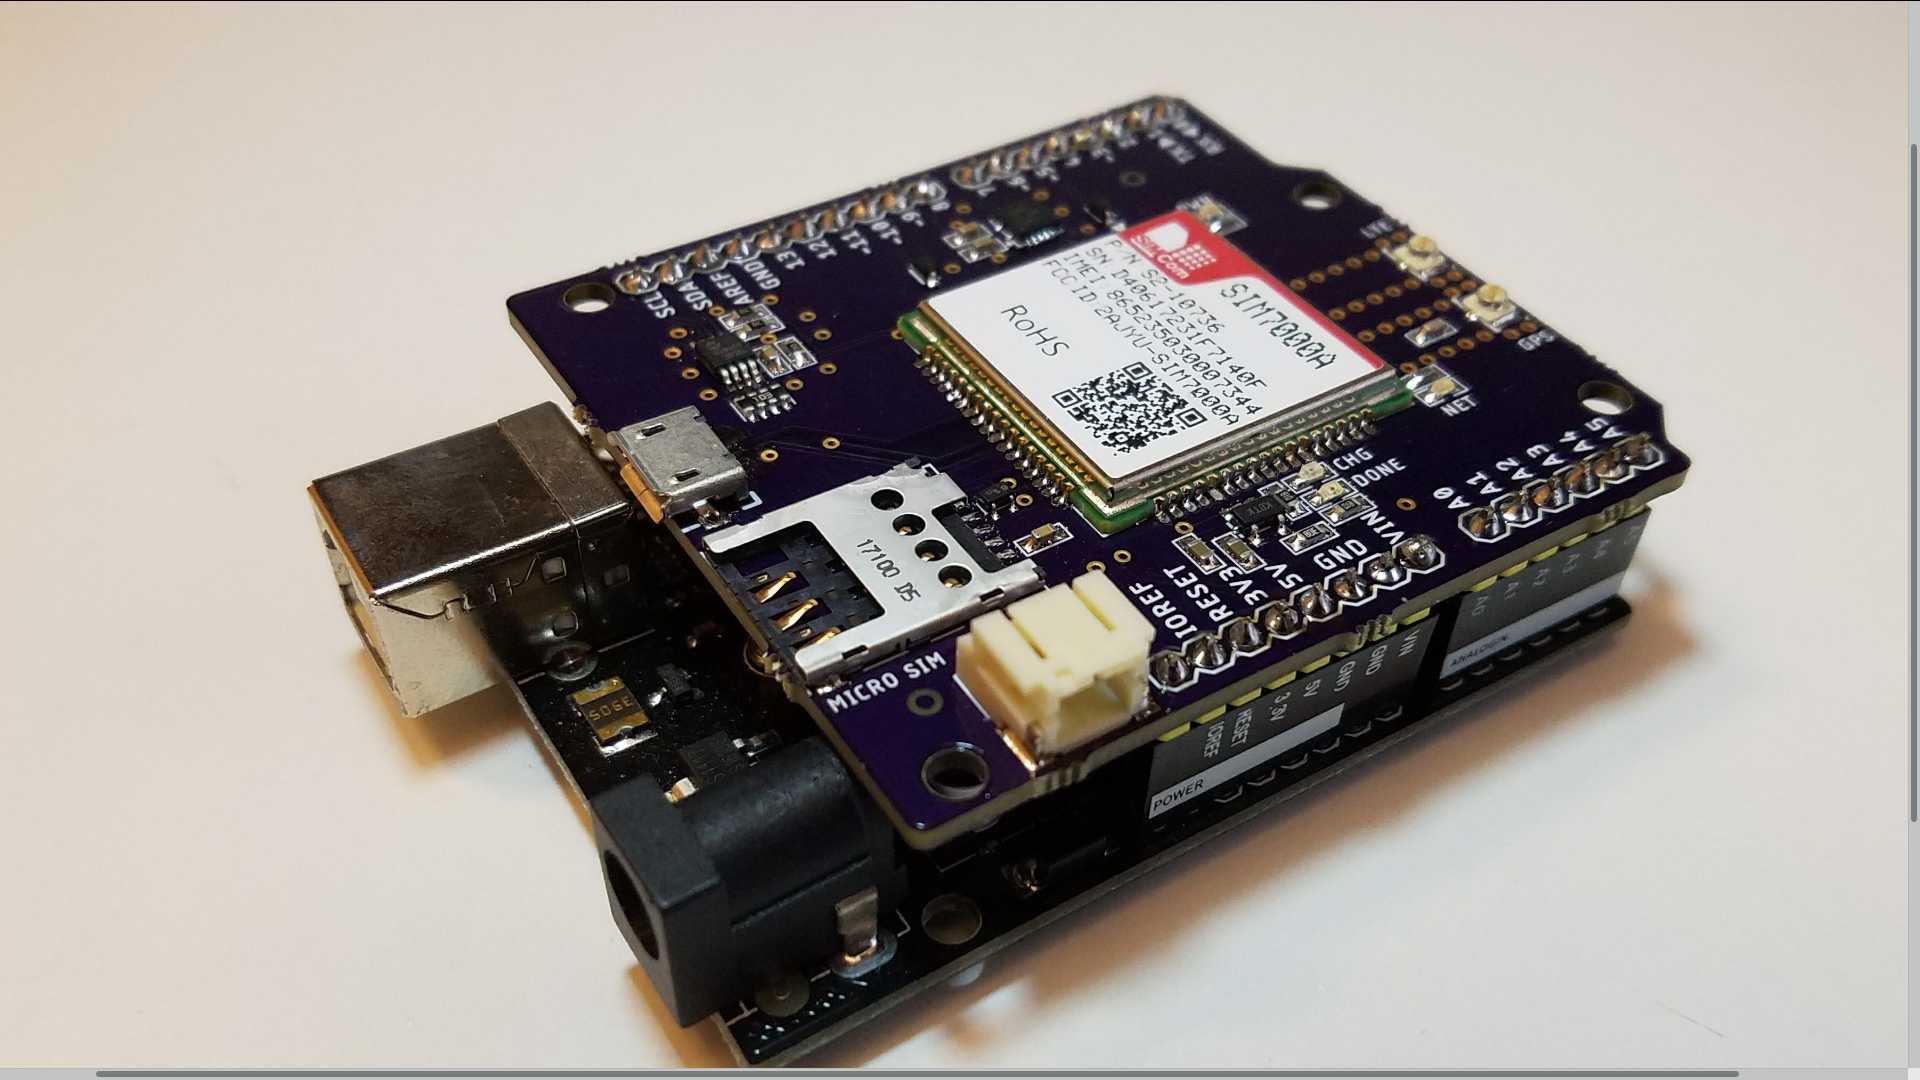


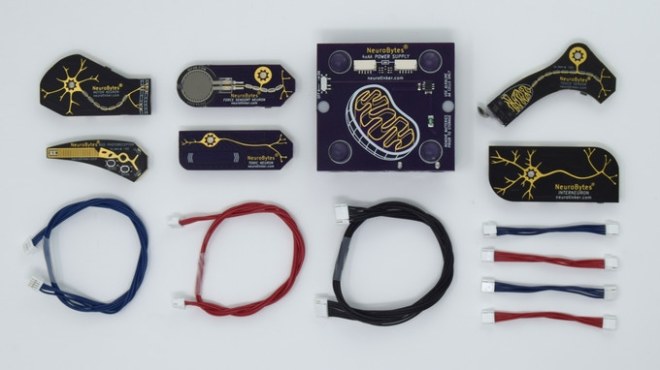
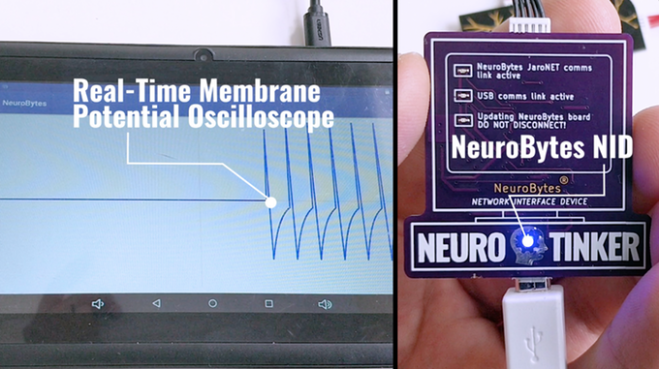

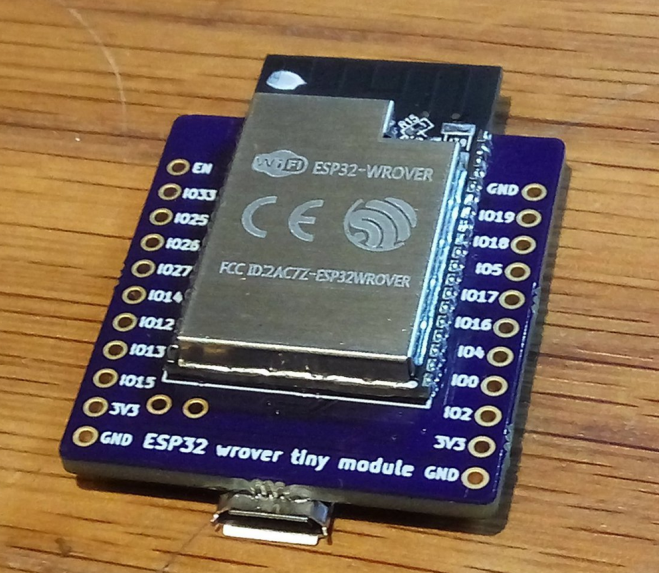


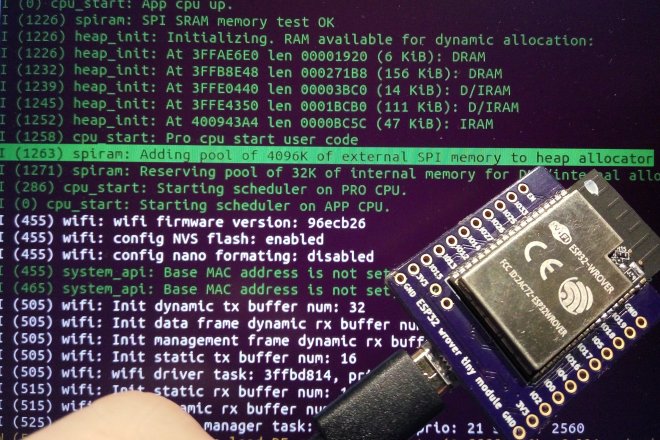

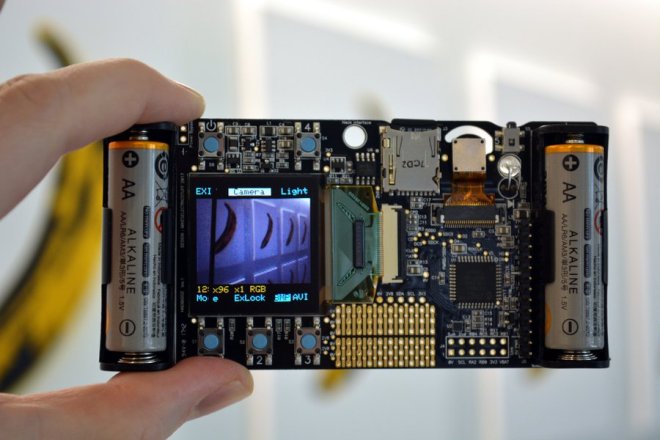
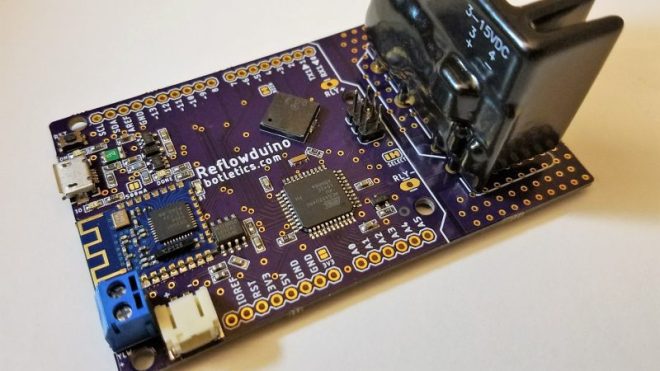
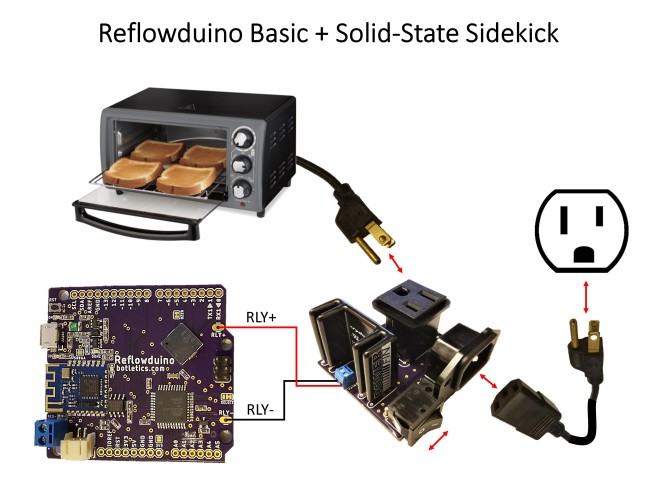

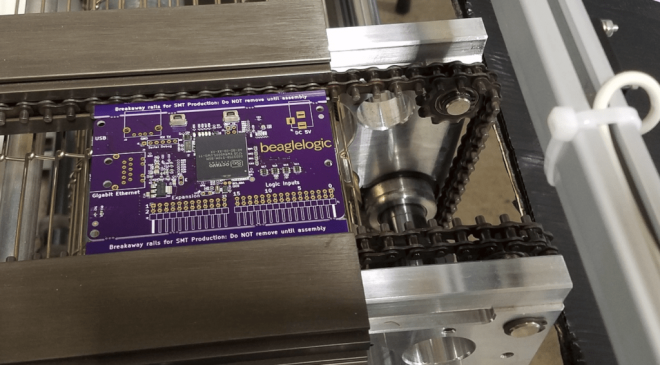
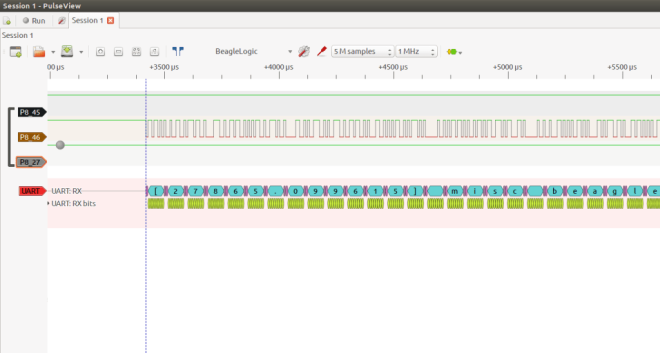


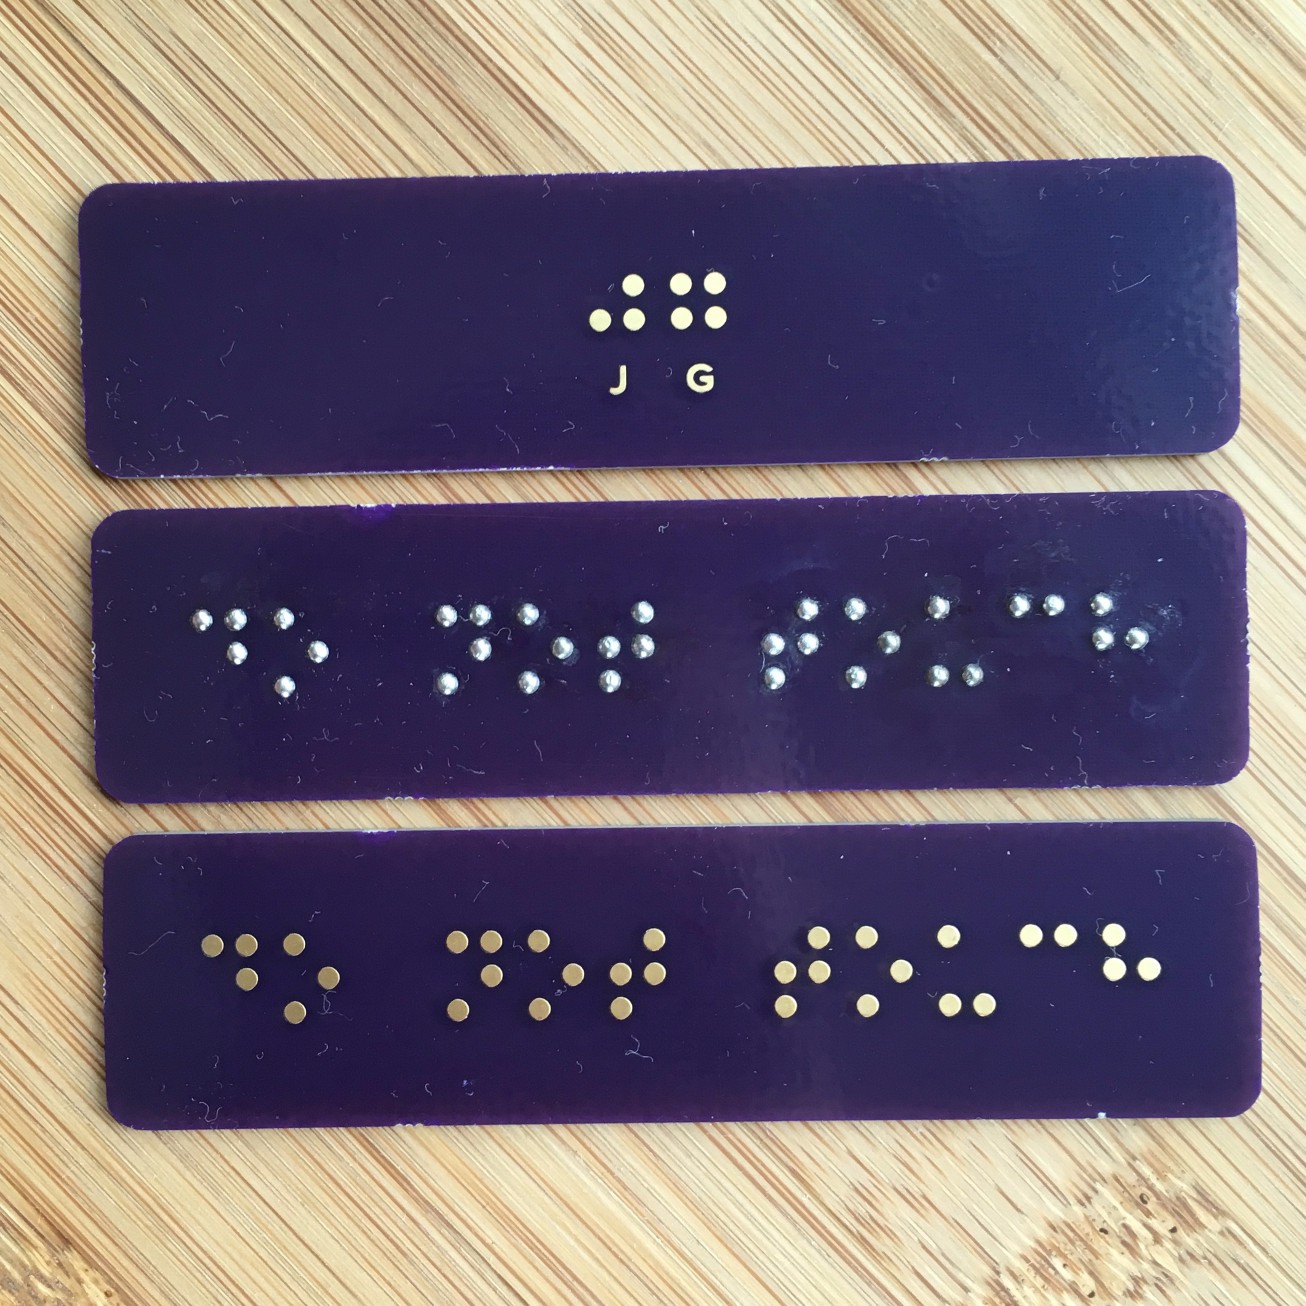
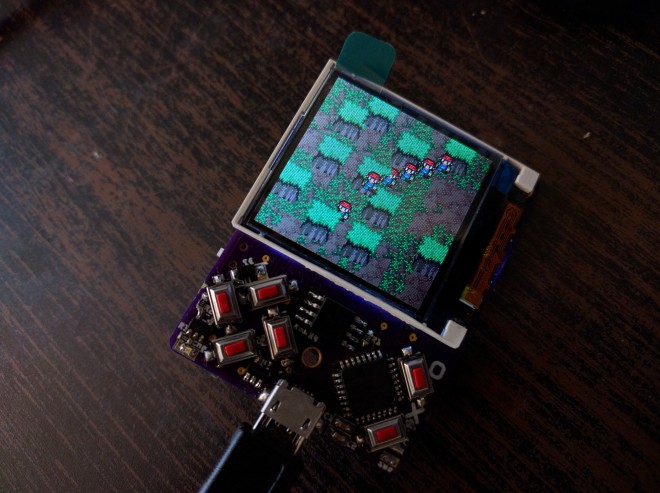

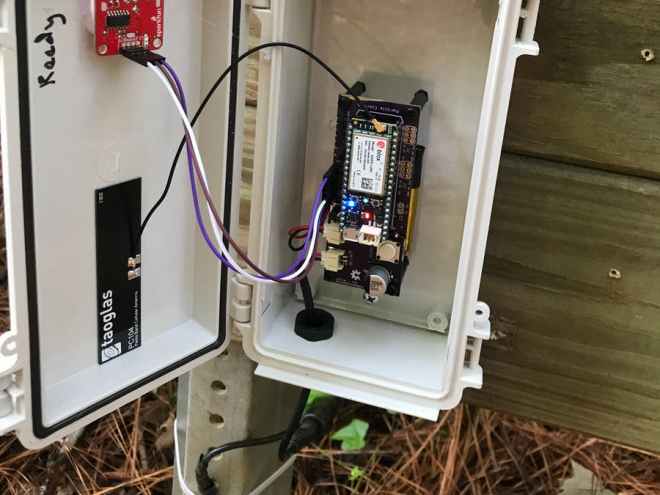

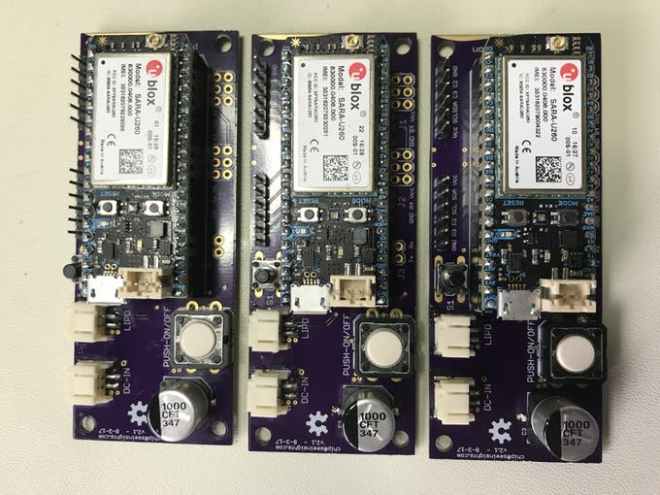


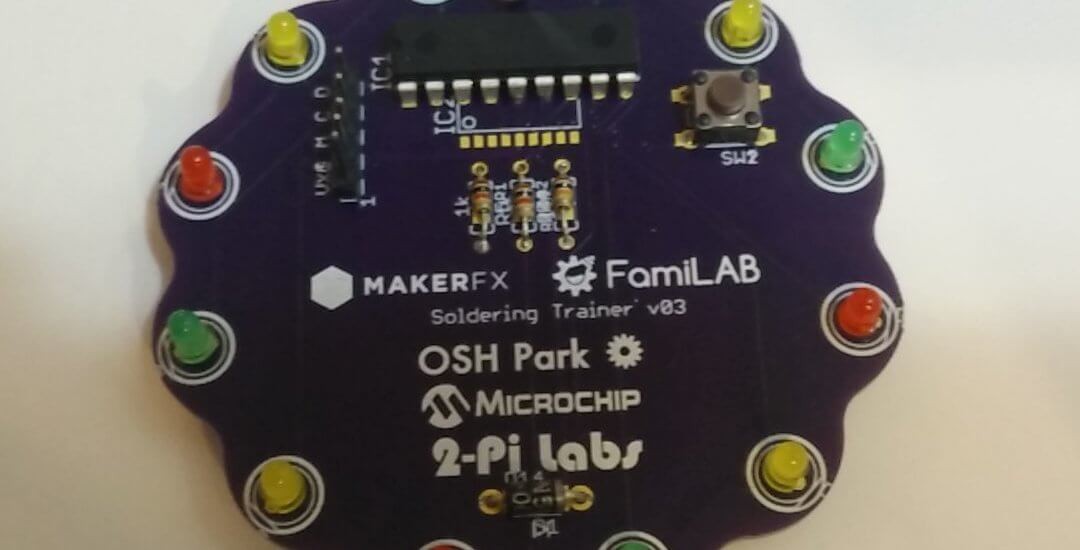


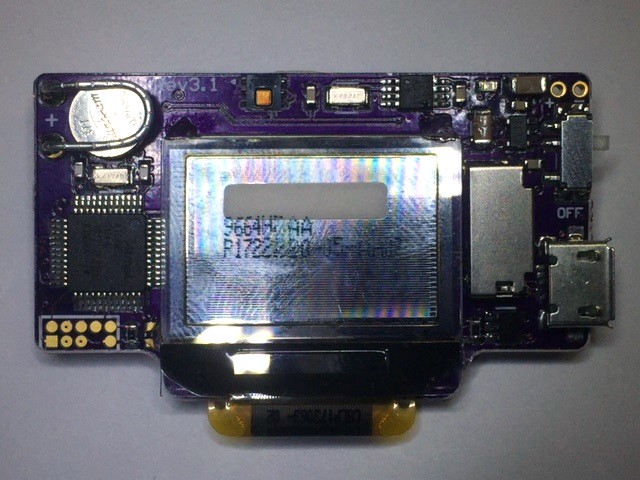





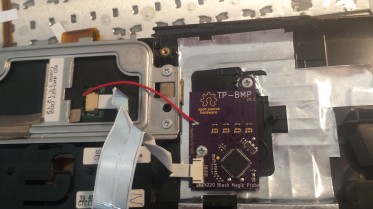
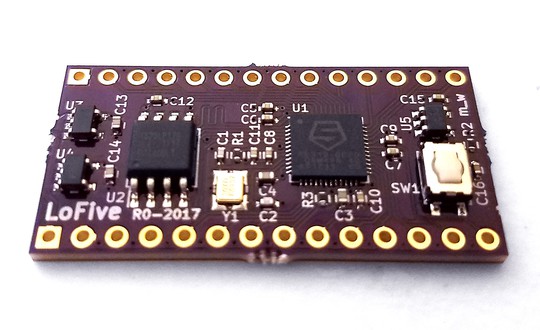
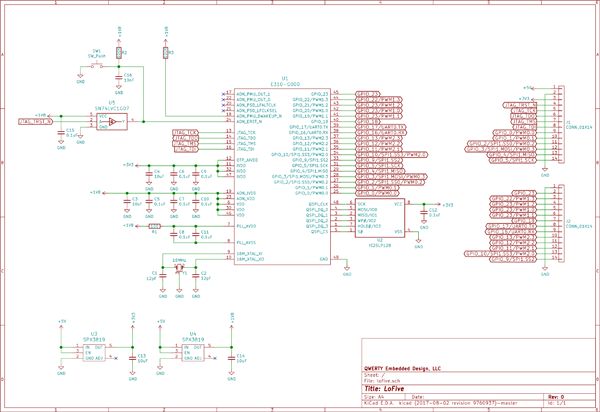


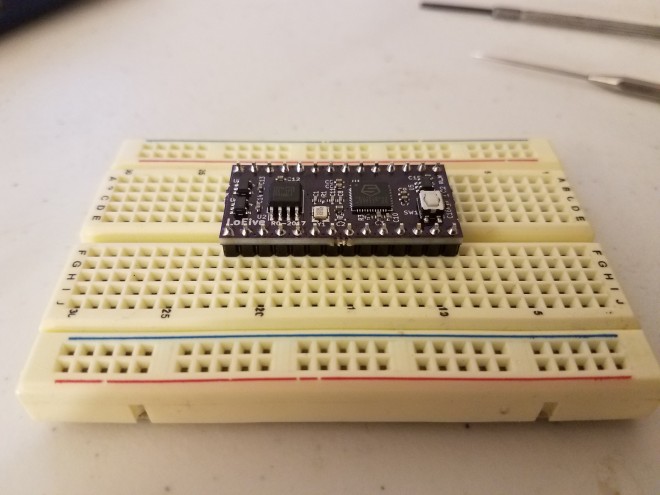

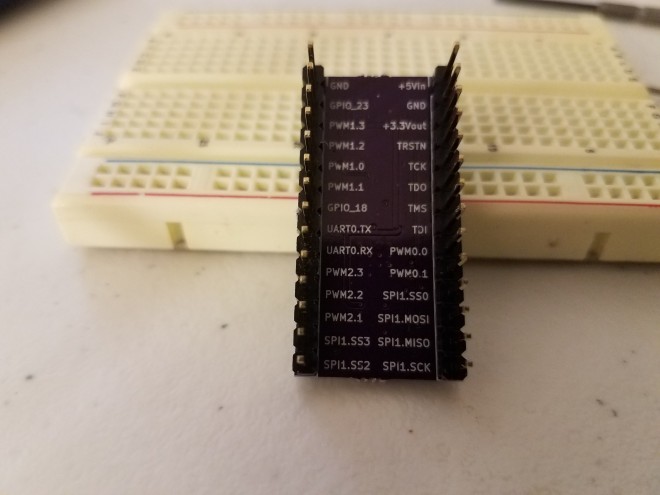
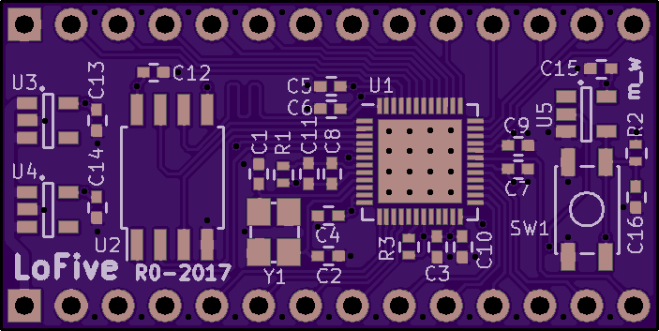



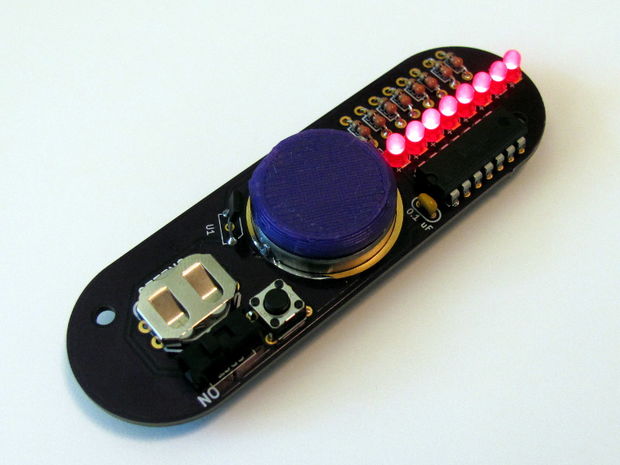


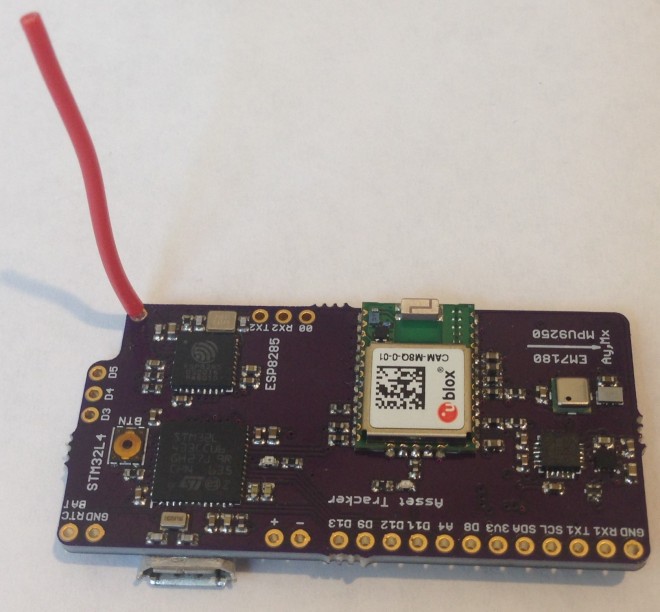


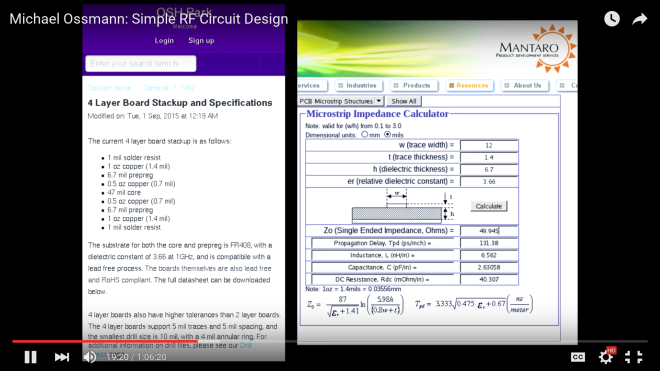


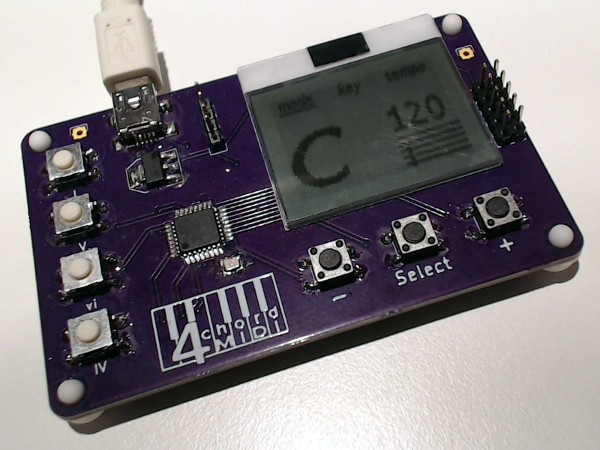


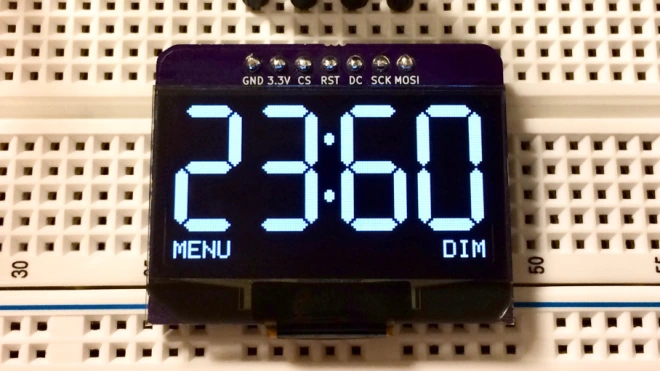

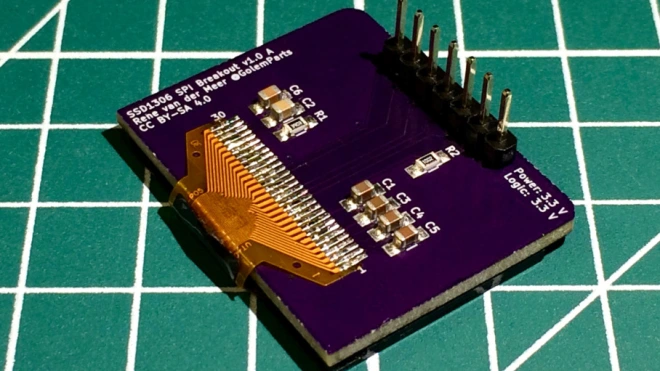
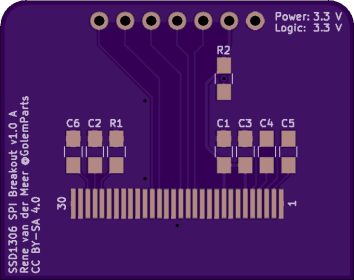


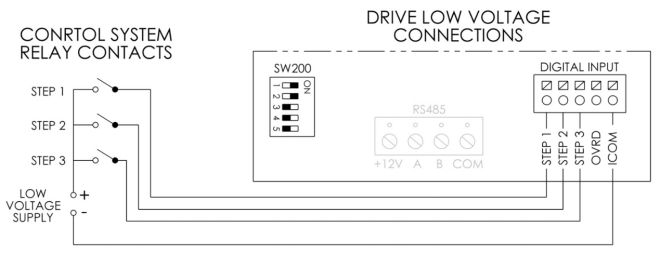

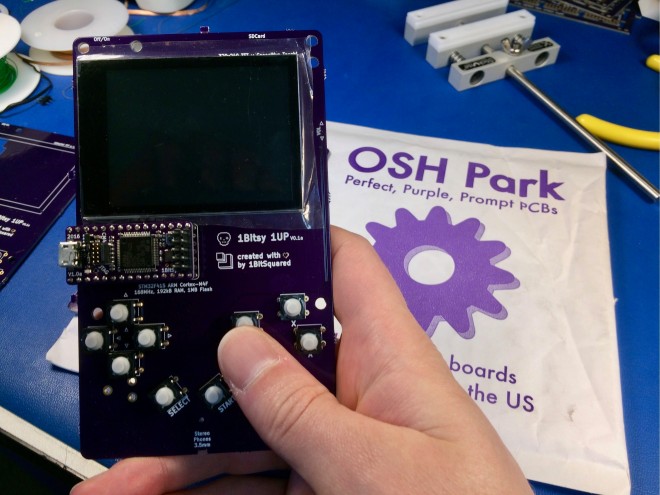
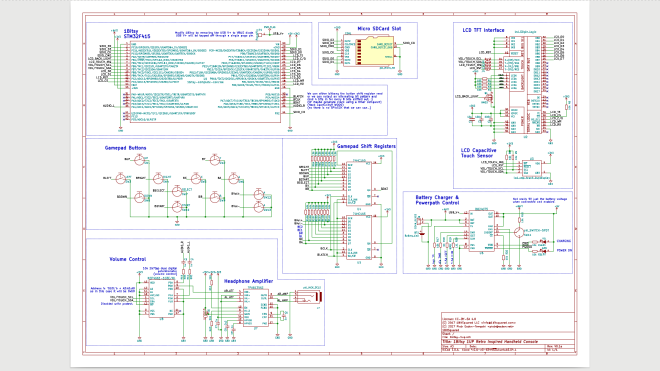
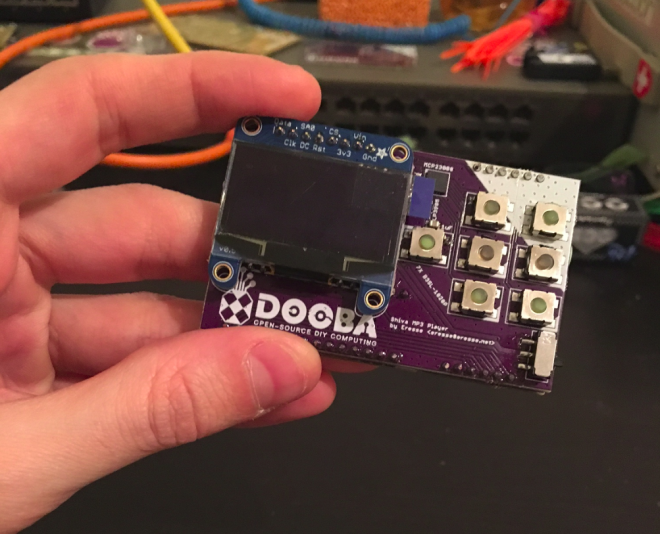
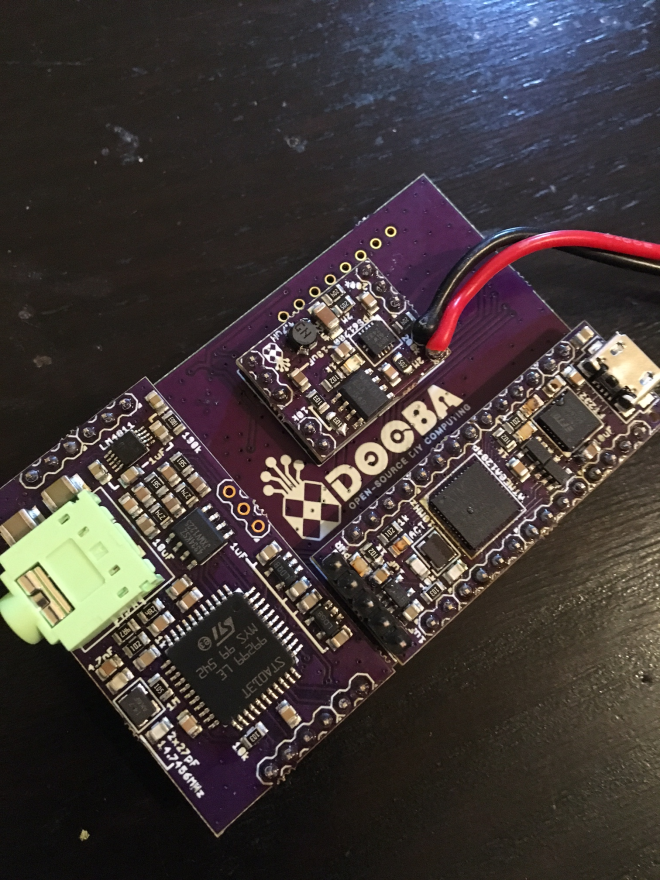
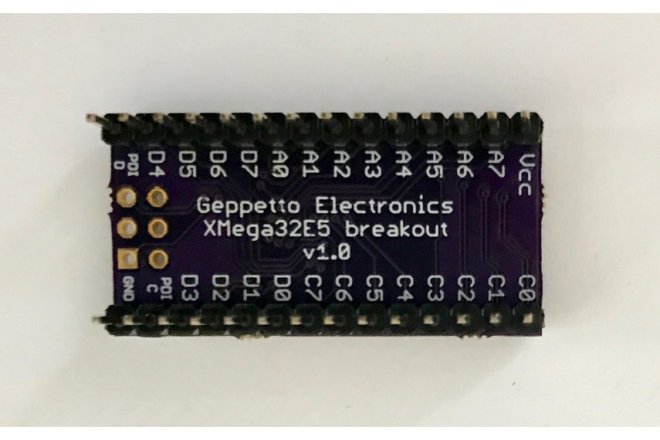


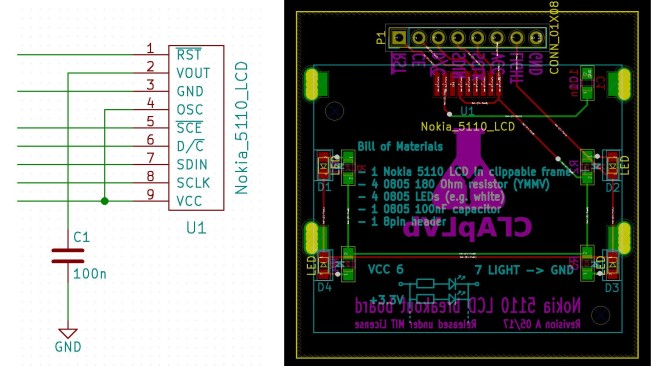
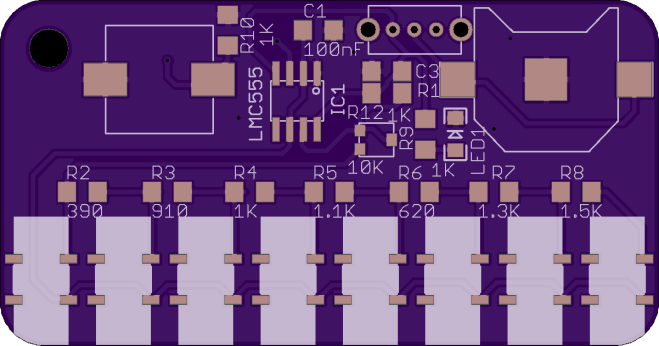
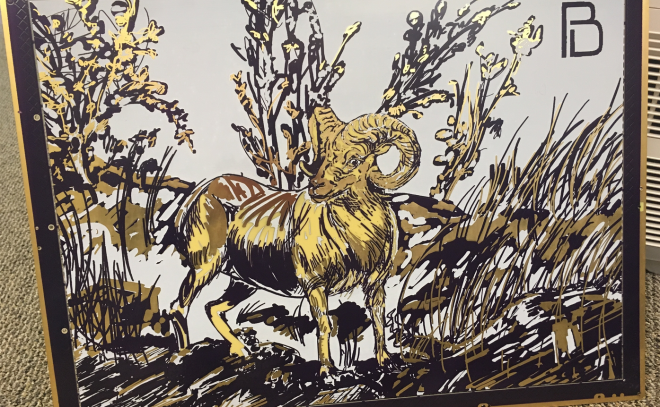

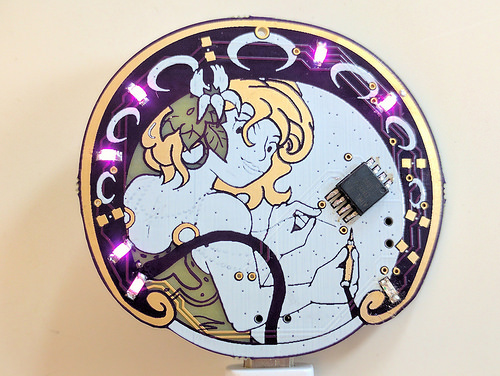

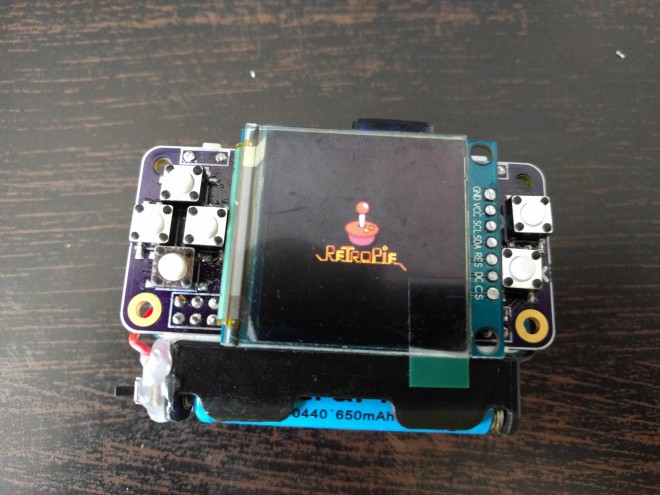




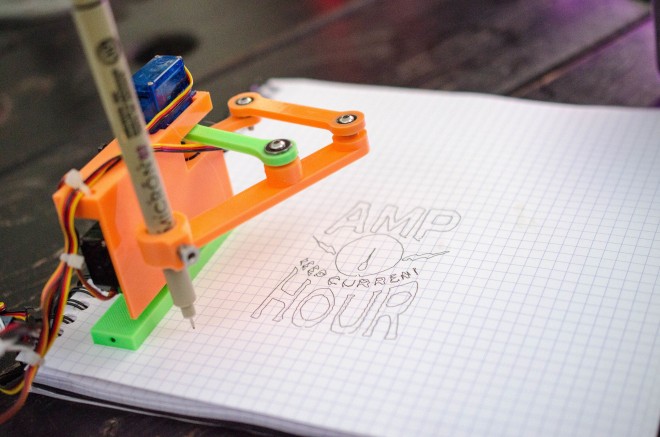


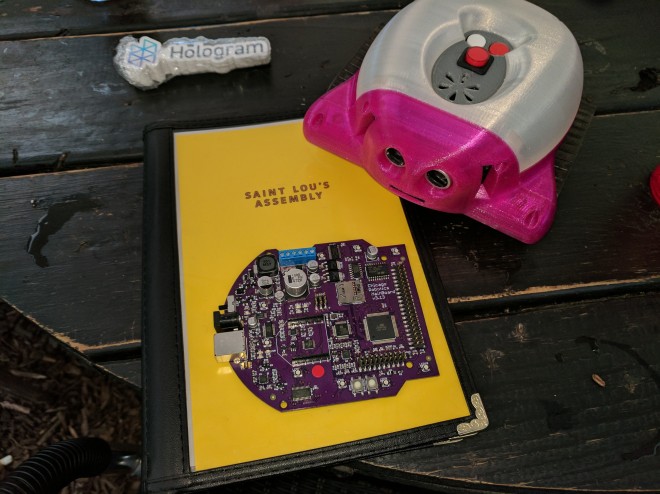


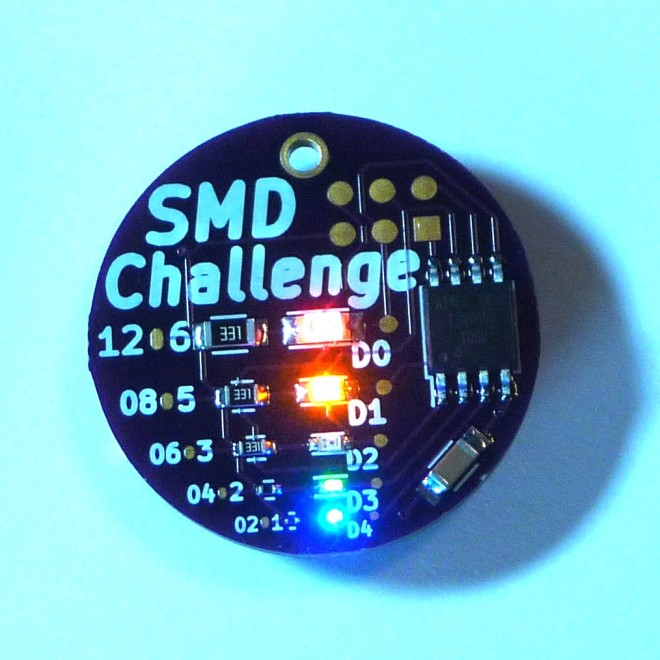


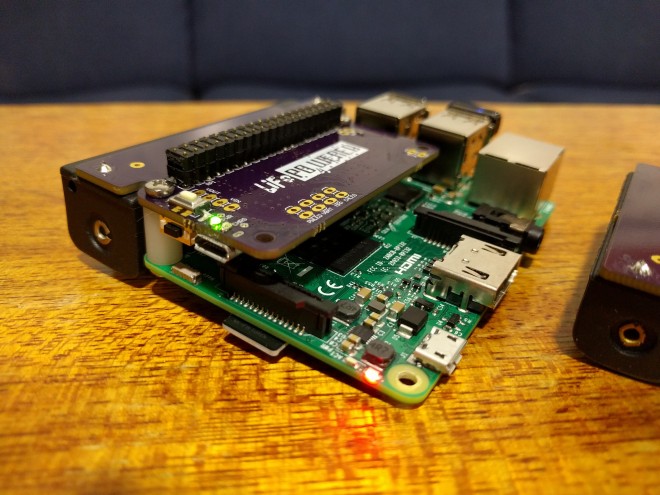


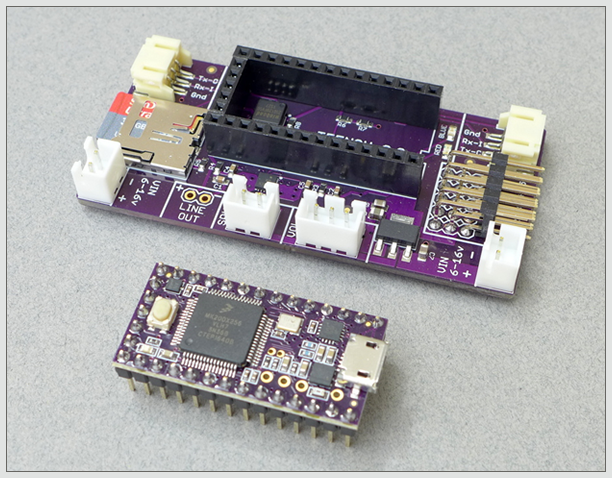
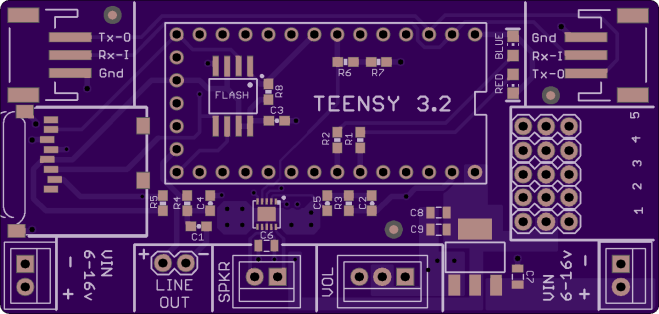

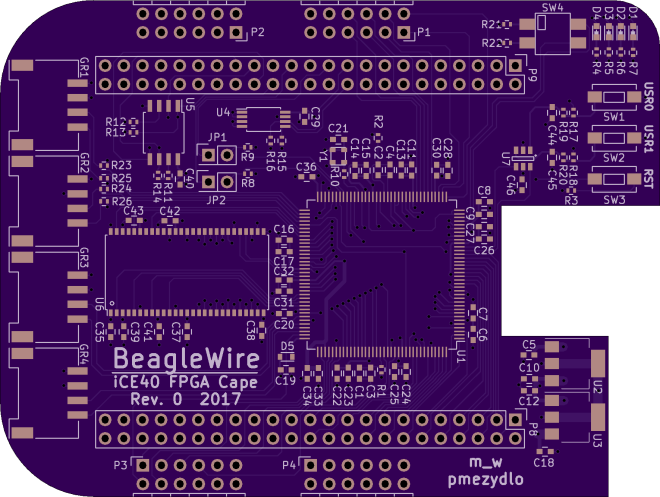
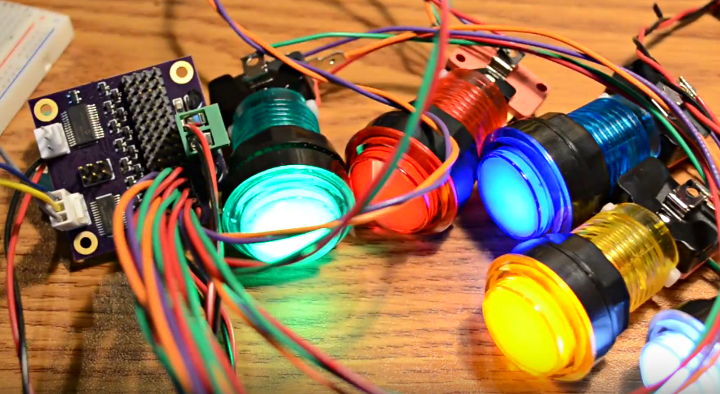




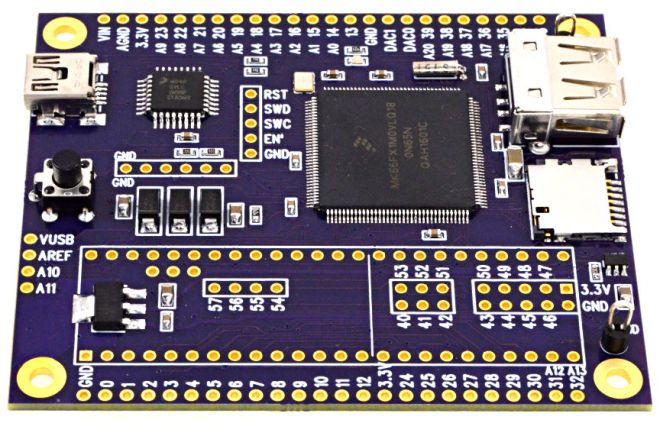


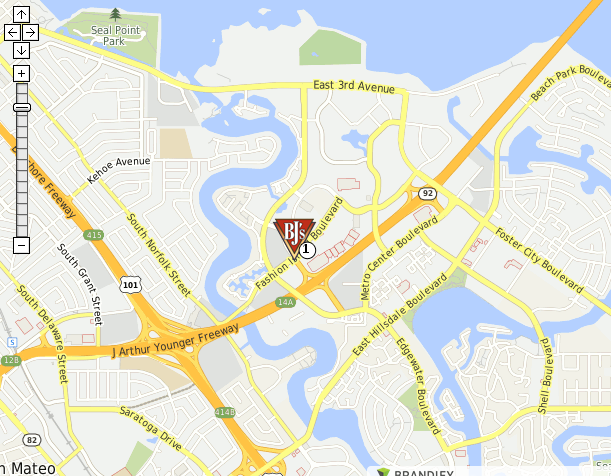


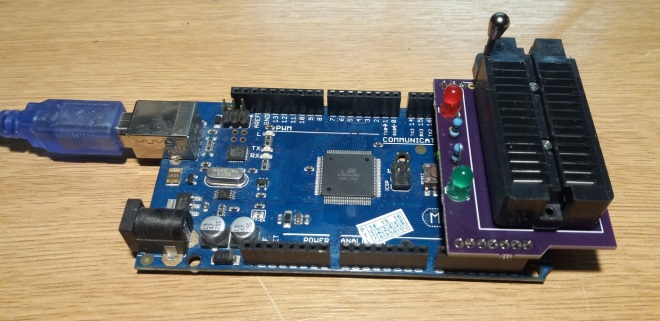


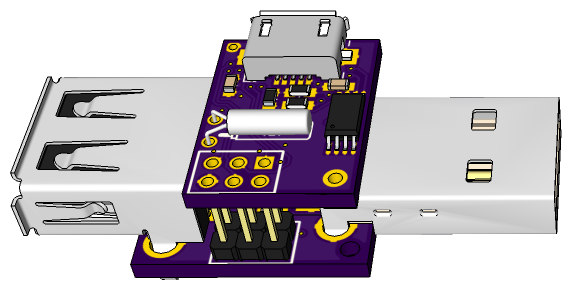
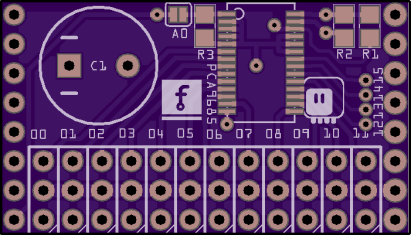


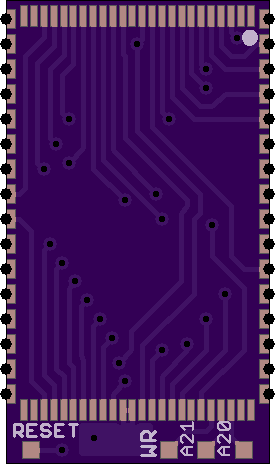

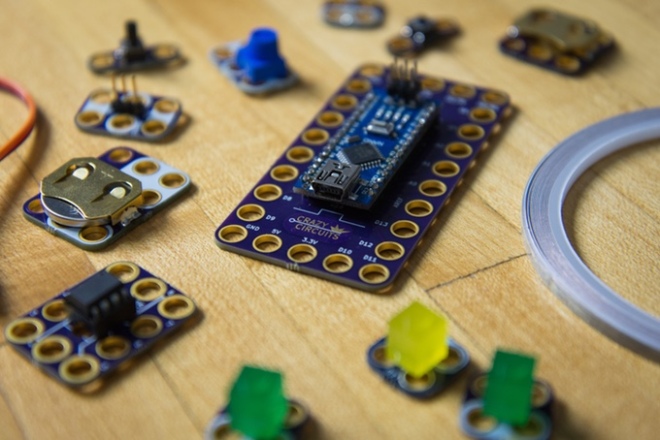


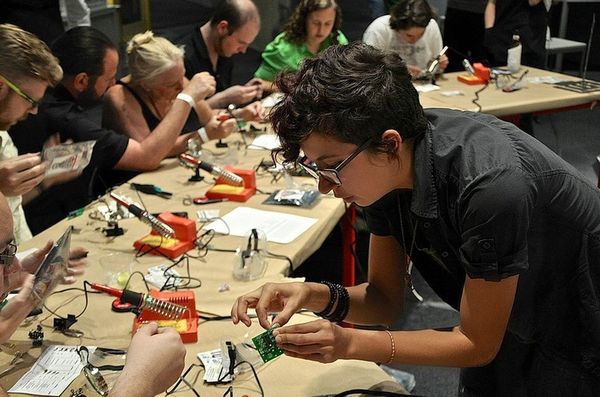
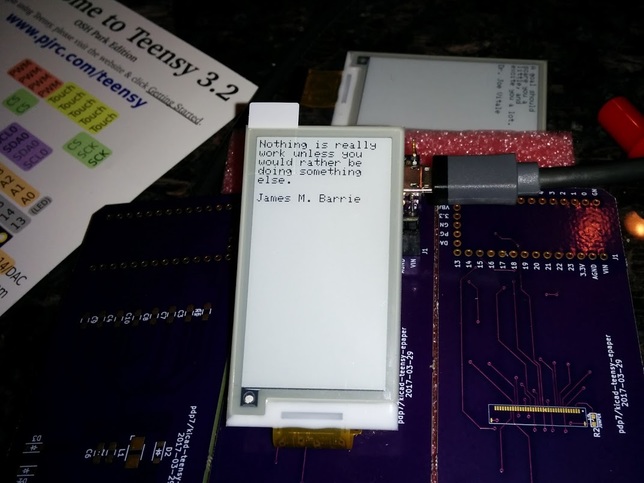
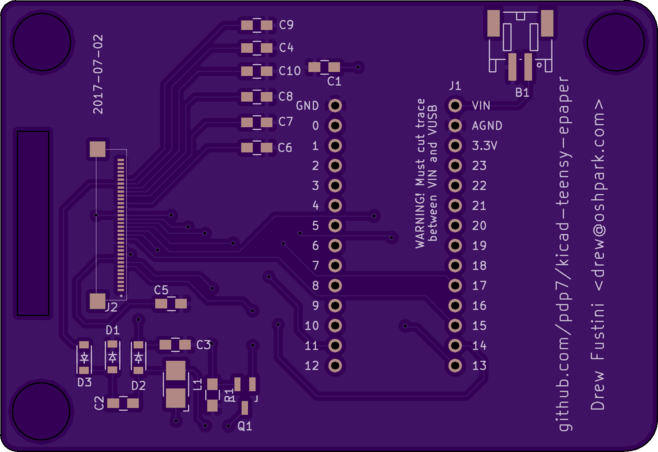
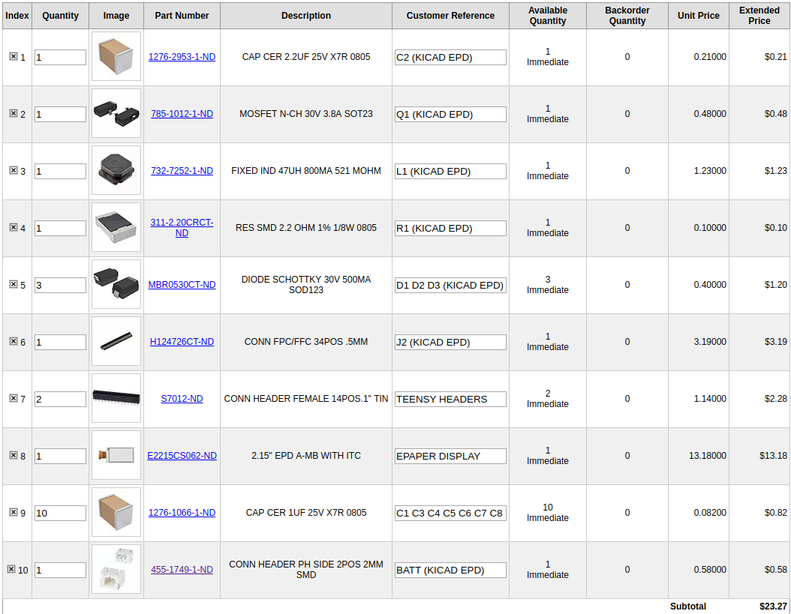
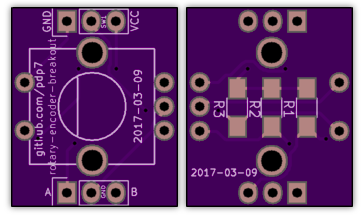


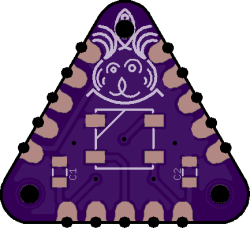


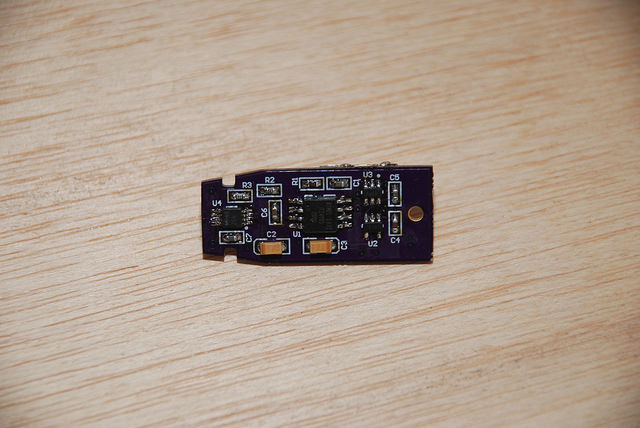


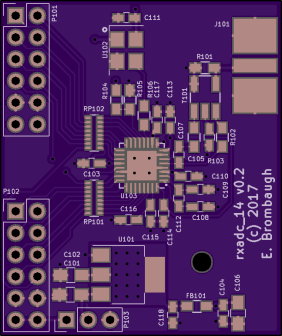

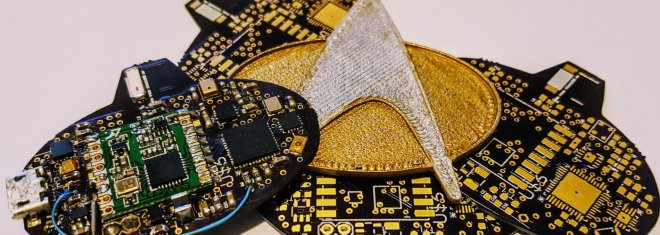








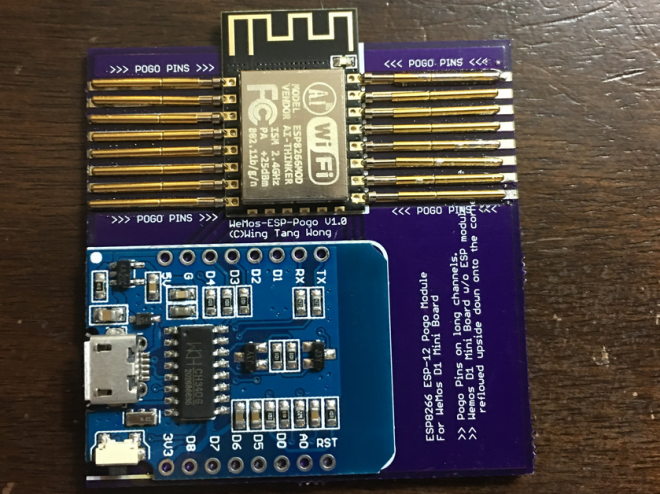


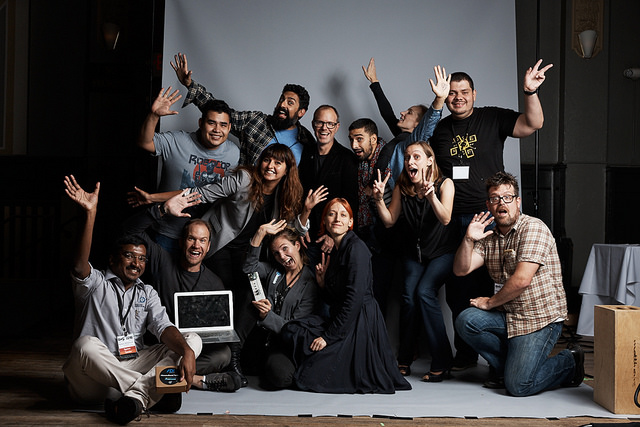
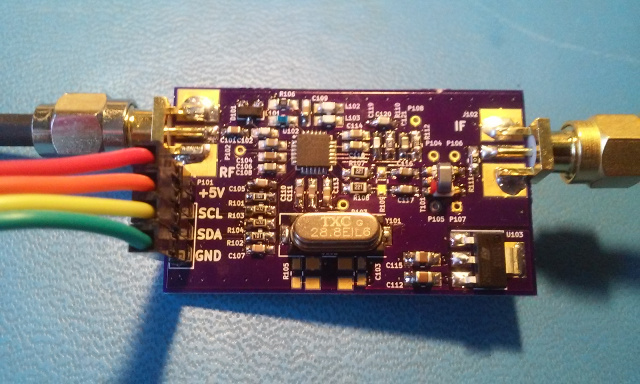


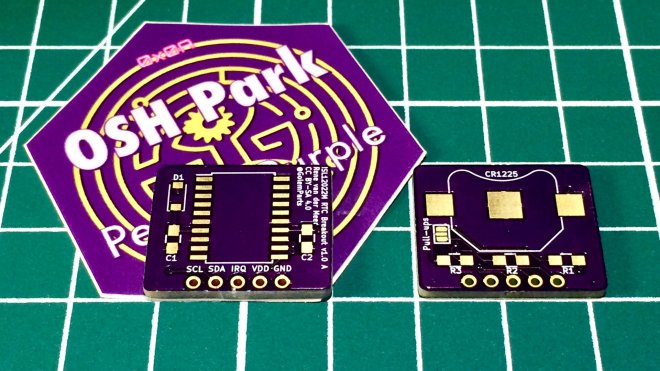


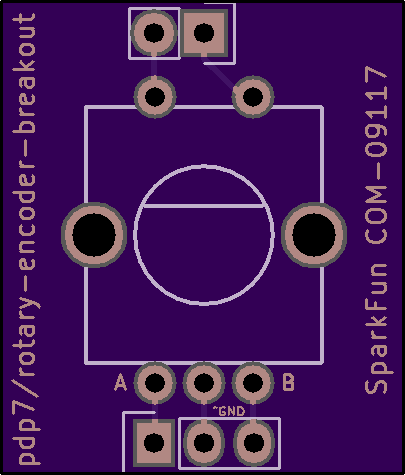
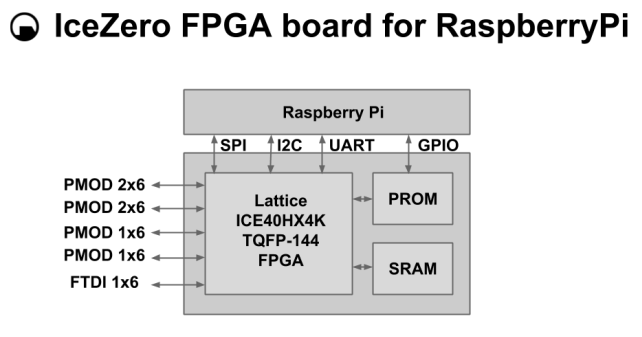
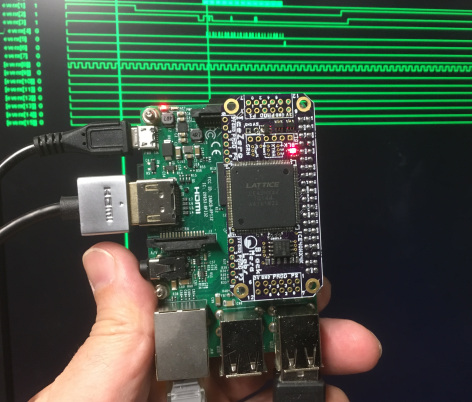
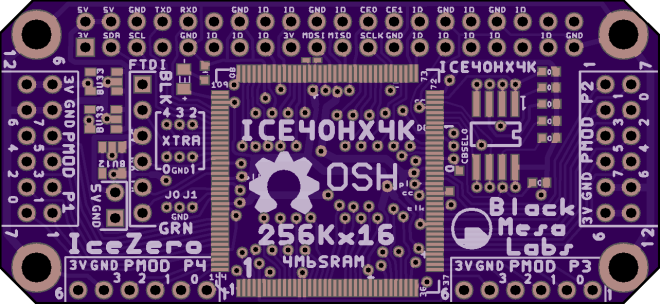

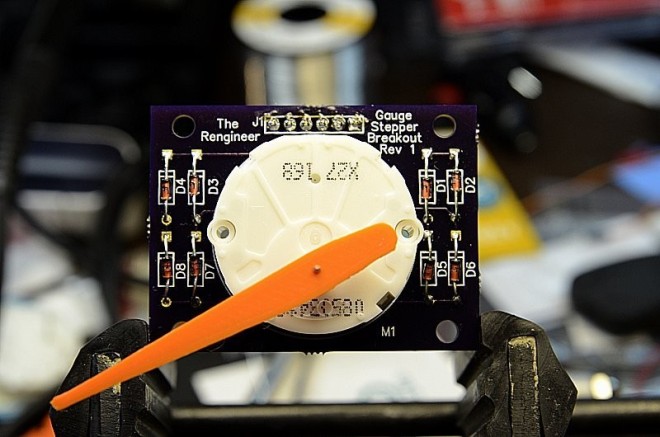

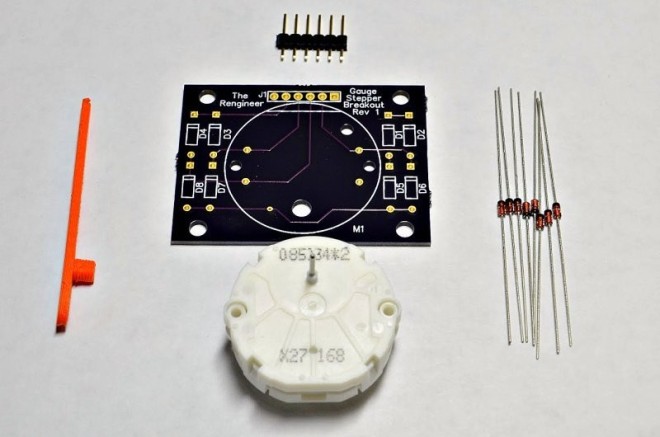


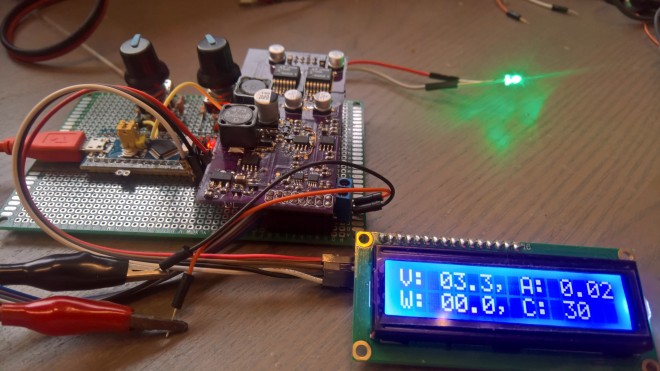
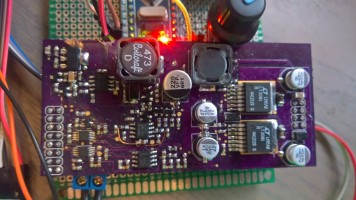

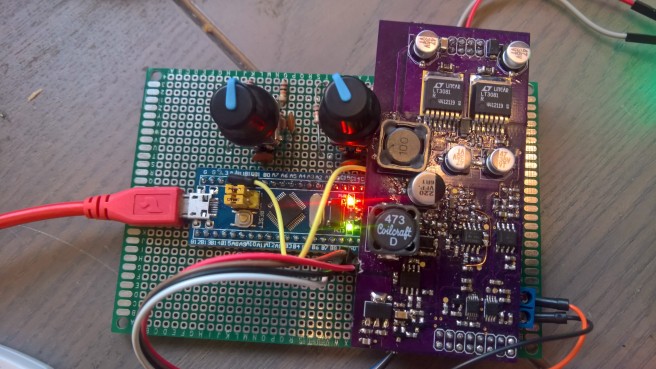
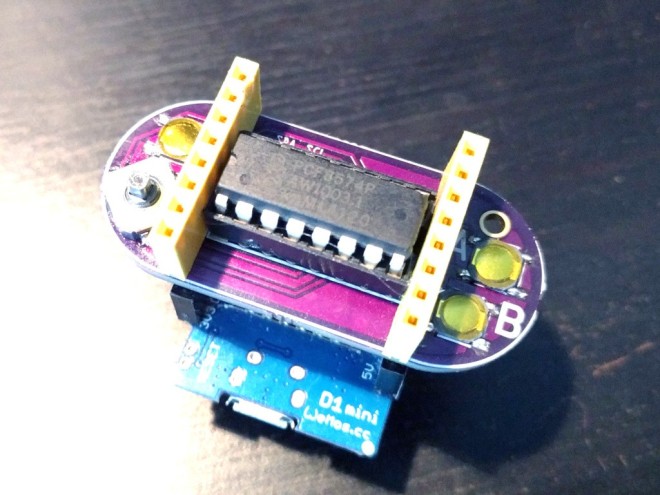
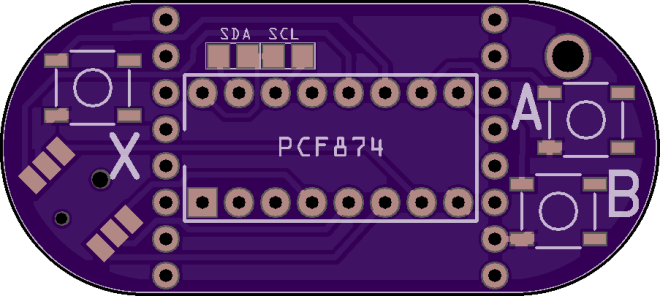

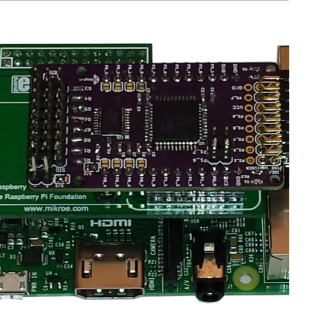
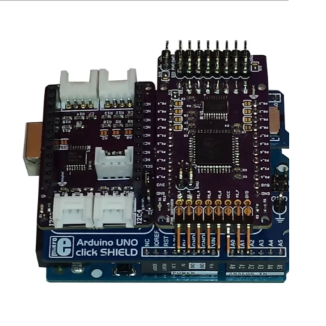

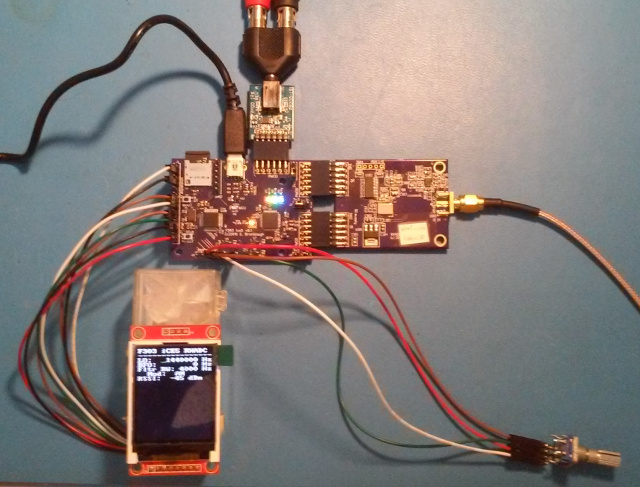
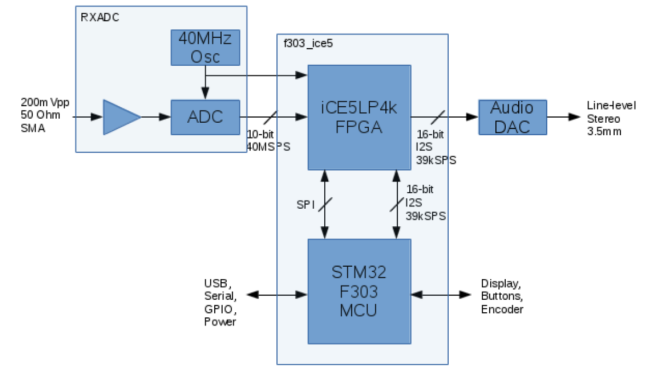

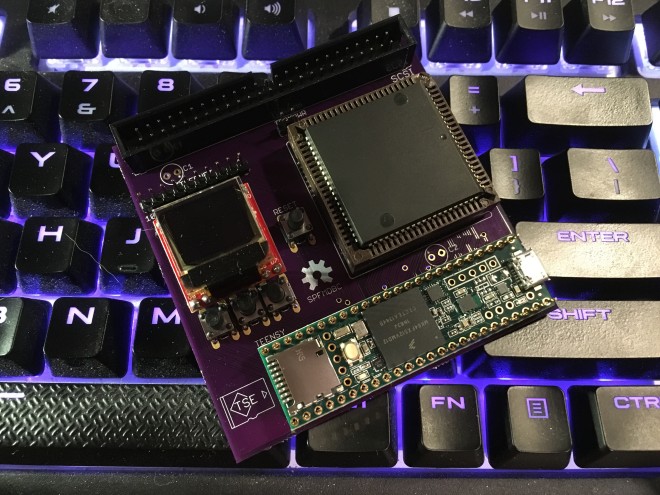
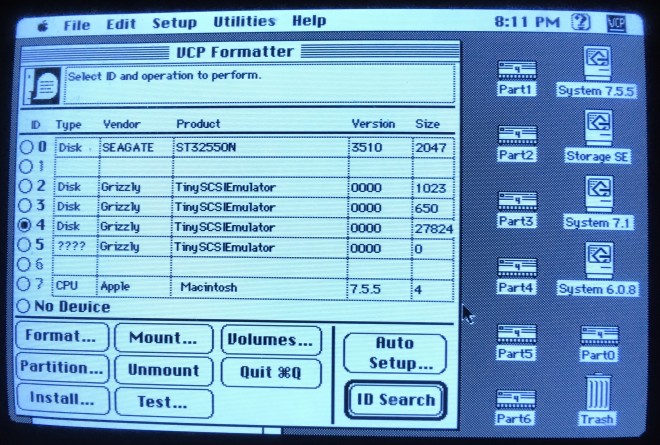




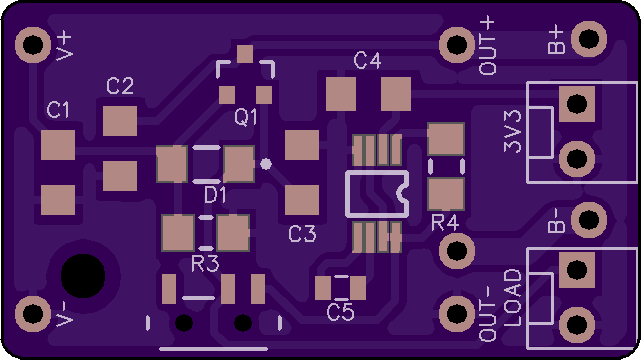

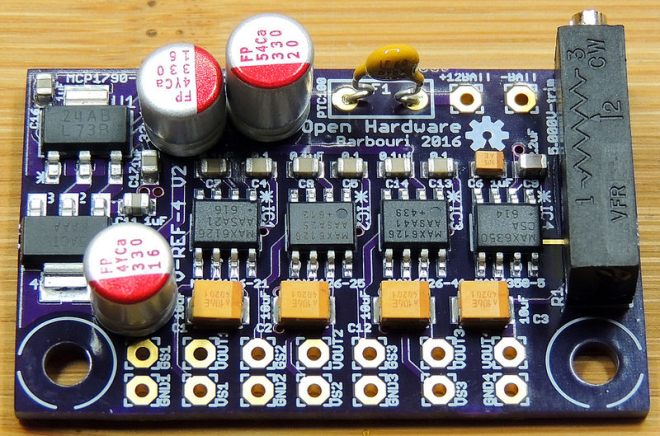


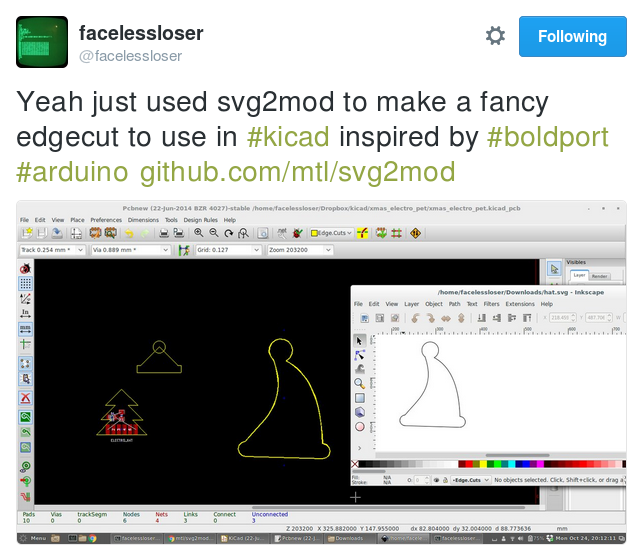


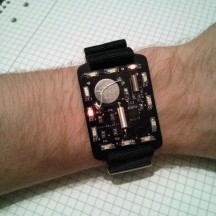
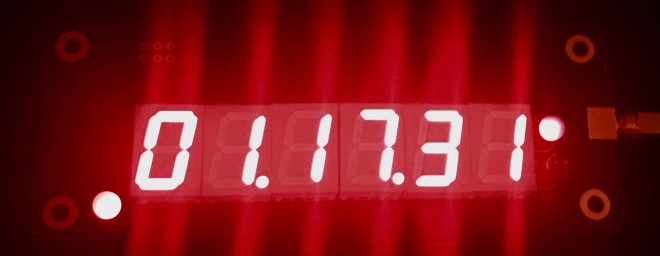


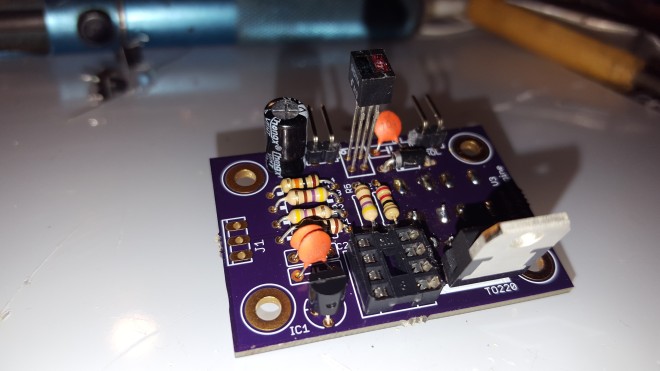


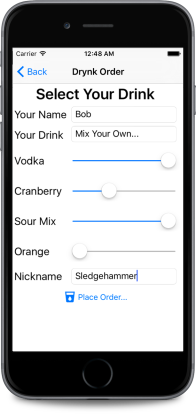



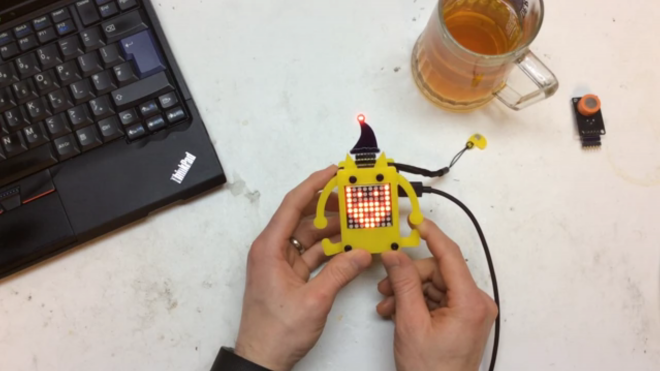
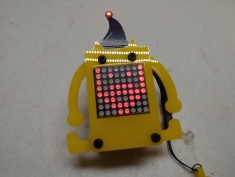

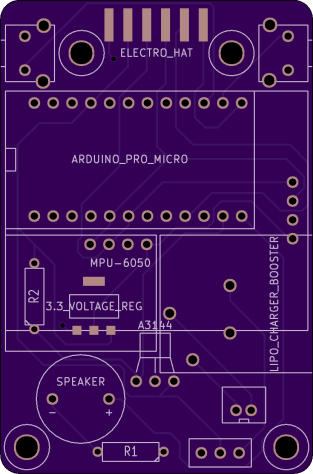


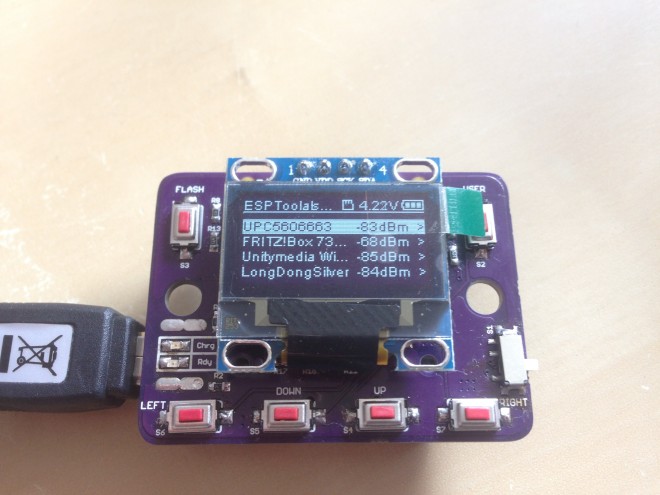
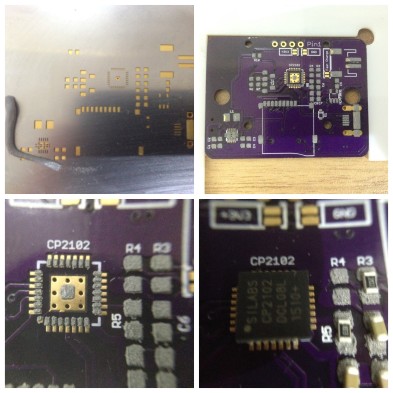














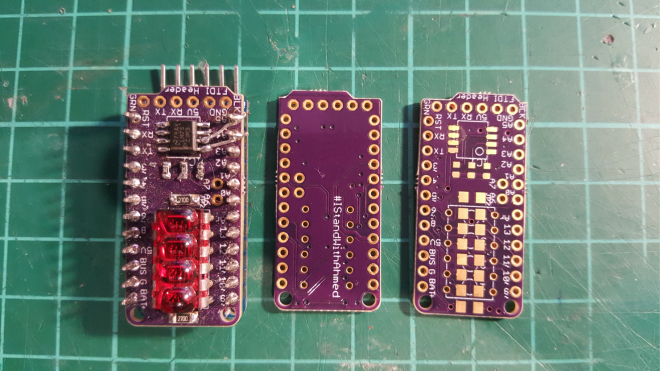
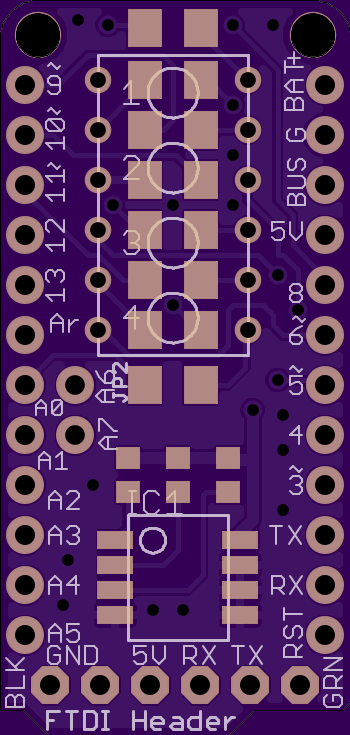




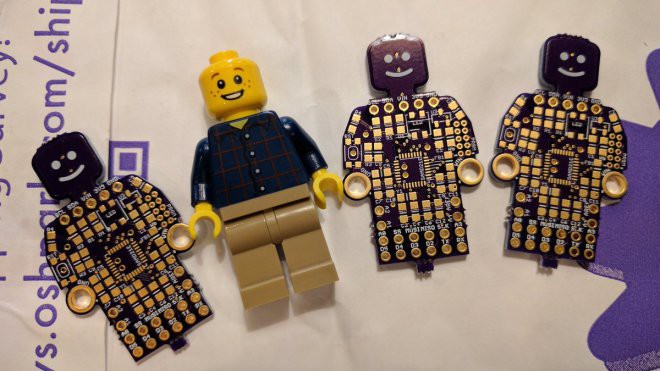
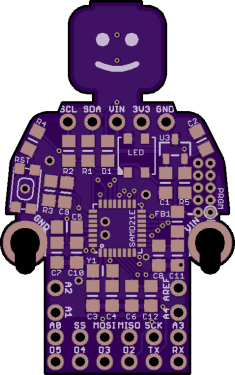
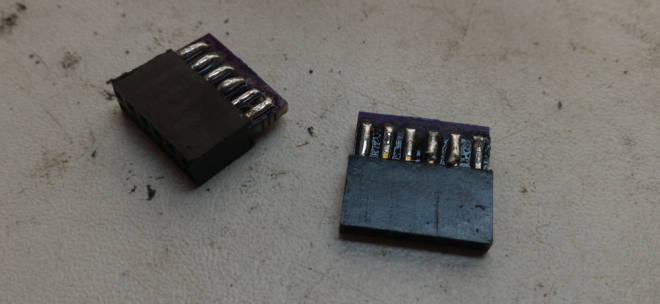
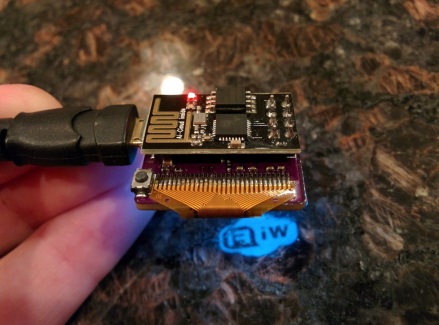
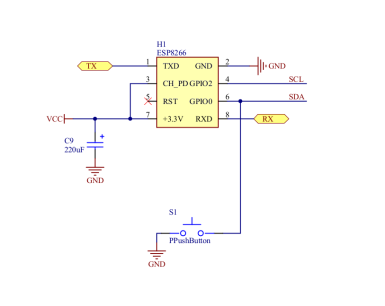

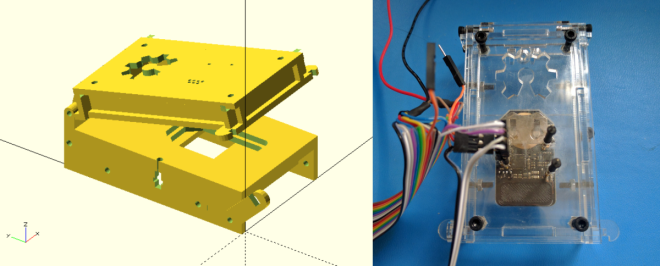


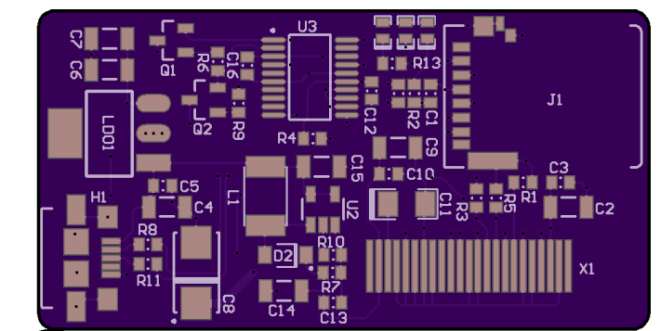


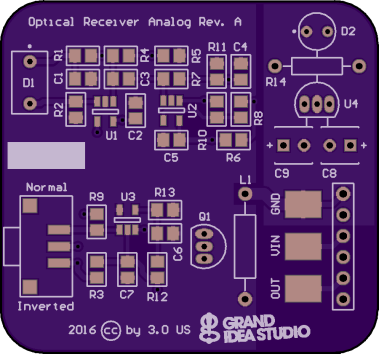

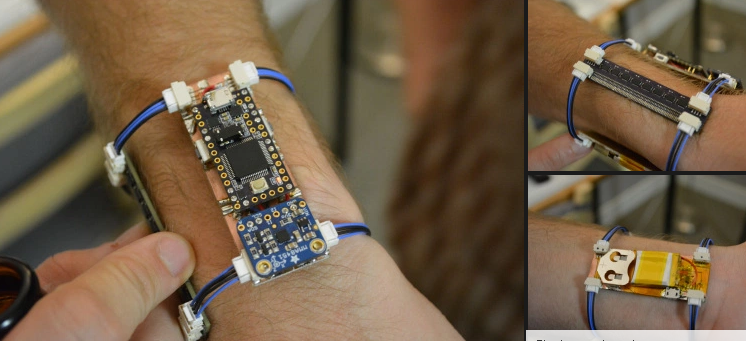








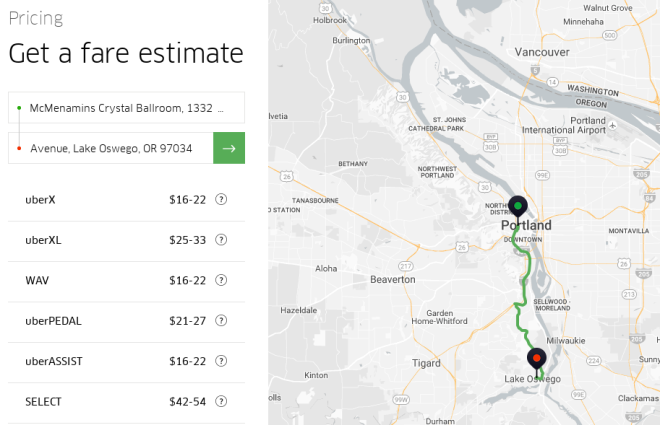
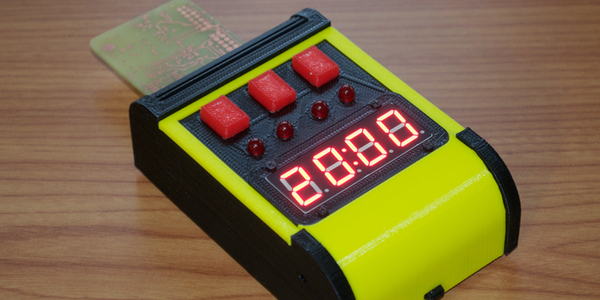

 CatherineH
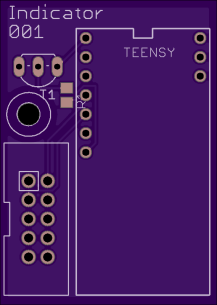

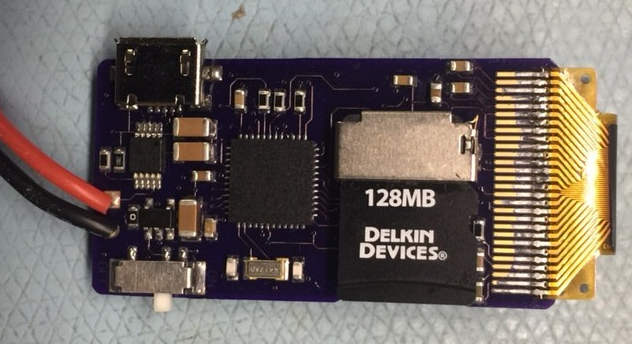
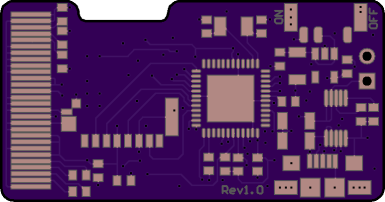

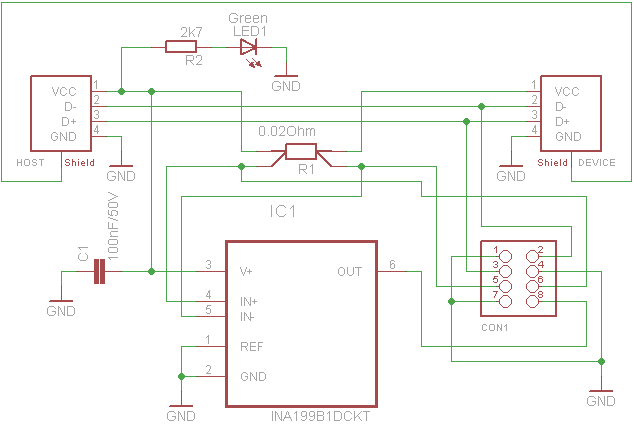


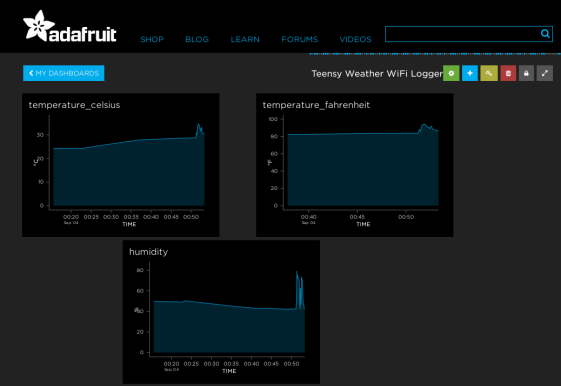
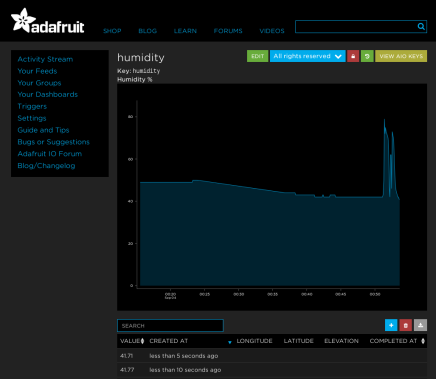

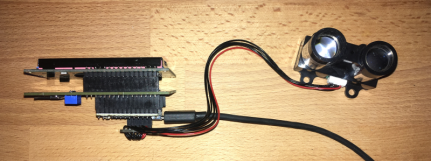


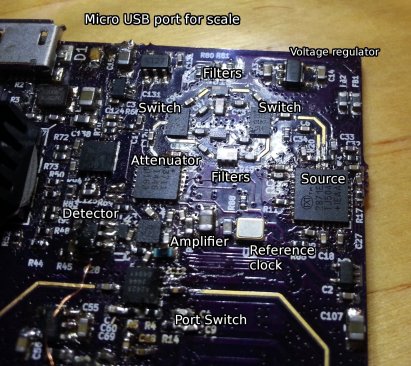

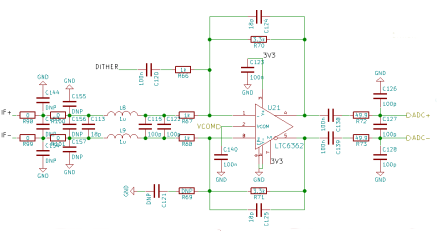


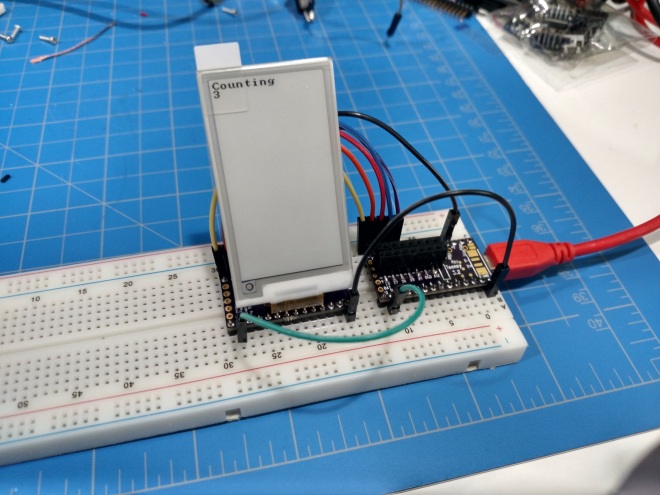
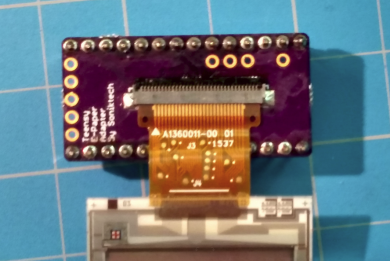
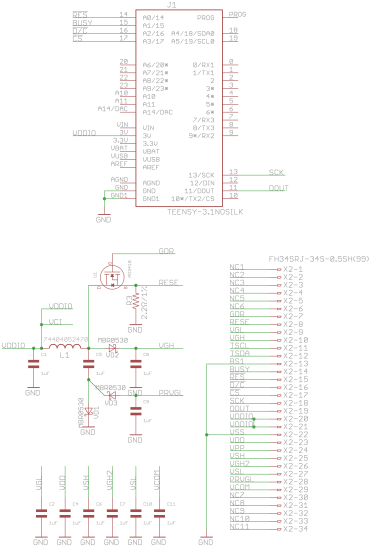





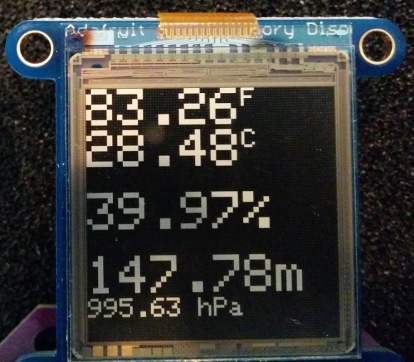







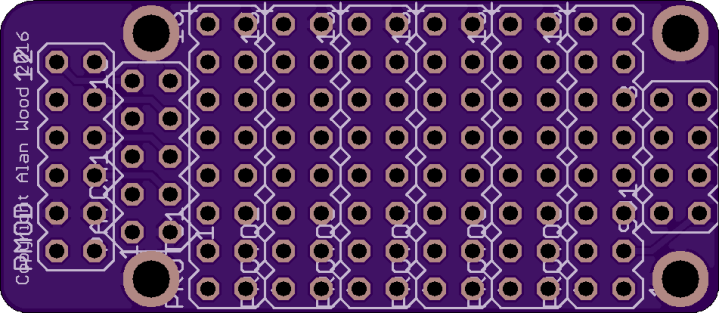


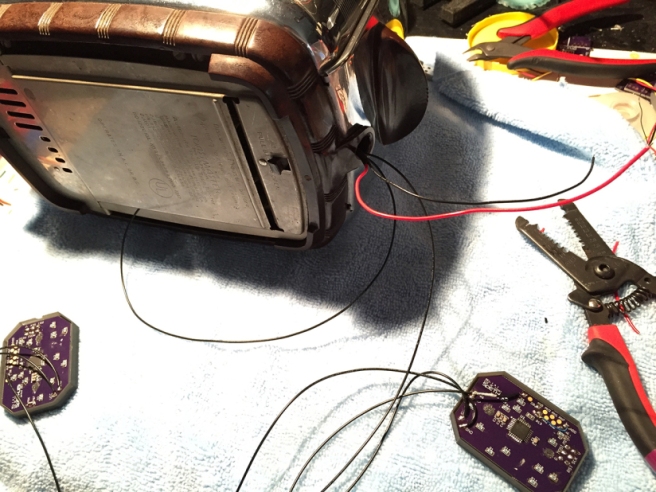
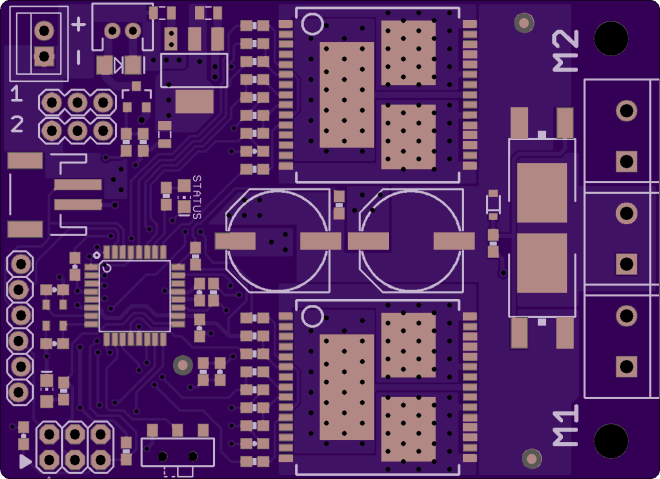

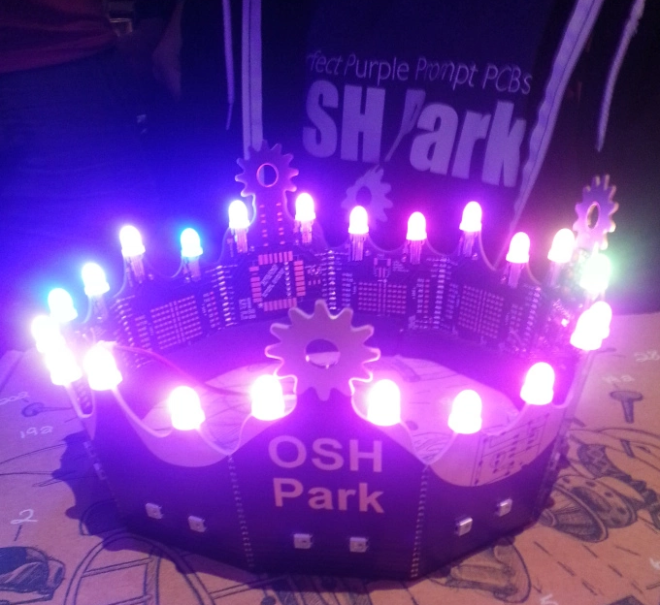


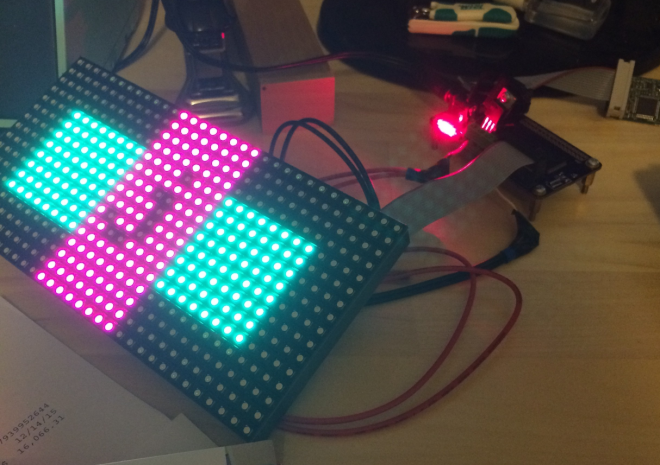
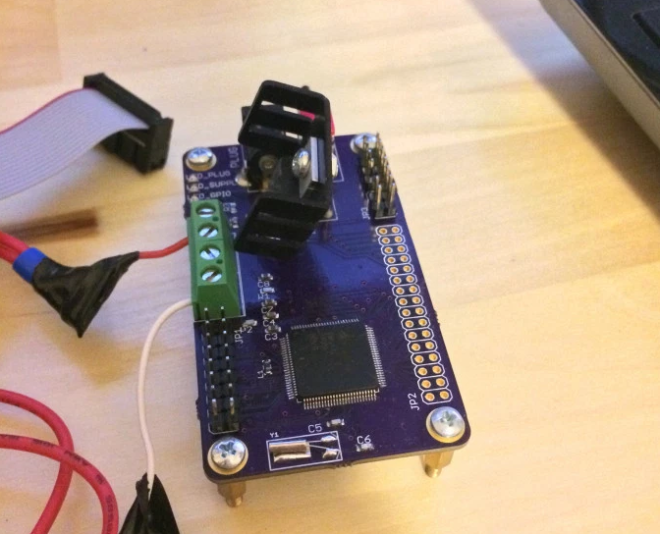

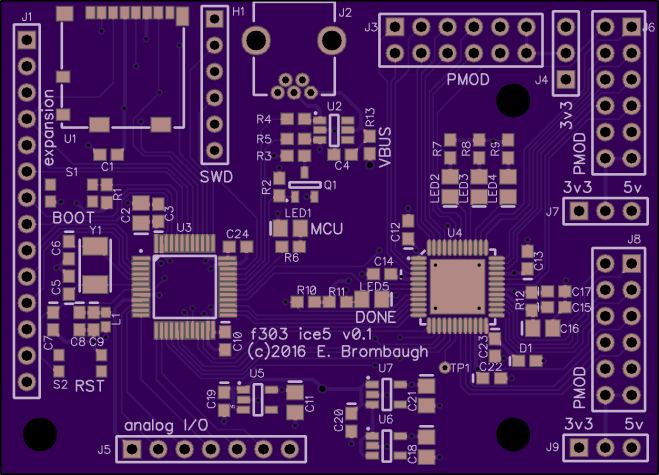






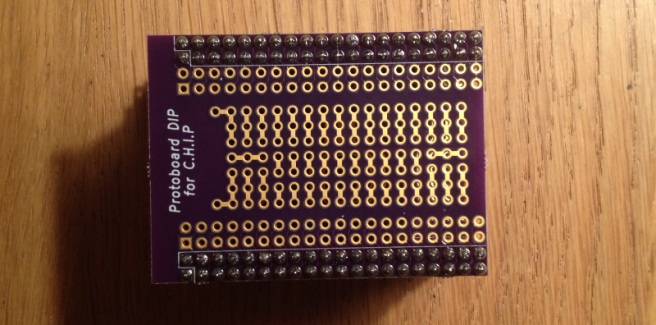
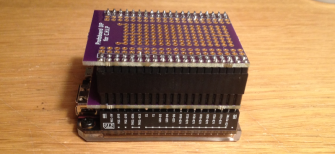

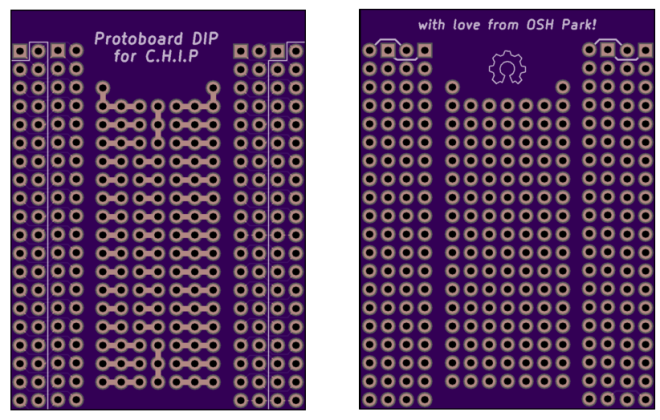
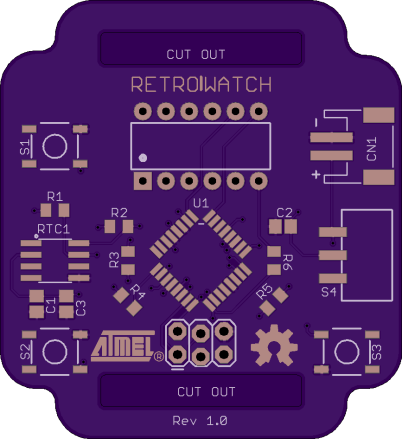
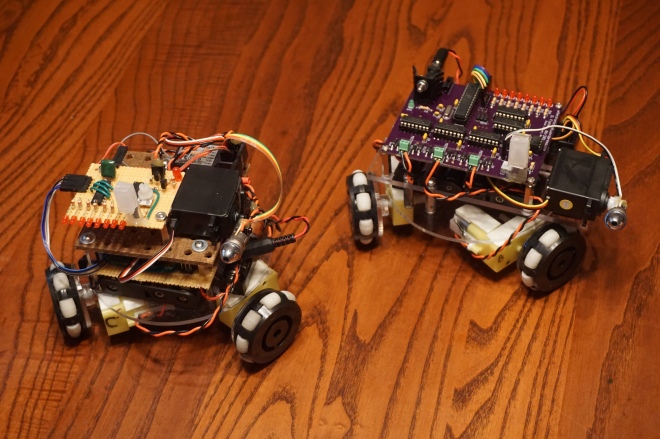
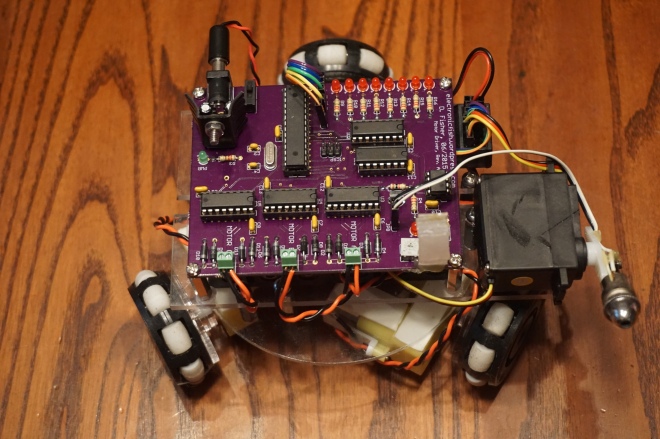




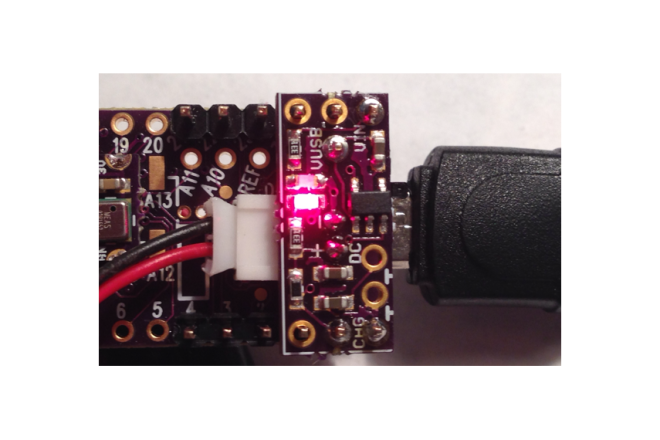

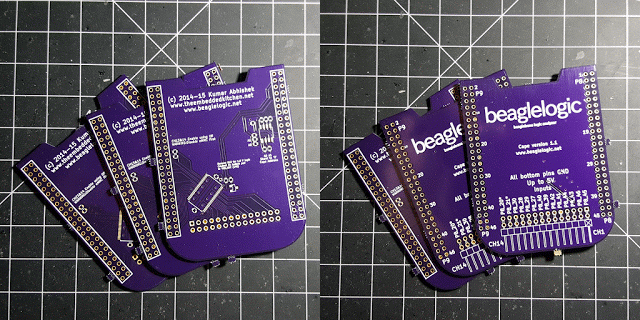


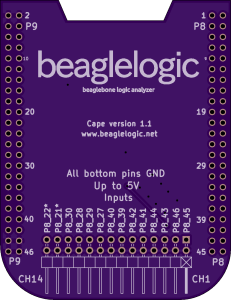
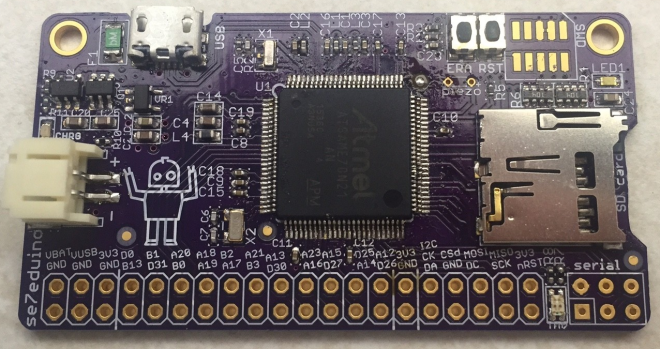


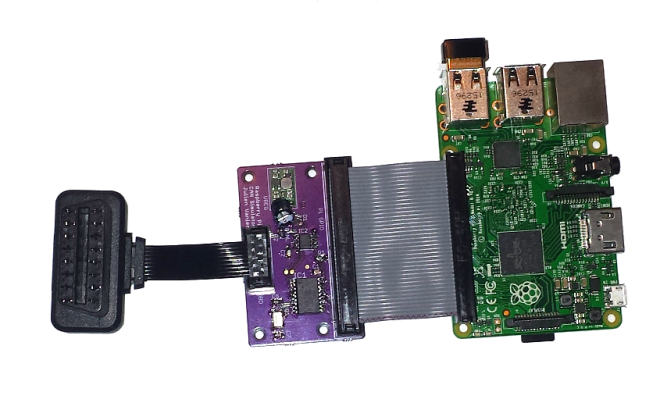

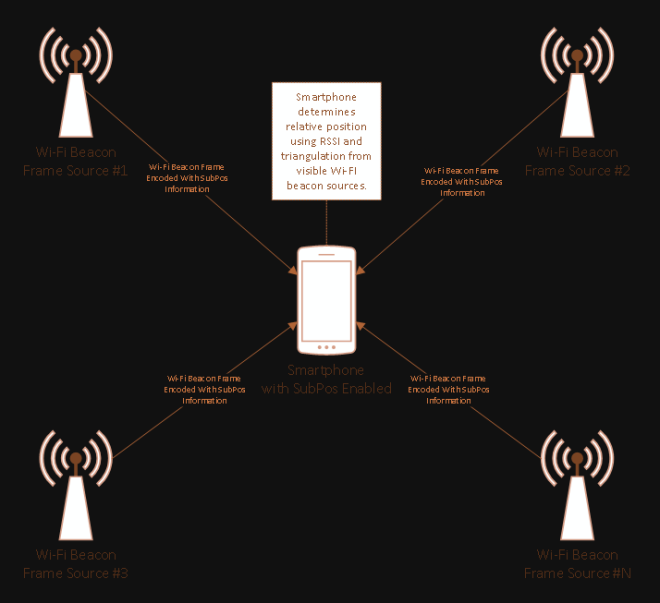

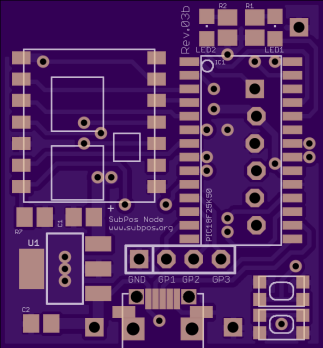



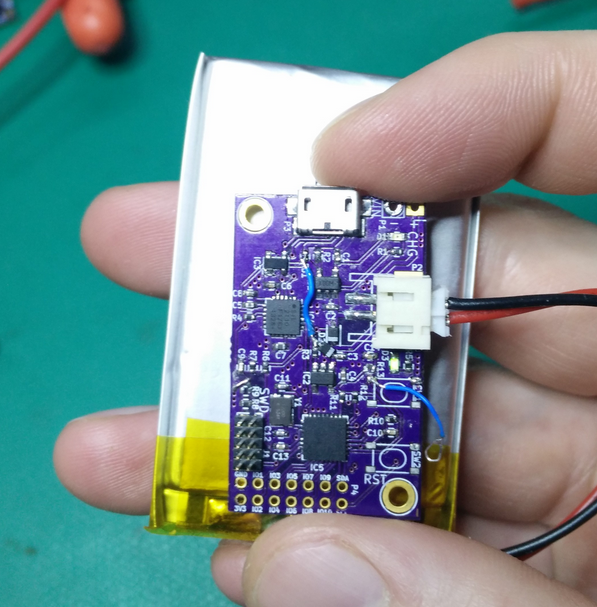


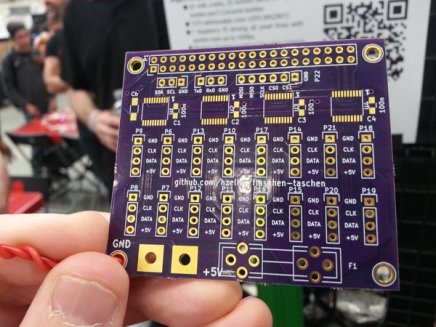


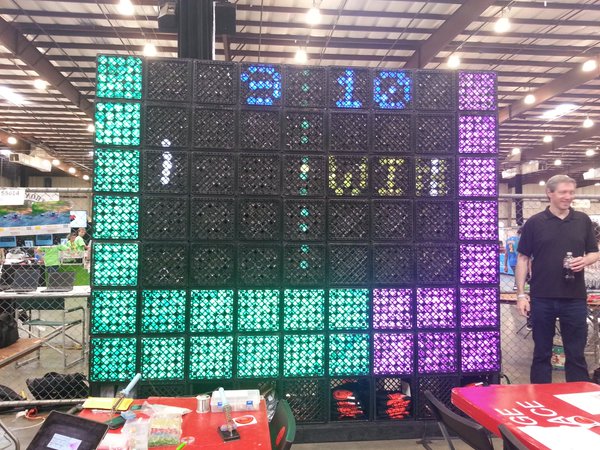
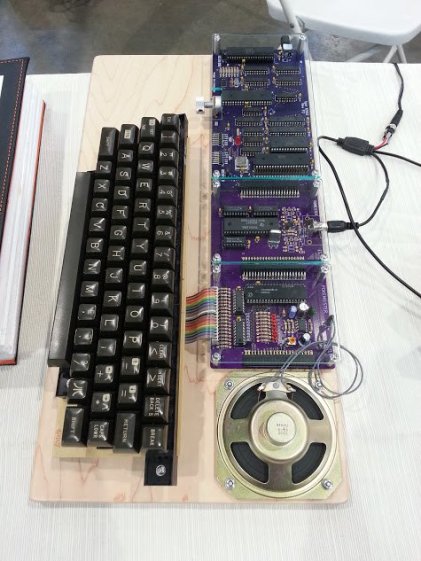


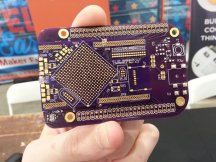
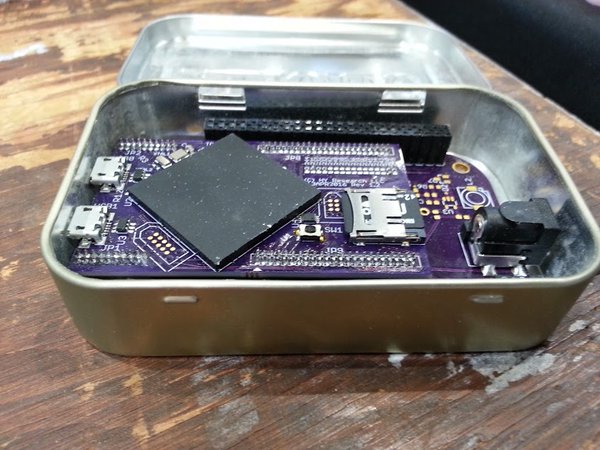
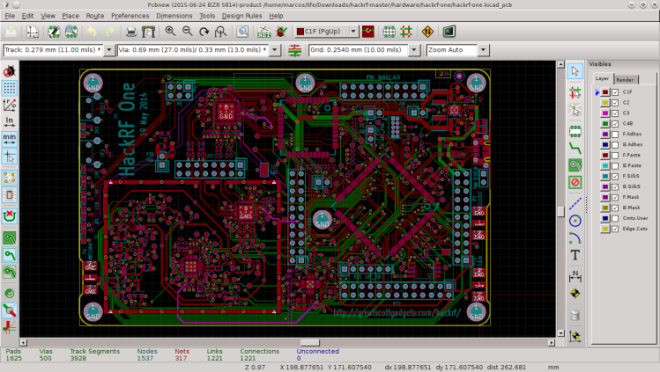





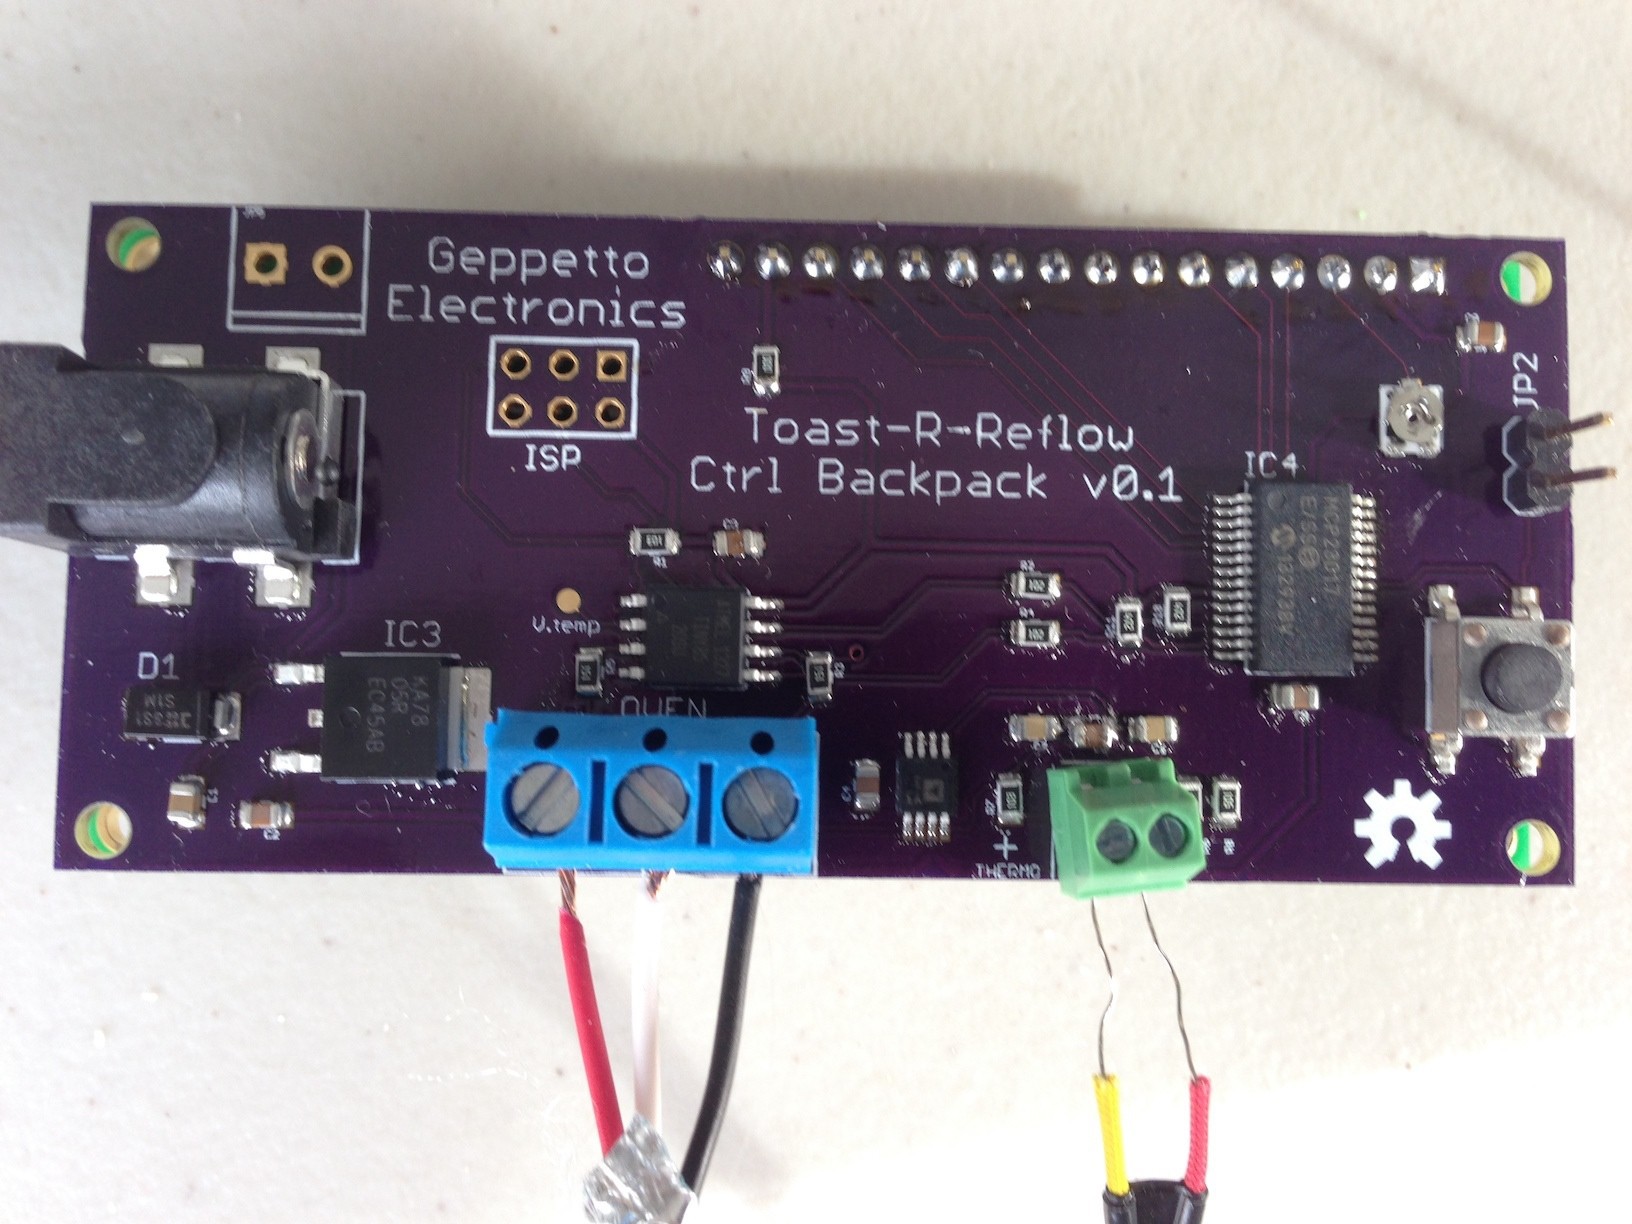
 KoljaWindeler
