Jan
JanScope of this project
My aim is to build a dough proofer with a lot more functionalities than any of the hobbyist devices on the market. For most white bread doughs you don't need anything fancy. Just keep it good and warm (preferably around 24-28°C, depends on a lot of things) and you're good. You could simply use a wooden box with a lightbulb in it.
Things get a lot more exciting when working with sourdoughs of various kinds e.g. rye or wheat. To keep things short and simple let me put it this way: You can influence a breads flavor greatly by varying
- amount of sourdough
- its temperature
- ripening times
This is where a good proofer comes in. Bakeries use huge proofing racks or whole rooms for this purpose. Thats not feasible for home use.
Features
1. General, technical features
- Easy to navigate user interface. Do everything with just one button (even wearing gloves)
- Real Time Clock with buffer battery. Keeps time, weekday and month for a few years without mains voltage
- Buzzer / blinking LCD-backlight for signaling end of modes / errors
- User may define START or END time in every mode.
- last used parameters are saved (and stored without mains voltage)
2. Modes
- Constant Temperature – User defines temperature, duration and start/stop-time
Description: perfect mode for bulk proofing and last rising process
Range: room temperature to 40°C - Reviving Sourdough – pre-set but changeable temperature (28°C) and time (6h)
Description: used to stimulate yeast-production in sourdough
Range: 28°C pre-set, changeable to own needs - Detmold 1 stage process – similar to constant temperature mode
Description: long ripening times (15-20h) at moderate temperatures (24 to 27°C) - Monheim salt method – high temperature and long ripening time
Description: addition of salt requires temperatures of 30-35°C and long ripening times of up to 24h
Hardware
1. The Box
Basically, the proofer consists of a insulated container which retains as much of the thermal energy the heating elements give off. A few additional thoughts were easily cleanable surfaces (food grade) and some kind of material machinable at home.
The BastaBox XL is made of foamed polypropylene and its inner (540 x 340 x 240mm) and outer (600 x 400 x 300mm) dimensions are perfectly suited for my needs. The surface is washable and HAACP-certified.
[INSERT PIC of BastaBox]
2. Tiltable door with window
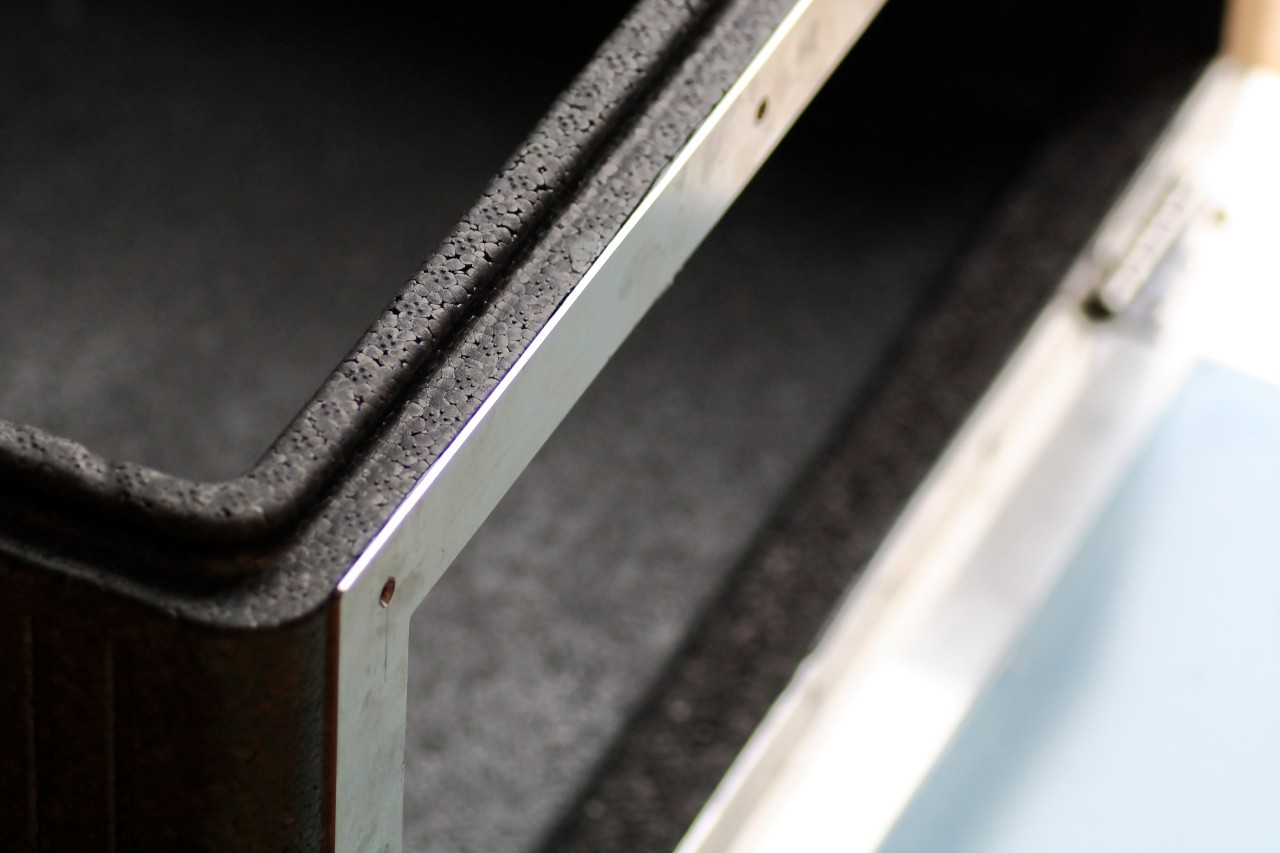
As I wanted the proofer to have a big window, I had to cut out a huge opening on one side. That imposed some structural problems, as there was only a 30mm wide strip of 28mm thick EPP left where the lid "sits". Also, a 1mm thick stainless door with a plexiglas window, insulation and most of the electronics weights way too much to be bolted directly to quite soft EPP.
So I sketched a front-frame and attached door and had it laser-cutted from stainless steel (1.4301, 1mm thick). The frame is glued to the box with clear 30 minute epoxy resin. Unfortunately it moved a bit in its fixture, so now it's a bit sloping to the down right corner. That won't impede functionality anyway...
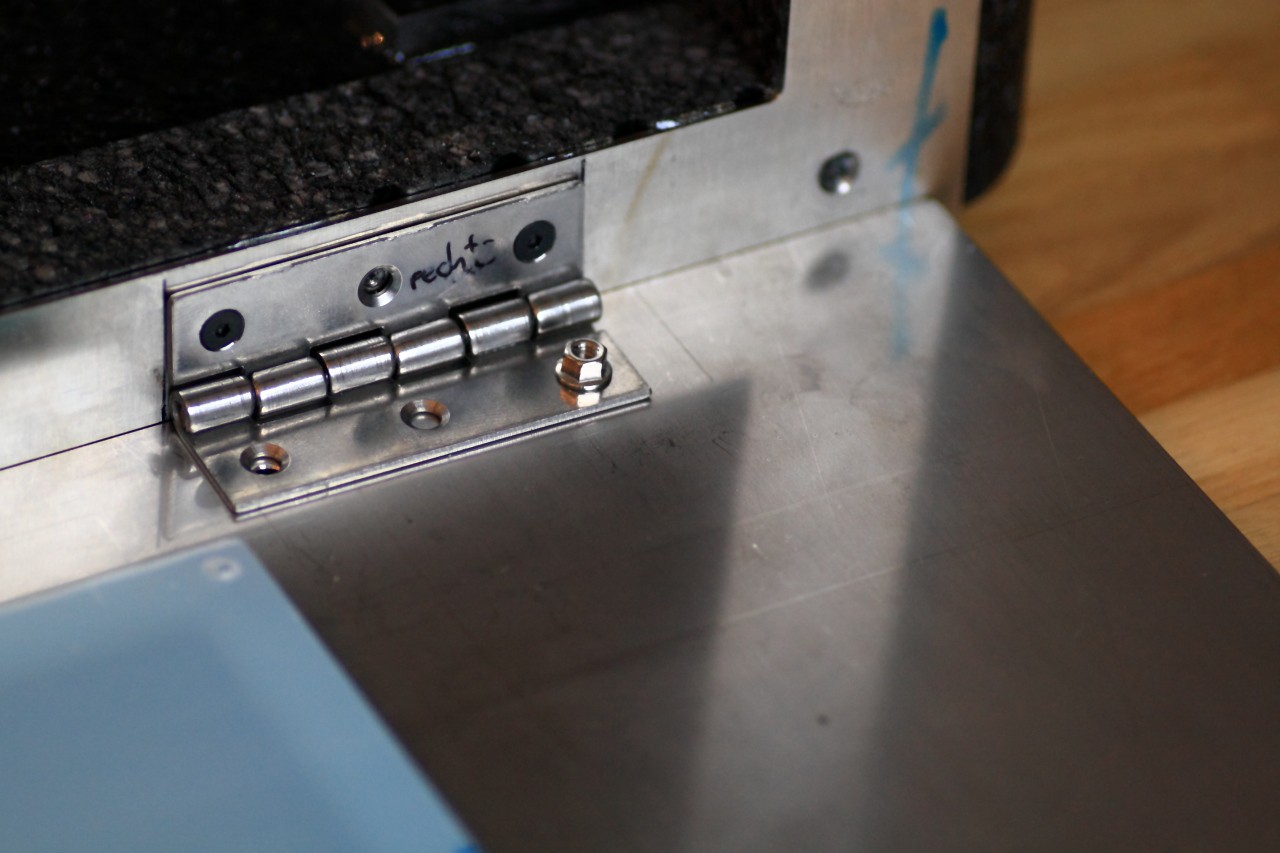
The front door is connected to the frame with two stainless hinges via M3 flat-head socket head cap screws. The plexiglass window is bolted to the door with the same screw type. It's this 5mm thick sheet which provides the structural strenght to the quite wobblystainless steel sheet!
The front door also holds all the electronics, there's a cutout for the LCD and rotary encoder.
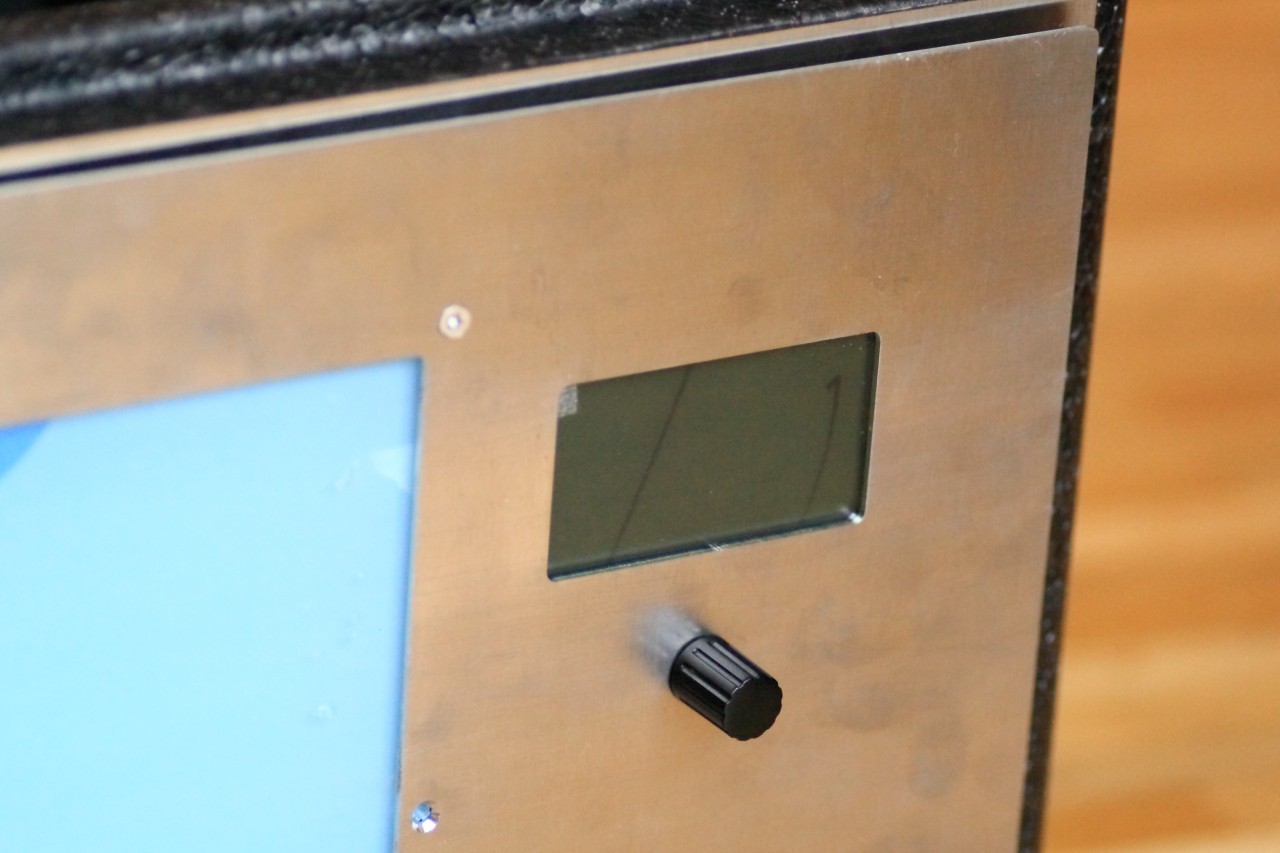
The black lines are on the protecting foil, so one remembers to peel them off of the display before finally mounting it into place.
The back of the front door will be fully insulated so no bare metal is exposed to the chamber which would yield a huge thermal bridge and literally suck the heat out of the box...
3. Heating plate
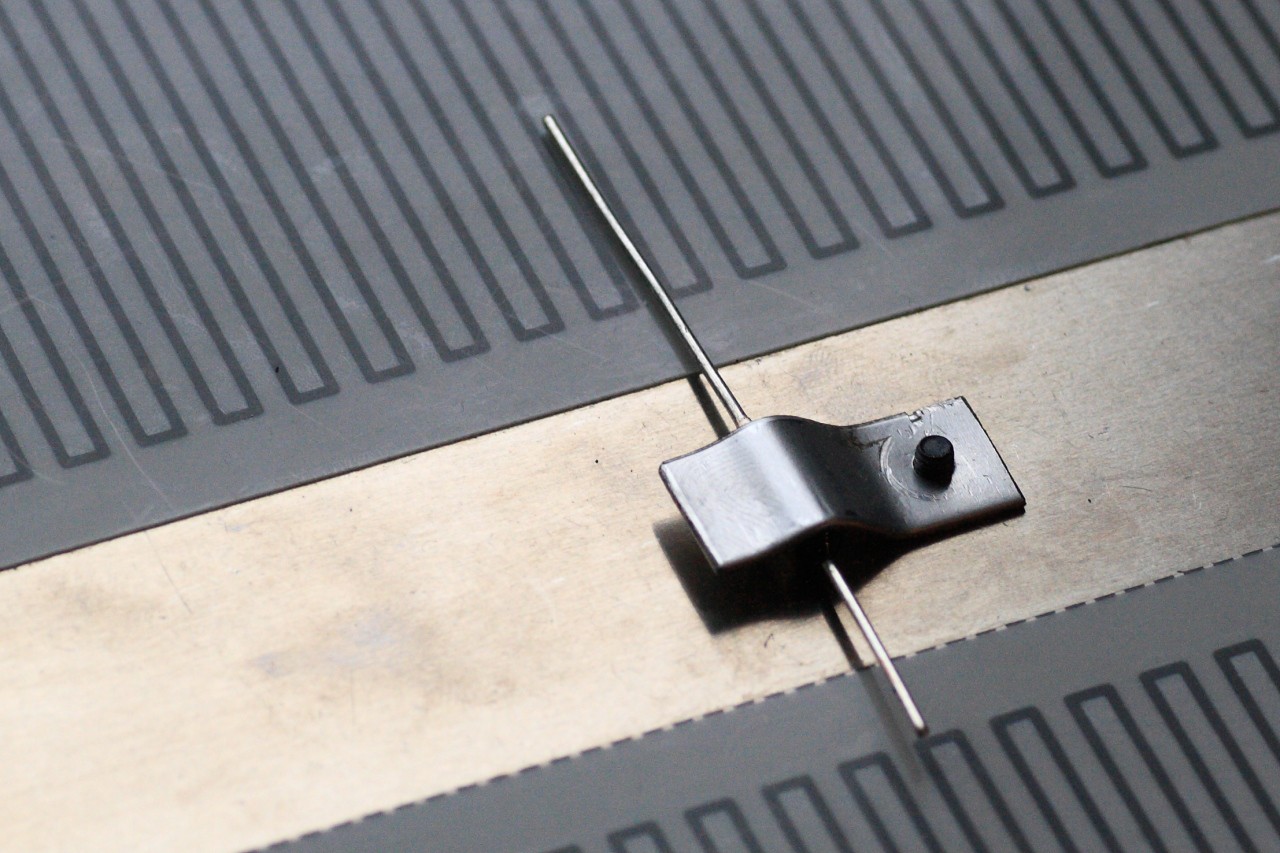
As mentioned before the heating plate is a 3mm thick aluminum plate which I could get for little money. I glued two 65W self-adhesive heating foils under it. These operate off 230V mains, so the plate (and every other metal part of the box) is tied to ground! In the picture below you can see a hardware thermal fuse (75°C), securely held in place by a bracket, which will be in series with the heating elements (which are paralleled). This fuse is non-resettable and opens if the plate should ever reach 75°C (which it never should software-wise). This gives maximum safety if the software or solid state relay should ever hang. The EPP is safe to operate up to 100°C.
120W does not sound like much, but tests showed it's enough power to heat up the interior quickly and keep it at a set temp. even with 3kg dough in it.
4. Air circulation, humidity control (sort of) and lighting
In a closed space air tends to build layers of different temperatures. Warm air rises to the top, cold air flows to the bottom. To counteract that, a small 60mm fan is integrated into the box. It will be PWM-driven for speed control. It can't blow too much, as under a steady air flow doughs tend to become incrusted which is not (always) desirable.
Controlling humidity is a complex topic which is not easily integrated. Thus, I opted for just measuring humidity. It should always be high enough, so no crust will build up on the dough. You can keep humidity high enough just by putting a small beaker of boiling hot water into the box. It's quite easy to get into the desired range of >70% RH.
Lighting is done with a few high power LED's. I have some white ones lying around, maybe these will serve a new purpose here...
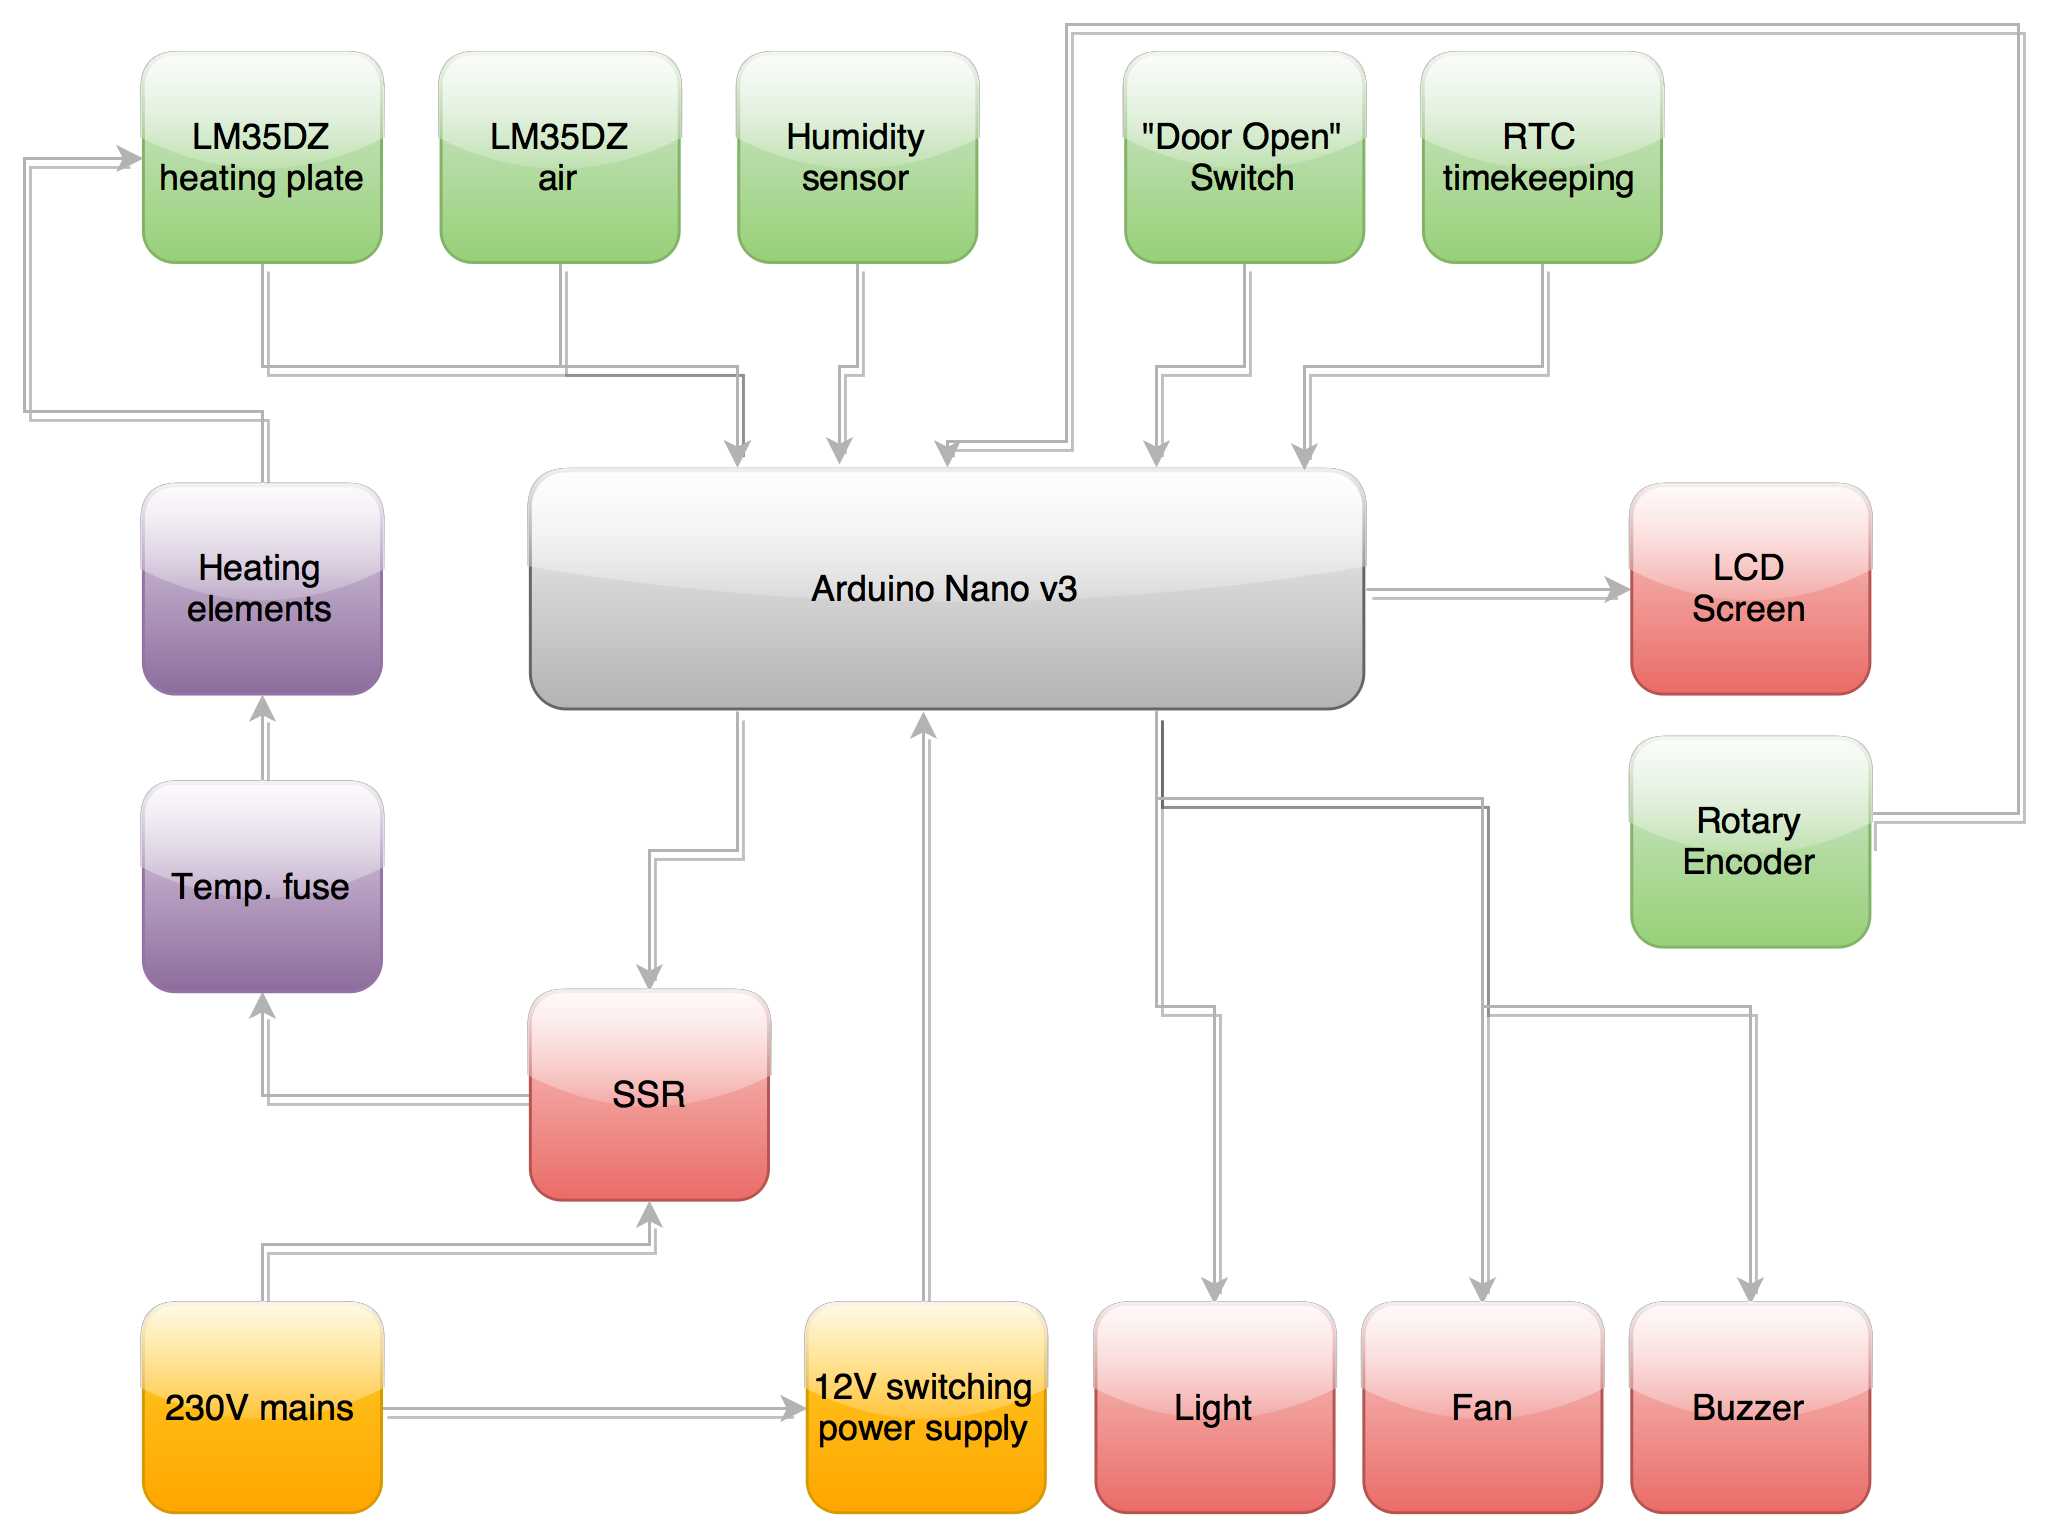
Electrical flow diagram
The following diagram shows all inputs (green) and outputs (red).