I have an Accurite weather station that I bought at Costco. I wanted to record the data and visualize it differently, so I installed an open source weather station (weewx http://weewx.com) on a Raspberry Pi 2B that I had. I was inspired by the guy at Desert Home (http://www.desert-home.com/2014/11/acurite-weather-station-raspberry-pi.html).
All was good. Some customization of the skins to my liking and I was in business.*
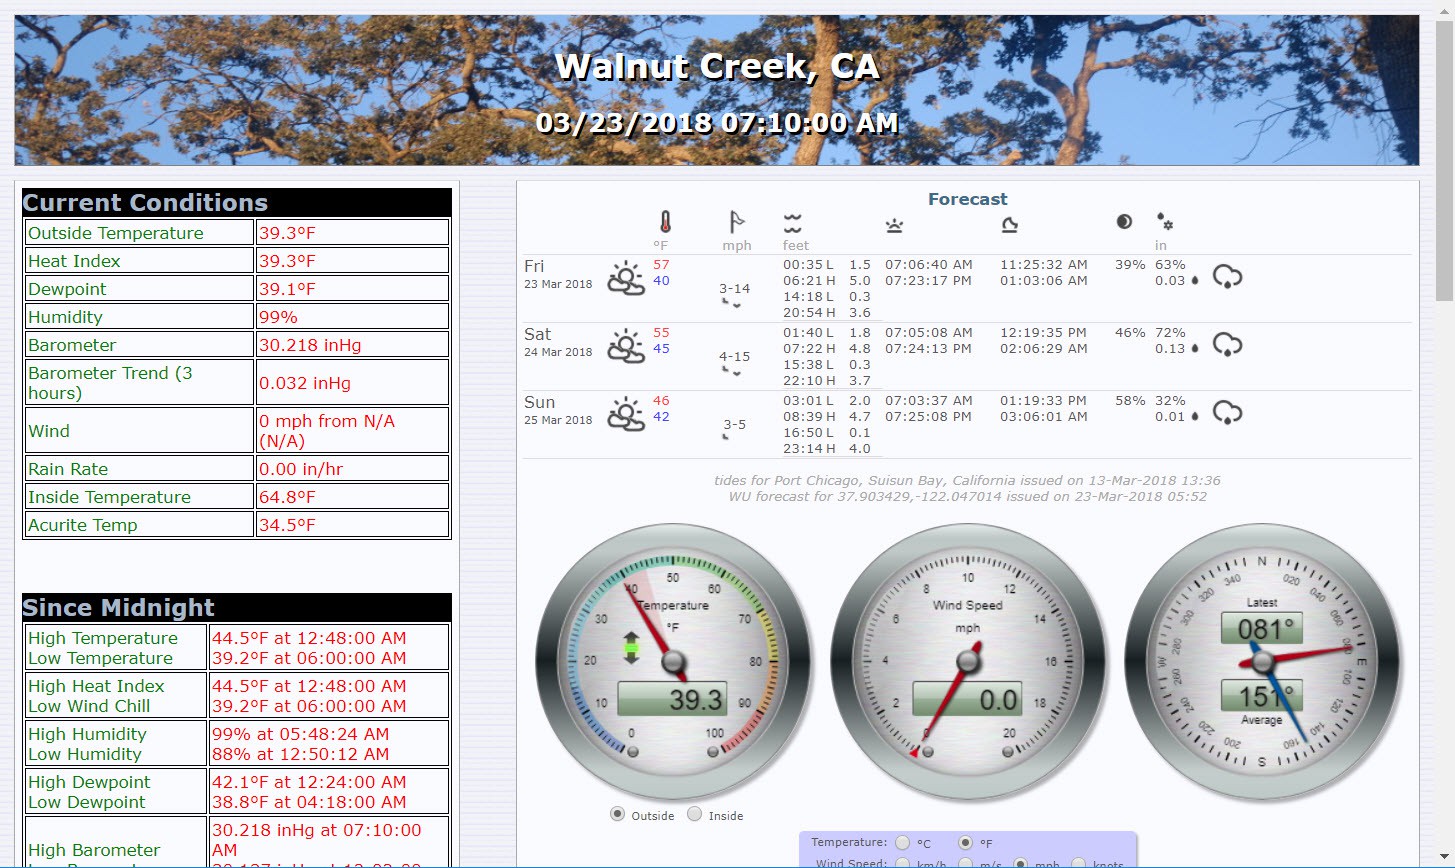
*I don’t have a static IP or public URL, but you can see the published data here: https://www.wunderground.com/weather/us/ca/walnut-creek/KCAWALNU35
I used Steelseries for the gauges. https://github.com/mcrossley/SteelSeries-Weather-Gauges
I had mounted the sensor on a 6’ piece of steel conduit on the edge of my roof where it the rain and wind gauges would operate properly. Unfortunately, I have a white foam roof that reflects heat like crazy in the summer. Well, fortunately for comfort in the house, but bad for recording temps. In the summer, I was recording >20 degF (about 10 degC) higher than actual. I got temps that were too low on winter nights too (probably due to radiative cooling).
I couldn’t find a spot that would work well for all three sensors. I could put it in the shade under a tree, but then the rain and wind gauges wouldn’t work well. I tried several spots with a clear view of the sky, but I always got excessive temps (not as bad as being on the roof, but not accurate). Mounting near ground level lead to virtually no wind readings.
My solution was to mount the sensor where it got good wind and rain data and build a new thermometer. It had to be wireless and preferably solar powered so I could find a good spot outside for it.
The overall plan:
- Get the temperature with a low power device once every couple of minutes, connect to wifi and via UDP push the data to a port on the Raspberry Pi.
- While idle, the device would shut itself down to save power.
- There is a daemon running on the Pi that would look for data on the port and write it to a file.
- The Weewx driver that reads the sensors would grab the temperature from the file instead of the standard sensor. (with some error checking)
Hardware
I decided on an ESP8266 as the main chip as it has wifi, can run at low power, and works with the Arduino tool set. I bought a Adafruit Feather HUZZAH with ESP8266. Also bought a Lithium Ion Battery and Digital Temperature Sensor Breakout - TMP102 from Sparkfun. To charge the battery, I found a USB solar panel on Amazon that’s meant for charging phones Docooler Solar Charger 10W Portable Ultra Thin Monocrystalline Silicon Solar Panel 5V USB. Last piece of the puzzle was a waterproof case. I found a ABS box at Frys. I’m not sure it was exactly this one, but close.
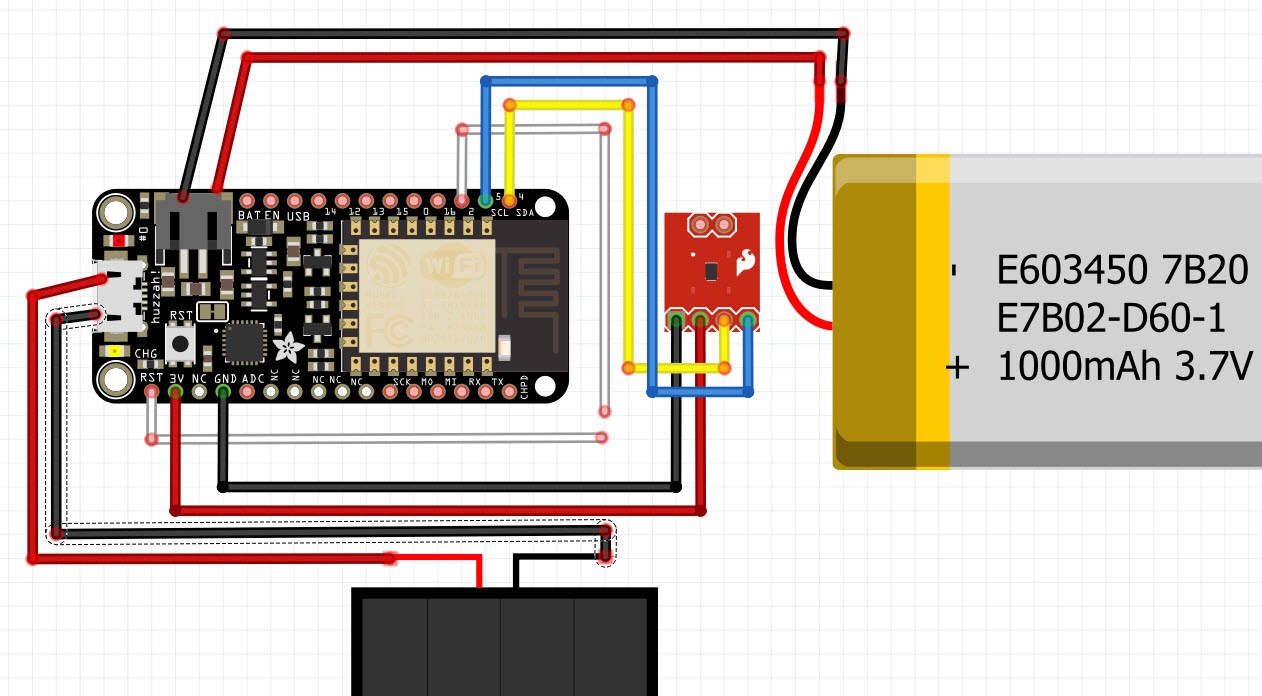
The black thing at the bottom is the solar panel. It’s plugged into a USB mini connector via a standard USB cable. The battery is plugged into the battery connector. When the sun shines, the battery charges. When it’s dark, the system operates off the battery.
The white wires are important. These two pins must be connected to enable deep sleep on the ESP8266. But they must be disconnected when programming. I used a spade connector to make a solid connection that was easy to open to debug.
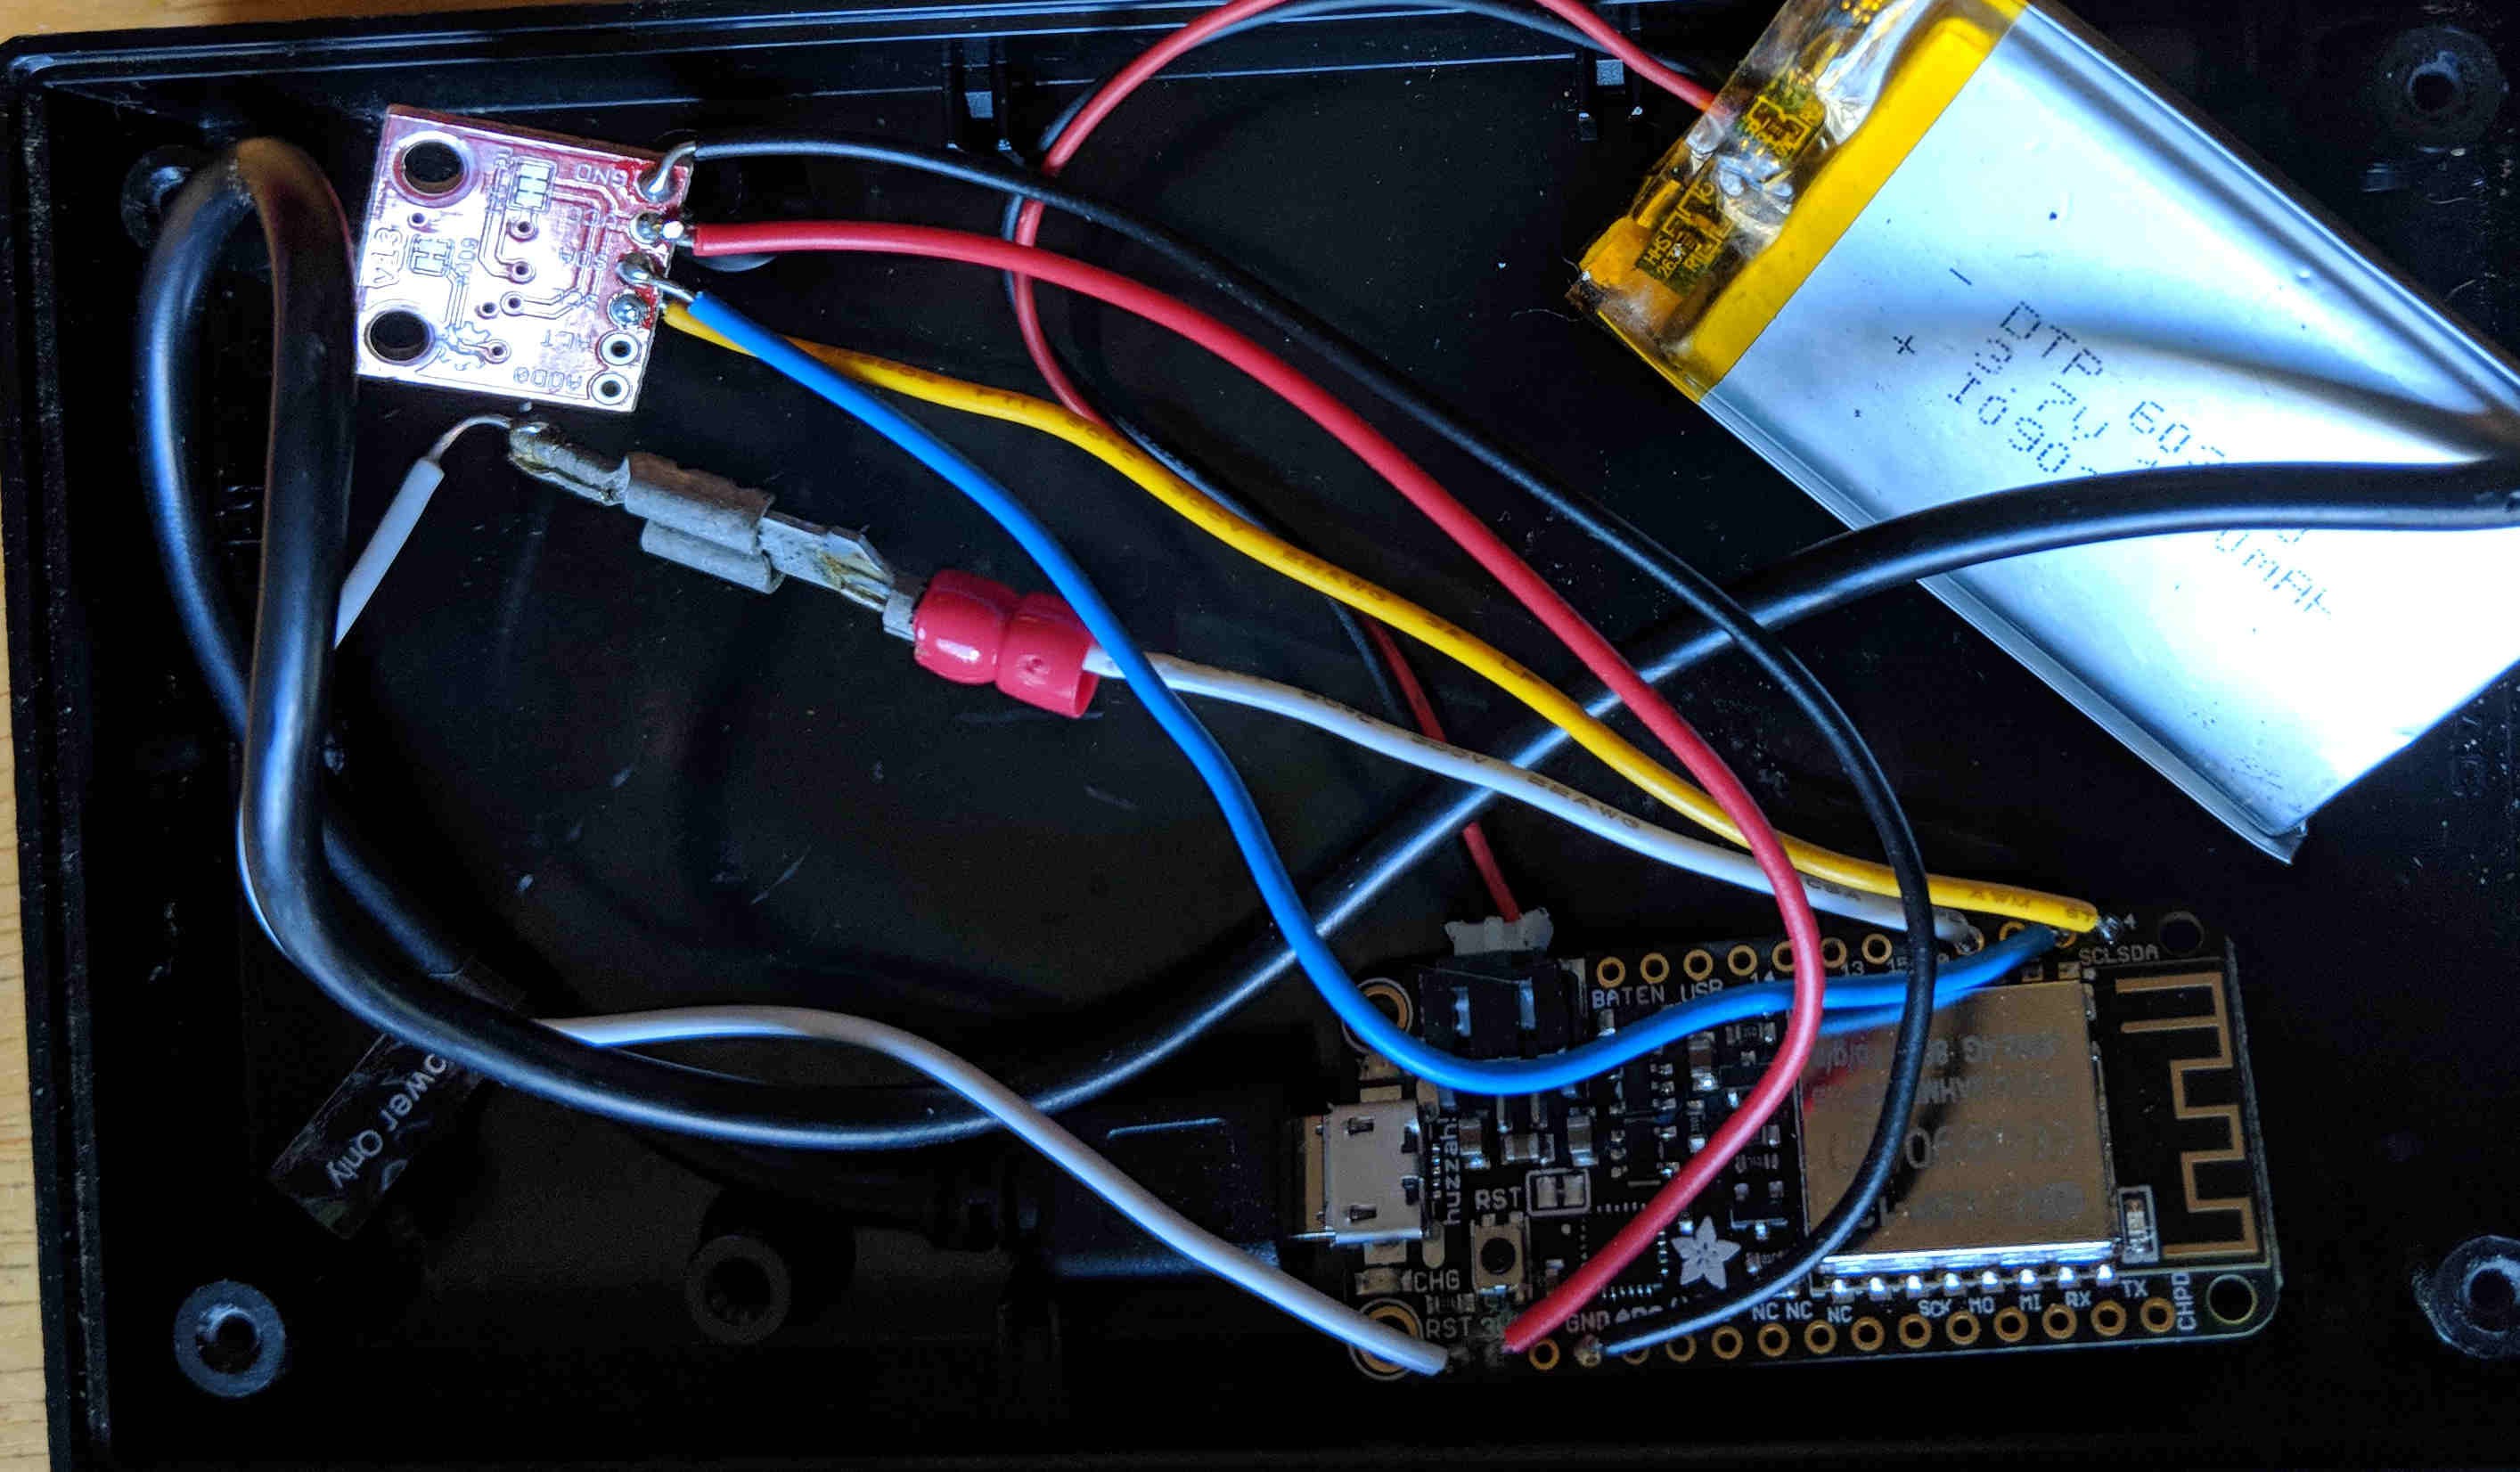
Not shown - I cut a small slit in the plastic case with a dremel tool to get the USB cable out to the solar panel.
 vaibhav sharma
 Manoj kumar