 deʃhipu
Having cleaned the switches overnight, in the morning I started to work on the wiring. I used a two-sided tape to glue a Pro Micro to the base, added a USB cable (I had to file the plug a little to make it fit inside the keyboard), and started to add the wires and diodes.
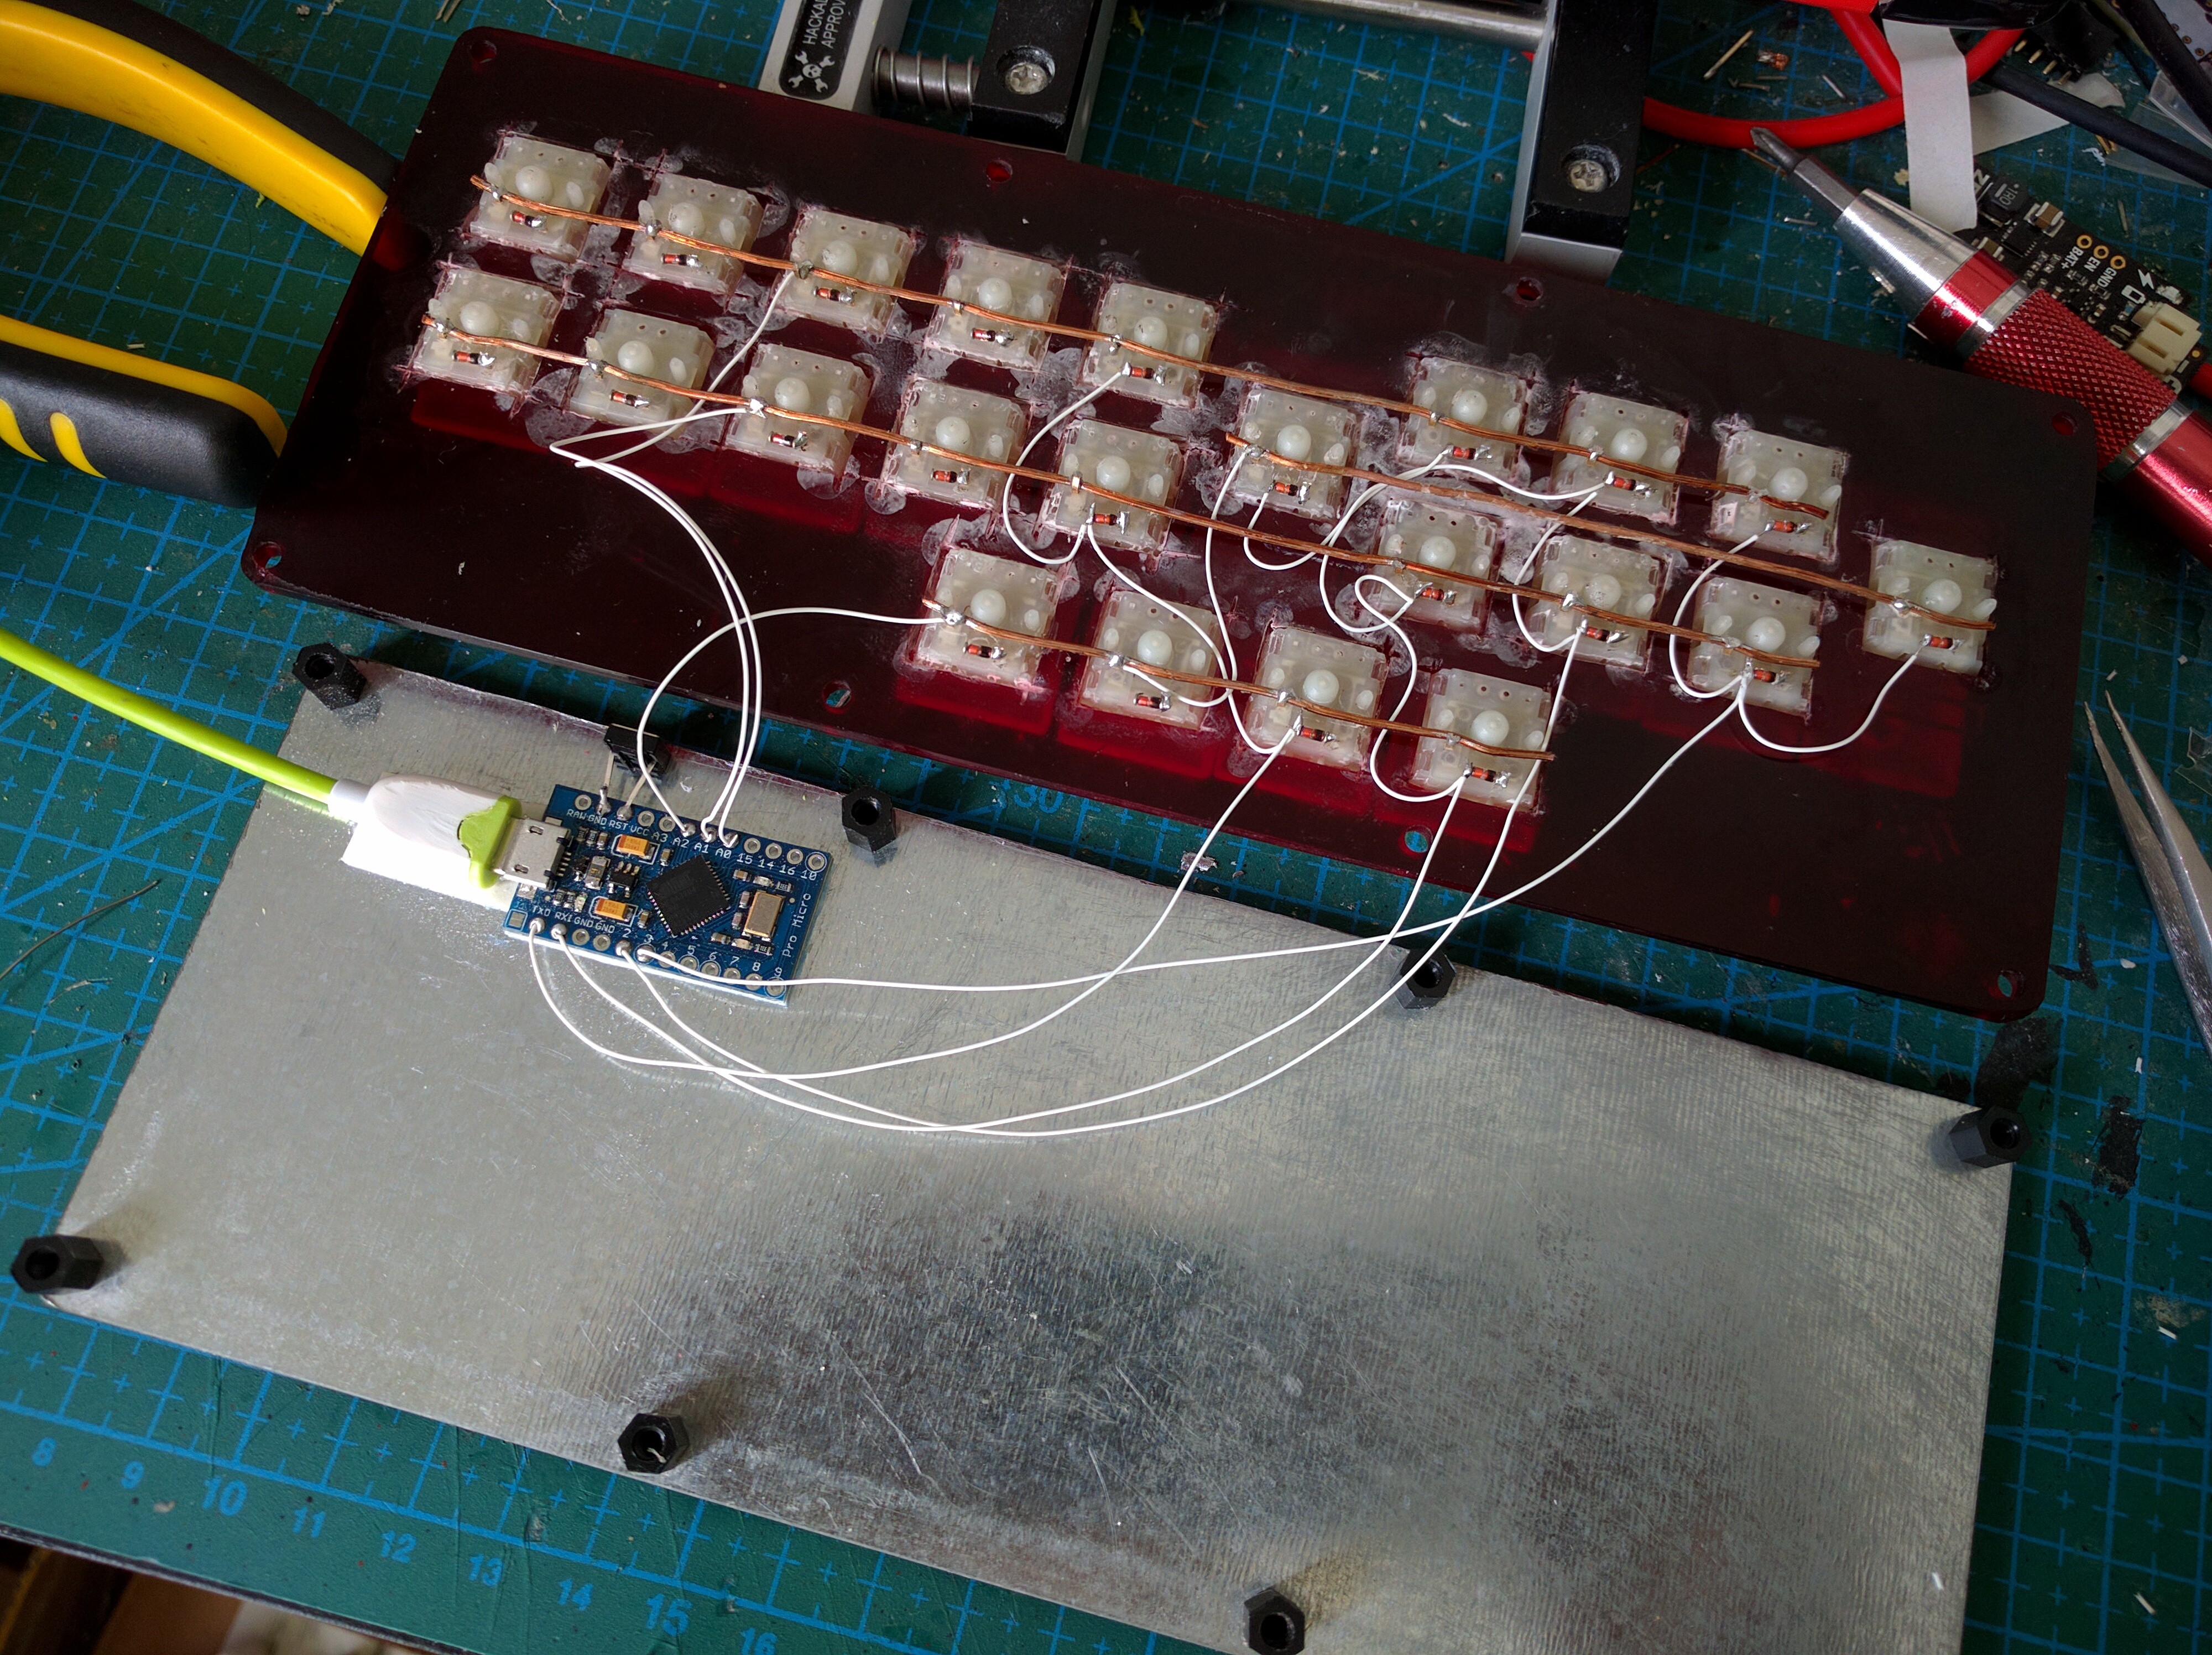
I decided to use 3 rows and 8 columns, with the two large keys in the same row as the vowels on the bottom. This lets me return the row status as a single byte and makes the scanning quite fast.
For software, I used the same TMK keyboard firmware as in #Alpen Clack, with just two changes, one to the key map:
static const uint8_t PROGMEM keymaps[][MATRIX_ROWS][MATRIX_COLS] = {
  {
    {KC_W,    KC_E,    KC_R,    KC_U,    KC_I,   KC_O,   KC_P,    KC_LBRC},
    {KC_S,    KC_D,    KC_F,    KC_J,    KC_K,   KC_L,   KC_SCLN, KC_QUOT},
    {KC_Q,    KC_T,    KC_C,    KC_V,    KC_N,   KC_M,   KC_NO,   KC_NO},
  },
};
and one to the matrix functions:
/* Column pin configuration
 * col: 8
 * pin: PD0 PD1 PD2 PD3 PD4 PD7 PC6 PE6
 */
static void  init_cols(void) {
    // Input with pull-up(DDR:0, PORT:1)
    DDRD  &= ~0b10011111;
    PORTD |=  0b10011111;
    DDRC  &= ~0b01000000;
    PORTC |=  0b01000000;
    DDRE  &= ~0b01000000;
    PORTE |=  0b01000000;
}
static matrix_row_t read_cols(void) {
    return (PIND&(1<<0) ? 0:(1<<0)) |
           (PIND&(1<<1) ? 0:(1<<1)) |
           (PIND&(1<<2) ? 0:(1<<2)) |
           (PIND&(1<<3) ? 0:(1<<3)) |
           (PIND&(1<<4) ? 0:(1<<4)) |
           (PIND&(1<<7) ? 0:(1<<5)) |
           (PINC&(1<<6) ? 0:(1<<6)) |
           (PINE&(1<<6) ? 0:(1<<7));
}
/* Row pin configuration
 * row: 3
 * pin: PF7 PF6 PF5
 */
static void unselect_rows(void) {
    // Hi-Z(DDR:0, PORT:0) to unselect
    DDRF  &= ~0b11100000;
    PORTF &= ~0b11100000;
}
static void select_row(uint8_t row) {
    // Output low(DDR:1, PORT:0) to select
    switch (row) {
        case 0:
            DDRF  |= (1<<7);
            PORTF &= ~(1<<7);
            break;
        case 1:
            DDRF  |= (1<<6);
            PORTF &= ~(1<<6);
            break;
        case 2:
            DDRF  |= (1<<5);
            PORTF &= ~(1<<5);
            break;
    }
}
Unfortunately the Pro Micro doesn't break out any of its pin ports in whole, so I had to use multiple ports for the columns. I still have whole port B free, I might decide to add LEDs to the keys as a teaching help. For now let's keep things simple.
I don't have any CapsLock or NumLock keys, so the LEDs on the board are unused. I still placed it in such a place, that it is visible, just in case I might need them for something later.
Once I made all the connections and uploaded the firmware, I realized that 5 of the switches actually didn't survive the glue removal operation — they give no electrical connection. Fortunately I still had a bunch of switches left to replace them.
Now I'm going through the lessons at https://sites.google.com/site/ploverdoc/lesson-1-fingers-and-keys
Discussions
Become a Hackaday.io Member
Create an account to leave a comment. Already have an account? Log In.