0%
0%
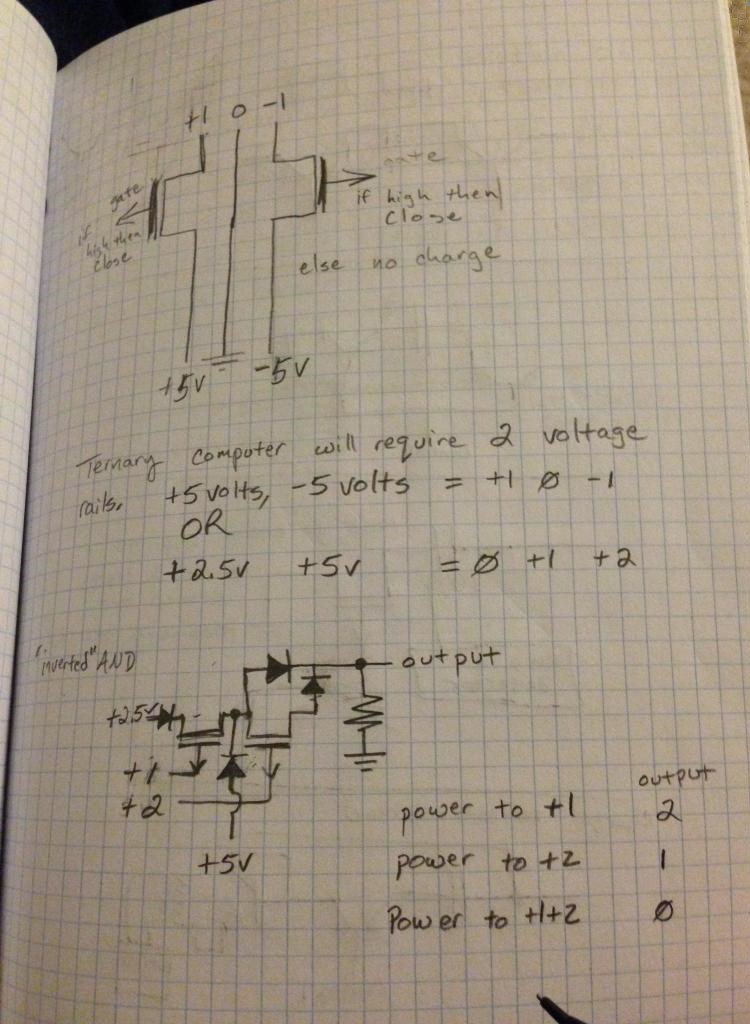
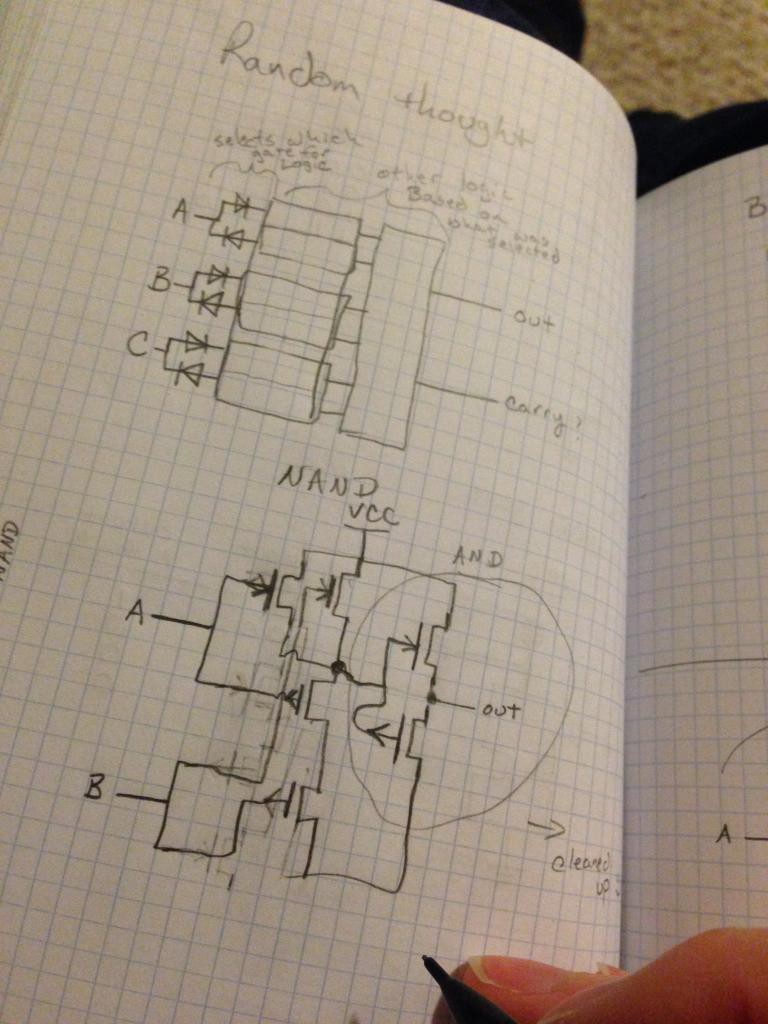
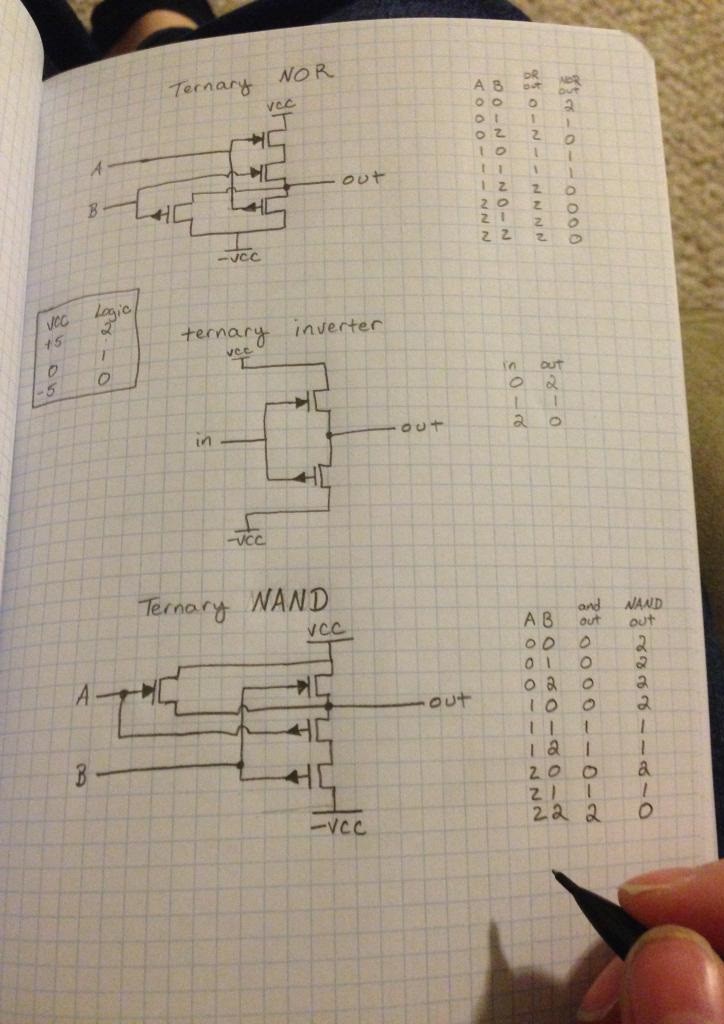
Base 3 -Ternary Computer from scratch.
Yes - No - Maybe? The goal is to completely step away from the normal binary system and investigate alternative computing systems.
 ThunderSqueak
Become a Hackaday.io member
Already have an account? Log in.
Just one more thing
To make the experience fit your profile, pick a username and tell us what interests you.
Pick an awesome username
hackaday.io/
Your profile's URL: hackaday.io/username. Max 25 alphanumeric characters.
Pick a few interests
Projects that share your interests
People that share your interests


 Mike
Mike
 Inne
Inne
 Spencer
 Dave's Dev Lab
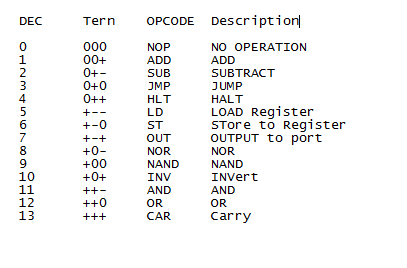
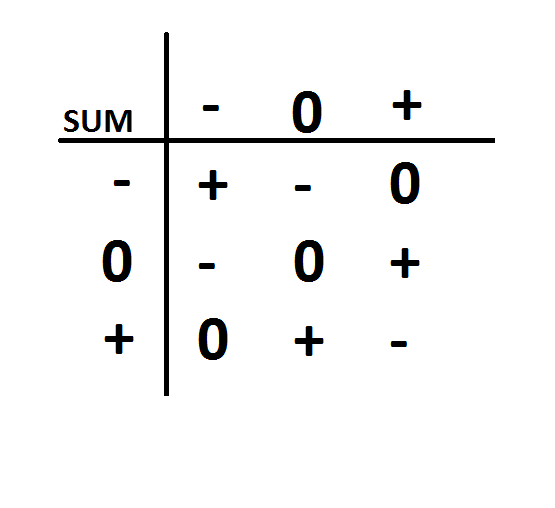
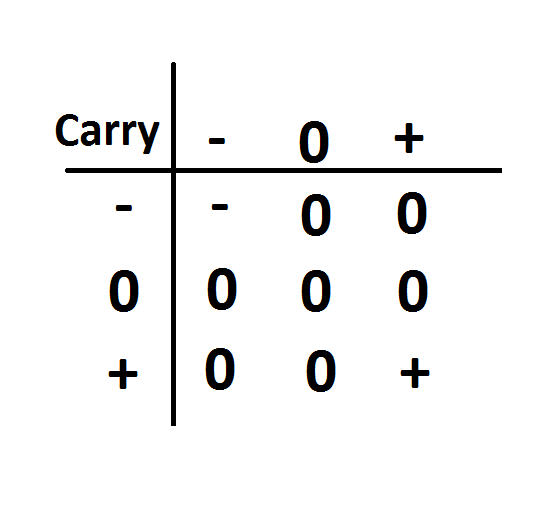
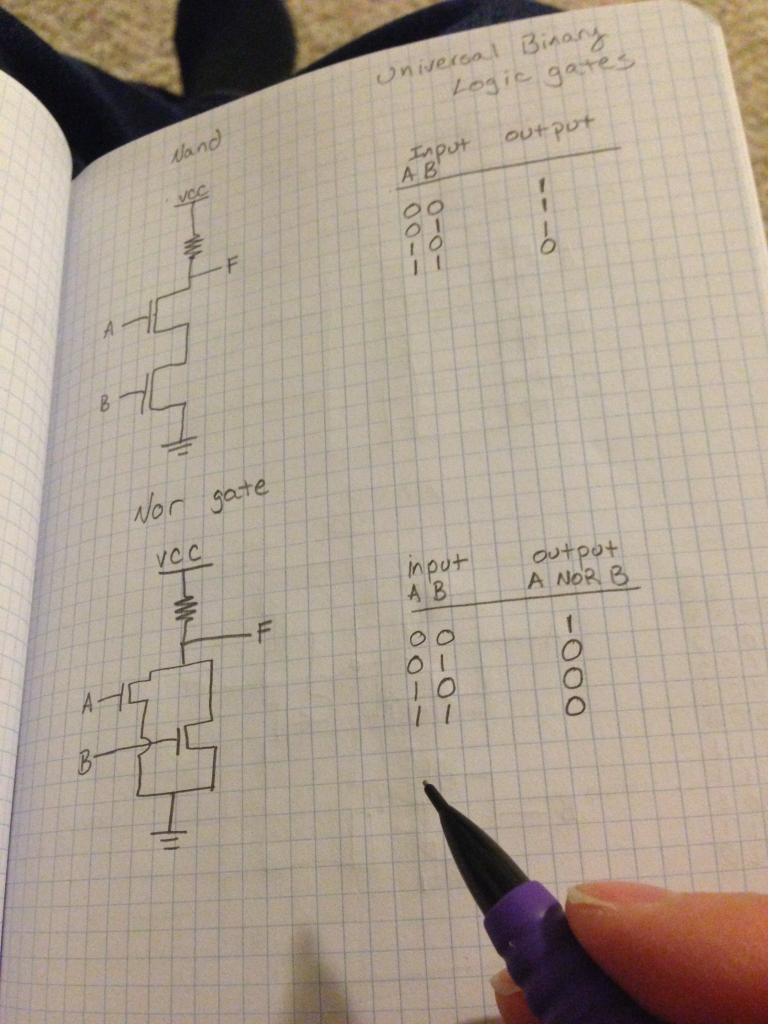
How to ternary Computers to boolean logic like And,XOR,OR and that sort of stuff.