Close
0%
0%

MeshPoint - wifi router for humanitarian crisis

Autonomous, smart, wifi mesh router which is easy to use by humanitarian NGO first responders during humanitarian or natural disasters.

Similar projects worth following
"This, Jen, is the Internet." (Moss, IT Crowd)

Our vision: build completely decentralised solution for crisis events that enables first responders to rebuild failed telecommunication infrastructure in hours, instead of weeks, and help save lives.

MeshPoint is smart and rugged WiFi hotspot designed to provide instant Internet access in adverse conditions. MeshPoint was born during crisis situation. It can be employed and used by everyone, from non-tech-savvy to tech-savvy.
MeshPoint relies on principles of open source, open hardware, maker culture and modularity.

Crisis situations: we make rebuilding communication infrastructure fast, easy and affordable while providing extra services (e.g. connecting different sensors) that help with anticipating, assessing and managing those situations.

MeshPoint's simplicity enables anyone to provide Internet in extreme situations and challenging conditions.

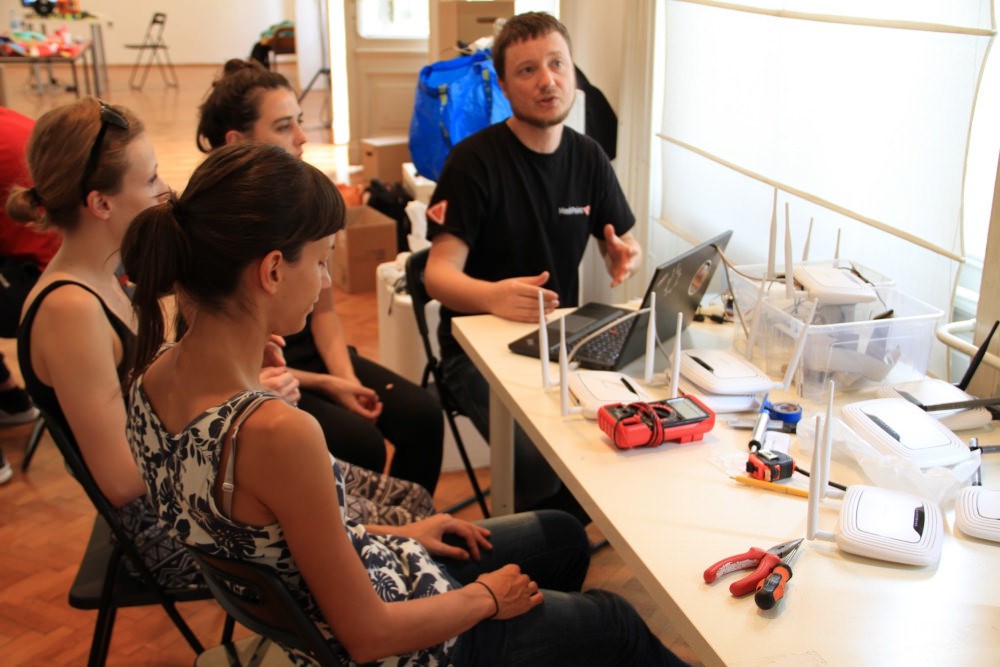
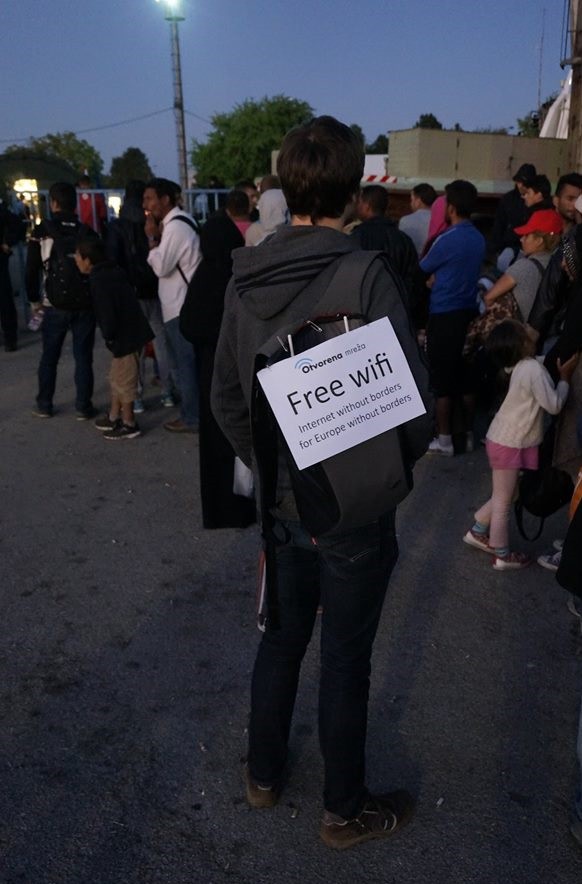
Idea for creating MeshPoint started when volunteers from project Open network (Otvorena mreža) in Croatia led by Valent Turkovic started helping humanitarian organisations and refugees during Syrian refugee crisis of 2015. They saw that need for communication was really great - humanitarian organisations needed communication for coordinating volunteers in the field, for logistics (having enough food and blankets in field warehouses, etc.). They also noticed that all the biggest NGOs like Greenpeace, Red Cross, International Organisation for Migration, Unicef and others struggled to setup communication with their teams in the field, and how all current networking products are not suited to be used in crisis events by first responders.

Open network volunteers setup mobile and fixed wifi hotspots and gave them to volunteers and humanitarian organisations that were working in the field. Really soon it was apparent that creating solution from off the shelf components was just too complicated for humanitarian volunteers to maintain.

That is how idea for building an really easy to use and autonomous wifi hotspots came about.

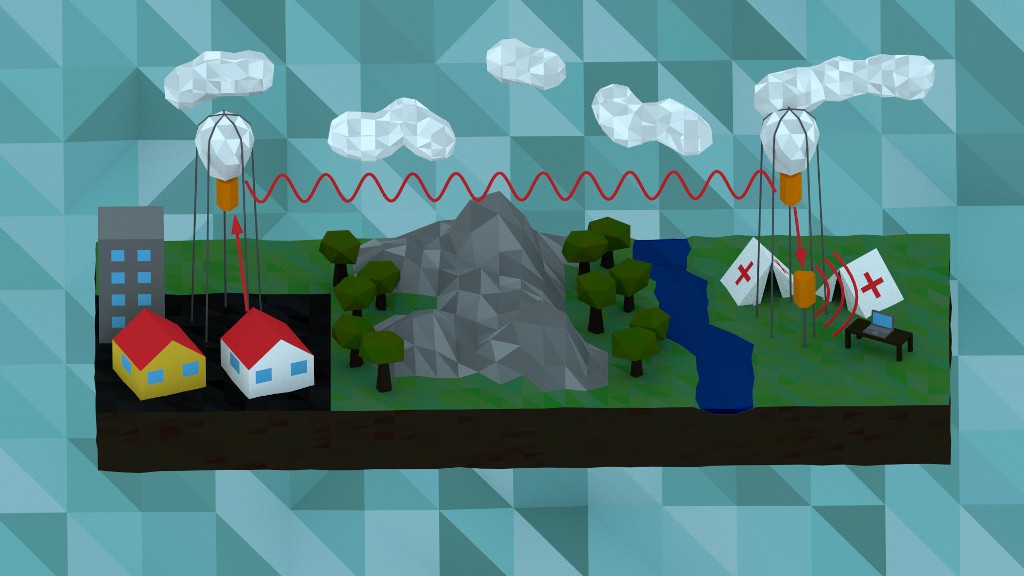
In order to setup communication in crisis situations like floods and earthquakes devices first and foremost have to be easy to use, especially by first responders, but they also need to:

  • be able to provide connectivity to multiple thousands of people
  • be scalable
  • use mesh networking
  • be battery and solar powered.

So what are the requirements?

- Open source hardware and open source software
- Setup needs to be easy, as easy as creating social networking profile
- Needs to work autonomously for at least 6-8 hours (via battery pack)
- Needs to be able to charge battery pack over any power source (solar, wind, AC generator, car battery...)
- Can form a mesh network so coverage is spread really fast
- Has capacity to server lots of people (multiple radios and frequencies)

You can find out more about the project at:

http://www.meshpoint.me/

https://github.com/MeshPointWifi

BOM_MPPTSolarCharger.csv

Bill of Materials for MPPT charger board inside MeshPoint.

Comma-Separated Values - 3.94 kB - 07/13/2017 at 21:27

Download

  • 3 × TP-LINK CPE210 v1 WiFi router board used in MeshPoint
  • 1 × Ethernet RJ45 outdoor connector with 20cm long cable Connector used for powering up MeshPoint via POE and for providing uplink or downlink lan connection
  • 4 × 3D printed case Download and 3D print case from our GitHub repository
  • 2 × 10 cm utp patch cable Utp patch cables are used to interconnect internal wifi radio boards
  • 3 × M4 screws

  • Next steps for MeshPoint - sky is only the limit...

    Valent Turkovic10/21/2017 at 13:53 1 comment

    So what will be next steps for MeshPoint?

    We need to reduce size of solar mppt charger/battery management PCB and integrate it into MeshPoint case with batteries.

    But we are also looking into what are other use cases for MeshPoint so we partnered with Hexaworx drone engineering company to create drone for crisis situations.

    Here is MeshPoint Hexaworx drone maiden flight and few photos. 

    We managed to establish wifi link 1km away without problems on first try. In out next test we will do 5km and 10km range tests.

    Deploying MeshPoint Hexaworx drone
    Deploying MeshPoint Hexaworx drone
    Final per flight checks
    Final per flight checks
    Final per flight checks
    Final per flight checks
    Our open source mppt solar and battery charge controller
    Our open source mppt solar and battery charge controller
    Fly little birdie, fly...
    Fly little birdie, fly...

  • Hardware and software issues

    Robert Marko10/20/2017 at 22:30 0 comments

    Since we are a small team and our resources are limited we currently do not design and manufacture WiFi router boards used in MeshPoint. We hope to design and manufacture our own boards in future. That way we will not depend on vendors who usually release a new revision of their products every year or sometimes even more often. Although devices still have the same product name and look the same hardware and software they use is often completely different.

    We are currently using TP-Link CPE210 v1 boards in current MeshPoint version. Unfortunately TP-Link discounted v1 of CPE210 couple of months ago and currently, v1 is not available at all and only v2 can be purchased. That poses a big issue to us since v2 of CPE210 brings completely new hardware and unfortunately second RJ45 port was removed.
    Since hardware has completely changed there was no existing support for LEDE we use as the operating system for MeshPoint. So the only solution was to work on supporting CPE210 v2 by us and the community.
    After a couple of weeks of intensive work done by us and the LEDE community finally, we have a working version of LEDE for CPE210 v2.
    Most of the time spent in development was due to unusual hardware design in which TP-Link did not use registers that usually tell bootloader what frequency to run CPU, RAM and reference clock. So values passed from bootloader were not correct and since LEDE uses those values to set correct clocks completely wrong values were set and the device will refuse to boot. That was eventually bypassed by having LEDE calculate clocks in the same way as stock firmware.

    After that was solved serial also started working and from there development process was the same as for any other Atheros powered device.

    We are still testing and fixing bugs as we find them but we expect that official support will also land in LEDE soon.

    We also may have a temporary solution in form of CPE220 v2 which uses the same hardware as CPE210 v1, so we will investigate that solution also.

    CPE210 v2 PCB:

    Bootlog from a working LEDE image on CPE210 v2 can be seen here:

    GitHubGist

    Source code for CPE210 v2 can be seen here:

    GitHub

    And for those not interested in whole source a small snippet of code that powers  RJ45 port of CPE210

        ath79_register_mdio(0, 0x0);
        ath79_init_mac(ath79_eth0_data.mac_addr, mac, 0);
        ath79_eth0_data.duplex = DUPLEX_FULL;
        ath79_eth0_data.phy_if_mode = PHY_INTERFACE_MODE_RGMII;
        ath79_eth0_data.speed = SPEED_100;
        ath79_eth0_data.phy_mask = BIT(4);
        ath79_register_eth(0);
        ath79_register_wmac(ee, mac);

  • Visualising Mesh

    Goran Mahovlic07/31/2017 at 19:44 0 comments

    In Radiona / Zagreb Makerspace we always need wireless for our project so we often use more then one router on events and some time we are setting up mesh network. There are always questions what mesh is and how does it work. So in one project that we realized through the Clubture network program for 2016 we decided to visualize mesh network.

    We have prepared 5 routers with openwrt, Croduino (https://e-radionica.com/hr/croduino-basic2.html) and 5 lasers. We wrote simple arduino sketch that starts lasers with serial messages. And we got first light :)


    Testing


    Lecturing

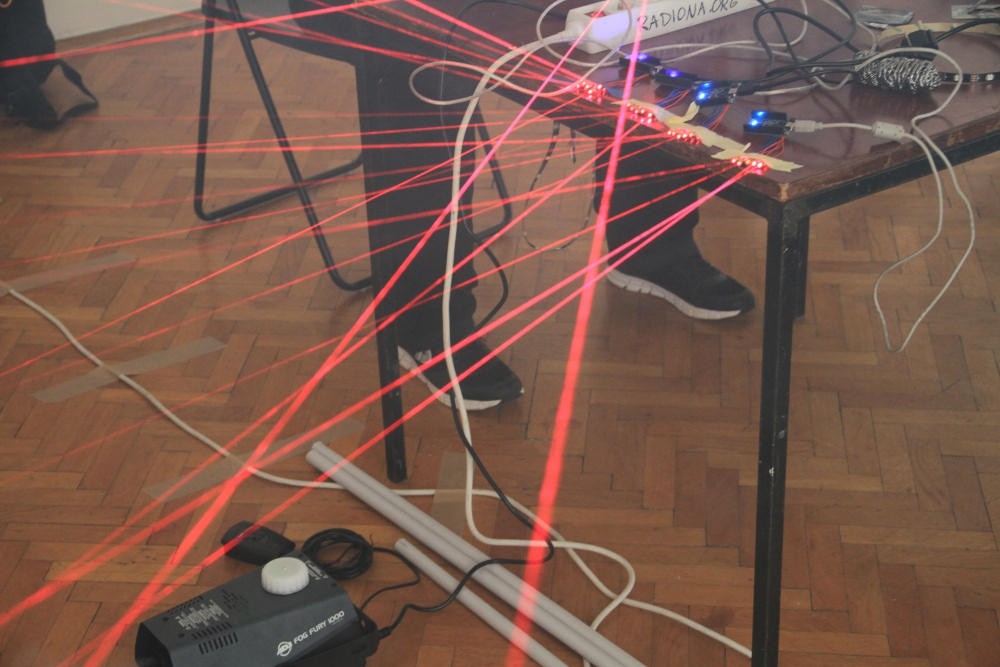
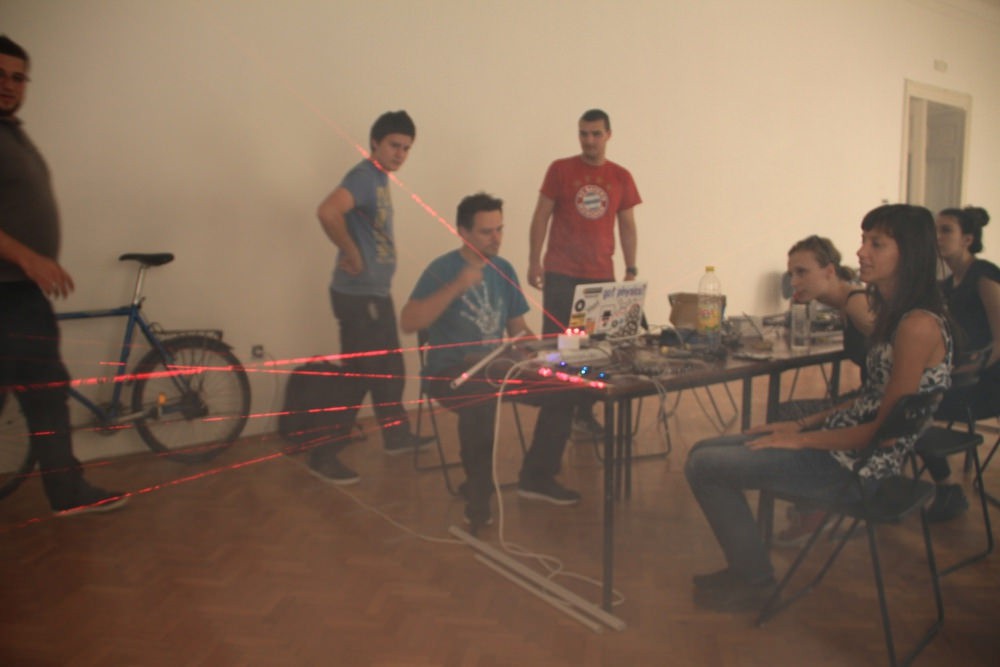
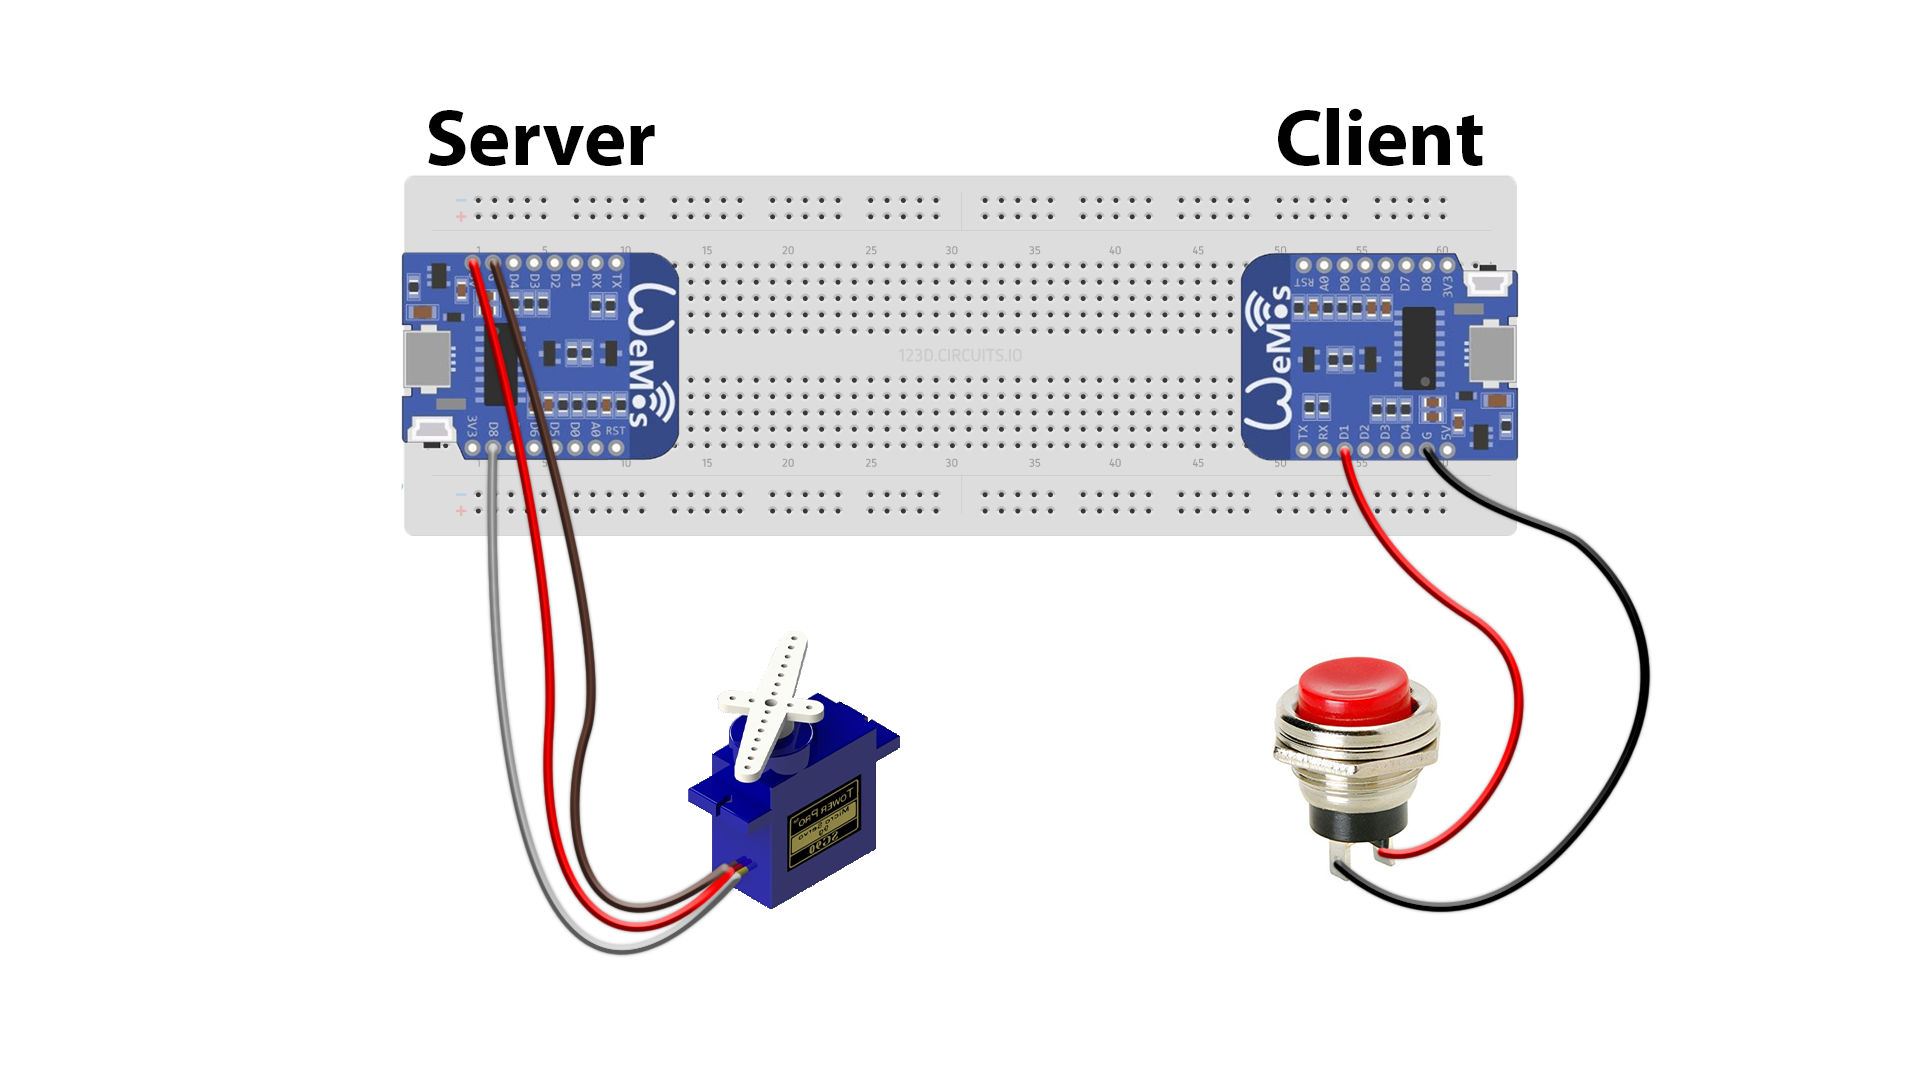
    At router we wrote small script that takes data from babel and sends serial message to arduino to start or stop lasers...

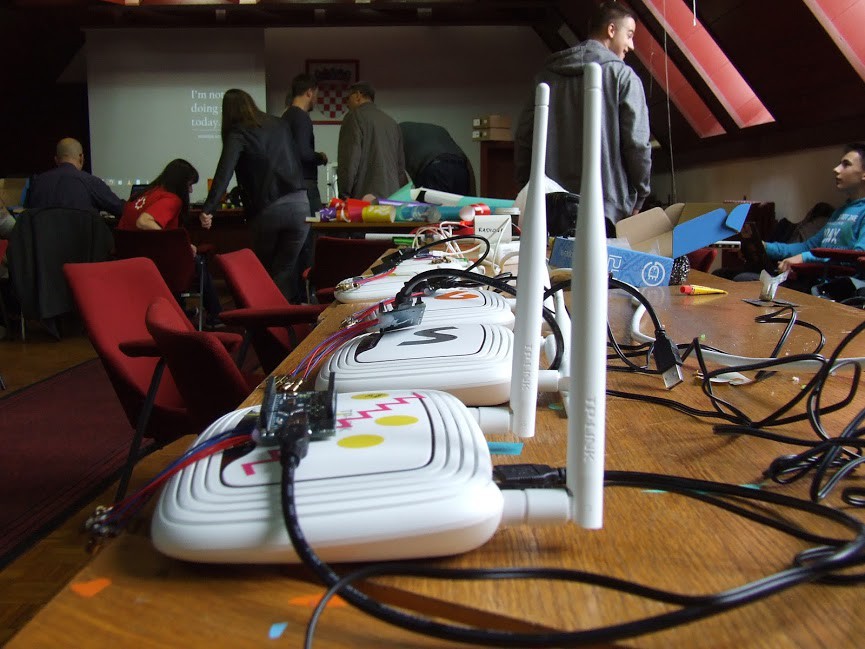
    And finally mesh visualizing

  • MeshPoint business plan for best product

    Valent Turkovic07/24/2017 at 14:15 2 comments

    Here is MeshPoint buiness plan canvas:

  • MeshPoint in a backpack

    milijana.micunovic07/24/2017 at 13:49 0 comments

    Having easy and simple to use technology that gives you exactly what you need, when you need it, is great. But it can be even better if you can use that technology in arduous and demanding situations where possibilities are limited, if not exhausted. Think of earthquakes, fires and floods when different parts of towns and villages get cut-off; or think of people trapped in wilderness or rugged mountain areas. These are situations where you need fast, simple and light solutions to your problems. One of them being communication – communication with those in need and communication with your team and center.

    This is one of the reasons why we decided to develop completely portable MeshPoint kit, i.e. MeshPoint in a backpack. The idea is to have weatherproof backpack containing battery and 20W solar panel that can be used for charging if needed. The backpack itself would serve as a construction with an attached pipe that carries MeshPoint.

    In an accident, disaster or crisis situation when people need to stay mobile or when rescue teams, such as mountain rescue service or firefighters, need to reach rugged and inaccessible mountain terrain, wilderness or remote cut-off areas, having portable Internet kit that enables you to move easily and use your hands freely can be of great help. Any individual, professional or other, could take a backpack and easily 'turn herself/himself' into an instant mobile hotspot while continuing with her/his search and rescue activities.

    (Valent carrying "Free WiFi" backpack and providing Internet connection to refugees in Croatia, September 2015)

    And, in a way, this is MeshPoint going to its origins. In September 2015, when Syrian refugees filled the streets of villages in Slavonia and Baranja county (Croatia), Valent and his friend took a backpack with few routers, battery and LTE sticks and went to help those in need.

    Now we want to empower others to do the same.

  • LoRa node delivery system using drones

    Marin Stević07/24/2017 at 13:44 0 comments

    Idea

    For our fire alert system we are using devices that need to be spread across a large area and sometimes they need to be placed in hard to reach places. Therefor to deliver our nodes we needed to use something that was quick and easy. We also couldn’t place them by hand because it would take too long and we needed to place them evenly across the whole area, so we figured out to use drones. With drones we get a better view from above that helps us determine where to place our nodes and we don’t need to worry about hard to reach places.

    Using drones

    After figuring out to use drones we needed some kind of a mechanism that would be fast and reliable to release the nodes from the drones. First idea was to use resistors that would burn a wire and drop the node but we would need to land the drone to replace the resistor every time and it would be messy to do that every time. Then we settled on using servos with custom 3d printed holders that would allow the node to be carried using a string attached to it and then dropped by releasing it over the drop point and we wouldn’t need to land the drone.

    Release mechanism

    The next step was to find out how to control the servo and there were 2 options: first was to use an RF module that would give us the ability to drop the nodes from far away, and the second one was to use 2 ESP devices connected to each other as a server and a client. We went with the second option because if we ever wanted we could even send some kind of commands with the ESP and not only to release the node, also we can achieve the same connection distance like the RF module by connecting an antenna to the client ESP. The use of ESP also enables us to put some kind of a router to the drone and we would be able to release the nodes from anywhere and by using a GPS module we could even automate the process.

    2 ESP devices connected and communicating over WiFi and able to send commands

    What is next?

    We still need to test the distance that we can achieve between the 2 ESP-s and also this could be helpful later on if we needed to make a mesh network out of ESP-s for our fire alert system.

  • Nodewatcher initial setup

    Robert Marko07/24/2017 at 12:40 0 comments

    Nodewatcher is a platform that we use for easy creation, configuration, firmware generation and monitoring from the web browser.

    In order to run Nodewatcher Docker and Docker-compose are required, instructions for their installation can be found here.

    Preferred OS for running Nodewatcher is Ubuntu/Debian and rest of Debian based distributions.

    1. git clone https://github.com/wlanslovenija/nodewatcher
    2. cd nodewatcher
    3. Edit docker-compose.yml
      Configure DB username and password to something other than the default.
      Change InfluxDB and PostgreSQL DB paths to preserve changes even after a reboot since by default tmp is used.
      Configure image builders to include your own custom built ones or you can use pre-built ones from here .
      Also changing private and public key pair is recommended.
    4. Run sudo docker-compose pull
      This step will pull are required docker images.
    5. Run sudo docker-compose build
      This step will build web and generator docker containers with required Python packages.
    6. cd nodewatcher and edit settings.py to suit you.
      This file handles most of the customizations.
    7. Run sudo docker-compose up
      This step will start all docker containers.
    8. In another terminal run sudo docker-compose run web python manage.py migrate
      This will make the required database migrations so Django apps can function properly.
    9. Run sudo docker-compose run web python manage.py collectstatic -l
      This will compile SCSS into CSS.
    10. Open your browser and go to http://localhost:8000/setup
      Replace localhost with correct IP.
      This will enable you to create an administrator account.
    11. Further configuration will be done from http://localhost:8000/admin/
      Replace localhost with correct IP.

      Now you have running but not configured Nodewatcher instance.
      The further configuration will be contained in another project log.

  • MeshPoint in the sky (balloons and drones)

    Valent Turkovic07/24/2017 at 12:21 0 comments


    During crisis situations telecommunication infrastructure is often disrupted and in order to bring connectivity to affected areas we decided to use balloons and drones.

    We plan to use balloons and drones in order to have line-of-sight communication between two MeshPoint routers. We need to take them around 25-35 meter above the ground if terrain is flat. We only need to be few meters above tree line, and in hilly areas we would use terrain to our advantage and setup MeshPoint on highest local point (small hill top) or on top of buildings if we are close to urban areas.

    We have bought Totex CR800 japanese military meteo balloons that can carry 800g of weight. We plan to deploy them soon and then update build log after that.

    Drones

    Also we have build a custom DIY drone that could also be used to keep MeshPoint at desired altitude and powered via land tether. We are now searching for power cable that has is light and still can handle power requirements (around 850W - 17V and 50A).


    We tested how much our drone uses power when under full load (with 1.5kg of weight).

  • Most efficient MPPT solar charger

    Valent Turkovic07/24/2017 at 12:19 0 comments

    In order to make MeshPoint mobile we need two things - batteries to keep it running, and battery management system (to charge the batteries, to keep batteries from under-voltage, to monitor power charging and power consumption and to manage power distribution).

    Charging

    For charging we needed battery management system that would charge from different power sources:

    • solar power (with active MPPT algorithm)
    • AC power (generator of from power grid)
    • external DC power (car battery or AD/DC converter)

    Monitoring and power management

    Monitoring is extremely important because then we can decide how to manage power we have in batteries and power coming in from input (solar or other types of power). For example we plan to disable 1 or even 2 (out of 3) wifi radios in MeshPoint if power capacity drops below 50% and there is not enough solar power to charge batteries faster then they are being depleted. Also with enough data from last few previous days and weather forecast for next few days we can predict how much we can expect to get solar power generated and stored in batteries.

    Battery chemistry

    For batteries we needed ones that could perform very well in outdoor conditions (high and low temperatures), that are safe to handle and that have good power/weight ratio. 

    We decided against lead-acid batteries because they would make MeshPoint much less portable and most lead batteries are not designed to be operated at high and low temperatures during hot summers and cold winters.


    Batteries based upon Li-ion and Li-polymer technology were also tested, and they have great capacity to weight ratio which made them almost ideal for making MeshPoint routers as light and as mobile as possible. Unfortunately these batteries are very dangerous when heated over 50°C (122F), if they get punctured they can easily catch fire and even explode. MeshPoint will be used in outdoor conditions, exposed directly to sun and needs to be rough handling during crisis events, so if we decided to pair MeshPoint with Li-ion batteries this could potentially make it quite dangerous.

    Li-FePO4 battery chemistry

    We decided to go with Li-FePO4 battery chemistry because they have really good weight to capacity ratio and can handle both high and low temperatures. Also if they are damaged or punctured they don't explode or catch fire, which is really important also. Li-FePO4 batteries are used in electric cars, scooters and bicycles there they are know for their good outdoor performance in wide temperature ranges. Only downside is that they are a bit more expensive, but because they are getting used more prices have also started to drop. Also one big advantage is number of cycles LiFePO4 have, which is usually few times more than other Lithium batteries and much, much better than Lead based batteries.

    Most efficient MPPT solar charger

    There are a lot of different solar chargers in the market which can be bought off the shelf, but we had specific requirements that none that we found could match:

    • active MPPT solar tracking
    • designed for LiFePO4 batteries
    • power charge/discharge monitoring
    • as light and as small as possible
    • 5V, 12 and 24V outputs
    • power management (turning off and on specific loads)
    • open source and open hardware
    • designed for 40W solar panels (most MPPT solar chargers are 100W and up)
    • to be extremely power efficient

    When we started MeshPoint project two years ago there were no open hardware solar MPPT projects, currently there are two besides one our design will be based upon:

    MeshPoint battery management system and MPPT solar charger is based upon Soldernerd's (Lucas) open hardware MPPT solar charger project and firmware is also fully open source as well.

    Some of modifications what will be done:

    • removed screen to reduce size
    • 24V output voltage
    • smaller PCB design to make it more compact
    • usb mini instead of full size usb connectors to make it more compact
    • designed for 5S battery pack
    • power management to turn off loads under low power...
    Read more »

  • Mesh protocols performance testing

    David Blažević07/24/2017 at 10:34 1 comment

    At Meshpoint we're always looking for ways to improve performance and stability.
    Therefore we're looking for compare our current setup that uses ad-hoc interfaces on top of which we use babel mesh routing protocol with 802.11s mesh that recently became available in OpenWrt and LEDE.

    With the availability of IEEE 802.11s mesh technology we wanted to compare results and is which solution offers better stability and more bandwidth.

    For first round of tests we devised this test:

    We used 2 TP-Link WR842ND routers flashed with our custom LEDE firmware image that uses babel mesh routing protocol. For the purpose of the test we disabled AP mode on there routers so that no client could connect and disrupt results on our test routers. 

    The routers were placed 2 meters away from each other (keep in mind that this was not a range test but stability and bandwidth test) and laptop with iperf3 was connected on each side.  On one side there was direct internet connection (fiber 200/100Mbits) for the dslreports.com part of the test.

    We used wireless channel 13 to minimise interference from other wifi networks.


                                                                 Test network layout diagram

    The results:

    Ad-hoc mesh

    Results were erratic and unpredictable, going from 5 to 33 Mbps, so we ran tests 10 times but we never got anything even remotely close to stable and reliable network bandwidth.

                                                             Iperf3 basic test results ad-hoc

                                                 Iperf3 speedtest results via dslreports.com

    Internet bandwidth test was done with laptop connected to router 2 that then run the tests. The graph shows that speed is inconsistent, starting with only 25 Mbps and dropping further to only 5-8 Mbps. Testing directly on router 1 showed is that Internet connection is not the cause of poor performance, but ad-hoc interface itself.


    IEEE 802.11s test results

    After testing ad-hoc mesh we switched to testing the 802.11s mesh. 

    Iperf3 test: 


    And speedtest results:

    802.11s mesh results were much more consistent, bandwidth was greater than with ad-hoc mesh and there were no bandwidth dropouts.

View all 22 project logs

  • 1
    Step 1

    Firmware configuration and flashing

    1. Go to Nodewatcher in your web browser
    2. You need to login or register
      Got to right top corner as shown in picture
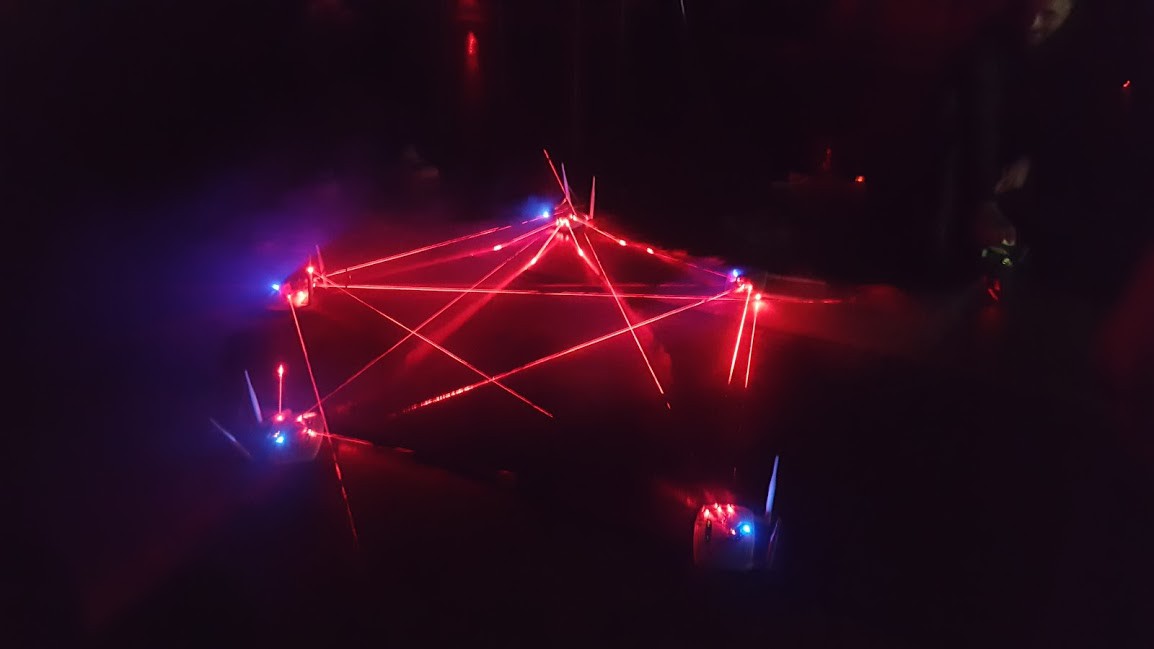
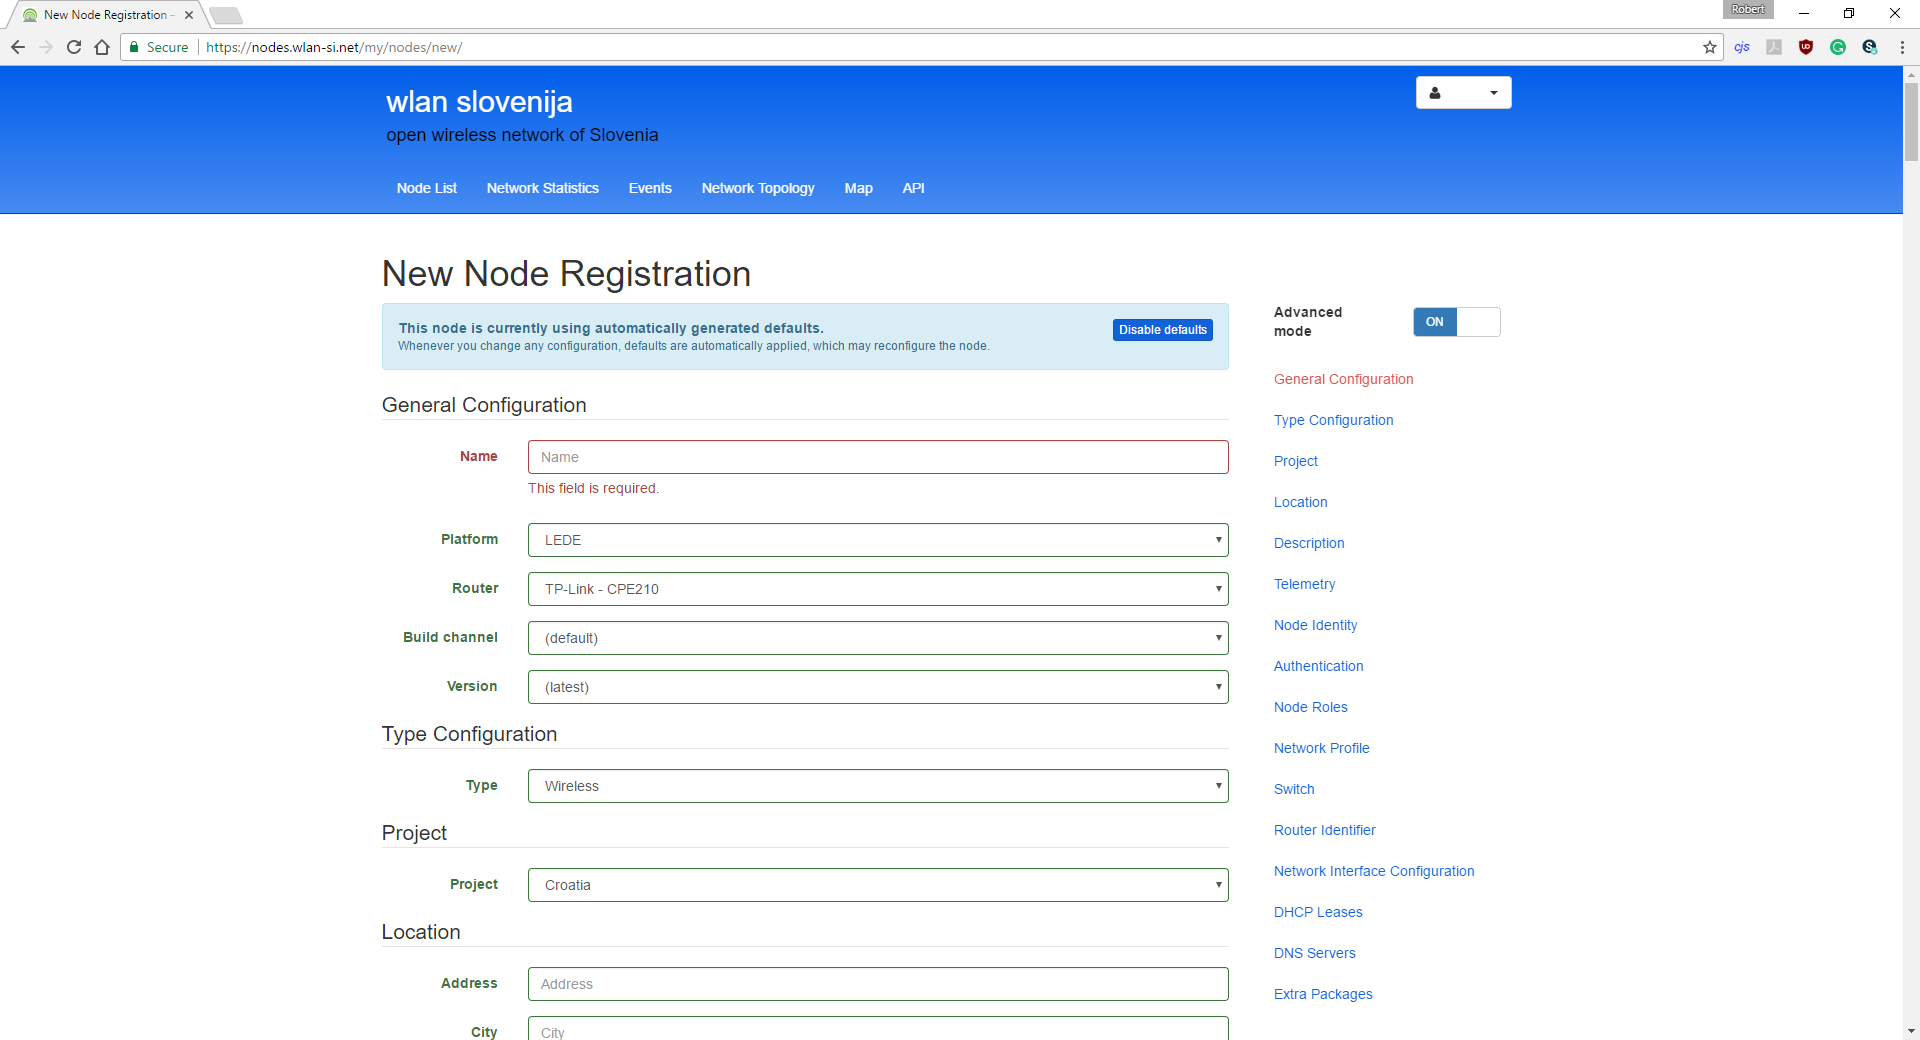
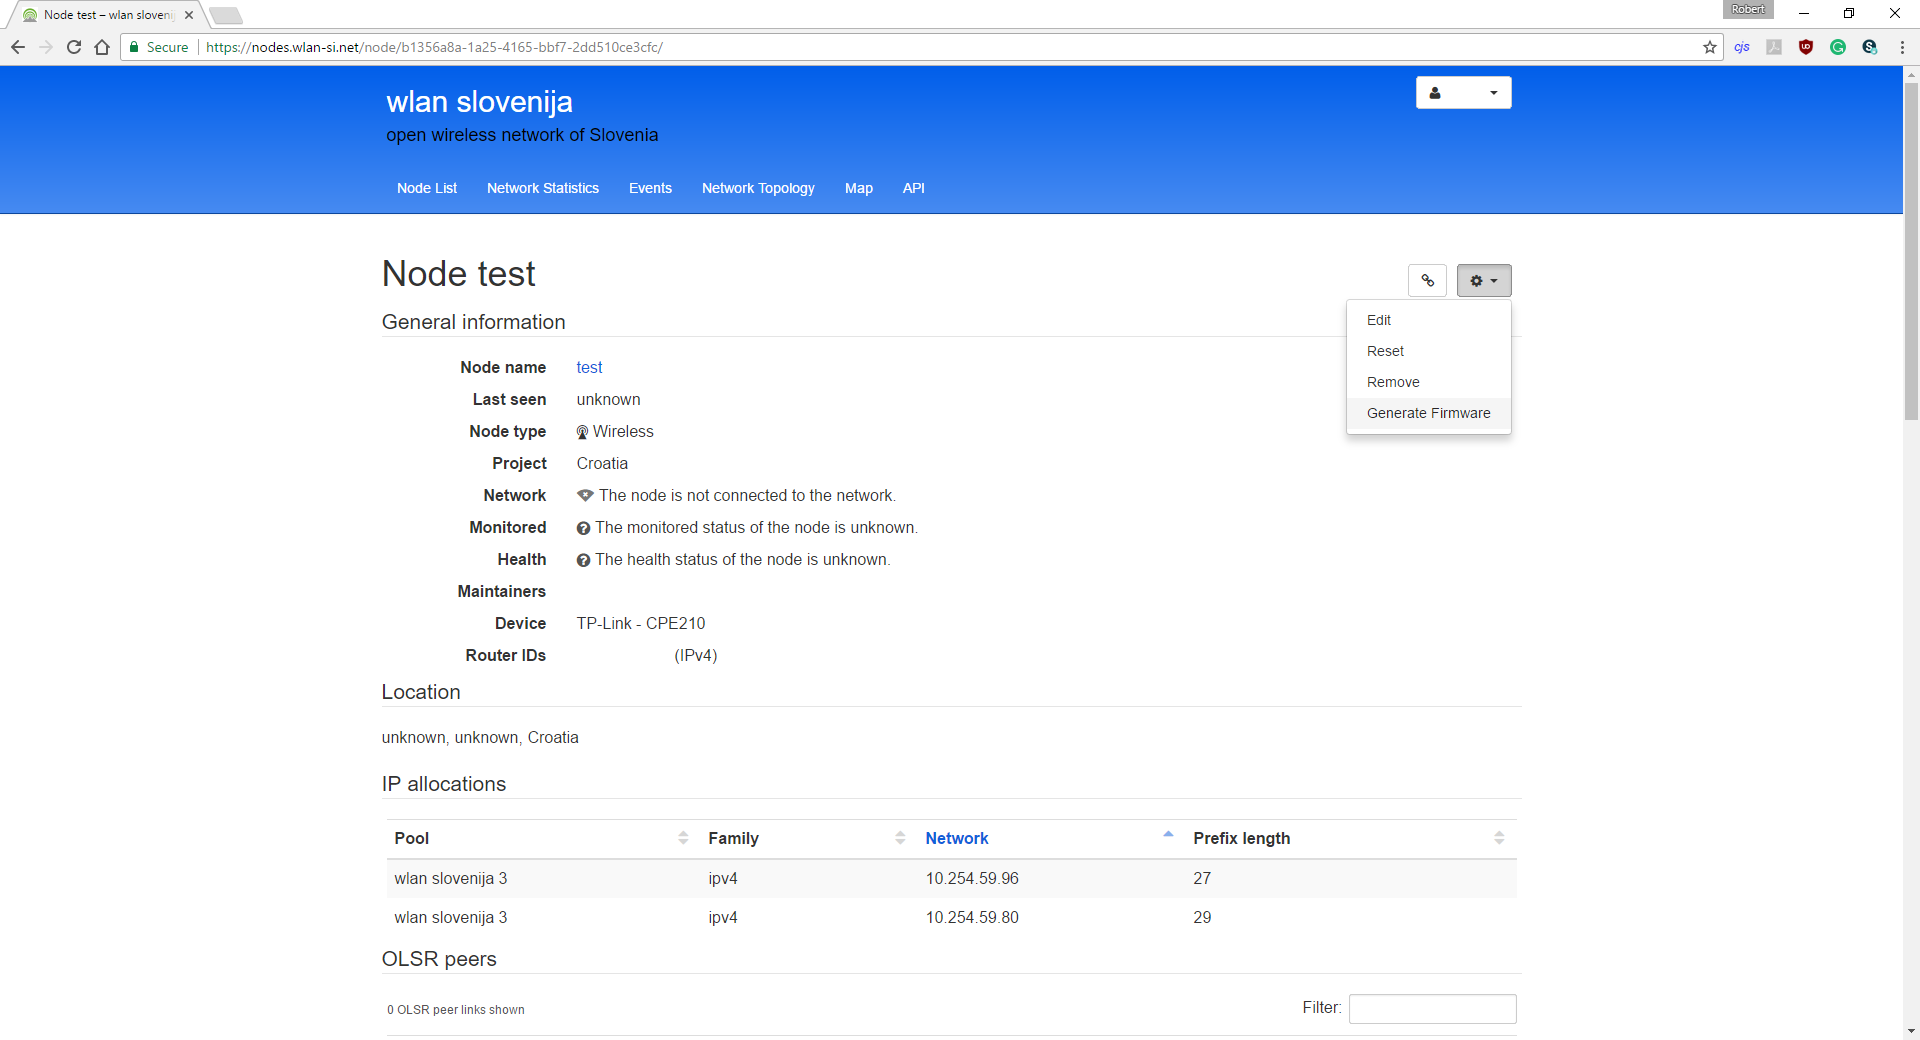
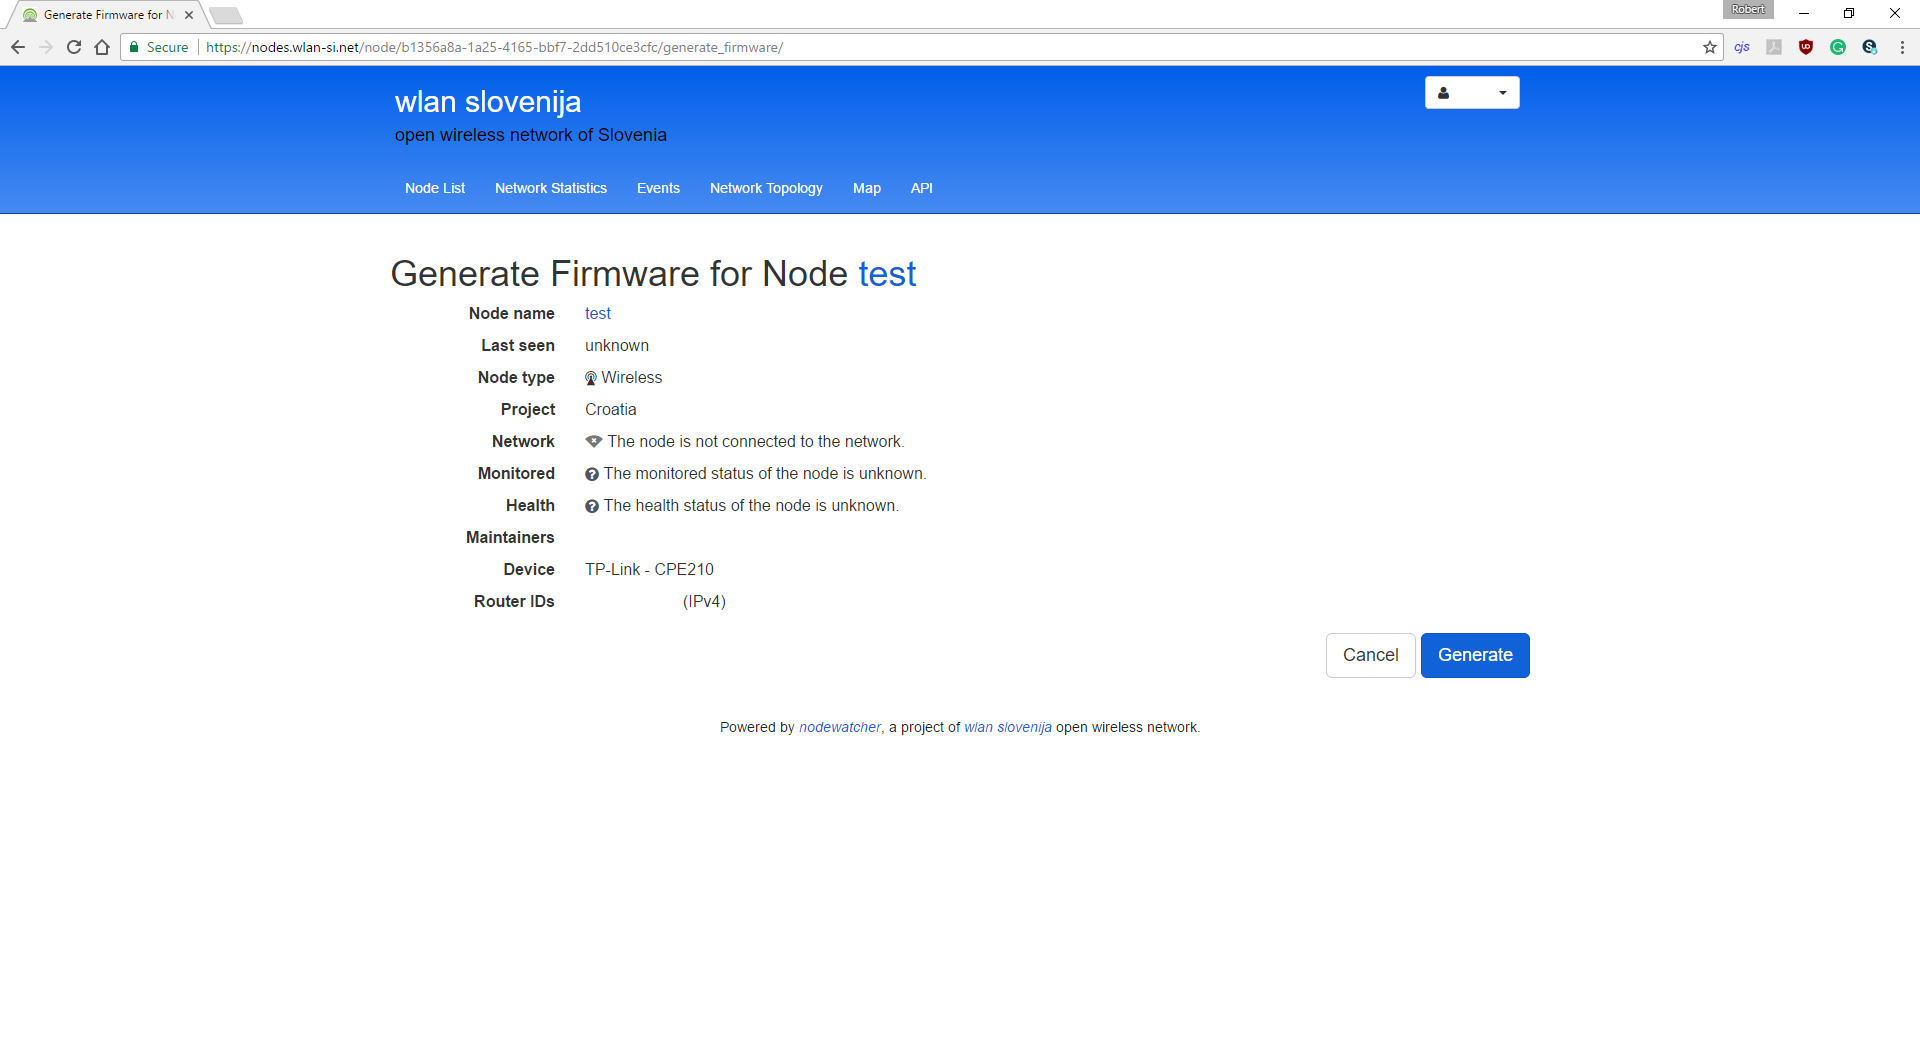
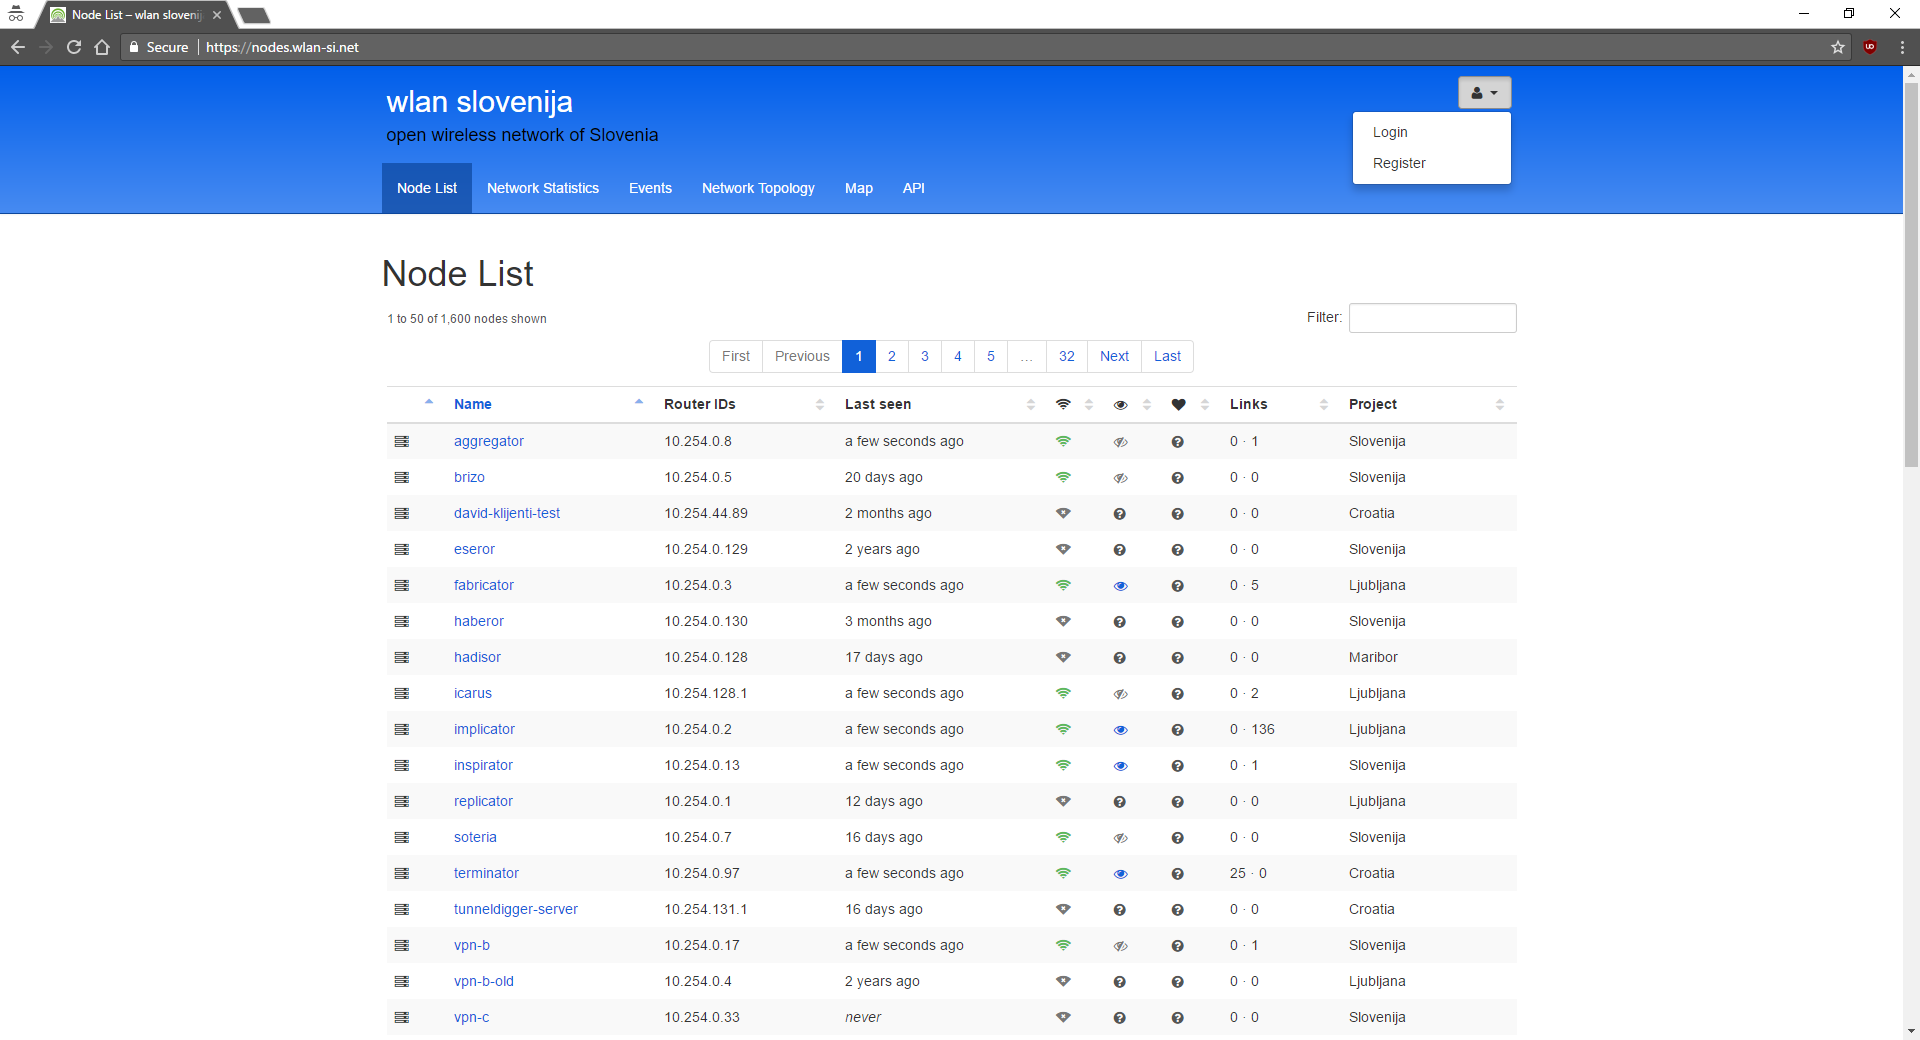
      Fill in required information and under Default project select Croatia.
      Click on register
    3. You now need to configure firmware for first of three TP Link CPE210 AP-s.
      Got to right top corner as shown in picture and click on Register New Node.
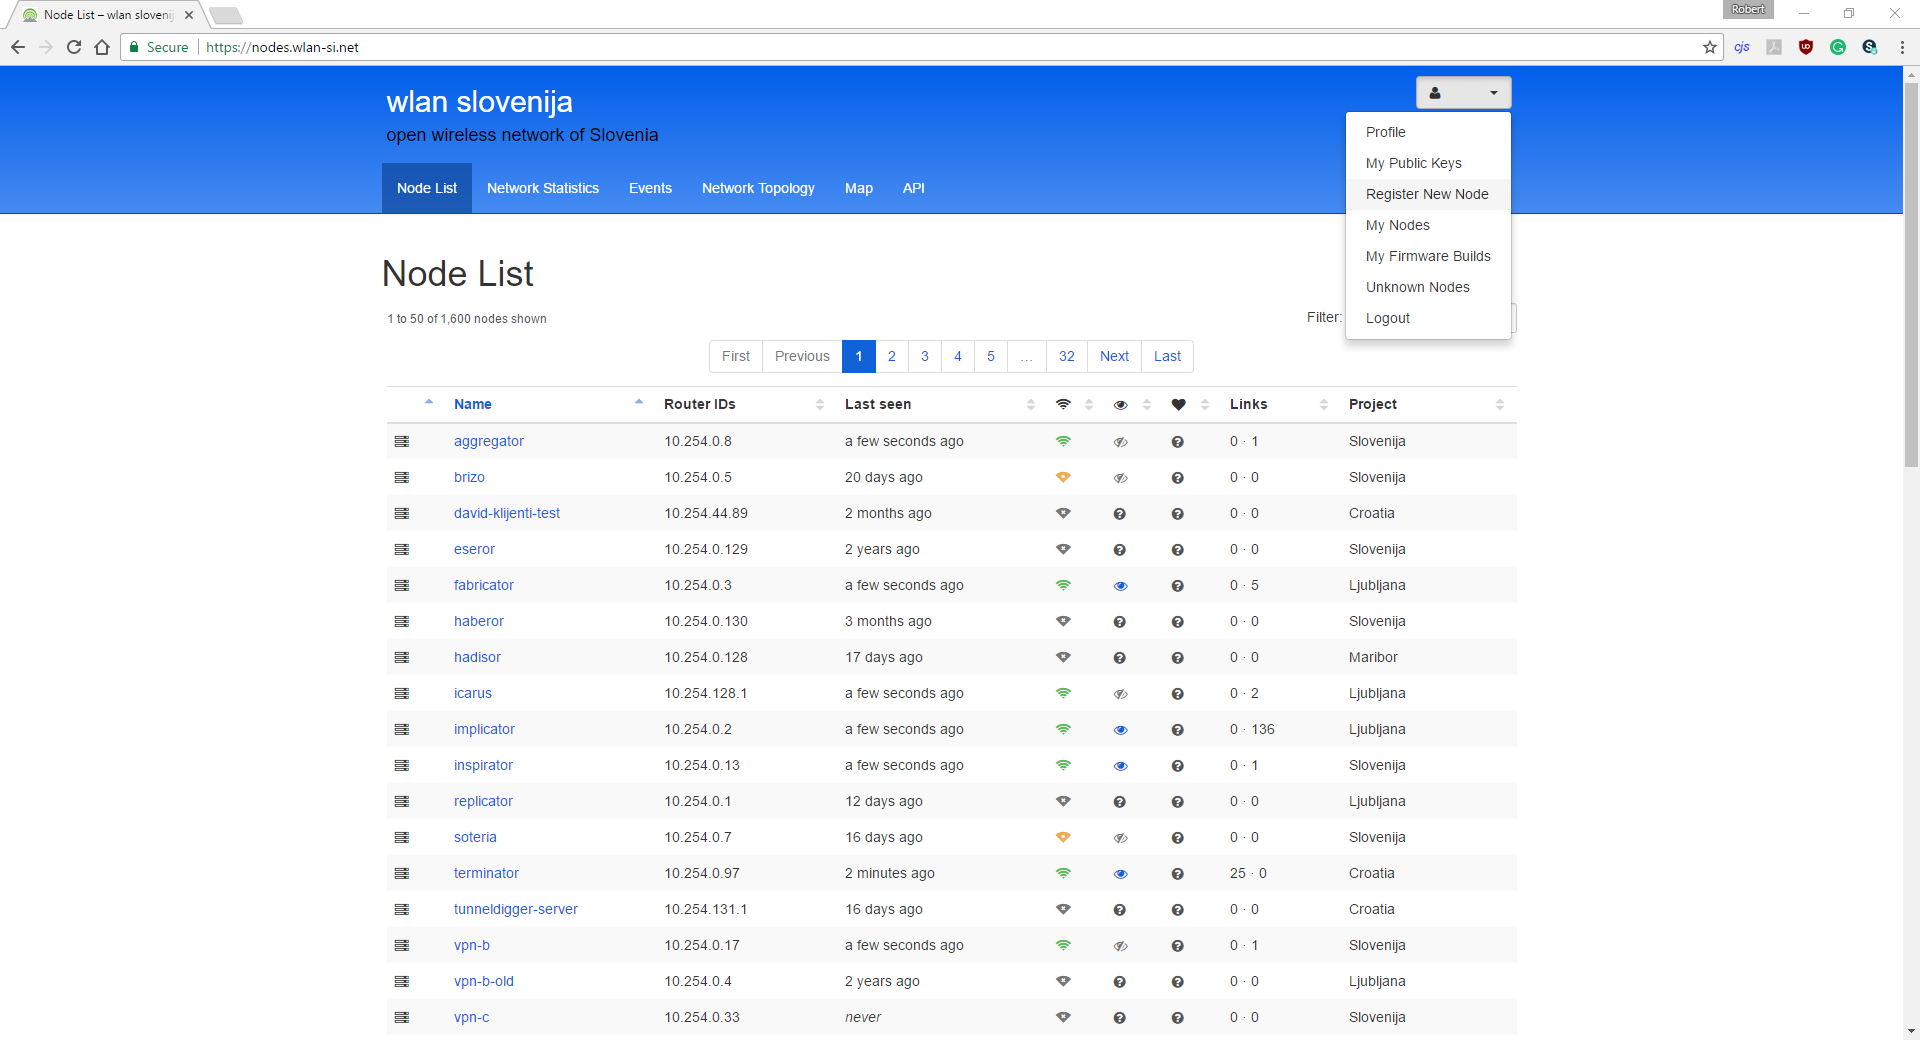
      Now you will see form like one shown in the picture.
      Now you need to at least fill out name and select TP Link - CPE 210 as Router from dropdown menu as shown in picture above.
      After filling in at least Name and selecting TP Link - CPE 210 as router click on Advanced mode.
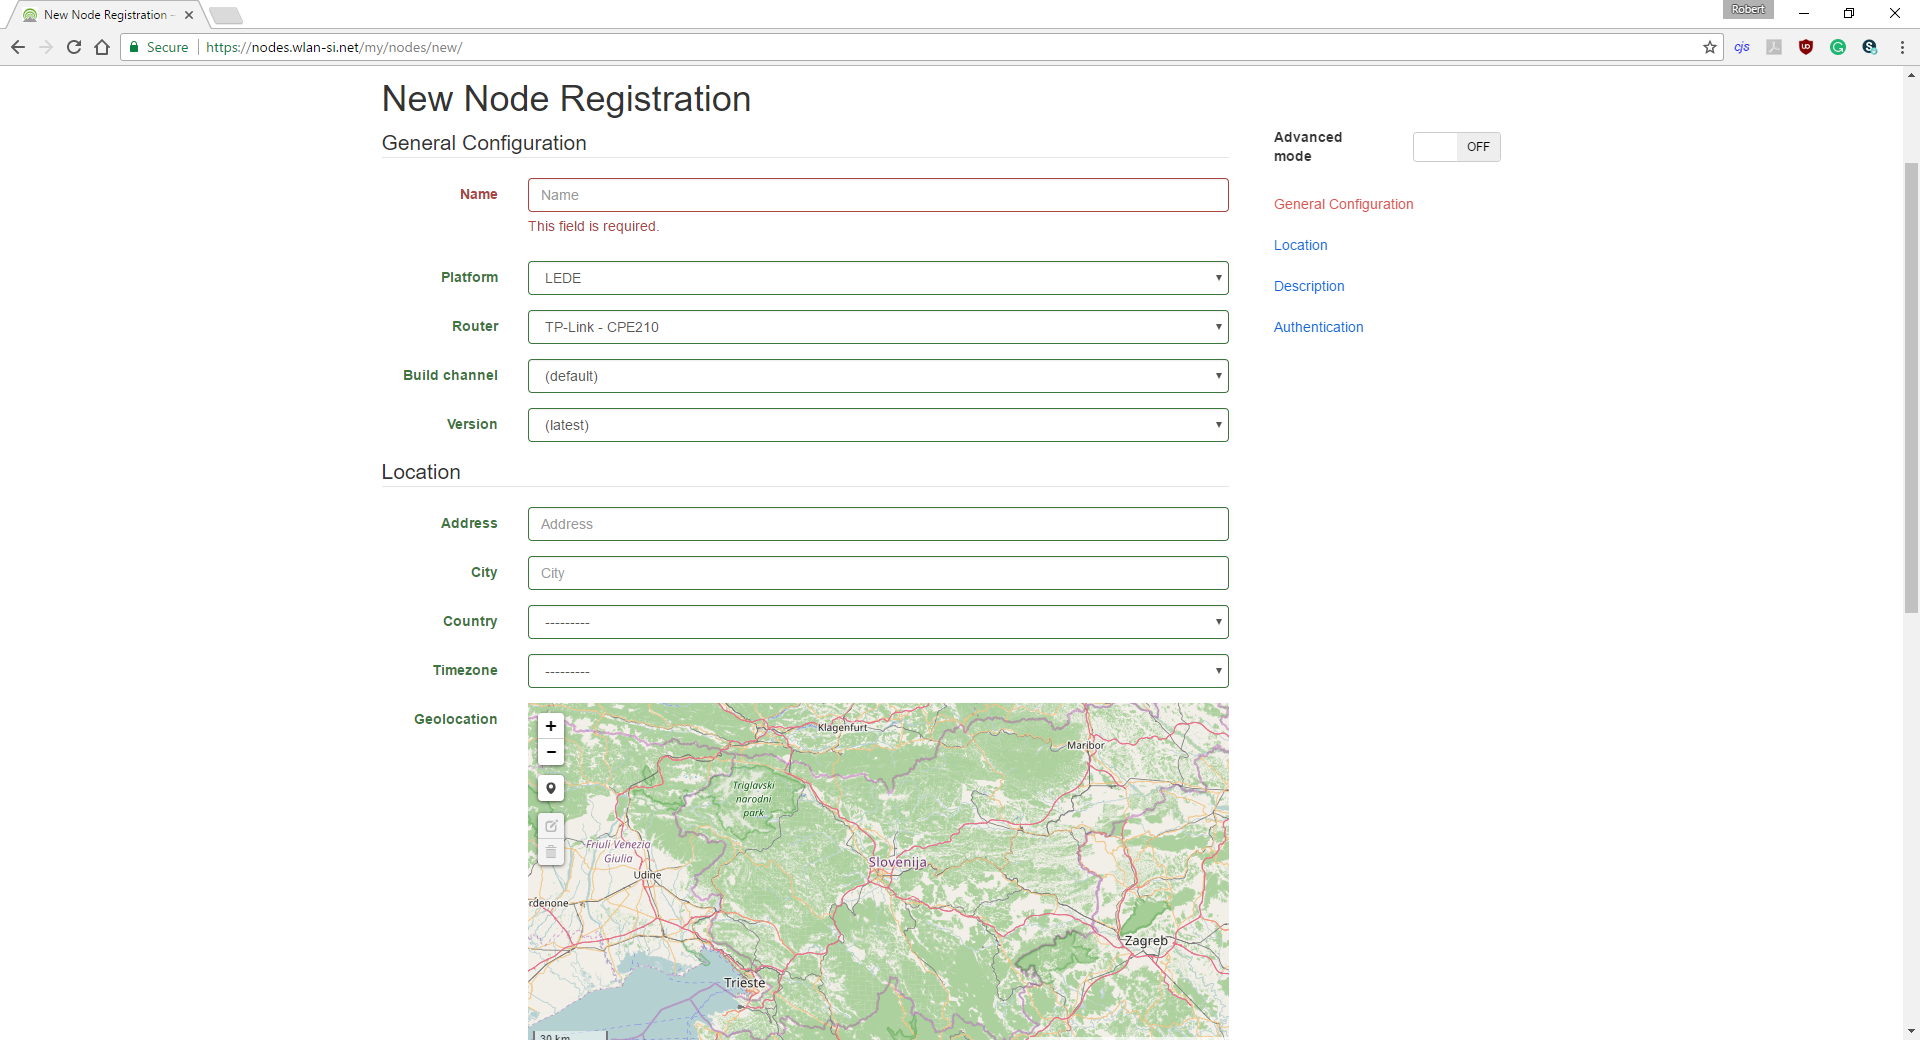
      Now scroll down to the part where you will see Wireless Radio.
      Now instead of default channel 8 select channel 1 from dropdown menu.

      Click on Register at bottom and configuration for first CPE 210 is done.

      After registration you will be redirected to page containing information about your node.
      Now you need to click on Settings icon located on right side.
      Now click on Generate firmware as shown in picture.

      Then you will be redirected to a page to confirm that you want to Generate firmware.
      Just click on Generate.


      After that firmware will be generated in couple of minutes.

      You can wait for it to complete and refresh the page in couple of minutes or continue to next step and configure firmware for second CPE 210.
    4. Second CPE 210 configuration is pretty much the same as first one.
      So follow step 3 instructions but with this slight change.

      This time select channel 6 instead of channel 1 from dropdown menu.

    5. Third CPE 210 is configured like first two but this time select channel 11 from dropdown menu.
    6. Now go to the same menu as when Registering a new node but select My Firmware Builds instead.
      Then you will se the list of all firmwares built for all of your nodes.
      Since this is the first time that firmware is generated for three of your nodes you should see three builds.

      Click on first build ID.
      Then download factory image by clicking on it.
      Repeat that also for two
  • 2
    Step 2

    Device assembly

    Prerequisites:

    • Make sure you have flashed and configured the firmware of the routers you will be using
    • Make sure you have assembled the 3D printed shell
    1. Mount the outdoor RJ45 connector to the bottom piece. This step does not require any tools. Simply place the connector trough the hole and tighten it using the included plastic nut.
    2. Place the routers onto the bottom piece with the antennas facing outwards. Cable that goes from the connector should go upwards trough the space in the center.
    3. Place the top part onto the routers. Thread the cable going from the connector trough the hole in the center and secure each router using a screw from the top.
    4. Plug the cable going from the connector into the ETH0 port of the first router. Then, using the 10cm patch cable, connect the remaining free port to the ETH0 port of the second router. Then connect the remaining free port to the ETH0 port of the third router using the second patch cable.
    5. Carefully place the router assembly inside the shell.
    6. Secure everything using the M4 screws
    1. 3
      Step 3
      Final firmware configuration after assembly
      In order to use only one UTP cable for data and power to all three CPE 210 AP-s additional configuration is needed.
      It is not time consuming and mostly consists of copy/paste.

      For this configuration you need to be connected to SSID broadcasted by CPE 210.
      By default it is otvorenamreza.org

      1. Login to first CPE 210 via SSH
        IP can be found on your node details and password by clicking on Settings menu and then on Edit.
        It is under authentication section.
        Username is root

        After logging in you will see basic information about your node.
        In order to enable POE to power second CPE210 you need to issue following commands.
        echo 20 > /sys/class/gpio/export
        echo out > /sys/class/gpio/gpio20/direction
        echo 1 > /sys/class/gpio/gpio20/value
      2. After that second CPE210 will power on.
        Then in order to enable POE to second CPE 210 after the devices have been rebooted you need to edit rc.local file.

        Issue the following command:
        vi /etc/rc.local
        Then you should see the following.
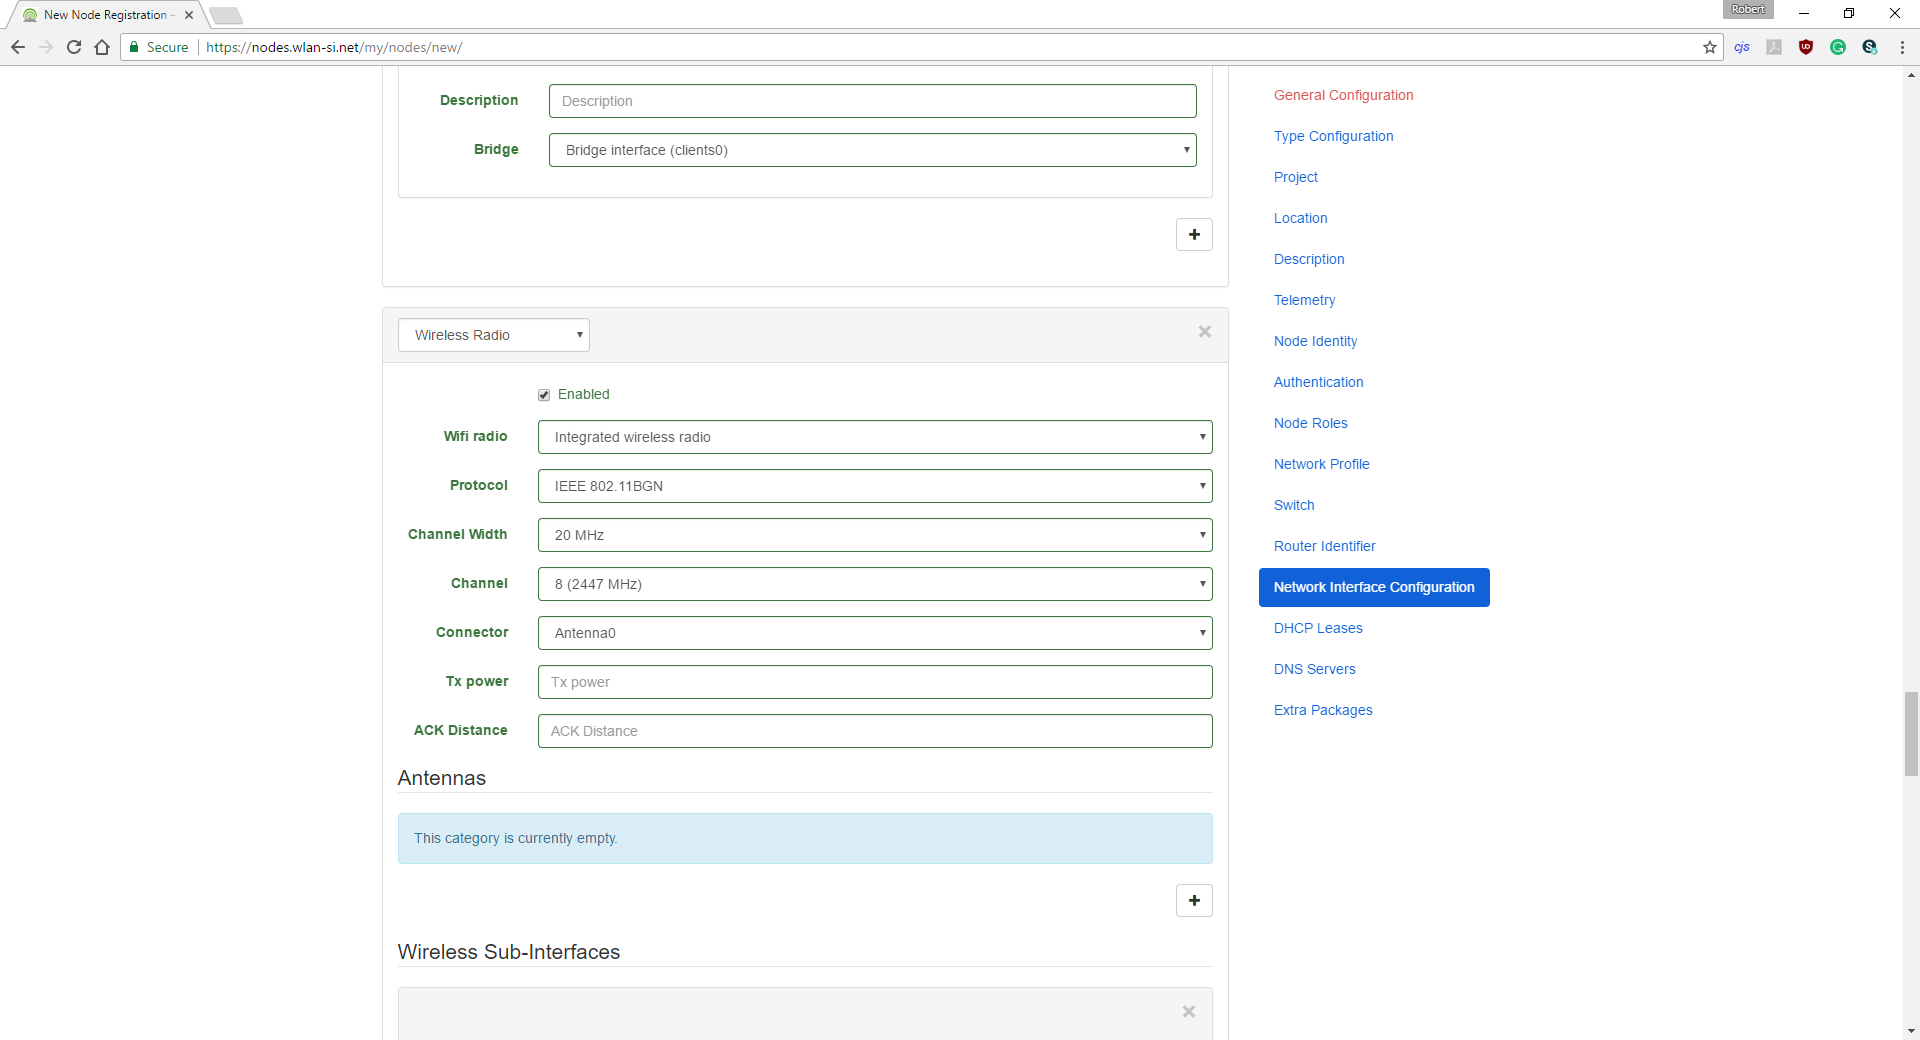
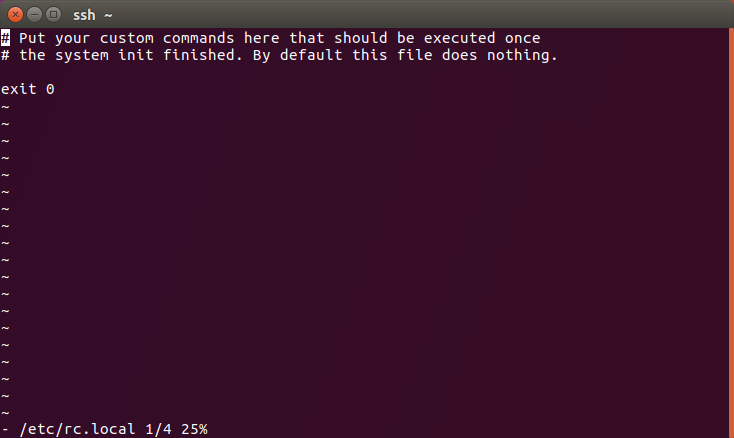
        In order to edit the file in vi text editor you need to simultaneously press SHIFT+I keys.
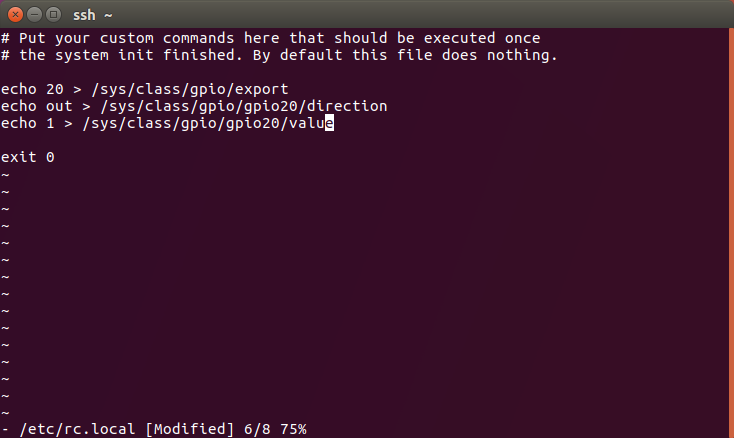
        That way you enter Insert mode.

        After that copy and paste commands from step 1.
        Contents need to be after line 2 and before line containing exit 0.

        File should look like this:


        If it looks like that press ESCAPE key and then type :wq
        That will save and exit.

        You have completed configuring first CPE 210.
      3. In order to configure second CPE 210 follow same instructions like for first one but with IP and password of the second one.
      4. Third CPE 210 does not need additional configuring.

        You are done with assembly and configuration of your Meshpoint.


    View all 3 instructions

    Enjoy this project?

    Share

    Discussions

    Bartosz wrote 08/09/2017 at 17:27 point

    interesting but why this not a sonet or gotenna2 functionality?

    lora is better than wifi

      Are you sure? yes | no

    Keith Olson wrote 07/23/2017 at 04:08 point

    Awesome idea!  I have to run so I haven't read your whole page, but I had an idea for powering it without needing batteries: use gravity.  https://gravitylight.org/how-it-works/

    A number of generators could hang off of the tower that your unit is on top of to provide sufficient power, with some 'end of travel' mechanism to let operators know that one of the weights is near the end of its travel.

    As weights could be on-site sand/metal pieces/etc. and the generators would slip into the weight bags, the whole system would be easy to transport.

    Hope this helps!

    Keith

      Are you sure? yes | no

    Similar Projects

    Does this project spark your interest?

    Become a member to follow this project and never miss any updates