Peter Walsh
-
Interferometer info coming
11/12/2016 at 17:33 • 0 commentsInterferometer video coming
There's a lot of interest in setting up the interferometer and how to use it, so I've decided to post some follow-on info.
This will include setup notes, how to make a closed-loop feedback measuring system, how to calibrate, and so on. It will probably include a short video and a Wiki page with pictures.
I won't be showing any actual experiments, simply because a lot of other people would enjoy doing them.
There's actually a number of interesting things that could be done, some of which are subtle and counter-intuitive. Speed of light, detecting the moon's gravity, detecting PH of a solution, and making a Q-switch.
There's an experimental setup that I like much better than the 2-slit experiment for demonstrating quantum mechanics. I'm considering setting that up and showing it.
Stay tuned - in a week (or a few) I should have an update coming.
As always, anyone who would like to contribute can PM me on GitHub and I'll add you to the project.
-
Looking for contributors
10/14/2016 at 18:15 • 0 commentsLooking for contributors
The project is in a good state right now.
There's some things that probably *should* go up on the wiki, but I'm really champing at the bit to continue my other project, I think the best course right now is ask for more contributors.
If you'd like to contribute to the project, either here or on GitHub, let me know.
The Optics Kit Christmas Present
Christmas is coming up, and one of these would make a nice present!
![]()
Packing optics
In anticipation of other projects, I've been going through all my optics and packing things up for storage.
I decided that I would tolerate 1 tote of optics plus 1 kit (case packed project kit), and it looks like I will be able to achieve that goal.
I cut out two more storage shelves, one specifically made to store my mirrors (blue-ish sheet, center right) and another one to store oddly shaped pieces such as square lenses (orange, center left).
These sheets really do store a lot of optics!![]()
Projectors have awesome components
I scavenged a video projector as part of the project and found a wealth of interesting optics there. Several color filters, a couple of polarized filters, and several nice front-surface mirrors.
If you have access to a broken video projector, consider scavenging it for optics. Lots of good stuff there!
Included in the haul was a very nice beam-splitter prism. If I can find a 2nd one of those, there's a kick-ass Quantum Mechanics demonstration experiment I want to try. I suspect it's easy to set up and show on a tabletop using the optics holders.
Might make for an interesting video.
-
Project is Done!
10/10/2016 at 02:53 • 0 commentsDone and done!
Contest video is up, complete BOM for one kit, assembly instructions, and all files available as a single ZIP file download.
Project is over, time to take a break.
Enjoy!
-
Optics Kit Christmas Present
10/09/2016 at 05:33 • 0 commentsThe Optics Kit Christmas Present
If you have kids and want to get them interested in science, consider making them an optics kit for Christmas.
Check out the GitHub wiki for a good overview.
![]()
====
I am SO champing at the bit to start work on my other project, but I promised myself that I'd finish up this project for the HAD prize cutoff date first.
====
And it's eating my brain. I am totally lost for a project video.
For previous videos, I recorded the audio first, then played it through an MP3 player while grabbing/showing things with my hands. That worked pretty well, but was tedious and time consuming.
This time I recorded the audio in pieces and tried to make short video clips to piece together in OpenShot to make the video...
...and failed completely. I've now spent the entire day and I'm exactly nowhere. My best guess is I'll have to redo the entire audio *and* video from scratch tomorrow.
*sigh*
Nothing for it. I've still got two days to put together a video. (And I haven't by any means been letting this go to the last minute-I've been working on the project full-time for the last couple of weeks.)
====
The good news is that I've finally figured out how to make good-looking images side-by-side with text on the HAD website.
The project on GitHub is pretty-well finished, and the GitHub wiki is coming along nicely. Simple, with lots of pictures, and should be easy to read and follow.
-
I have discovered GitHub
09/27/2016 at 17:13 • 0 commentsI'm working up a wiki description of the project, with images and some simple instructions and... wow! GitHub is *really* easy to use!
I'm very impressed with the easy interface and simple actions to edit the wiki.
I can download the wiki to my local system, make edits locally, then upload to GitHub with ease. There's no waiting 45 seconds for each individual image, there's no file->select process for each individual image or file, and I can get a local preview live (without having to save/reload).
Much faster!
Only about half the project wiki pages are complete, but if you're interested you can check them out: project page and Wiki.
Once the GitHub wiki is in good shape, I'll copy/paste some of the text and images back into the Hackaday.io project. The Hackaday.io site has limited space for presentation, so it'll be in abbreviated form. The GitHub site allows multiple pages in wiki format.
![]()
As part of the documentation blitz, I've been going through the project as a newbie, cutting and assembling the holders, trying to find problems with the directions and clarirfying ambiguous steps.
I've figured out a good GitHub format that melds images and text in separate columns, a'la Tufte. I think it looks pretty good, and now that I know the arcane steps to make this happen on the Hackaday site I'll probably port that over.
-
Sanding and polishing the project
09/10/2016 at 19:29 • 0 commentsSummer's over, time to get back to doing projects.
I had an idea for my other project, which was interesting enough that I designed new boards and hope to do some interesting experiments. This new idea is quite exciting because it might actually work. I'll post more on this later, and on the other project page.
While waiting for the new boards to arrive (I got the "status: shipped" E-mail today), I'm going to go over the project, make sure that all the files are complete and can be successfully cut, spruce up the wiki, and then put the project to bed.
-
Finishing the project
07/09/2016 at 23:45 • 3 commentsTL;DR
- Finishing the project
- Lens folio
- Project case
- Various rings
- I've figured out image and text flow on Hackaday.io!
Finishing the project
Of late, interest in the project has flagged at my hackerspace.
Additionally, I think we're at a good stopping point. We have lens storage, a carrying case, a number of holders, and rings for most of the common optical components.
By common agreement, as a team we're going to finish the designs (one or two still need some minor development), fill in all the documentation, and put the project to bed.
I'll then open the GitHub project to other contributors if there's interest. In a month or so.
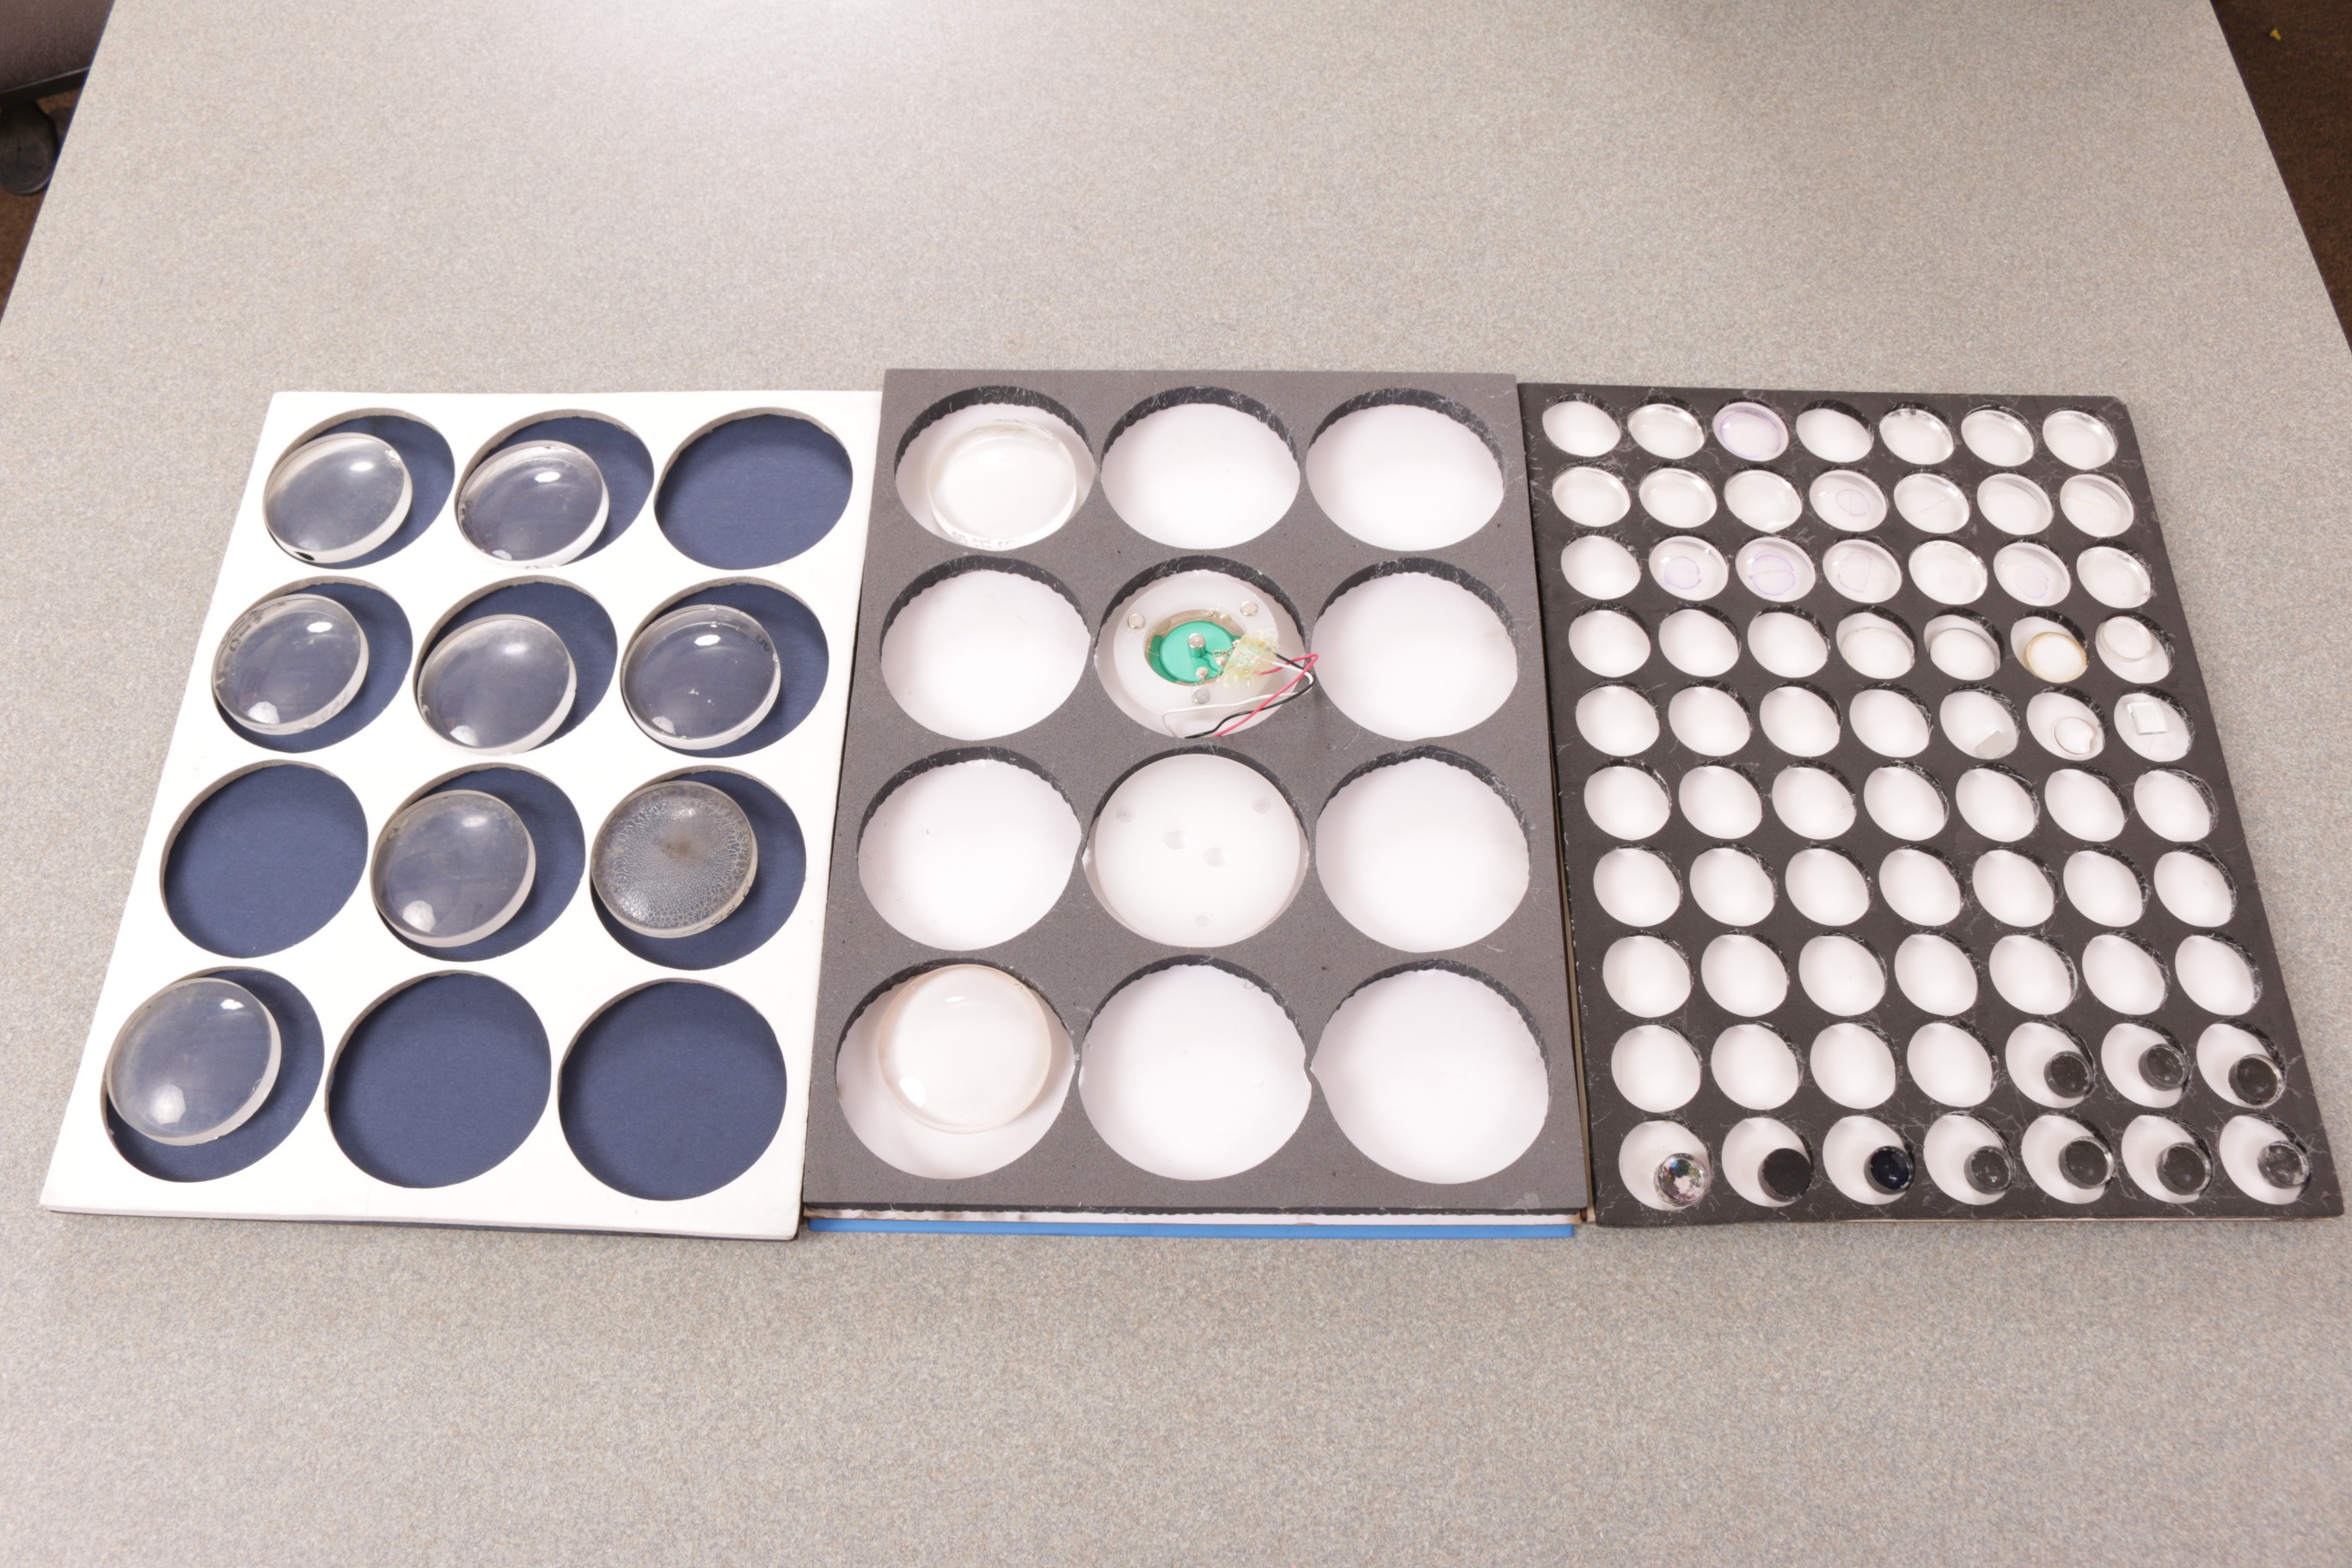
Lens Folio
![]()
As mentioned in the [updated] project description, I'm drowning in lenses :-)
So I lasercut some foam into well patterns glued onto posterboard backing, making a folio system for lens storage.
You can *really* store a lot of lenses this way.
I've since discovered that when you lay out the foam shelves, it's very easy to grab any component you need - they're all visible and accessible.
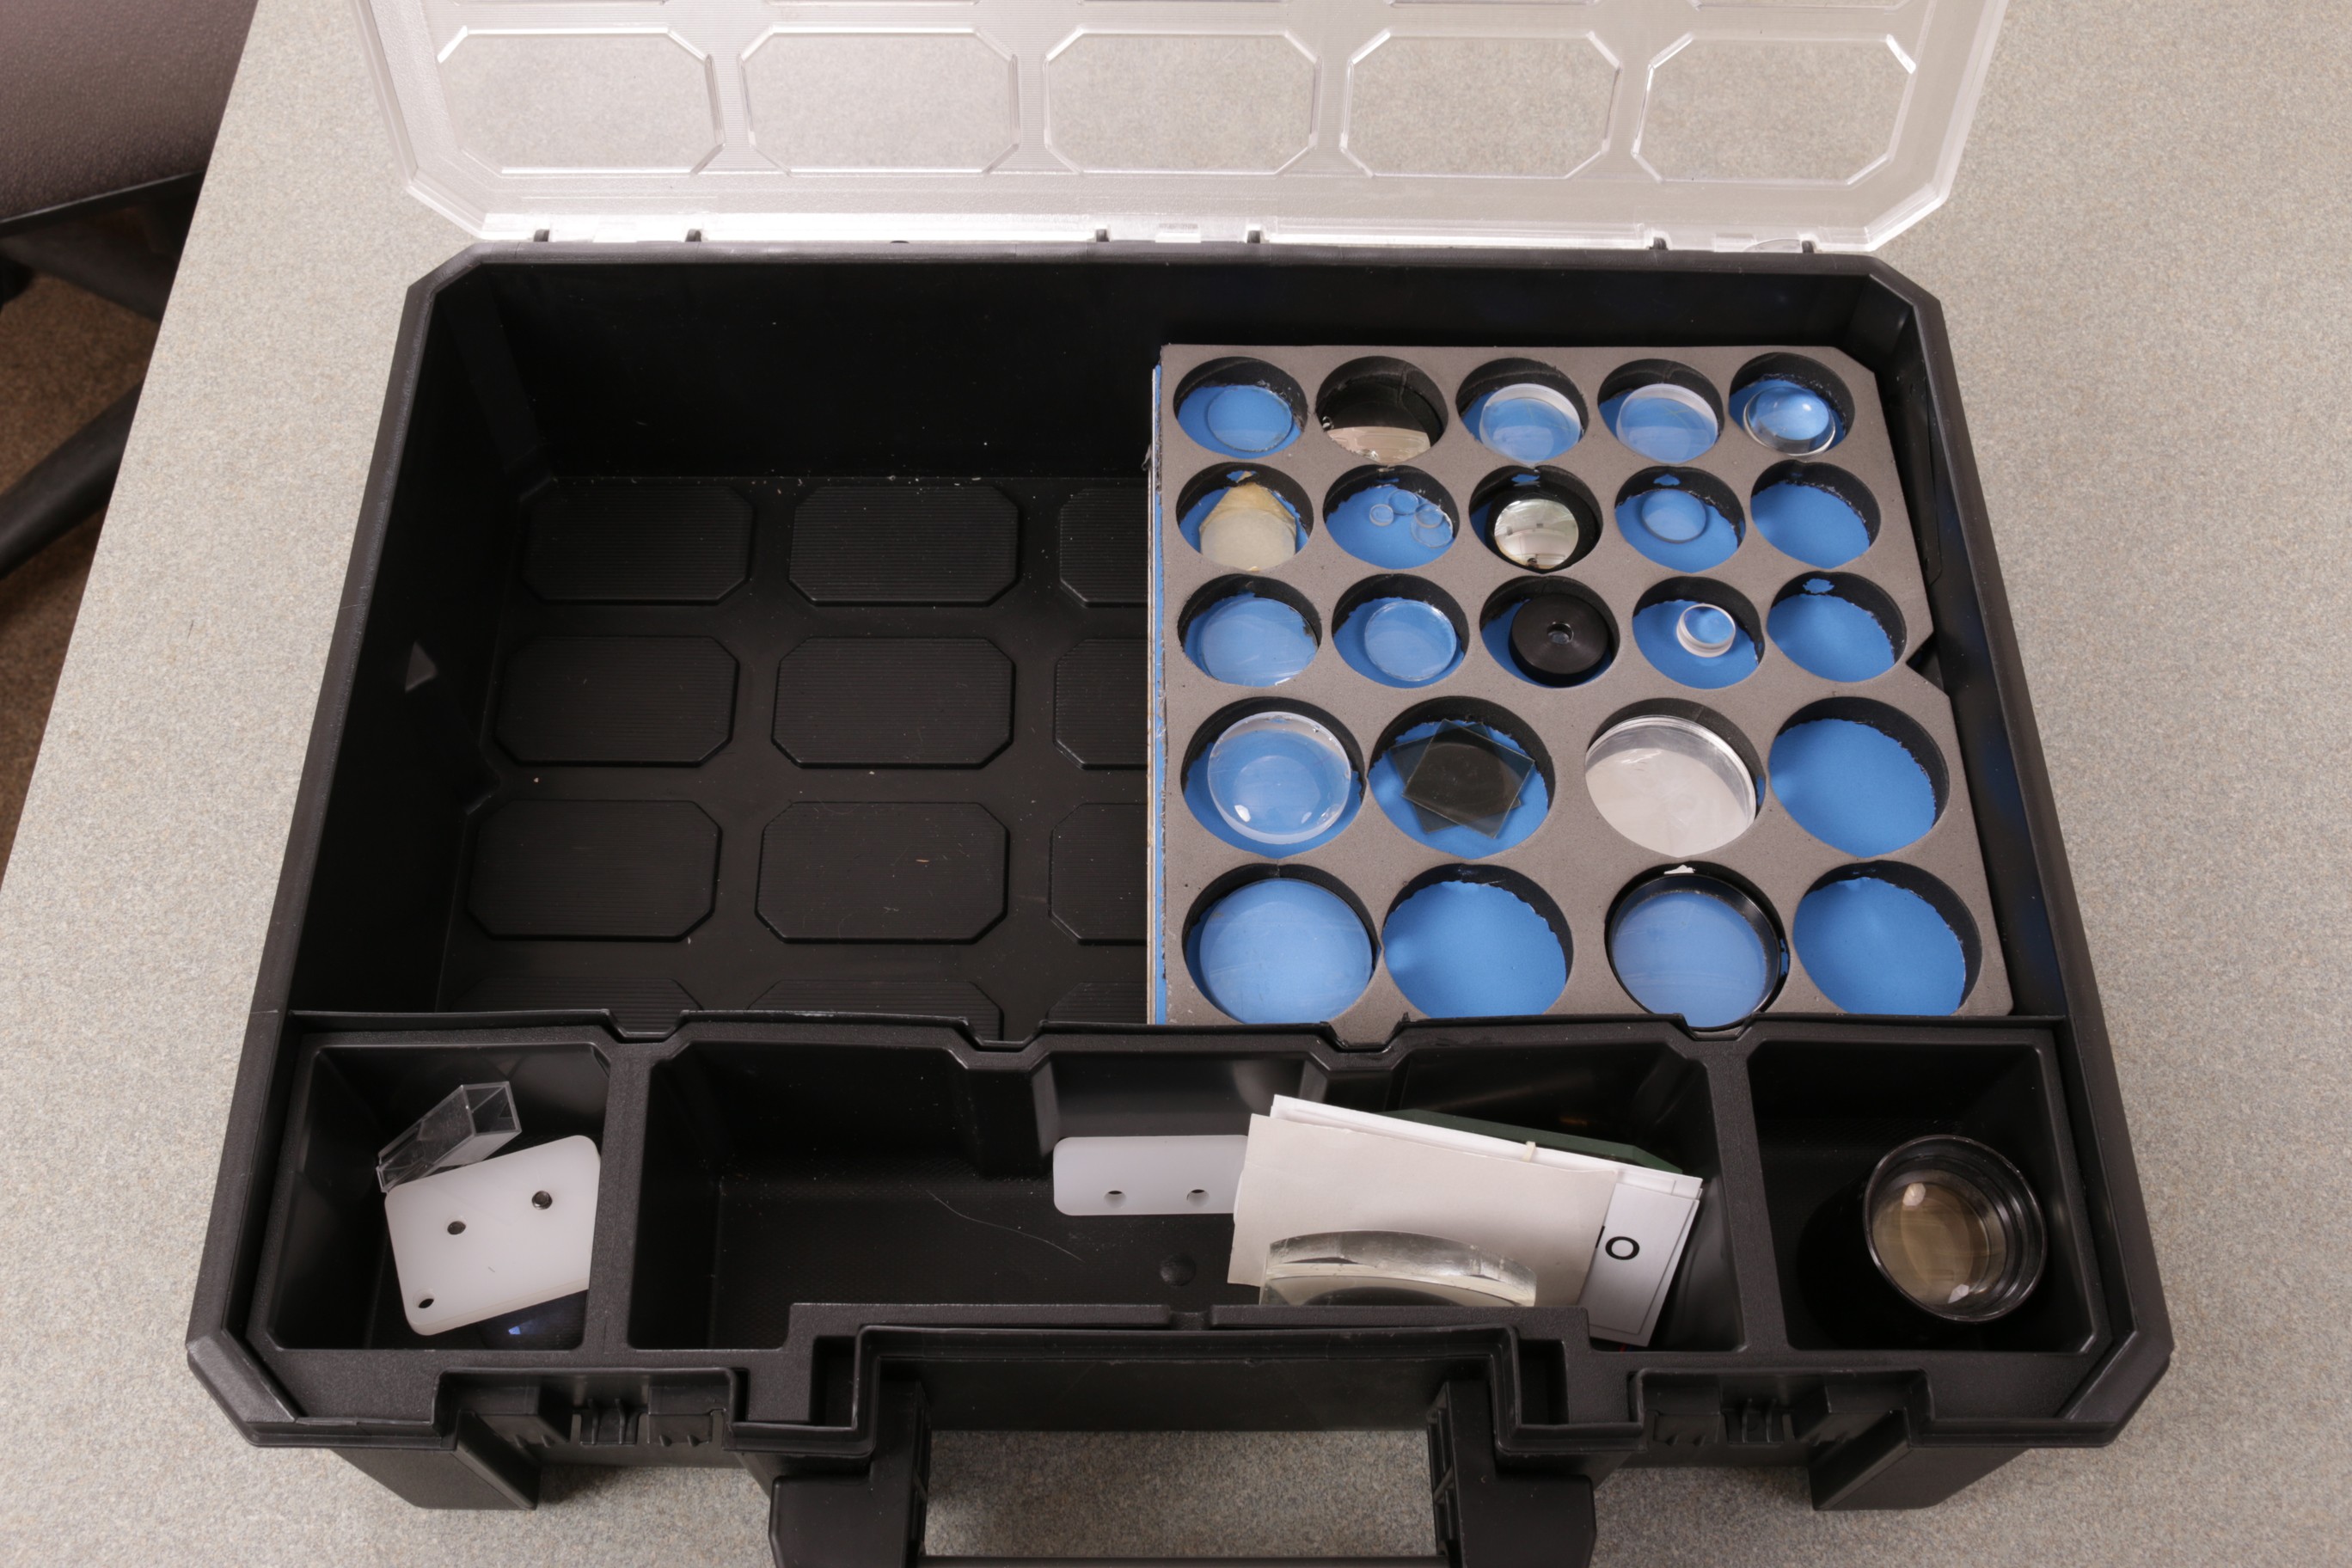
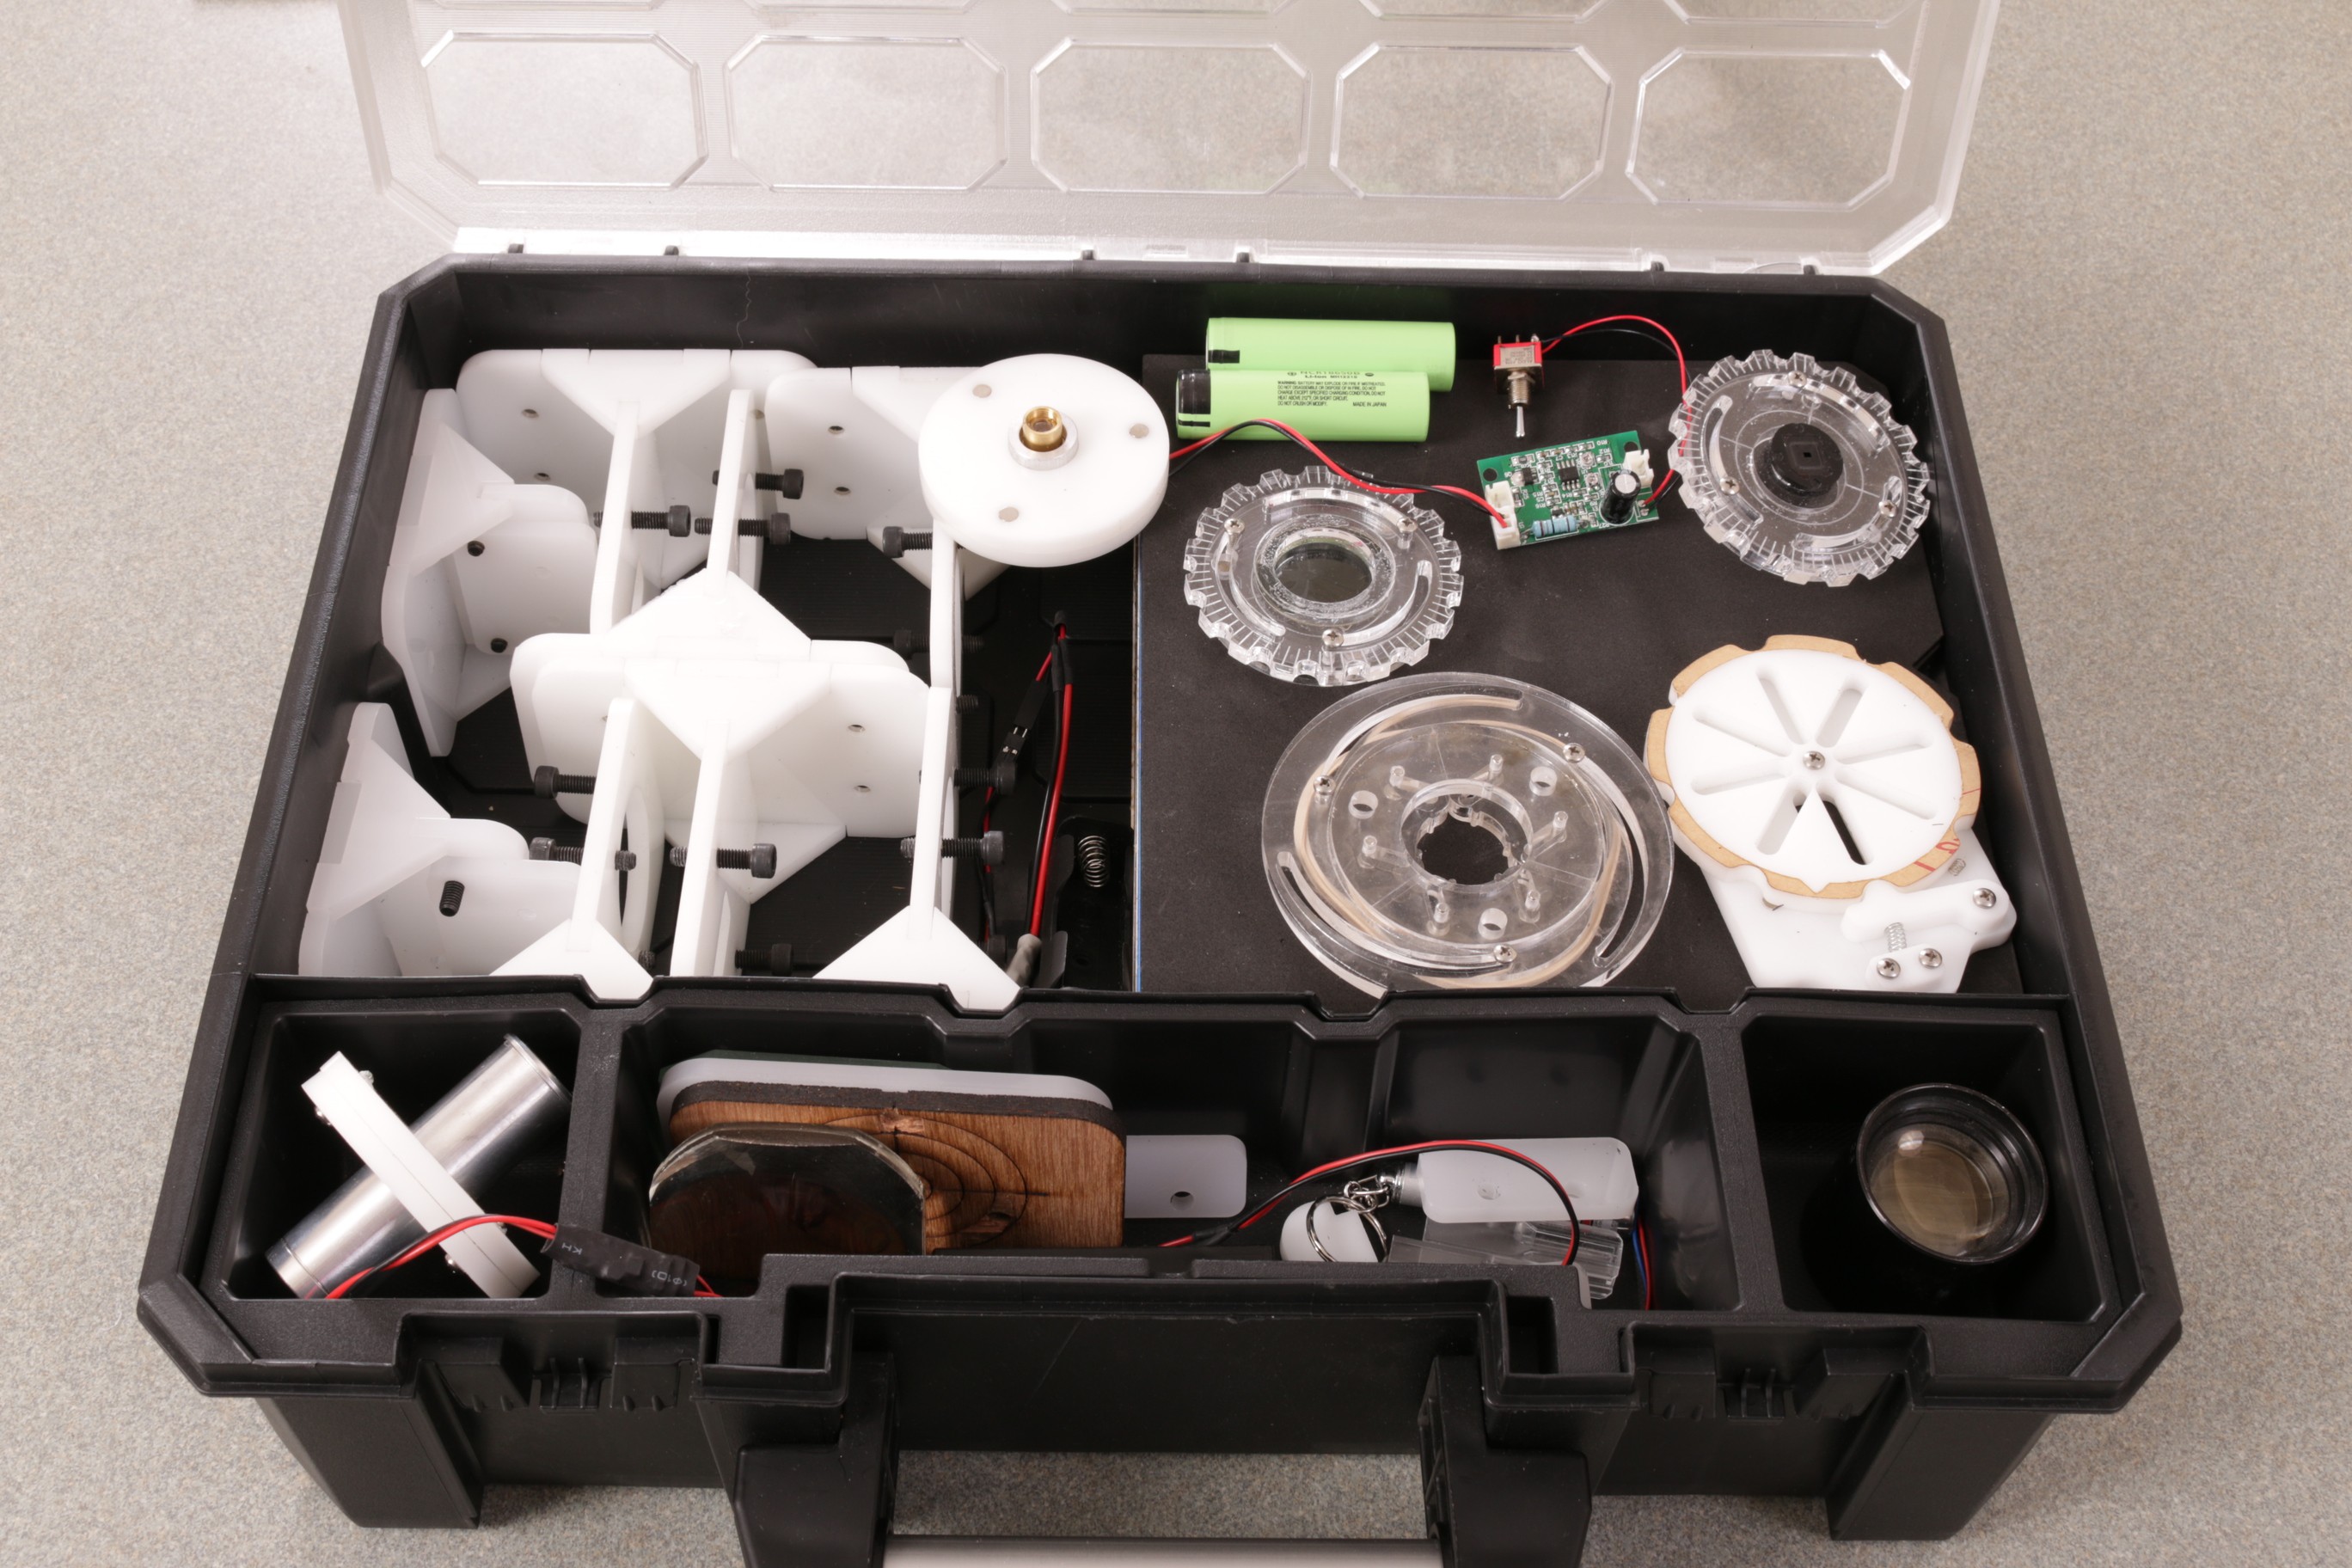
Project case
I found a Husky brand parts organizer case from Home Depot that's deep enough to store the holders. (Husky 16-1/2 in. 8-Bin Deep Pro Organizer, Black,
Model # 211102)Then it occurred to me to make a lens folio that fits into half of the box, and with a small adjustment to the "clamp holder" the other side will nest 6 ring holders and 2 clamp holders.
The result looks pretty good, everything is organized and well dressed, and nothing spills or rattles when it's tipped or carried.
![]()
![]()
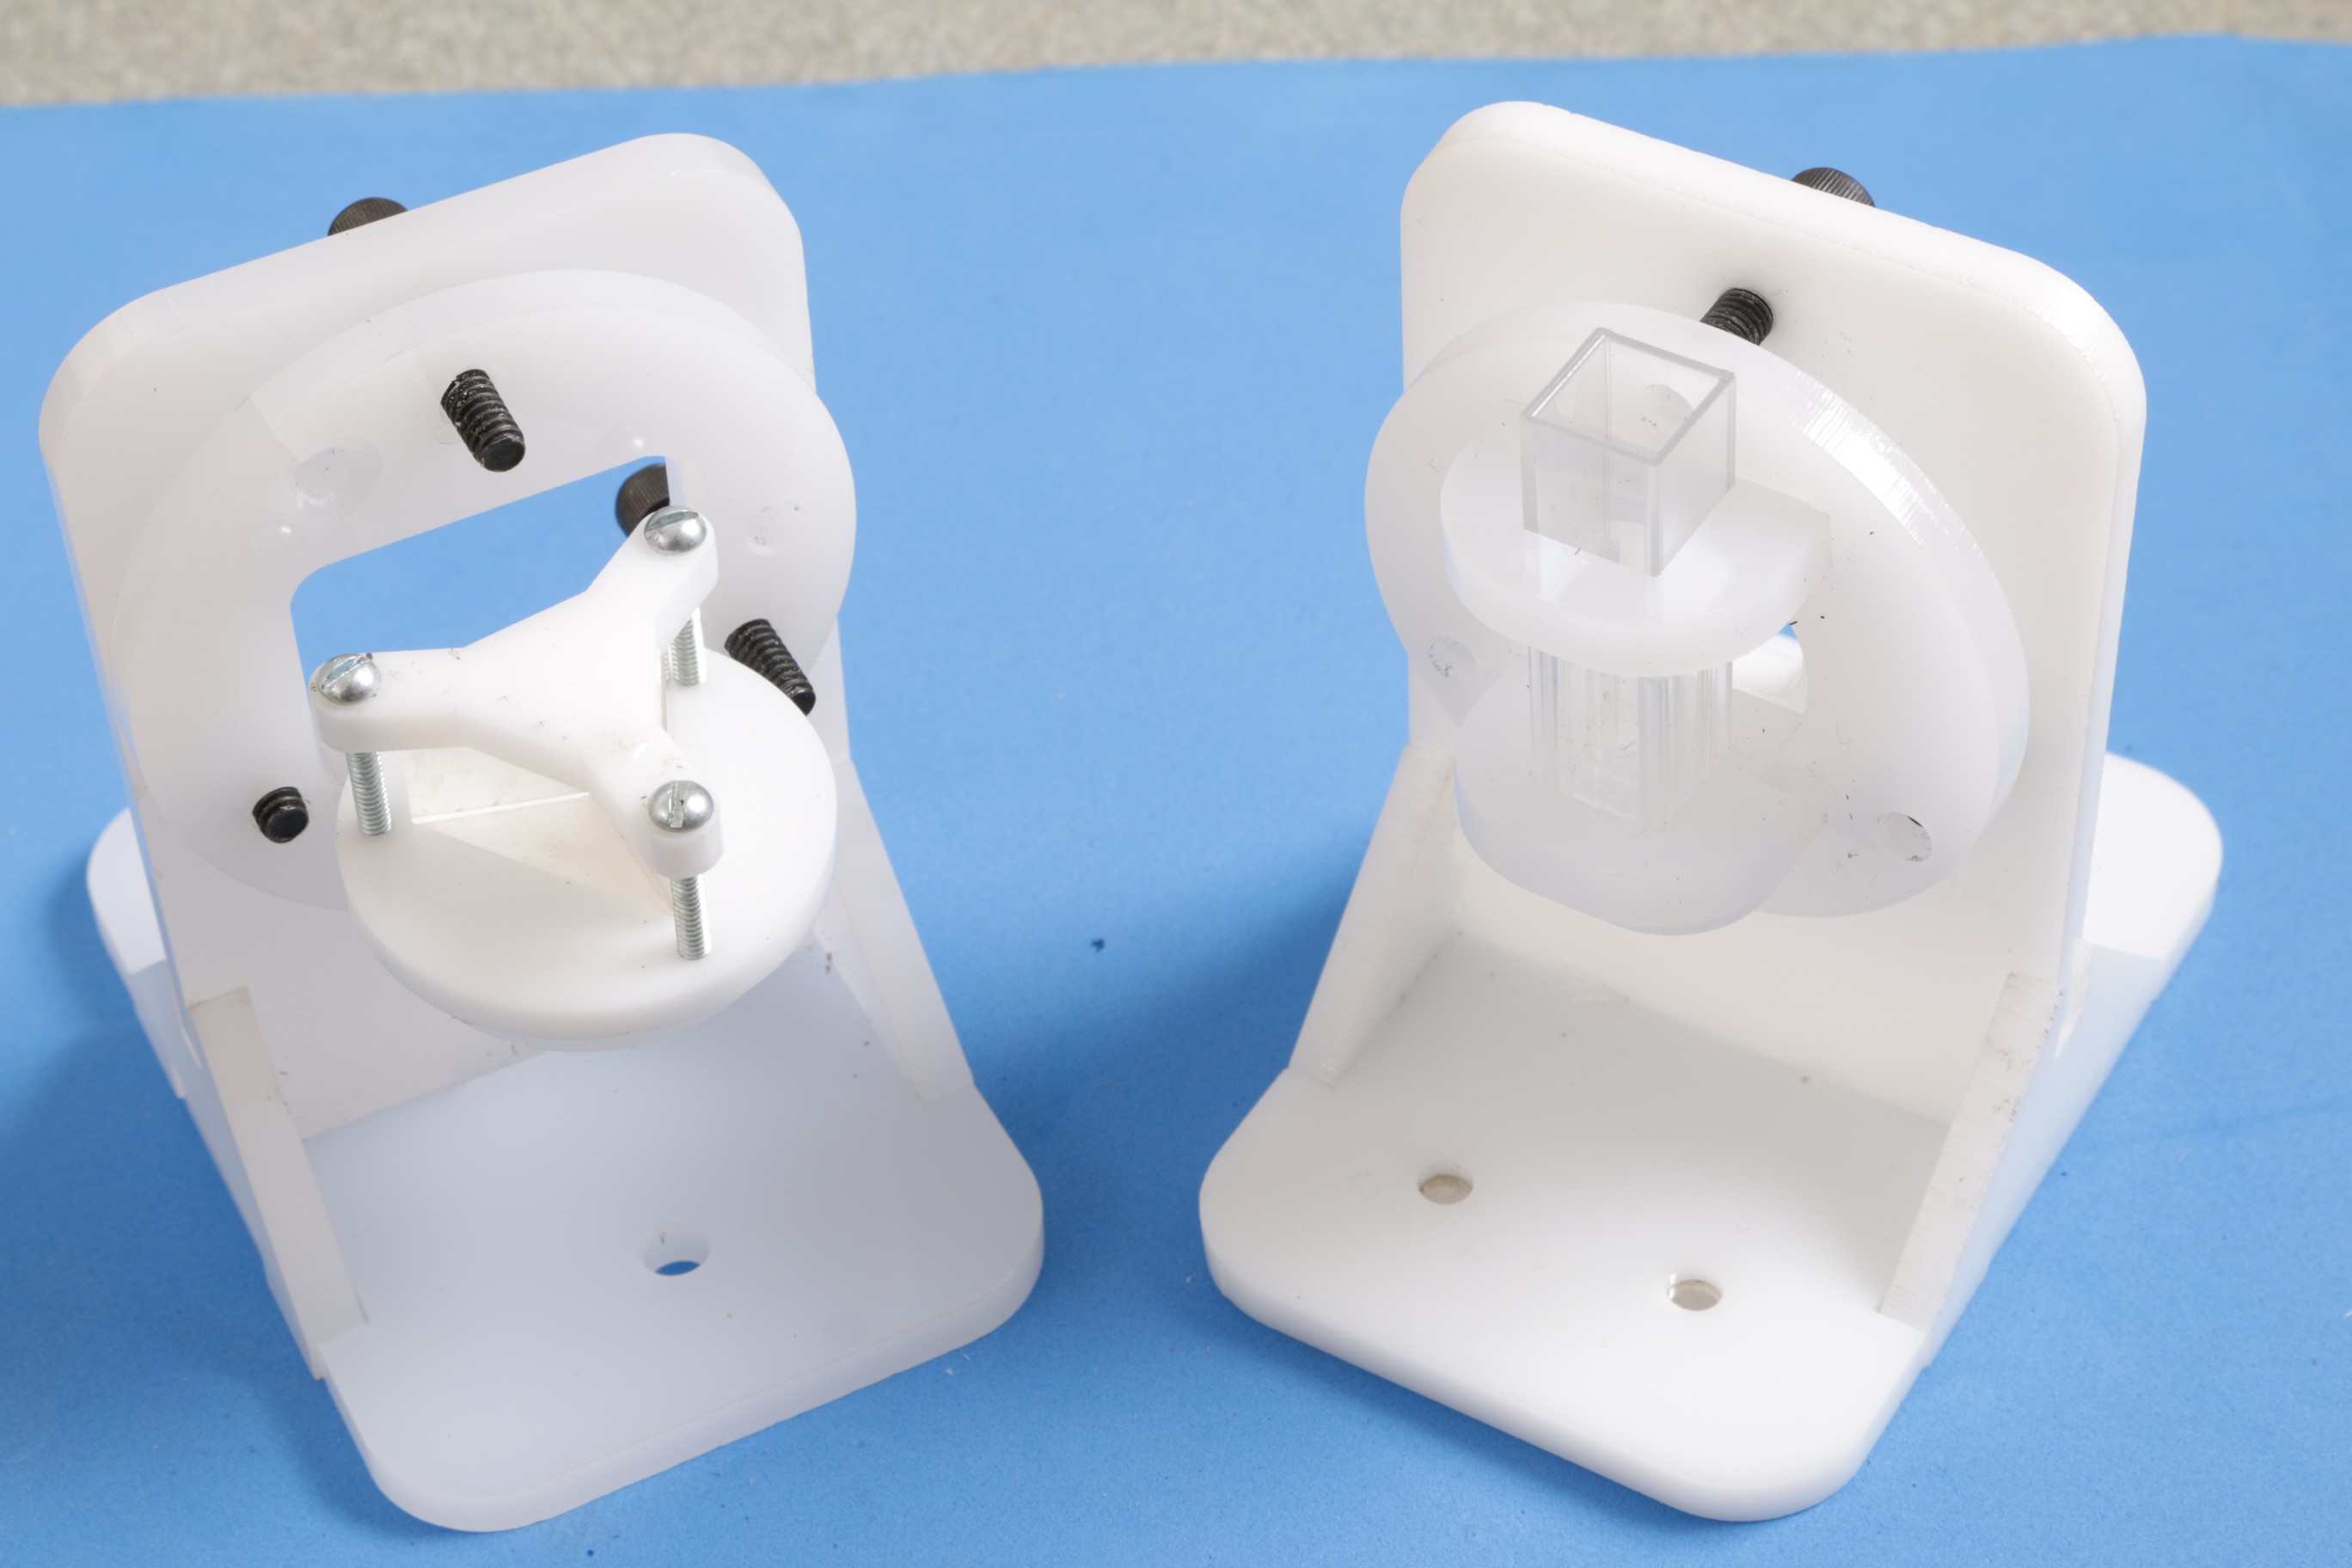
Various rings
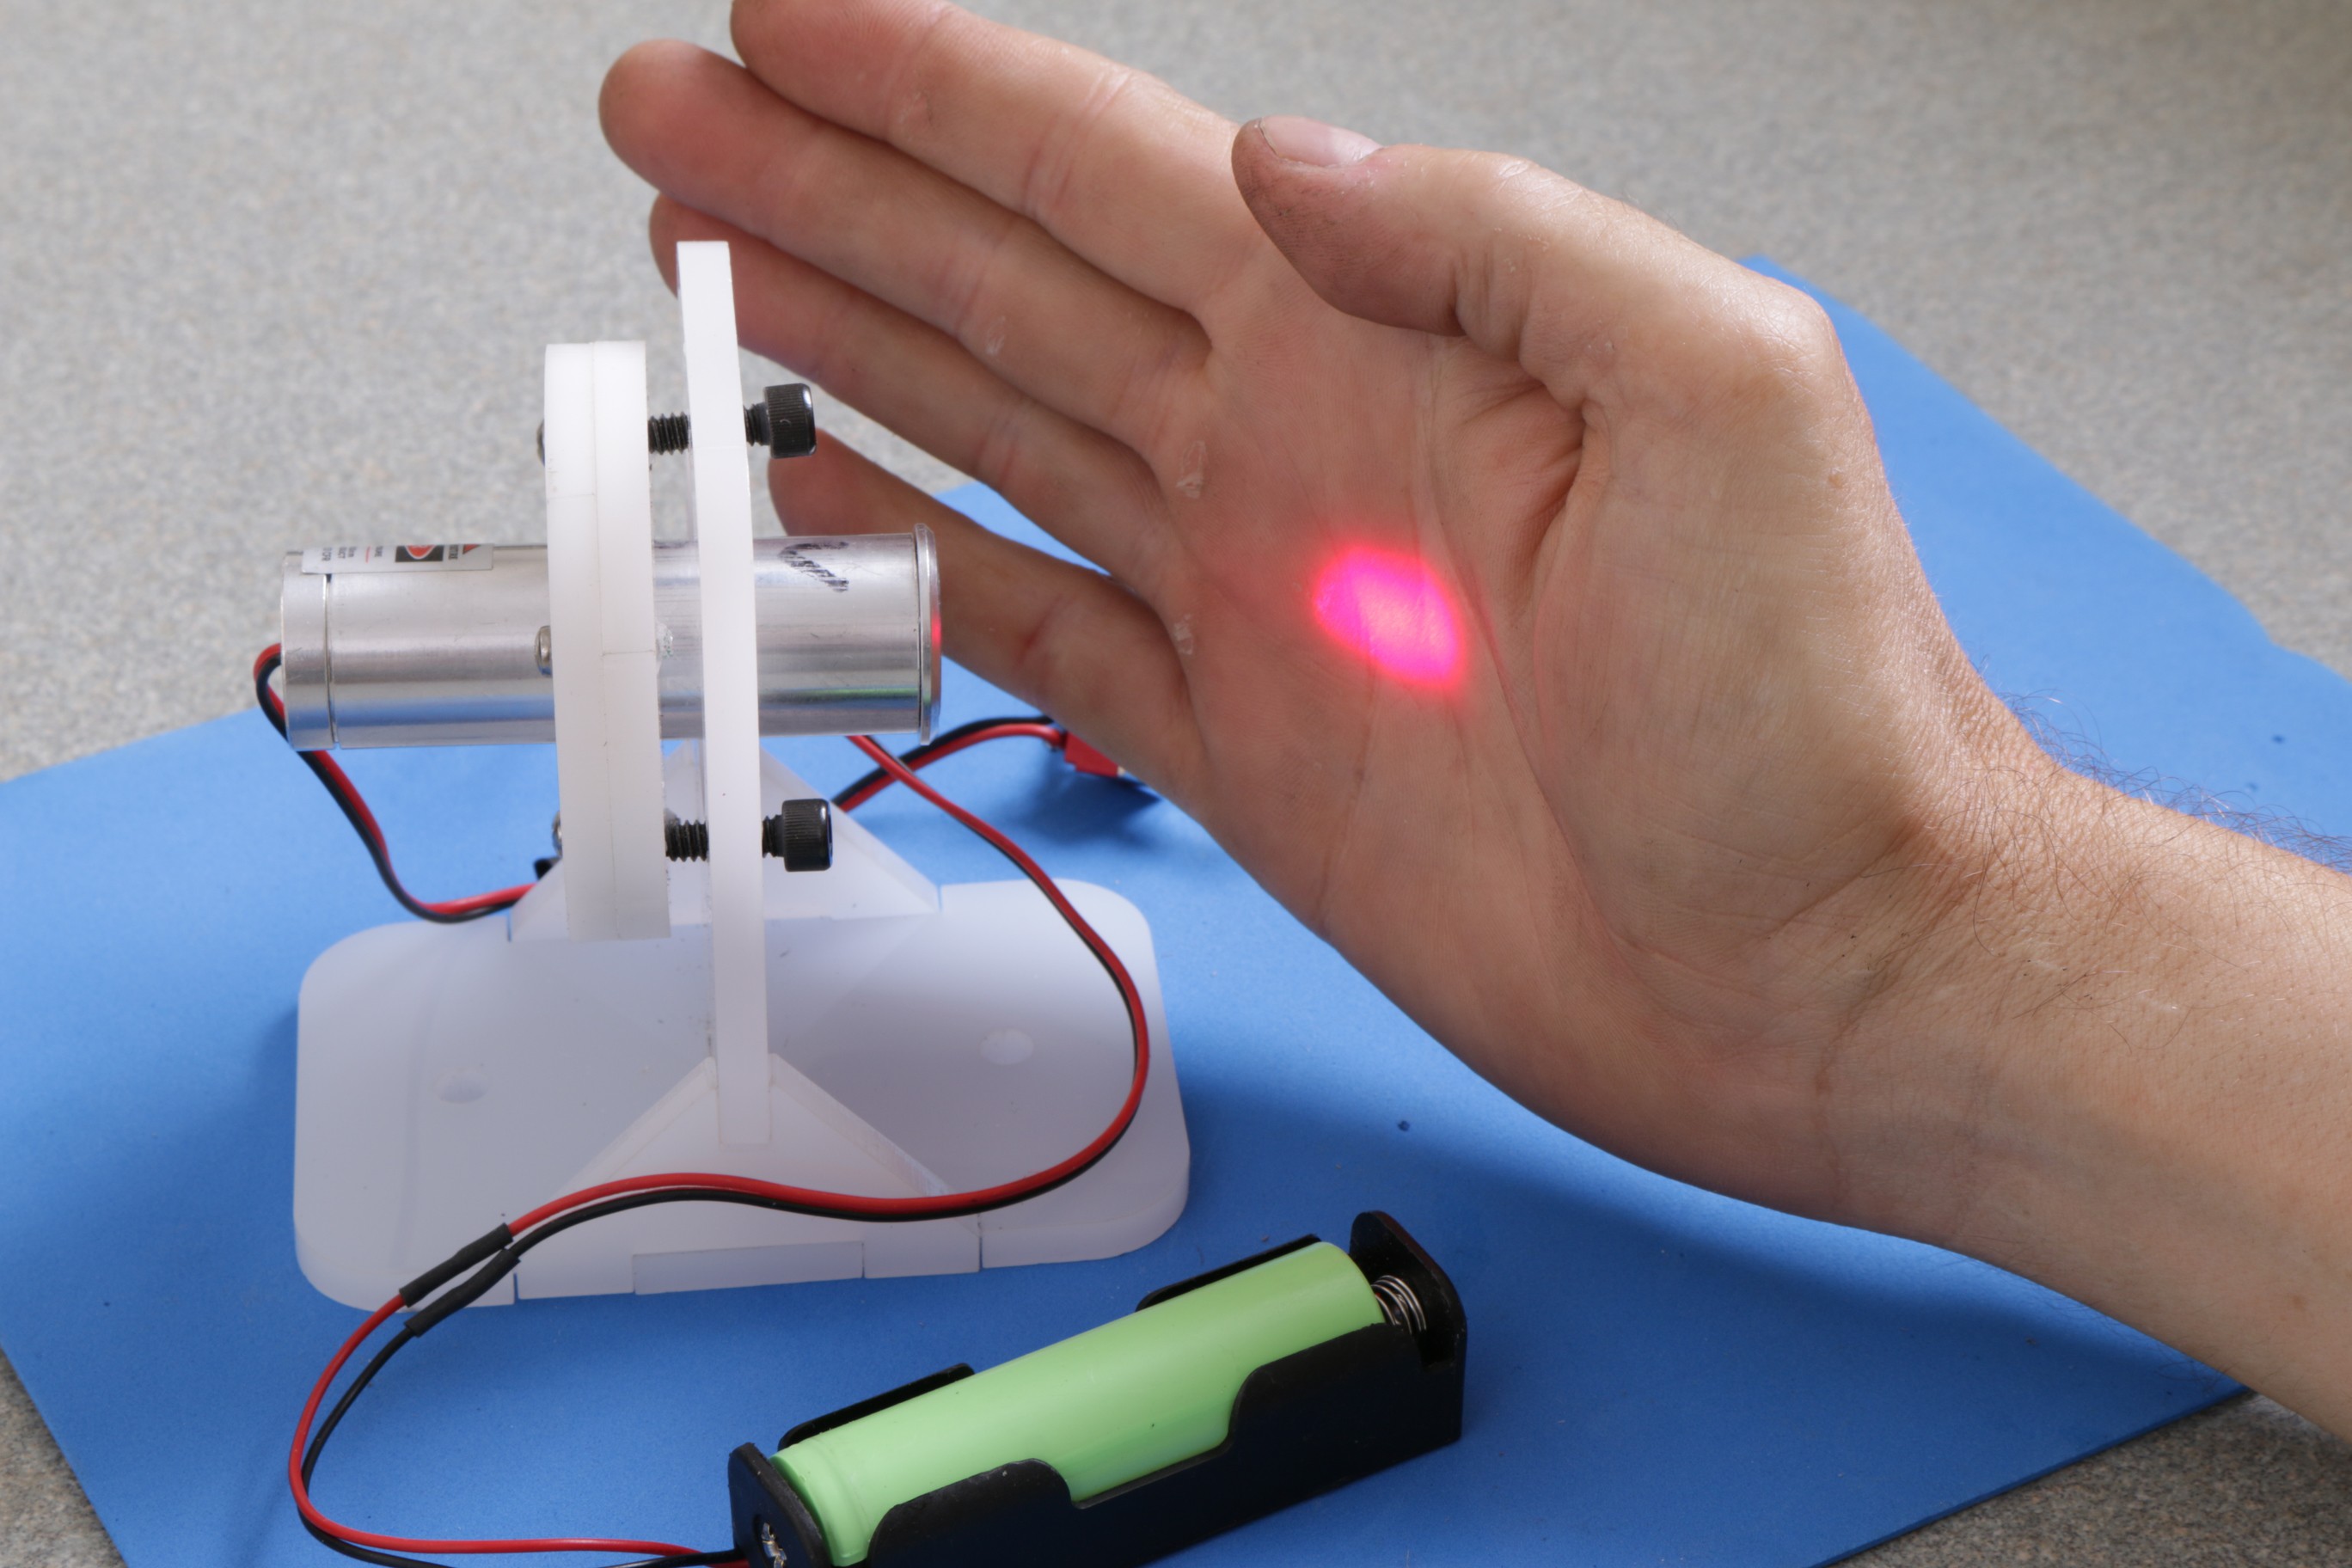
We now have designs for a lot of interesting rings. On the left (below) are holders for a prism and a cuvette, on the right is a holder for a big 100mW laser.
The prism ring can be fixed to the holder to hold the prizm horizontally (like a table, shown) or vertically. ![]()
![]()
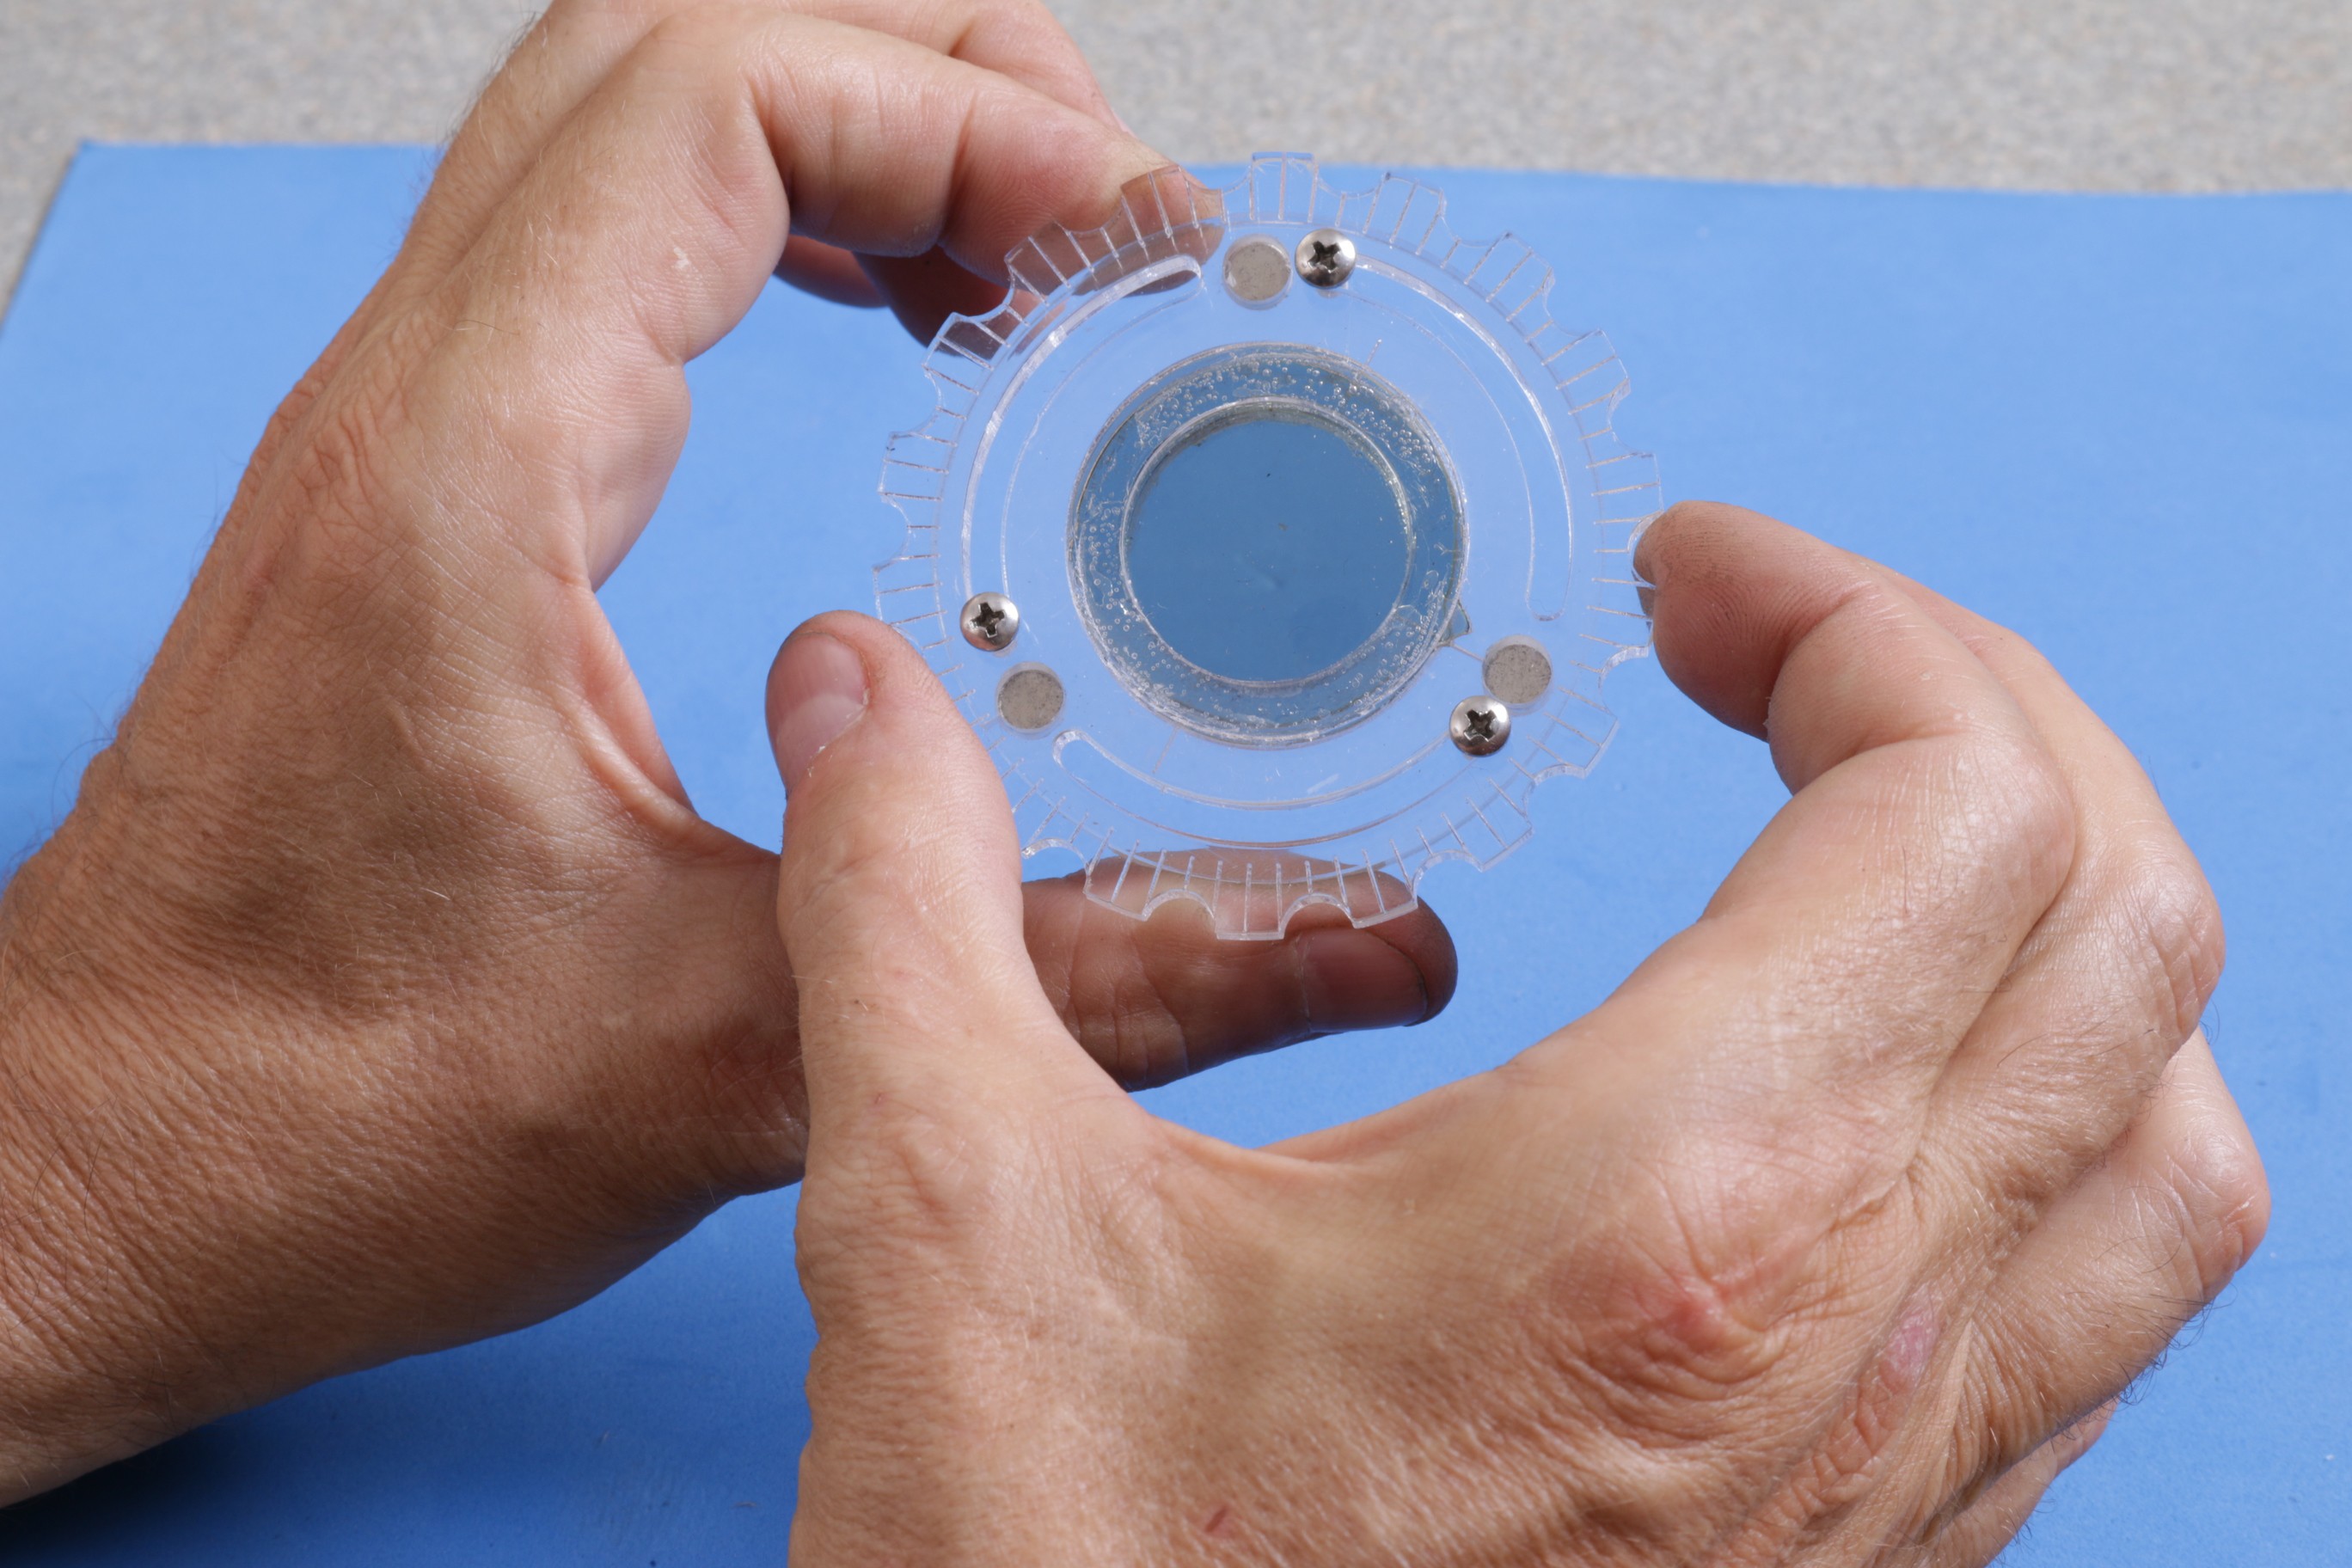
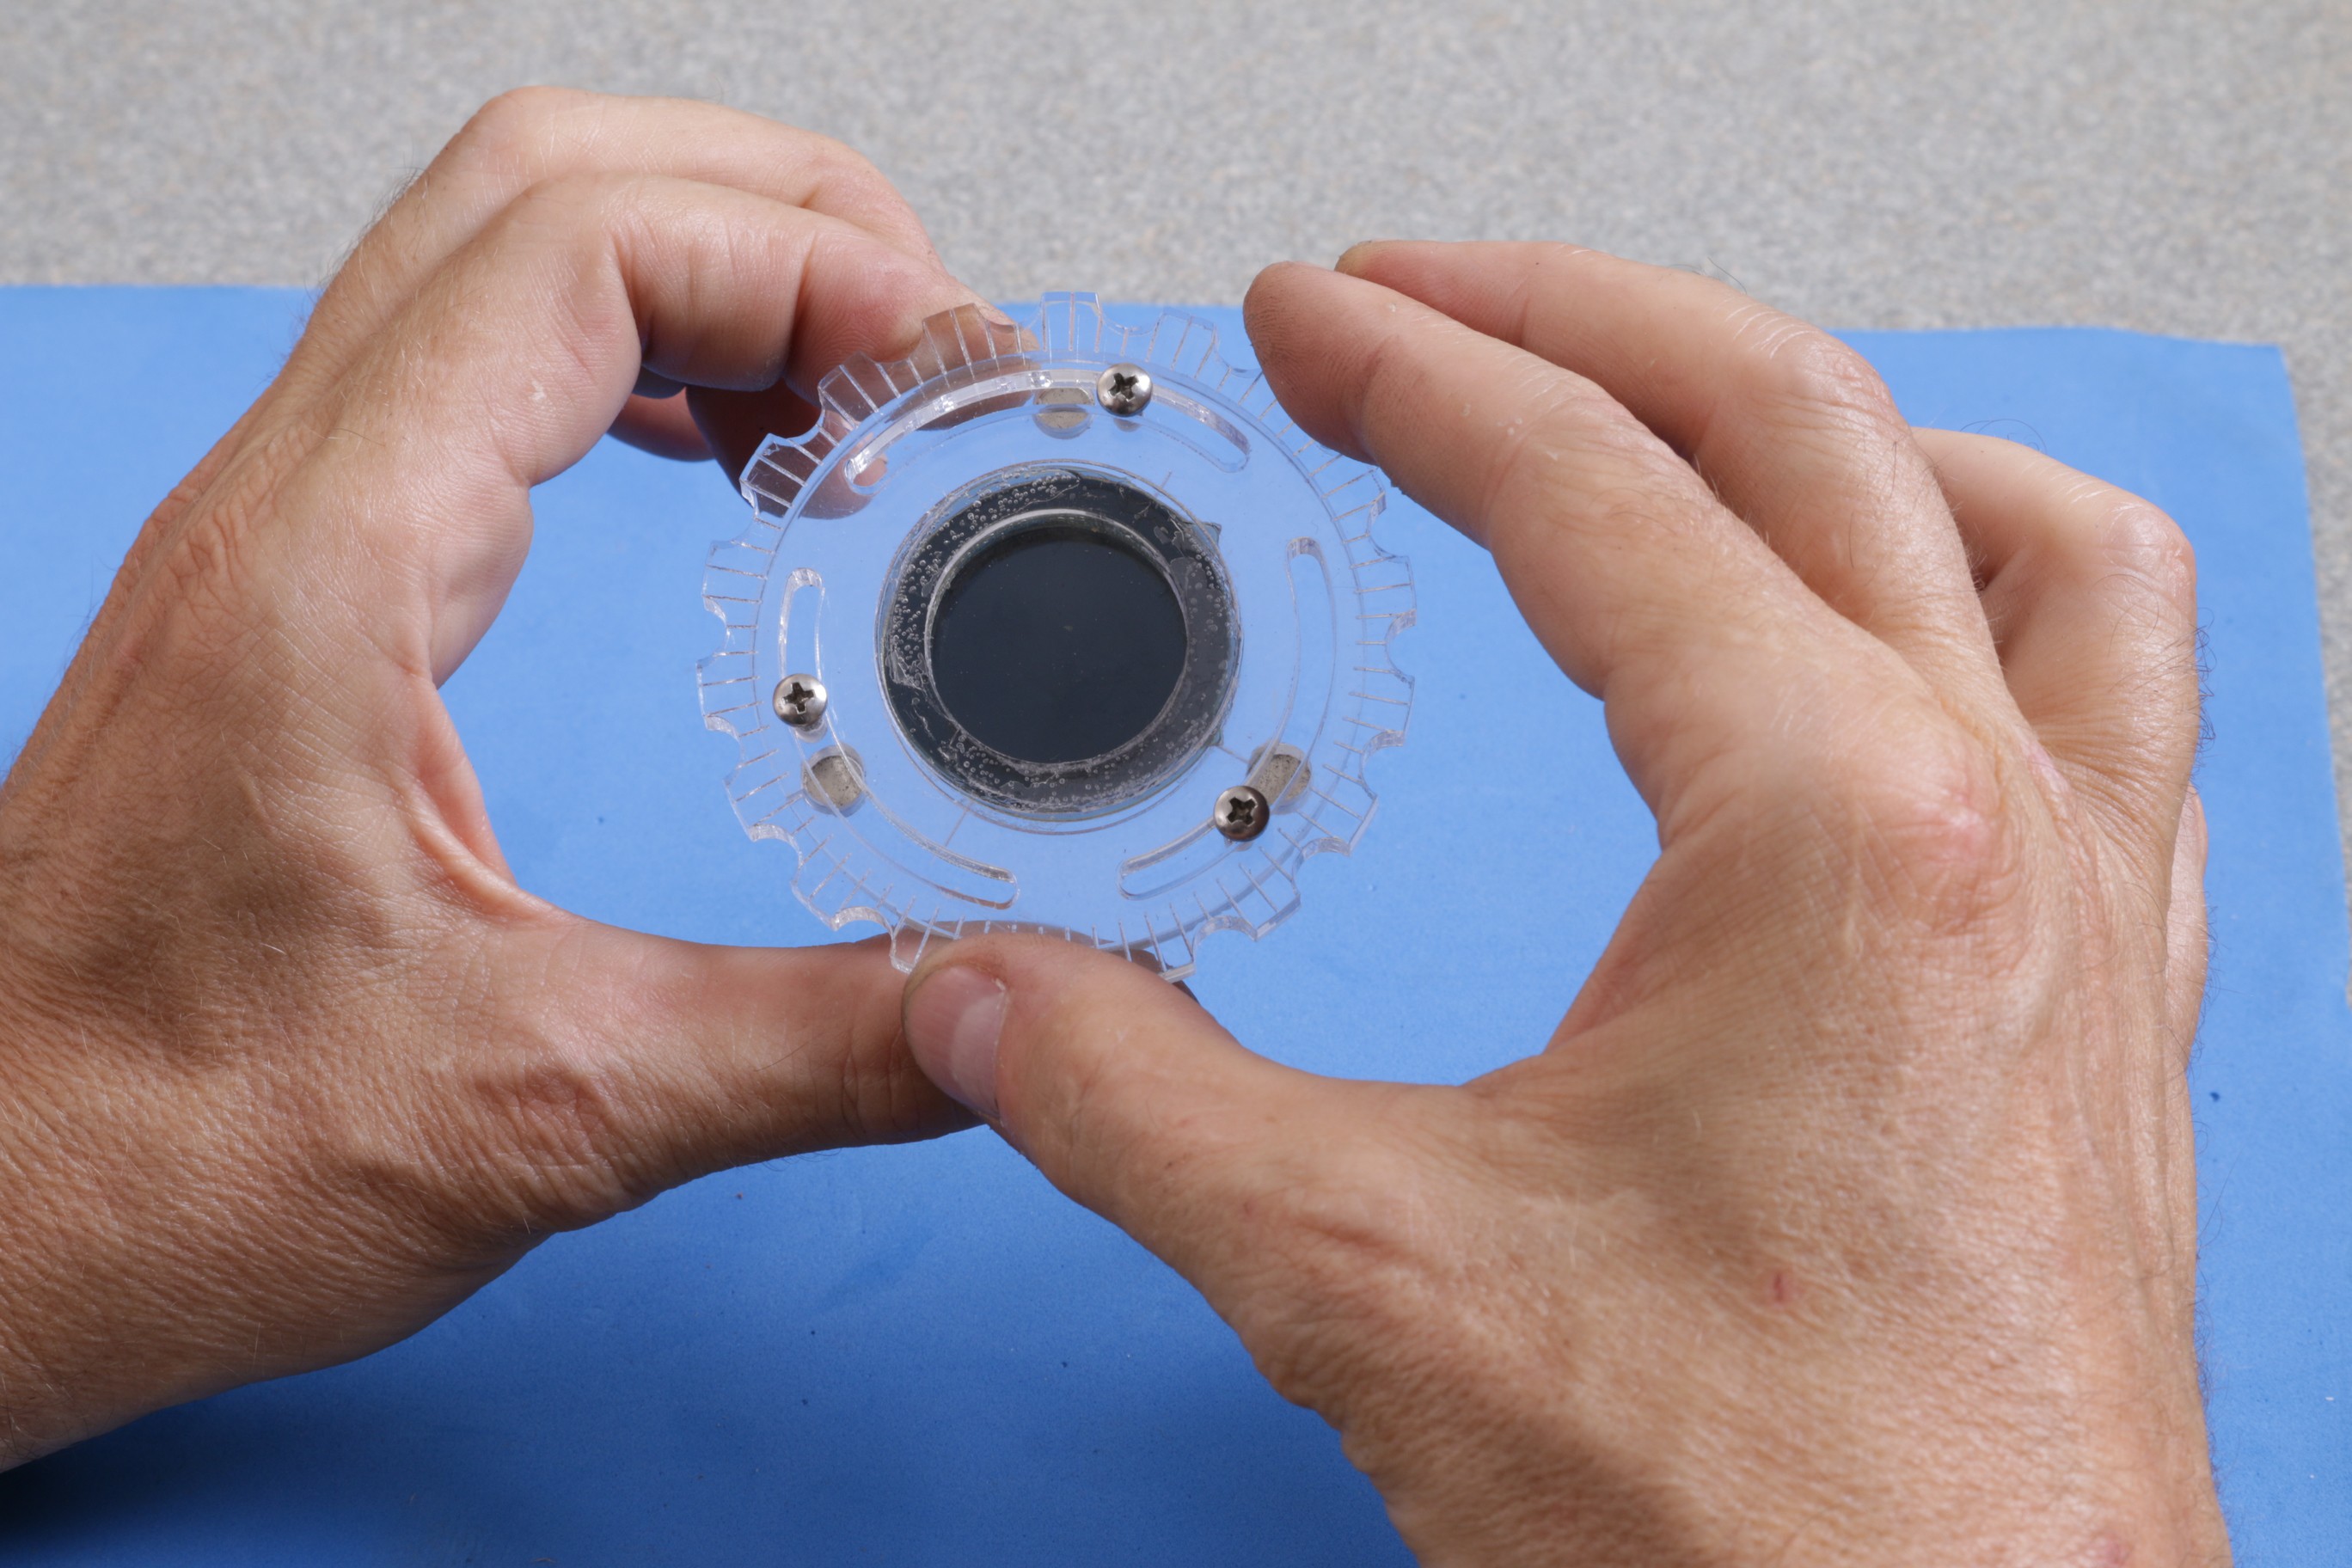
A polarizer ring can hold one or two polarizers (two shown). The angle can be locked into place by tightening the screws. ![]()
![]()
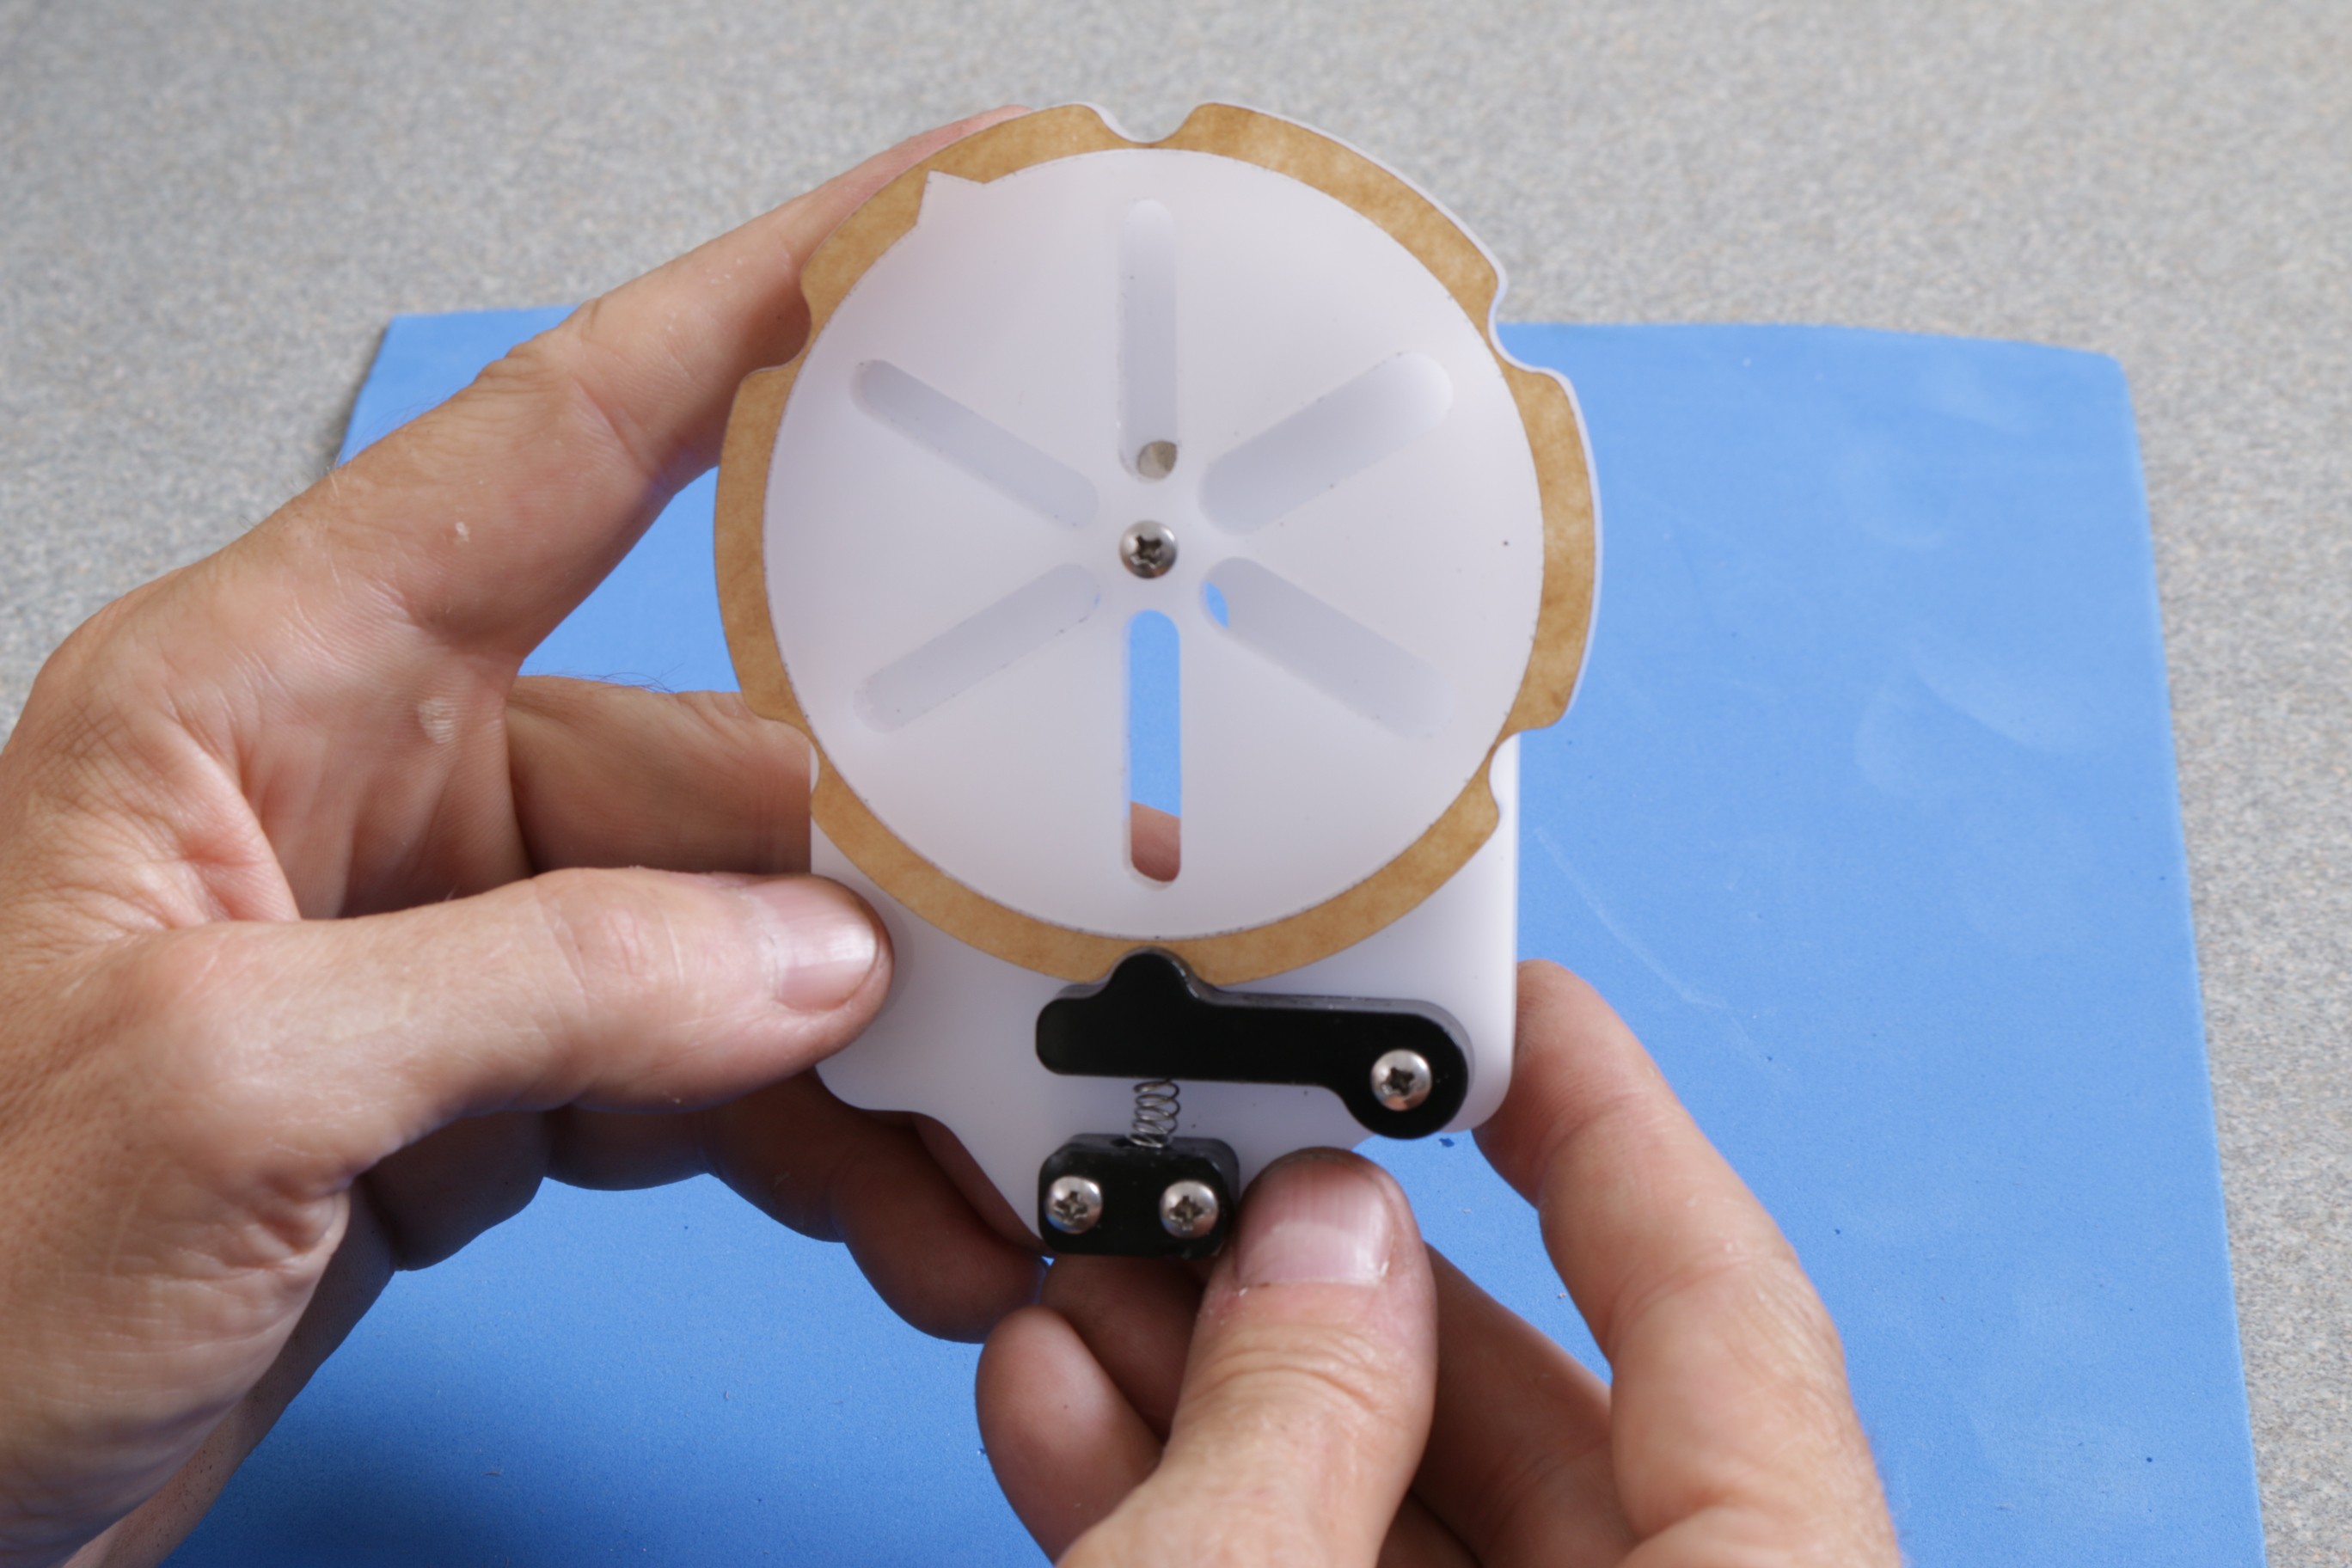
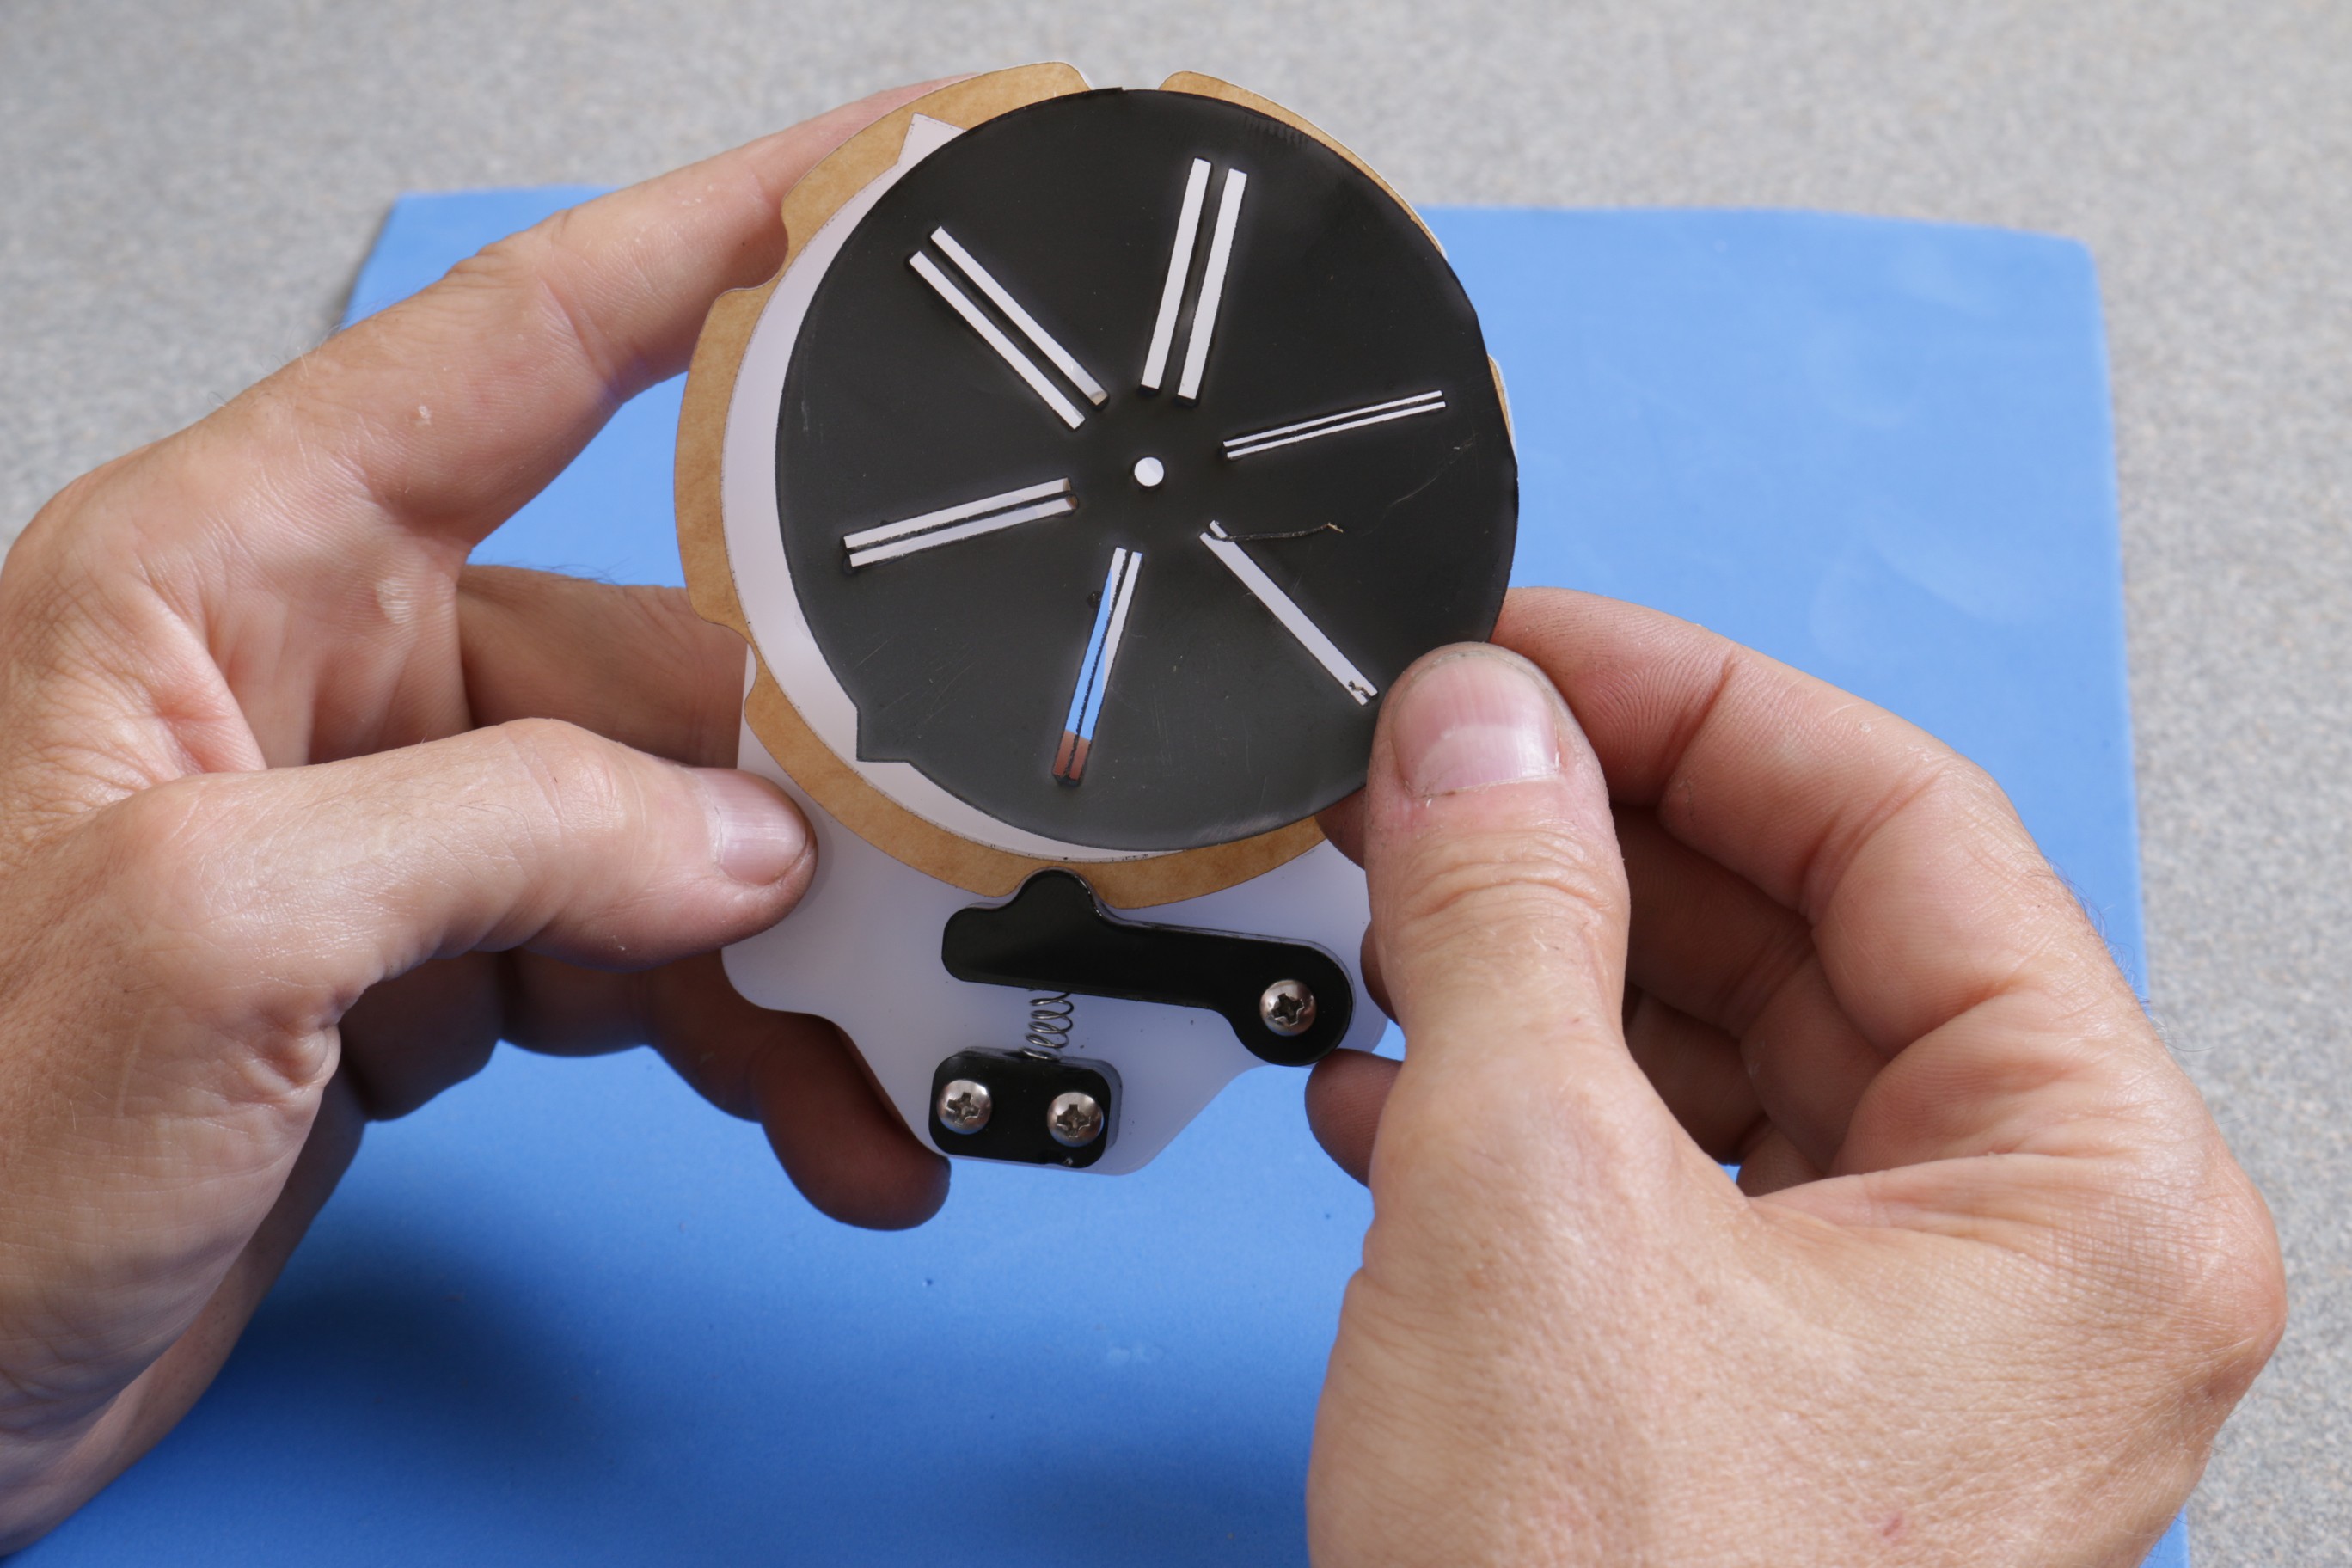
The slit ring has a ratcheting pawl held in place by a spring from a ballpoint pen. With a lasercut brass plate glued to the surface, this lets you select one of several single- or double-slits of various width.
Yes, you can lasercut thin brass.
No, it's not done yet. Still some issues to sort out.
![]()
![]()
Image and text flow on Hackaday.io!
After much experimentation and trial-and-error, I finally (!) figured out how to get good looking text and image flow on Hackaday.io!
This blog entry and the project description are the first examples of my new formatting method.
It's a bit tedious, but it *does* work!
I'll publish a "how-to" on my "Potpourri" project when I get the time.
-
Optics demo file is not ready
06/15/2016 at 05:02 • 0 commentsWoot! We got an article on Hackaday!
The new video demonstrates laser-cut lens profiles, but the design files aren’t available yet because I encountered a problem specific to the CAD program I’m using. Curves in “saved” files are curves, but exported as DXF files they become polylines. I can cut curved pieces, but when you cut from DXF files the curves are faceted.
Our CAD expert is looking into this and should have well formed files soon, and then they’ll go up on the GitHib account and the Hackaday.io page.
(Also, we’re cooking up something special for the “Citizen Scientist” interim prize, and that’s taking up a lot of time. Check the project page for updates.)
-
Working indoors in the summer
05/25/2016 at 18:17 • 0 commentsAh, summer. The sun is shining, the smell of freshly cut grass, flowers are in bloom... And it's hard to get any indoor work done.
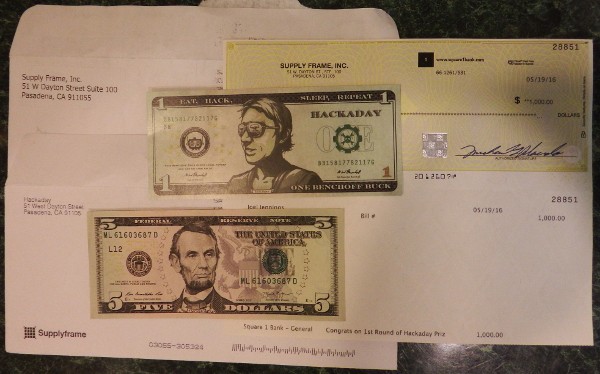
We got prize money from Hackaday!
![]()
Woot!
We've been purchasing little things throughout the project ($5 here, $5 there), and this will go a long way towards reimbursing everyone in the project.
Thanks, Hackaday!
CAD Designer is temporarily out of action
One of our members is in the hospital, which 'kinda of puts a crimp in our development because he's the CAD expert and made a bunch of awesome designs which we can't get at for the moment.
He should be getting out tomorrow, so we should have some more designs maybe next week.
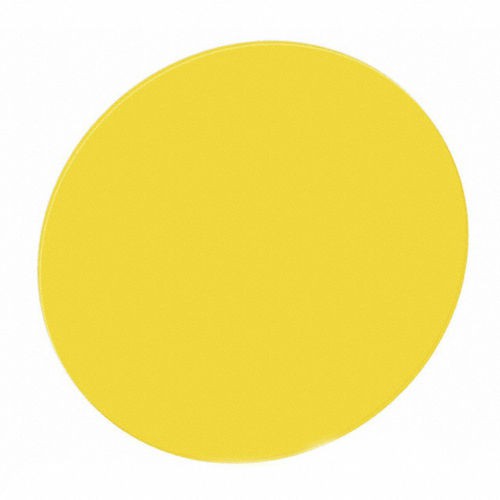
Spinthariscope design doesn't work
![]()
If you put a radioactive element next to a phosphor screen, you'll see small flashes of light. This is called a "spinthariscope", and is used to detect and measure radioactivity.
A white LED works by shining a blue (or borderline UV) LED onto a phosphor, which then lights up "white". The phosphor is the yellow dot you see on white LEDs. I got a big one from eBay.
I figured the LED phosphor might serve as a spinthariscope phosphor, and you could scavenge one from an old LED light bulb, but apparently the phosphor is of a different material.
Scavenging glass lenses works
One of the goals of the project is to build a high quality kit, something that you could use to learn optics as a kid, do experiments in high school, perhaps do research in college, and then give to your own children when they are old enough.
To that end, we're trying to use glass lenses, filters, and so on. Plastic lenses get scratched, fog up, and crack from sunlight. There are any number of cheap plastic optics kits you can buy, and they inevitably end up in yard sales or at the dump.
Another goal of the project is that it should be inexpensive, and glass lenses are not in that category. A glass lens on eBay will cost around $10 apiece, and you need six or so to do experiments.
For the project we are recommending that the student scavenge parts wherever possible. Check craigslist, yard sales, flea markets, and the local dump, look for the old slide projector, film projector, cameras, and so on. Is it possible to scavenge glass lenses?
As it happens, it's pretty easy.
![]()
In two weeks without any effort, just keeping an eye out for optics in my daily routine, I managed to collect:
- A microfiche reader (lenses, target)
- A scanner (prisms, front surface mirrors)
- Two camera lens attachments (lenses, irises)
- Two cameras (lenses, mirror)
- A telescope (eyepiece, eyepiece lenses, barlow lens, mirrors)
The only thing I actually paid for was the telescope ($10), and that was only because I thought it would make a good project piece.
(It turns out that 4.5" telescopes are useless for astronomical observations, so I dropped that idea. More lenses for the kit!)
Enough glass lenses and mirrors for 3 kits, with lenses left over!
I live in cow-town New Hampshire, so I expect most students will be able to scavenge glass lenses with little or no effort.
I'm planning on disassembling everything and documenting the process (and noting what you would hope to find), so people will know ahead of time what to look for.
-
Heirloom optics kit
05/11/2016 at 19:41 • 0 commentsHackaday Blog Entry
The project got a blog entry on Hackaday, and this gave us some interesting feedback and useful information.
Reading through the comments, one thing that stood out was many people had an optics kit growing up, usually with molded plastic lenses. These are obviously meant for kids, the kids grow out of them, and the lenses get all scratched and foggy.
Heirloom Optics SetTaking inspiration from the Heirloom Chemistry set, we're envisioning the optics bench as a quality product that you might use as a college student, perhaps use at home as a gentleman scientist, and then give to your teen-age children so they could learn optics.
We're trying to make a kit that has low-level learning experiments as well as high-end setups that can be used as part of an experimenter's kit.
(We're not planning on making an actual product, though it's sometimes useful to think in those terms to help set the scope and prioritize the tasks.)
We're also trying to come up with ways to scavenge the components so that people who are on a budget can build the kit for little or no money. For example, you can take apart an old scanner/printer and recover some glass front-surface mirrors and possibly a prism.
Inkscape doesn't do CAD files very well
It turns out that Inkscape has problems with CAD files. It doesn't understand the POLYLINE construct (common in DXF files), converts bezier curves to lines, and doesn't output paths very well. When we import the resulting files, we have to "unite lines" on our laser cutter to consolidate line segments into paths.
This isn't a problem for us (several team members use high-end CAD programs), but we need to recommend something for end users to use and as a basis for wiki descriptions. For example, we recommend tuning the magnet holes to compensate for inaccuracies in their laser, and have a descriptive narrative that walks the user through doing this.
So we're looking to QCad. Selecting and scaling a feature (magnet hole, for instance) seems to be simple, QCad is free, and runs on all platforms.
Our laser is Inaccurate
Our laser cutter got tuned by the resident laser expert, and this is causing some trouble with the holders.
(This is not a problem, we recommend that the end user make test cuts and modify local copies of their files as needed. It's not hard, there are only a few features, and they might not need to be modified.)
This got me to thinking about our laser: we're making assumptions based on perfect cuts, but we don't know how perfect our cuts actually are.
For example, the 6mm magnet holes are actually 5.9mm to make a strong friction fit. This works for our laser, but now I'm wondering if that's specific to our laser.
So I'm going to go over everything in the files and holders with a micrometer and my AWG drill set to determine what the correct scale differences should be.
The plan is to design files that assume a perfect cut, since that's the design most likely to be correct for the end user, then advise them to make test cuts and adjust as needed.