 SimpleTronic
Part-1 Video :
This Part-1 video focuses on the circuit operation and basic program flow.
Part-2 Video :
This Part-2 video focuses on a "good looking" enclosure example.
Materials :
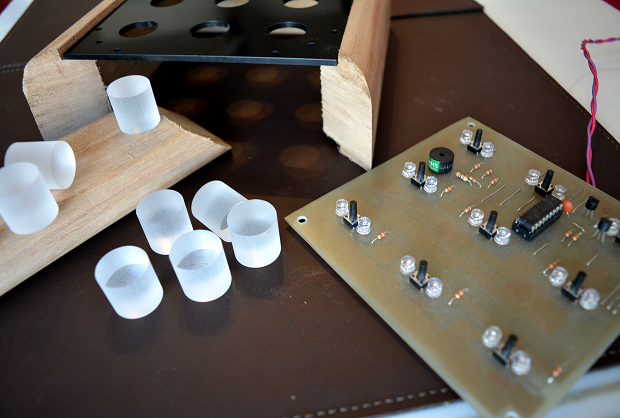
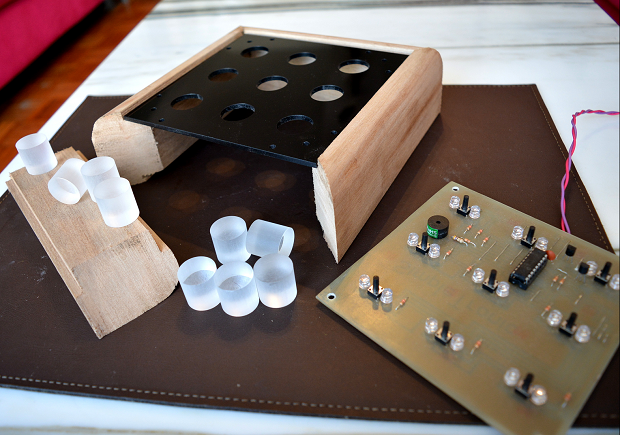
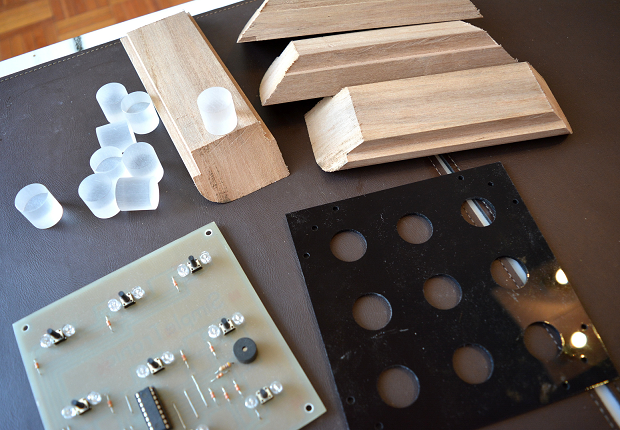
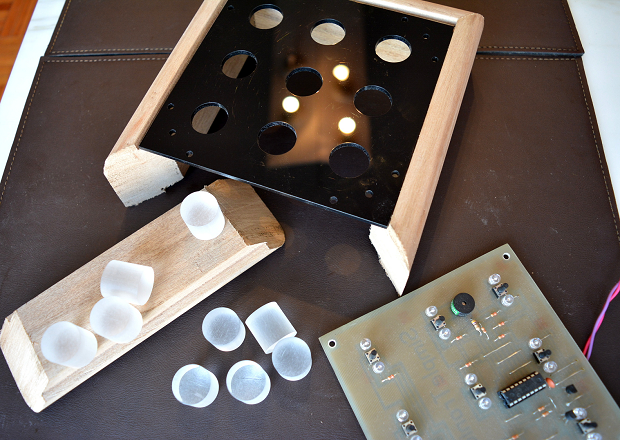
Basic materials are:
1)Wood moulding for frame (details later)
2)Acrylic buttons (details later)
3)Acrylic top panel (laser cut)
other materials: circuit board & components, bottom cover, 3 AA cell holders, nuts&bolts, screws, varnish, glue etc.
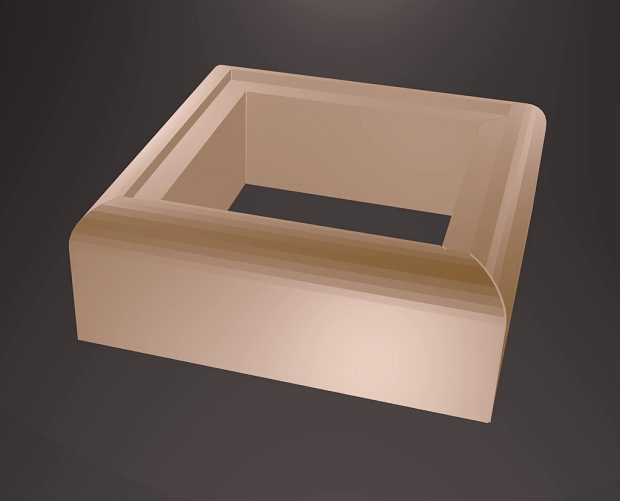
Wood Moulding :
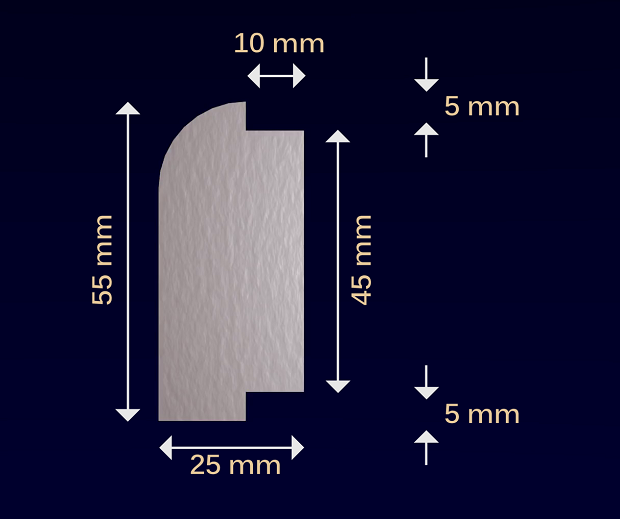
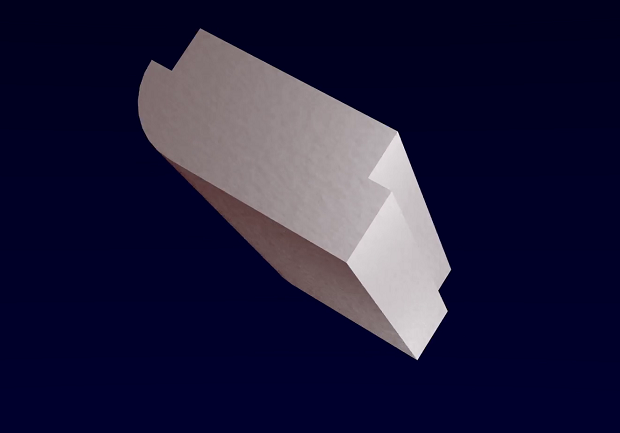
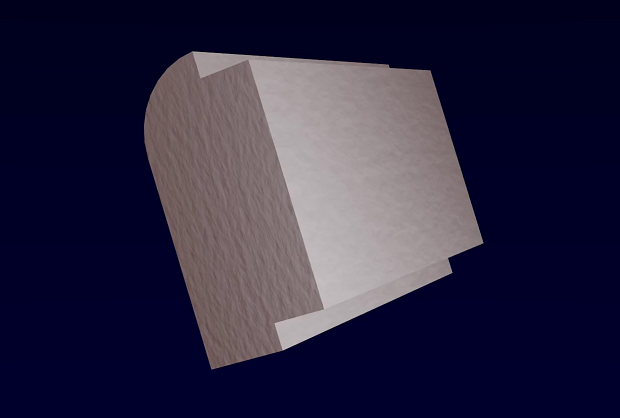
Cross section dimensions of the moulding for the enclosure frame.
Frame Assembly :
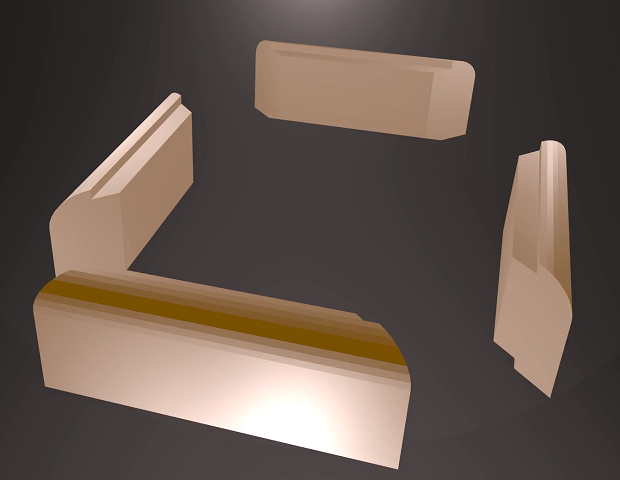
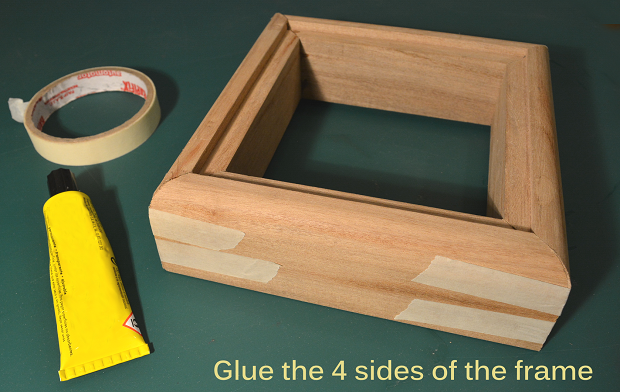
Cut 4 sides of frame at 45° angle on ends. Edge where panel rests should be 142 mm long. Glue parts together and hold in place with masking tape. Verify right angles.
Acrylic Top Panel :
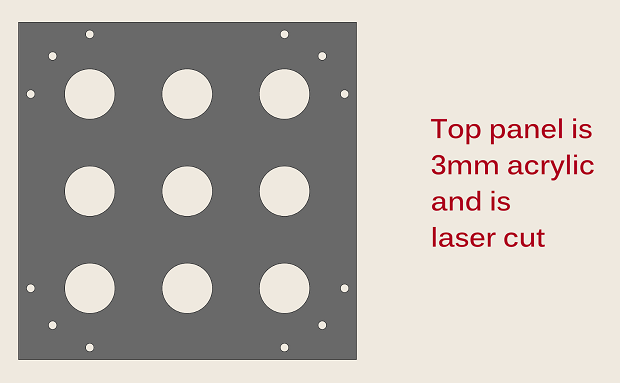

Download .CDR (corel draw) file for laser cutting of top panel. Panel is fastened to frame with 8 wood-screws.
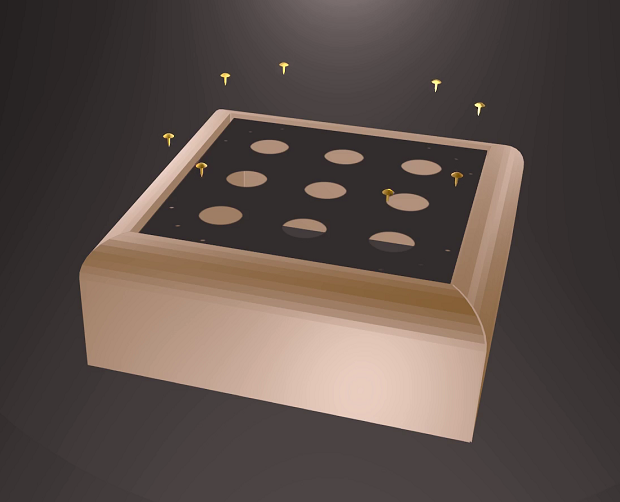
PCB Board to Top Panel :
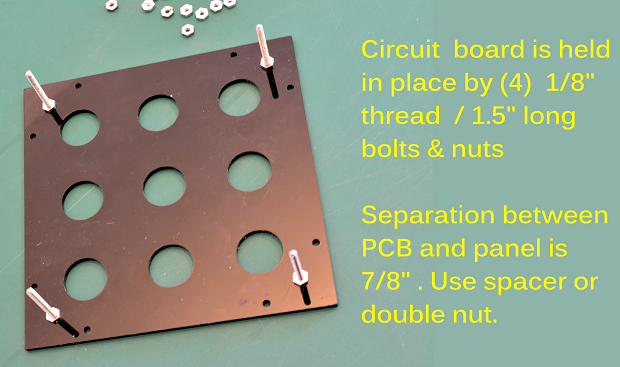
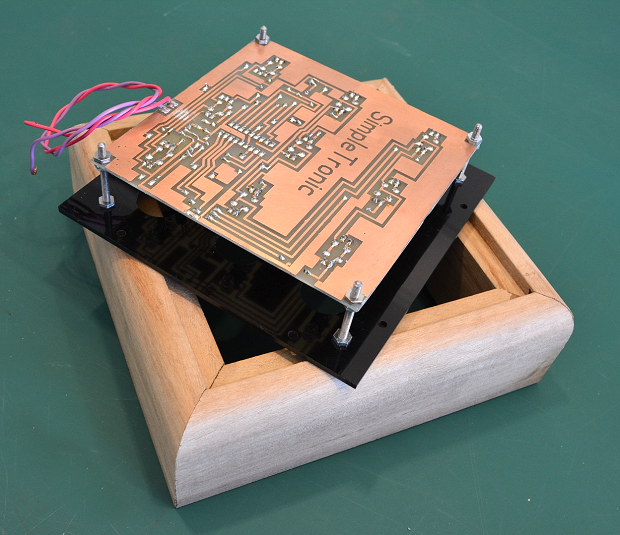
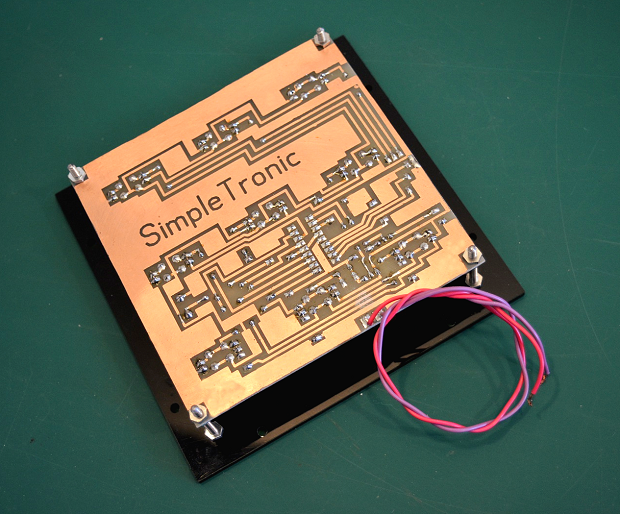
PCB is attached to panel with (4) 1/8" thread, 1.5" length bolts & nuts. Clearance between PCB and panel is 7/8". Use spacers or double nut.
Acrylic Buttons :
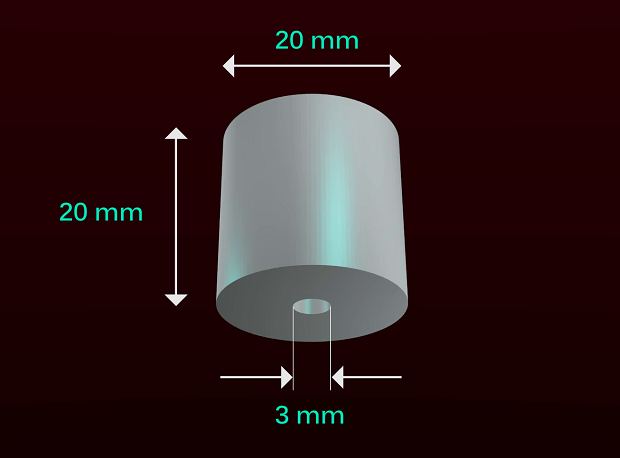
Acrylic buttons are cut from 20 mm diameter transparent acrylic rod. Button length is 20 mm. All faces have a frosted finish for light diffusion, except the bottom face where LED light enters which is polished. Drill a 3 mm diameter & 3 mm deep hole on bottom face to fit the switch stem. Use a little silicone glue if necessary.
Battery Holders :
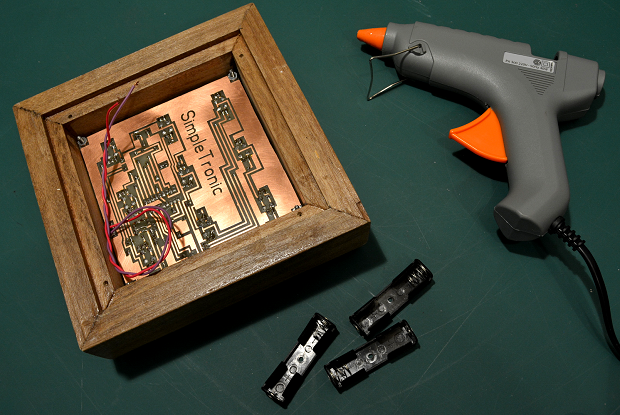
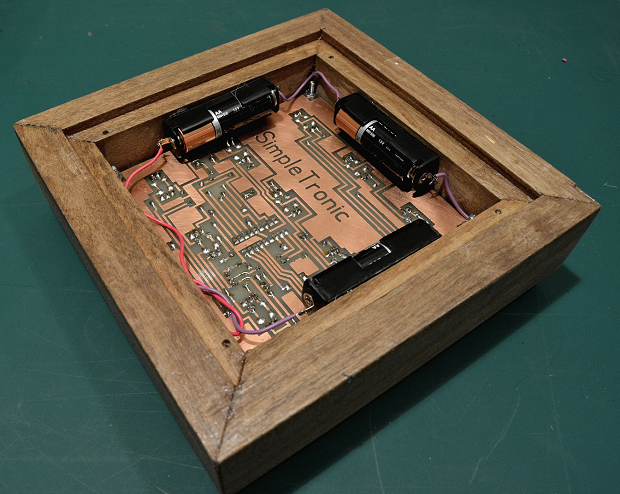
Glue the (3) AA cell holders around the inside of frame.
Bottom Cover :
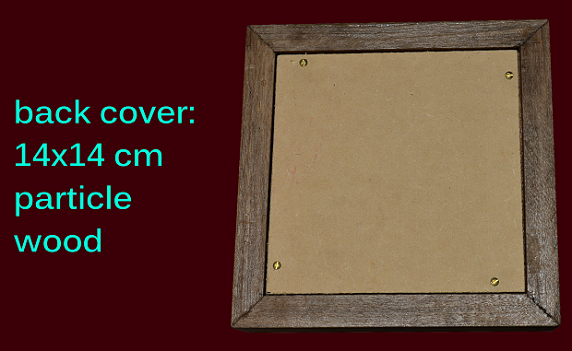
3 mm thick, 140 mm x 140 mm particle wood.
Game :
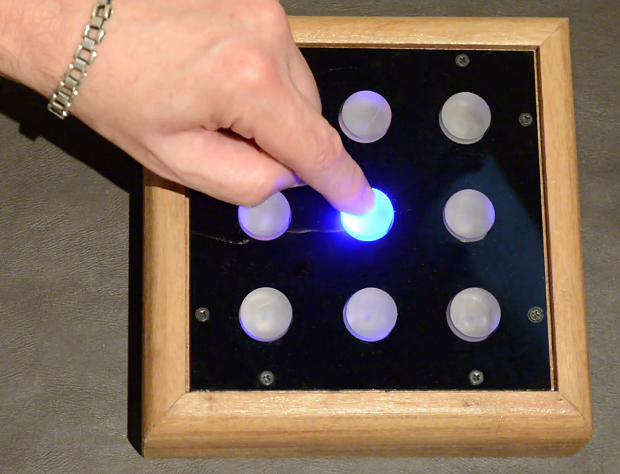
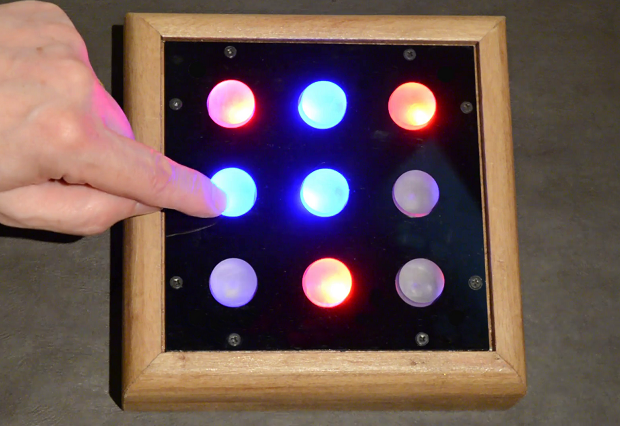
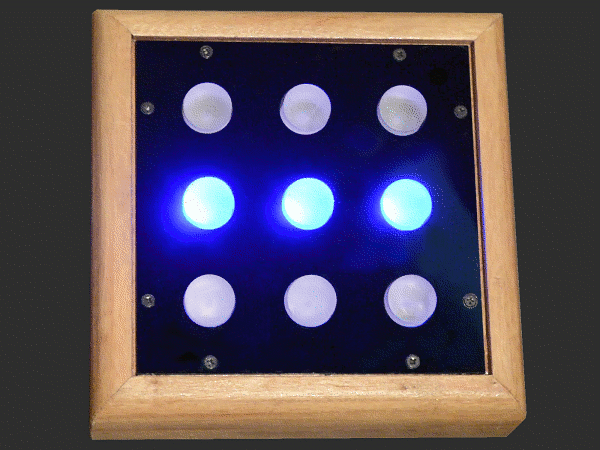
Wake : Press center button. After splash, all buttons flash 3 times with player 1 color.
Reset : Press center button for 2 seconds anytime.
3-in-a-row : Winning pattern blinks. Reset with middle button.
Sleep : Game shuts down after 20 seconds of inactivity.
Links :

PCBoard & Hex code: https://goo.gl/2WcVBM
Top panel corel CDR: goo.gl/arD1j3
Part 1 video: https://youtu.be/DVL3ryTkjgI
 Gertlex
 Jon
Jon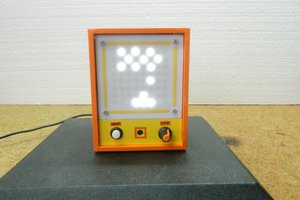
 mircemk
 Chris Gervang