 Danny Caudill
Here are the major components:
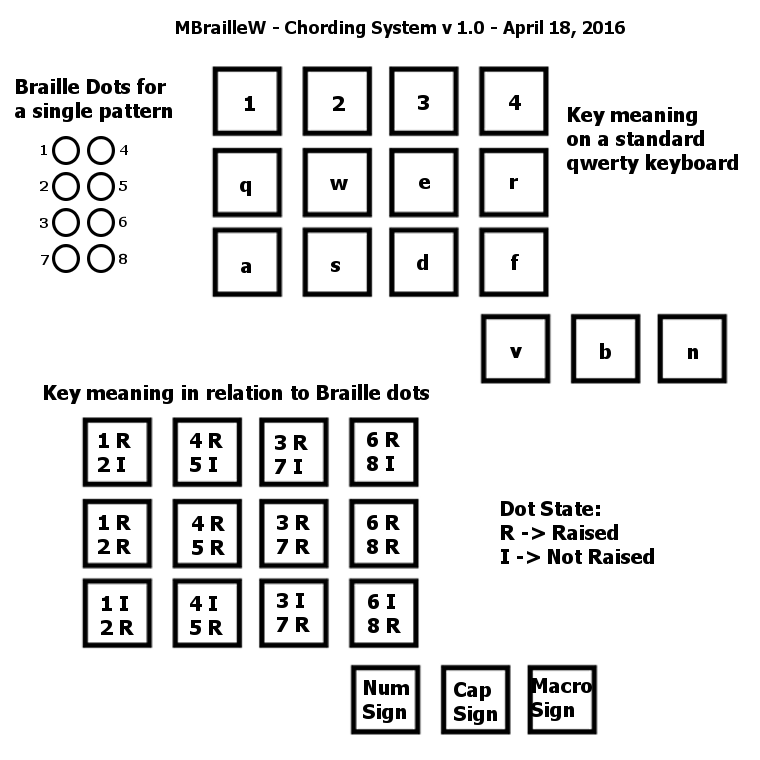
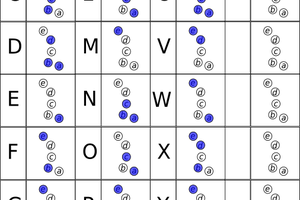
- Open Source Software for using a standard qwerty keyboard to enter Braille-inspired chords with only 1 hand. (MBrailleW Chording Software). I have the beginnings of a plan to make the chords easy to remember by those who already know Braille. A large chunk of this project will involve refining those chords and writing the code to make it work.
- Open Source Hardware for a custom keyboard for entering Braille-inspired chords with only 1 hand (designed to be a bit quicker amen more ergonomic than a standard qwerty keyboard). (MBrailleW Chording Hardware). The same software mentioned above will work with the custom hardware, since it simply masquerades as a HID-compliant keyboard.
- Open Source software/hardware solution for presenting a single line of Braille text for reading by touch using a custom embossing surface. A computer sends one line at a time to the embossing surface (likely 25 characters), which reconfigures itself to the proper Braille patterns. When users are finished reading that line, they simply press a button on the right side of the line, and the next line is sent from the computer. By the time the user repositions a finger to start the next line, the surface is already reconfigured. (MBrailleW one-line embossing surface). My initial approach is to use low-pressure compressed air (think Aquarium Pump), along with a series of electrically controlled valves. Each dot will effectively be a small balloon. For 25 characters with 8 dots each, that will require 200 air valves. Researching those valves will be the largest challenge for this portion of the project.
- Open source hardware for embossing Braille onto a sheet of paper. By taking advantage of the embossing surface (mentioned above) that presents a single line at a time, this printer will emboss entire sheets of paper. (MBrailleW embossing printer).

 Patrick Tait
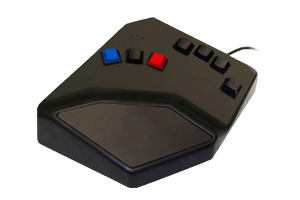
 Big Boy Pete
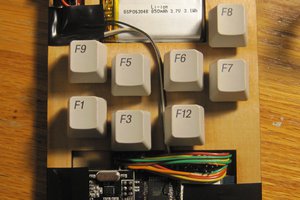
 Owen Trueblood
 Eric Jacob