 Kate Reed
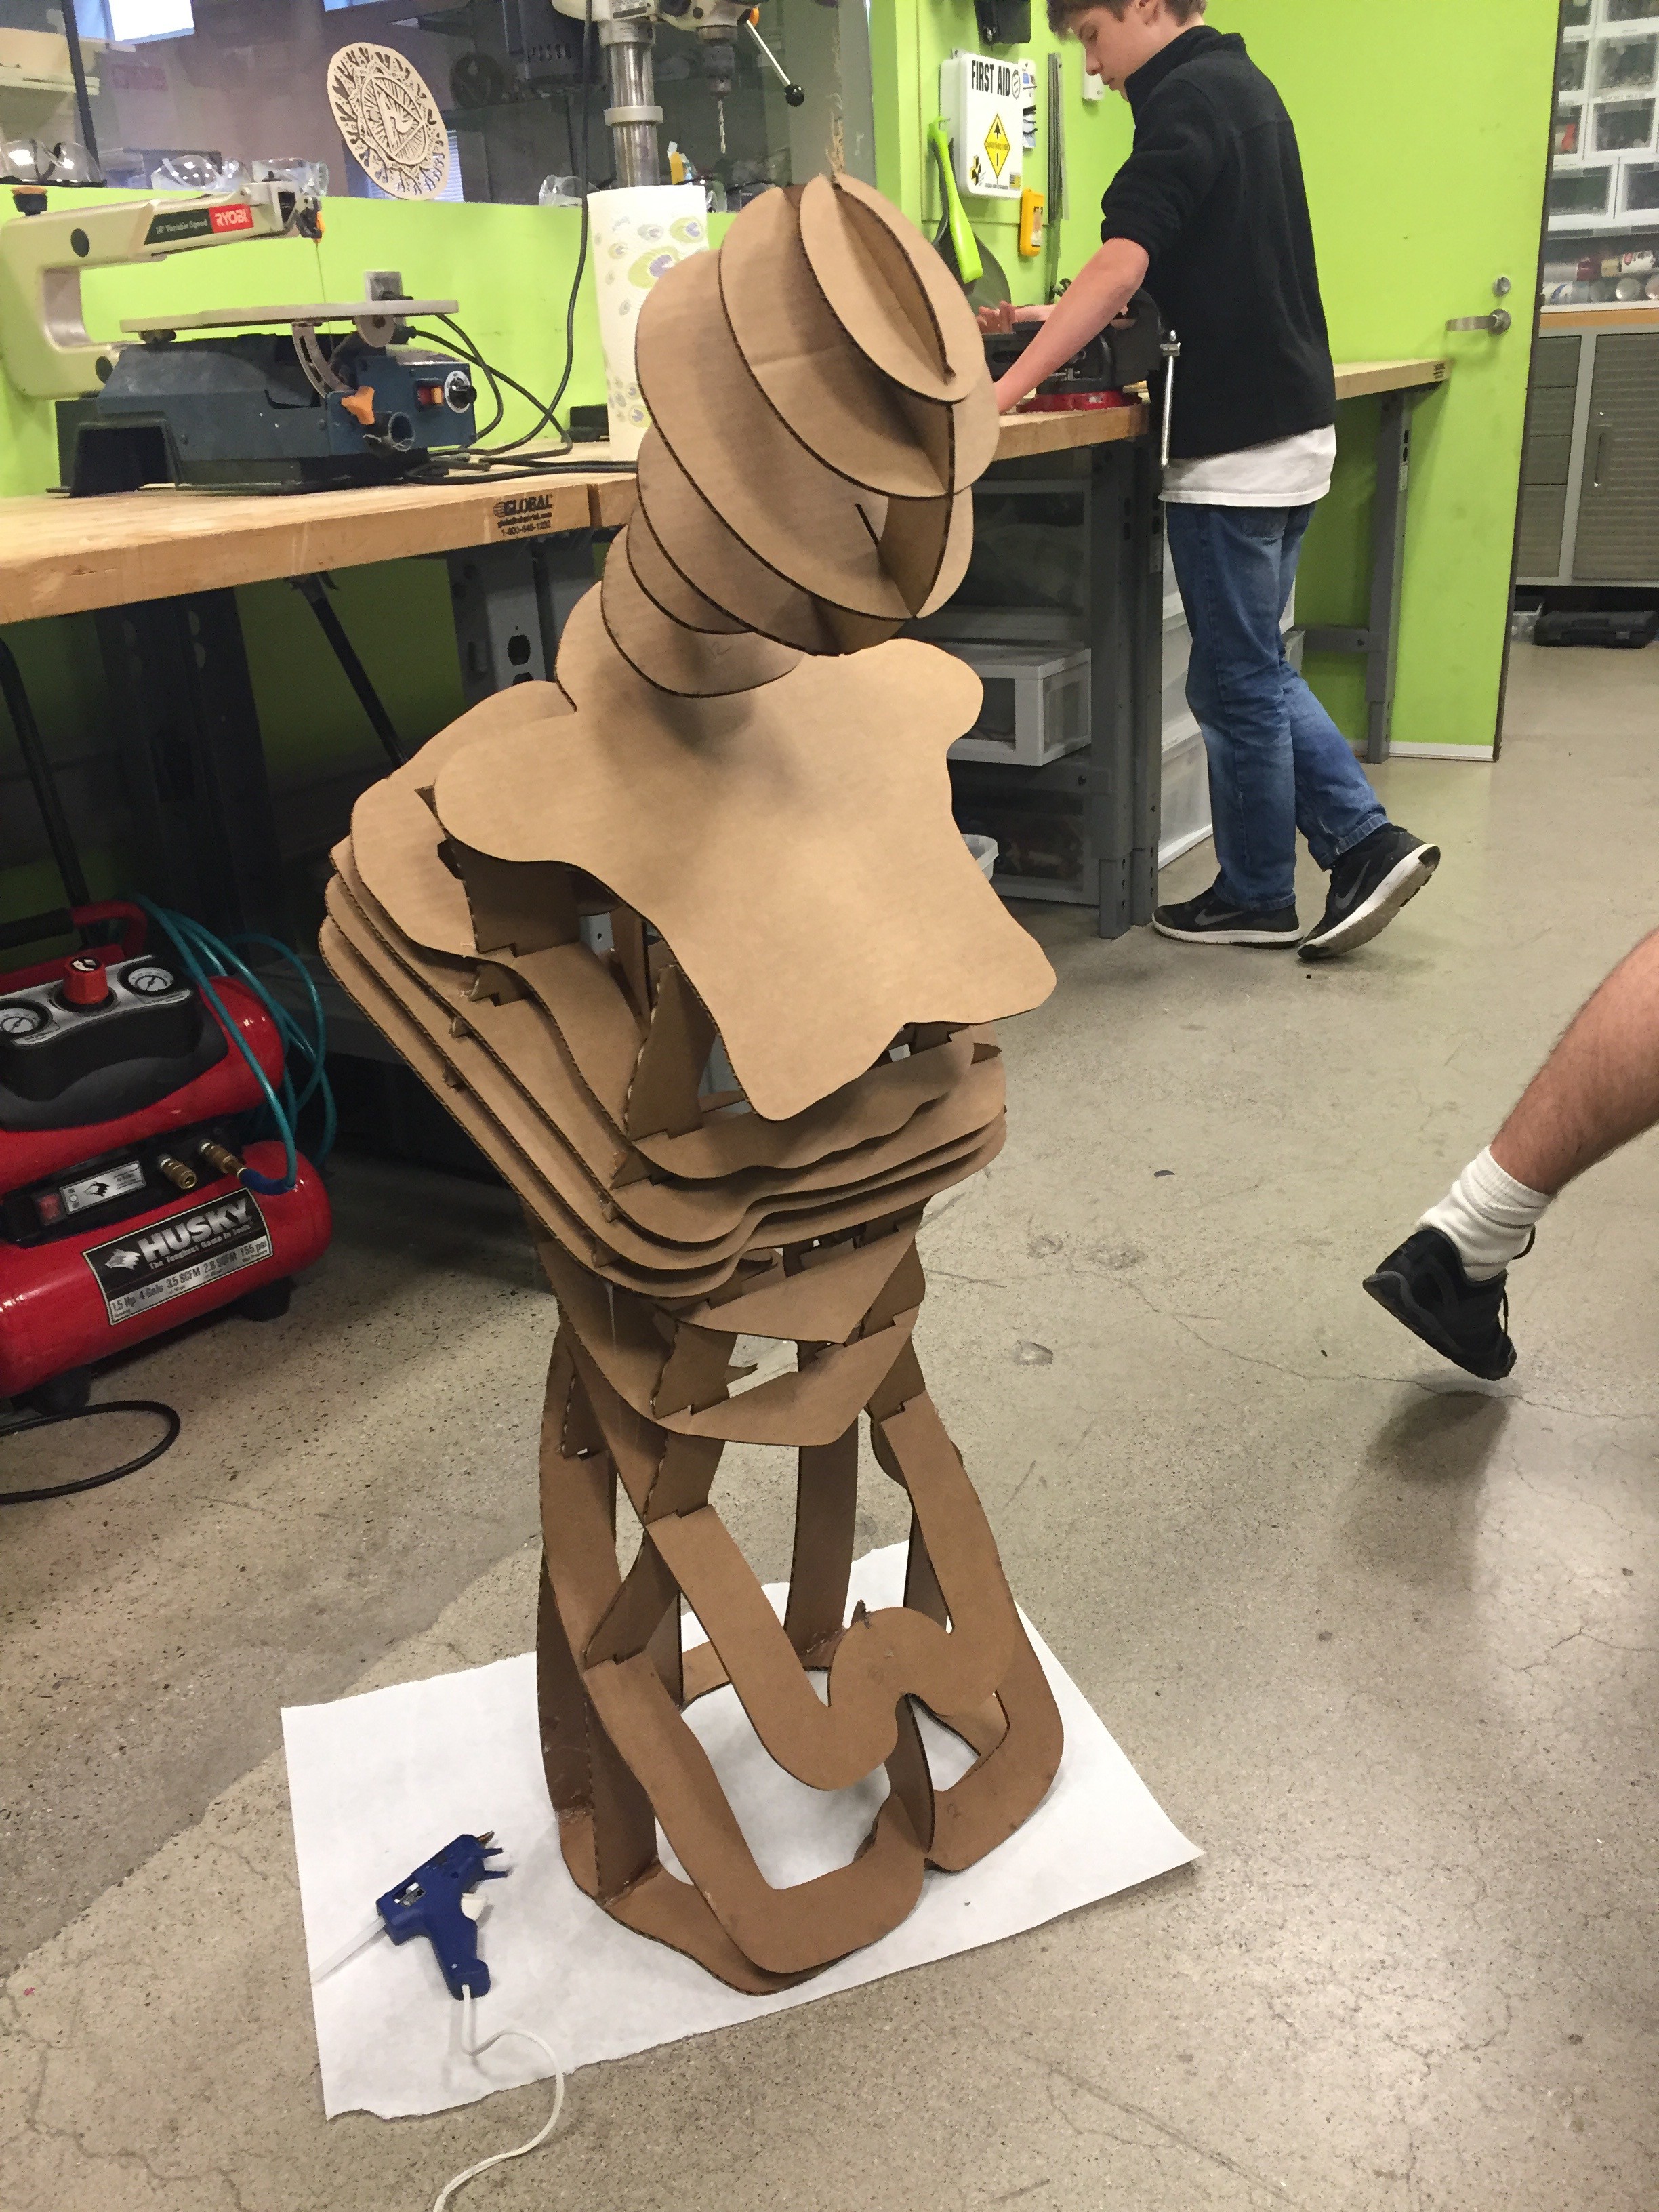
Once I felt like I had my design for Invisible all squared out, I decided to cut a cardboard model first, just to be safe. I was nervous about cutting the acrylic because it’s so expensive, and thank goodness I waited! I learned a lot while assembling the cardboard model.
For my first step in assembling, I started gluing the supports to the base piece of Invisible, then tried to hook each of the layers into the supports. I quickly realized that this was not going to work. Each layer was a different size and each layer was supposed to lock into place, and because of this it was impossible to add any layer on while the vertical supports were glued in place. I l figured out that I needed to put all the layers on one of the vertical supports, then add the vertical supports one at a time. It was very stressful because each time I had to add a vertical support, the process of getting it in the right place would pull the other supports out of line. I ended up enlisting an extra set of hands for holding pieces in place.
After 45 minutes of ripped cardboard, glue gunning and stress, I finally had the cardboard model finished. All of the pieces fit together just as I expected them too. However, I did notice that when I went to show it off, as soon as I sat the sculpture down, the head started to wobble. It became clear that the head was too fragile and needed some supports. I designed some head supports, and switched out the wobbly parts. I also added a support between the legs, which really helped the structure stand up.
With the cardboard model made, it was clear that the more vertical supports I could have, the better.

Discussions
Become a Hackaday.io Member
Create an account to leave a comment. Already have an account? Log In.