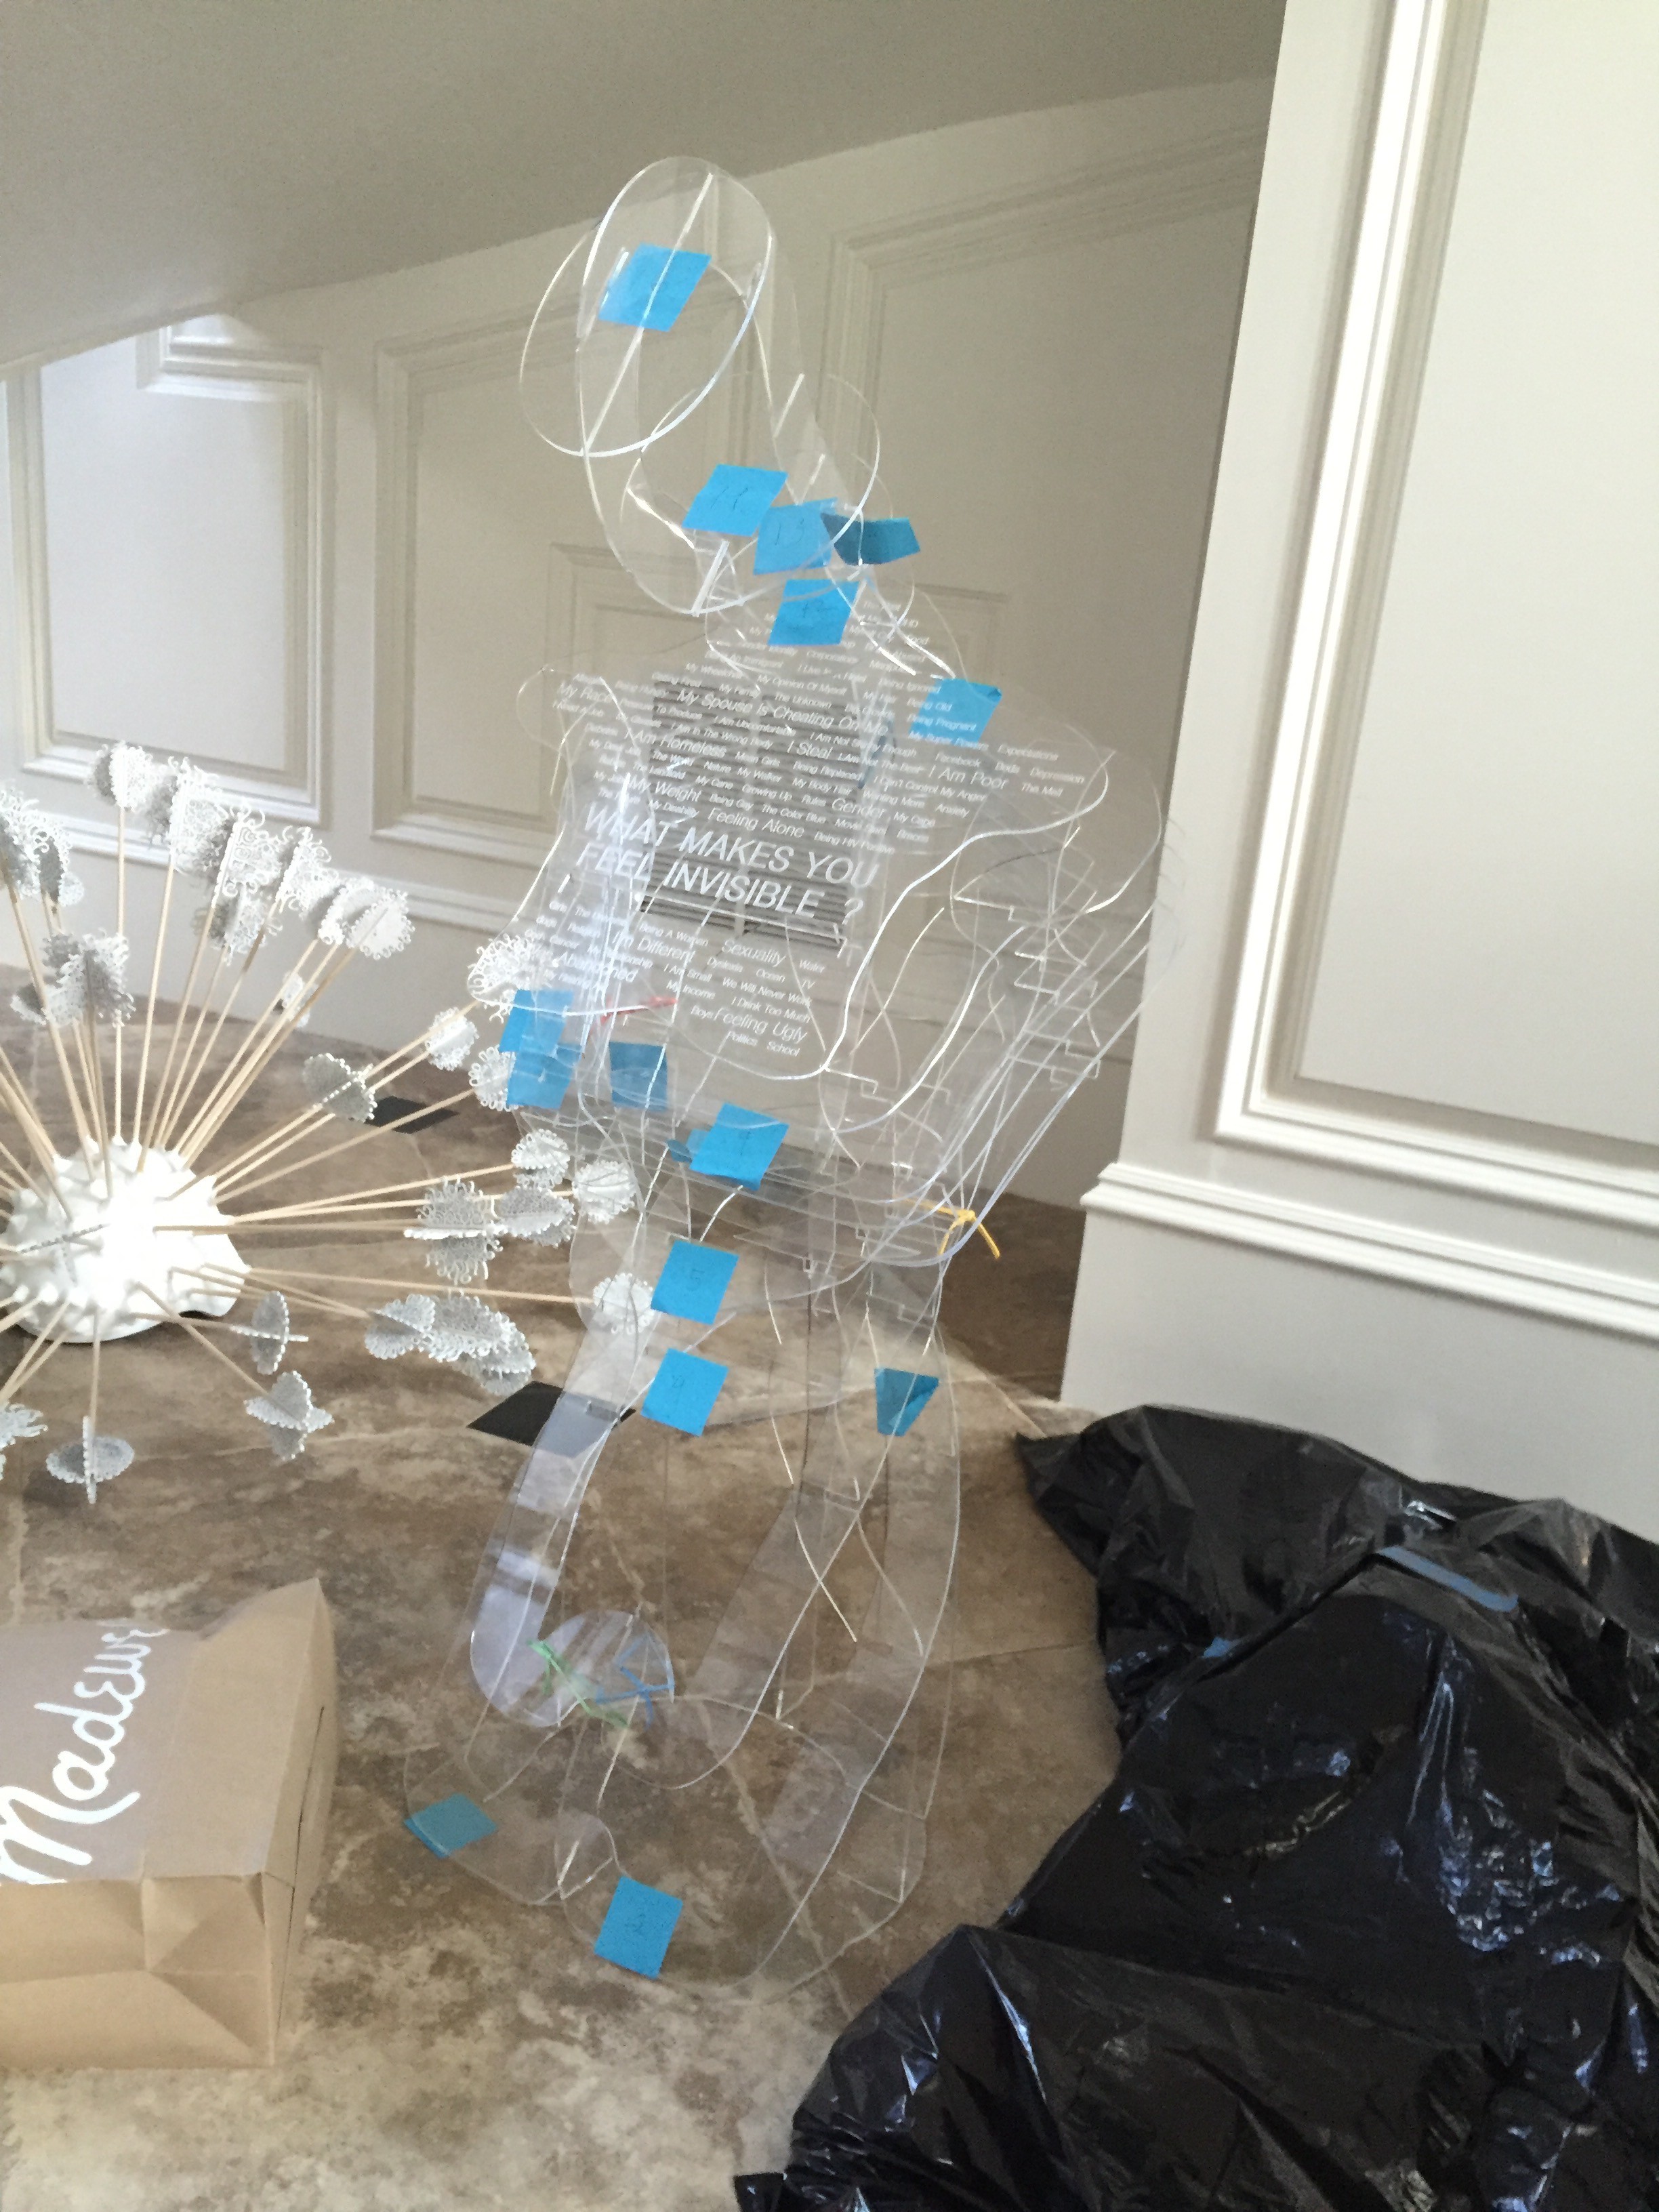
With all of the pieces in place, it is finally time to cut the Invisible sculpture out of the clear acrylic! I double-checked my measurements several times, just to be sure, and now it is ready to cut. I spent a few hours trying to pack all of the pieces as tightly as I could on each sheet of acrylic, so that I can laser cut them in the most efficient way possible. I was able to arrange the pieces so that I can cut out one sculpture from two big sheets and one little sheet of acrylic.
Once I had the pieces cut out, I had to keep them as safe as possible to transport them so they wouldn’t get scratched, cracked or break. When I had the pieces safely at home on my rug, I started to take off the paper coating on the acrylic and lay all the pieces out. I labeled each part with a sticky note so that I could keep them in the right order. I kept loosing pieces on the rug because they were all transparent. They were, literally, invisible.
I realized that I had forgotten to cut one of the pieces out of the acrylic. I went ahead to start assembling the sculpture anyway, thinking I could add the piece later, but about ten minutes in, I realized that I couldn’t assemble the pieces out of order, and I would have to wait until I had the last piece.
A few days later I went to assemble the sculpture again, this time with all of the pieces in order. It is definitely a two-person job assembling invisible. My mom was holding up the spine, as I started to string each layer and lock it into place on the spine. One by one we started adding in the vertical supports, as we would squeeze the whole sculpture to keep the pieces in place. Once we got to the chest piece though, we ran into a problem because there wasn’t enough support to hold it up. I missed this on my cardboard model because the cardboard was so light it didn’t really need much support. Luckily this wasn’t a difficult fix, I just needed to add a notch in two of the vertical supports, and then it could notch into the slot for the holes.
Wanting to salvage the acrylic supports we already had, we tried to cut the notch by hand, which was not an easy thing. We got our Exact-o Knife out and tried to saw through the acrylic, which didn’t work so well. We then started heating up the Exact-o in a candle and melting through the acrylic, which worked better. It was a very long process cutting the corner notch out of the acrylic. Once we finally got it cut, it did not look pretty so we had to sand down the edges. In the end it didn’t look that bad, but it didn’t look laser cut, and ultimately it didn’t fit in the apple store vibe of the sculpture.
Nonetheless, we put the supports back in the sculpture to see if it would support the chest piece, and it worked just fine. I then went on the computer and added the notch to the design, so that I could re-cut the piece when I got the chance. I decided I didn’t want to glue the sculpture together at this time and wanted to wait for the new laser cut pieces. We moved the sculpture over to a safe place. Just as I was moving the extra pieces of the sculpture over to that same area, I must of bumped something, and the entire sculpture came tumbling down. The chest piece slid out and caused a chain reaction, and all of Invisible went down hard. It was devastating. The entire sculpture was on top of me. I decided that was enough work for one day, piled up the pieces, and walked away.

 Kate Reed
Discussions
Become a Hackaday.io Member
Create an account to leave a comment. Already have an account? Log In.