 bfoz
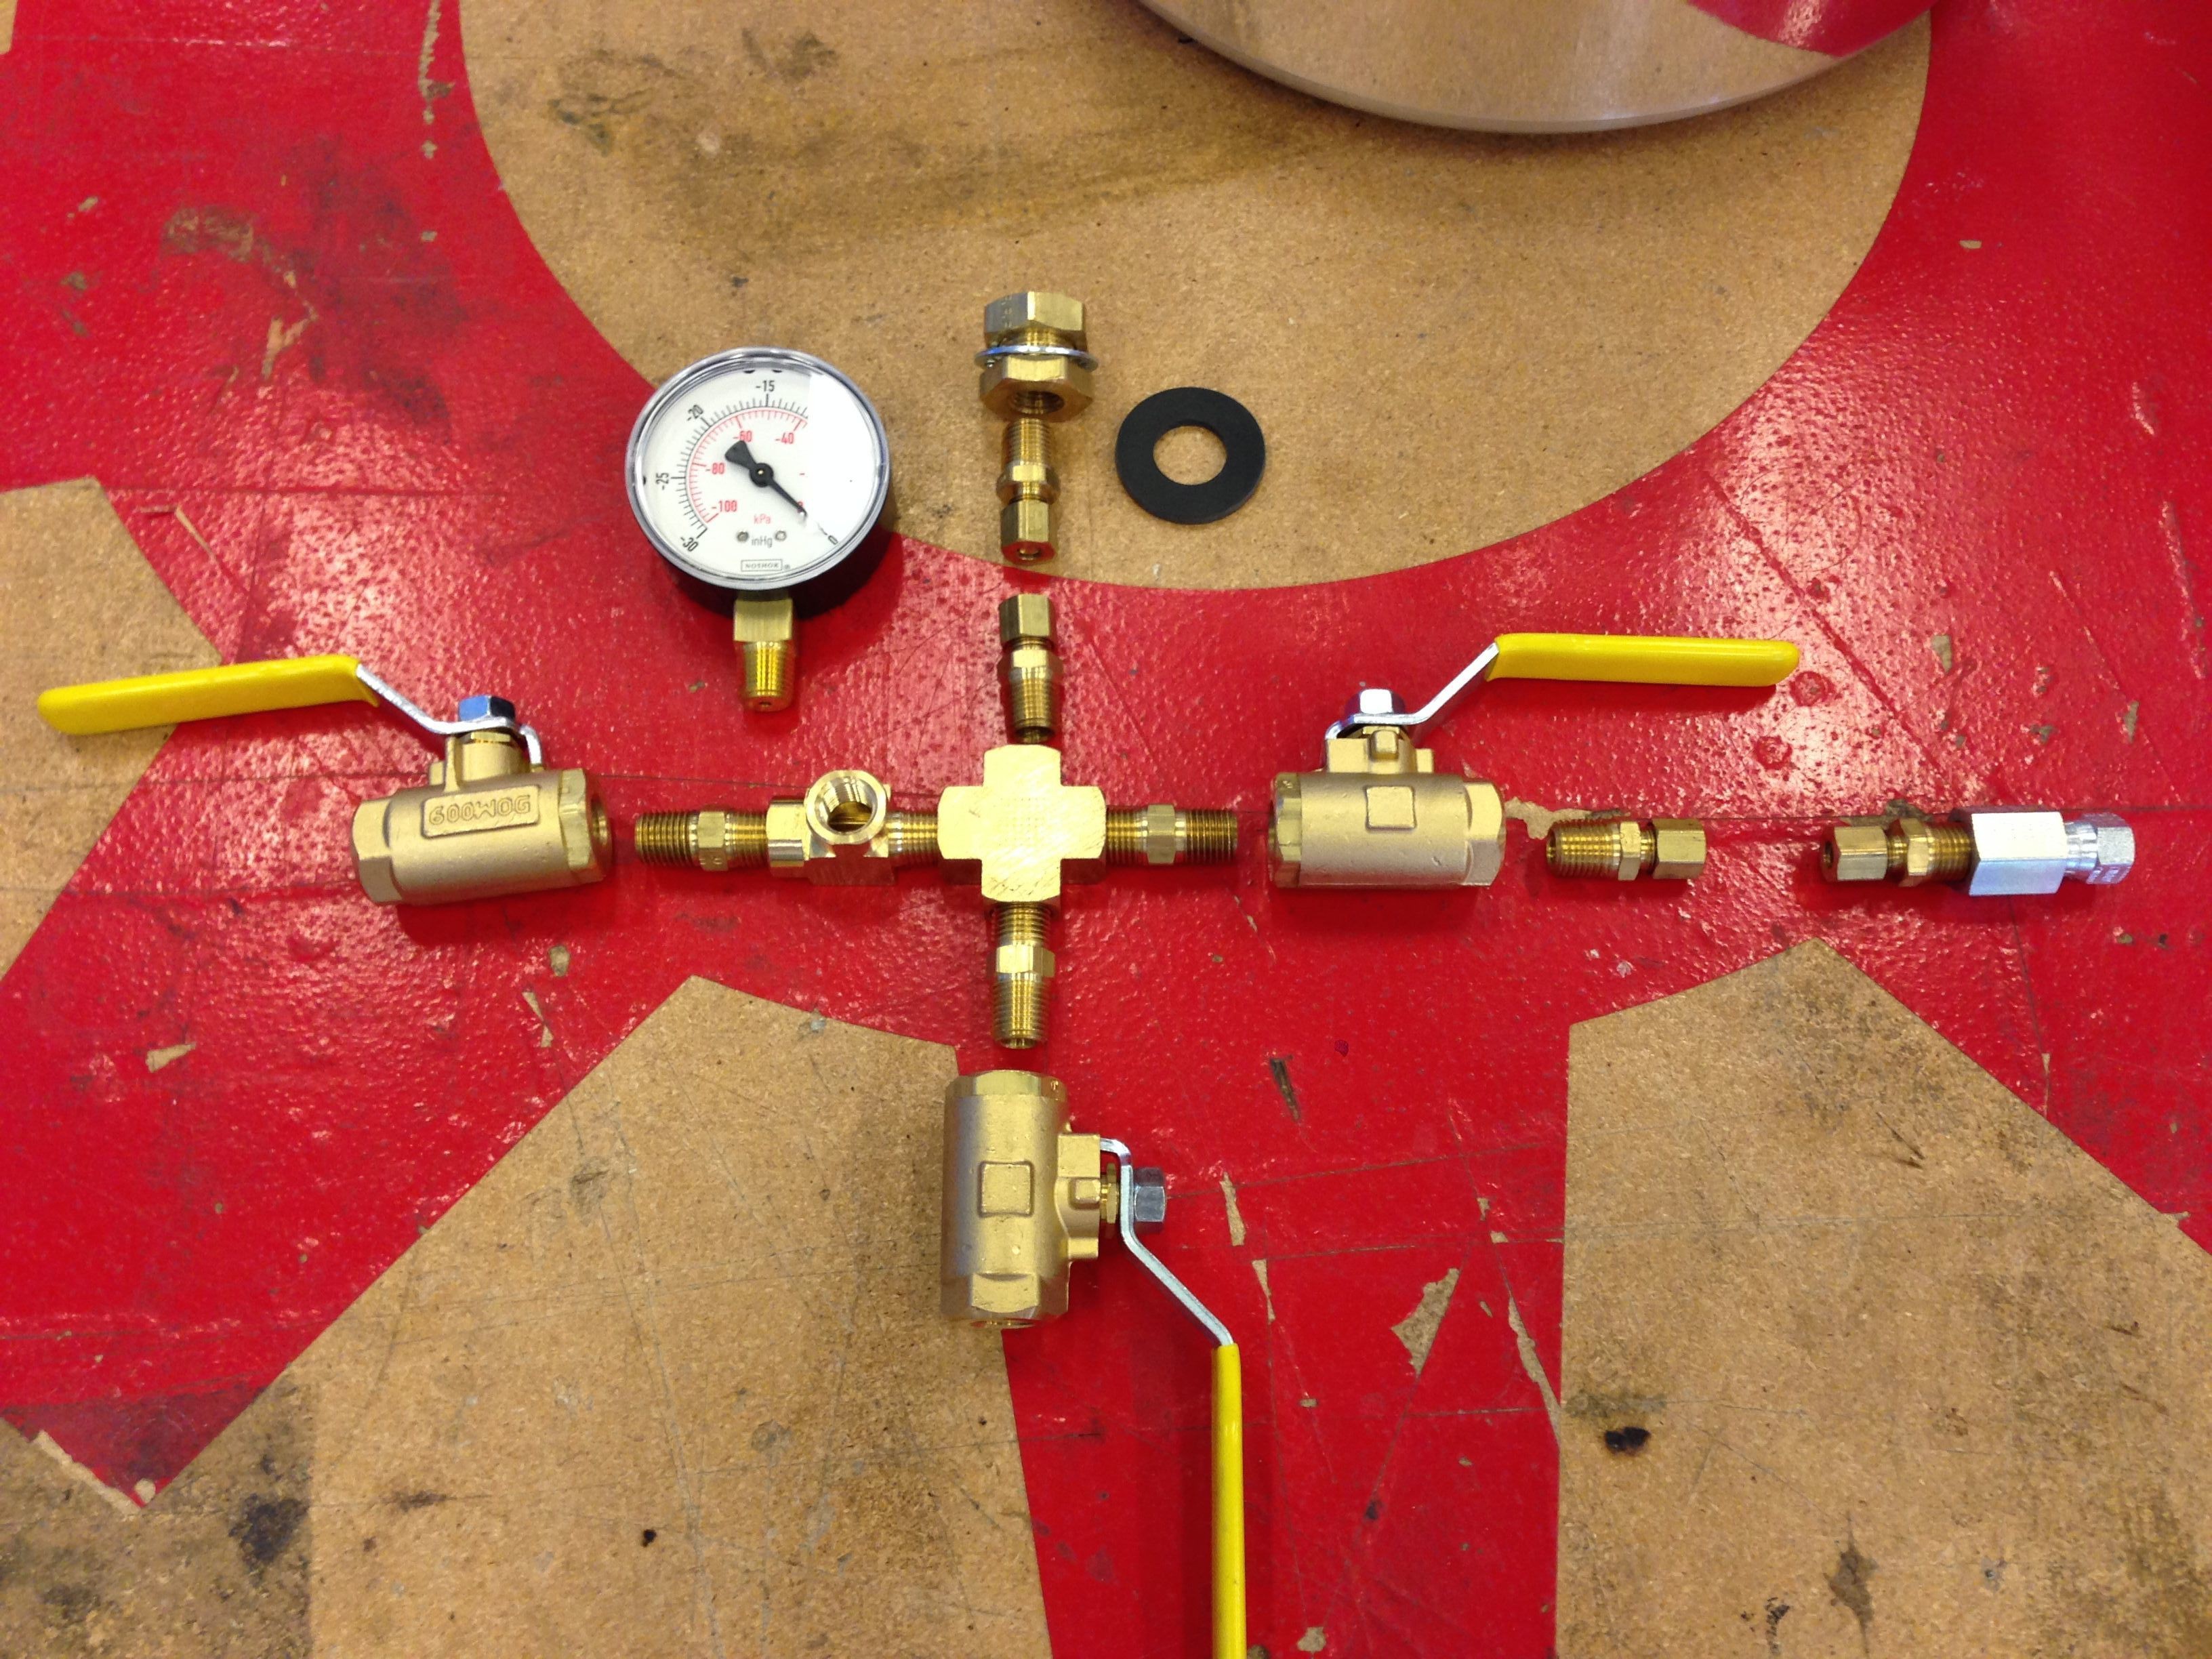
bfozI used a Miro 22-quart aluminum pressure cooker, and a Robinair 15300 vacuum pump. Both were available from Amazon and reasonably priced, but there are plenty of other sources for each. That particular pump comes with 3/8" and 1/4" Flare fittings on the inlet port, which is why I needed a compression-to-flare adapter. If your pump has different fittings, you'll need to use the appropriate adapter.
For the 3/4" drill bit, I used a low-end black oxide bit from the local hardware store. This isn't the best choice for this application, but it's all they had, and I only needed it to work once.
All of the fittings are standard 1/4" NPT brass fittings. I found them at a local supply store, but they're generally available online for about the same prices. I used a cross-fitting as the central fitting in this setup so I would have an extra port for future use. You can just as easily replace the cross with another T-fitting, and use one less ball valve, to save a little money. Fewer fittings means less leakage, and better vacuums, so feel free to remove anything you don't need.


 Inne
Inne
 Tobias
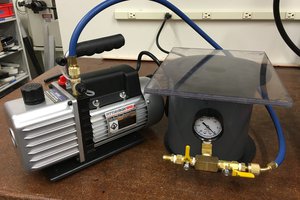
 jupdyke
This is really pretty cool, this can have a lot of viable uses in chemistry :)