 Chuck Glasser
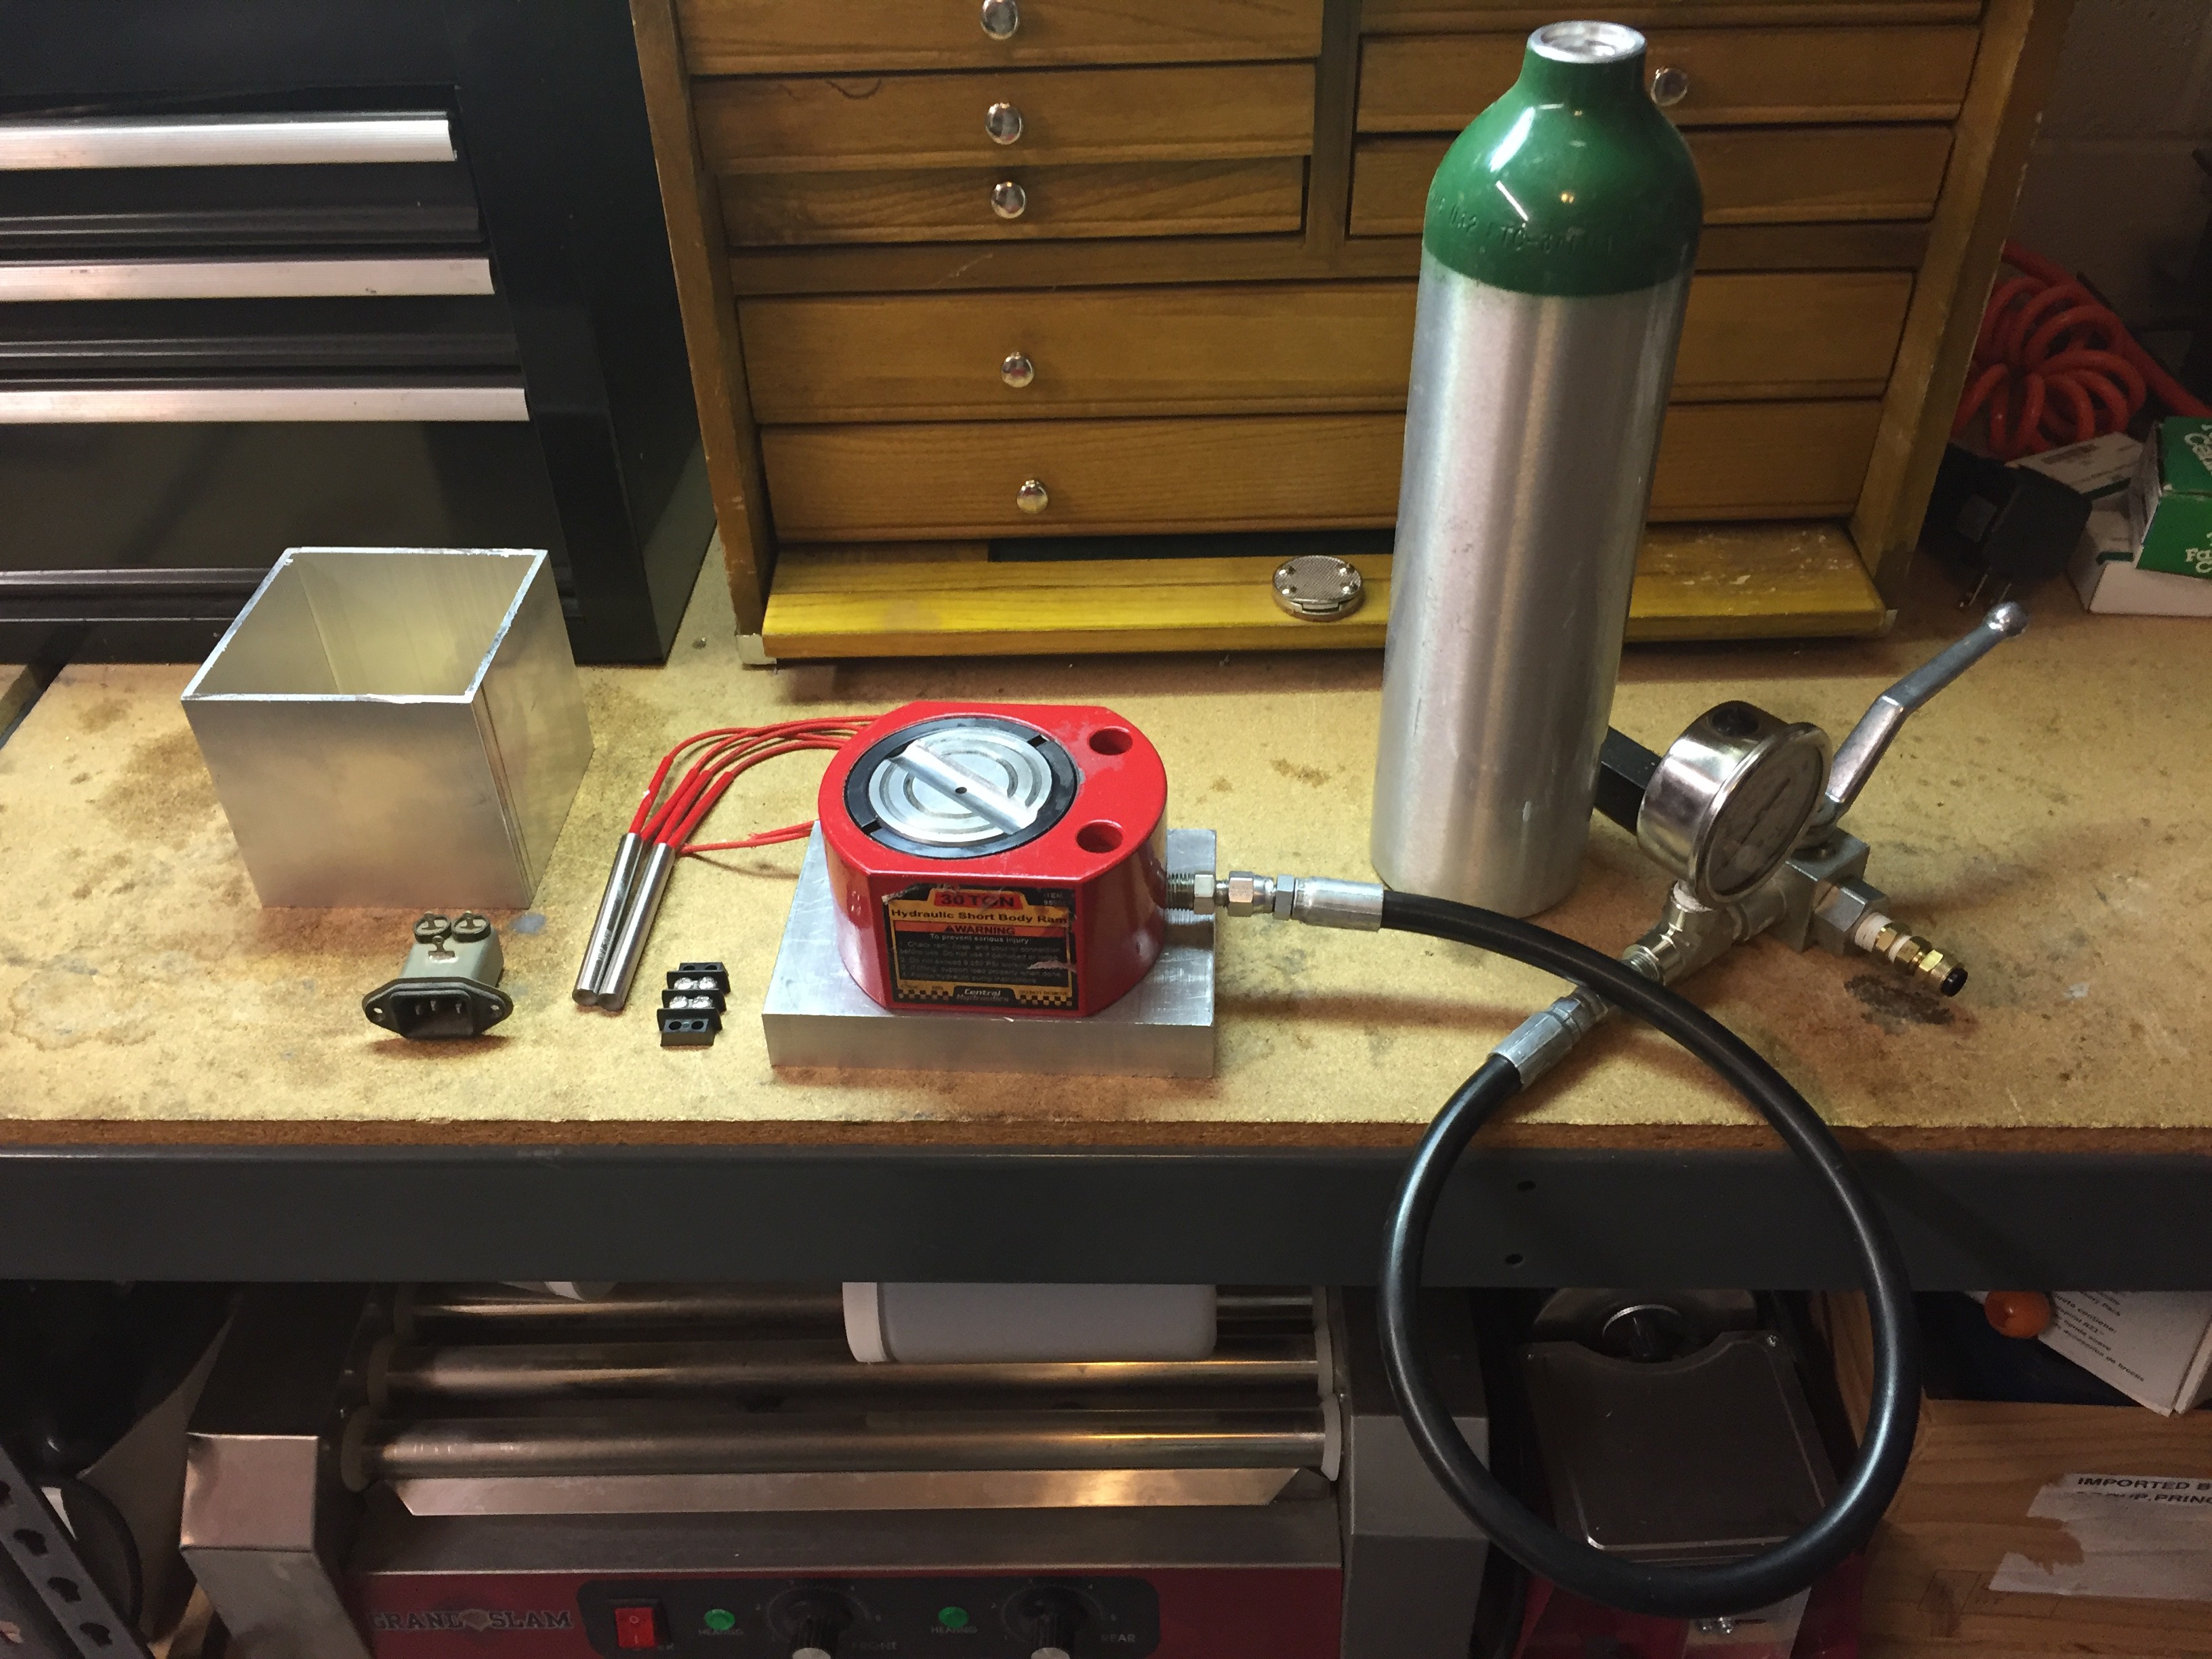
This project didn't start off with a big huge press. Time to go back to basics. I had started off with this Short Jack, 1/2" of lift rated at 9,250 psi, with a piston 3" in diameter. Actually perfect for my needs.
When I initially tried to change the hydraulic fitting it only stripped in the socket wrench that was perfectly sized. So, I got frustrated, and lost interest. Better to spend tons of money, and time on a boondoggle.
With the big press down for some considerable time, and needing to move forward, I took a wrench to the offending fitting and welded it in place. The fitting now came off quite easily, with only a bit more torque that would previously strip the fitting. No tool, the wrench, has ever been so enthusiastically destroyed.
Even more important, these jacks are really inexpensive! New parts cost, jack, hoses, fittings, hydraulic pump. Around $250. This seriously improves the odds of overall project success!
Also, of some considerable importance is understanding why it is necessary to use a screen when printing the conductors. The simple answer is that with a screen in place the ink can only go in one direction, Z.
Here's the new press . Isn't it beautiful!
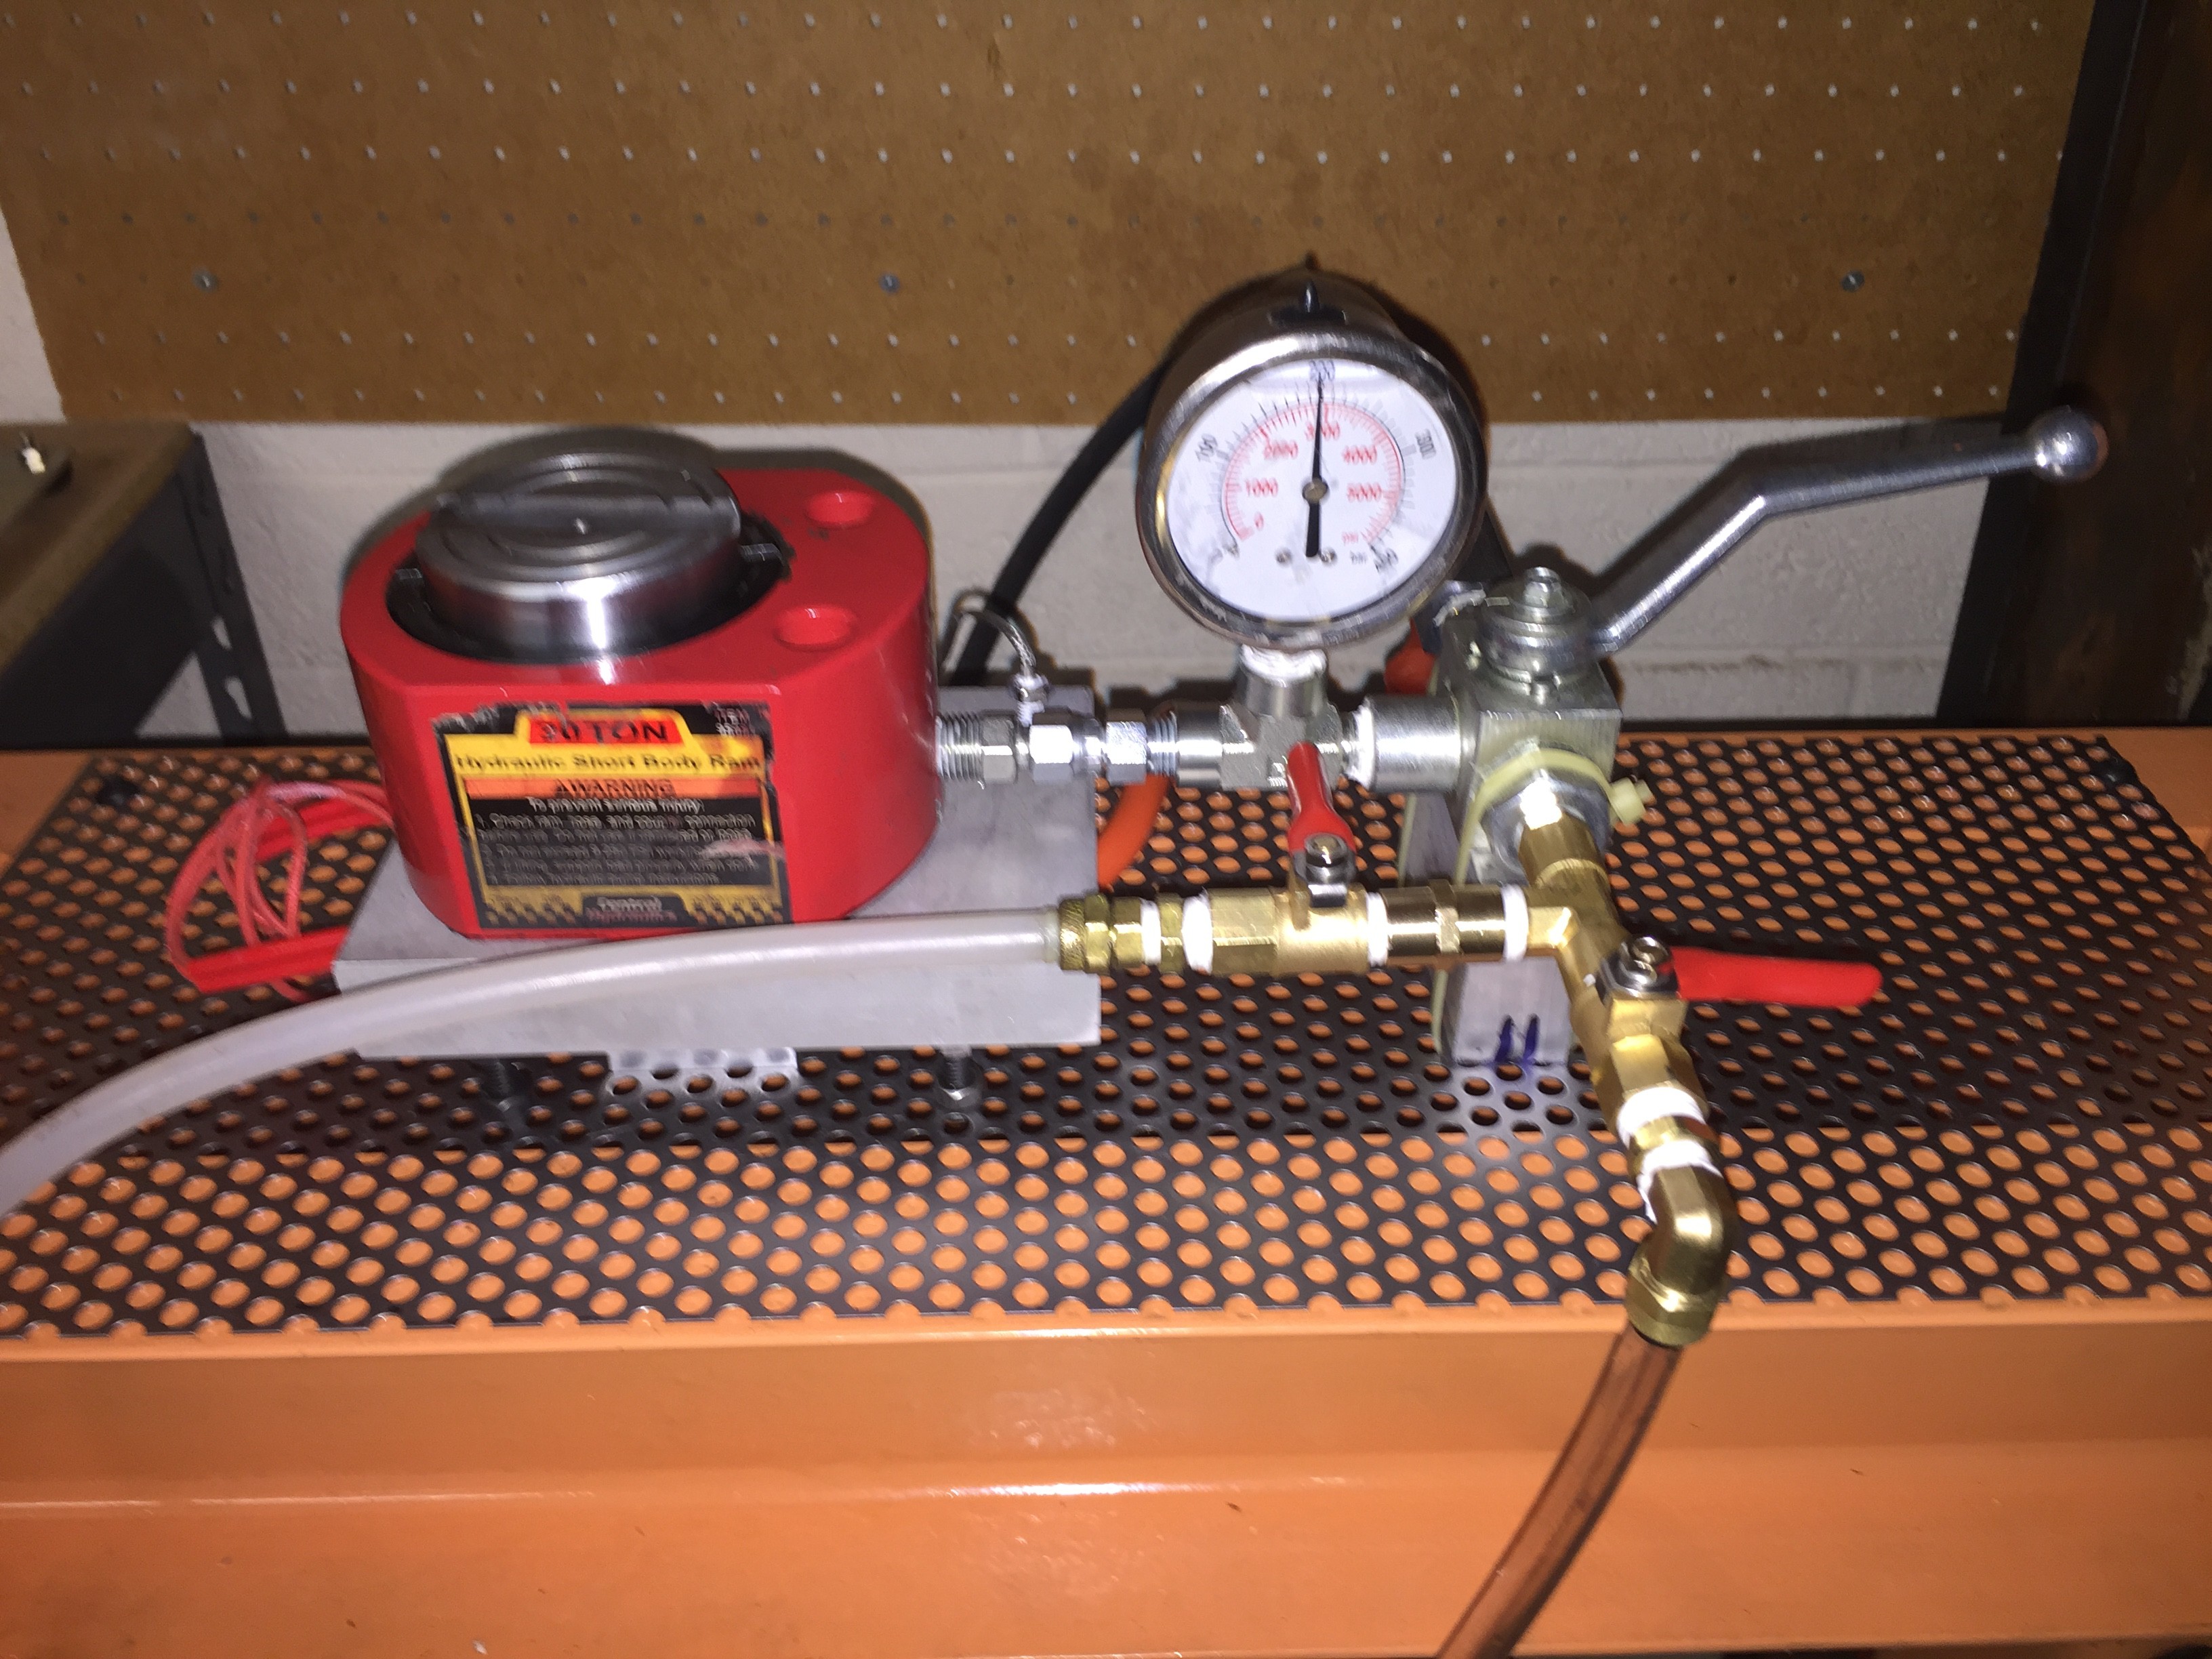
Nice and clean. So simple. This is my first, and really positive experience, using perforated metal. Now when oil leaks it will simply drip through onto the drip pan below.
You'll note that the pressure gauge indicates 3000 psi. Oh happy day!
There are three valves visible. The silver handle sources the piston to the hydraulic pump via a check valve. The check valve allows the chamber to be pressurized without the pump running. Very important.
If the silver handle is thrown in the other direction then the chamber releases the fluid to the low pressure side and will flow back into a reservoir where it may be filtered and returned to the pump. One line goes to the bottom of the reservoir and supplies oil, the other is at the top of the tank and provides air. So by pressurizing the reservoir with low pressure air either air or oil may be forced into the piston, or my manually pressing on the piston push hot oil out of the chamber and refill it with air to retrieve the sample.
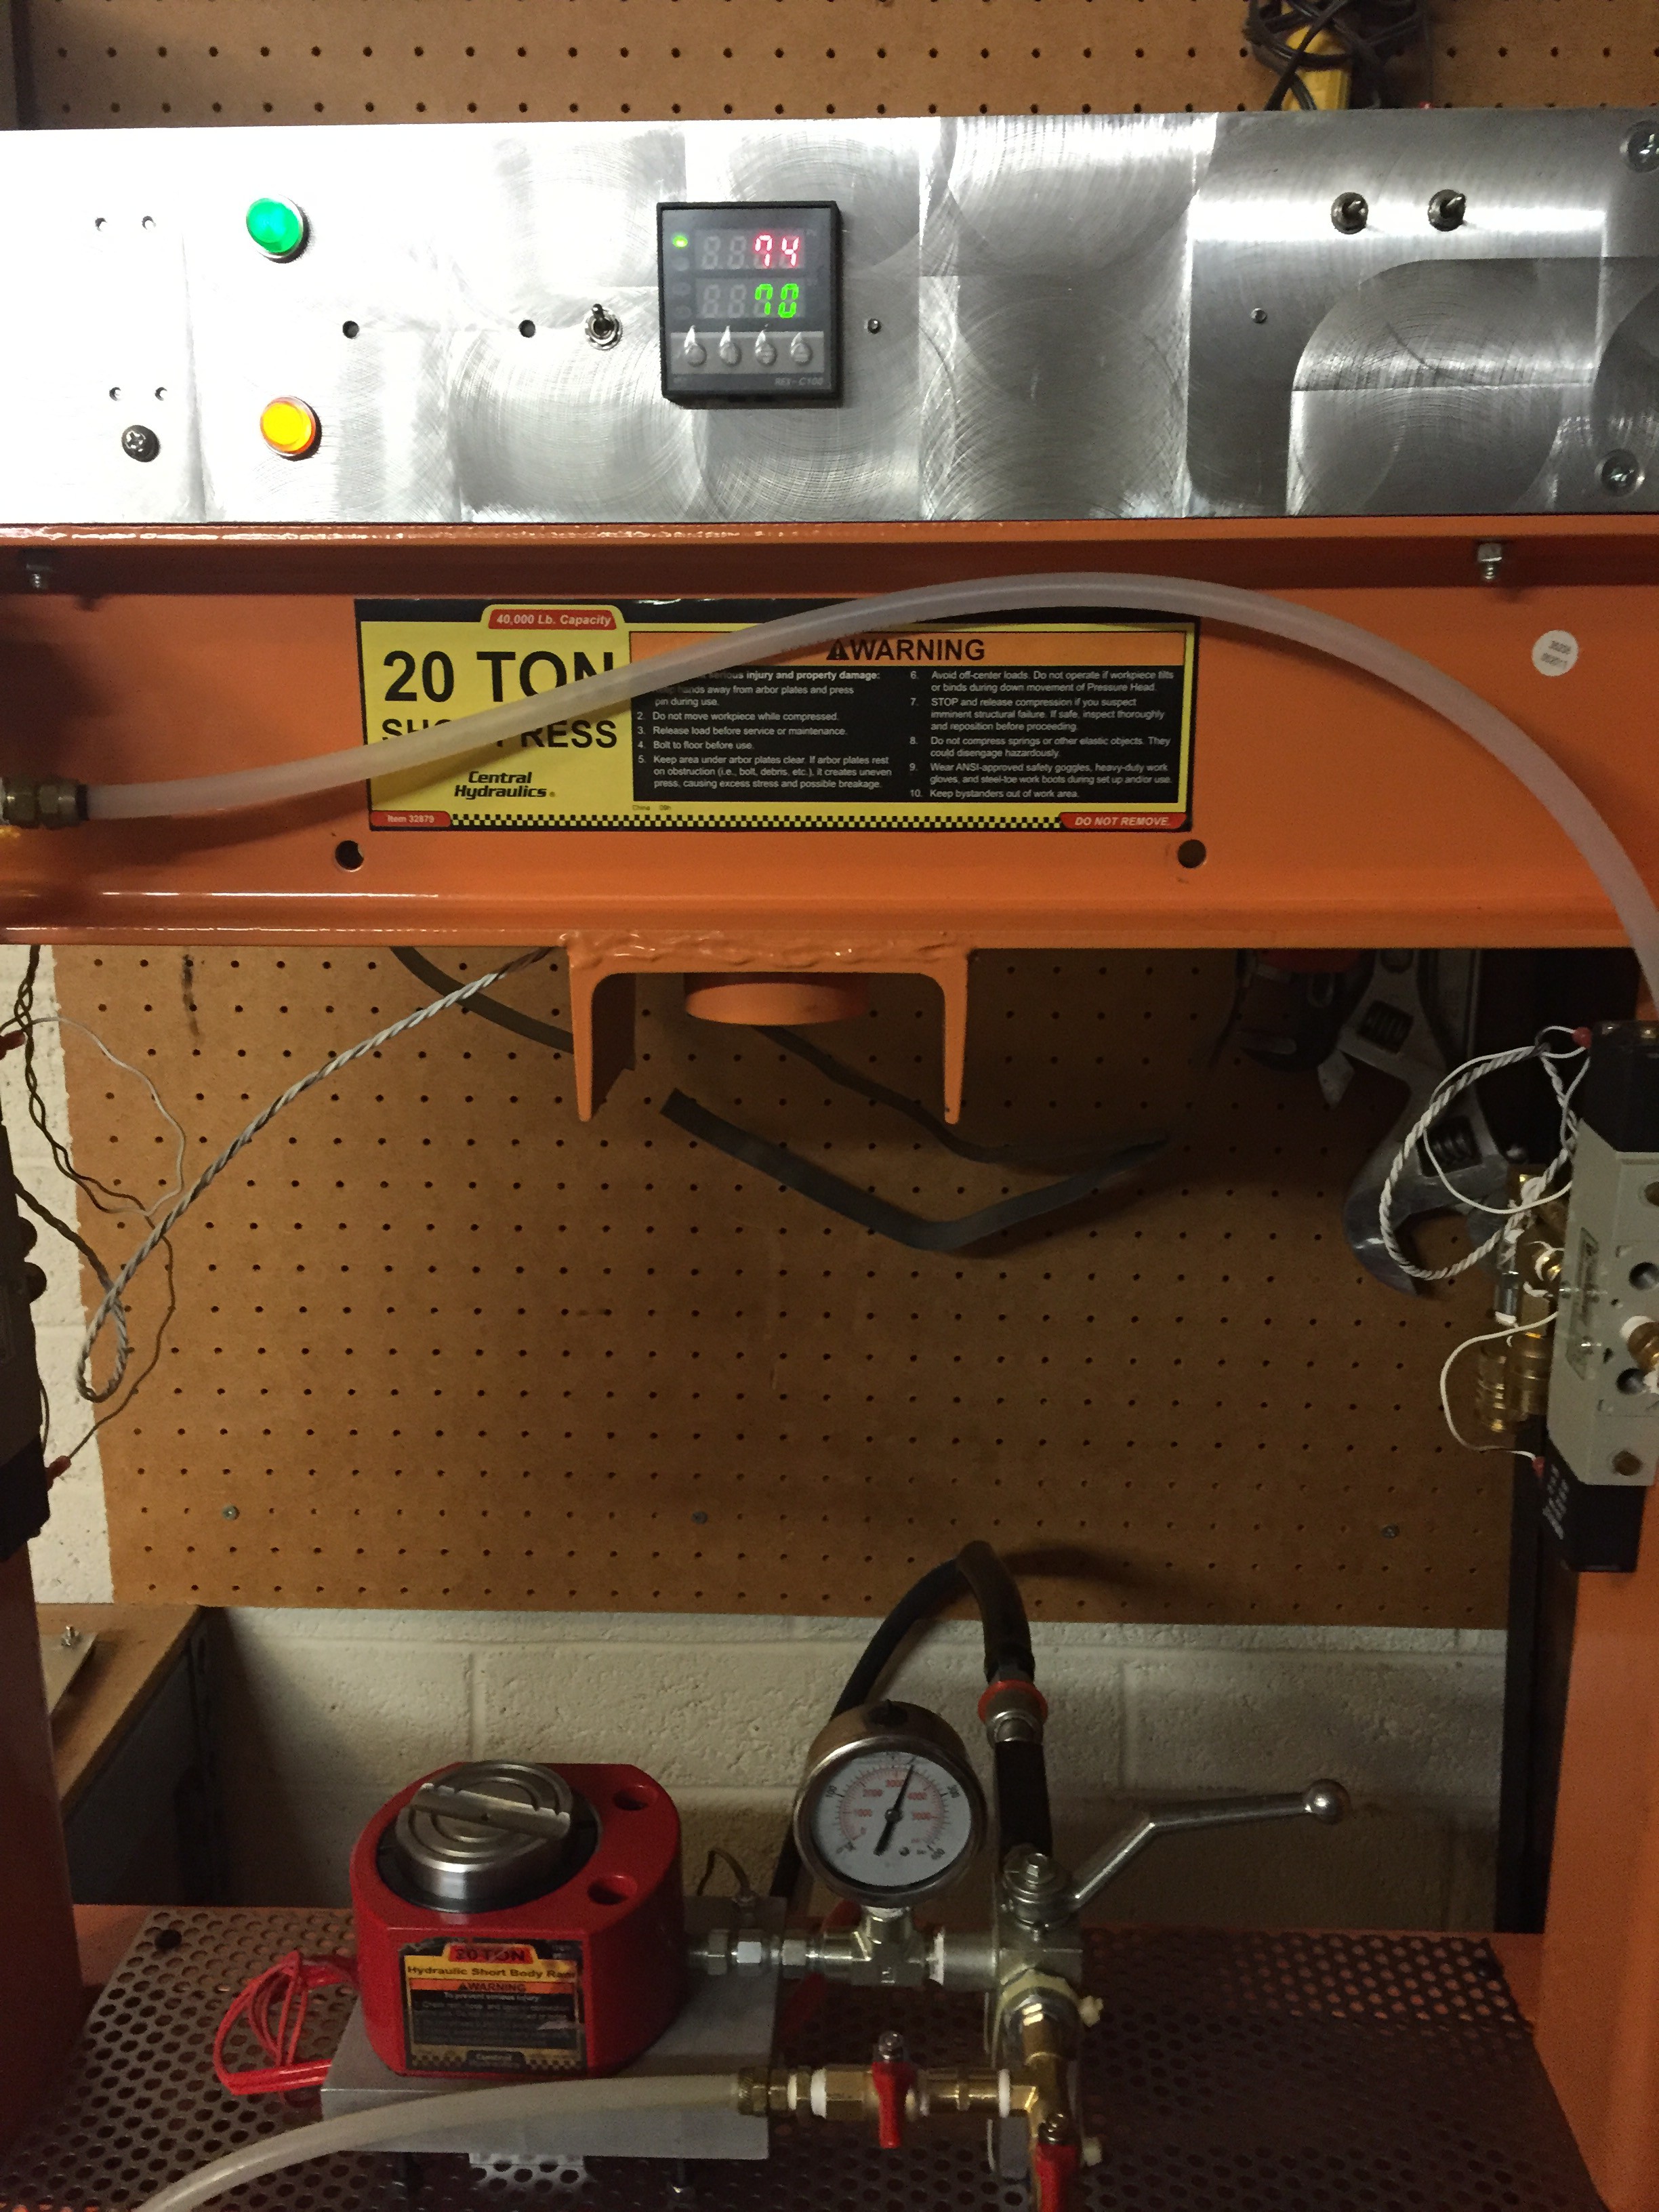
In this image we see the heater block running and the system at pressure.
The industry standard seems to be 3000 psi at 70 C for 10 minutes. That's a big block of material, with the thermal sensor located in the top right corner of the gray aluminium block. As it turns out if the system is pressurized to the working pressure of 3000 psi and the pump shut off, then the check valve will maintain pressure in the line. Thanks to Boyle's law, any subsequent increase in pressure is due to a change in temperature. When the pressure stops going up, in this case by almost 1200 psi, we know the fluid and sample have reached the desired goal.
Other than a few more sea trials to check for leaks I think we can safely put this one to bed! Isostatic press, done! Most importantly, done safely!
Discussions
Become a Hackaday.io Member
Create an account to leave a comment. Already have an account? Log In.