 Michael Barton-Sweeney
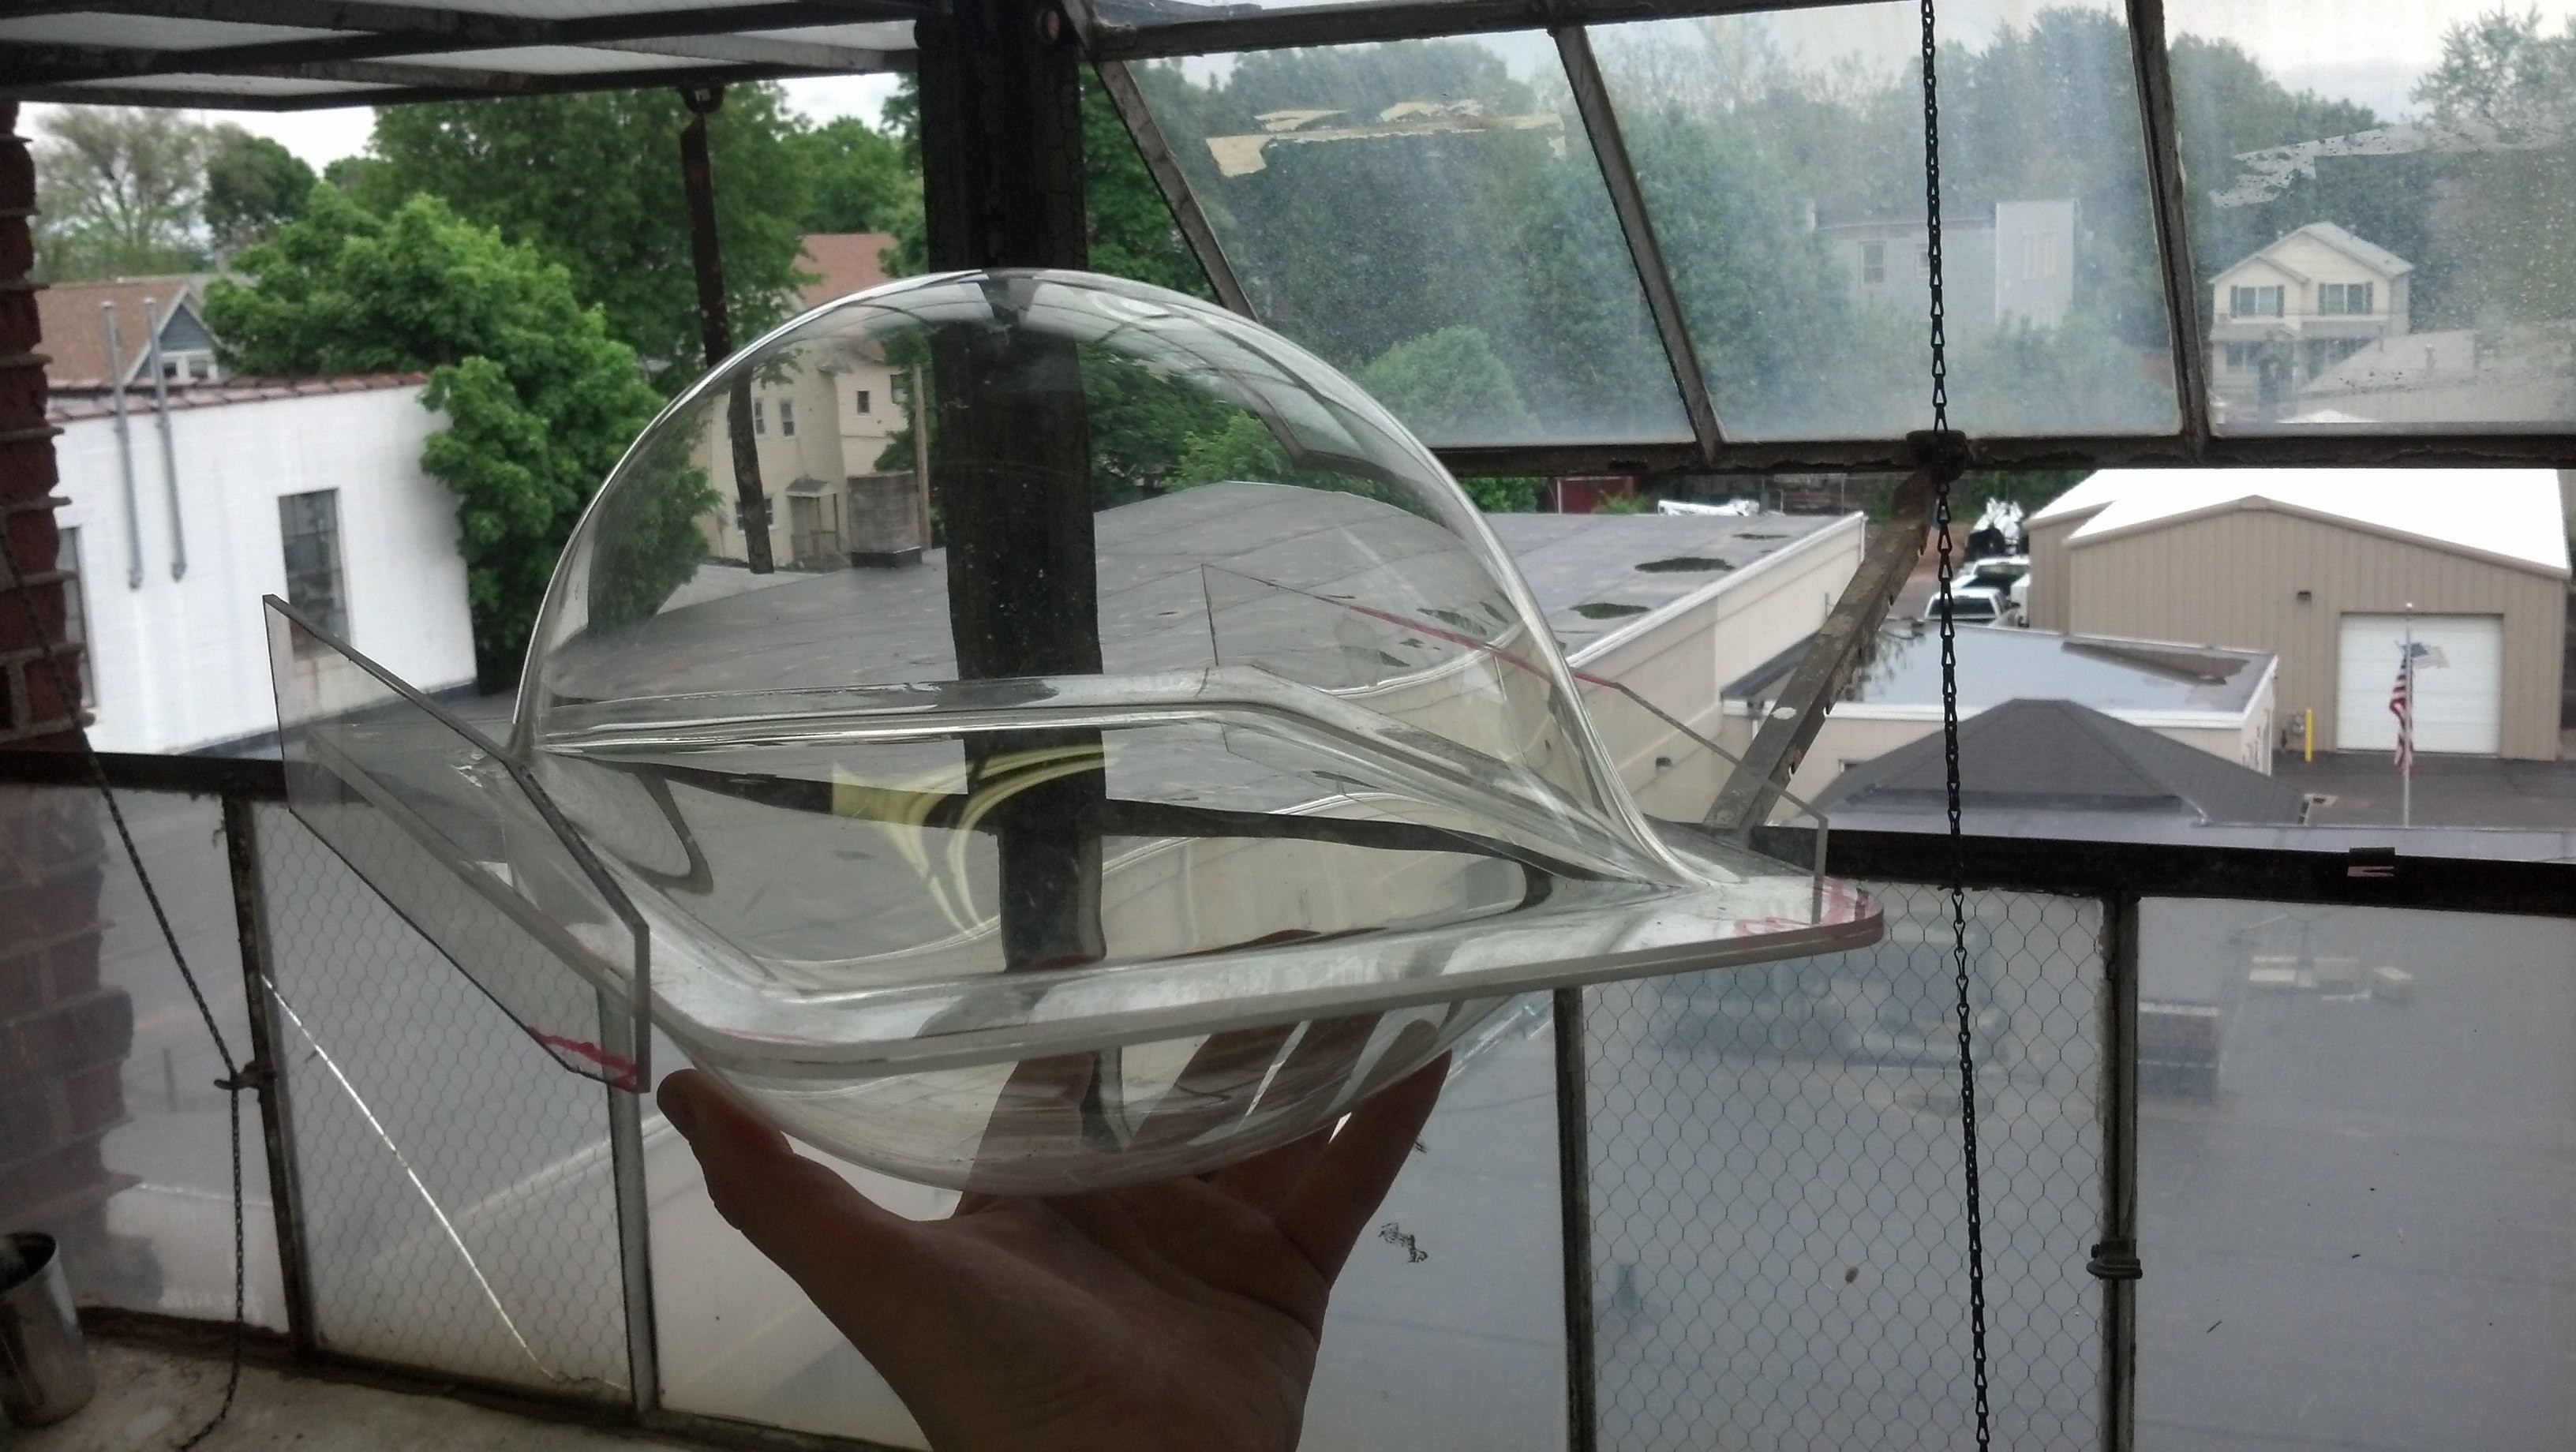
Acrylic is a fantastic material to work with. For finished pieces, It has optical properties that 3-D printing cannot match. For prototyping, it is more intuitive and less deliberate than designing a CAD model. It is transparent, so the interior structures of prototypes can be easily seen, which aids in the creative process. With a bandsaw, sander and drill press, acrylic can be worked like wood or aluminum. With the addition of a blow oven, it opens up new possibilities to make useful and artistic objects.
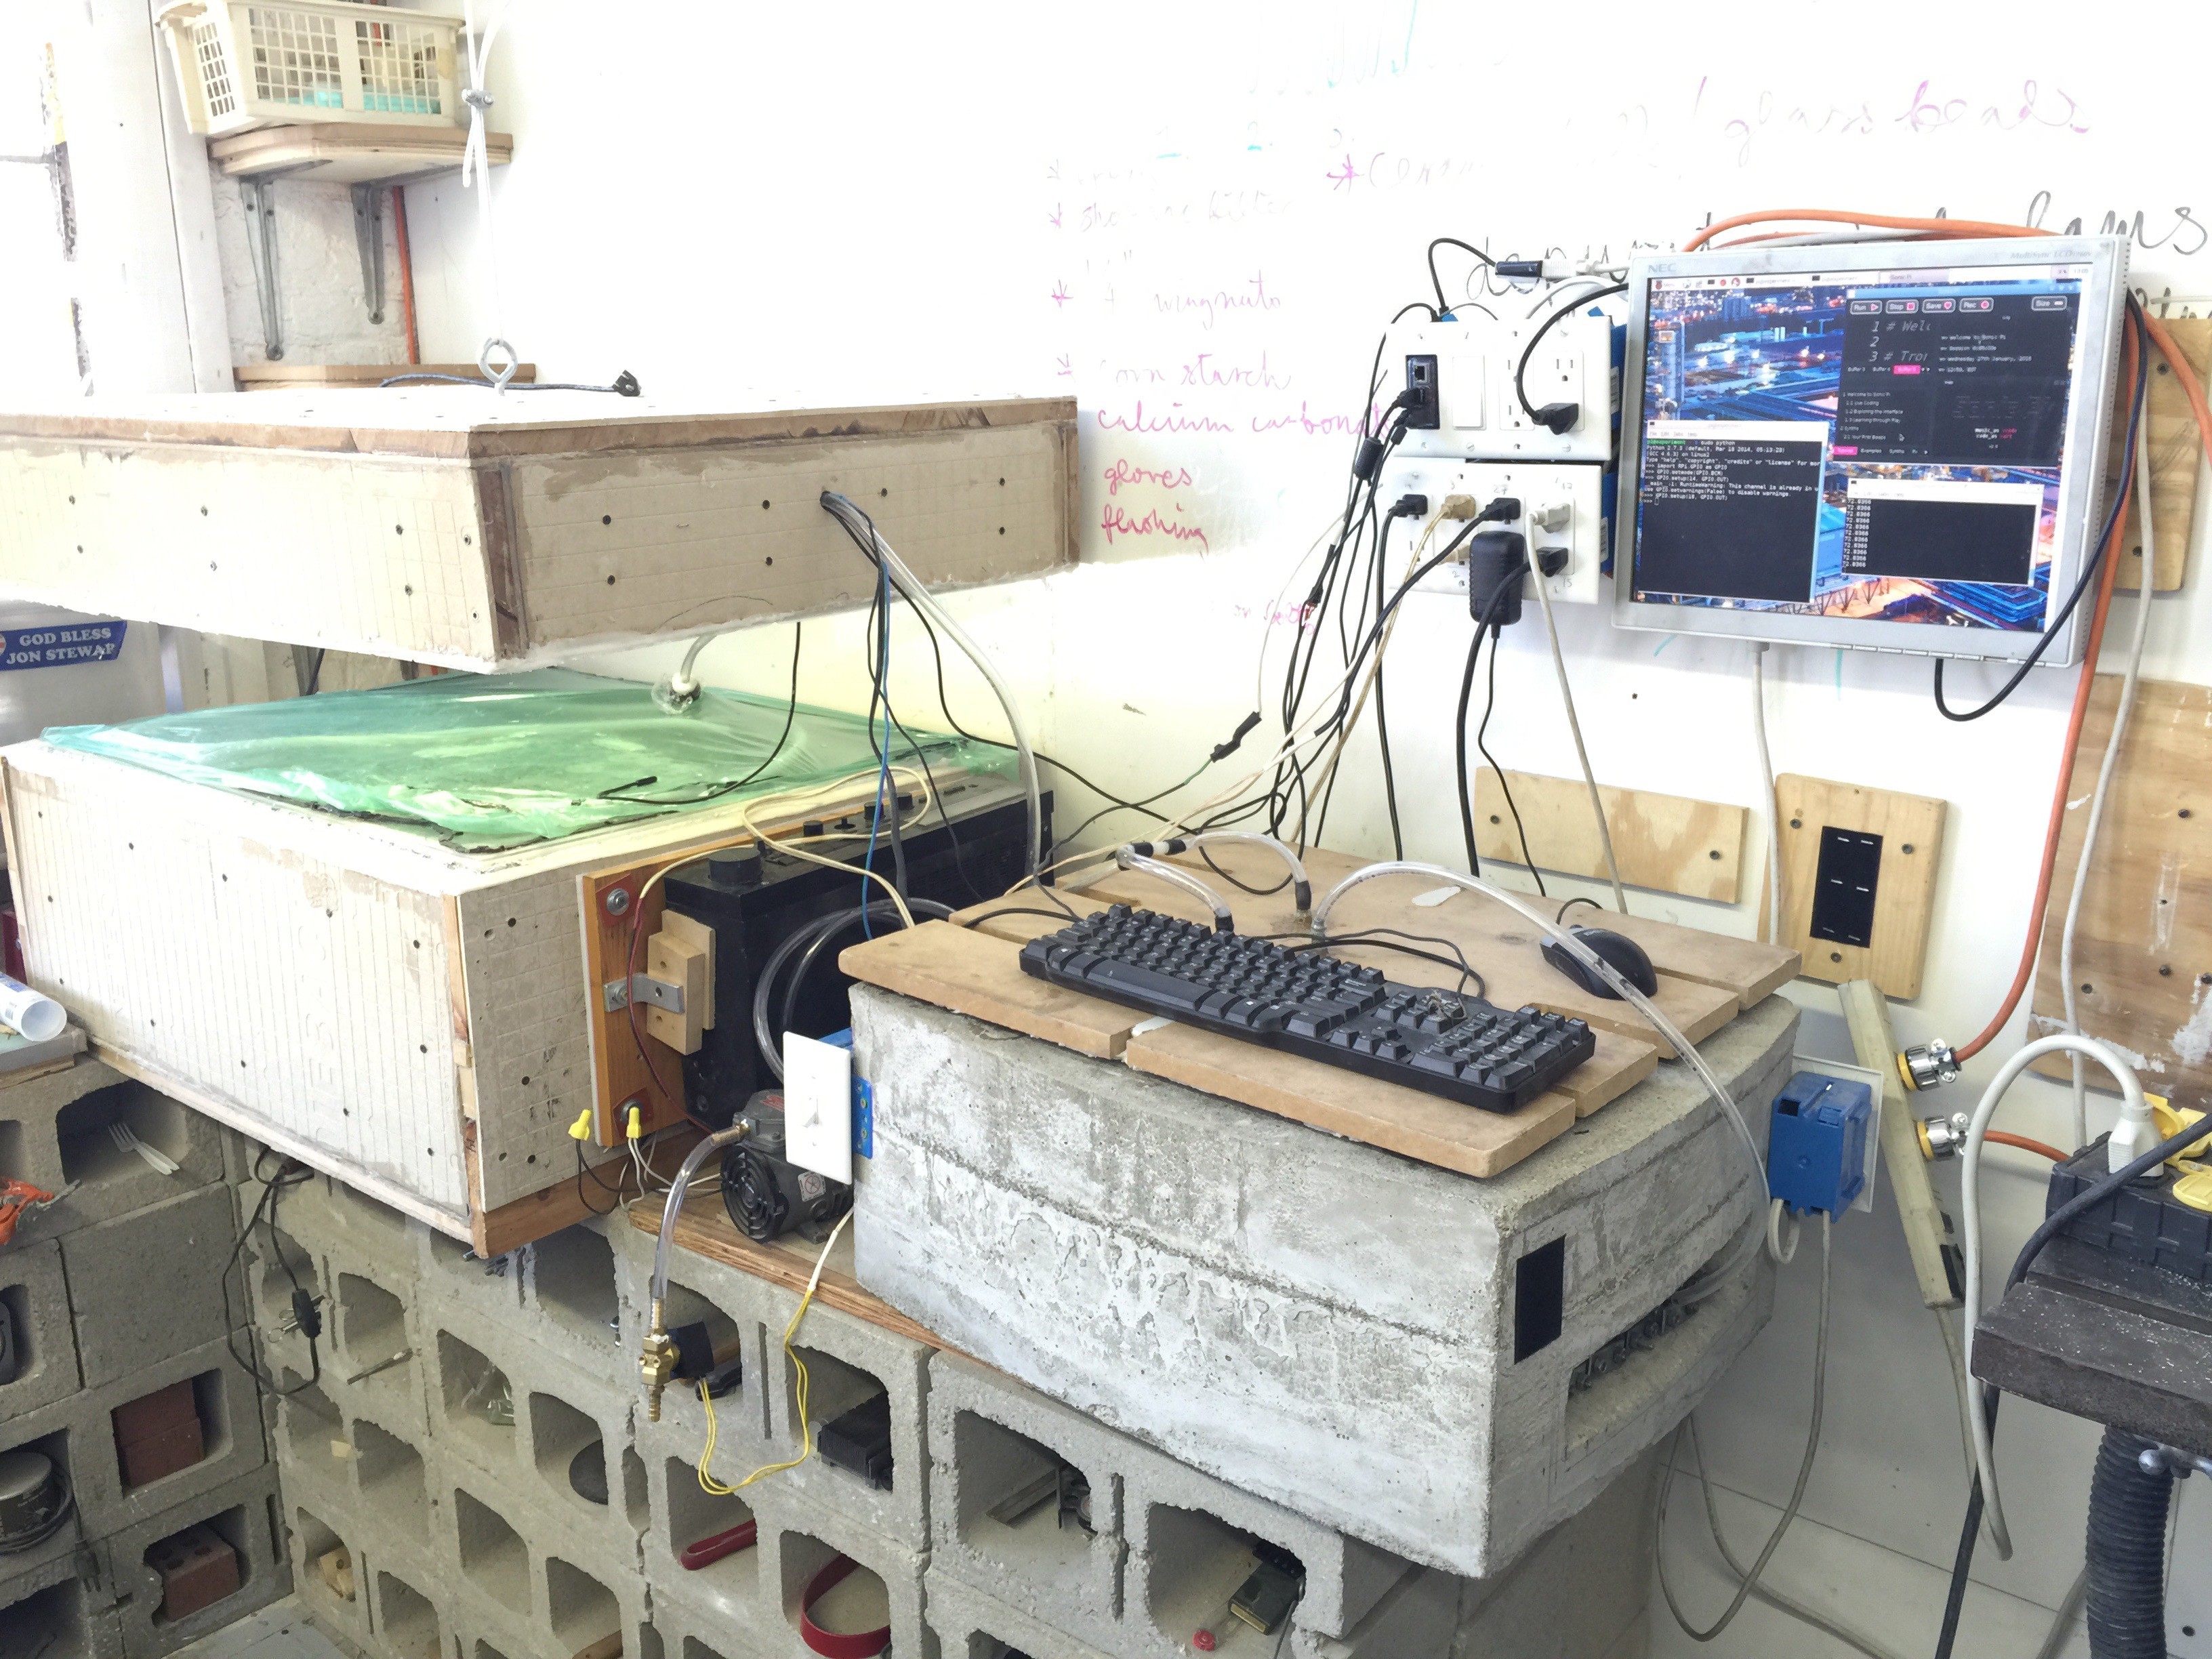
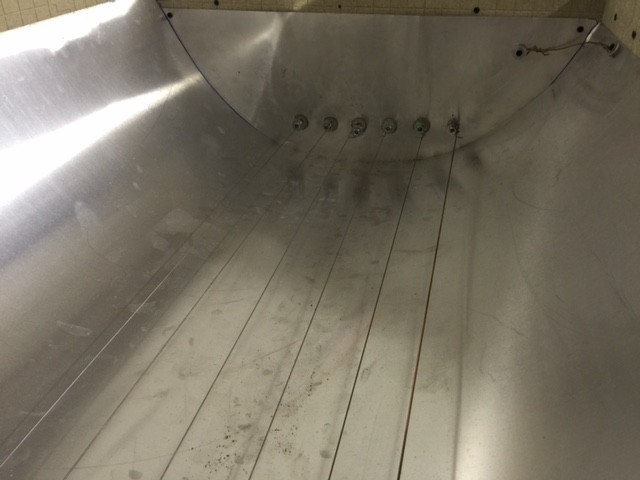
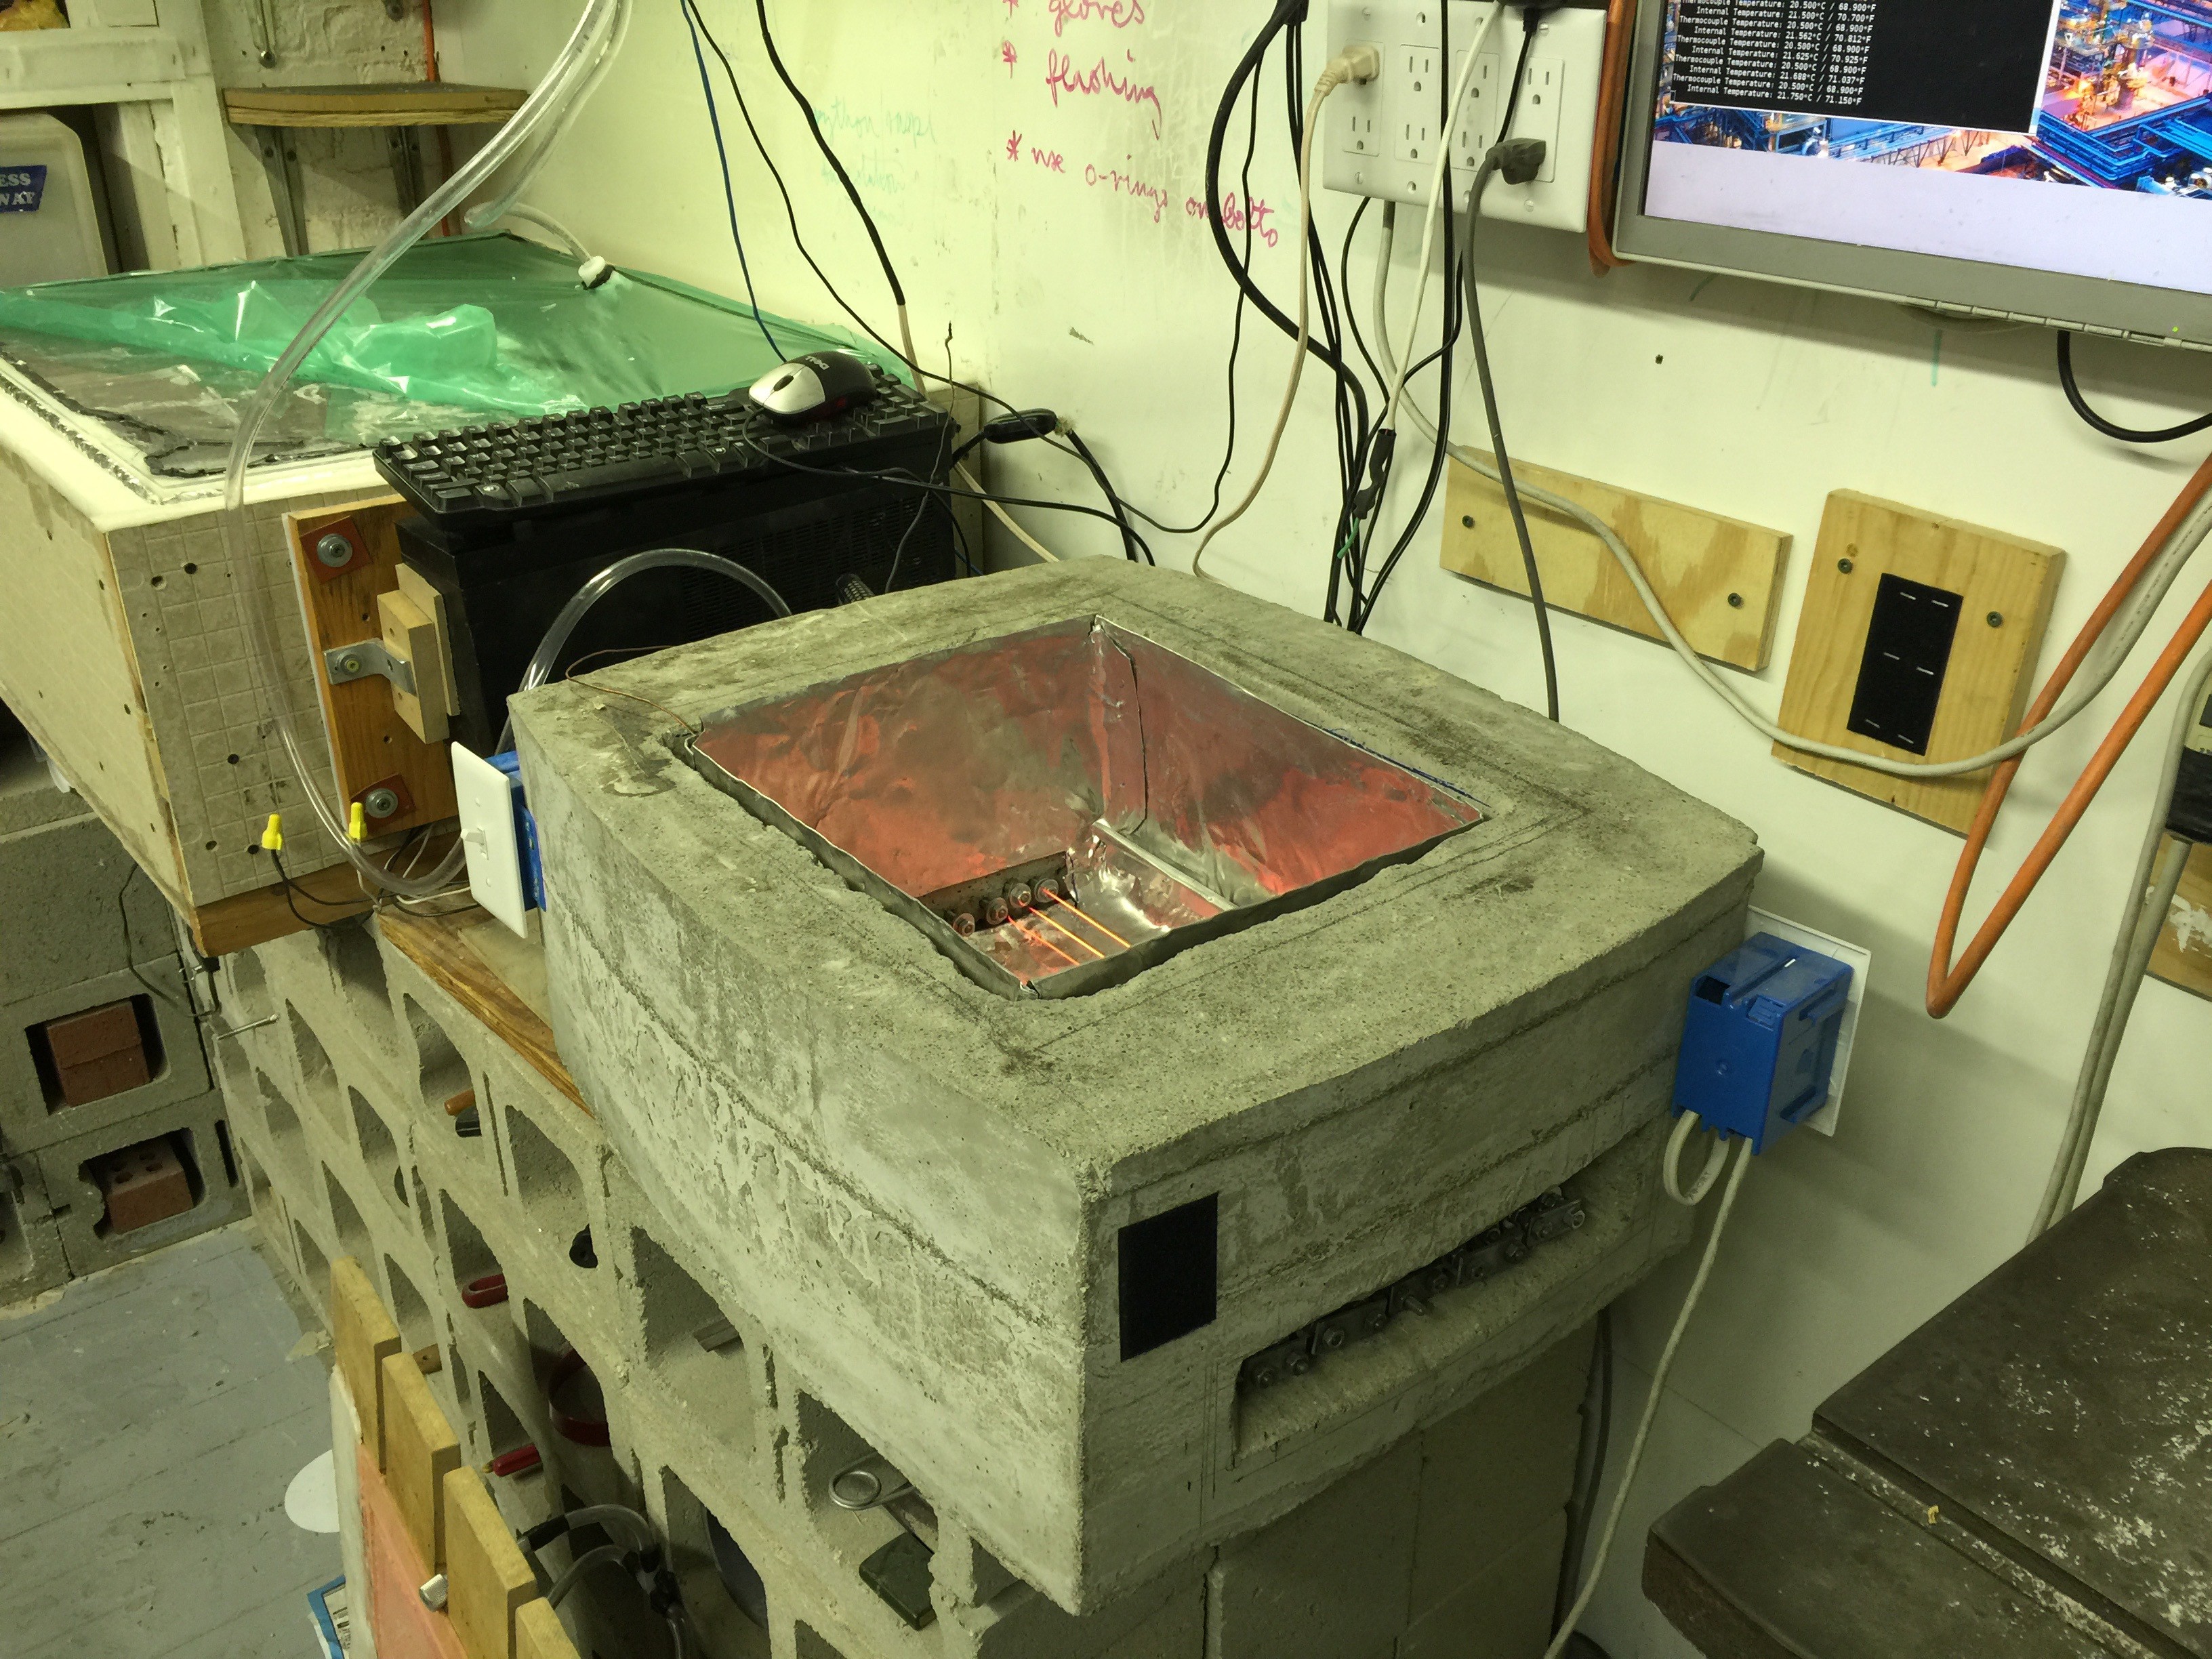
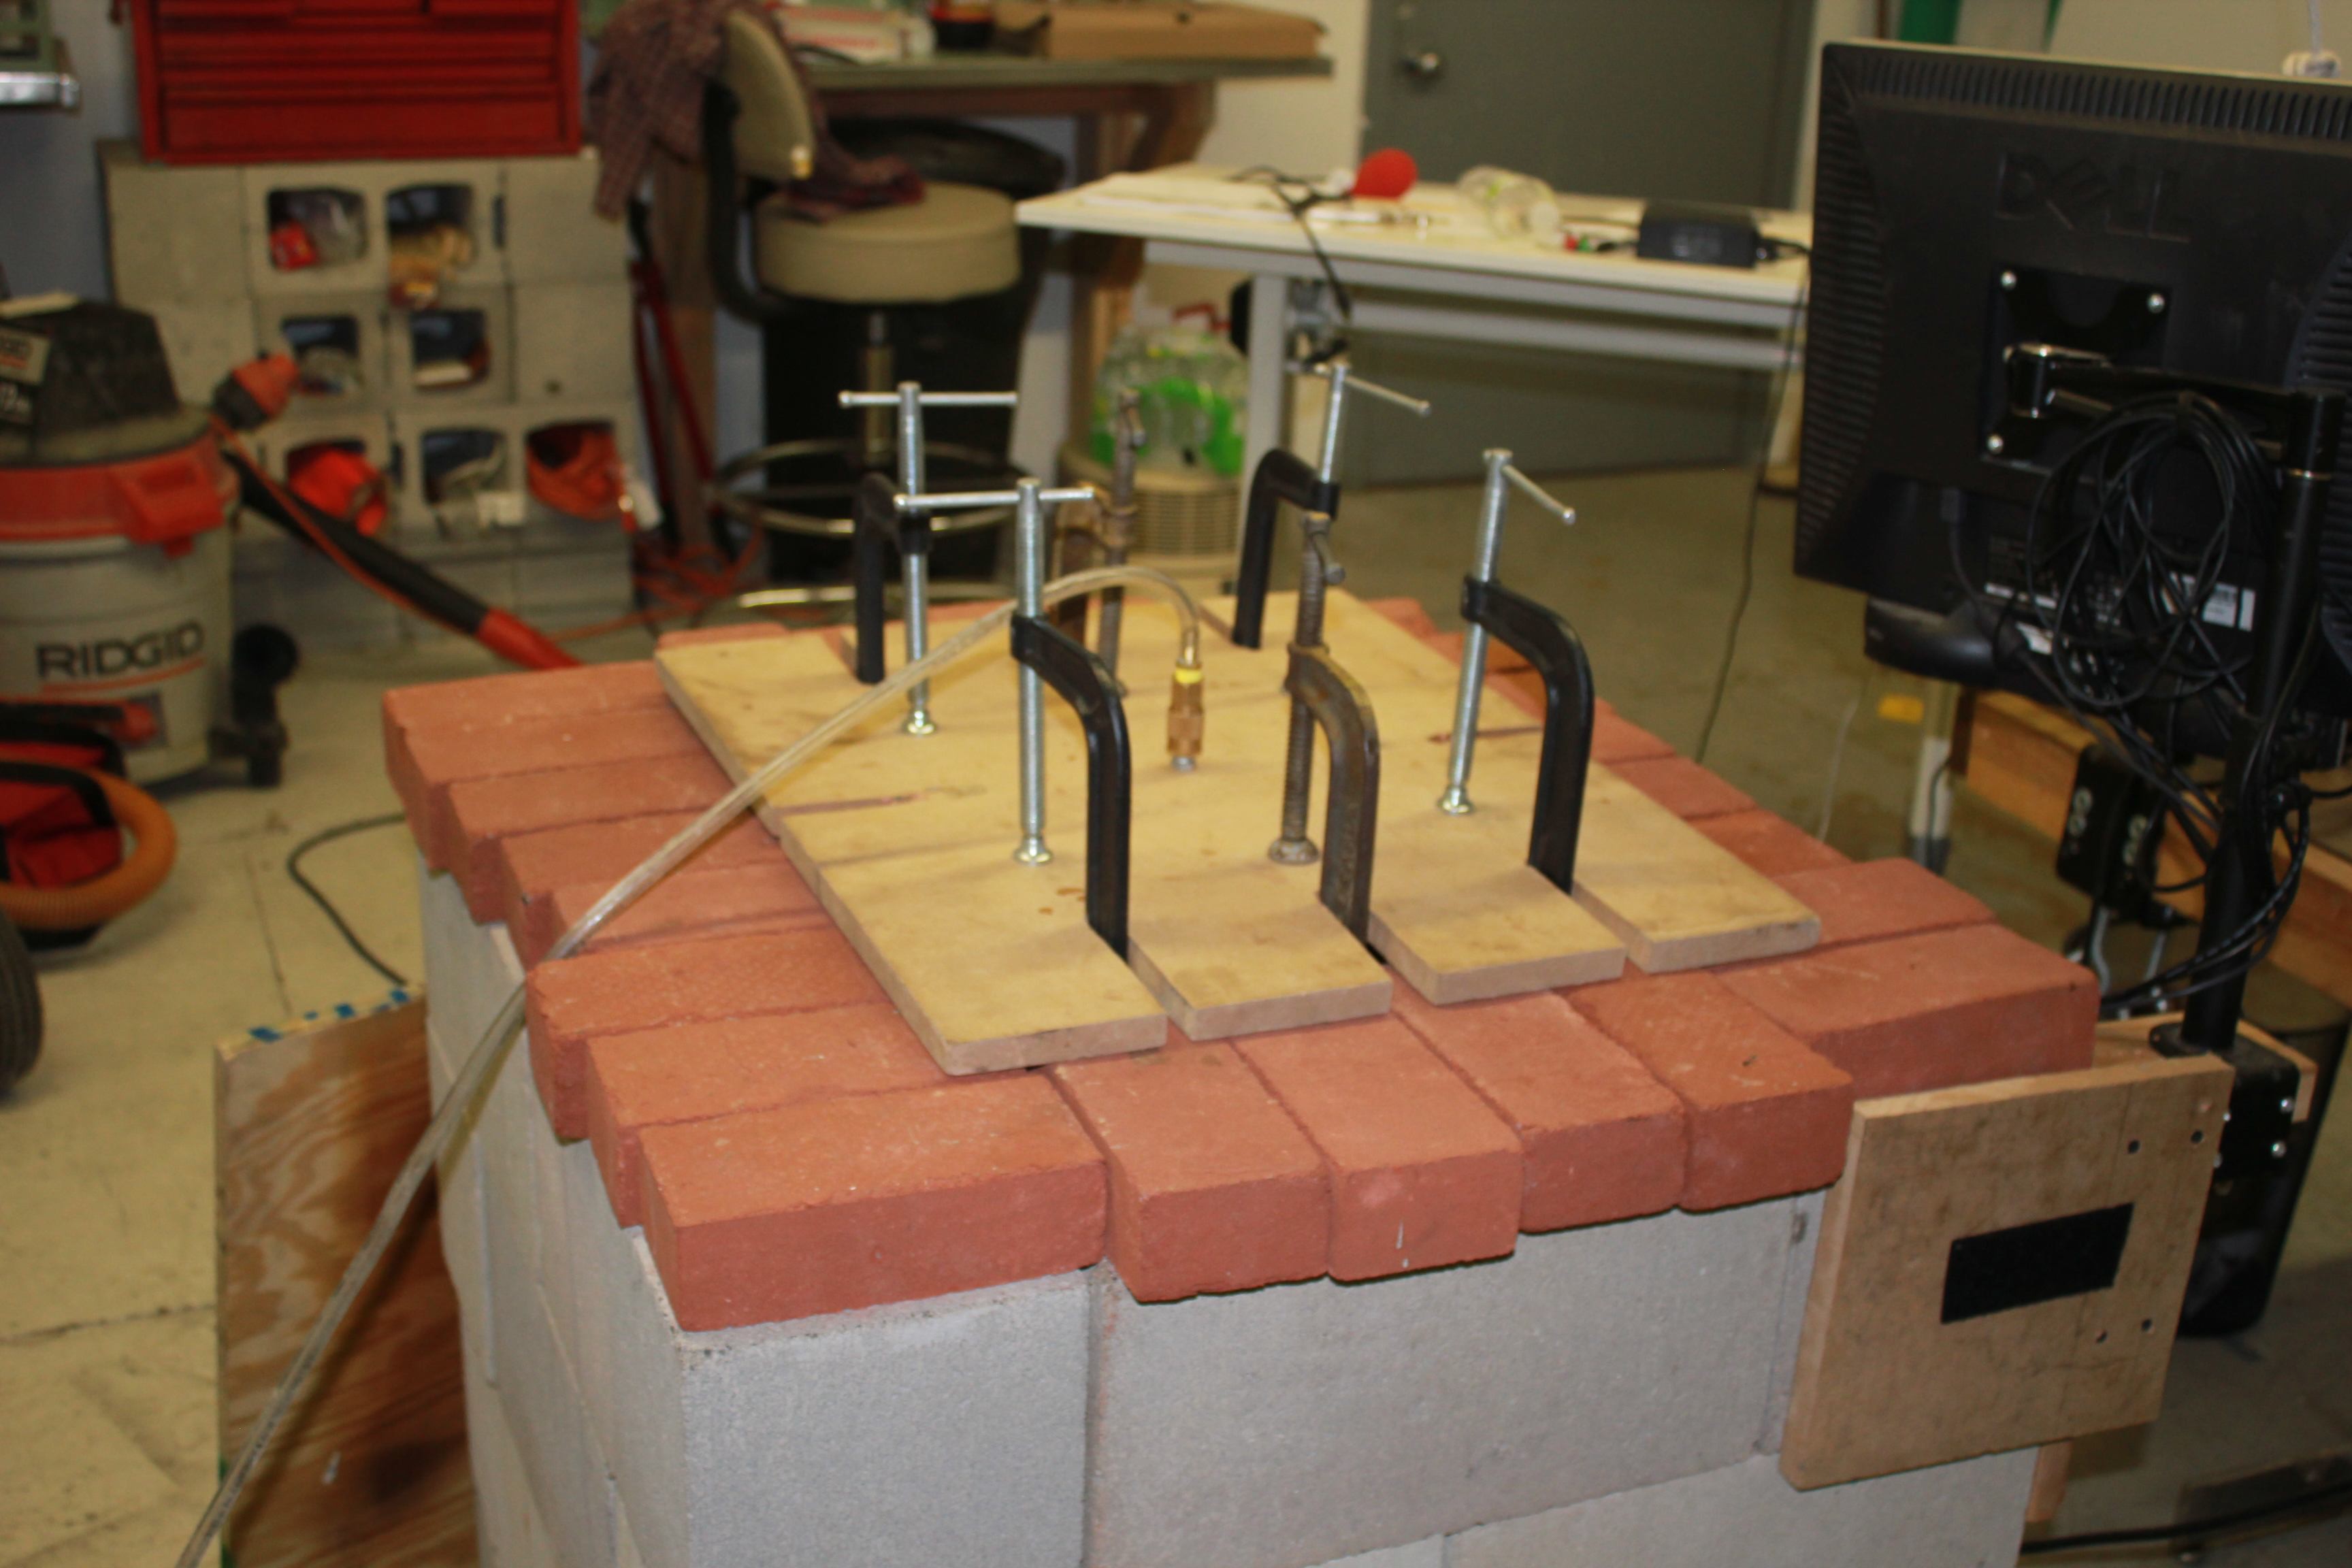
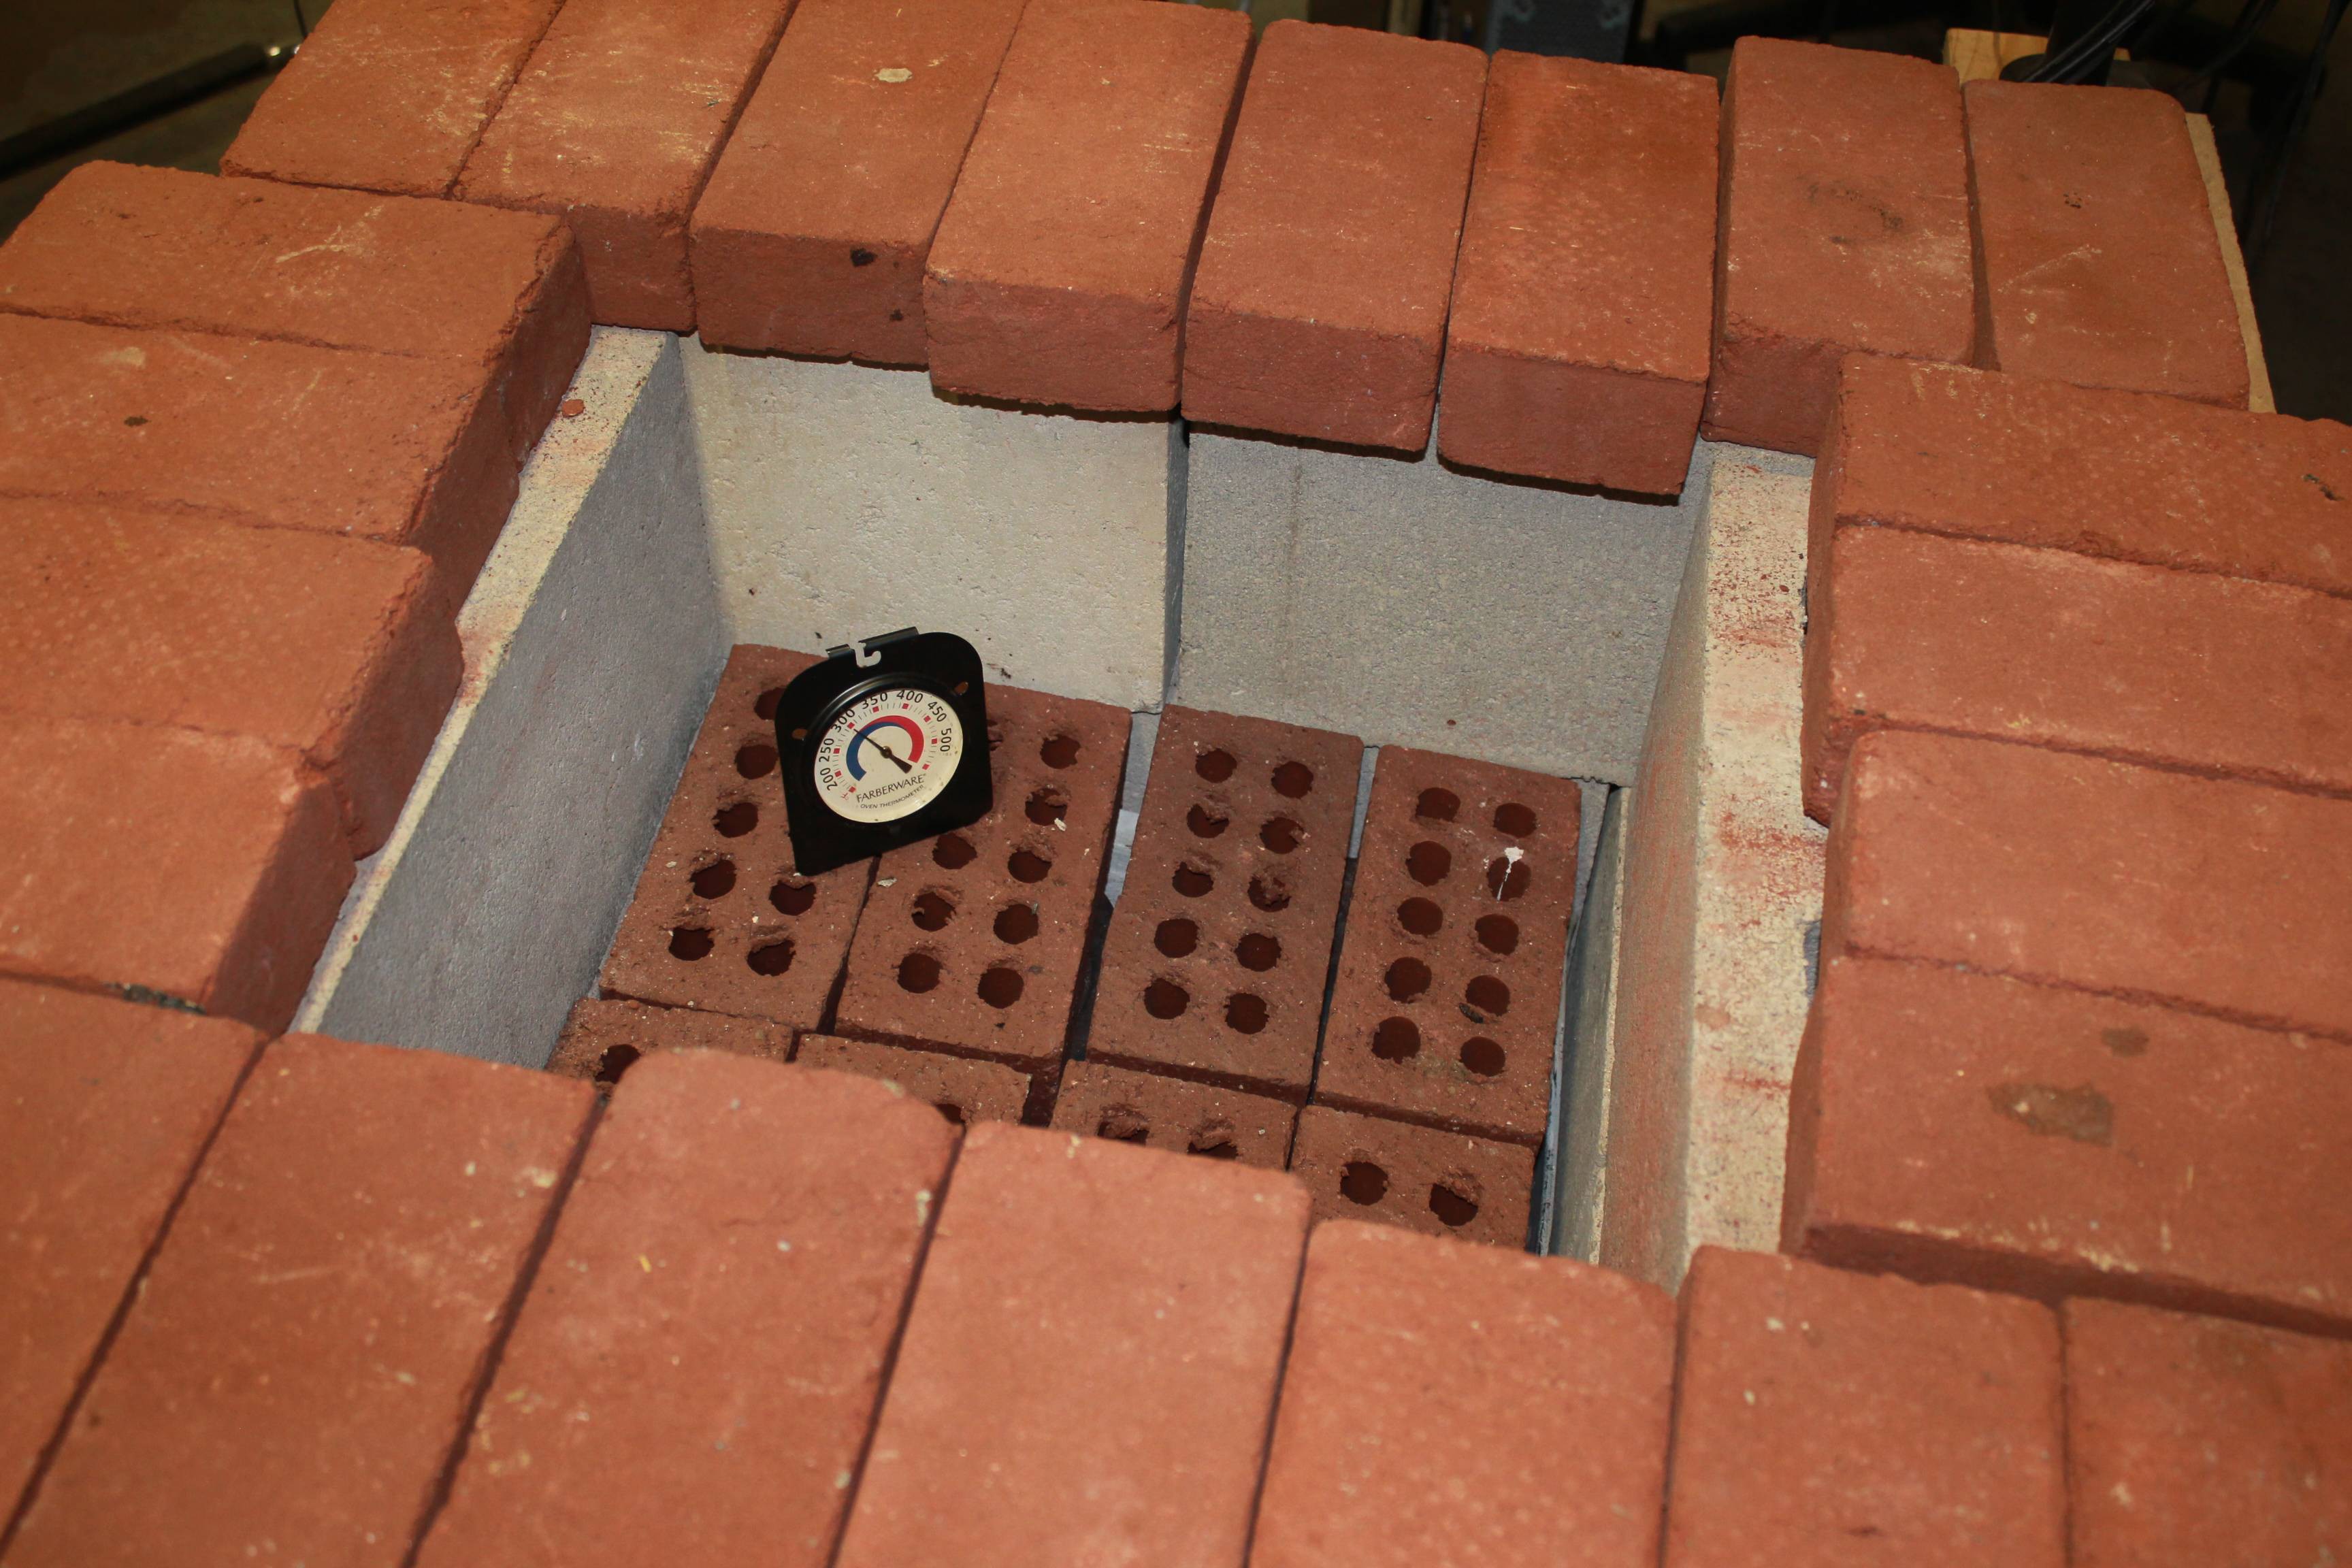
This blow oven uses CMUs (cinder blocks) and bricks for the body. The lid of the oven is made from MDF and silicone, and doubles as the holder for the acrylic being blown. The oven can be scaled up by increasing the amount of CMUs and the size of the lid.
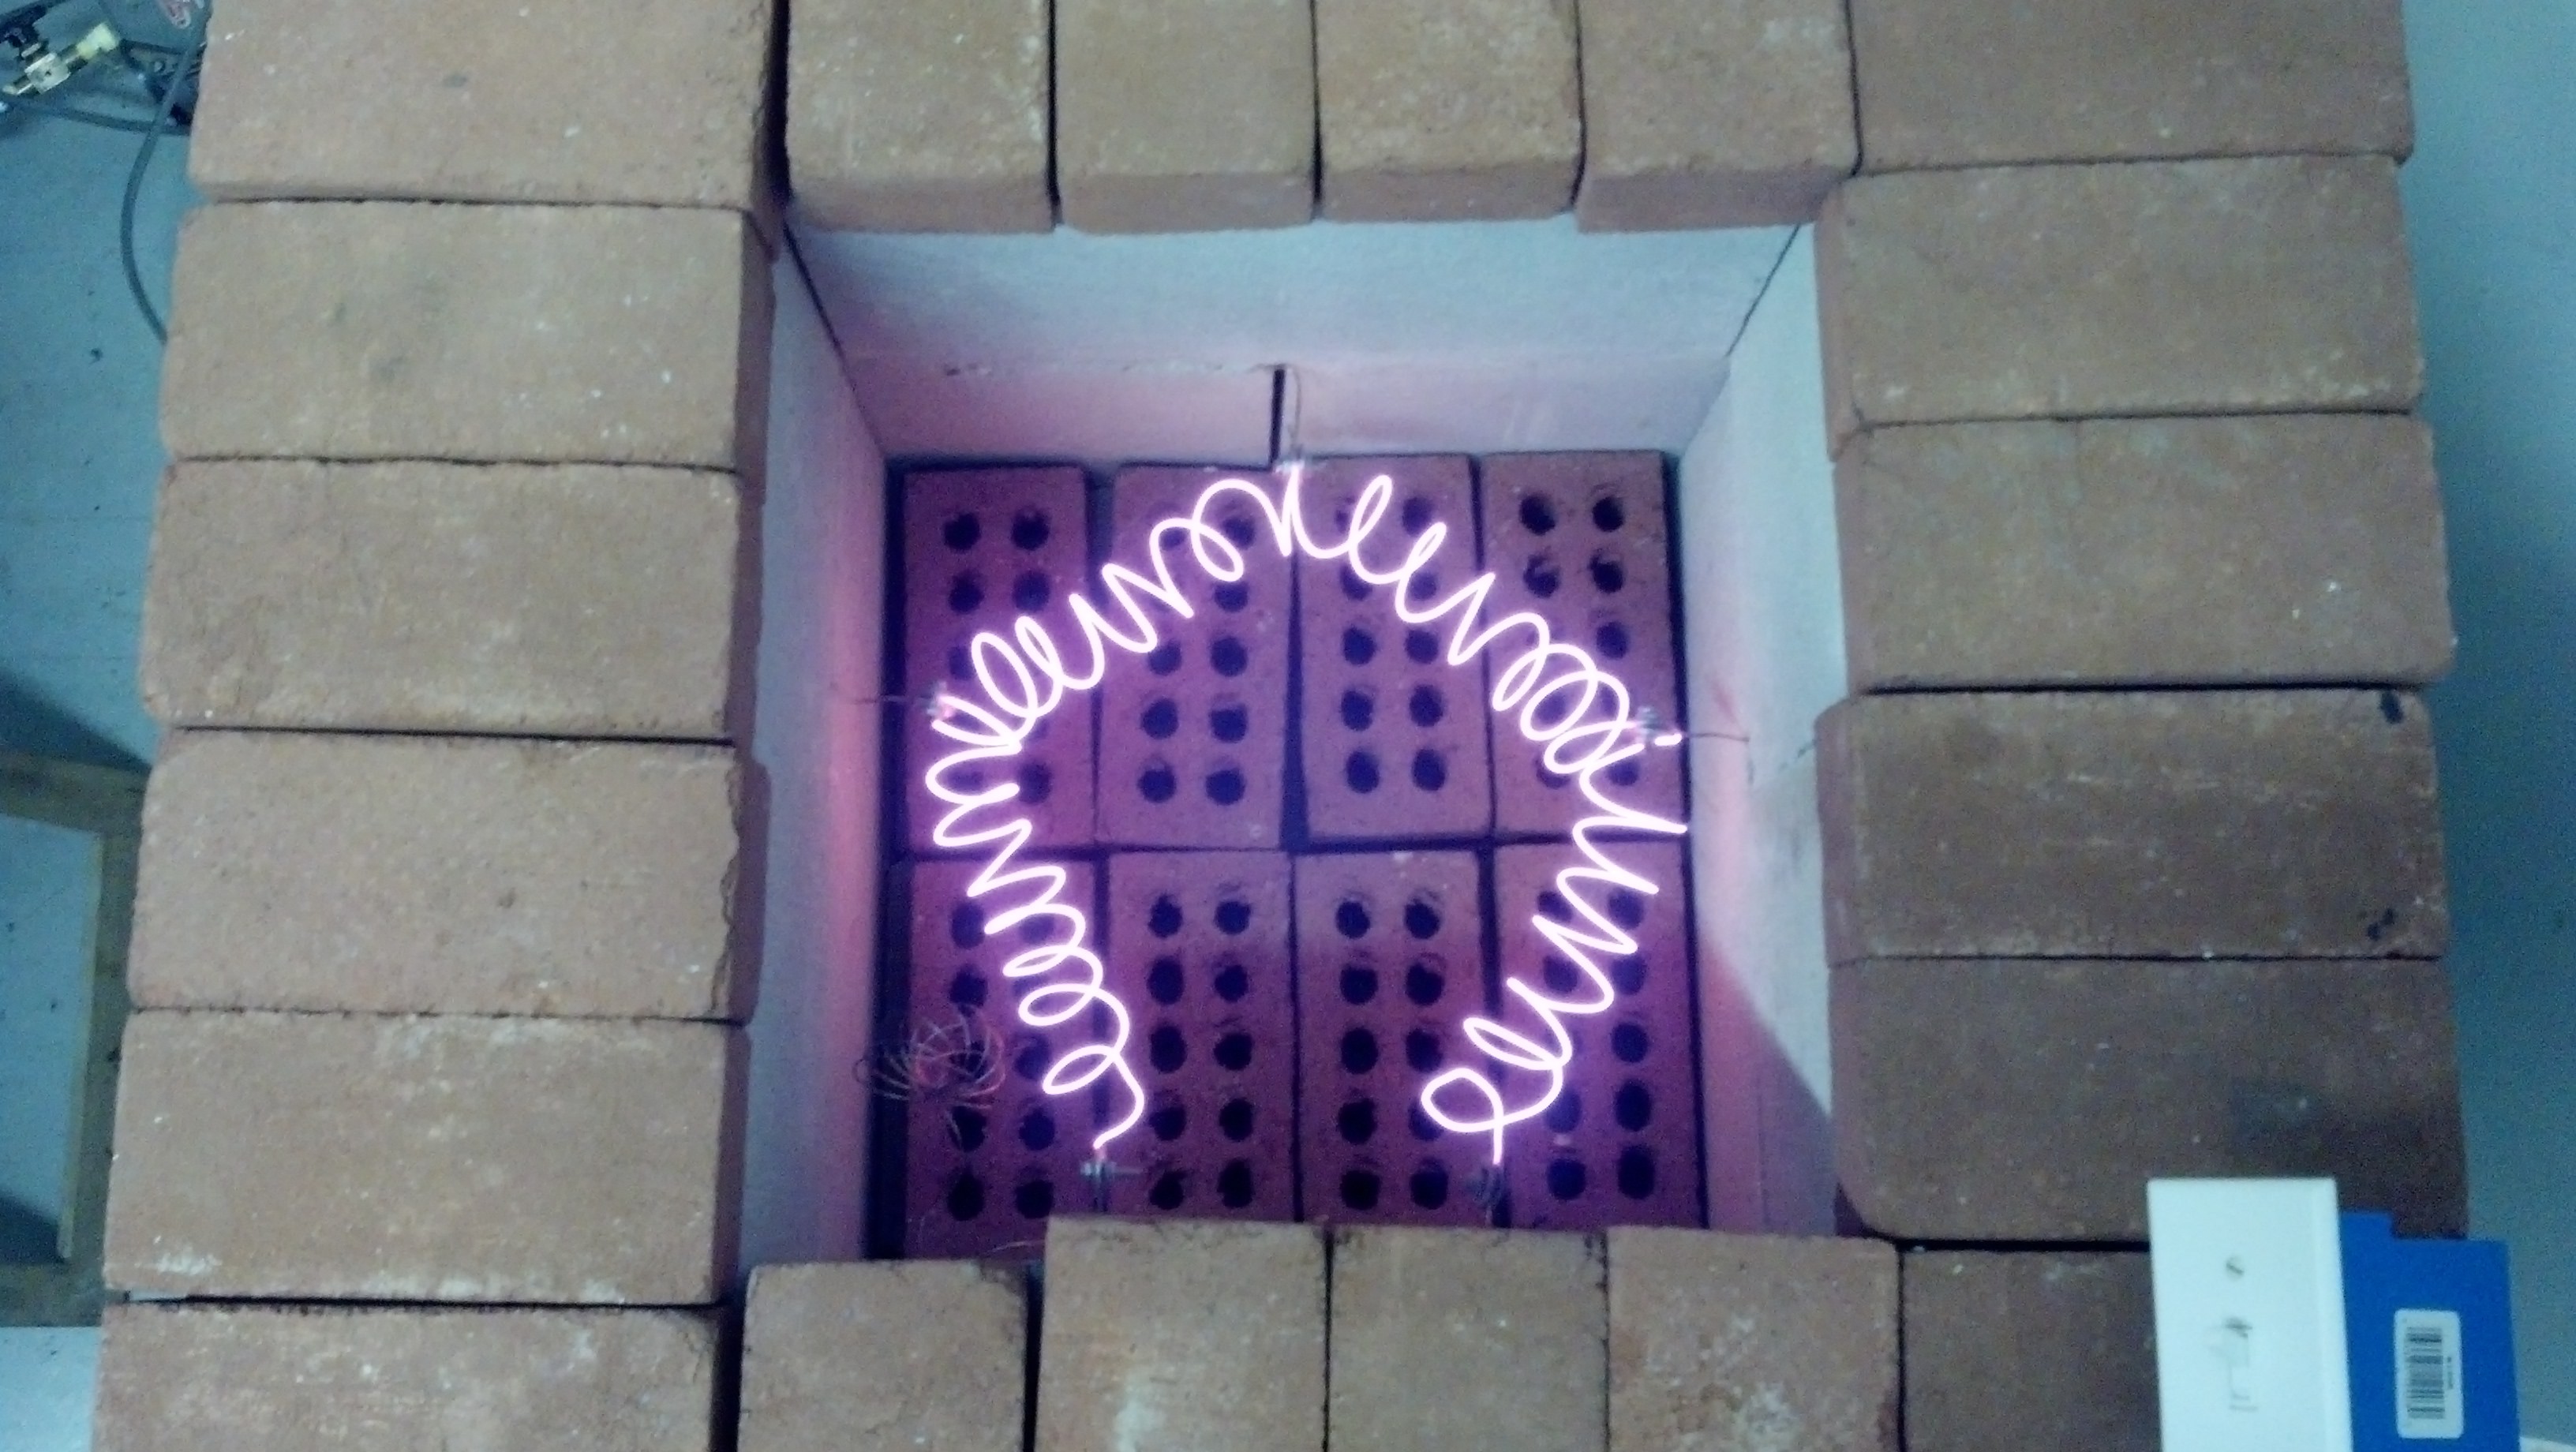
The heat source for the oven can be electric or propane. Electric works better, but propane may be more readily available (i.e., you might already have a propane burner, but not Kanthal wire). Almost all of the materials can be bought at the hardware store.
Subsequent versions of the oven have used cement board and cast concrete for the bodies of the oven, and have added some degree of automation. Future ovens will be made out of sheet metal, but these original CMU-based ovens work great and can be made and disassembled in a weekend for one-time builds.


 Hunter Scott
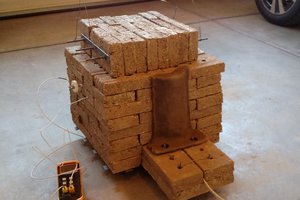
 Matt Moses
 xdylanm
 Jason Knight
IInteresting, I did almost exactly the same thing back in 1963. I made a model of a quartz crystal atomic structure, the oxygen atoms were made from 2 hemispheres of acrylic, blow moulded into a brass mould, happy memories! The finished article still has pride of place in the geolgy department of Aberdeen University.