 Absolutelyautomation
KEYCHAIN CAMERA
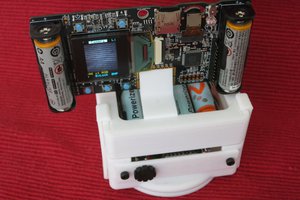
This diminute mini cameras were built into multiple forms like keychains, gum pack, pen, cigarette lighter, etc. All basically have a CMOS picture sensor, image processor and a rechargeable battery to record video (with audio! ) and to take still pictures, usually using a removable micro SD card.
* Este articulo tambien esta disponible en Español haciendo clic aqui
The build quality of those cameras is very low (their price is usually under 5 USD/EUR/GBP) so they fails often. The rechargeable battery like in other portable electronic devices is their Aquiles Tallon. If there's a battery failed camera somewhere lying in a drawer, it's time to give a second chance as a time lapse camera with very low budget additional components.
The project's features are:
- Programmable time intervals
- Very low power
- Automatic flash
- External battery
- Low budget ( could be 0 )
For more info visit: Absolutelyautomation.com
EXTERNAL CONNECTIONS
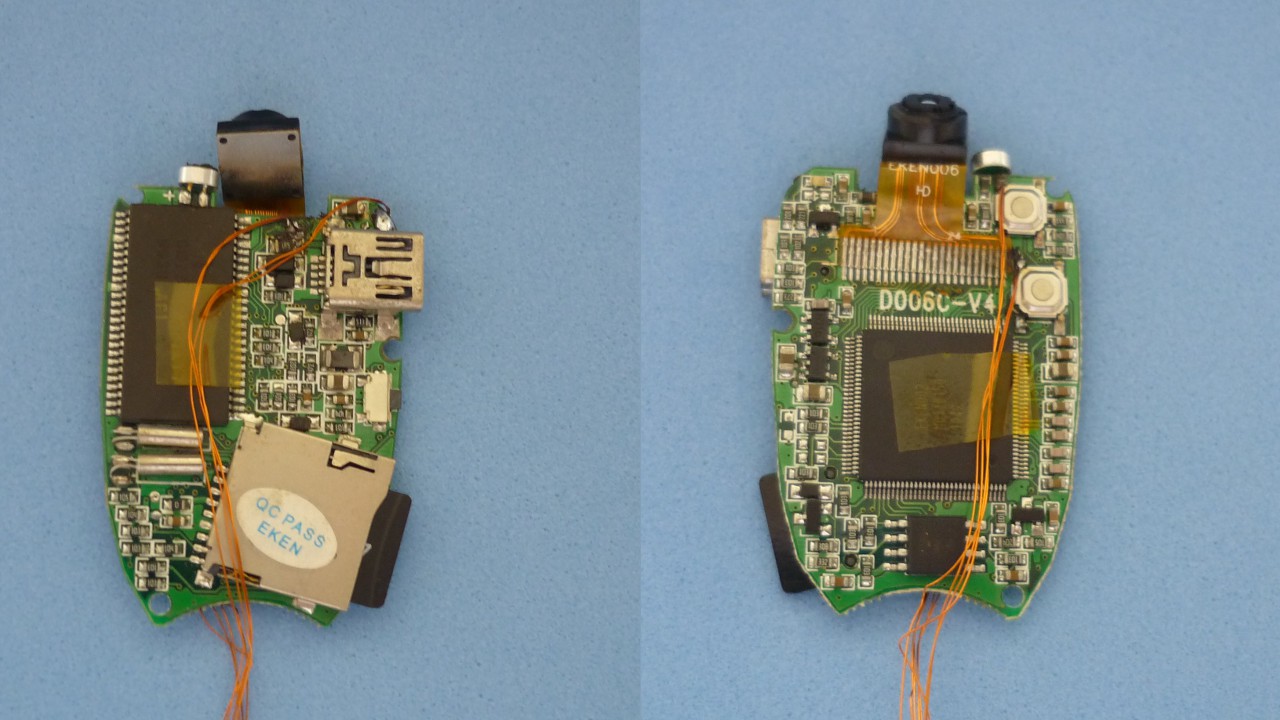
The camera has two push-buttons to set up the different operating modes, like video recording or still pictures taking. Usually one of the two buttons, when pressed for some amount of time powers on the camera , and if pressed again for the same amount of time, the camera powers off . The on/off process is all in software because the power of the camera is never cut (to preserve the time and date).
The other push-button is used as camera shutter to take still pictures if pressed and released quickly. If kept pressed for some amount of time, the camera enters into a continuous video recording mode, and it will be in that mode until the button is pressed again or battery is depleted. If the camera isn't recording video it will shut down automatically after some time, if there is no other action like taking still pictures.
Push-button quantity, time intervals to turn on/off, take pictures, start/stop video recording may vary depending on camera model and manufacturer, but generally speaking, tends to work in the way mentioned earlier.
To control and power the camera externally (in case of defective battery or to give more autonomy), wires must be soldered into the circuit board to the push-button contacts and battery PCB pads. Use enameled wire as thin as possible.
AUTOMATE BUTTON PRESS
To automate the picture taking process, a simple 555 or transistor based circuit is enough. However, if more complex things are required like taking pictures with varying time intervals, or the time interval is longer than the automatic shut down camera timer, or if a flash is needed in low light conditions, a "smart device" is needed.
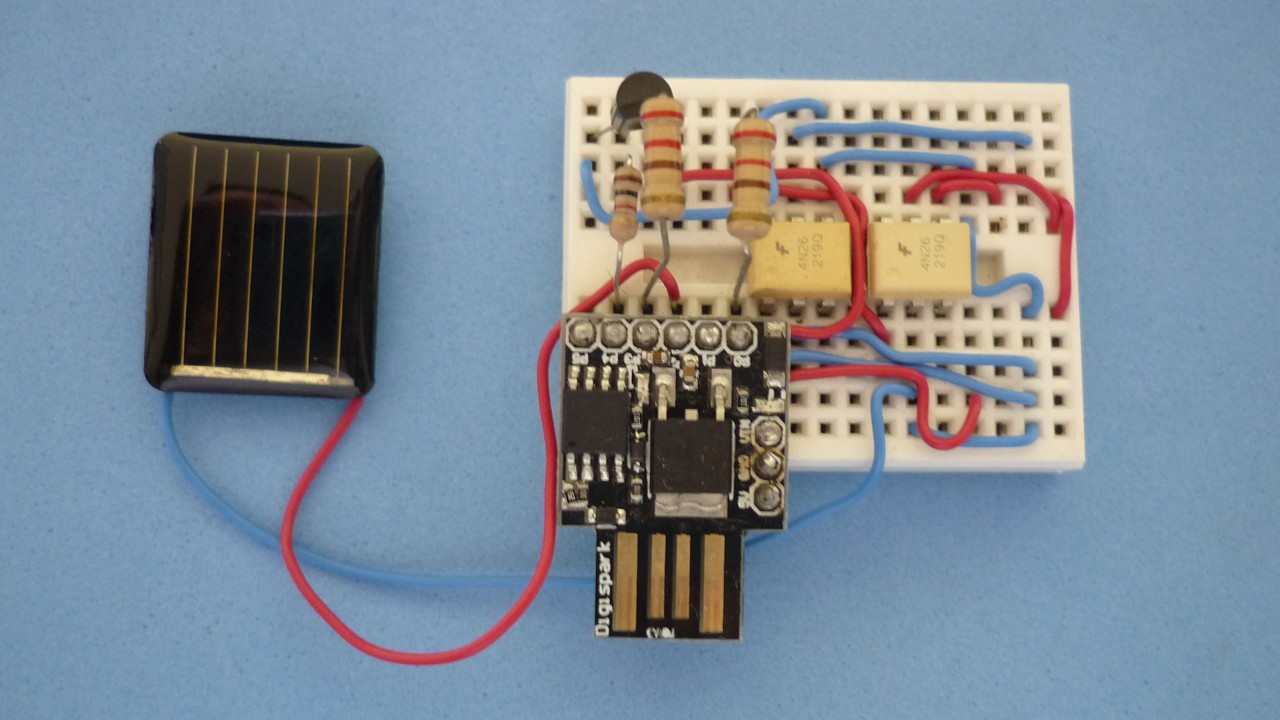
To complete this task, whatever embedded programmable platform could be used, in this case a Digispark will be used, thanks to its small size, very low cost (clones available for around 1USD/EUR/GBP worldwide shipment included),plugs directly into USB port so no cable is required, and also with a bit of effort supported in the Arduino suite.
The cyclic steps executed by the microcontroller are the following:
* Press power button, keep pressing and then release (camera power on)
* Wait while the camera initializes
* Observe light conditions (using toy solar panel) to turn on "flash" if needed.
* Press shutter button, keep pressing and release quickly (to avoid entering into video recording mode)
* Turn off flash
* Wait until the picture is written into the micro SD card
* Press power button, keep pressed and then release (camera power off)
* Enable watchdog and put microcontroller in sleep mode.
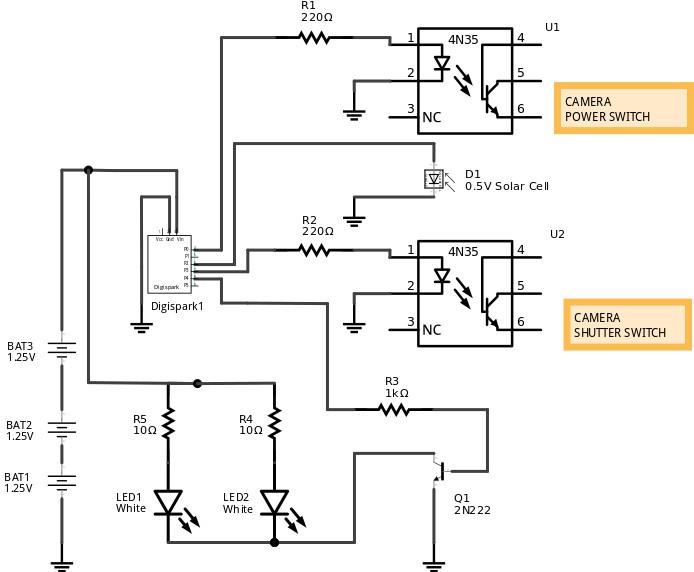
The different waiting times, like button presses, initialization, turn on, turn off, should be found experimentally because they tend to vary according to the camera used. Usually one of the push-button works in "pull-up" mode and the other in "pull-down" mode. Verify this with a multimeter to know the proper way to connect each optocoupler.
The system was programmed in C using AVR GCC, Micronucleus drivers must be installed to program the Digispark module.
IMAGE PROCESSING
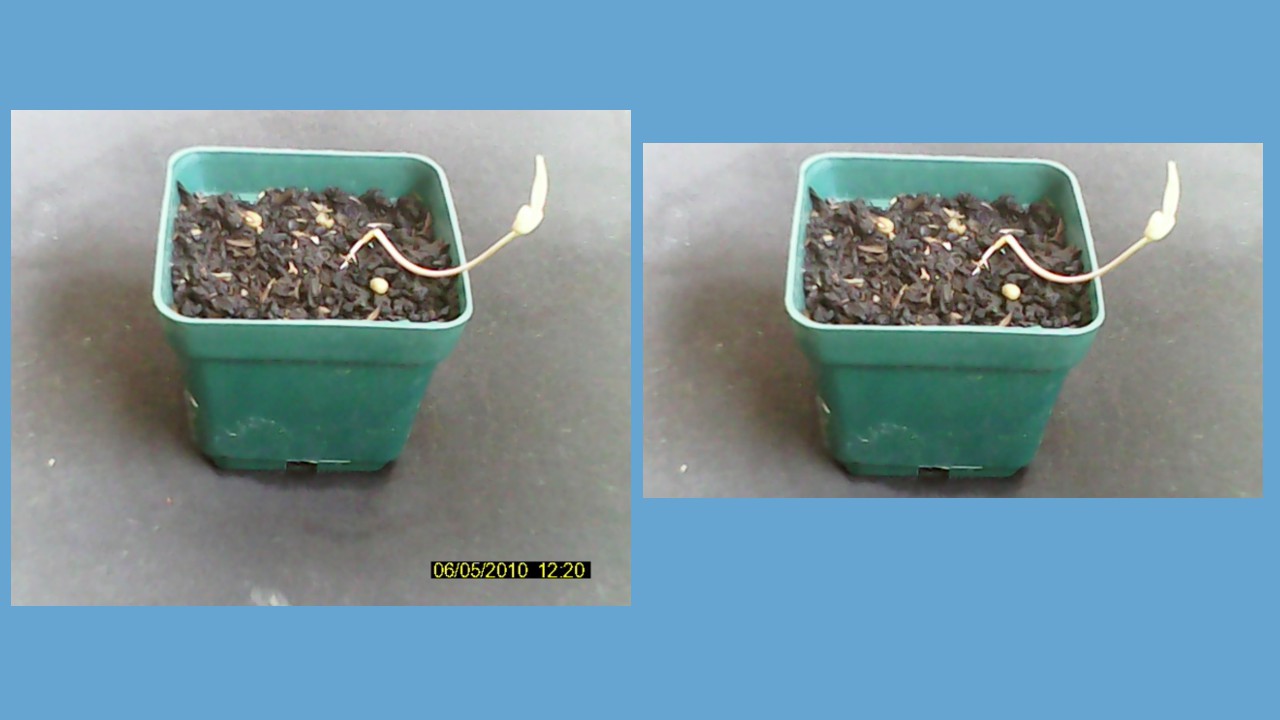
The camera stores the images on a removable Micro...
Read more »


 Roger
Roger
 The_Mekon
 andyhull
 Mike Rigsby
Thanks for the useful information