 Dennis
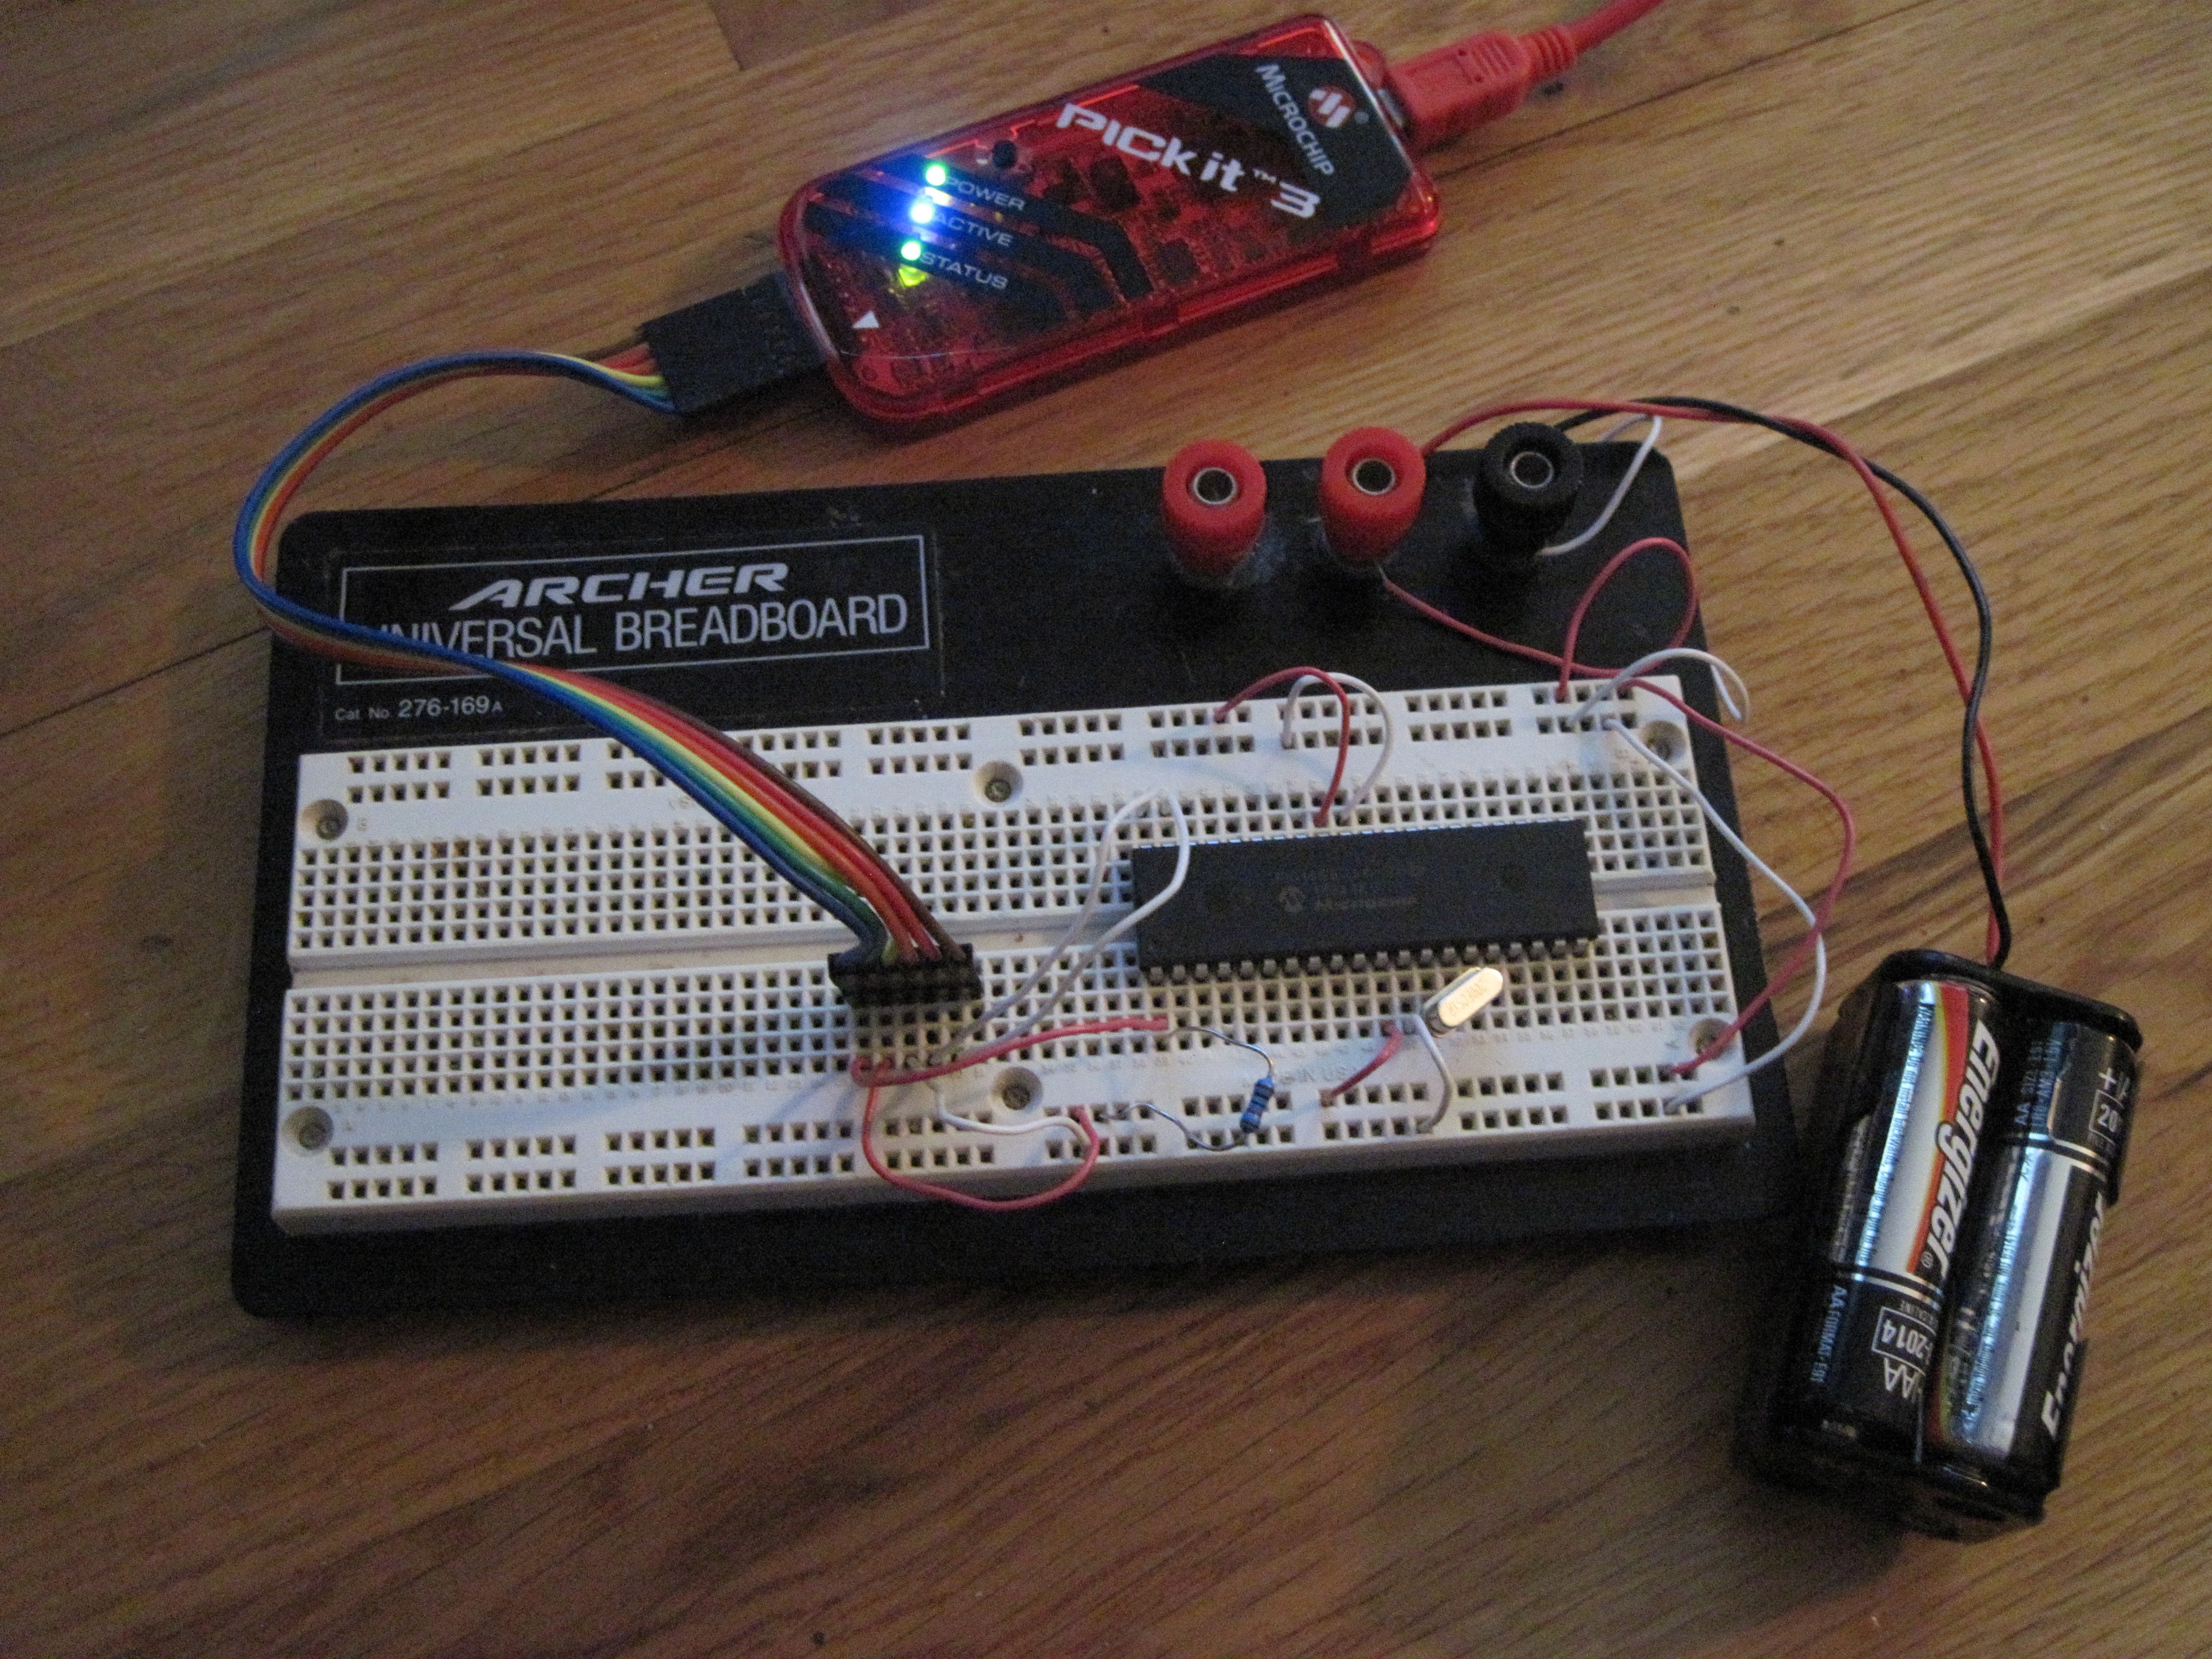
When starting a new program, I like testing each individual sub-routine and function on a solderless breadboard setup. This can help work out problems while reducing the risk to the fully assembled circuit board. Below is an image of a quick and easy setup for testing. I’m using a PICKIT 3 to store the program in the PIC. The USART and I2C pins are easily available to test connections to other devices.

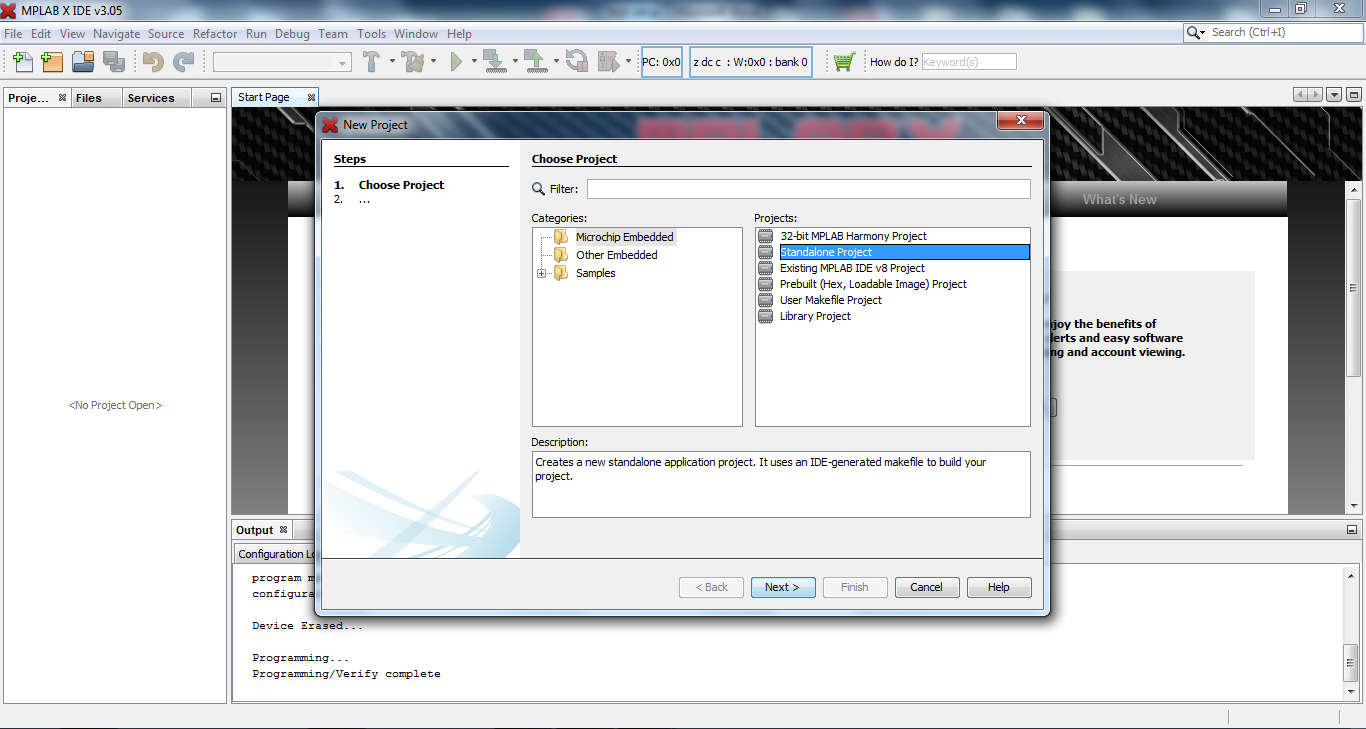
For an IDE (Integrated Development Environment), I’m using MPLABX v3.05 with XC8 as the compiler. I was debating about writing the program in assembler but decided to use “C” since more people are familiar with “C”.
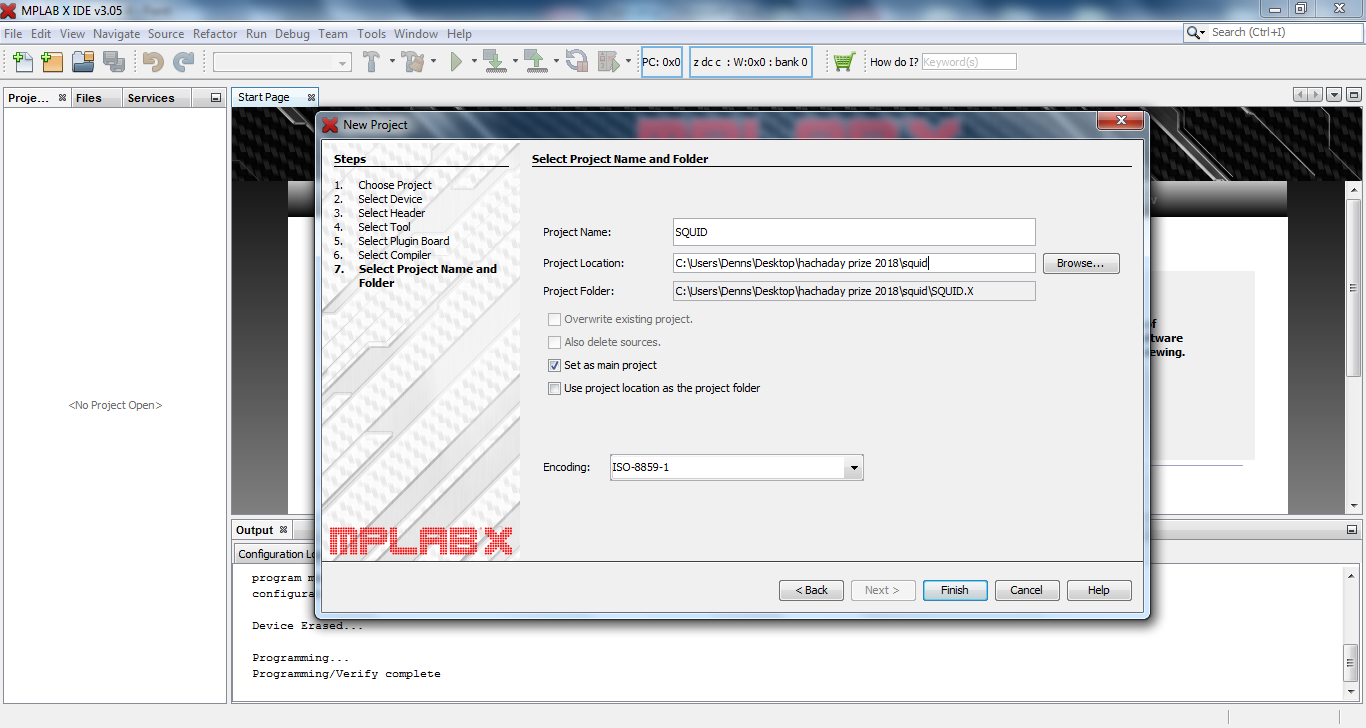
For anyone new to the wonderful world of MicroChip PICs, here is a quick run through of starting a new project. First, open MPLAB, click on “file” and click “New project”. Highlight “Microchip Embedded” and “Standalone Project” and click “Next”.
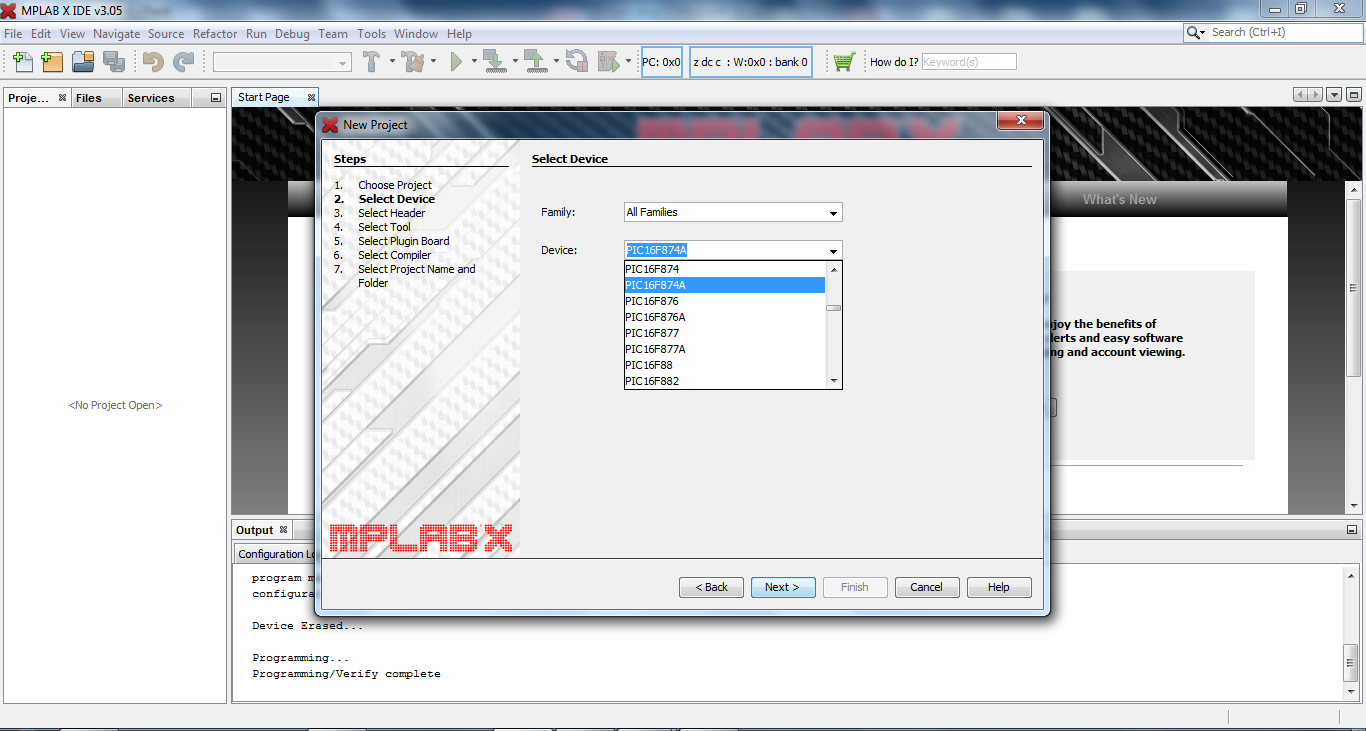
Select the device you are going to use. In this case, PIC16F874A and click “Next”.
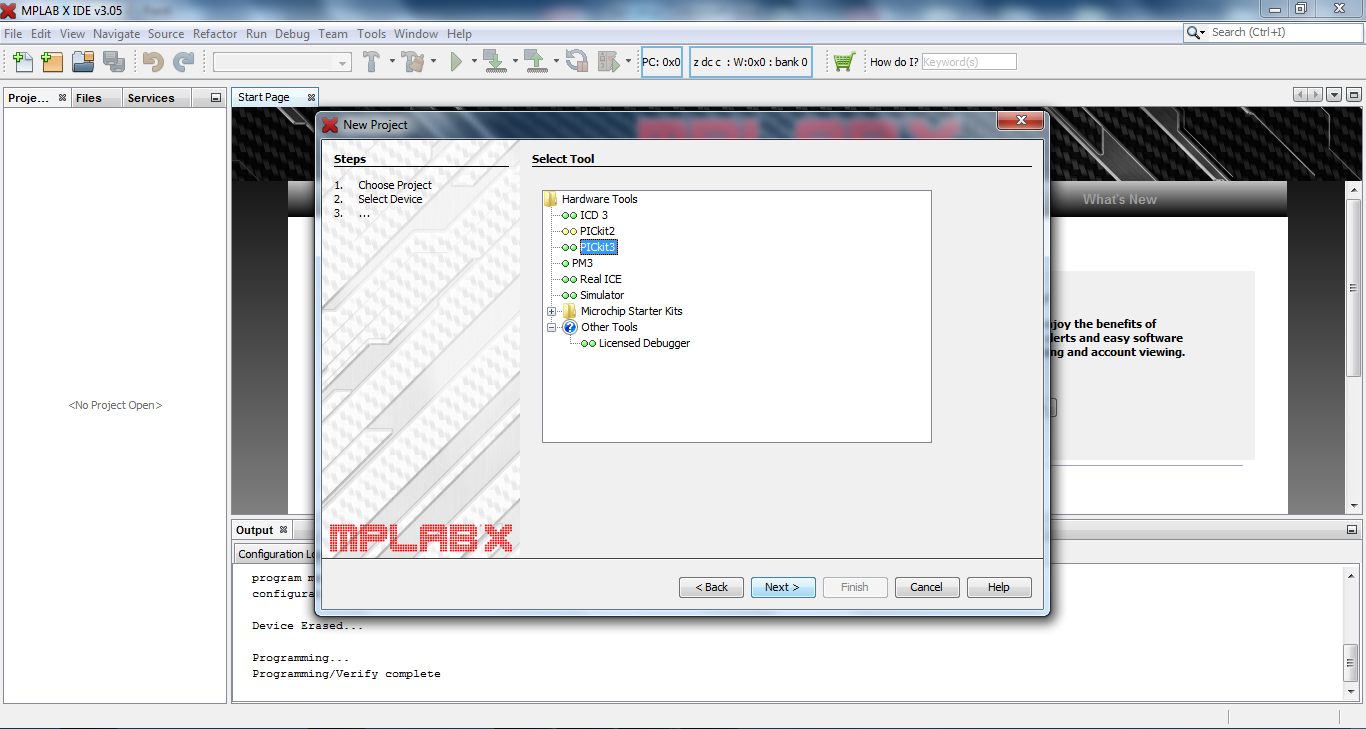
Select your programmer and click next.
Select the compiler you are going to use and click “Next”.

Discussions
Become a Hackaday.io Member
Create an account to leave a comment. Already have an account? Log In.