 T. B. Trzepacz
So, I made a test print of the new keyboard model I made in Autodesk Fusion 360 the other day. In case you didn't read the last post, it looked kinda like this:
It took a few tries to get a reasonable 3d model out of the Rostock printers. It didn't like some text I had placed on the bottom of a few small parts, and I had set the resolution fairly high, so the extruder would sometimes clip the model and move bits around. 3d printing kinda sucks.


But after a couple of tries I had to leave the office, so I just let it go, and it came up with passable prints in the morning!


There were some strange artifacts, tho.


Some sort of "ghost wind"?
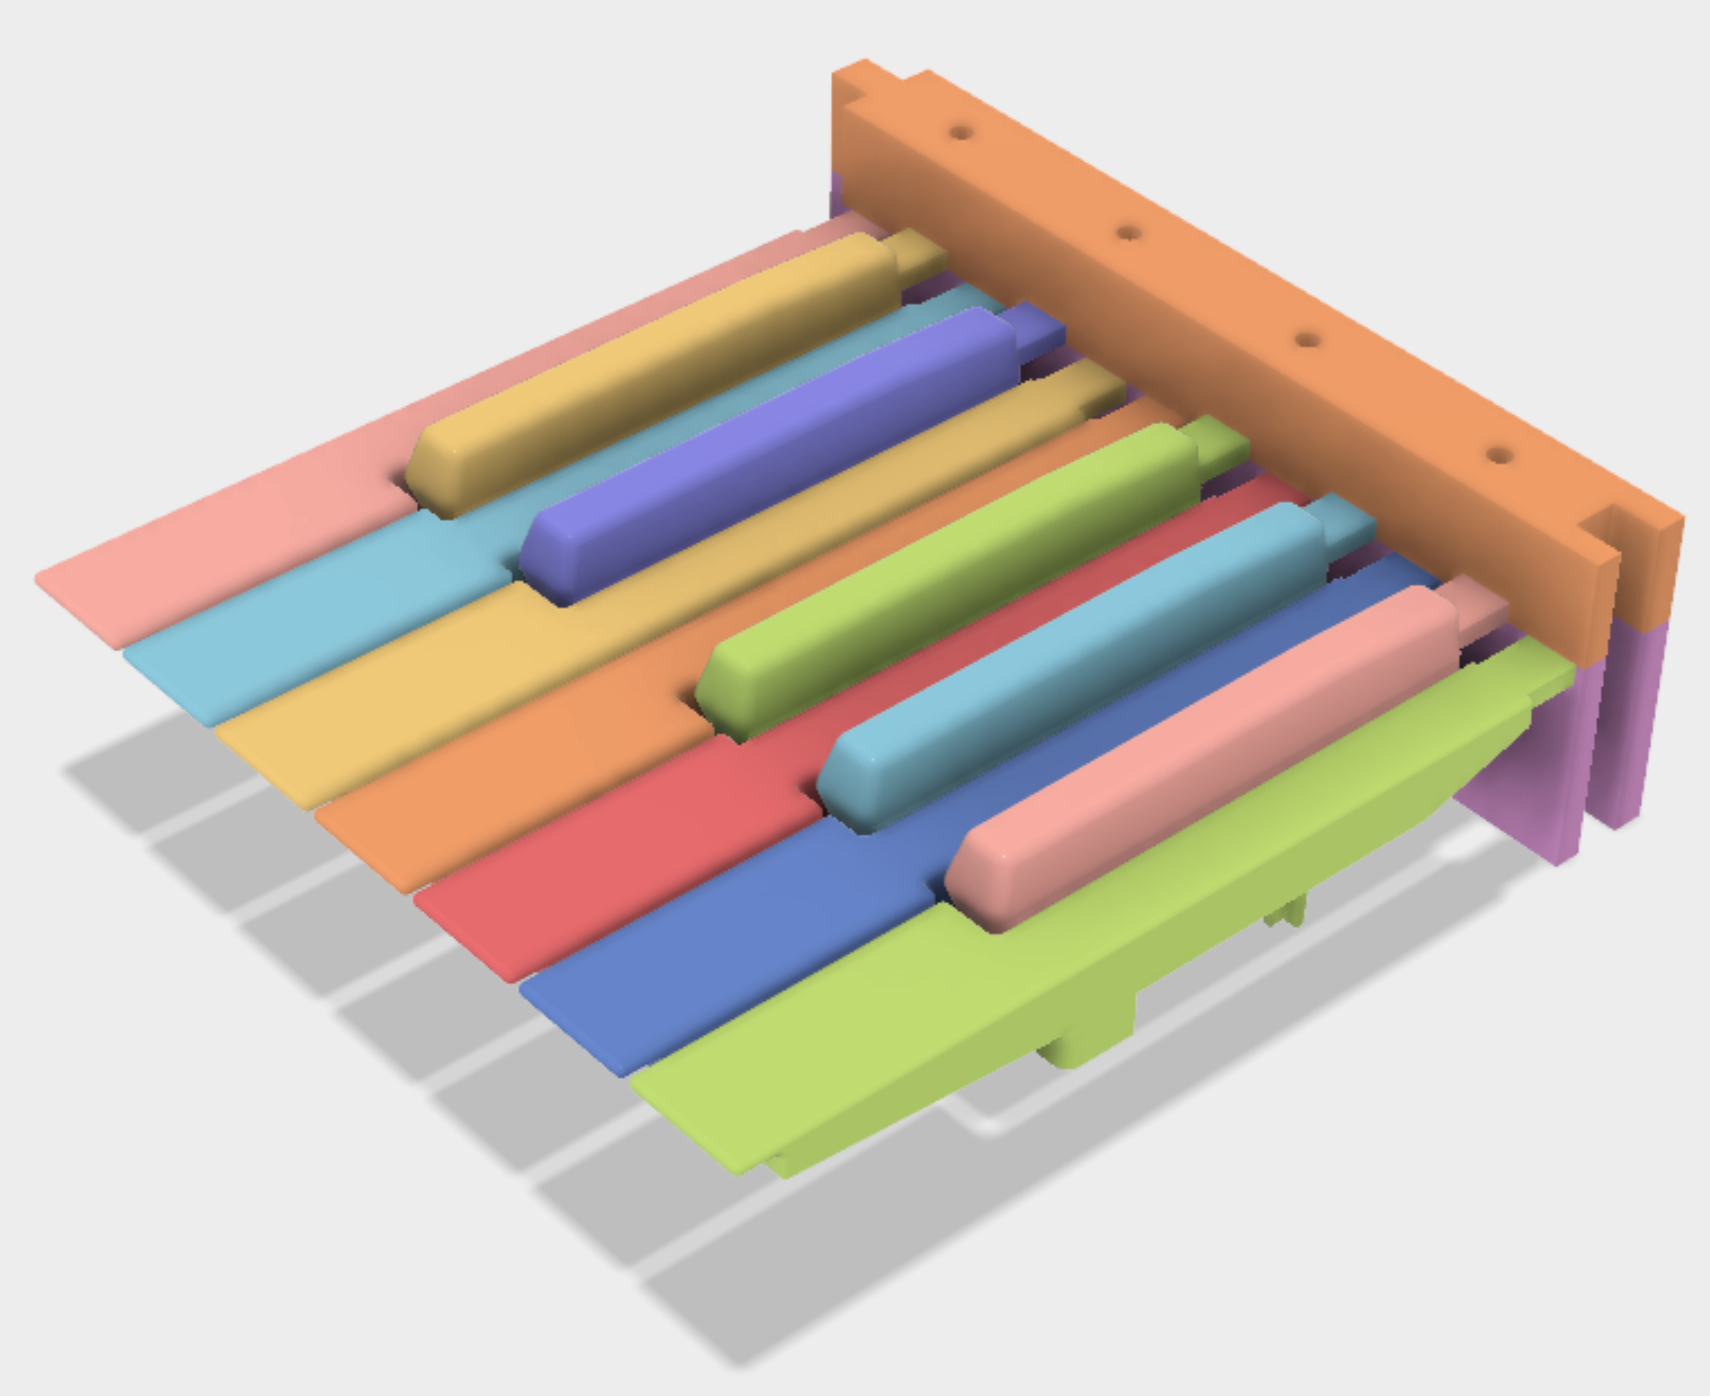
As always, I made separate models for white keys and black keys. The black keys had to be split into two parts because there needs to be a flat surface somewhere for 3d printing, so there is a top and bottom for each black key. I also added some parts to act as "cookies" or joiners to hold the two halves together. I had hoped for a friction fit, but it did not quite turn out that way, so I had to glue them.


The white keys could be printed as a single solid.


Speaking of which., I was tired of having so much trouble with not having a good throw on the keys, I decided to disassemble a stack of toy keyboards and take down some metrics. Hopefully this helps me make something that it actually playable.

Discussions
Become a Hackaday.io Member
Create an account to leave a comment. Already have an account? Log In.