Close
0%
0%

Air Pressure Quadcopter

Intake duct, Control Module, Fan 1, Forward/Backward Left/Right servo motion design, Fan 2, Battery, Recycle Duct, 8 tubes, All inside one u

Public Chat
Similar projects worth following
Air pressure powered all in one unit
Fans push high speed Air into tubes to blade fans and gives lift with a air return system back to unit.

This unique Quadcopter idea goes like this..

Top Duct Air intake (Intake vents on top, Remote Control Module inside)

Remote Control Module (Controls all motors and motor speeds inside unit)

Fan 1 (Moving at high speed drawing air into the unit)

Top Motion Design (Tilts Forward/Backwards, connected over servo motor)

              (Motion created by slightly cutting percentage off of air way on top)

Center Air Ducting Design (the Center duct is designed to direct the air flow into the 4 tubes and up to the blade box. Inside the Blade box is another designed fan, when air pressure is pushed against this fan it spins. Coming from the bottom of the Blade box is another tube connected to the bottom duct.

Bottom Motion Design ( Tilts Left/Right, connected under servo motor)

              (Motion created by slightly cutting percentage off of air way on bottom)

Fan 2 (Moving at high speed, this fan recycles air at the bottom of the unit. Pushing air into the top tubes while at the same time drawing air from the bottom of the Blade box back into the bottom ducting.)        (Hoping for a continuation of Blade motion)

Battery (A great power source with a lot of kick)

Bottom Recycle Air Duct (The battery sits inside, 4 tubes connected for air recycle)

And that is it for now... I know in one of the pictures it shows a winged bird on top. I was jumping way ahead by adding a glider when the testing should be focused on creating enough air pressure to get off the grounds.

Thank you for viewing...

JPEG Image - 3.16 MB - 04/16/2018 at 23:11

Preview
Download

20180416_190004.jpg

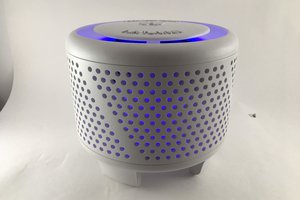
The small model in front. All together Air Pressure Quadcopter. All wires, motors, fans, controls, servos, and battery inside. Unit has been taped up the final will be glued and sealed at tight as possible.

JPEG Image - 2.76 MB - 04/16/2018 at 23:08

Preview
Download

20180416_123906.jpg

Wiring charging connection will be the only wires showing on the bottom outside of unit. Connecting top duct and wiring together. Close unit up.

JPEG Image - 2.74 MB - 04/16/2018 at 16:59

Preview
Download

20180416_091834.jpg

Connecting wires together from bottom of unit up. Battery wire Motor wire

JPEG Image - 2.76 MB - 04/16/2018 at 16:56

Preview
Download

20180415_151712.jpg

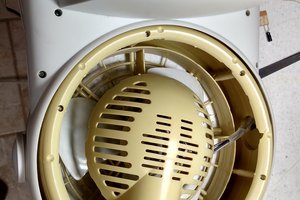
Broken down. Prepare for inside wiring.

JPEG Image - 3.05 MB - 04/15/2018 at 19:30

Preview
Download

View all 30 files

  • 1 × Remote Control Module controls all motor speeds
  • 2 × brushless motors Brushless Motors w/Fans
  • 1 × Battery Used to Power Unit
  • 8 × 8 Lite Weight Tubes Used to transfer Air Pressure
  • 2 × Servo Motors Used to control Tilt Motion

  • Wiring unit

    Future1xtech04/16/2018 at 17:14 0 comments

    started wiring unit from bottom up.

    Connected battery wires 

    Set rechargeable plug on outside

    Connected motor wires

    Ran both wires up the unit and taped all wires out of fans way.

    Connected top motor wires and connected top motor duct to top of unit.

    TEST MODE.... connected battery to both motors and fans spin as designed.

    (This unit must be sealed tight)

    Far from done still work progress to be made.

    Thank you for viewing.

  • Fan box 2

    Future1xtech04/15/2018 at 17:03 0 comments

    installed Fan Box.

    Input blades

    Input rod

    Input spacers

    Input propeller

    Glue on top

    Having slight problems and working on solutions.

    Nothing that can't be fixed.

  • Fan Box

    Future1xtech04/15/2018 at 03:40 0 comments

    3d printed fan box along with fan.

    Assembled all parts and connected tubes.

    Next step work on setting rods in place.

  • Fans

    Future1xtech04/12/2018 at 17:06 0 comments

    All fans have been printed

    Working on blade box design.

    Running test on motor fans.

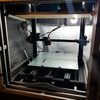
  • Quadcopter body printed

    Future1xtech04/09/2018 at 14:03 0 comments

    Finished printing quadcopter body.

    Printed piece by piece.

    Project was not perfect had to patch a few holes with hot glue.

    Posting pictures 

    Next step redesigning box and 3d printing all fans.

    Thank you for viewing..

  • Top Duct 3d print

    Future1xtech04/07/2018 at 21:24 0 comments

    3D printing Top Duct Vent.

  • Middle Duct 3d print

    Future1xtech04/07/2018 at 04:02 0 comments

    Middle Air Duct Design has been 3d Printed

    Minor design flaws have been detected and patched. 

  • Middle Duct 3d print

    Future1xtech04/07/2018 at 01:46 0 comments

    3d printing started on Fri, April 6

    Printing Quadcopter Middle system air duct design.

View all 8 project logs

  • 1
    Instructions

    please contact me if you would like to give it a try.

    Thank you

View all instructions

Enjoy this project?

Share

Discussions

Future1xtech wrote 04/09/2018 at 11:26 point

hello

Yes the entire design is done.

Designed in Blender.

I print piece by piece with around 20% infill.

I will update log today and post pictures.

  Are you sure? yes | no

malvasio wrote 04/09/2018 at 16:01 point

i hope to see it  in action in video soon ;)

i made https://hackaday.io/project/47138-pure-mechanic-motor not very designed for air but i can add 1 or 2 designs for air if you  want (openscad designed)

i have a project for a flying drone the opposite way (need a working 3d printer to begin)

  Are you sure? yes | no

malvasio wrote 04/09/2018 at 06:10 point

hi

is the entire design done ?

in what cad ?

do you print in full (more than 100% infill) ?

  Are you sure? yes | no

Similar Projects

Does this project spark your interest?

Become a member to follow this project and never miss any updates