 T. B. Trzepacz
Let's build it! I decided to build it on perfboard, since I don't have a PCB mill.
First, I laid the whole thing out in Fritzing so that I could see how best to use my perfboard to handle a Teensy (with Megsy expansion) and the screen and keyboard.
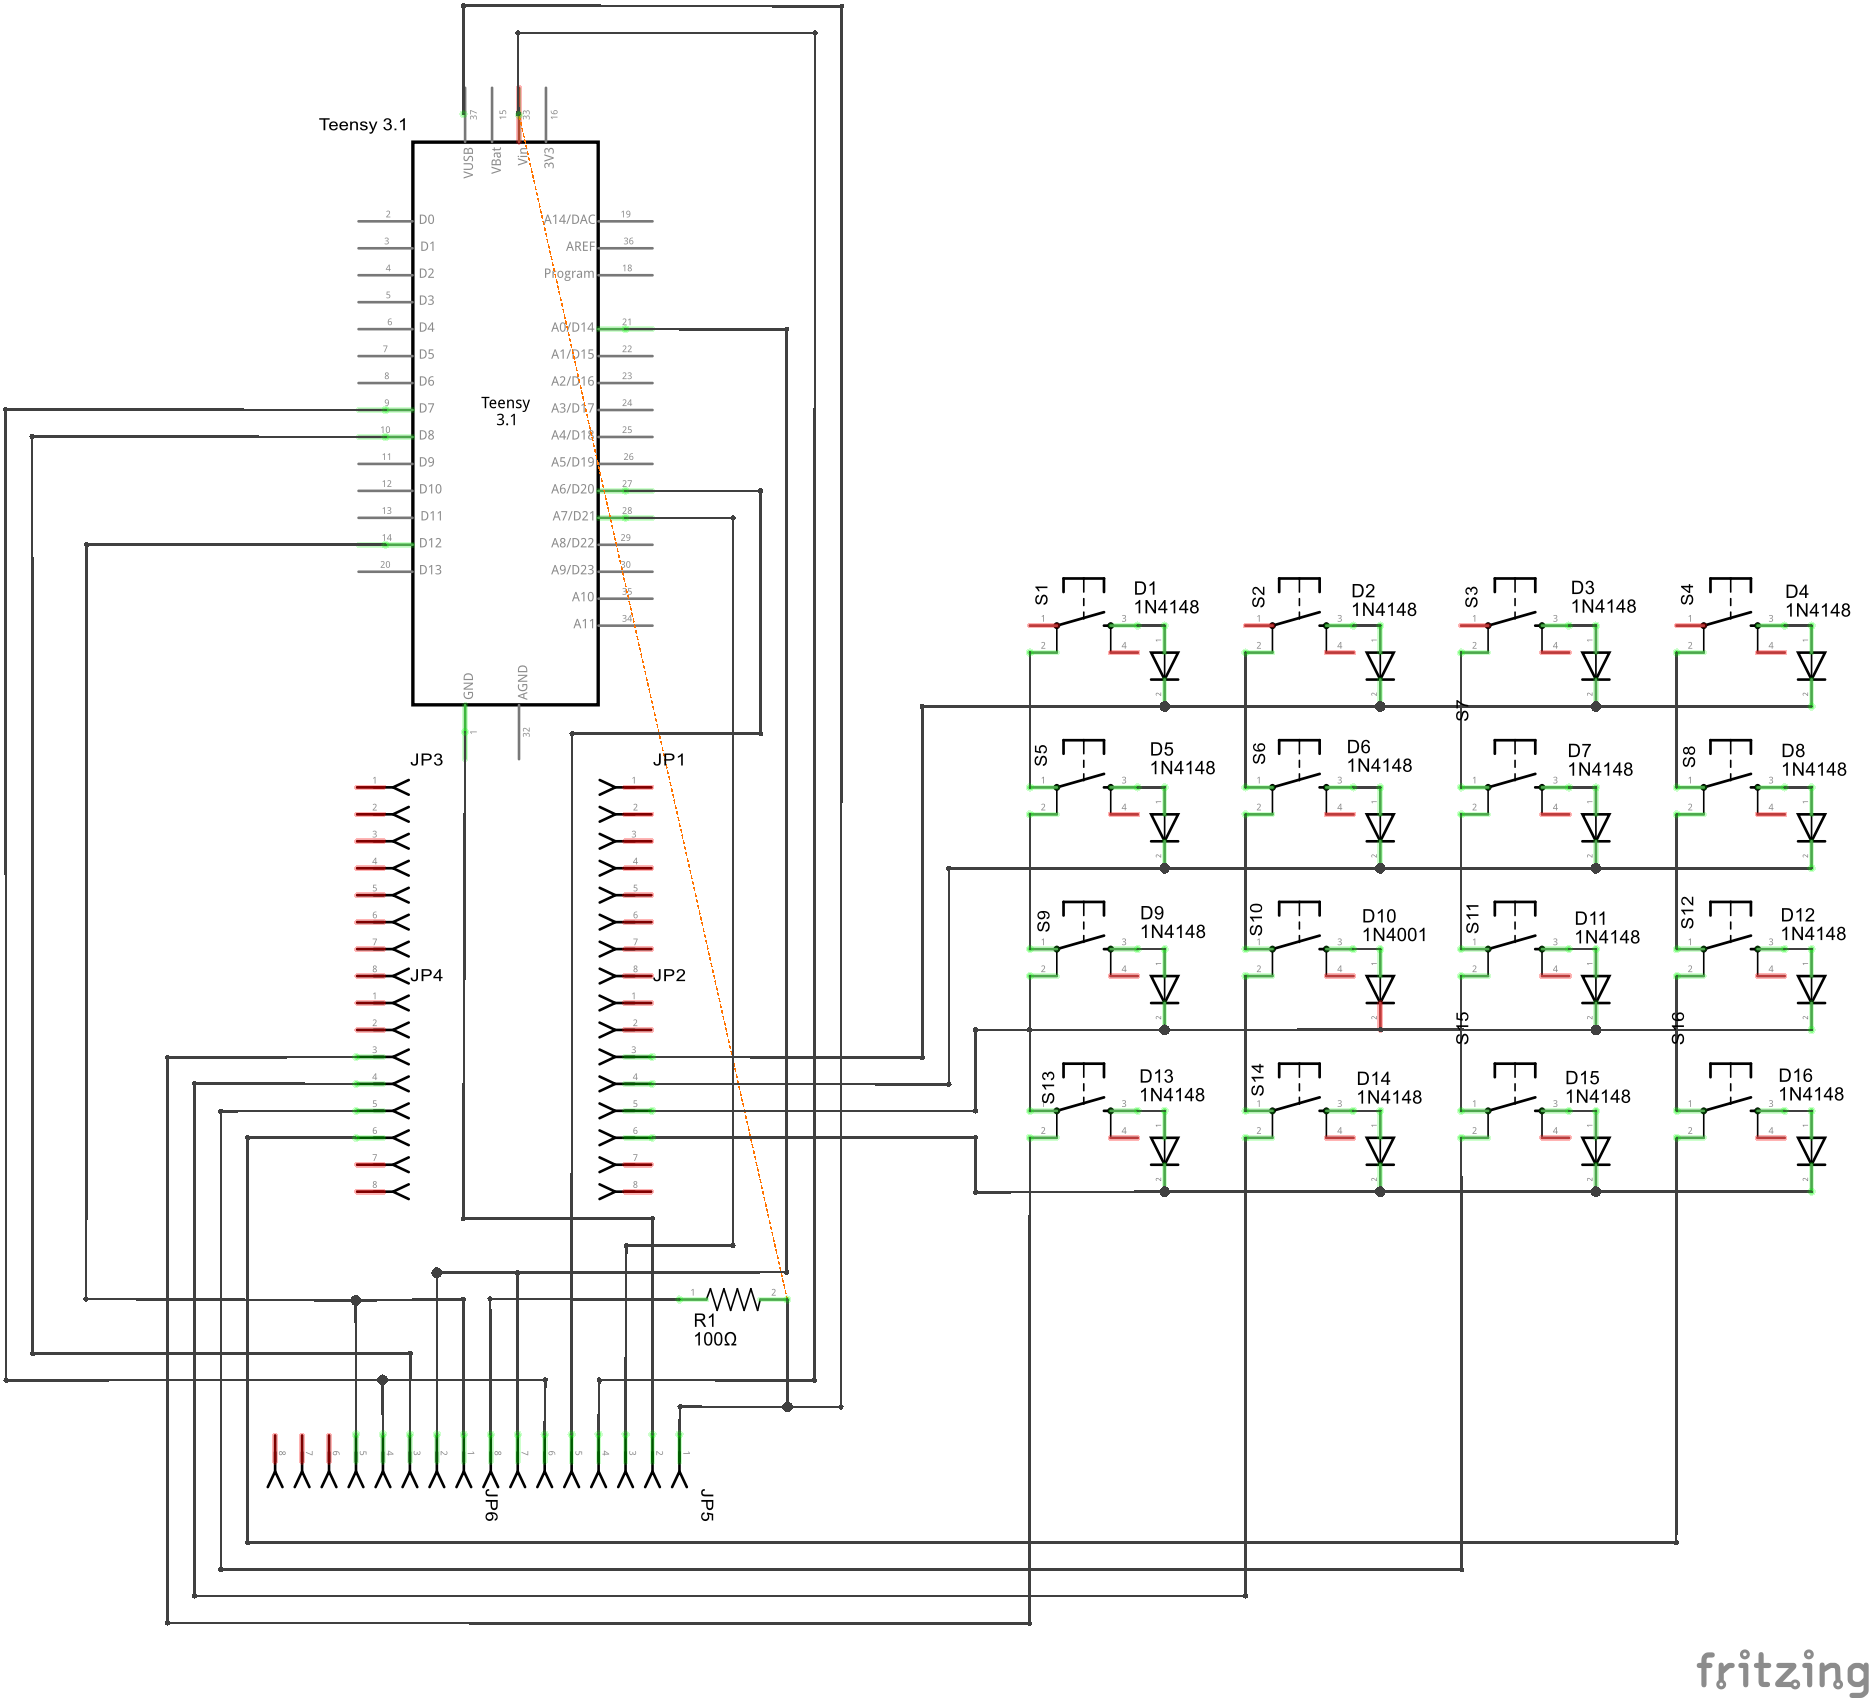
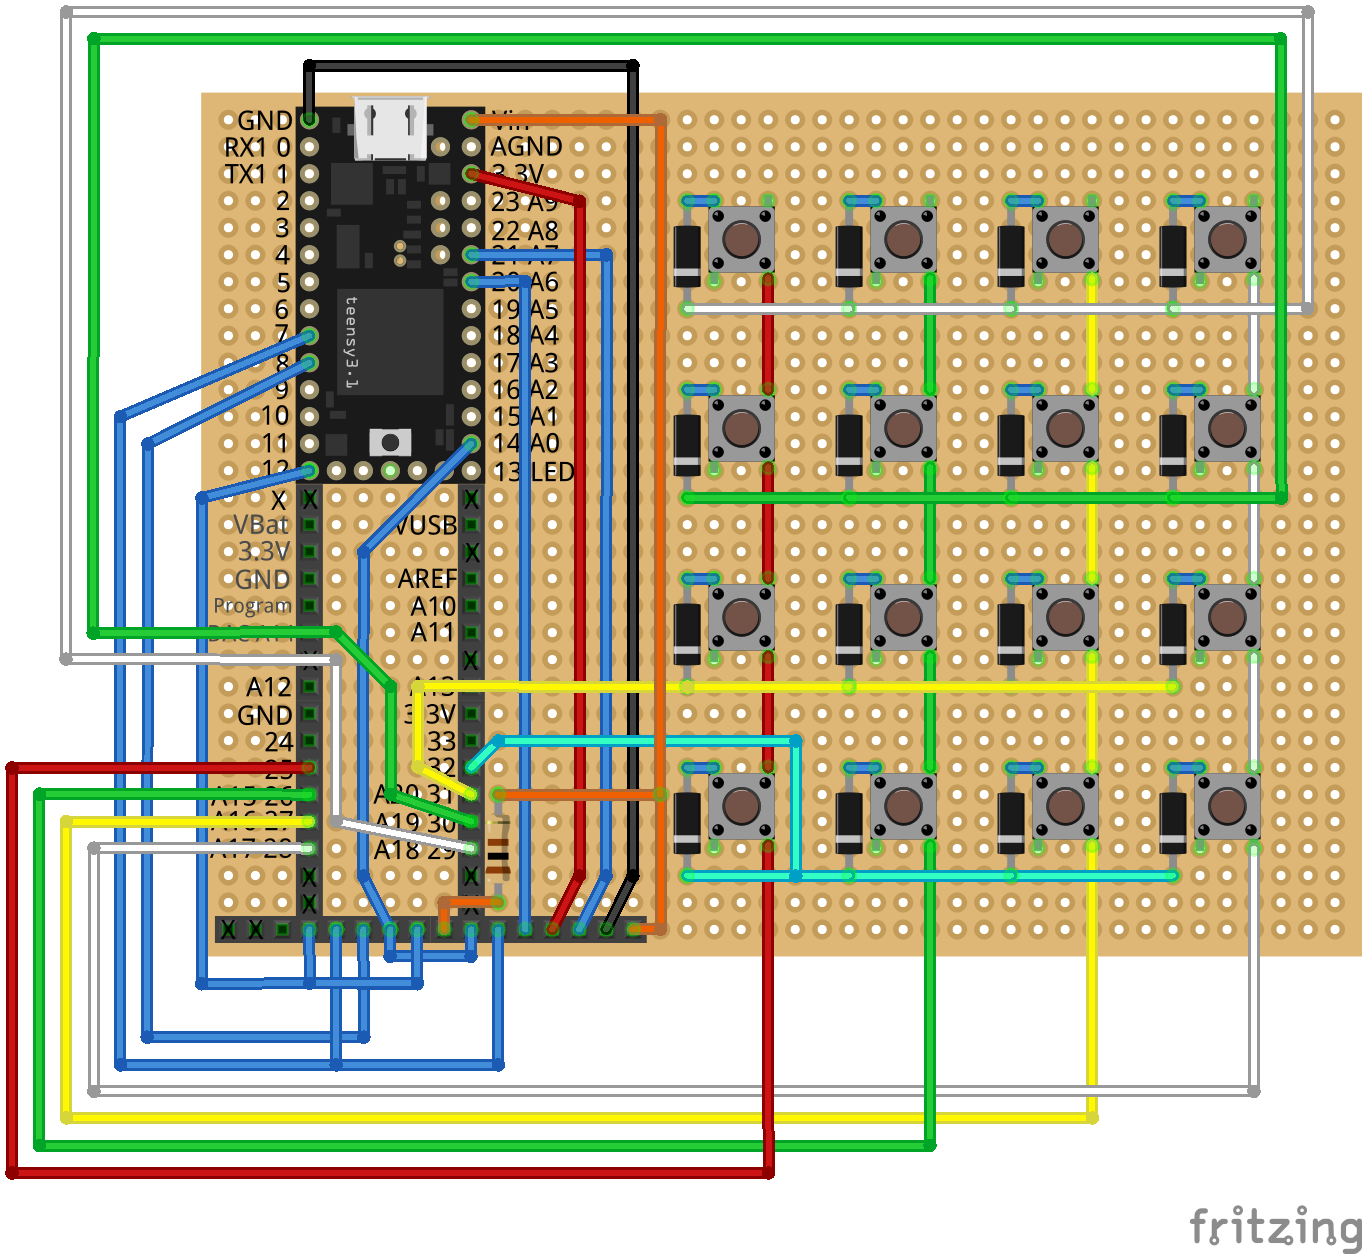
In real life, I had 28 pin sockets available, for Teensy/Megsy, but only 8 pin sockets, so the two extra pins displayed on the screen socket were indeed a problem.
Also, note that I used the far right side of the socket for the screen. That was a bad decision that would bite me later...
In order to clear the buttons, I needed to drill a few more holes, so I just went at it with a screwdriver.

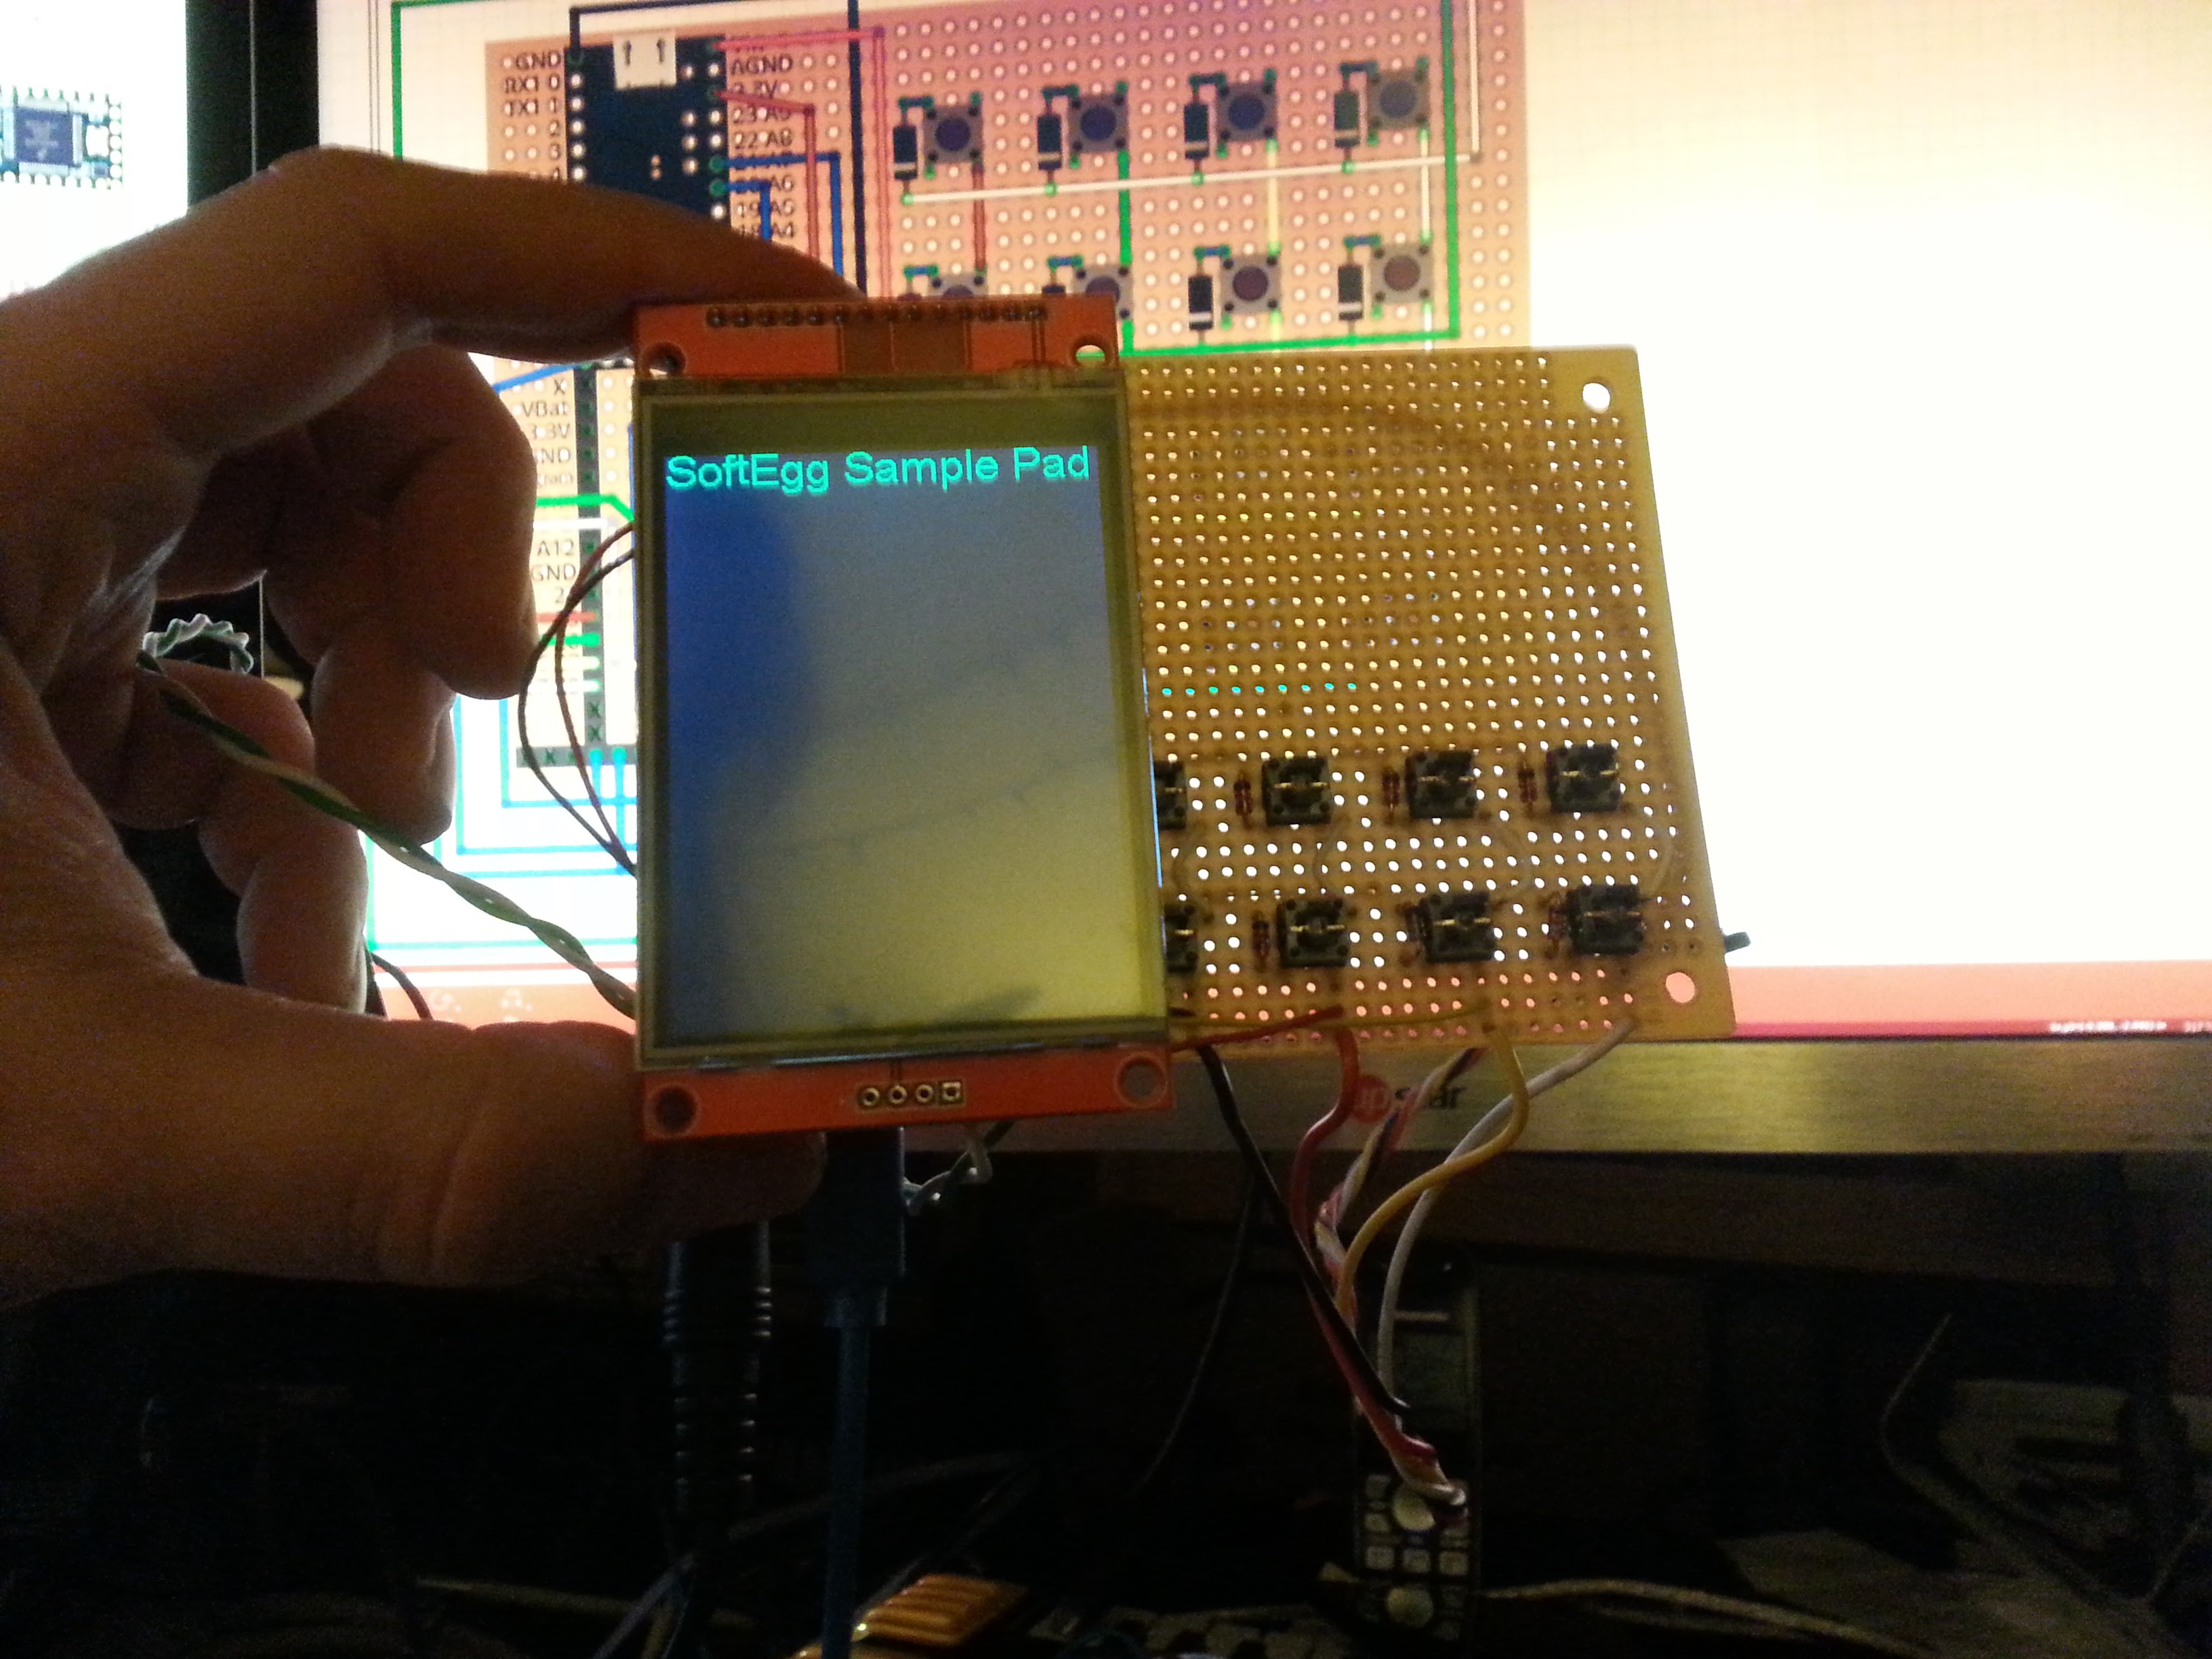
So I wired it up! I didn't have headers with the right number of pins for the screen, so I used two smaller ones. Unfortunately, I chose the wrong side to wire it up to, the screen overlaps the buttons a bit... GAH!
You can see on the back where the keypad is wired up, and you can see the Teensy and Teensy 3.1 wired up on the back side of the board. I actually used my Megsy project for the Teensy here, giving myself access to even the tiny pads on the bottom of the board.

Does it work? You betcha!

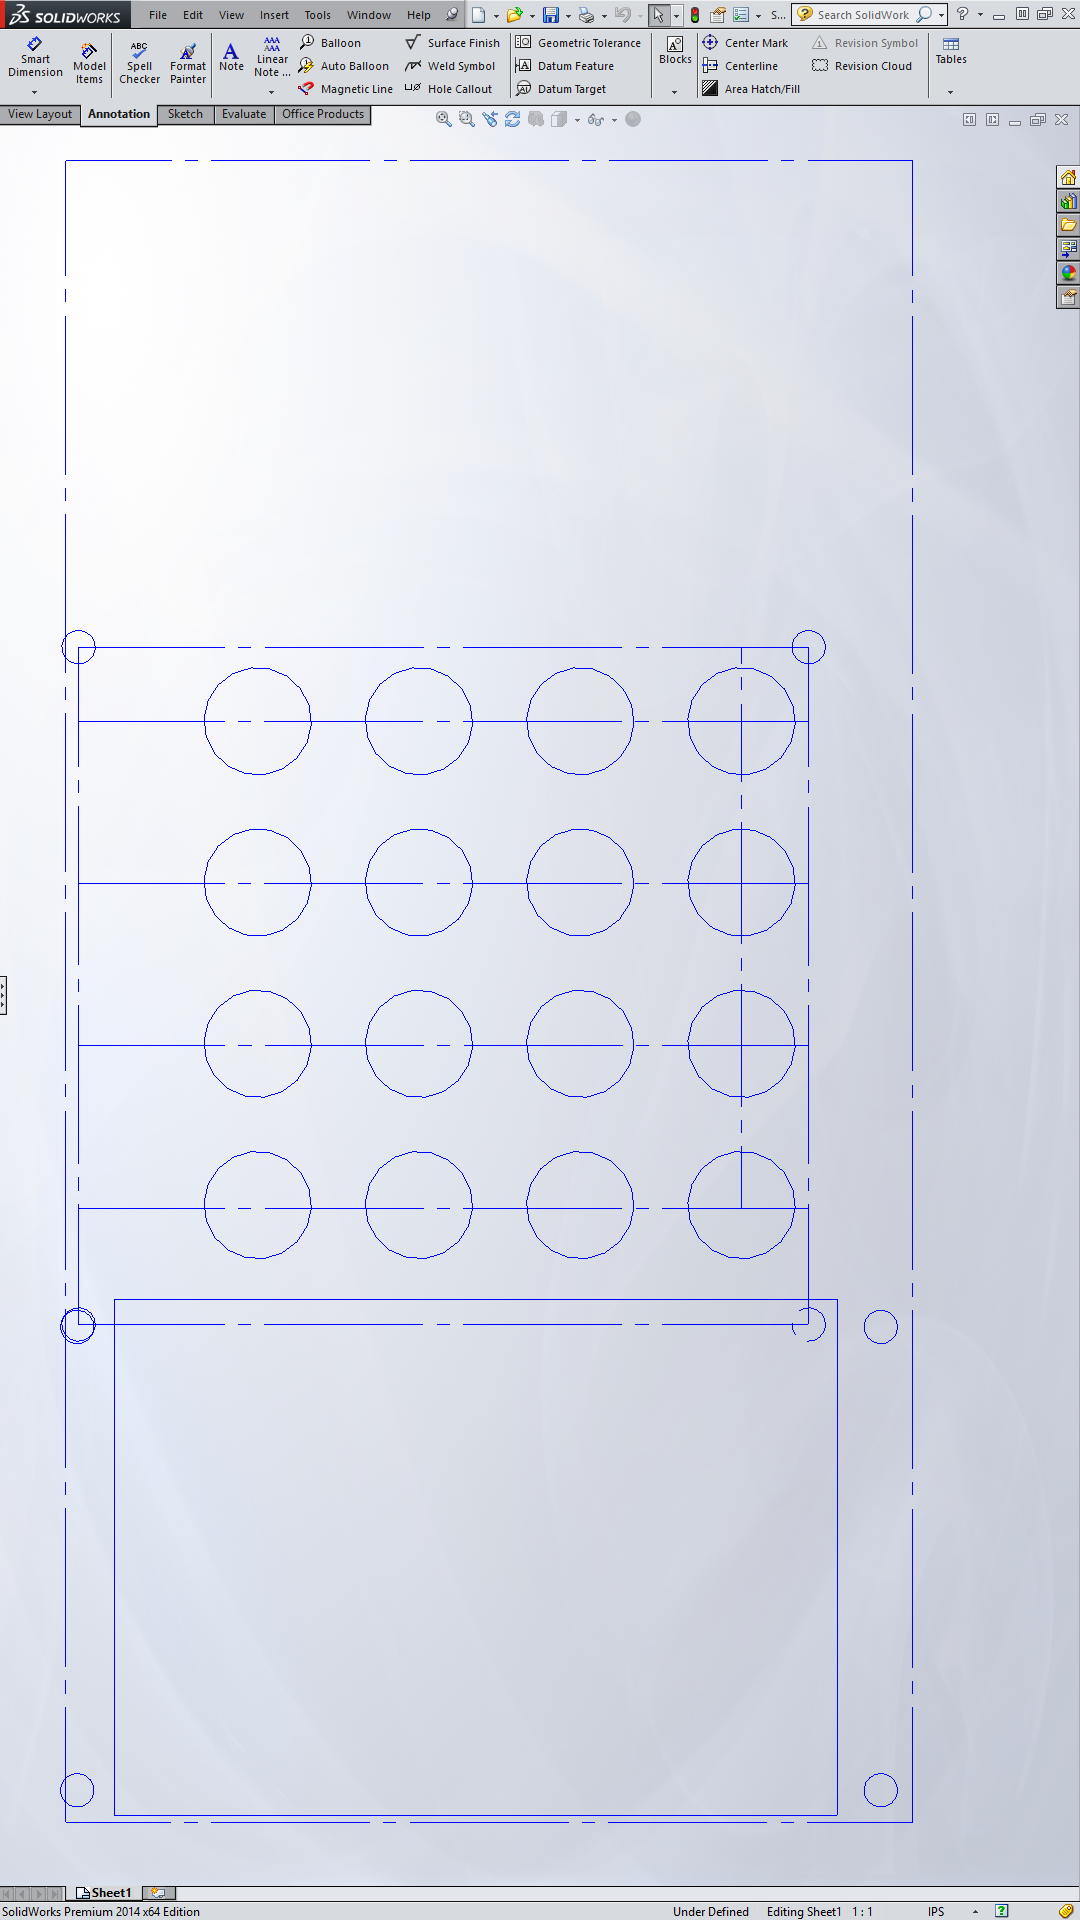
Then, I used the laser cutter at MAG Lab in Pomona to cut it.
After cutting, it came out like this. (Actually, this is the 2nd one cut from the same bit of bent acrylic. We had to cut it in half.)


I'm running out of time and material to make changes, but I've got one more bent piece of acrylic with me, maybe try that?
I want to be really careful to line it up right. I know, I'll use some scrap cardboard on a low power setting to determine where the beam will be...


So I put the PCB in the grinder in my shop and made it fit.

Looks good... but you know there is a giant *but* coming...


Well, the touch screen isn't necessary for the show, so I guess it will have to do.
So I give the box to Tina and she goes off to do the show, and amazingly it behaves fine. Mission accomplished!
But I still have "unfinished business" with it....
Today, I want to fix up the touch before I take it out to 23b, so I disassemble the thing to grind the board again.
I had attached the buttons on one side with some double-backed foam tape, so I had to use some Goo Gone to get the residue off.

Do ya think 3/4 of a diode will still work ok?
How about that screen?


Well, let's button it up...
Still remaining to do:


- Finish wiring the other 8 keypad buttons.
- Add functionality to the LCD touch screen to select samples, adjust levels, add effects, etc.
- Add MIDI ports. With those it can also run NanoEgg software and give me a more rugged platform for carrying that around.
- Add a port for the SD card that doesn't require futzing inside the case.
- Add a volume knob. The audio board has a connection for it.
- Add an audio input to record samples.
- Maybe add some other adjustment pots.
- Make a case that is not open on 3 sides.
But this works and is good enough to handle shows. So far, only one song requires samples, but maybe in future here will be others. Now that we have that capability, the sky is the limit!
Discussions
Become a Hackaday.io Member
Create an account to leave a comment. Already have an account? Log In.