 Carl Strathearn
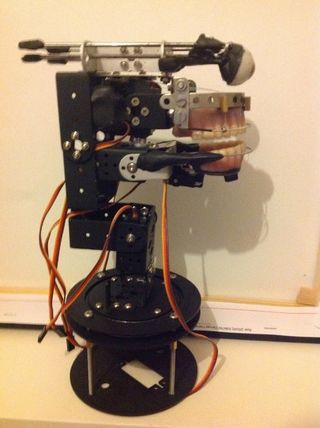
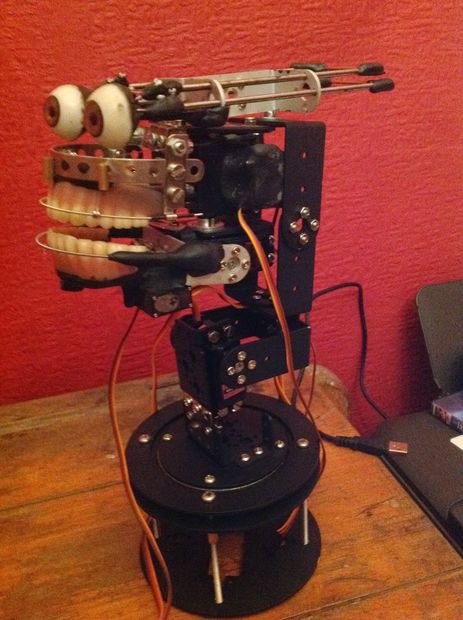
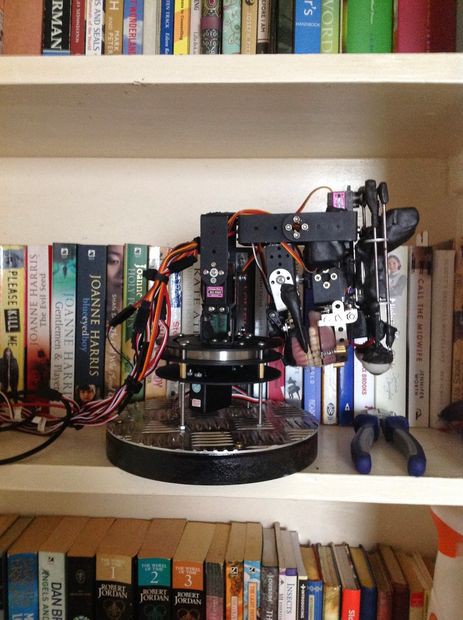
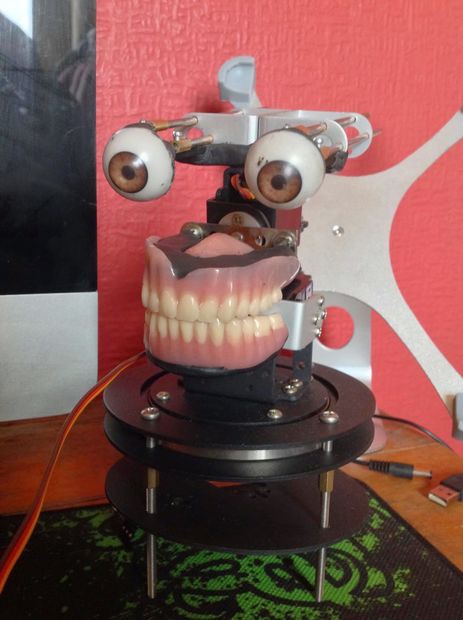
The title of my final year Multimedia Design project (Actuality and Artificiality) is an adaptation of the post-modernist philosopher Jean Baudrillard’s ideology, Simulacra and Simulation: Simulacra as object and Simulation as process. The robot can track movement and respond to questions via a wireless keyboard, however, voice recognition can be implemented using macs dictation and speech function in system preferences in-putted via the xbox kinect's internal quad mic set up. The robot uses an adapted version of the Eliza algorithmic framework (siri derivative) to respond to participant questions, The 'script' is then out-putted to apple scripts voice modulator so it can be heard through the robots internal speaker system. The application of the project is as an interactive exhibit, but this project is highly adaptable and would be suited for museum displays, help desks or interactive theatre. The Eliza framework can be changed to mimic any individual or language (Currently based on Marvin from Hitchhikers Guide to the Galaxy) and also answer complex questions, making this a highly interactive and knowledgeable system. The voice can also be outputted and modelled on specific individuals and the mouth and lips react to the sound coming into the computer's audio output so it is always more or less in time. The system tracks peoples movement via a Kinect module, the current system uses an open software library that tracks the nearest pixel to the sensor, however, the script also includes skeleton tracking output which can be activated via un-commenting the skeleton tracking code and commenting the point tracking library. This means that multiple individuals can be tracked and interacted with at once, allowing for larger audiences.

Abstract: Theory
Beginning with Tom Gunning’s theoretical model of cinema as a machine for creating optical visceral experiences, the core proposition of this study stipulates that pure CGI characters no longer have the ability to accurately simulate consciousness and materiality, or to meet the expectancies of the modern day cinematic audience. It has been claimed that the movement towards Hybrid systems (Motion Capture / Live action integration) provides a form of mediation between actuality and virtuality, adding depth 'soul / consciousness' and a kinaesthetic grounding of external operations in an attempt to solidify and reify the virtual image into something organic. However, it is suggested here that hybrid systems have problematic issues concerning inaccurate approximation of: surficial reflection, portrayal of additional appendages, incomplete character formation (interaction / performance) and encapsulating / staying true to an actor’s performance during editing. The imprecision of these elements become increasingly apparent over time - especially at close proximity, where it becomes discernible via the evolving critical eye of the average modern day cinematic observer.
This projection positions Hybrid systems not merely as mediation between physical reality and holographical dimensions but as a means of returning to the greater substantial and grounded animatronic character systems. Modern animatronic characters / puppets exhibit greater detailed aesthetic verisimilitude and organic simulative, external and internal operations at close proximity in comparison to the most advanced CGI and Hybrid systems as they are augmented via the parameters of the physical world. This research explores a possible return to animatronic special effects in the future of film as the primary medium for character creation, overtaking CGI and other virtual hybrid systems which lack the ability to propagate visceral optical experiences, fine detail / nuance and genuine/responsive characters to meet the evolving critical expectations of the cinematic observer. Technological advancements in animatronic interactive control systems allow accurate tracking of movement, autonomous extemporaneous expressions (programmable level), voice recognition: recording / response technology, exact precision of kinetic functions with meticulous coordination and the ability to continually repeat sequences of action. In addition to these properties there is potential postproduction value via adaptation (Interactive Rocket Raccoon, Guardians of the Galaxy 2014 promo: Tetsushi Okuyama). Further reinforcing this theoretical position, the film, Harbinger Down (2015) became the first successful publicly backed Kickstarter campaign for a cinematic feature to exhibit animatronic characters as the primary special effects medium (3,066, backers pledging $384,181). The major Hollywood production, Star Wars: The Force Awakens (2015) has demonstrated a return to practical and animatronic special effects over the predominant modern orthodox virtual progression, grounding the possibility of an animatronic renaissance.
I'm going to show you the foundation of this project so you can devise you own variation.
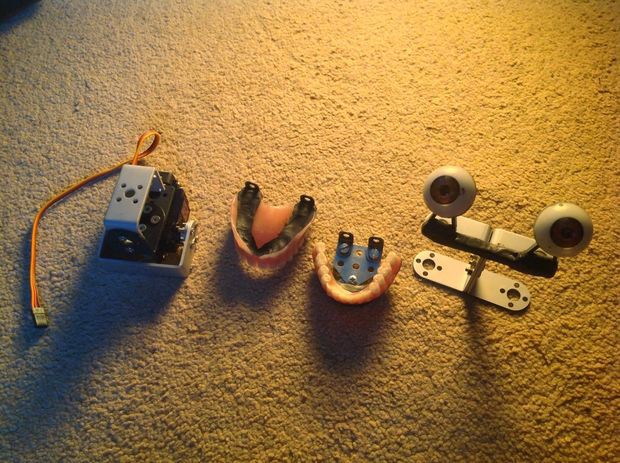
Equipment:
1x wooden circle (20cm dia)
1 x check plate (aluminium) same size as wooden circle
Black paint
Processing free from Processing.org
Arduino free from Arduino.cc
Mac computer
Bolts and Nuts of Various sizes 1mm-4mm (m3)
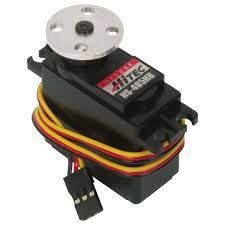
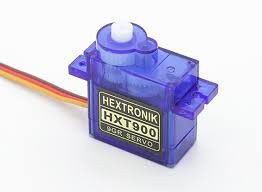
2 x 12g micro servos
5 x hex screws
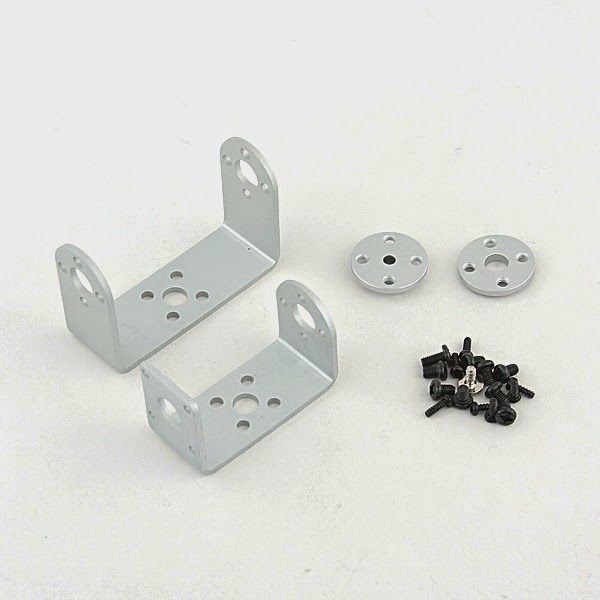
2 x meccano L brackers small (fish plate)
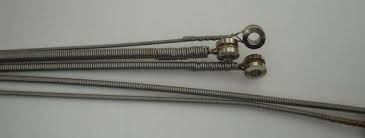
3 mm wire (sturdy)
1 x kinect sensor
1 x kinect sensor stand
1 x arduino (leonardo)
1 x servo shield v2
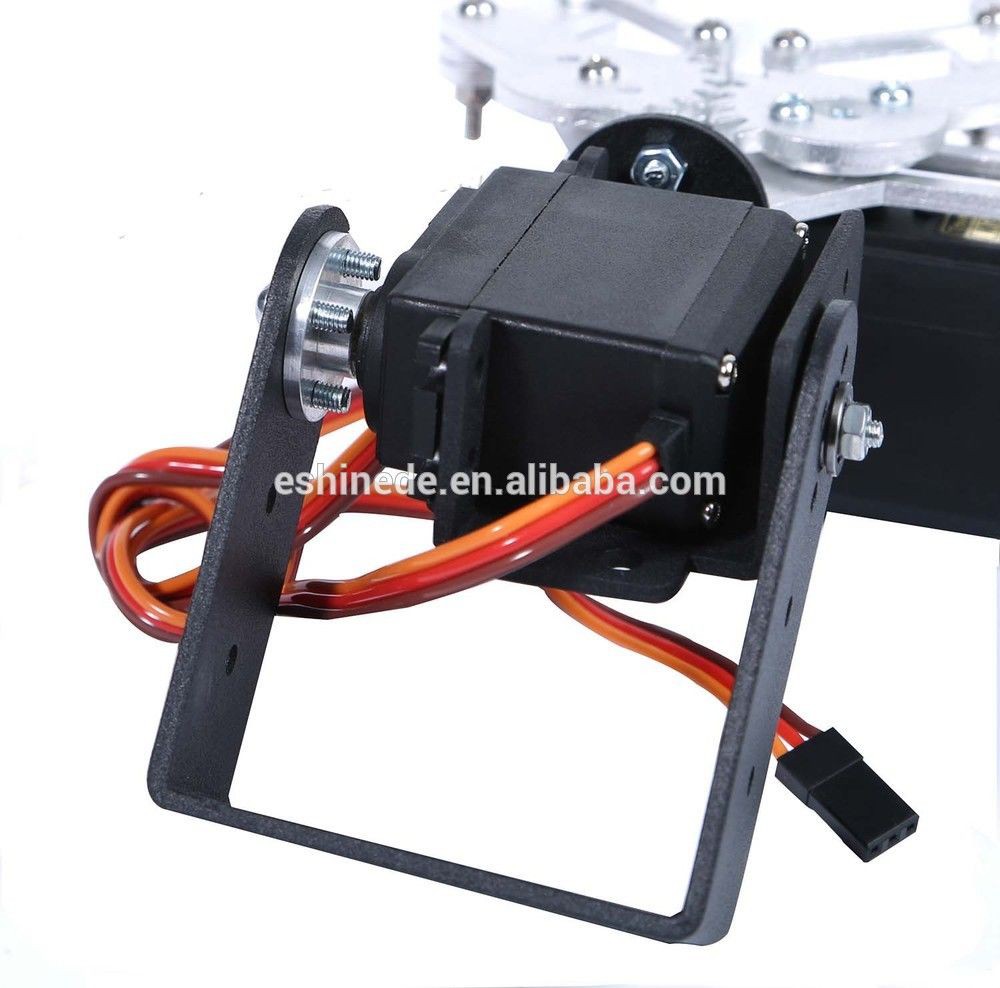
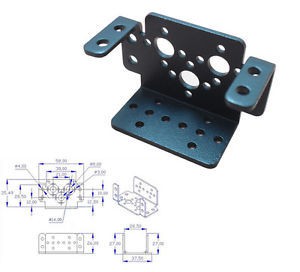
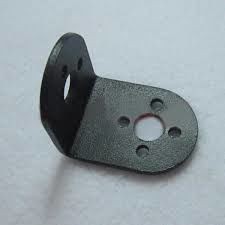
3 x Robot L bracket
1 x Robot circular rotating base (aluminium not plastic) - (ebay) (around £30)
1 x 10kg servo (base)
3 x silver small 'short' robotic U brackets (ebay)
1 x guitar neck plate - black
1 x 15 kg servo (neck) u / d
3 x large robot brackets in black (ebay)
false teeth
Artificial eyes
Miliput (black)
3 x 9g micro servos
Guitar string (E)
2 x Springs from pegs
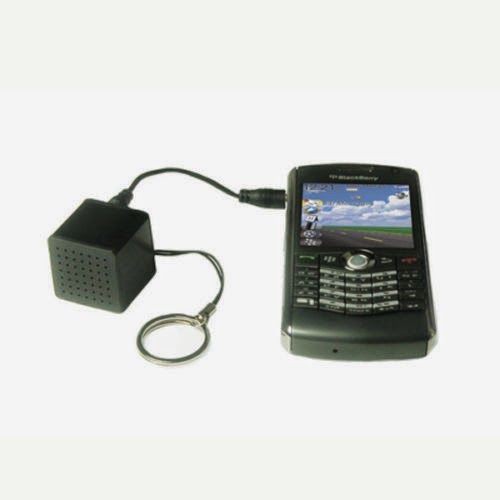
1 x pocket speaker (anker - front)
1 x pocket speaker (larger - back)
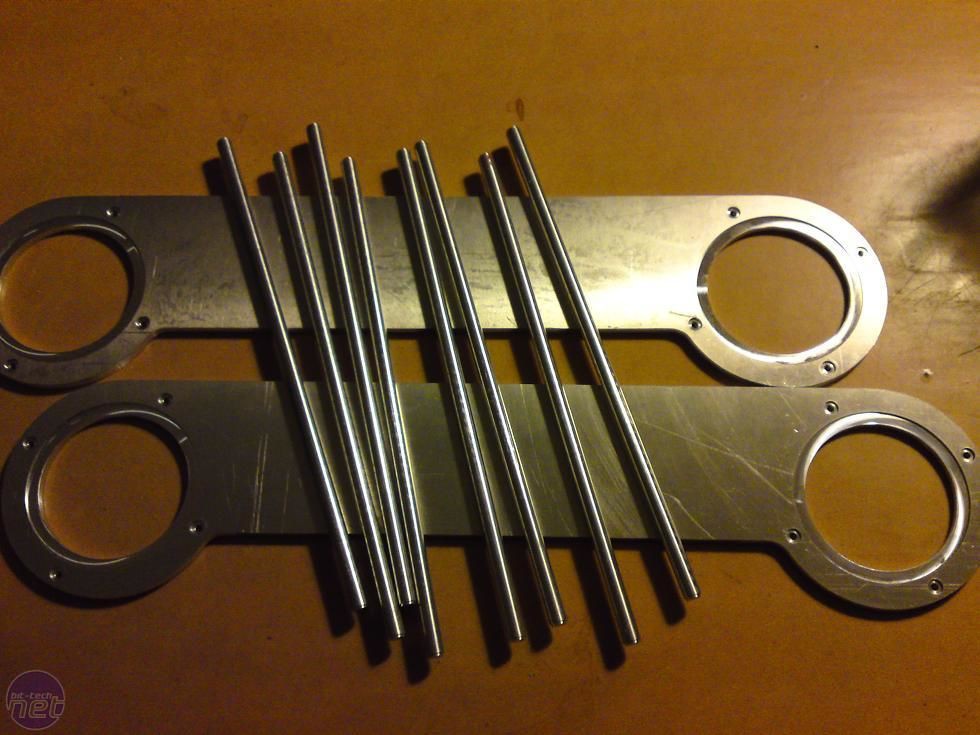
4 x metal rods 15 cm
1 x short 7 cm
8 x brass screw bricks from wire connector blocks
2 x circular servo horns
1 x meccano long plate
1 x breadboard
reel of tribind wire (90lb fishing wire)
10 x servo lead extension leads
2 x multifunctional robot brackets
8 x brass spacers (m4)
4 x m4 bolts 8 cm
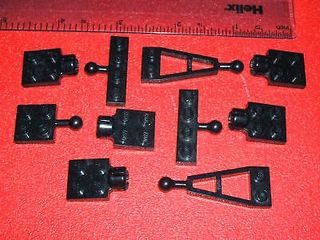
2 x ball and socket joints (lego)
extension lead 2.1mm audio
1 x 5 kg sero (jaw)
1mm wire
black thermo plastic (small bag)
2 mm eyelets
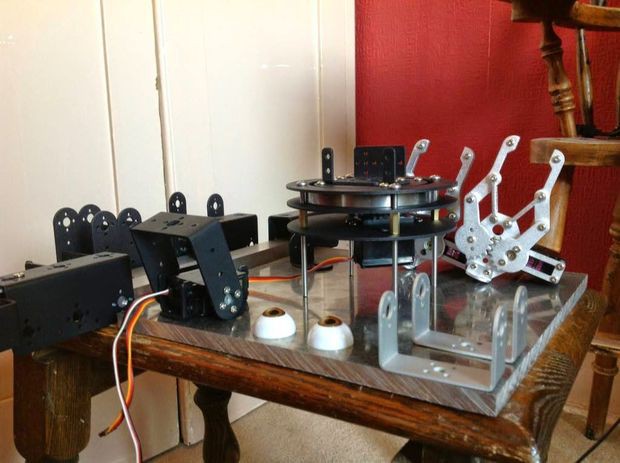
Step 2: Base Construction
Diagram.
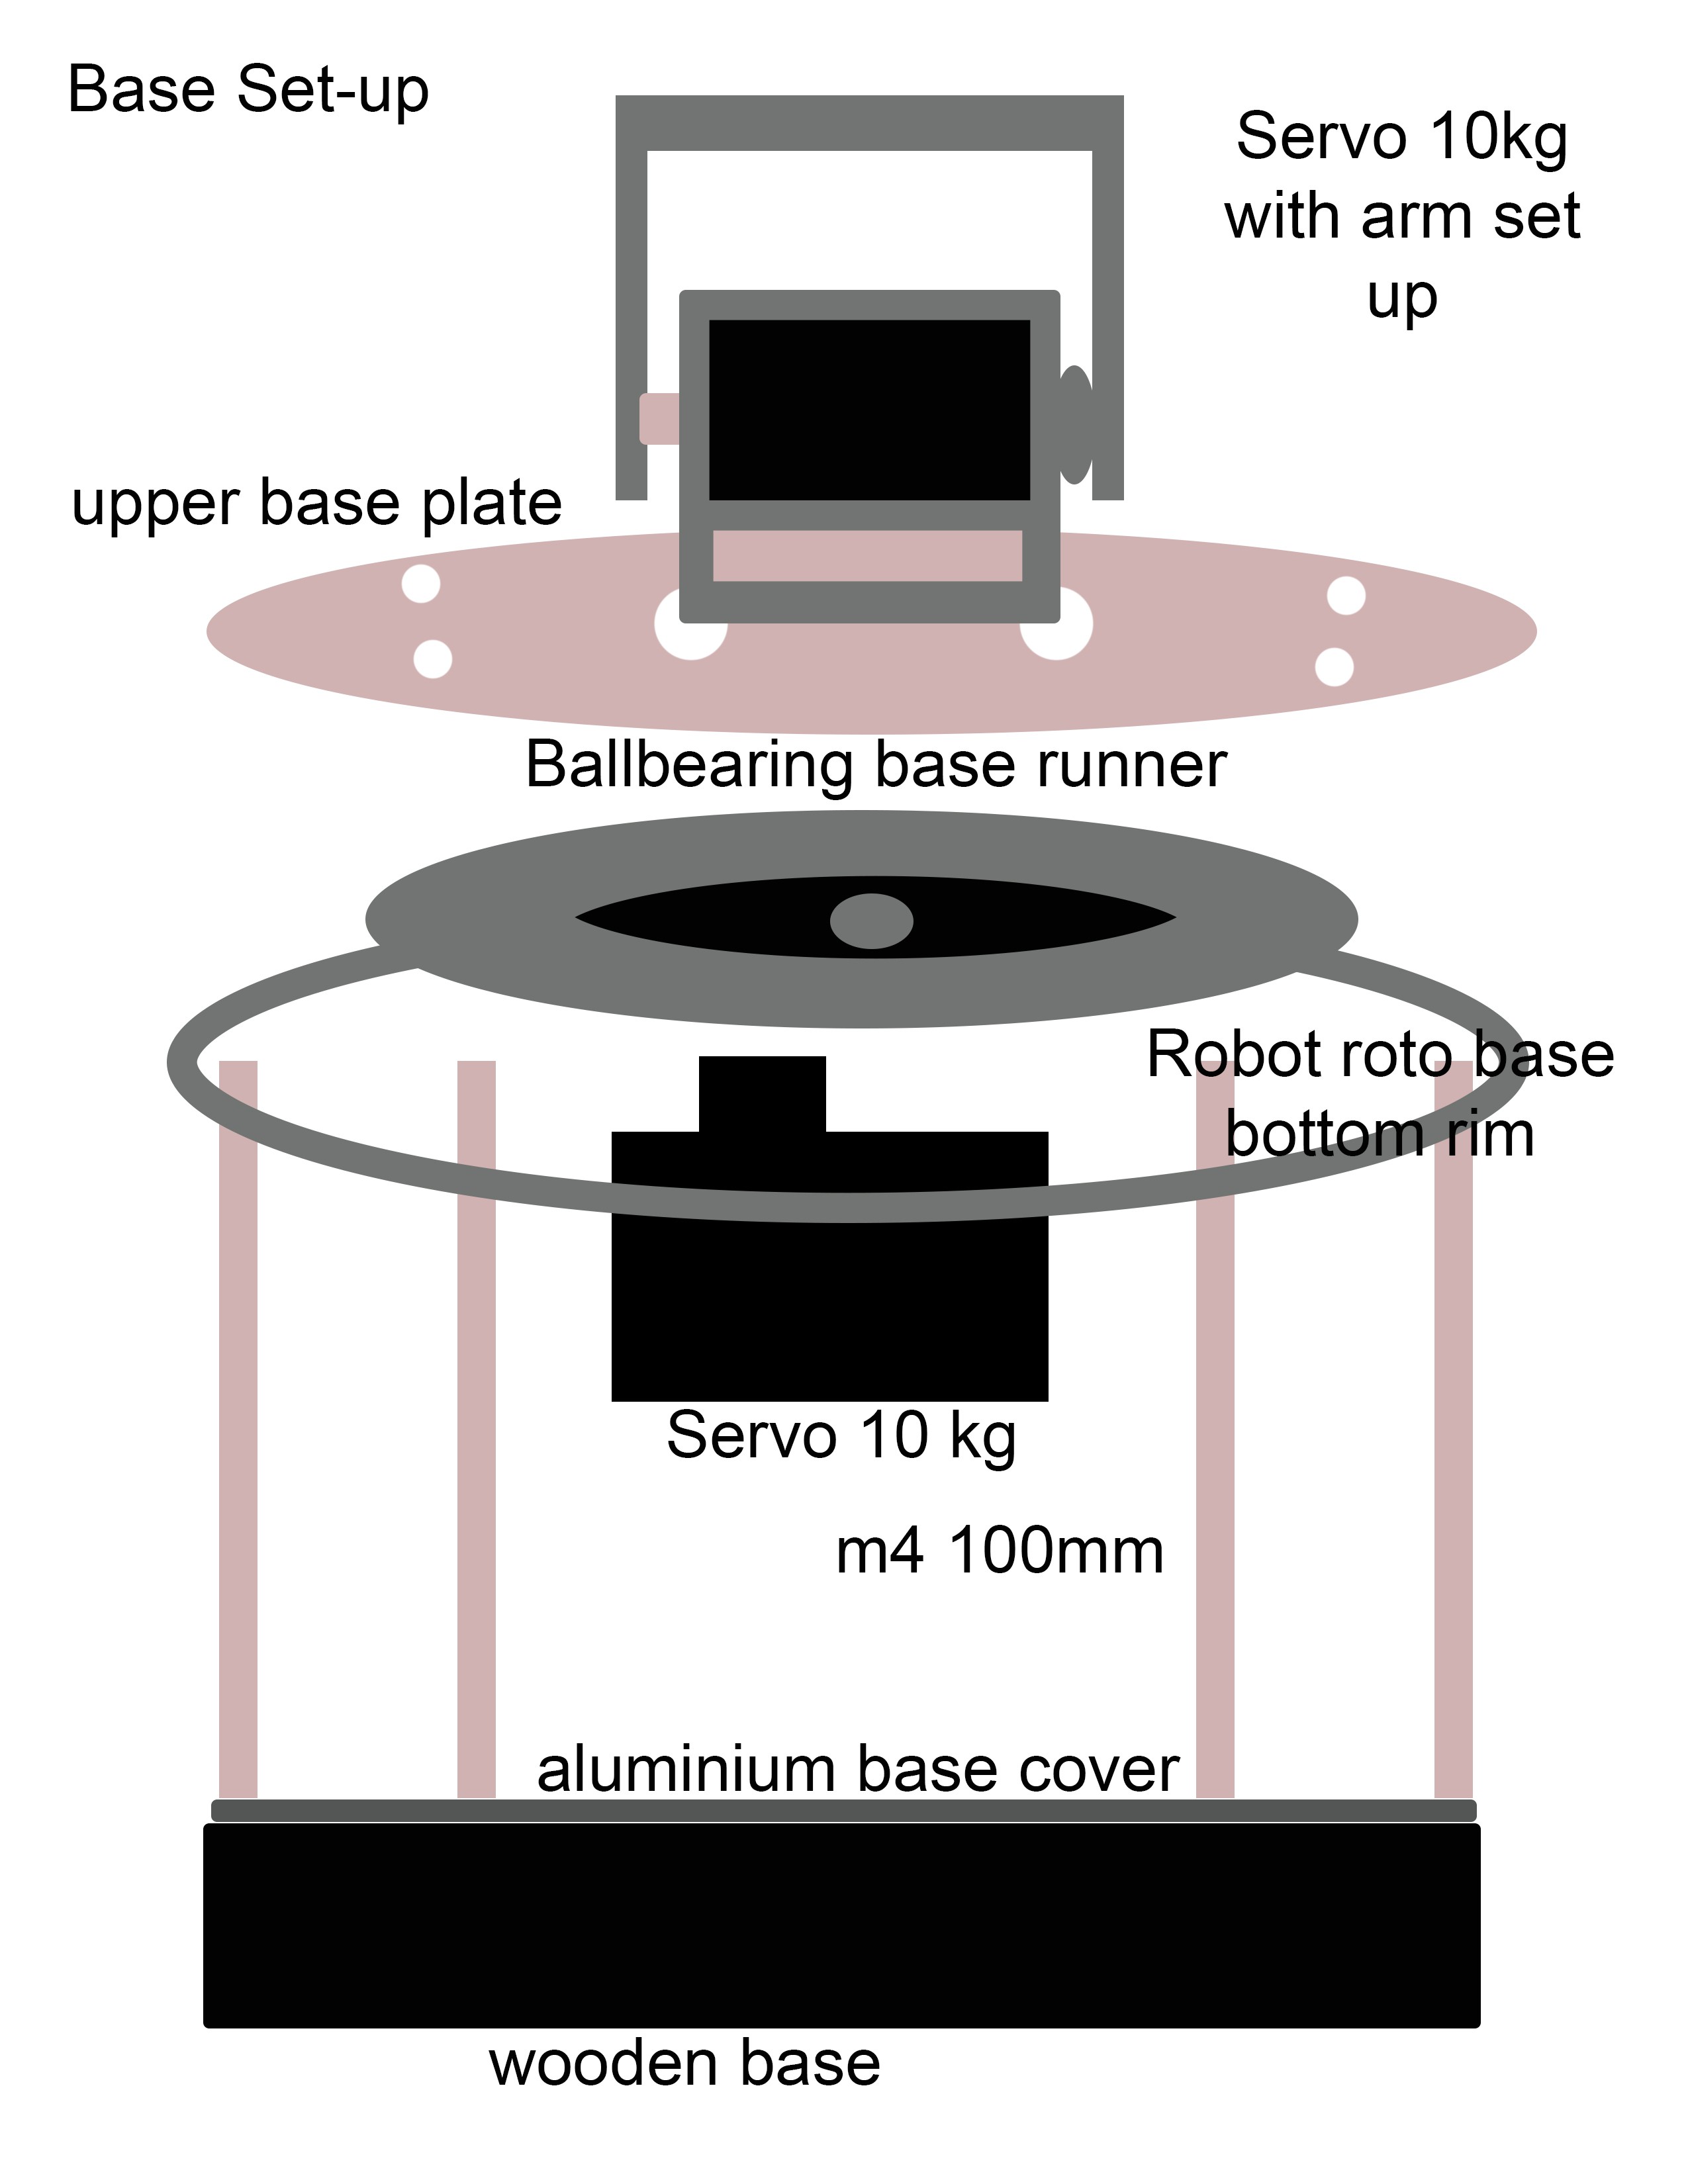
1.1


Neck Diagram
2.1

2.3

2.4
2.5

2.6
2.8
Take a multifunctional robot bracket (2.1) and attach a servo (2.2) and a large robotic U bracket (2.3). Take the L bracket and bolt it into the back of the multifunctional bracket using M3 bolts and nuts (2.4). Fit the other end of the L bracket to to upper aluminium platform of the rotational robotic base (2.5). Attach A large black U bracket to the servo via a circular servo horn (2.6) and a ball and flange cup bearing on the other (standard formation) to the end of the Large L bracket attach another L bracket facing the opposite way to for a H shape. To the front of this mechanism attach the guitar neck place to the front to finish it off using the bolts supplied with the fitting. This completes the neck set up. (2.7).(2.8)
Step 4:
Jaw Set Up
3.1

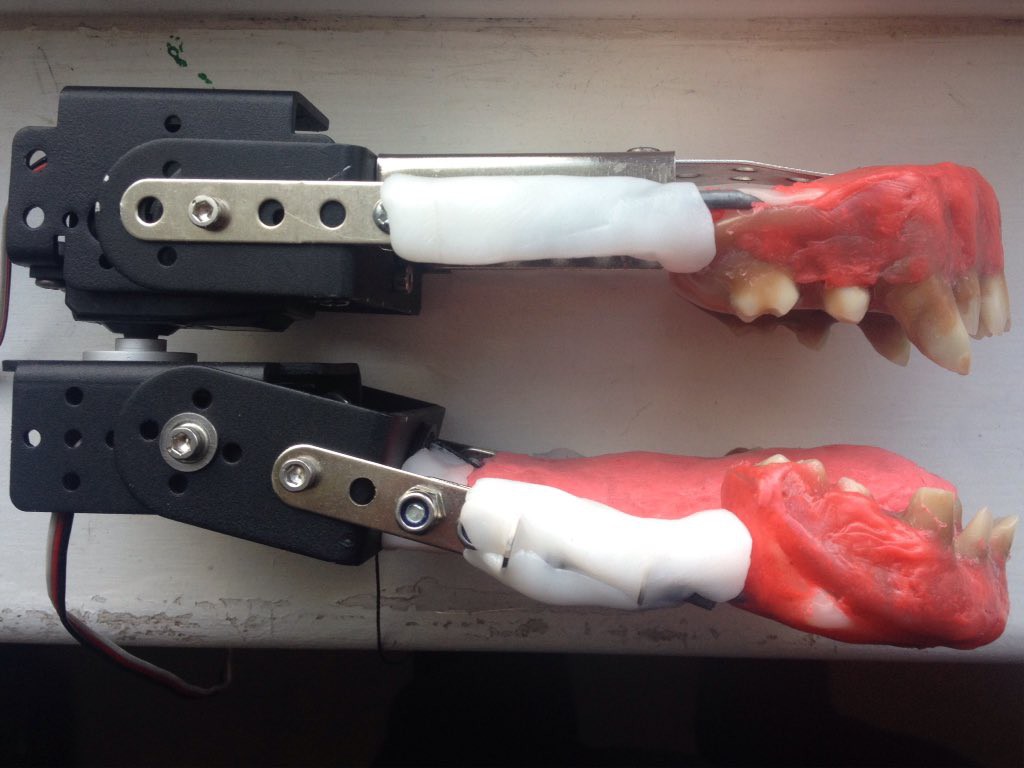
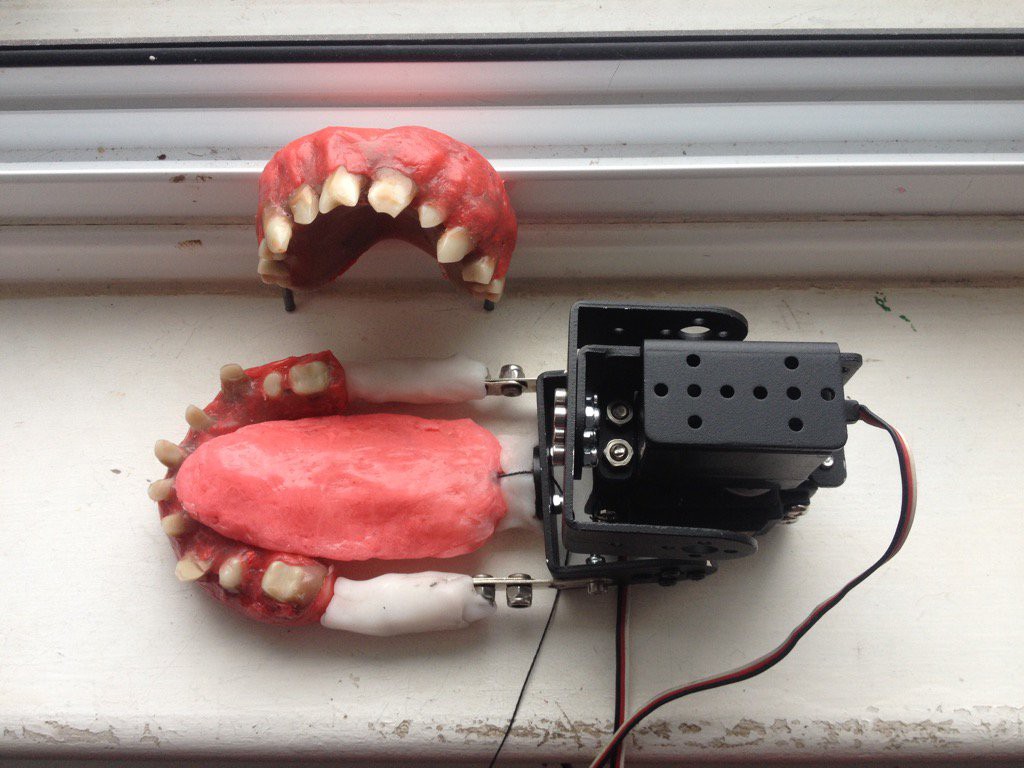
The jaw is made up of a multifunctional bracket (3.1) with a small silver aluminium U bracket (3.2) attached to the end in standard formation (3.3). To make the lower jaw take the lower part of the false teeth and some 3 mm metal wire (3.4), bend the wire into the shape of the lower jaw use black miliput to fix this element in place on the ends fix meccano L fish plates into the milliput and under the wire for extra support. Fit the wire through the holes in the U bracket and curl the wire to fix in place, use miliput to seal these ends to form a stable structure. Do the same procedure for the upper jaw, take two multifunction brackets and attach them back to back. Use two L shaped small meccano parts to secure the upper jaw wire to the two multifunctional brackets. Example set up (3.5) video using r.c remote test (3.6)
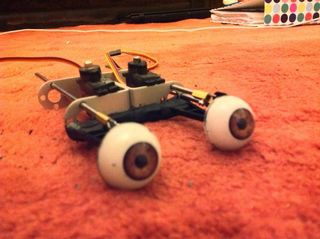
Step 5 : Eyes
Diagram.
4.1


 4.6
4.6 4.7
4.7
 4.8
4.8
 4.9
4.9
 4.2.1
4.2.1
 4.2.2
4.2.2
 4.2.3
4.2.3
 4.2.4
4.2.4
 Test Footage using R.C
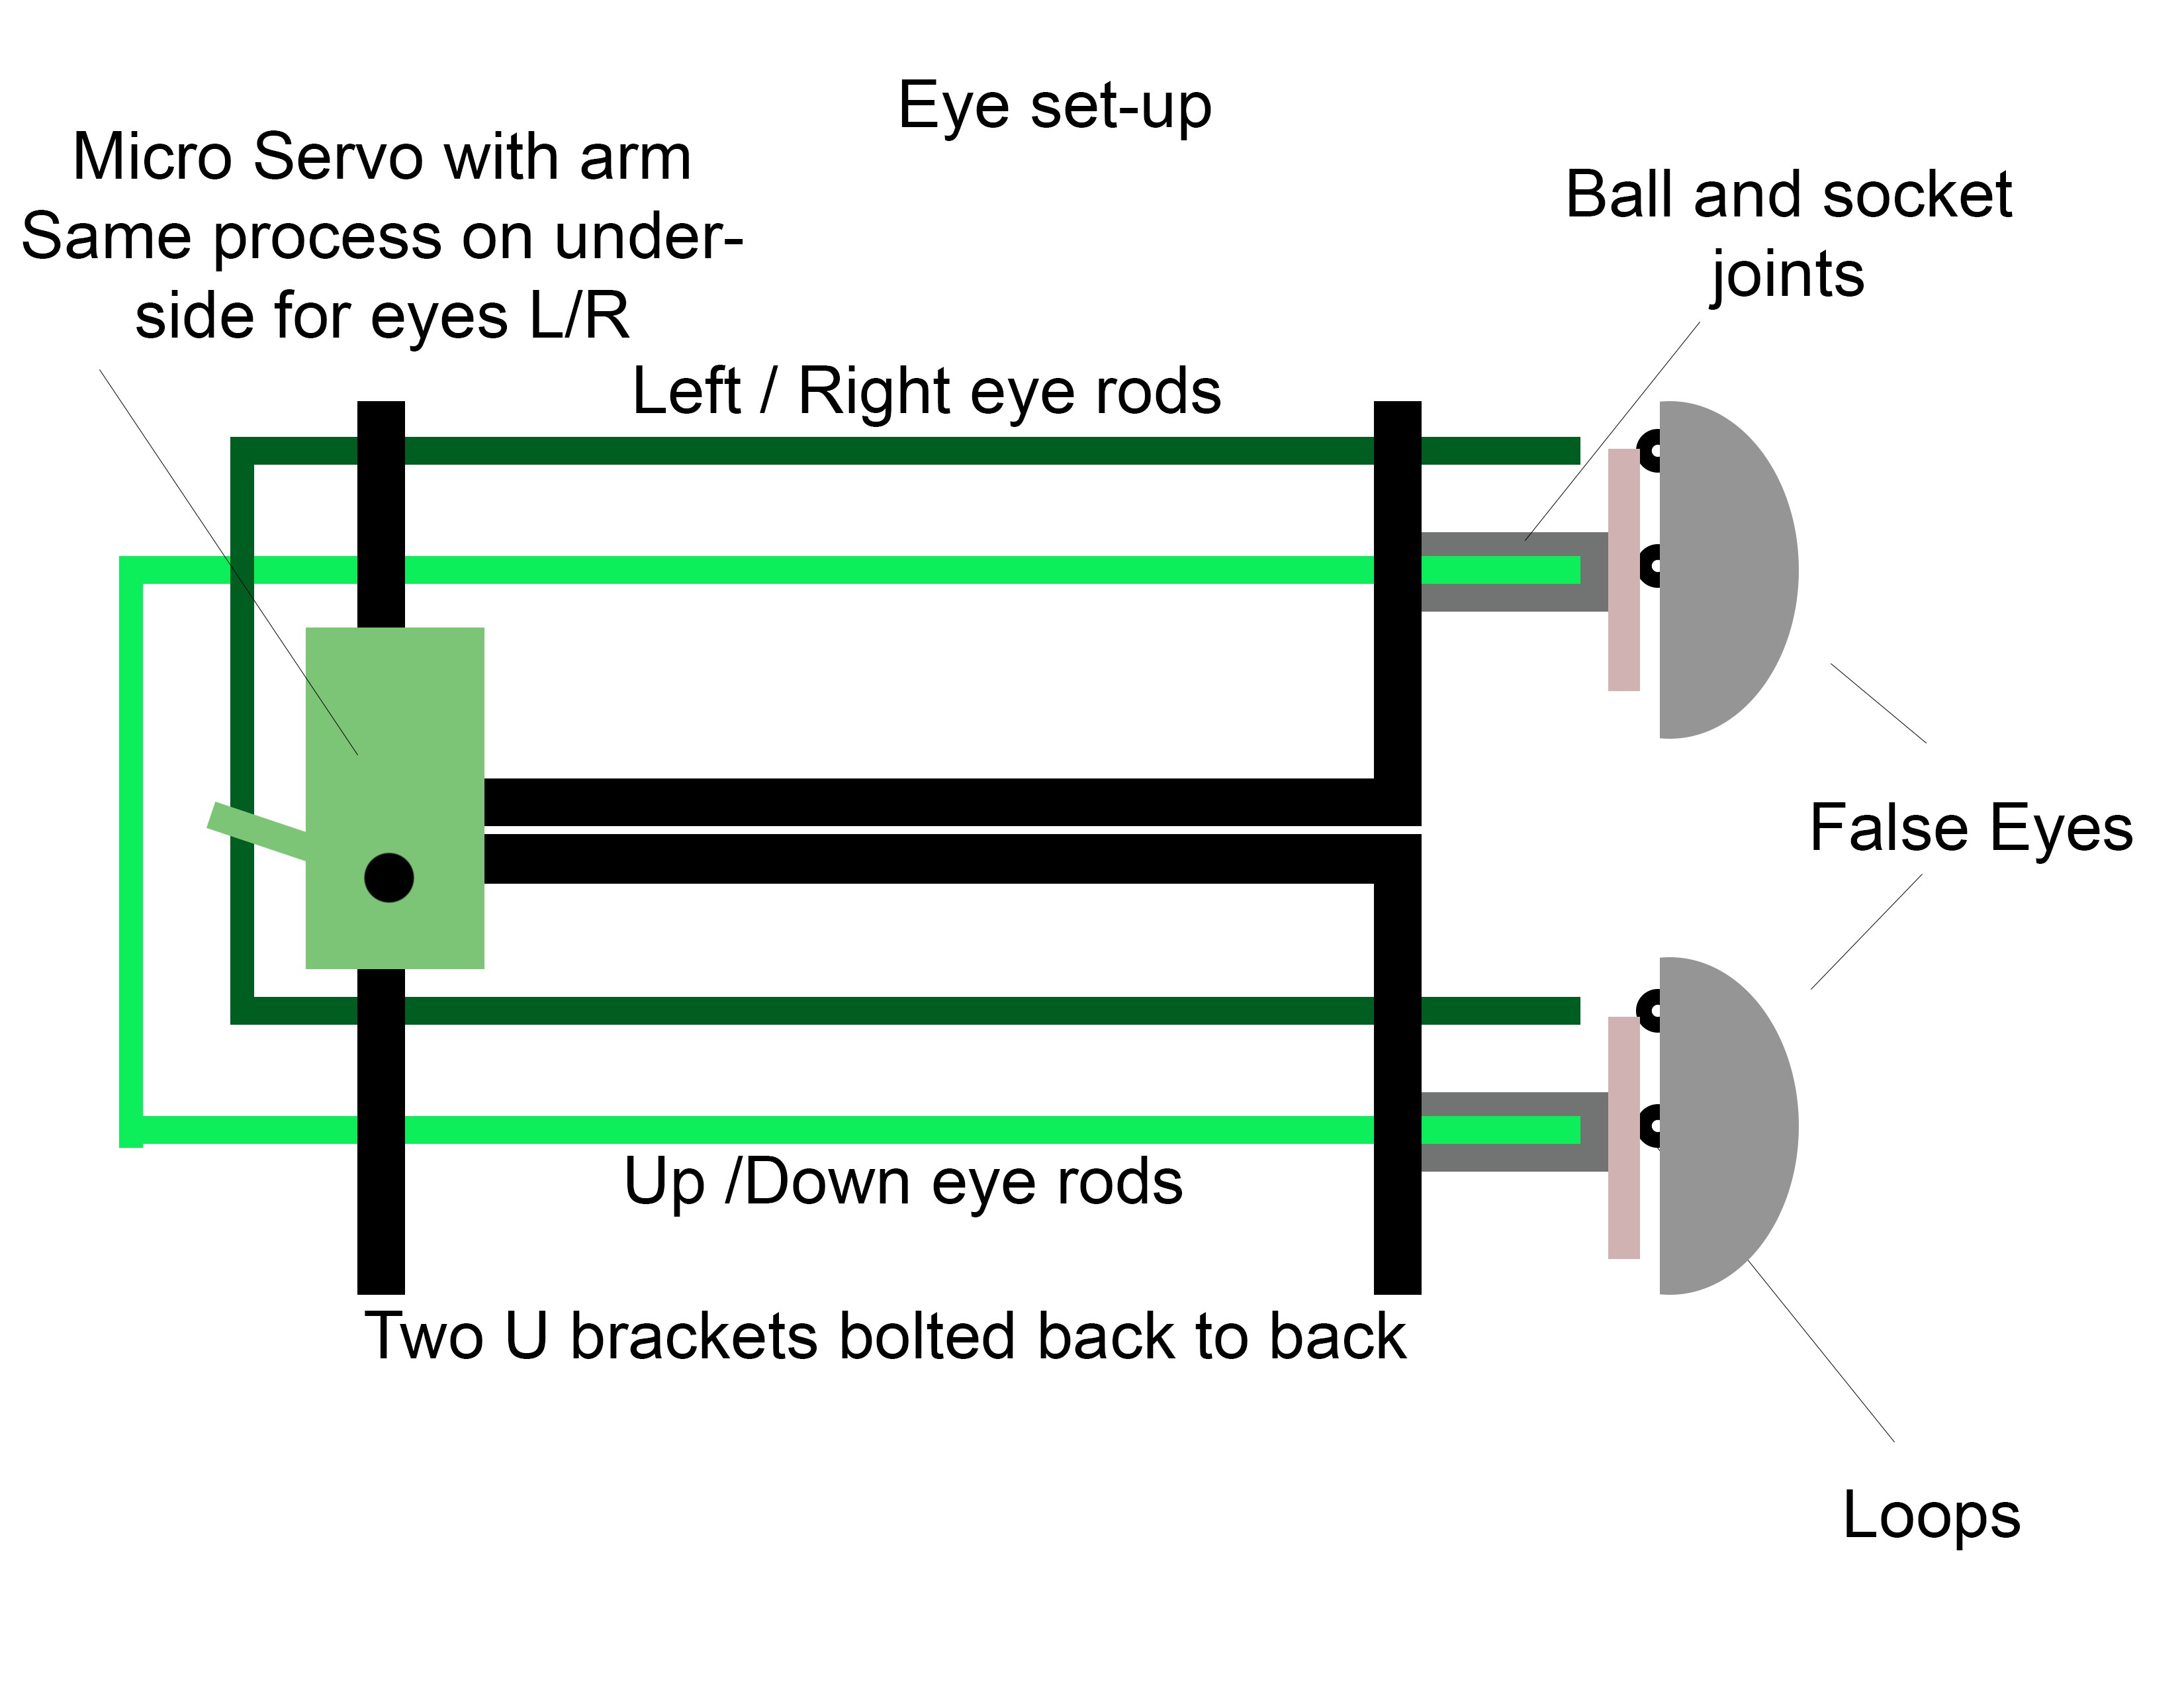
Take two medium aluminium U brackets (4.1) and bolt them back to back ][ like this (4.2) there are four holes at each end of the bracket. The holes will be used to thread the 3mm x 100mm straight rods through (4.3). To make the eyes move up and down we need to use the top holes and left and right we need to use the left hole on the left side and the left hole on the right side (4.4). Attach the 70mm smaller rods (4.5) to the ends of the upper (eyes up / down) and lower (eyes left / right) rods with brass bricks taken from cable connector blocks (4.6), bolt the frame together with the supplied bolts. This forms two large U shapes that slide in and out of the holes in the two medium aluminium U brackets. Take the artificial eyes (4.7) and using miliput (4.8) secure the socket joint of the ball and socket (4.9) element into the middle of the back of the eyes. Then take 4 (2 for each eye) small brass screw eyelets (4.2.1) and .secure them into the miliput. These eyelets should be level with the rods that are coming out of the upper two medium aluminium brackets. To each end of the rod take a brass wire connector block and bolt it half way onto each of the metal rods. Make a small loops using 1mm wire and attach it to the spare hole in the end of the brass connectors and secure in place with miliput. The the ball part of the ball and socket joint and secure it to middle lower part of each of the medium aluminium U brackets. Secure this part onto the bracket using Black thermo plastic (4.2.4). Attach the ball and socket joints together and 1mm wire through each of the brass eyeless, close the eyelets with pliers and tighten the 1mm wire (with caution) to form a snug fit. Use miliput on the renaming parts of the brass connectors and 1mm wire loops to secure in place. Take two micro servos and attach them upside down to eachother by their bases using glue. Add stand plastic servo arms take some 3mm wire and cut two pieces into 4cm strips. Loop one end and fit it through one of the holes in the servo arm and loop the other end around the back part of the large U bracket the controls the eyes up and down / left and right. secure this in place on each side with thermo plastic (allows the loop to turn with the servo arm but not move up and down the metal rod). Attach the two servo to the upper part of the back of the robot with miliput (see picture). This completes the eye mechanism. see video for test footage.
Step 6:
Lips.
5.1


5.4

5.5


Attach 2 micro servos (5.1) to each side of the middle head bracket (aluminium multifunctional robot brackets bolted back to back) one servo here > ][ < on here (5.2). These motors will drive the lips. To make the lips take a long 18 hole meccano (5.3) strip and attach brass wire blocks (5.4) to the middle and either side secure in place with black thermo plastic (5.5). On the end of each block take a small spring from a peg (5.6) and place it over the end of the block (this with retract the lips back into place) Take the guitar string (5.7) and cut it to size using the teeth as a guide leave plenty spare on each end so you can play around with getting the fit right before securing each end to frame with miliput. Take some thick fishing wire (5.8) and thread it through the arms of the micro servos, through the brass blocks and secure to the upper lips with a knot. Secure in place with miliput (I used metal clasps in the picture but replaced because they kept slipping along the guitar string). Use the same set up for securing the lower lip into the bottom jaw aluminium L bracket (5.9) and secure with thermoplastic. Attach a mirco servo to the underneath of the bottom jaw using two bolts and thermoplastic. Take a brass block wire connector and attach it to the middle of the lower jaw (underneath) use miliput to secure in place. Run wire from the servo arm through the brass block and attach to the lower lip with a knot and secure with miliput.
This completes the lip functions, see test video and photos of finished set up.
Step 7: Fixing the elements together
6.1
 Perspective

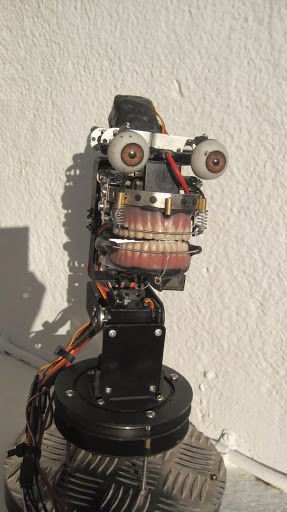
Attach the eye mechanism to the top of the multifunctional brackets (bolted back to back in the middle of the head) use thermoplastic to secure in place as this gives it a strong tight hold (6.1). Take the bigger pocket speaker (giz wiz 6.2)and place it at the back of the robot ( it will fit perfectly between the Large upper black U bracket if you buy the one stated in the equipment list. Take the smaller speake (6.3)r and secure it to the upper top part of the jaw mechanism. Extend the reach of the cables using extension leads (2,1mm)
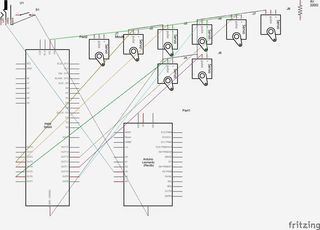
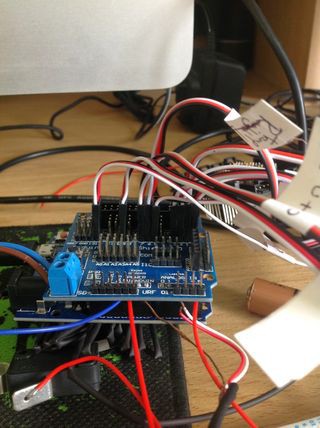
Step 8: Arduino set up and Audio trigger.
Diagram
1.1

1.3
1.4
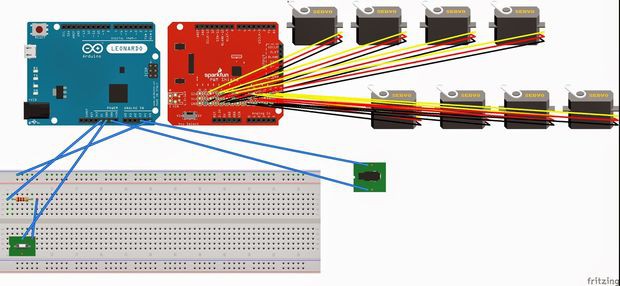
Take an arduino 1.1 and place the servo shield on top of it 1.2-1.3, place each of the servos into a digital port on the board. (Note: I run a 6v 3amp psu / battery into the servo shield to power to motors: remember to remove the crossover on the shield if you are going to do this). Take a 2.1 mm headphone/audio cable and remove the female end. Take the wires and twist the ground together and the signal. Place the ground in the ground port on the arduino and the signal into one of the analog ports. (It does not matter which port because you can change the code to suit the ports of our liking). Place the end of the cable into a apple laptop or computer. set up 1.4
Step 9:
Arduino Script
Well done if you have come this for on our robotic journey, I hope you have understood things so far and what you have not understood you have asked for clarification or made your own version of the element. The eyes and mouth are the only elements that run solely off the arduino board. The other elements need processing to control them.
Arduino Script
#include
int c=0;
int pos = 0;
int talkmode=0;
int oldtalkmode=0; long rfac;
long mpos; int eyedel=0;
int pose =140;
int poslip =90;
int eyeposh=57;
int eyeposhinc=1;
int posbot=90;
//int stopy=90;
Servo myservo; // create servo object to control a servo
// a maximum of eight servo objects can be created
Servo myservo2;
Servo myservo3;
Servo myservo4;
Servo myservo5;
Servo myservo6;
Servo myservo7;
Servo myservo8;
int talkcount=255;
//eventually use audio stop trigger
int doclosemouth=0;
int turnmode=0;
int turnmode2=0;
int globmode=1; //1 is move about 2 is eyetwitch
int wcount;
int pcount;
int mystart=1;
int notalkcount=0;
void setup(){
Serial.begin(9600);
wcount=0;
pcount=0;
pinMode(1,OUTPUT);
pinMode(8,OUTPUT);
pinMode(5,OUTPUT);
pinMode(4,OUTPUT);
pinMode(13,OUTPUT);
pinMode(11,OUTPUT);
pinMode(10,OUTPUT);
pinMode(12,OUTPUT);
pinMode(3,OUTPUT);
// pinMode(A3,OUTPUT);
// pinMode(A4,OUTPUT);
myservo.attach(1); // attaches the servo
myservo2.attach(8); //left right
myservo3.attach(5); //up down
myservo4.attach(3); //eyes left and right
myservo5.attach(4);
myservo6.attach(12);
myservo7.attach(11);
myservo8.attach(10);
int oldtalkmode=0;
// myservo3.attach(A3);
// myservo4.attach(A4);
} void loop(){
// if(talkmode==1){
// pose=140;
// poslip=90;
// posbot=100; // }
// if(mpos>131){
// notalkcount++;
// }else{
// notalkcount==0;
//}
// Serial.print(notalkcount);
// if(notalkcount>2000){
// talkmode=0;
// oldtalkmode=0;
// notalkcount=0; // } // }
int t=random(2000);
int pos=random(400);
if(t>1998){ if(pos>195){ int v=25+random(60);
int pos2=140+random(60);
myservo4.write(v);
myservo5.write(pos2);
} }
while(Serial.available()>0){ int din=Serial.read();
if(talkmode<9) oldtalkmode=talkmode;
if(din<8) talkmode=din;
if(din>8 && din<70) turnmode=din;
if(din>70 && din<201) turnmode2=din;
// if(din==201 && talkmode==0) {
// globmode=2;
// mpos=134;
// }
// if (globmode=1);
// Serial.print("TM="+talkmode);
// if(globmode==1){
// eyeposh=57;
// myservo4.write(eyeposh);
// } }
globmode=1;
//force it into this mode if(globmode==1){
//movement if(talkmode==1){
//wait for start of talking
if(mystart==1){
int dropout=0;
while(analogRead(3)==0){
updatestuff();
} mystart=0; // Serial.println("hello"); }; //count pauses
if(mystart==0){ int v=analogRead(3);
// Serial.print("v:");
// Serial.print(v);
// Serial.print(" ");
if(v==0){ pcount++; if(pcount>10){ mystart=1; } }else{ doclosemouth=0;
pose=140;
poslip=90;
posbot=100;
if(pcount>5){ pcount=0;
wcount++;
doclosemouth=1;
// Serial.println(wcount);
pcount=0;
// pose=140;
// poslip=90;
// posbot=100;
// mystart=1;
} } //? } //? //talking // delay(10+random(2));
pose=140+random(60);
poslip=2+random(32);
posbot=50+random(30);
//delay (100);
myservo6.write(pose);
myservo7.write(poslip);
myservo8.write(posbot);
rfac=random(100);
if(rfac<45){
// mpos=random(130);
mpos=99+random(50);
delay(60+random(40));
// delay(random(11));
}
}else{
//core bit if(doclosemouth==1){ mpos=134;
pose=140;
poslip=90;
posbot=100;
// myservo8.write(100);
//myservo6.write(140);
// myservo7.write(90);
// myservo8.write(90);
} } int r=analogRead(5);
if(r<1000){ mpos=133;
pose=140;
poslip=90;
posbot=90;
// myservo8.write(100);
talkmode=0;
} if(talkmode==0){
// myservo6.write(140);
// myservo7.write(90);
// myservo8.write(100);
pose=140;
poslip=90;
posbot=90;
mpos=132; // close mouth } if(turnmode>9 && turnmode<70){ //left/ right myservo2.write(turnmode); // Serial.print("TM="+turnmode);
// talkmode=oldtalkmode;
} if(turnmode2>70){ //left/ right int sv=turnmode2-70;
myservo3.write(sv);
// Serial.print("TM="+turnmode);
// talkmode=oldtalkmode;
} if(mpos>130 && talkmode>0) myservo4.write(57); //up/down here myservo.write(mpos);
}//end of globmode 1;
if(globmode==10){ //never = 10 so disables // int v=analogRead(3);
/// if(v>20){ // globmode=1;
// talkmode=1;
// } updatestuff();
//start of eye loop eyedel++;
if(eyedel==1000){ eyedel=0;
myservo4.write(eyeposh);
eyeposh=eyeposh+eyeposhinc;
if(eyeposh==90 || eyeposh==25) { eyeposhinc=eyeposhinc*-1; int d=250;
d=d+random(1750);
delay(d); } } } }
void updatestuff(){ int t=random(2000);
if(t>1998){ int v=25+random(60);
myservo4.write(v);
int pos=random(400);
if(pos>195){ int pos2=140+random(60);
myservo5.write(pos2);
} } // if(mpos>131){ //notalkcount++;
// }else{ // notalkcount==0;
//} //if(notalkcount>2000){ // talkmode=0;
// oldtalkmode=0;
// notalkcount=0;
// } while(Serial.available()>0){ int din=Serial.read();
// if(talkmode<9) oldtalkmode=talkmode;
// if(din<8) talkmode=din;
// if(din==1){ // globmode=1;
// talkmode=1; // eyeposh=57;
// myservo4.write(eyeposh);
// } if(din>8 && din<70) turnmode=din;
if(din>70 && din<201) turnmode2=din;
// Serial.print("TM="+turnmode);
// if(din==201 && talkmode==0) globmode=2;
// if(din==202) globmode=1;
// if(globmode==1){ // eyeposh=57;
// myservo4.write(eyeposh);
// } } if(turnmode>9 && globmode==1){ //left/ right myservo.write(135);
// myservo8.write(stopy);
myservo2.write(turnmode);
// Serial.print("TM="+turnmode);
// talkmode=oldtalkmode;
} if(turnmode2>70 && globmode==1){ //left/ right int sv=turnmode2-70;
myservo3.write(sv);
myservo6.write(140);
myservo7.write(90);
myservo8.write(90);
// Serial.print("TM="+turnmode);
// talkmode=oldtalkmode; } }
Step 10:
Processing Script and Kinect libraries
Example background BG1
First of all we need to download the kinect libraries for processing (look it up on google) Make sure you install the point tracking for kinect library into your processing library. When you can run the demo for point tracking you know it is installed correctly on your system. We also need to install the Eliza chat bot library, this comes with a test package.
You will need to make your own background image for your program and call it bg1.jpeg
You will also need to make your own Eliza script ive called it something like newscript.txt but call it what you want, or unhash the internet sample code if you just want to use the original.
You can also comment out point tracking and access skeleton tracking mode to interactive with multiple participants.
Processing Code:
import processing.serial.*;
/* A little example using the classic "Eliza" program.
Eliza was compiled as a Processing library, based on the java source code by Charles Hayden: htp://www.chayden.net/eliza/Eliza.html
The default script that determines Eliza's behaviour can be changed with the readScript() function. Intructions to modify the script file are available here:http://www.chayden.net/eliza/instructions.txt *
/ max is 67 on sweep
import codeanticode.eliza.*; Serial myport; int dummy=8; int sendx=0; Serial myport2; // neck motor int drawskeleton=0; //1 / 0 int lastsentx=-1; int lastsenty=-1;
int archsenty=-1; int archsentx=-1;
int eyecount=0; //used for sampling movement
Eliza eliza; PFont font; String elizaResponse, humanResponse; boolean showCursor; int lastTime; PImage bg1a;
int closestValue; int closestX; int closestY; int lastcx; int lastcy;
float targx; float targy;
//simple openni import SimpleOpenNI.*;
float globx, globy;
float oldglobx, oldgloby;
SimpleOpenNI context; color[]
userClr = new color[]{ color(255,0,0),
color(0,255,0),
color(0,0,255),
color(255,255,0),
color(255,0,255),
color(0,255,255)
}; PVector com = new PVector();
PVector com2d = new PVector();
//end simpleopenni
void setup() { size(1200, 786);
println(sketchPath);
//si context = new SimpleOpenNI(this);
if(context.isInit() == false) { //println("Can't init SimpleOpenNI, maybe the camera is not connected!");
exit();
return;
} // enable depthMap generation context.enableDepth();
// enable skeleton generation for all joints
// context.enableUser();
background(200,0,0);
//end si bg1a=loadImage("bg1.jpg");
//println(Serial.list());
myport=new Serial(this, Serial.list()[5],9600);
//myport2=new Serial(this, Serial.list()[??????],9600);
// When Eliza is initialized, a default script built into the
// library is loaded. eliza = new Eliza(this);
// A new script can be loaded through the readScript function.
// It can take local as well as remote files.
eliza.readScript("scriptnew.txt");
//eliza.readScript("http://chayden.net/eliza/script";);
// To go back to the default script, use this: //eliza.readDefaultScript();
font = loadFont("Rockwell-24.vlw");
textFont(font);
printElizaIntro();
humanResponse = "";
showCursor = true;
lastTime = 0; }
void draw() { while(myport.available()>0){ int dat=myport.read();
/// println(""+dat);
} eyecount++;
//println("EYECOUNT:"+eyecount);
if(eyecount>=30){ println("diffx="+abs(closestX-lastcx)+" diffy="+abs(closestX-lastcy));
// println(archsenty+" "+closestY+" "+archsentx+" "+lastsentx);
//if(archsenty==-1) archsenty=lastsenty;
//if(archsentx==-1) archsentx=lastsentx;
if(abs(closestY-lastcy)<30 && abs(closestX-lastcx)<30){ // archsenty=lastsenty;
// archsentx=lastsentx;
// for(int lop=0;lop<100;lop++){ println("WOULD GO INTO EYE TWITCHING");
// myport.write(201);
lastcx=closestX;
lastcy=closestY;
}else{
//if(abs(lastsenty-archsenty)>45 && abs(lastsentx-archsentx)<45){ println("WOULD GO BACK TO MOVEMENT");
lastcx=closestX;
lastcy=closestY;
// myport.write(202);
// } } eyecount=0;
} image(bg1a,0,0,width,height);
//background(102);
if(globx!=oldglobx){ sendx=int(abs(globx));
// sendx=8+(sendx/8);
oldglobx=globx;
// myport.write(sendx);
} if( sendx>9 && lastsentx!=sendx){ //println("sending neck positions"+sendx);
if(abs(lastsentx-sendx)>35) eyecount=145;
myport.write(sendx);
// UNCOMMENT FOR PEOPLE TRACKING lastsentx=sendx;
} //println("neck y:"+int(globy));
if(random(10)>4){ int outy=70+int(globy);
if(outy>200) outy=200;
//println("outy="+outy);
//HERE IS THE LINE SENDING THE NECK Y COORDINATES if(lastsenty!=outy){ if(abs(lastsenty-outy)>35) eyecount=145;
myport.write(outy);
//println("OUTY:"+outy);
lastsenty=outy;
} }
//DUMMY SWEEP STARTS HERE if(random(10)>2){ // myport.write(dummy);
////println("DUMMY:"+dummy);
//dummy++;
//if(dummy>170) dummy=9;
//myport.write((70+dummy));
////println("neckyyyyyyyy"+(70+dummy));
} //DUMMY SWEEP ENDS HERE
fill(255);
stroke (111);
text(elizaResponse, 30, 450, width - 40, height);
fill(0);
int t = millis();
if (t - lastTime > 500) { showCursor = !showCursor;
lastTime = t;
} if (showCursor) text(humanResponse + "_", 30, 600, width - 40, height);
else text(humanResponse, 30, 600, width - 40, height);
// simpleopennidrawmethod();
closestpixdrawmethod();
}
void closestpixdrawmethod(){ closestValue = 8000;
context.update();
// get the depth array from the kinect int[] depthValues = context.depthMap();
// for each row in the depth image for(int y = 0; y < 480; y++){
// look at each pixel in the row for(int x = 0; x < 640; x++){
// pull out the corresponding value from the depth array
int i = x + y * 640;
int currentDepthValue = depthValues[i];
// if that pixel is the closest one we've seen so far
if(currentDepthValue > 0 && currentDepthValue < closestValue){
// save its value closestValue = currentDepthValue;
// and save its position (both X and Y coordinates)
closestX = x; closestY = y;
} } } float scfac=67.0/640;
globx=(closestX*scfac)*.7;
targy=(closestY*scfac)*3.2;
globy=globy+((targy-globy)/8);
// globy=targy;
// //println(globx);
//draw the depth image on the screen
// image(kinect.depthImage(),0,0);
// draw a red circle over it,
// positioned at the X and Y coordinates
// we saved of the closest pixel. // fill(255,0,0);
// ellipse(closestX, closestY, 25, 25);
}
void keyPressed() { if ((key == ENTER) || (key == RETURN)) { //println(humanResponse); //first scan for keywords
elizaResponse = eliza.processInput(humanResponse); //println(">> " + elizaResponse); String[] out={elizaResponse};
saveStrings("/Users/carlstrathearn/Desktop/test.txt",out);
delay(10);
//println(sketchPath+"/data/applescriptbridge.app");
open(sketchPath+"/data/applescriptbridge.app");
myport.write(1);
humanResponse = "";
} else if ((key > 31) && (key != CODED)) {
// If the key is alphanumeric, add it to the String
humanResponse = humanResponse + key;
} else if ((key == BACKSPACE) && (0 < humanResponse.length())) { char c = humanResponse.charAt(humanResponse.length() - 1);
humanResponse = humanResponse.substring(0, humanResponse.length() - 1); } }
void printElizaIntro() { String hello = "Hello.";
elizaResponse = hello + " " + eliza.processInput(hello);
//println(">> " + elizaResponse);
}
void simpleopennidrawmethod(){ context.update();
// //println("gx="+globx+" GY="+globy); // draw depthImageMap //image(context.depthImage(),0,0); if(drawskeleton==1) image(context.userImage(),0,0); // draw the skeleton if it's available int[] userList = context.getUsers(); for(int i=0;i
vertex(com2d.x - 5,com2d.y);
vertex(com2d.x + 5,com2d.y);
endShape(); fill(0,255,100);
text(Integer.toString(userList[i]),com2d.x,com2d.y);
} } } }
void drawSkeleton(int userId) {
// to get the 3d joint data /* PVector jointPos = new PVector(); context.getJointPositionSkeleton(userId,SimpleOpenNI.SKEL_NECK,jointPos);
//println(jointPos); */ //
//println(SimpleOpenNI.SKEL_HEAD);
if(random(100)>97){ PVector jointPos = new PVector(); context.getJointPositionSkeleton(userId,SimpleOpenNI.SKEL_HEAD,jointPos);
//println(jointPos.x);
//println(jointPos.y);
//println(jointPos.z);
globx=jointPos.x;
globy=jointPos.y;
}
if(drawskeleton==1){ context.drawLimb(userId, SimpleOpenNI.SKEL_HEAD, SimpleOpenNI.SKEL_NECK); context.drawLimb(userId, SimpleOpenNI.SKEL_NECK, SimpleOpenNI.SKEL_LEFT_SHOULDER); context.drawLimb(userId, SimpleOpenNI.SKEL_LEFT_SHOULDER, SimpleOpenNI.SKEL_LEFT_ELBOW); context.drawLimb(userId, SimpleOpenNI.SKEL_LEFT_ELBOW, SimpleOpenNI.SKEL_LEFT_HAND);
context.drawLimb(userId, SimpleOpenNI.SKEL_NECK, SimpleOpenNI.SKEL_RIGHT_SHOULDER); context.drawLimb(userId, SimpleOpenNI.SKEL_RIGHT_SHOULDER, SimpleOpenNI.SKEL_RIGHT_ELBOW); context.drawLimb(userId, SimpleOpenNI.SKEL_RIGHT_ELBOW, SimpleOpenNI.SKEL_RIGHT_HAND);
context.drawLimb(userId, SimpleOpenNI.SKEL_LEFT_SHOULDER, SimpleOpenNI.SKEL_TORSO); context.drawLimb(userId, SimpleOpenNI.SKEL_RIGHT_SHOULDER, SimpleOpenNI.SKEL_TORSO);
context.drawLimb(userId, SimpleOpenNI.SKEL_TORSO, SimpleOpenNI.SKEL_LEFT_HIP); context.drawLimb(userId, SimpleOpenNI.SKEL_LEFT_HIP, SimpleOpenNI.SKEL_LEFT_KNEE); context.drawLimb(userId, SimpleOpenNI.SKEL_LEFT_KNEE, SimpleOpenNI.SKEL_LEFT_FOOT);
context.drawLimb(userId, SimpleOpenNI.SKEL_TORSO, SimpleOpenNI.SKEL_RIGHT_HIP); context.drawLimb(userId, SimpleOpenNI.SKEL_RIGHT_HIP, SimpleOpenNI.SKEL_RIGHT_KNEE); context.drawLimb(userId, SimpleOpenNI.SKEL_RIGHT_KNEE, SimpleOpenNI.SKEL_RIGHT_FOOT); }
}
// ----------------------------------------------------------------- // SimpleOpenNI events
void onNewUser(SimpleOpenNI curContext, int userId) { //println("onNewUser - userId: " + userId); //println("\tstart tracking skeleton"); curContext.startTrackingSkeleton(userId); }
void onLostUser(SimpleOpenNI curContext, int userId) { //println("onLostUser - userId: " + userId); }
void onVisibleUser(SimpleOpenNI curContext, int userId) { ////println("onVisibleUser - userId: " + userId); }
Step 11: Applescript voice app script and voice recognition output
Make an apple script app with the following:
set theVoices to
{"Alex", "Bruce", "Fred", "Kathy", "Vicki", "Victoria"}
set thePath to (path to desktop as Unicode text) & "test.txt"
set the_file to thePath
set the_text to (do shell script "cat " & quoted form of (POSIX path of the_file))
set the clipboard to the_text
set theSentence to the clipboard
log (theSentence)
say theSentence using ("Bruce") speaking rate 140 modulation 5 pitch 15
on readFile(unixPath)
return (do shell script "cat /" & unixPath)
end readFile
To use voice recognition simple activate the function on your apple mac from the system menu and out put it to the processing / eliza chat interface instead of using a keyboard. (You will need to set up the microphones in the kinect sensors for this to work)
Step 12:
Setting up the kinect sensor

This is a little bit tricky but if you buy a kinect stand or make one you can move it around a little bit and find the best position for your robot. I find this easier to do than re-programming everytime, although sometimes this is practical if the robot is going to be stationary for a long period of time to refine the positions.
Hope you have enjoyed this tutorial, viva la robtica revolucion !!! Carl.