Ill get to this later.
3D Printed PCB mill
3D Printed components and other hardware to make a PCB routing machine, which inherently can do other things.
3D Printed components and other hardware to make a PCB routing machine, which inherently can do other things.
To make the experience fit your profile, pick a username and tell us what interests you.
We found and based on your interests.
Ill get to this later.
DCNC28Sep18.zipCAD programx-zip-compressed - 1.82 MB - 09/23/2018 at 03:48 |
|
|
DCNCTerminal 22Sep18.zipTerminal to communicate with machinex-zip-compressed - 109.58 kB - 09/23/2018 at 03:47 |
|
|
Firmware 22Sep18.inoMachine softwareino - 29.42 kB - 09/23/2018 at 03:47 |
|
|
PCB Mill 28Aug18skb.skpThe sketchup of all the partsSSEYO Koan Play File - 7.86 MB - 08/29/2018 at 02:50 |
|
|
DCNC.zipOLD The limited CAD program I made to easily design quick little things. The circuit board designs for the controller was made with this. Updated it to produce G Code and send it to the DCNCTerminal program.x-zip-compressed - 1.83 MB - 08/29/2018 at 02:47 |
|
Someone randomly private messaged me what you see below. I do not recommend them.
So I was fiddling around and figured making one of those breadboard deals would be a good test so I mocked one up in my CAD program and gave it a go. Turned out pretty good, I dont want to turn on the air compressor and wake my room mate up, so its still got the obvious pcb dust in the nooks and crannies, but electrically it would be fine for a small circuit. The only thing I dont really like about it is the screw hole cutouts, for some reason the Y carriage has some left and right play that only really showed up on the screw holes so I'll need to look at that.
Heres a timelapse that for some reason youtube wont let go above 240p and some after pictures.
So I started revamping this project back in August 2018 to make it better. I saw a good deal for a spindle on Amazon and redesigned most of the 3d printed parts. The changes to the parts were to mate the spindle to the machine and increasing the rigidity of the machine.
With that I wanted to add an LCD to display the different states of the machine and the XYZ location of the spindle. So to add that new functionality I changed the controller out to an Arduino Mega (well a chinese cheap knock off because why spend $40 when I can spend $10).
Back in the early days of this project before I decided to get the machine to talk in pseudo G-Code (it will accept the g-code spit out by flatcam no problem, but it doesnt follow all the silly parsing rules that I hate) I had developed an Auto Level method where, much like most other solutions, it maps the surface of the work peice and from there interoplated points between those mapped points. Well I scrapped that once I moved onto the pseudo g-code version. With the new revamped software, I included an M code that will map the surface of the work piece and a few more M codes that control it.
I currently just finished doing some testing of the new machine and circuit and am very happy with the results. I induced an uneven surface with a sophisticated setup of pushing a screw driver under the board on one side to raise the right side of the board. I then mapped the surface and cutout a little "circuit".
My next task is to create the 2 circuit boards, one for the Keypad and LCD, and one for the stepper drivers. The keypad and lcd will have its own fancy enclosure designed and printed out, as will the controller housing for the arduino and stepper drivers.
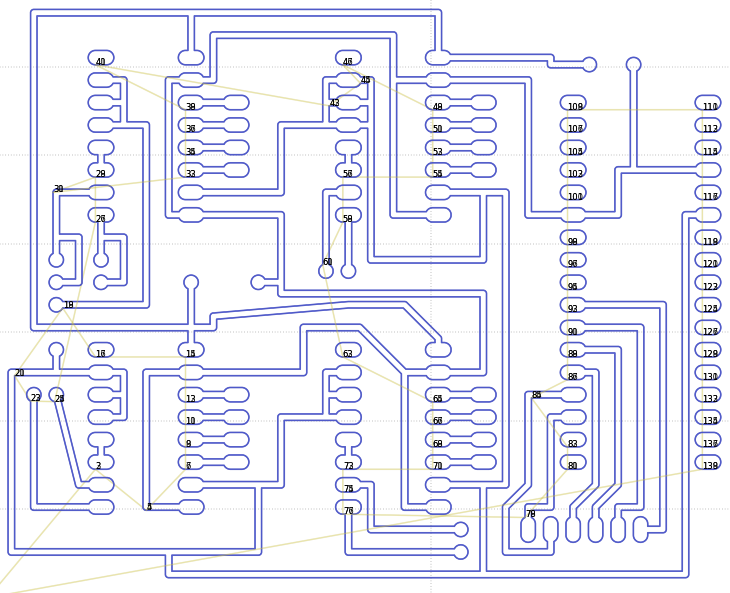
Below are pictures of the current machine, controller circuitry, the CAD design of the circuit to be etched, and the etched "circuit" with a resistor inserted for scale.
aight aight, i modified a syntax coloring editor i maed a wile bak to hilite dem gcodes, and den i made a wae to make dat program send da code dats in da editor to dee controller to mayke it do wut u want.
da filez be uploaded, along wit da new firmware 4 dee ardweeno. nah im sayin.
#getRekt.
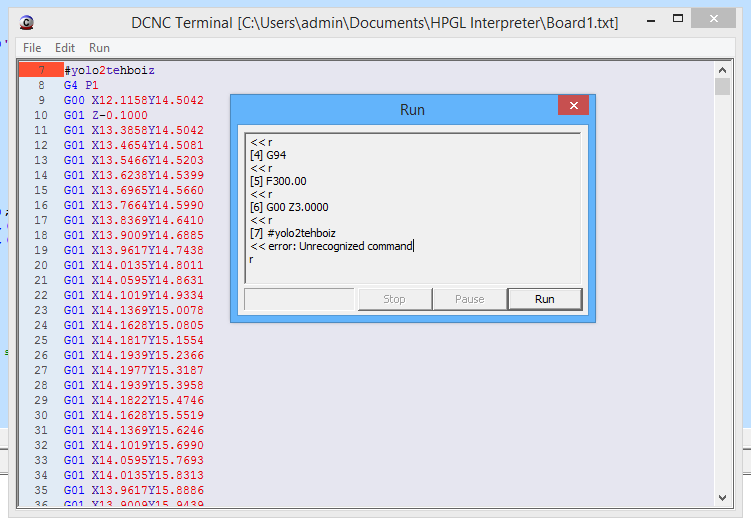
As a test, I wrote my name in DesignSparks whateverthefuckprogramitscalled, then exported it to a gerber file, then imported that to FlatCAM, which exported G Code, which I imported to this DCNC Terminal program, when then exported it via a serial connection to the controller, which then exported wood off this block of wood to make this.
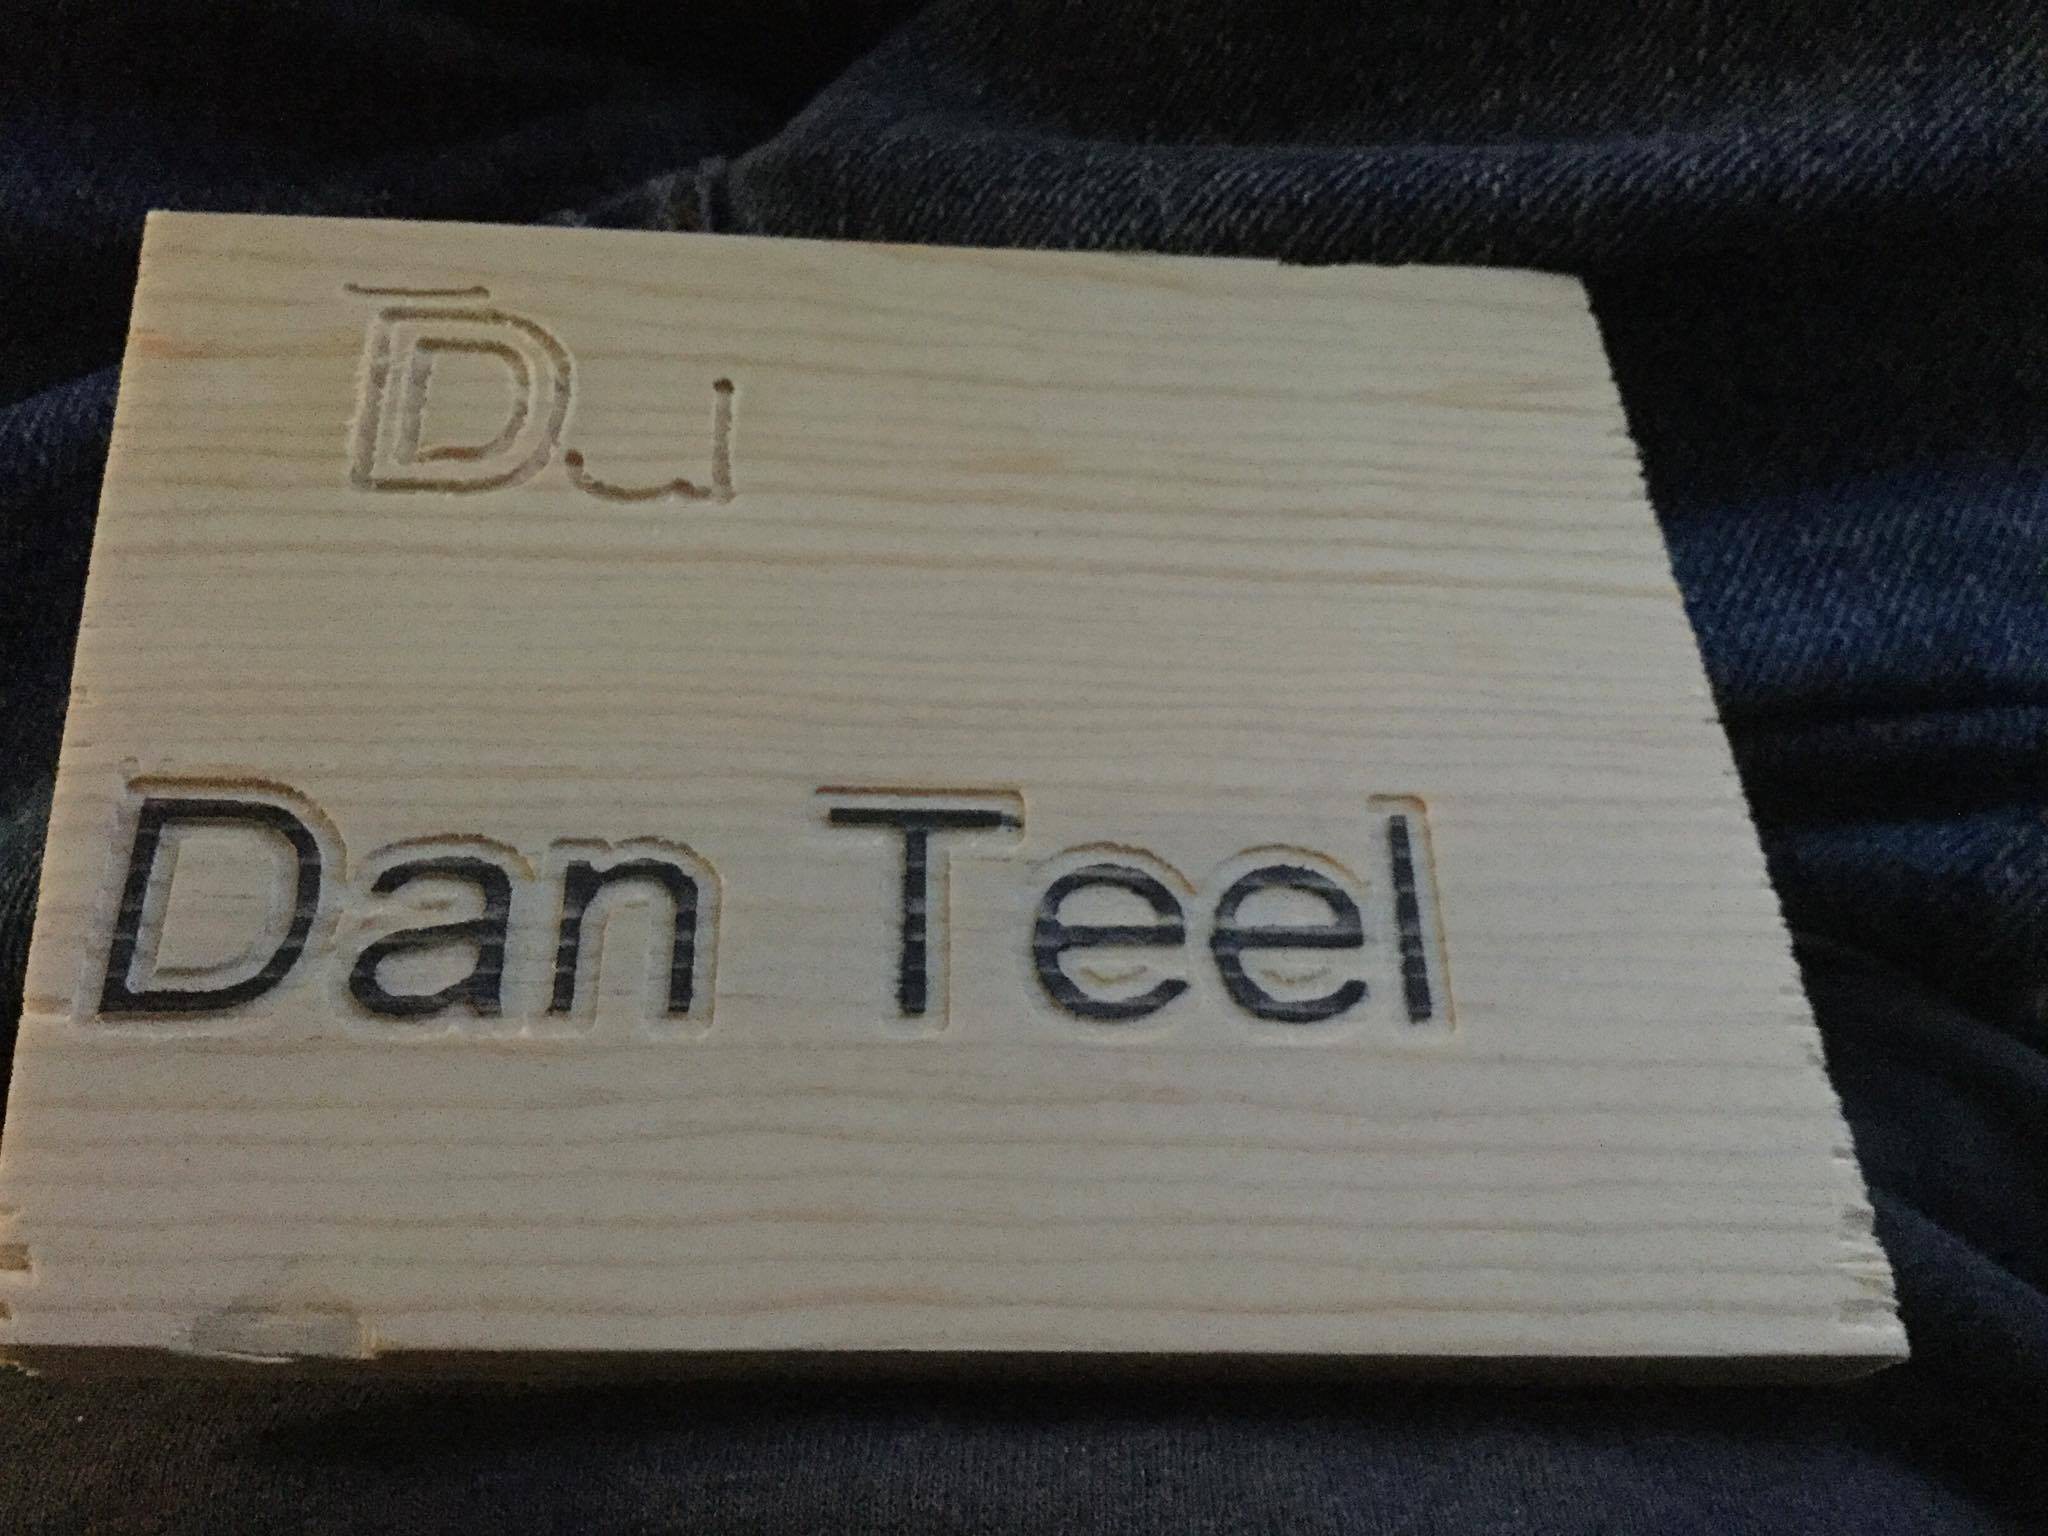
The feed rate was definitely too high on the top one, so I lowered the feedrate, and gave it another go (the one I highlighted the lettters with sharpie) and turned out aight.
So G Code is dumb, luckily FlatCAM outputs G Code that makes sense to me. Instead of having a whole line of commands, that need to be interpretted in a different order then the order recieved, it just sends one command at a time which is easy to interpret on an Arduino, dont need to worry about loading the entire line, and then picking through and running stuff in different orders.
The firmware is real simple, theres a 128 byte line buffer that reads in until it gets a carriage return or line feed, once it hits that, it goes to an interpret routine which runs through and if it sees what I call a word (X,Y,Z,F,P) it will read in a real number, and store that in its associated variable. If it sees a G, it will read in an integer, then read for words, and then execute that command. If it sees an M, then it currently just ignores it and continues interpreting the line. If it sees an error, then it will update an error flag variable, and then output "error: <description here>", to let the operator know whats up. If it doesnt see an error, after interpreting it will output "ready" telling the sending program it can send the next line.
I implemented an actual bresenham line algorithm using longs instead of floats to make the routine quicker and easier to implement fairly accurate feed rates. The only real issue is when the Z axis is the dominant axis since it has 400 steps per mm versus the X/Y which only has 80 steps per mm. With that, if the Z axis has to step 400 times, and the X axis has to step 400 times, the X axis would need a longer minimum delay time between steps then the Z axis or else the motor will stall, words suck and I dont want to put in the effort to make my brain thoughts into them.
So far it supports G0, G1, G4, G20, G21, G90, G91, G93, G94. It'll read the M commands and just ignores them, but the only M commands I find that flatcam outputs is like spindle on and shit like that, and since Im using a manually operated dremel, thats no issue.
For developing, I've made all the locals static to get a better idea of how much RAM I'm using, which is only 429 bytes out of 2048, which leaves plenty on the stack for parameters and return addresses. And its only using 30% of the program memory, so I still got plenty of space for adding other shit to it.
Ima make the program that sends g code files to the controller a little fancier and then do some test cuts. I'm pretty happy with it so far.
EDIT: I did a quick tape-a-pen-to-the-dremel-carriage-and-tape-a-notepad-to-the-y-carriage test, and it looks pretty good. I stopped it during the drill hole phase and sent it back to 0,0,0, hence the line through it all.
versus the flatcam expected
so I made another small change to make use of some scrap rod i had to reinforce the x axis, its that top spar in the new image.
I got some particle board to get a real flat surface for the top layer, drilled some holes, cut some holes, did a light sanding and put some sealant on it, and did the same for the bottom layer. Its got a way cleaner look now, the wires now get tucked underneath through some holes in the top layer and run towards the controller. I finally fixed the controller and the keypad to the fixture with screws instead of tape to make it easier to move around.
Im thinking instead of make a new version of my CAD program, I'll just make a program that will interpret gerber files and send the appropriate commands to the machine. That way I'll be able to use whatever CAD program I want (that exports gerber files), but whatevs, i dunno.
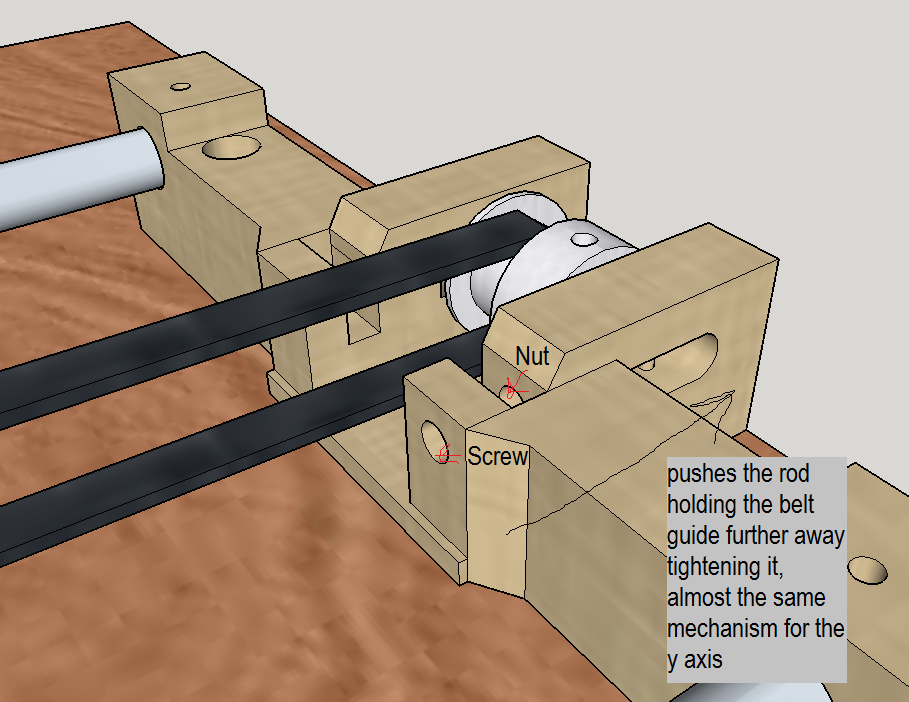
So I was tweaking parts in sketchup, developed a way to tension the belts for x and y axis (z is lead screws so dont need that there) and printed them out and it works pretty good. After that I redesigned all the parts making them beefier, which makes everything stiffer, which should make it more gooder over all. I havent touched the software, but whatevs.
So Ive been working on that auto level thing, which turns out is pretty awesome because I can use V bits now, I can etch faster due to milling at a precise depth instead of milling at a range of depths due to the board flexed/uneven/whatevs. And the bits dont break like its going out of style.
Heres pictures of board, and the unevenness I introduced to test the auto leveling. Its quite extreme and I dont forsee anything like this happening. I made it do 12 samples in the x axis and 12 in the y axis. I could have improved the results by increasing the sampling to 25, 20 (which will fit in the RAM just fine on the arduino, but its pushing it based on all my other globals and locals and other items pushed on the stack during its calling procedures, maybe I should make most of the locals static so I can get an accurate picture on compile since nothing is being called recursively?)
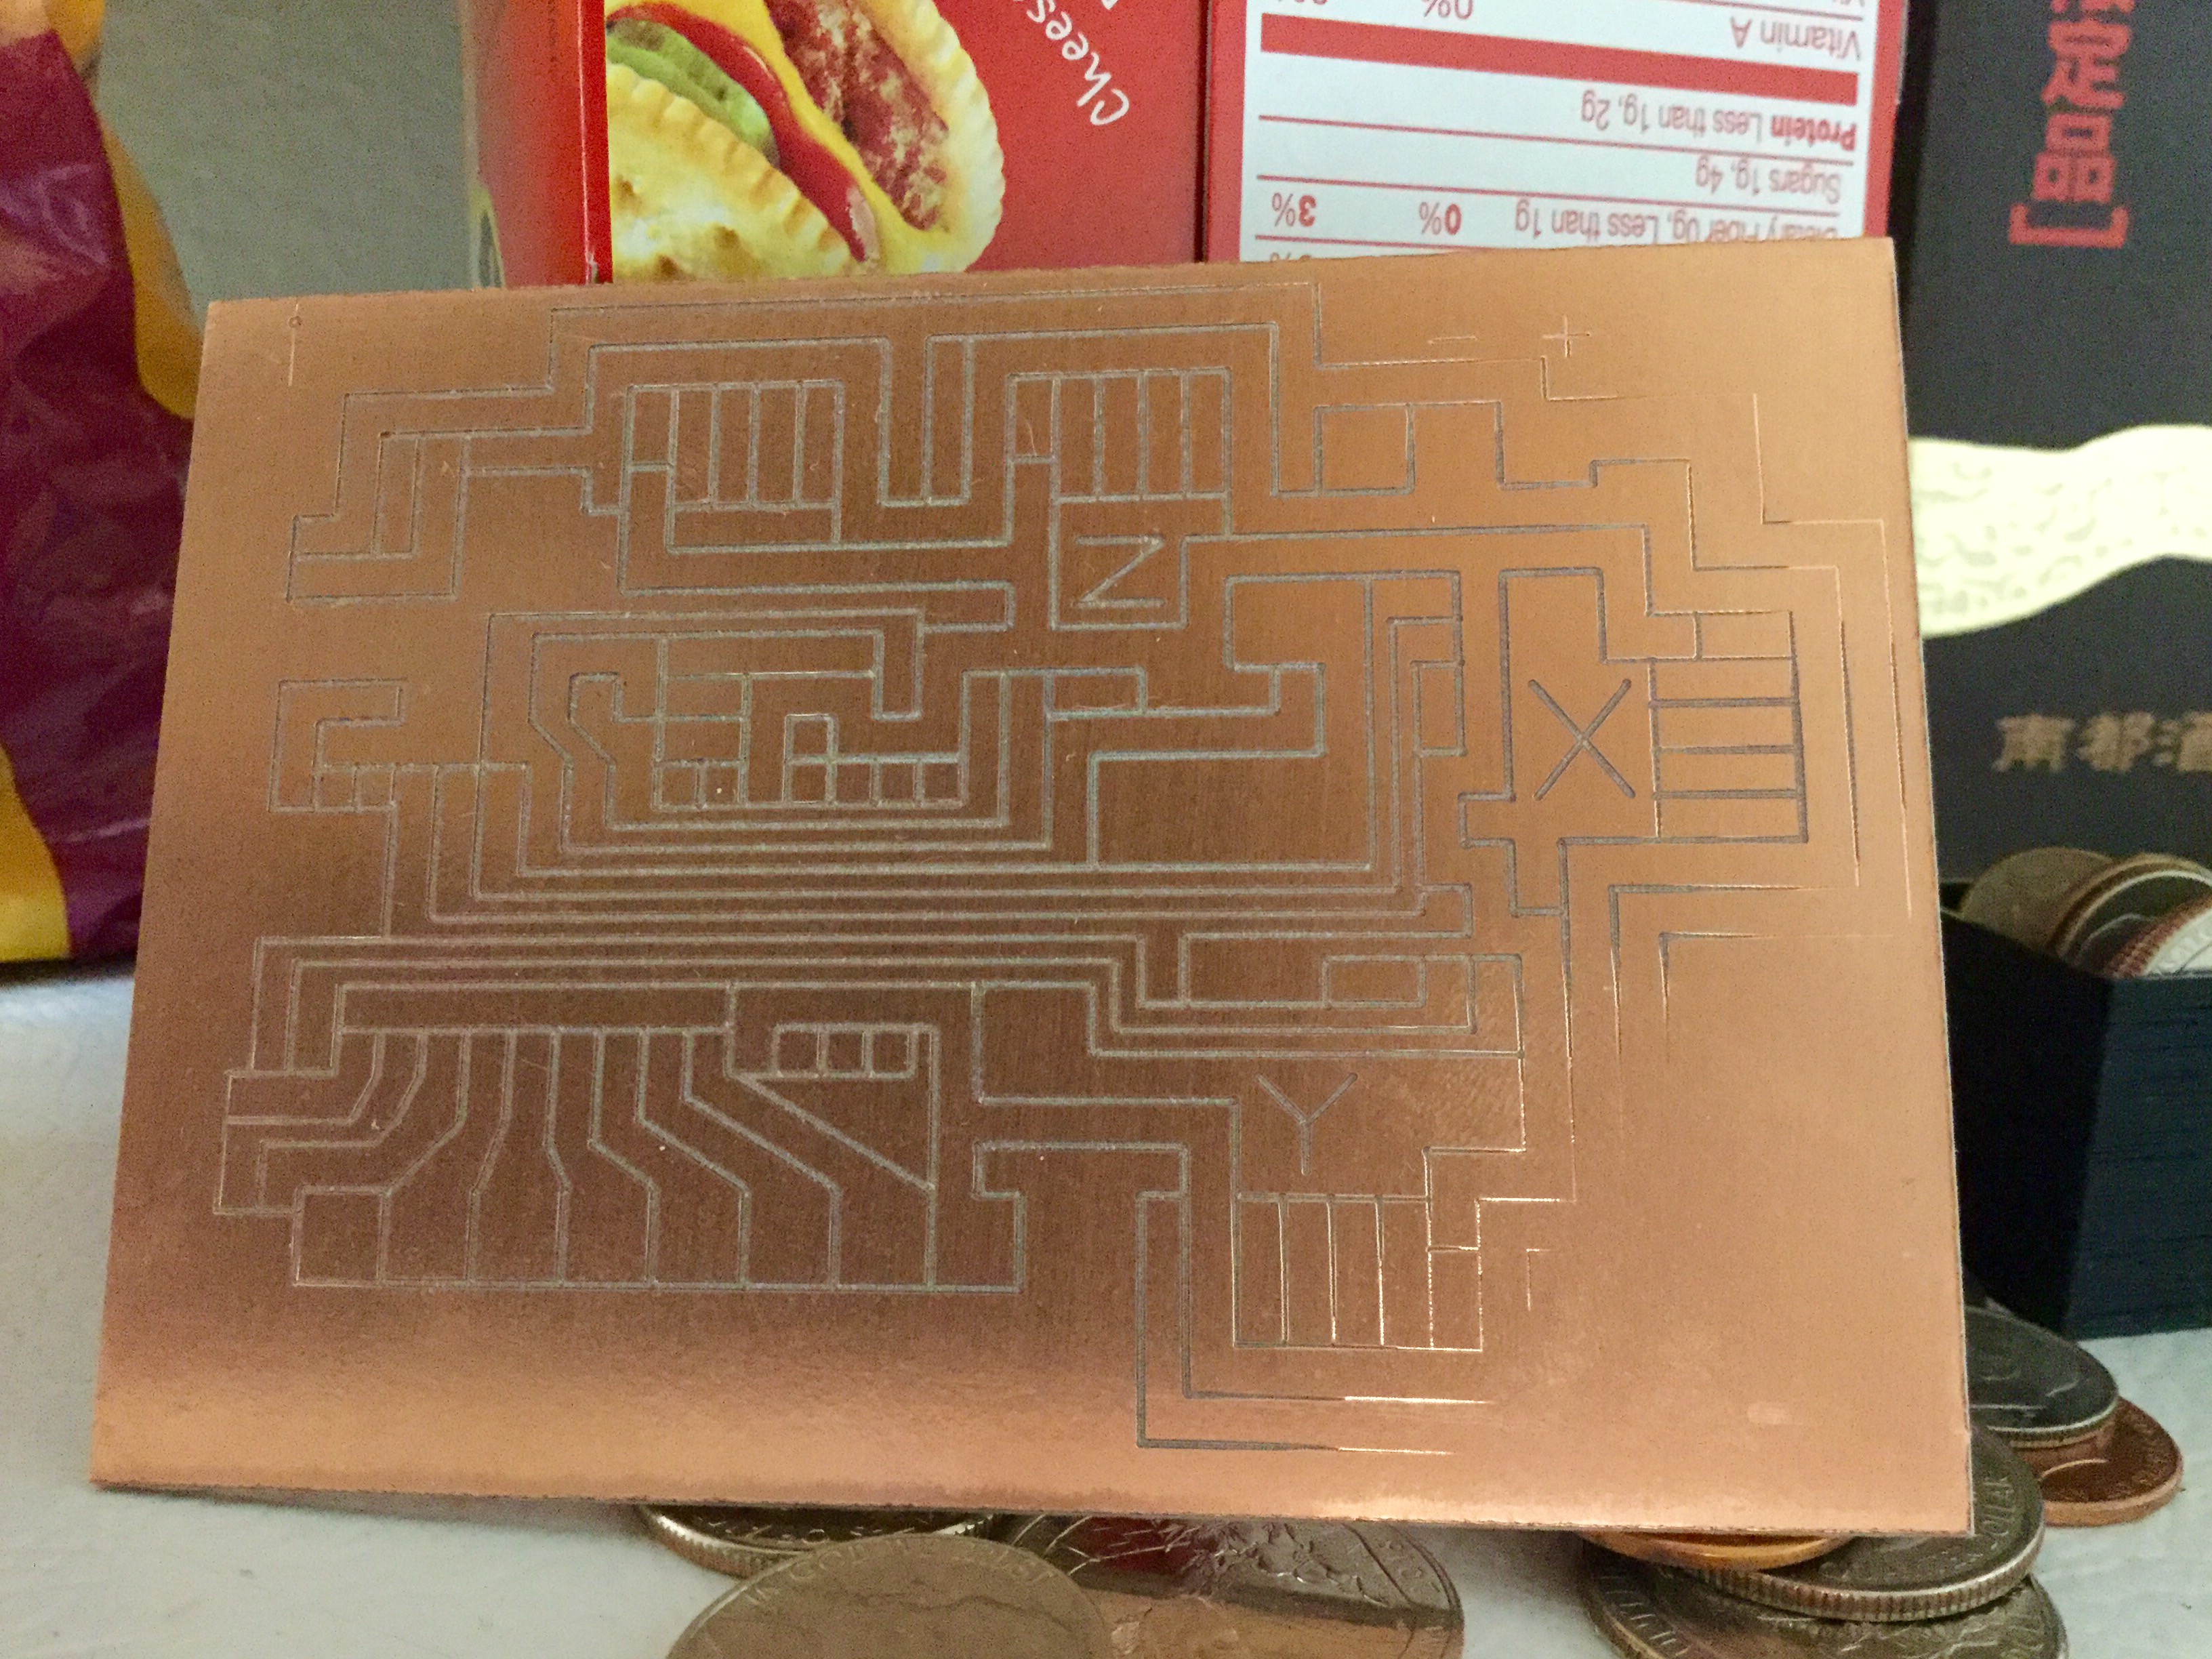
As you can see, the bottom right hand corner where the change in surface depth was most extreme (change in depth versus change in lateral/horizantal direction) it didnt like so well, but as I said, I can increase the number of sample points to correct this. But with how extreme this example was, I shouldnt need to.
Heres a time lapse video of it doing its thing, you can watch the Z axis coupling as a reference to see it adjust its height for the contours. It's a shitty video, for some reason my ipad wouldnt let me upload at Hi Def saying I had to be on wifi (which it was, its not a 4g or 3d ipad), but you can still see the auto level in action.
Code wise it was pretty simple, I've done some interpolating in code in the past and I just applied that to this.
For building the sample points, I just had 2 for loops going through the points and recording them
void buildLevelTable(double maxDepth){
  if (maxDepth>5) maxDepth=5;//since we're using a uchar for height data, its limits are -5.1 to 5.

  autoZeroZAxis(10);

  for (int y=0;y<LEVELH;y++){
      for (int x=0;x<LEVELW;x++){
          gLevelTable[x][y]=0;
          gotoZ(gTravelHeight,gZTravelSpeed);
          gotoXY((gLevelWidth/LEVELW)*x,(gLevelHeight/LEVELH)*y,gXYTravelSpeed);
          for (double deep=fmax(-5,gTravelHeight);deep<=maxDepth;deep+=0.02){
              gotoZ(deep,gZTravelSpeed*5);
              if (!digitalRead(LEVELPIN) && !digitalRead(LEVELPIN) && !digitalRead(LEVELPIN)){
                  gLevelTable[x][y]=(double)(deep*25.0f);
                  break;
              }
          }
      }
  }
  gotoZ(gTravelHeight,gZTravelSpeed);
  gotoXY(0,0,gXYTravelSpeed);
}
And for the interpolation to get the z offset at the current X/Y
double zOffset(){
	double x=((double)gCurStepX)/80.0;
	double y=((double)gCurStepY)/80.0;
	double bw=gLevelWidth/(LEVELW-1);
	double bh=gLevelHeight/(LEVELH-1);
	int tablex=floor(x/bw);
	int tabley=floor(y/bh);
	x-=((int)((double)tablex*bw));
	y-=((int)((double)tabley*bh));
	if (tablex>=LEVELW-1 || tabley>=LEVELH-1) return gTravelHeight;
        if (tablex<0 || tabley<0) return -10;
	double left=(gLevelTable[tablex][tabley+1]/25.0f-gLevelTable[tablex][tabley]/25.0f)/bh*y+gLevelTable[tablex][tabley]/25.0f;
	double right=(gLevelTable[tablex+1][tabley+1]/25.0f-gLevelTable[tablex+1][tabley]/25.0f)/bh*y+gLevelTable[tablex+1][tabley]/25.0f;
	return (right-left)/bw*x+left;
}
Dont mind the poor code.
So, I had a free pin on the arduino, and I'd hate to see it go to waste, so its going to become the sense pin for auto leveling.
I got a wire hooked up to ground, and the other wire hooked up to the free pin (D8). They both have aligator clips, so you clip one to the board, and one to the end mill, and then run the auto leveling routine.
It probes the entire board (with a width and height you specify) at intervals you decide (so for my board, its 100mm x 70mm, and I have it probe 10 in X axis, and 7 in the Y axis) and gets the Z offset compared to home. It puts all that into a table and becomes accessible during x/y movements. Every step of the xy axis in my gotoXY routine it says "Hey, im at a new position, lets check to see what my new Z height needs to be to get that route depth i want" so it does a bunch of math and corrects the Z position to give you that cutting depth you want.
Its a work in progress and I've gotten some nice test cuts, but Ive also found some bugs and need to decide how I want to actually have it implemented in code. right now the codes a mess, and very awkward. I have it implemented in my gotoXY routine, with a parameter asking if you want to make auto leveling corrections. I'm thinking I'll make a gotoXYAutoLevel routine that will do all this, and it will leave the gotoZ and gotoXY commands pure and free of this mess.
or should it be gotoXYZAutoLevel? That'd probably be easier. I dont know. I'm going to find out.
#hashtagssuck
i made a lil video were i go through what i got so far and talk a lilttle about what i want to do in the future with it.
Create an account to leave a comment. Already have an account? Log In.
كيف حالك
أنا معجب بك وعملك
يمكن أن تساعد في بناء هذا المشروع الجميل؟
لدي جميع المكونات المطلوبة ولكن خطة الاتصال مفقودة
أو توصيل الأسلاك مع جميع الأجزاء هل تسمح لي الرسم التوضيحي لتوصيل
شكرا
Become a member to follow this project and never miss any updates
 Thomas Bladykas
 zacnotes
 fruchti
This is my next build. Currently I'm building my second Prusa I3 clone. Fingers crossed ;)