 DTeel
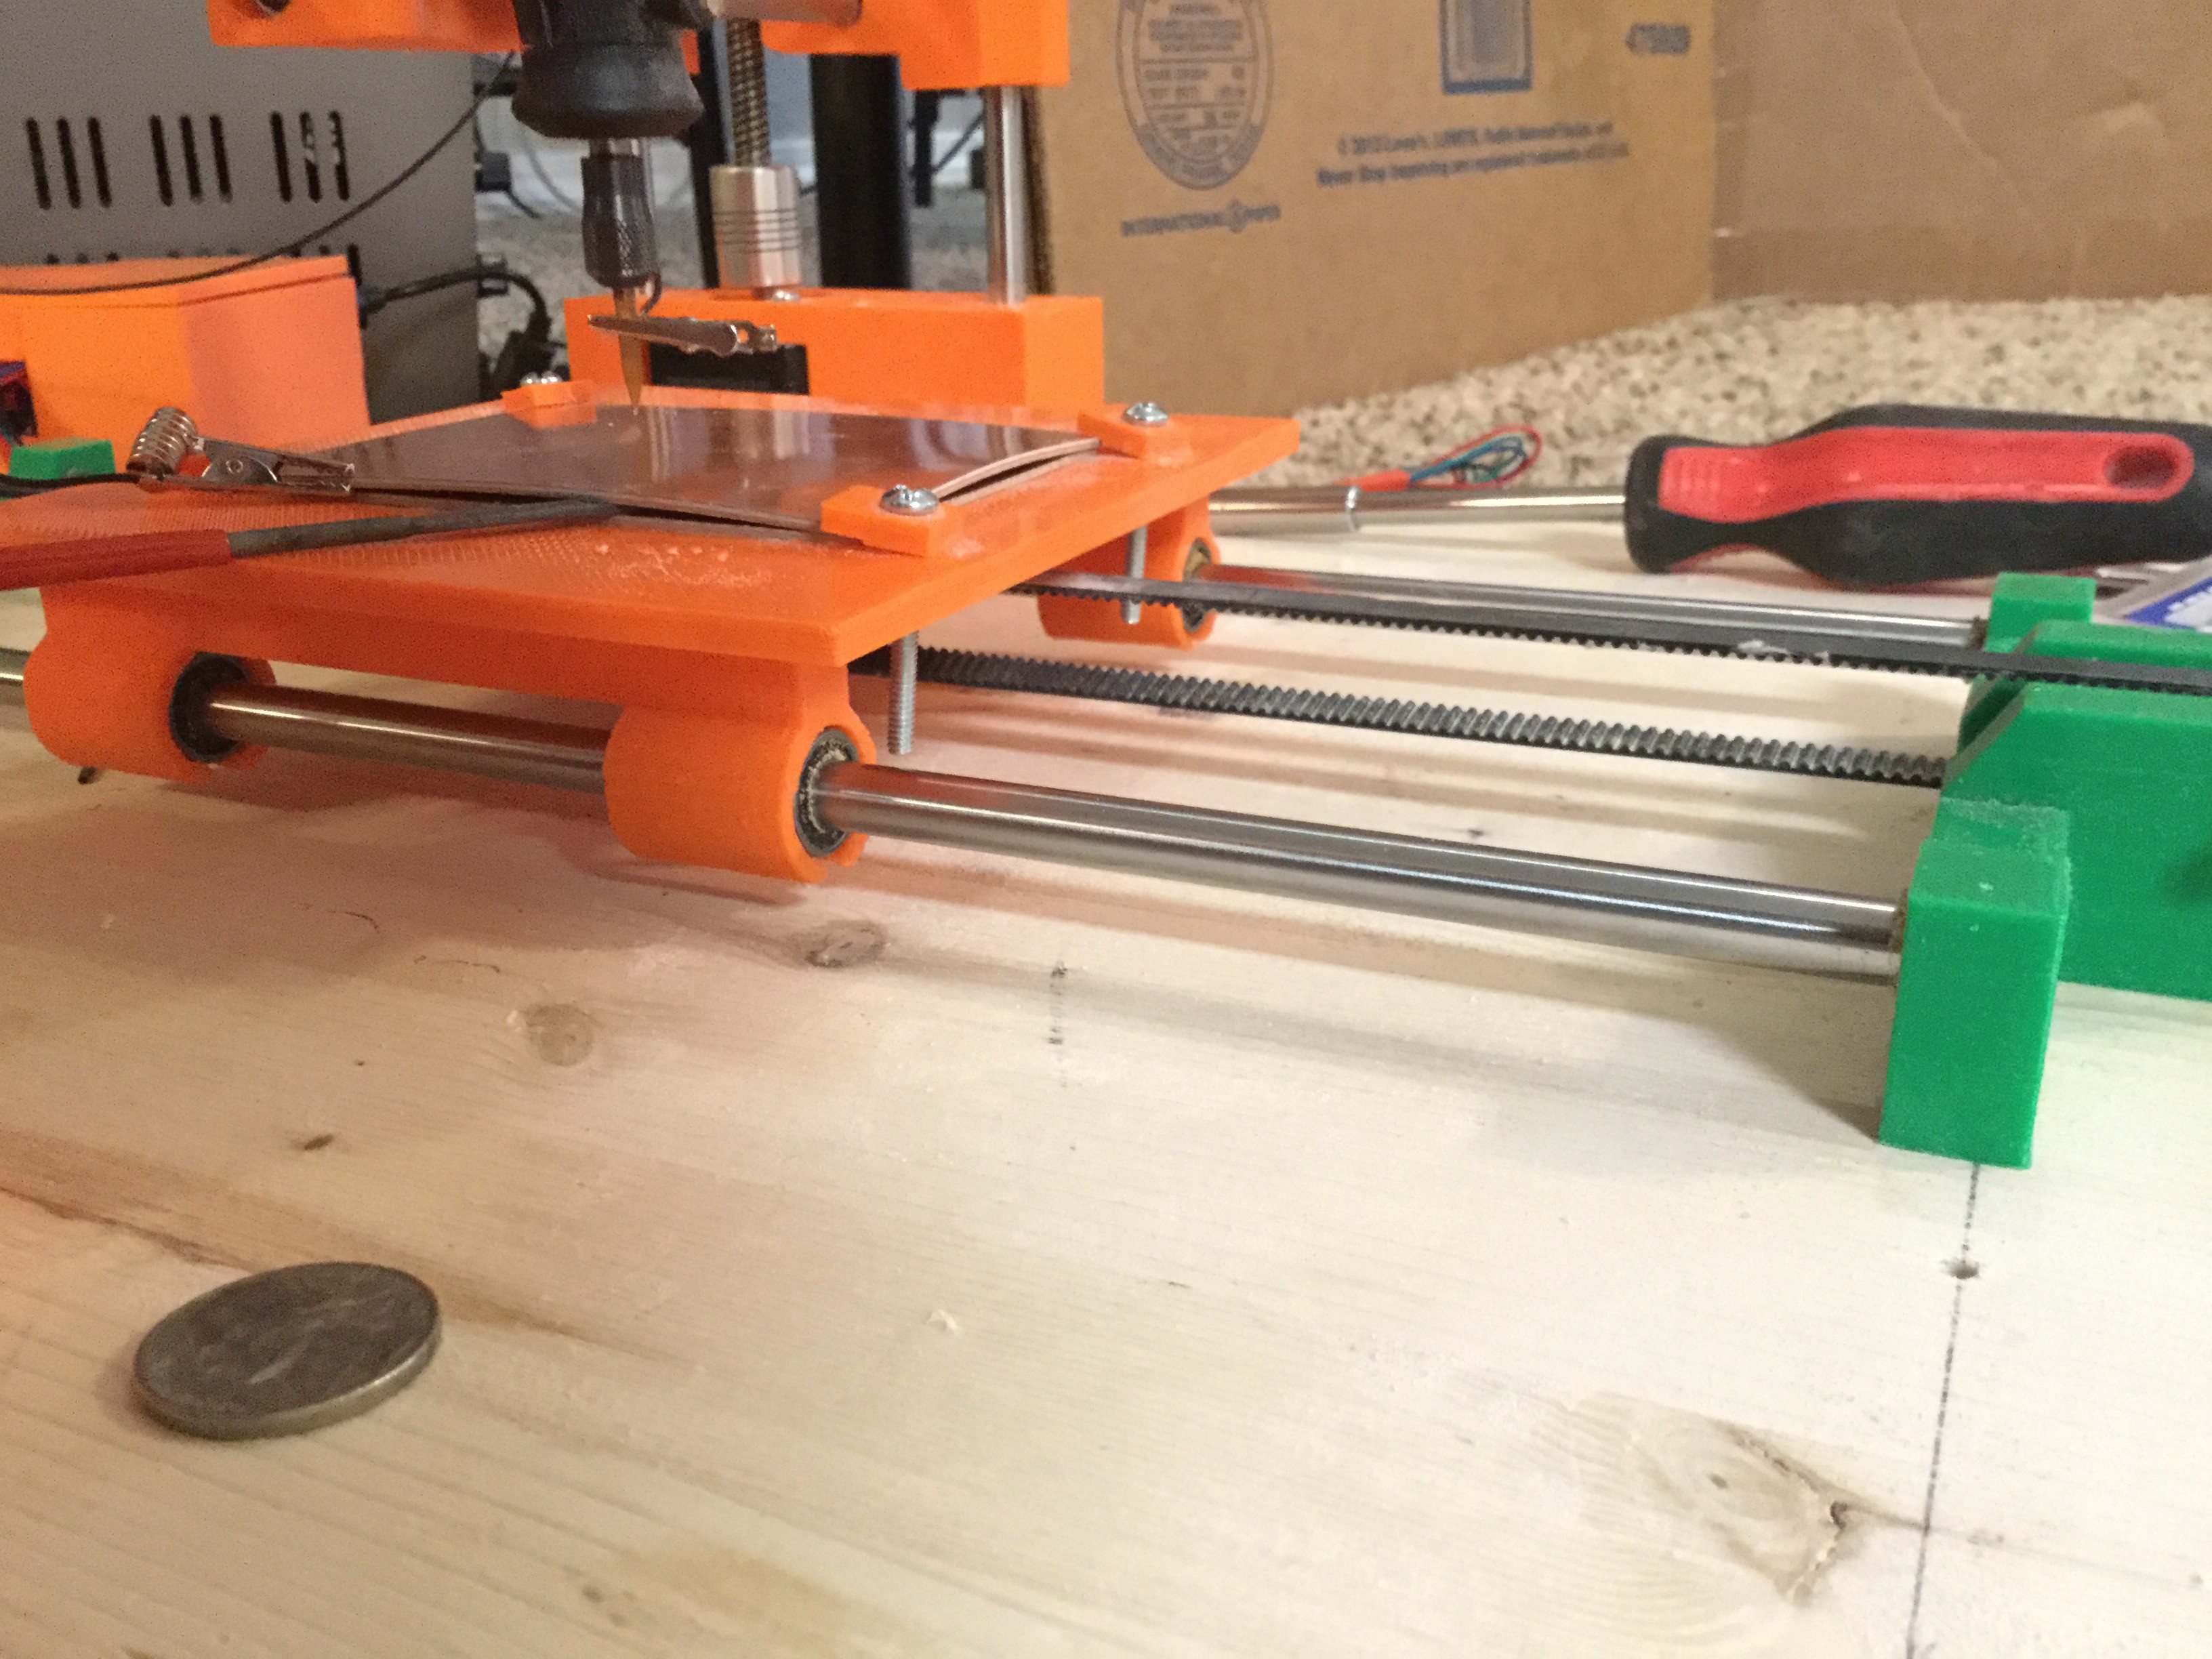
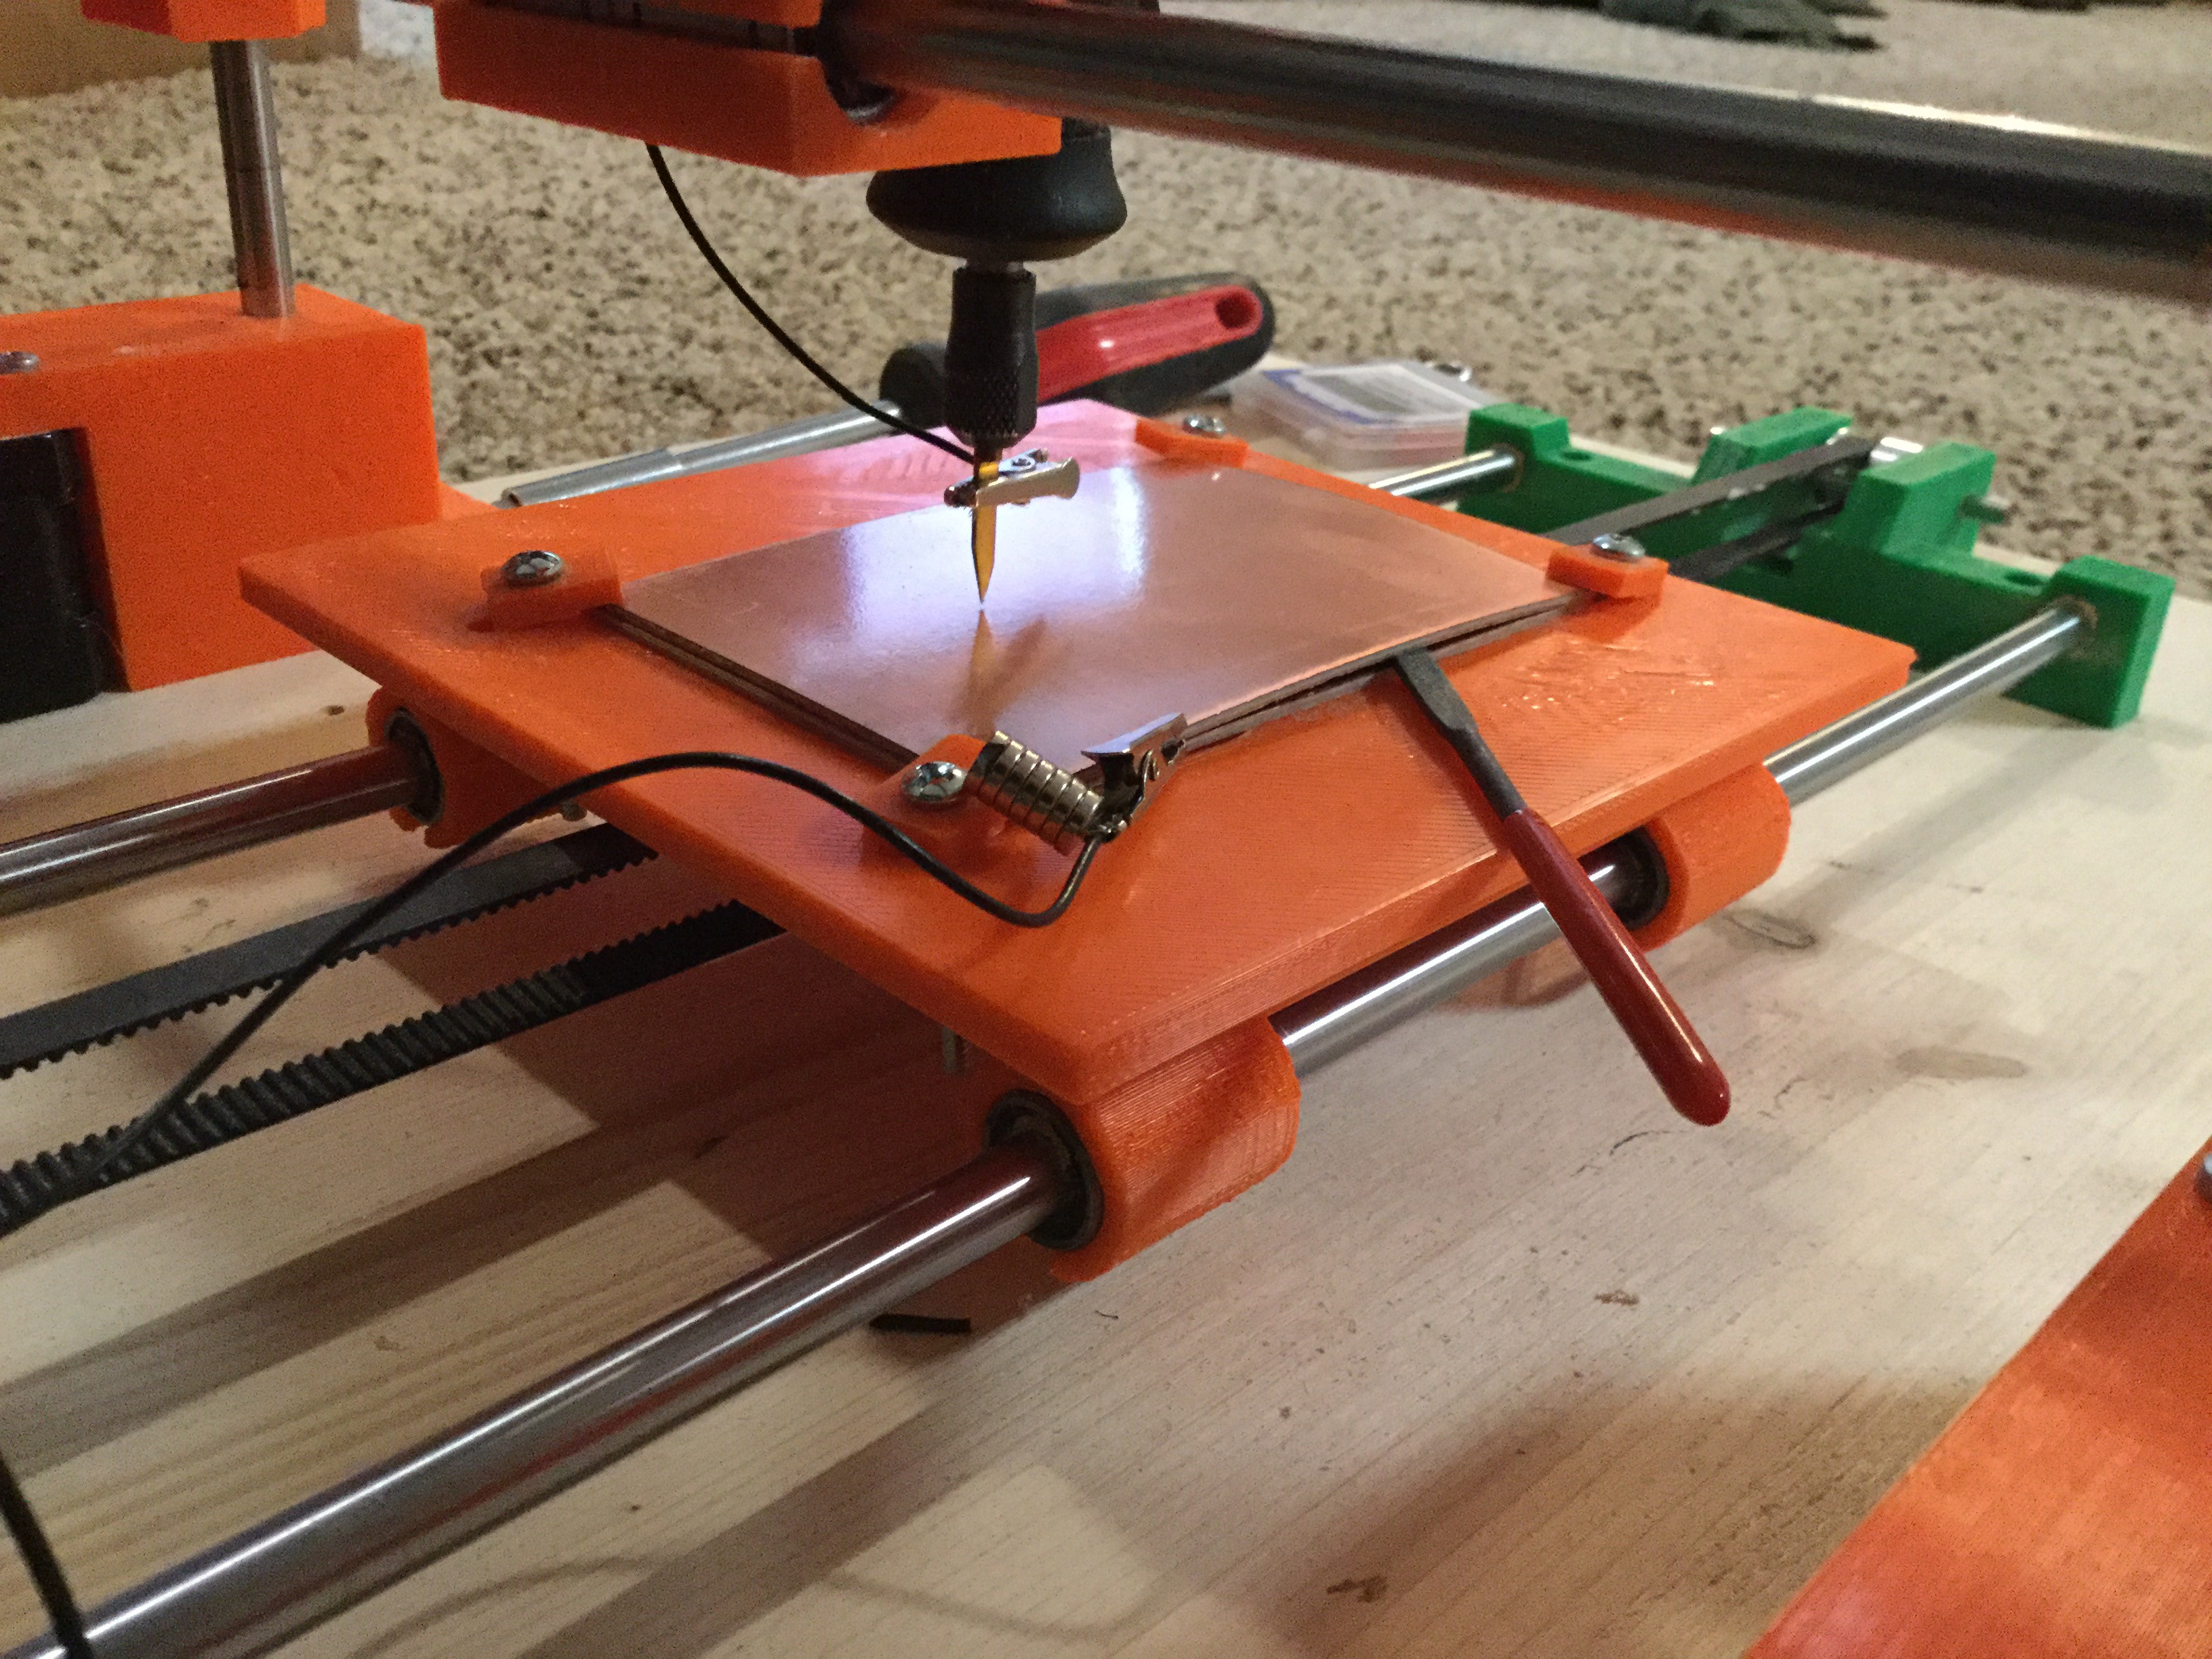
DTeelSo Ive been working on that auto level thing, which turns out is pretty awesome because I can use V bits now, I can etch faster due to milling at a precise depth instead of milling at a range of depths due to the board flexed/uneven/whatevs. And the bits dont break like its going out of style.
Heres pictures of board, and the unevenness I introduced to test the auto leveling. Its quite extreme and I dont forsee anything like this happening. I made it do 12 samples in the x axis and 12 in the y axis. I could have improved the results by increasing the sampling to 25, 20 (which will fit in the RAM just fine on the arduino, but its pushing it based on all my other globals and locals and other items pushed on the stack during its calling procedures, maybe I should make most of the locals static so I can get an accurate picture on compile since nothing is being called recursively?)
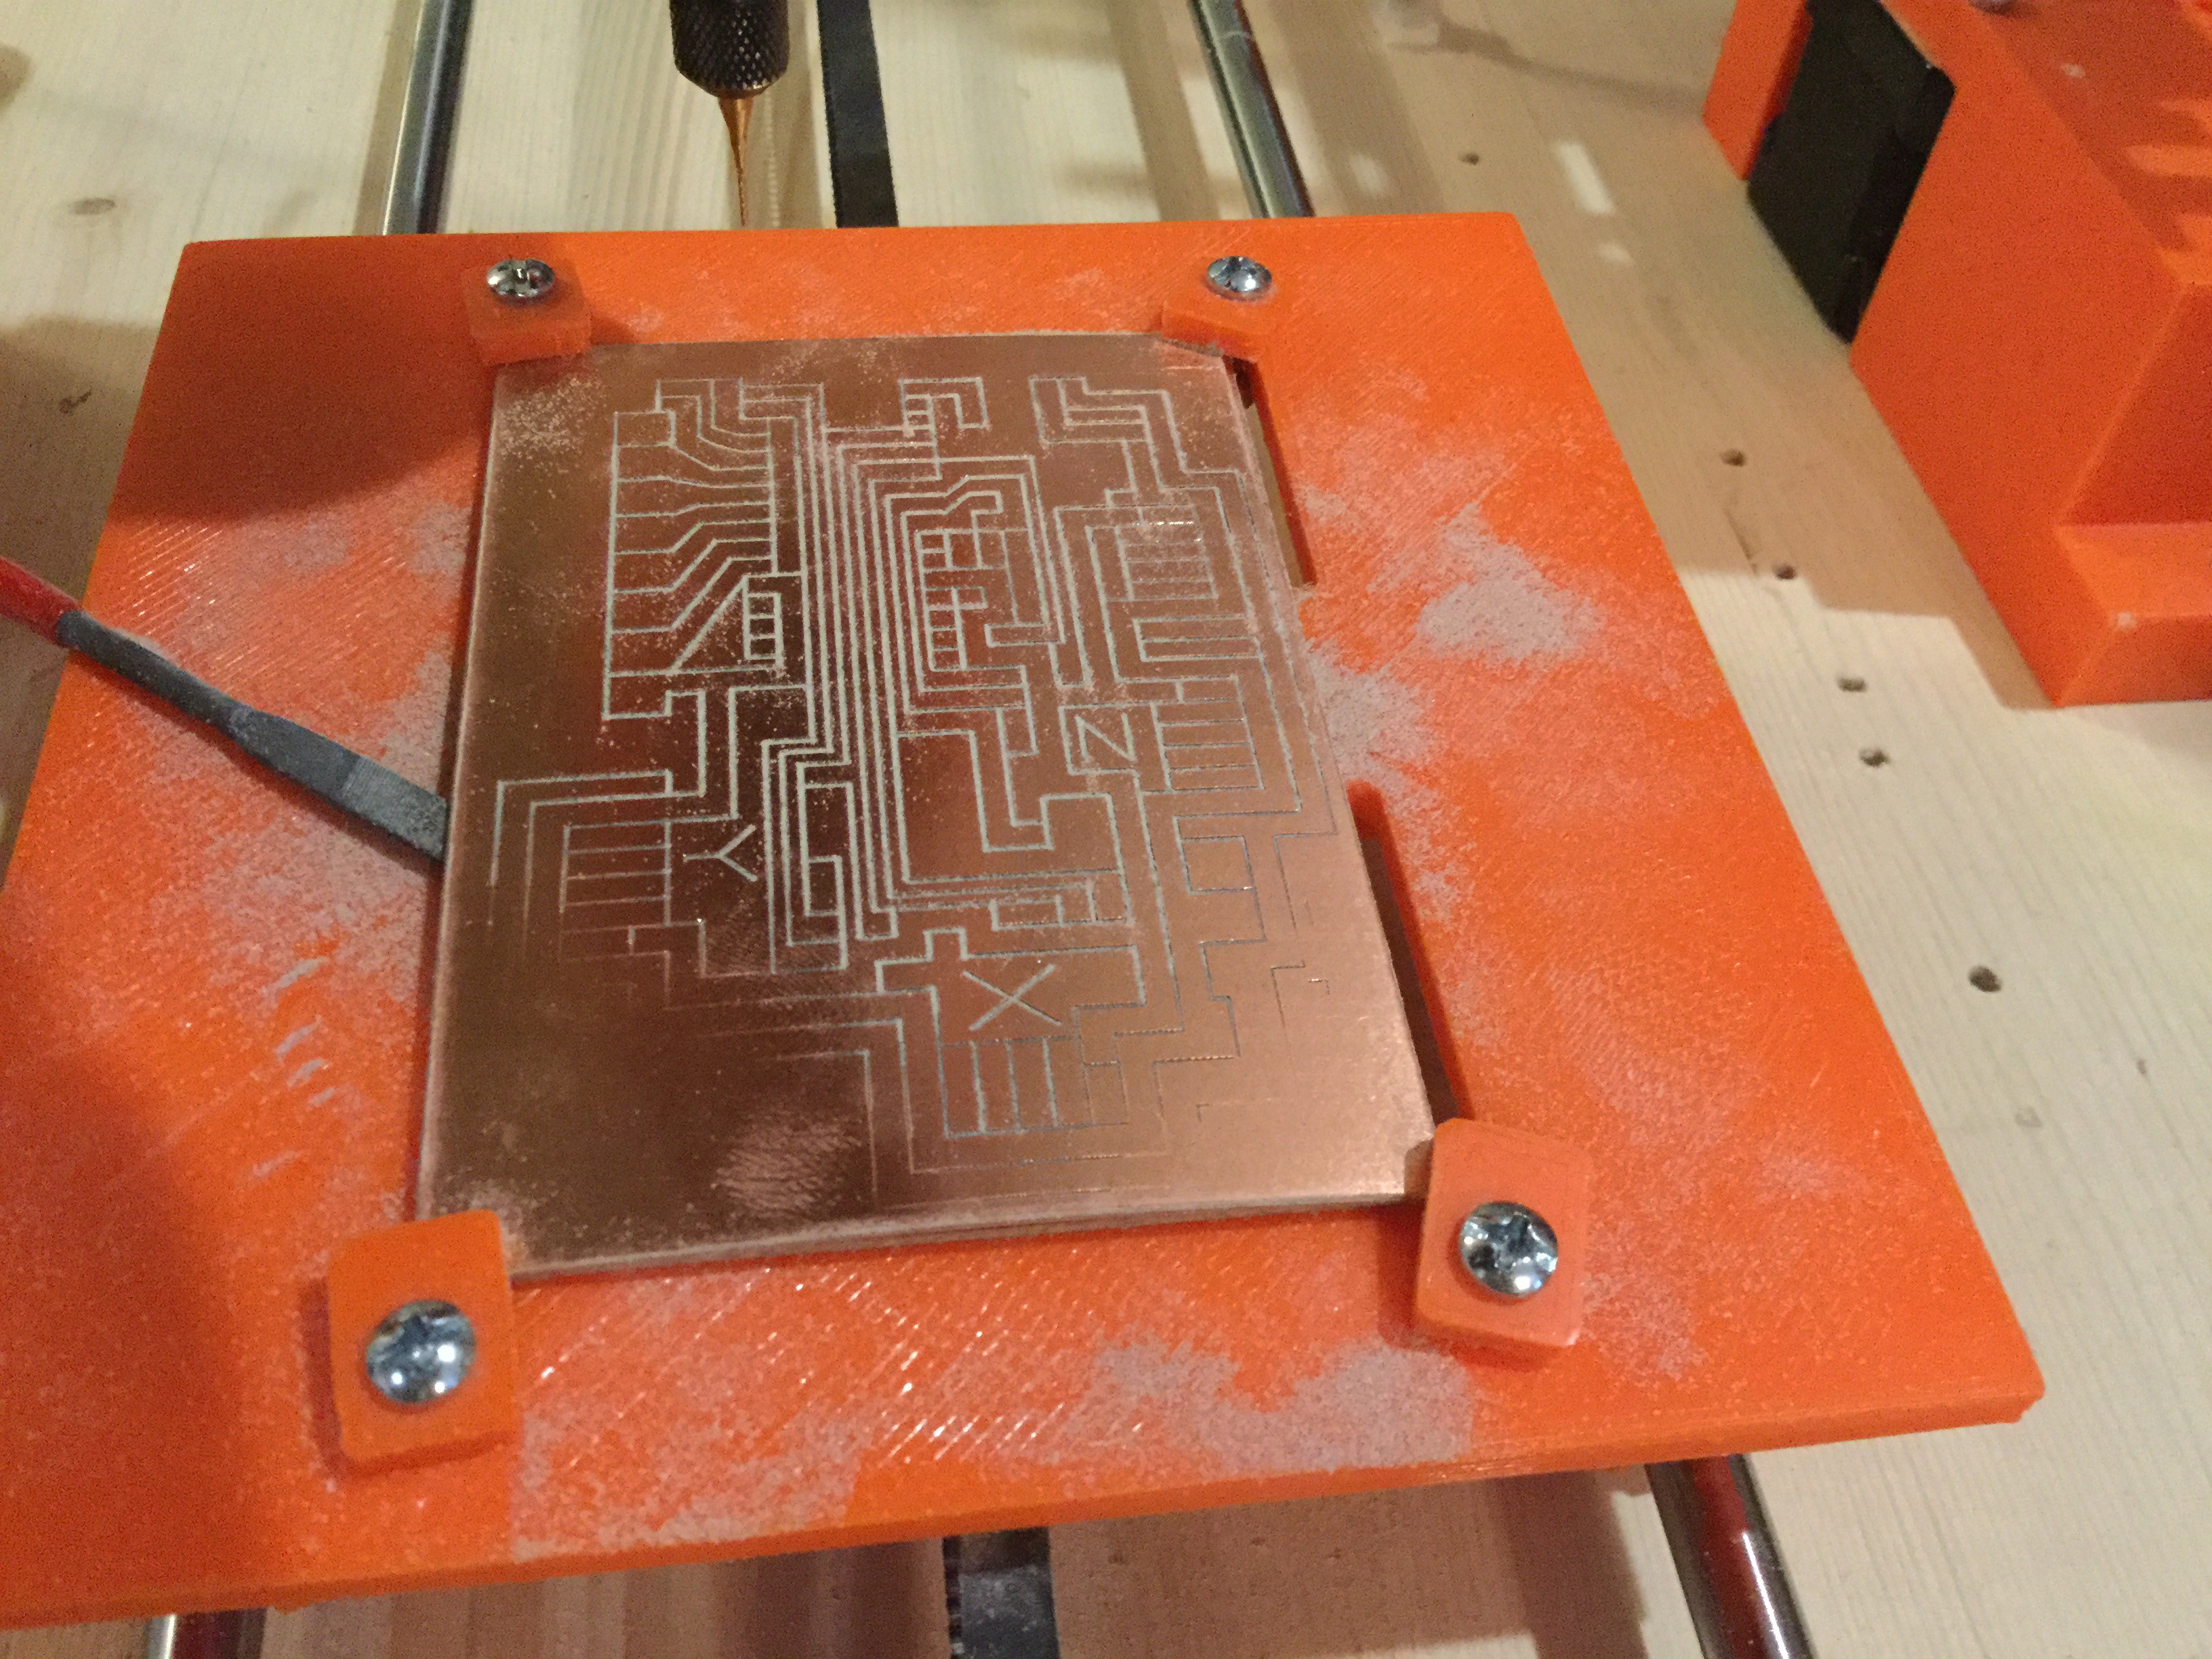
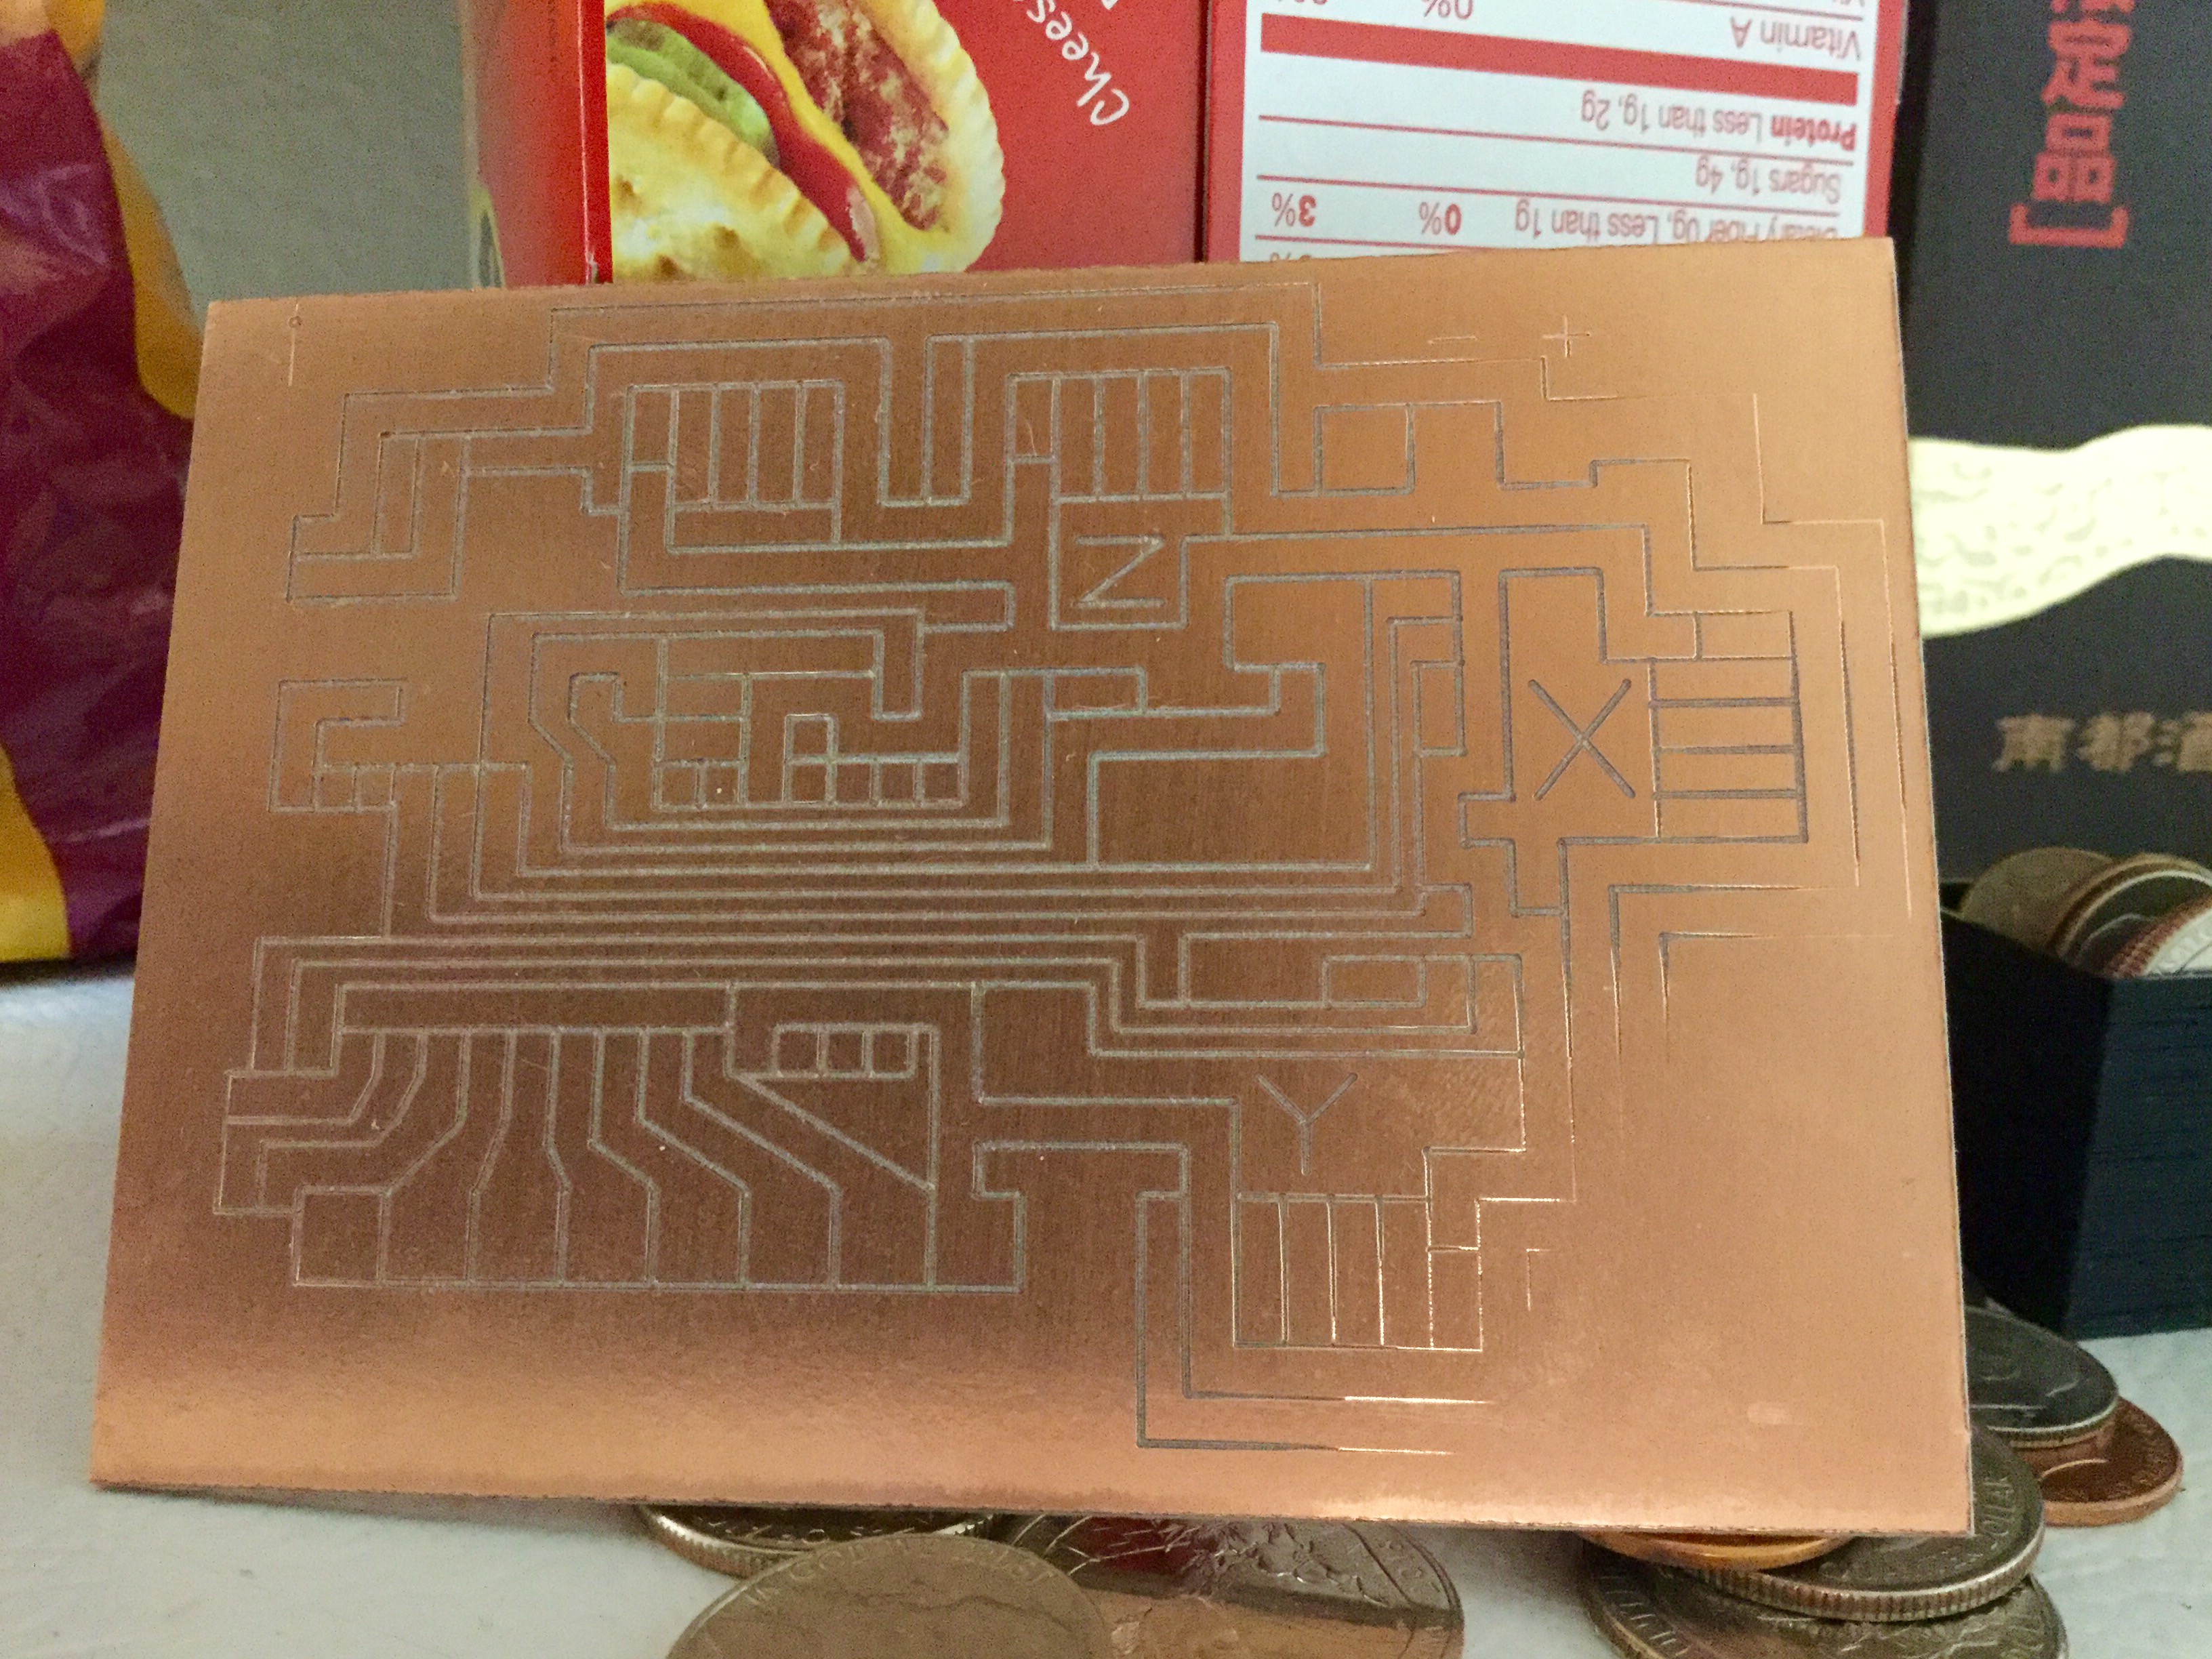
As you can see, the bottom right hand corner where the change in surface depth was most extreme (change in depth versus change in lateral/horizantal direction) it didnt like so well, but as I said, I can increase the number of sample points to correct this. But with how extreme this example was, I shouldnt need to.
Heres a time lapse video of it doing its thing, you can watch the Z axis coupling as a reference to see it adjust its height for the contours. It's a shitty video, for some reason my ipad wouldnt let me upload at Hi Def saying I had to be on wifi (which it was, its not a 4g or 3d ipad), but you can still see the auto level in action.
Code wise it was pretty simple, I've done some interpolating in code in the past and I just applied that to this.
For building the sample points, I just had 2 for loops going through the points and recording them
void buildLevelTable(double maxDepth){
  if (maxDepth>5) maxDepth=5;//since we're using a uchar for height data, its limits are -5.1 to 5.

  autoZeroZAxis(10);

  for (int y=0;y<LEVELH;y++){
      for (int x=0;x<LEVELW;x++){
          gLevelTable[x][y]=0;
          gotoZ(gTravelHeight,gZTravelSpeed);
          gotoXY((gLevelWidth/LEVELW)*x,(gLevelHeight/LEVELH)*y,gXYTravelSpeed);
          for (double deep=fmax(-5,gTravelHeight);deep<=maxDepth;deep+=0.02){
              gotoZ(deep,gZTravelSpeed*5);
              if (!digitalRead(LEVELPIN) && !digitalRead(LEVELPIN) && !digitalRead(LEVELPIN)){
                  gLevelTable[x][y]=(double)(deep*25.0f);
                  break;
              }
          }
      }
  }
  gotoZ(gTravelHeight,gZTravelSpeed);
  gotoXY(0,0,gXYTravelSpeed);
}
And for the interpolation to get the z offset at the current X/Y
double zOffset(){
	double x=((double)gCurStepX)/80.0;
	double y=((double)gCurStepY)/80.0;
	double bw=gLevelWidth/(LEVELW-1);
	double bh=gLevelHeight/(LEVELH-1);
	int tablex=floor(x/bw);
	int tabley=floor(y/bh);
	x-=((int)((double)tablex*bw));
	y-=((int)((double)tabley*bh));
	if (tablex>=LEVELW-1 || tabley>=LEVELH-1) return gTravelHeight;
        if (tablex<0 || tabley<0) return -10;
	double left=(gLevelTable[tablex][tabley+1]/25.0f-gLevelTable[tablex][tabley]/25.0f)/bh*y+gLevelTable[tablex][tabley]/25.0f;
	double right=(gLevelTable[tablex+1][tabley+1]/25.0f-gLevelTable[tablex+1][tabley]/25.0f)/bh*y+gLevelTable[tablex+1][tabley]/25.0f;
	return (right-left)/bw*x+left;
}
Dont mind the poor code.
Discussions
Become a Hackaday.io Member
Create an account to leave a comment. Already have an account? Log In.