Follow me on Twitter: @SteveSchuler20 and right here on Hackaday: KRA5H

Snap Circuits is an educational toy that teaches electronics with solderless snap-together electronic components. Each component has the schematic symbol and a label printed on its plastic case for easy identification. They snap together with what appear to be ordinary clothing snaps. The components also snap onto a 10 X 7 plastic base grid somewhat analogous to a solderless breadboard.
All the kits include manuals printed in color with instructions for ages 8 or older and with easy to follow diagrams to assemble the projects. The illustrations for each project look almost exactly like what the components will look on the base grid when finished. Because the electronic symbol is printed on each electronic component, once the project is completed, it will look like a printed electronic schematic.


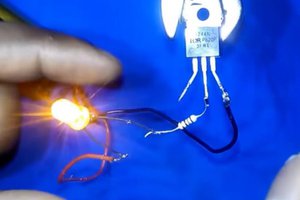
Most of the Snap Circuits blocks are self documenting (again, when the circuit is built, it looks like an electronic schematic). The above pictures show a sample circuit. It is Project 159 "NPN Transistor" on page 61 of the Snap Circuits Arcade manual.
The Snap Circuits Arcade set includes 36 parts to build over 200 projects. One intriguing part is the LED MC. It has a dual 7-segment LED display and a PICAXE 08M2 microcontroller. The PICAXE is preprogrammed with 21 mini arcade games such as dice rolling and memory games and the manual includes the circuits to build and play these games. To modify the game programs or write new programs for the PICAXE, you’ll need the PICAXE program editor (download it for free from www.picaxe.com/Software) and you’ll need a special USB to Snap Circuits programming cable (sold separately).
The Arcade kit also includes a programmable persistence of vision LED fan. The POV fan has six preprogrammed phrases but you can erase them all and program your own phrases. The circuit to change the phrases is fairly simple.
Parts needed from the Snap Circuits Arcade set:
1 Base Grid (11” x 7.7”) # 6SC BG
1 Programmable Fan # 6SC M8
1 Battery Holder 4.5V (3-AA) # 6SC B3
1 Selector # 6SC S8
1 Jumper Wire 8" (Orange) # 6SC J3A
1 Slide Switch # 6SC S1
1 Press Switch # 6SC S2
2 Single Snap Conductor # 6SC 01
4 Conductor with 2-snaps # 6SC 02
3 Conductor with 3-snaps # 6SC 03
1 Conductor with 5-snaps # 6SC 05


To add your own word or phrase, turn on the Slide Switch (S1) and the POV fan will spin displaying the preprogrammed phrases. Press the “C” button on the Selector block (S8) to scroll through the phrases until you get to the “YOUR PHRASE” message. Press and hold the Press Switch (S2) until you see the blinking cursor displayed on the POV fan. Press the “C” button on the Selector block (S8) to move down through the alphabet (and numbers or characters) until you get to the letter or character you want to display. Conversely, to move up through the letters and characters, press the “A” button. Once the letter you want is displayed on the POV fan, press the momentary switch on the Press Switch (S2) block to move the cursor to the next space.
Continue this process until you complete your custom word or phrase. Press and hold the Press Switch (S2) to save your message and exit. NOTE: the POV fan editor only has capital letters.


Snap Circuits might seem at first to be somewhat pricey. A Snap Circuits resistor costs $1.49 USD. A resistor from Mouser costs fifteen cents. On the other hand, the Snap Circuits Arcade set costs $64.95 whereas the littleBits base kit costs $99.00. So, you get a lot more Snap Circuits than littleBits and at a lower price.
As an introduction to electronics, both Snap Circuits and littleBits have an advantage over breadboard and conventional spring connector electronics kits. Some folks might find working with electronics and breadboards a bit too fiddly. Spring connector kits are easier to use than breadboards, but once you build a circuit of any complexity with a spring connector...
Read more » Steve Schuler

 Ember Leona
 Kody Alan Rogers

 BreeStephany
Thanks, SophieTwo, for liking my project!