Enrico
-
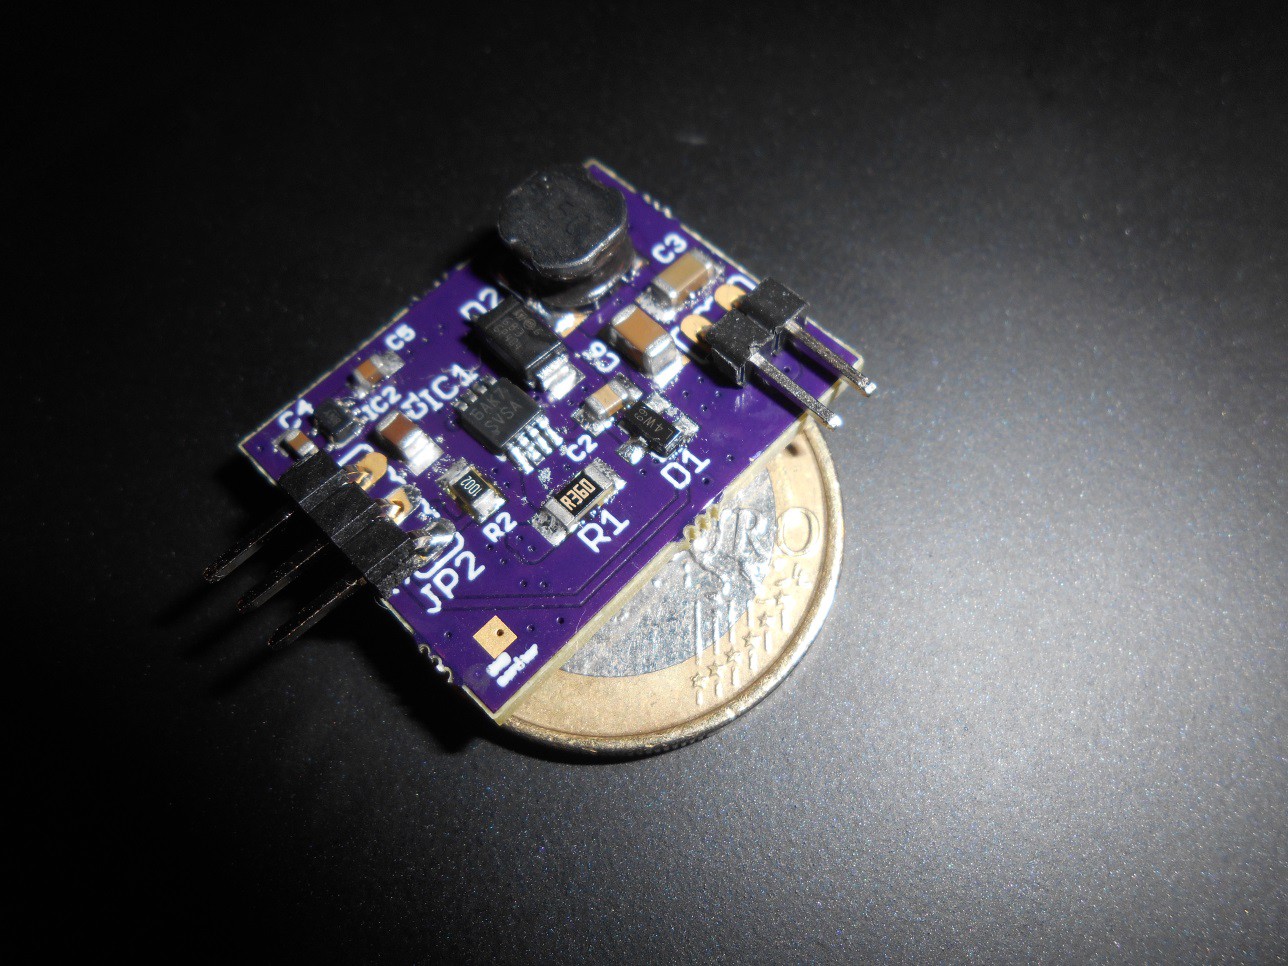
Glighter-S - new revision!
02/21/2017 at 20:48 • 0 commentsGlighter now have a new form factor. It is a real coin size this time.
My need was to enable the possibility to use smaller boxes, with a better organization. I tried to make the board smaller, more similar to a square, with the output connector rotated by 90°.
This is the newboard:
![]()
Under the electrical point of view, nothing has changed. Only the board sizes are new, with a form factor of 19mm x 24mm.The output connector is conceived to be used with pluggable cables, or if a flexible solution is needed without the male header, there is now more space to solder wires directly on the output pads.
The input connector is kept the same, to allow the board to be either used with pluggable connectors, wires or to be inserted in a breadboard.
The infos are updated on the project details!
-
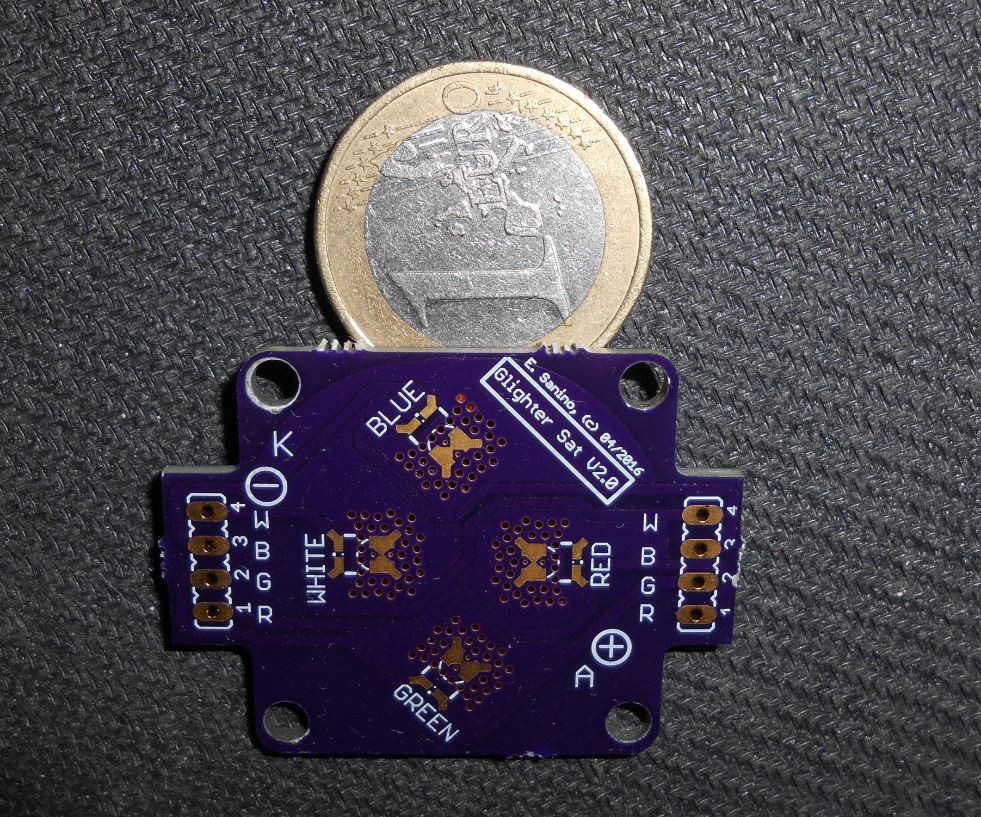
Power LEDs breakout board
06/16/2016 at 20:16 • 0 commentsI think that also referring to what I used to test the driver can be useful/more complete.
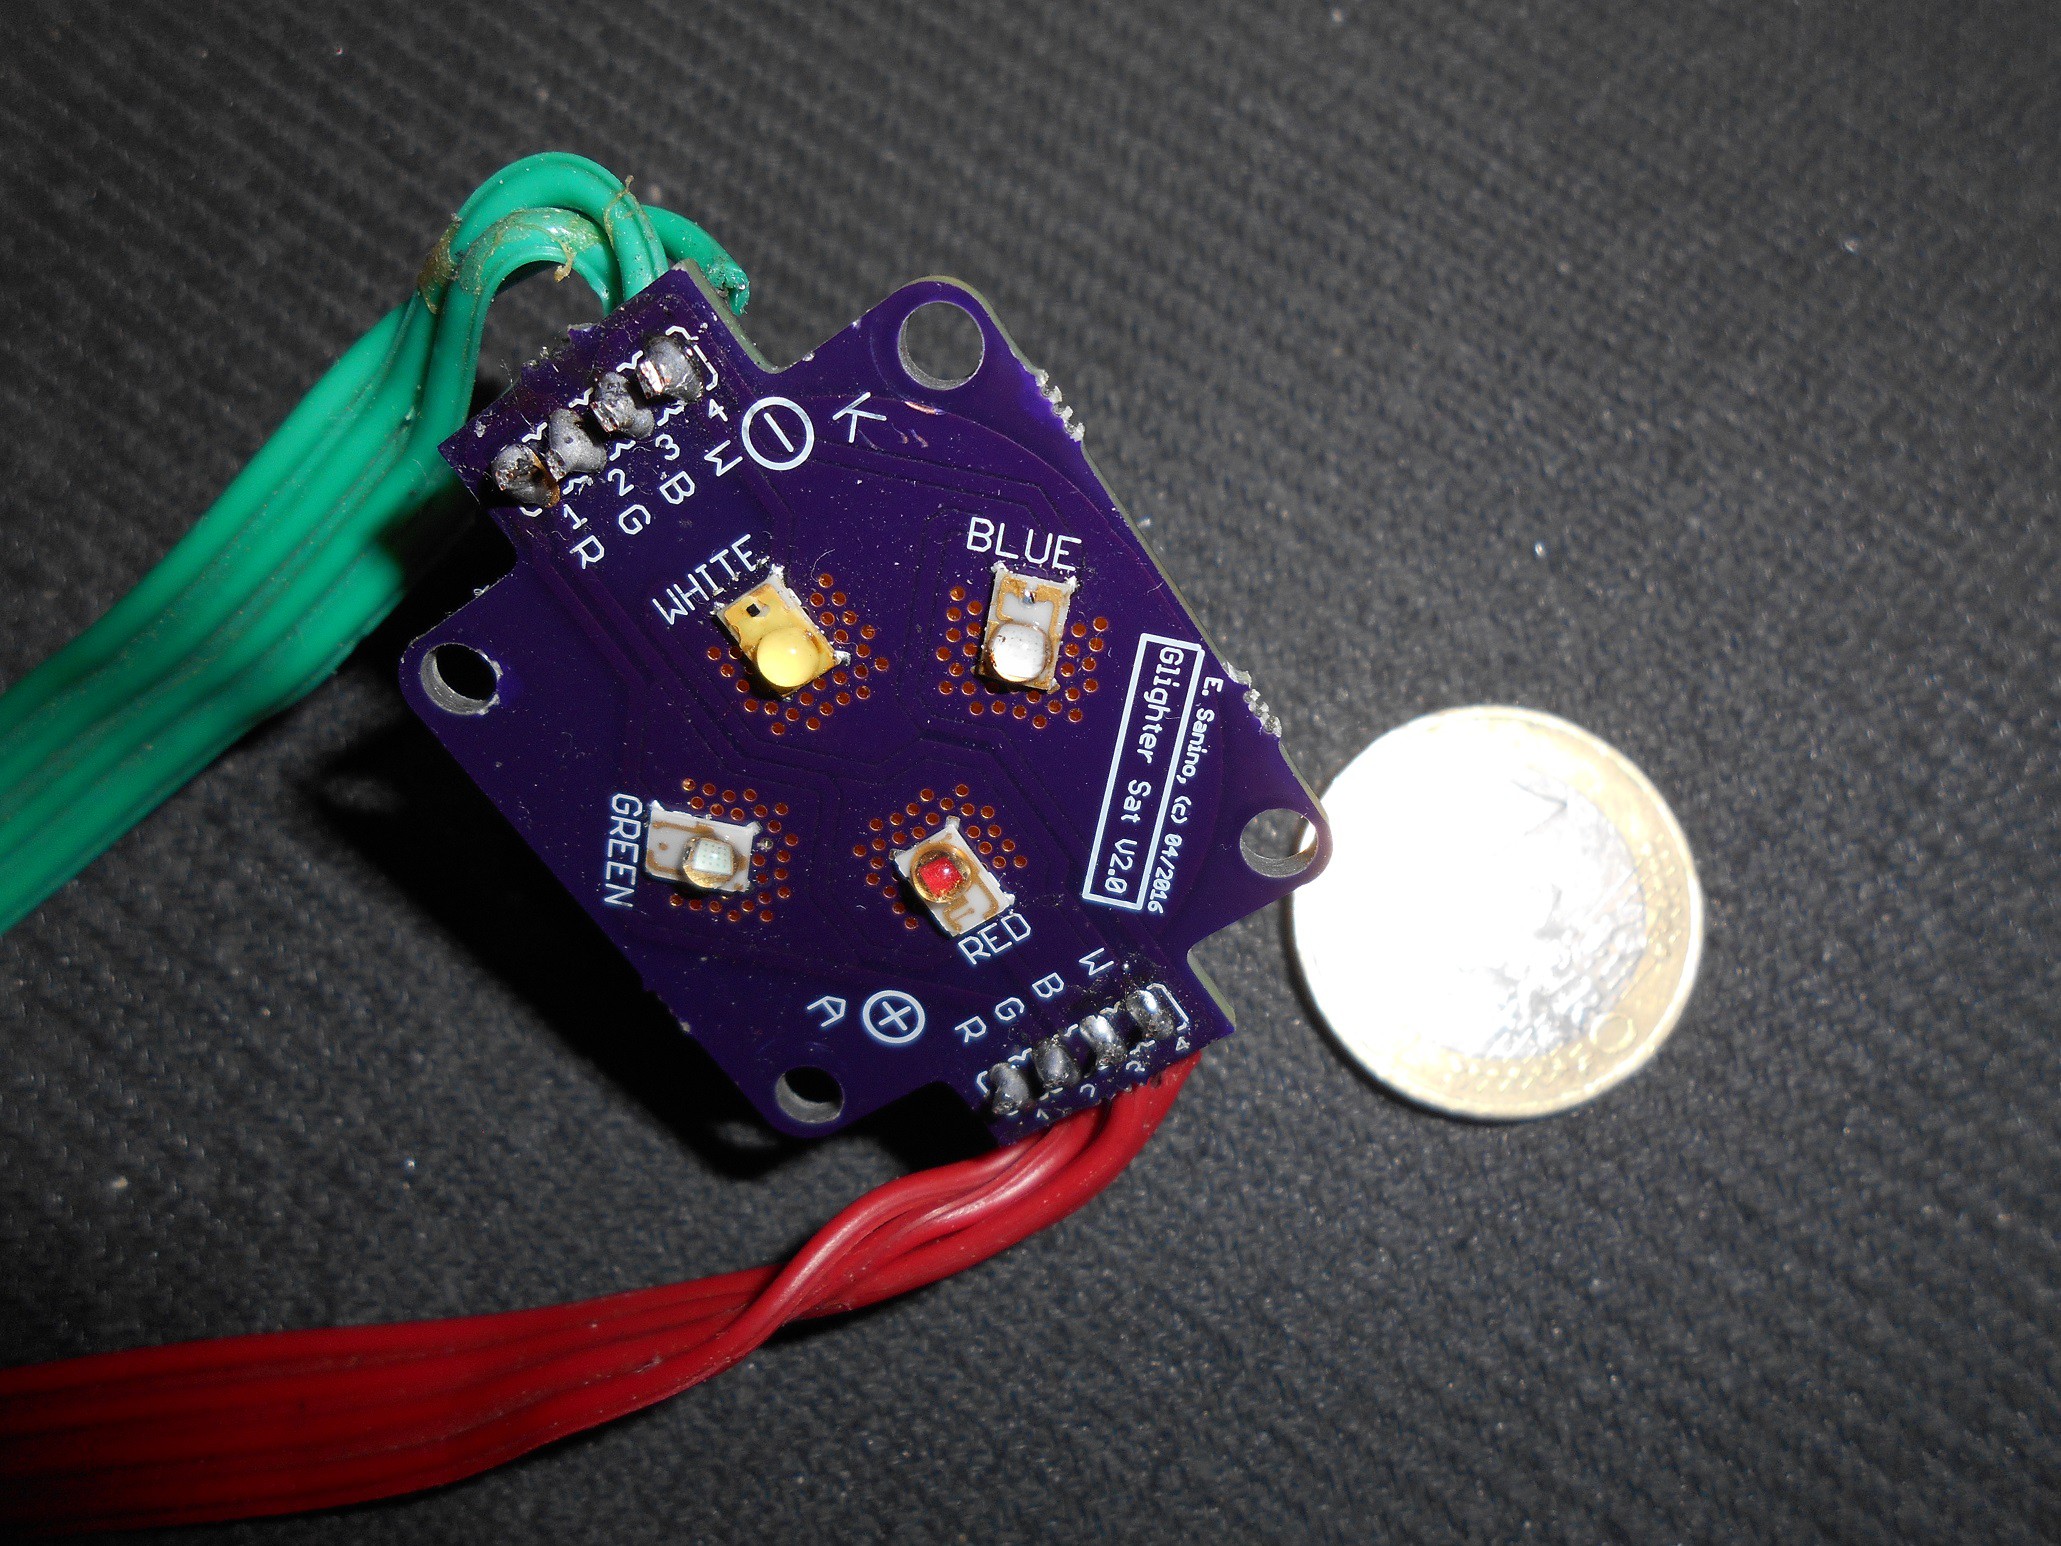
I designed a small "satellite" that mounts 4 LEDs. There are a Luxeon Rebel series ones, that have the peculiarity to have a low forward voltage: this allow me to use any power supply more easily.
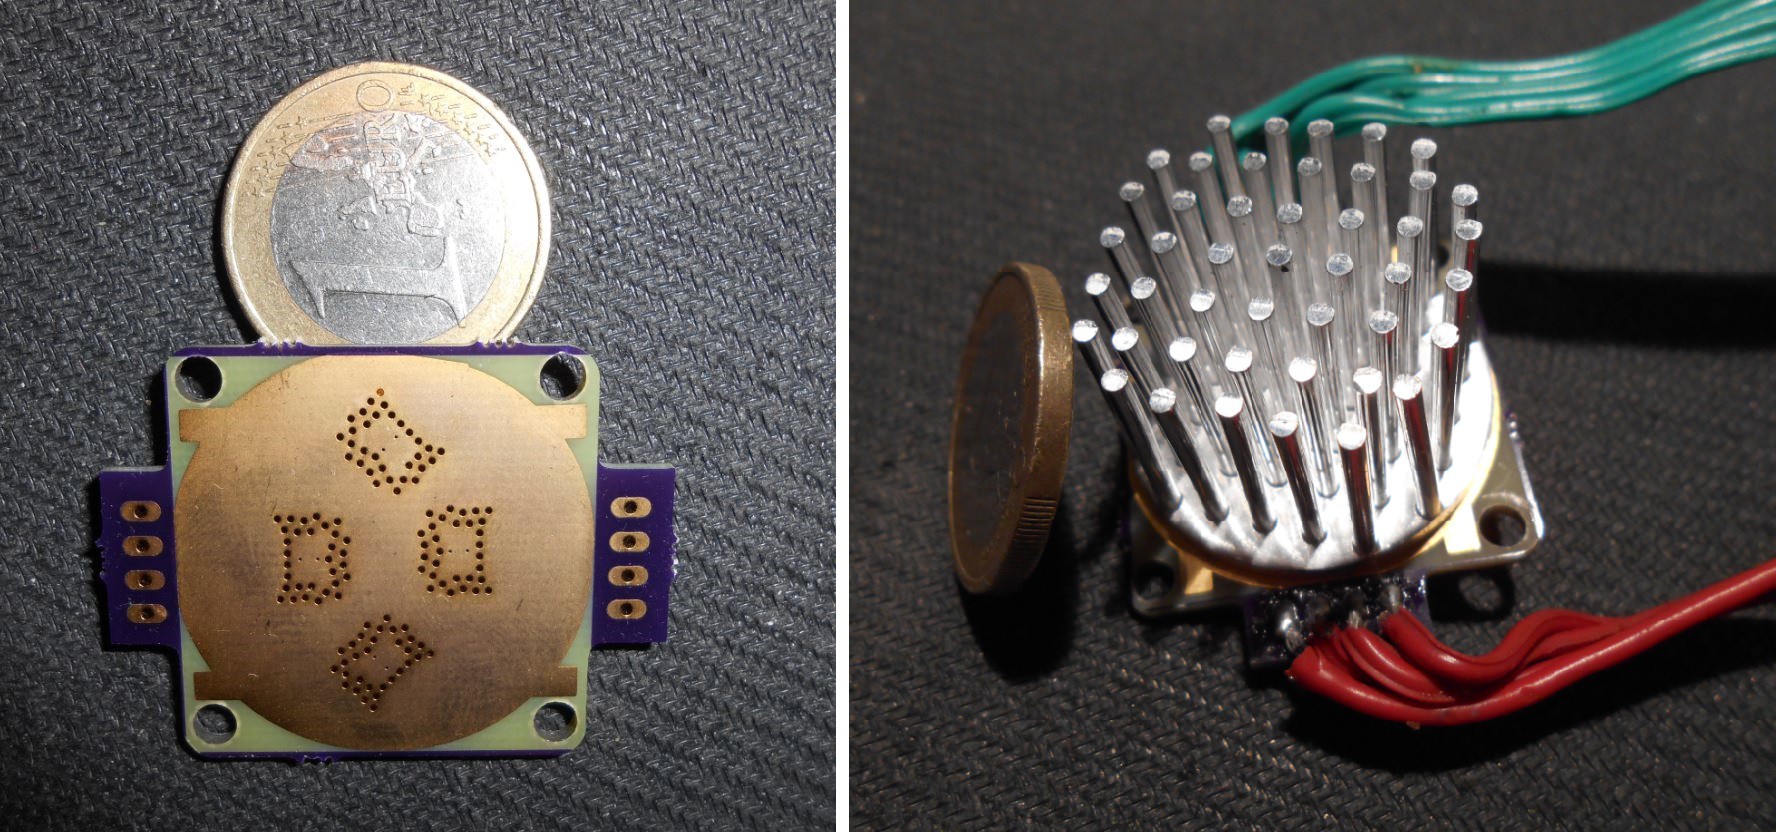
Electrically speaking, this additional board simply is a breakout, the effort was in making it small but considering its power capability. So a proper PCB design is deployed in a way that proper heatsinks can be interfaced to the LEDs without using a metal PCB.
Technical characteristics:
- Luxeon Rebel LED breakout board
- 4 LEDs can be mounted. Actually red, green, blue and white.
- Thermal capability of up to 9W up to 40°C. Can be improve by increasing the heatsink
How I used it to test the driver:
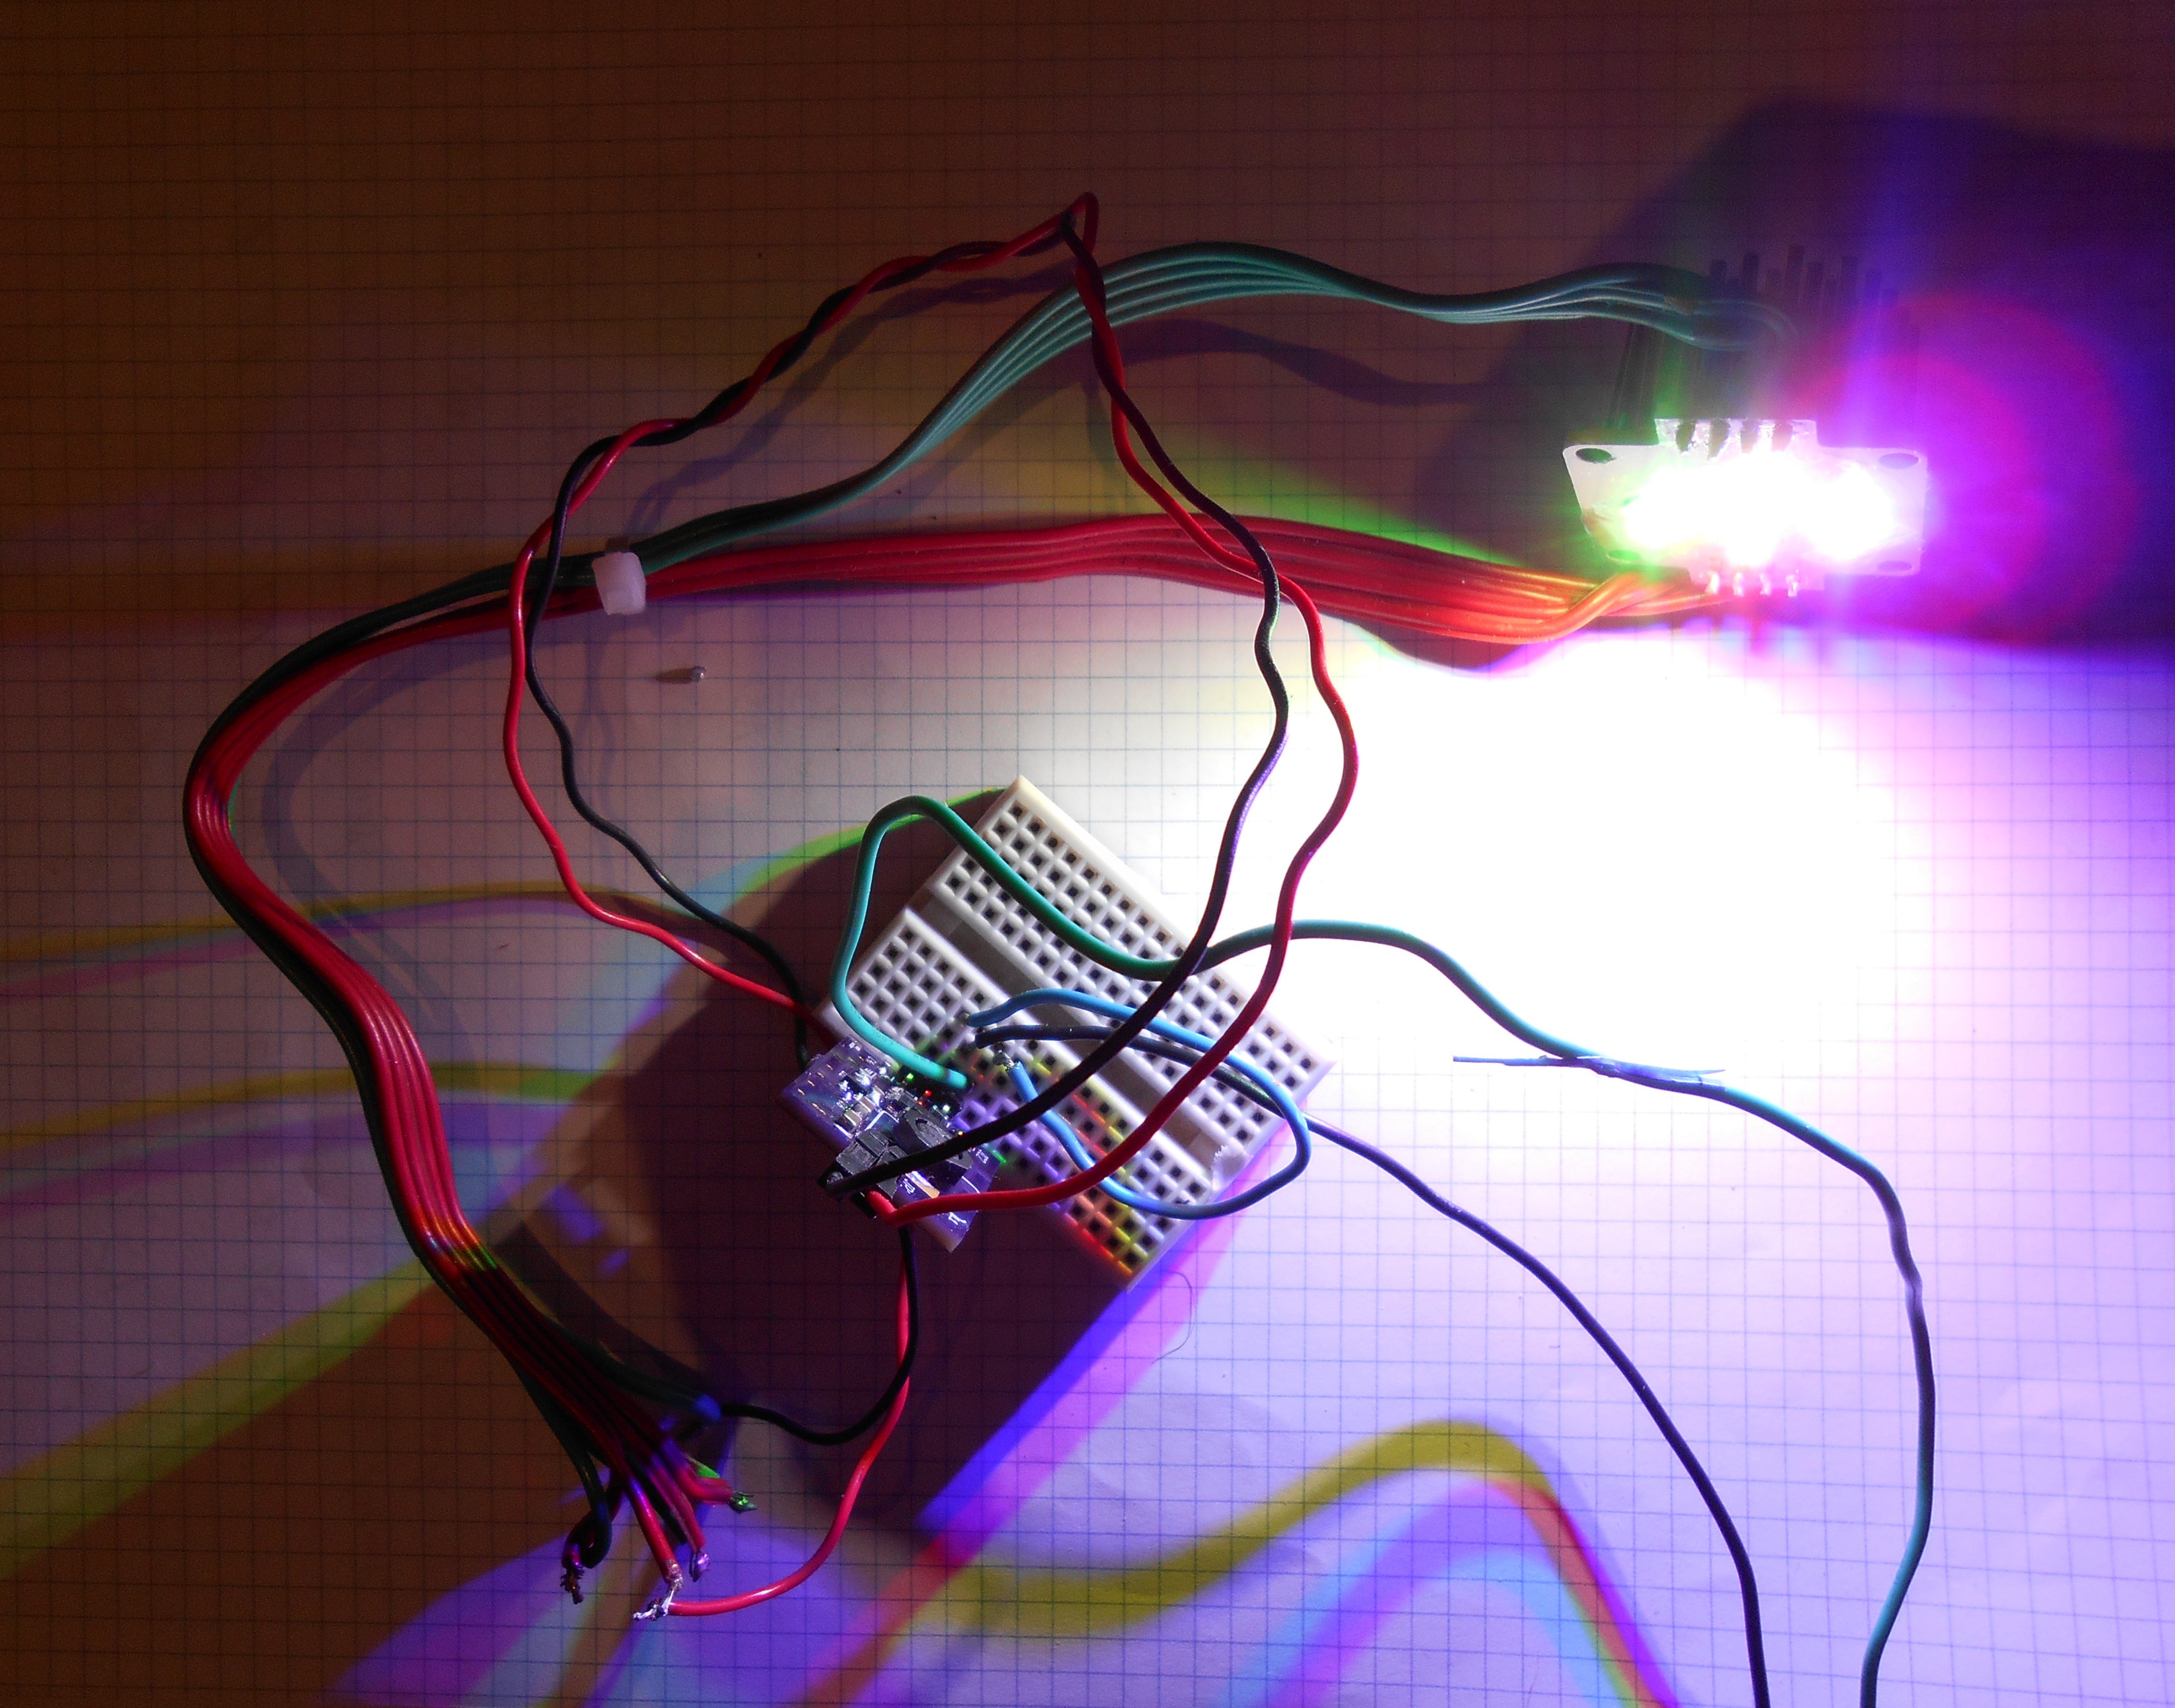
These 4 LEDs are simply powered in serie to test the maximum efficiency of the driver, then also one of them is tested and seeing the behavior of the board.
4 Luxeon Rebel ES series are providing an average drop of 3V, therefore I used a power supply with more than 12V, and connected the EN pin to the power supply. There is no damage if the EN pin is at low or equal level of the supply, no matter what it is.
![]() After soldering:
After soldering:![]()
And here the back, before and after attaching the heatsink:![]()
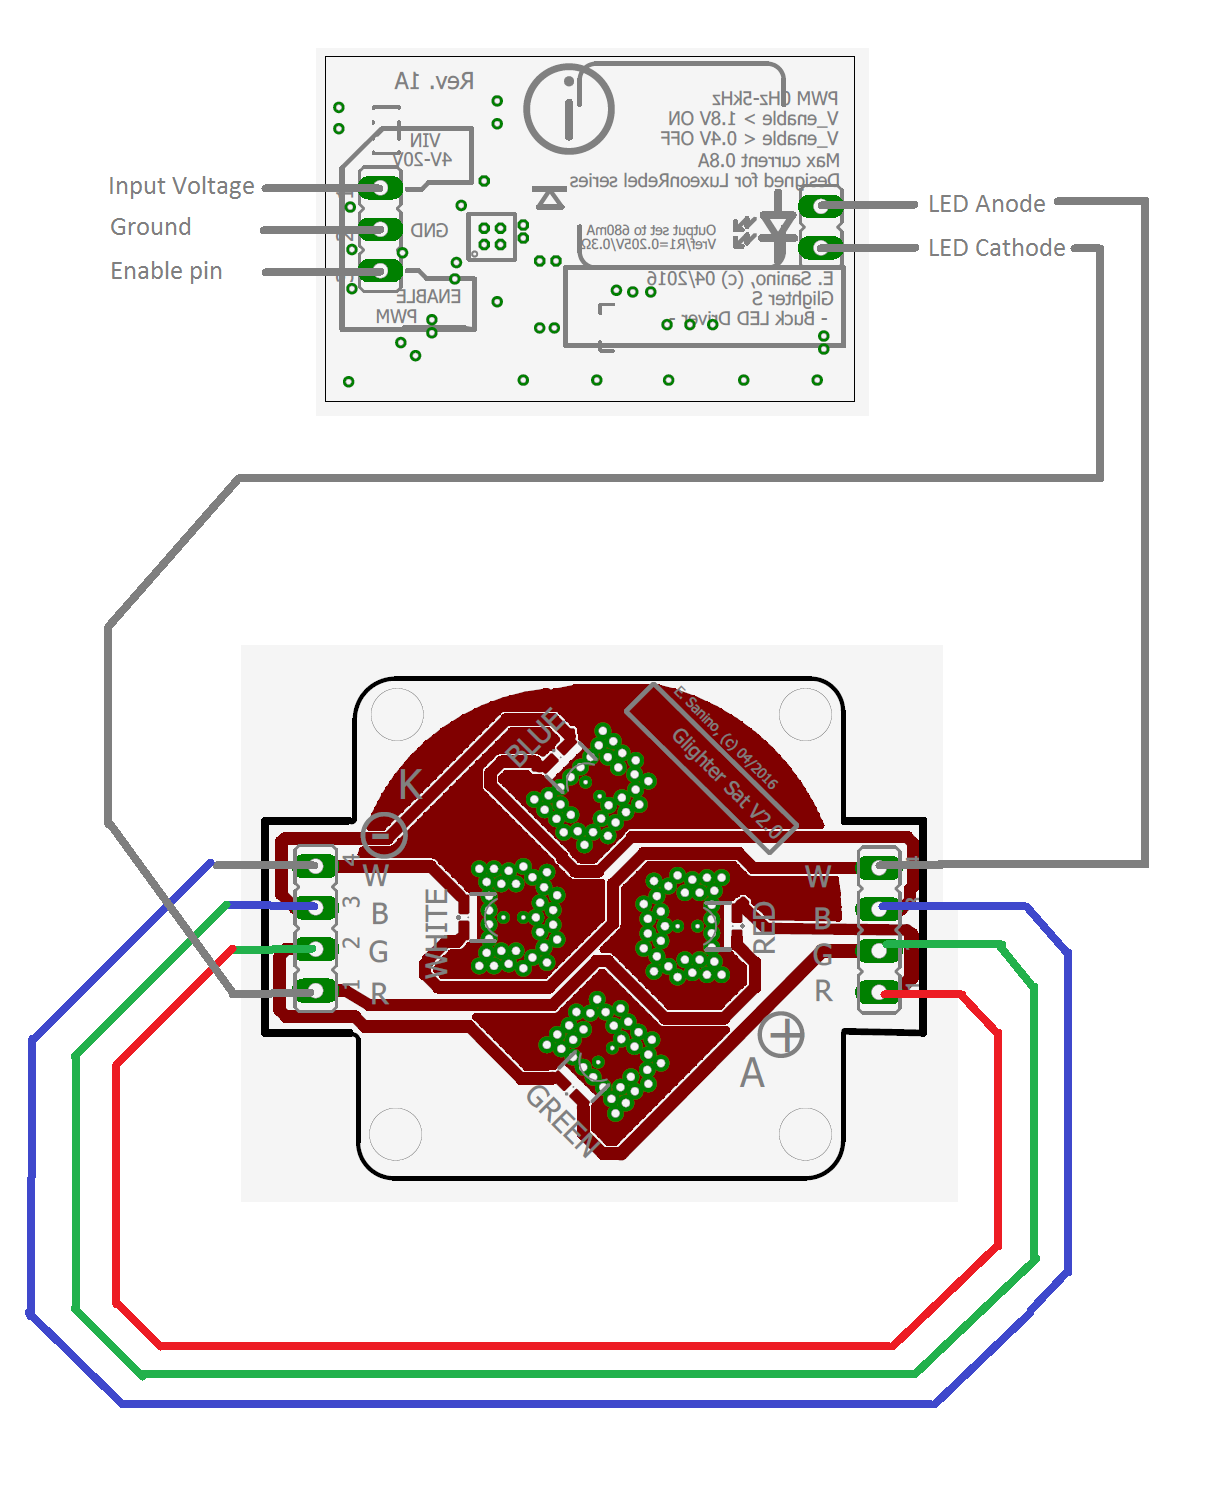
Connetions![]()
And.. voilà:
![]()
Glighter-S
Just another coin-size, wide input voltage range, low cost, failsafe, high power LED driver.
 After soldering: