 Christoph
Screw the UART, I tried I²C first.
Preparing the Teensy
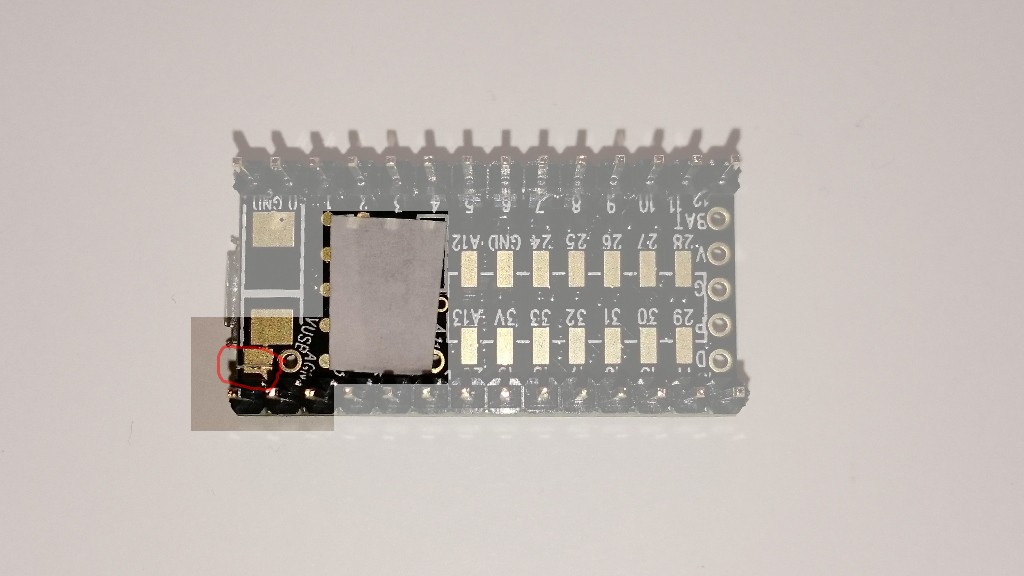
There are some things I stumpled upon, beginning with the pogo pin mounted on the Pi-duino board that's supposed to touch the reset pad on the Teensy's bottom side. It doesn't point straight up:

So I decided to cover that area of the Teensy to prevent shorts. While I'm dealing with that side I can also cut the Teensy's VUsb trace, because I don't want all those power supplies to fight each other.
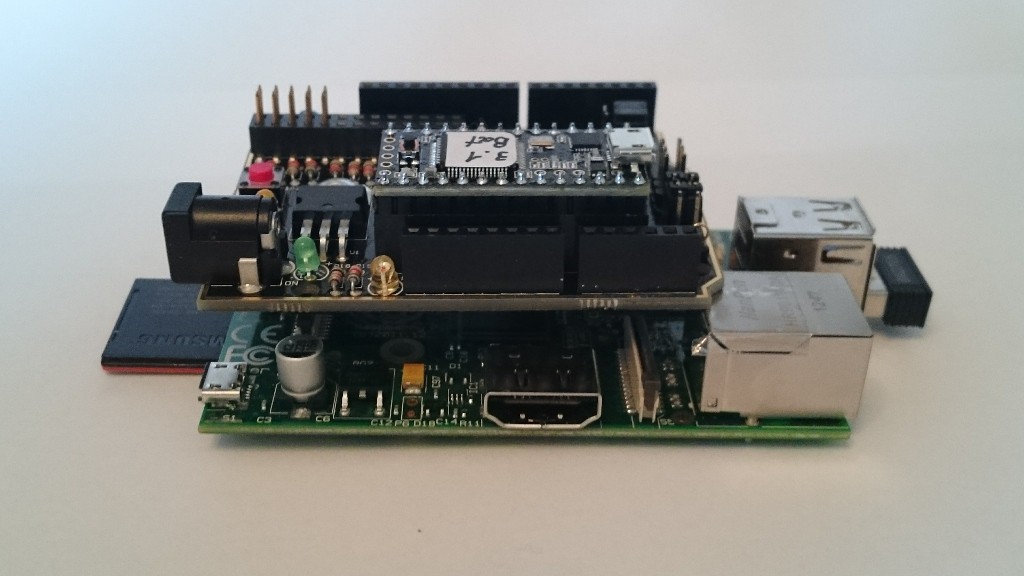
Now we can stack all of them:
Configuring the board
The board has a configuration header for the I2C connections, H3:
 H3 is used to connect either the Teensy or the RPi with the arduino headers. Too bad I want to connect the Pi with the Teensy, but there's a workaround. I configured the header for Teensy <-> arduino, and then used two jumper cables to connect RPi <-> arduino:

There's a very cool I2C library for the Teensy 3.x that I use (find it at http://forum.pjrc.com/threads/21680-New-I2C-library-for-Teensy3) and it comes with a slave example sketch. I uploaded that to the Teensy and ran
i2cdetect -y 1on the Pi and the device was detected:
     0  1  2  3  4  5  6  7  8  9  a  b  c  d  e  f
00:          -- -- -- -- -- -- -- -- -- -- -- -- --
10: -- -- -- -- -- -- -- -- -- -- -- -- -- -- -- --
20: -- -- -- -- -- -- -- -- -- -- -- -- -- -- -- --
30: -- -- -- -- -- -- -- -- -- -- -- -- -- -- -- --
40: -- -- -- -- 44 -- -- -- -- -- -- -- -- -- -- --
50: -- -- -- -- -- -- -- -- -- -- -- -- -- -- -- --
60: -- -- -- -- -- -- -- -- -- -- -- -- -- -- -- --
very good! I can now adapt it to actually turn received data into servo pulses.
Discussions
Become a Hackaday.io Member
Create an account to leave a comment. Already have an account? Log In.