 Jeremy g.
First I would like to give a big thanks to @Philip from #OSHChip V1.0 for helping me late into the night debuging the bootloader. He is an awsome dude with a wealth of knowledge. If you get the chance say hi.
What does it do!
The bootloader allows one to upload a "sketch/app/code" if you will, in the form of a .bin file to the samd09 while preserving the bootloader as well.
How does it function?
The bootloader (this one in general) resides at Non Volatile ram address 0x00000000. This may change at a later date. The user application gets uploaded via a python front end to address 0x00000800. Once the bootloader is done writing the user code and the verification process finishes (still working on this) the bootloader rebases the stack pointer, provides an offset to the vector tables and resets to the new program address at 0x00000800.
The verification process currently fails with the python script. This is an unknown bug atm but the program that is flashed vs the program that is created using Atmel Studio 7 are identical and works well.
How to use it.
To use the bootloader you must first flash the micro with the bootloader (uart_bootloader_R1_0_current.hex or .bin, you choice. This has to be done with a jtagger. Once the bootloader is flashed it should reside in the nvm at least until a full chip erase is issued.
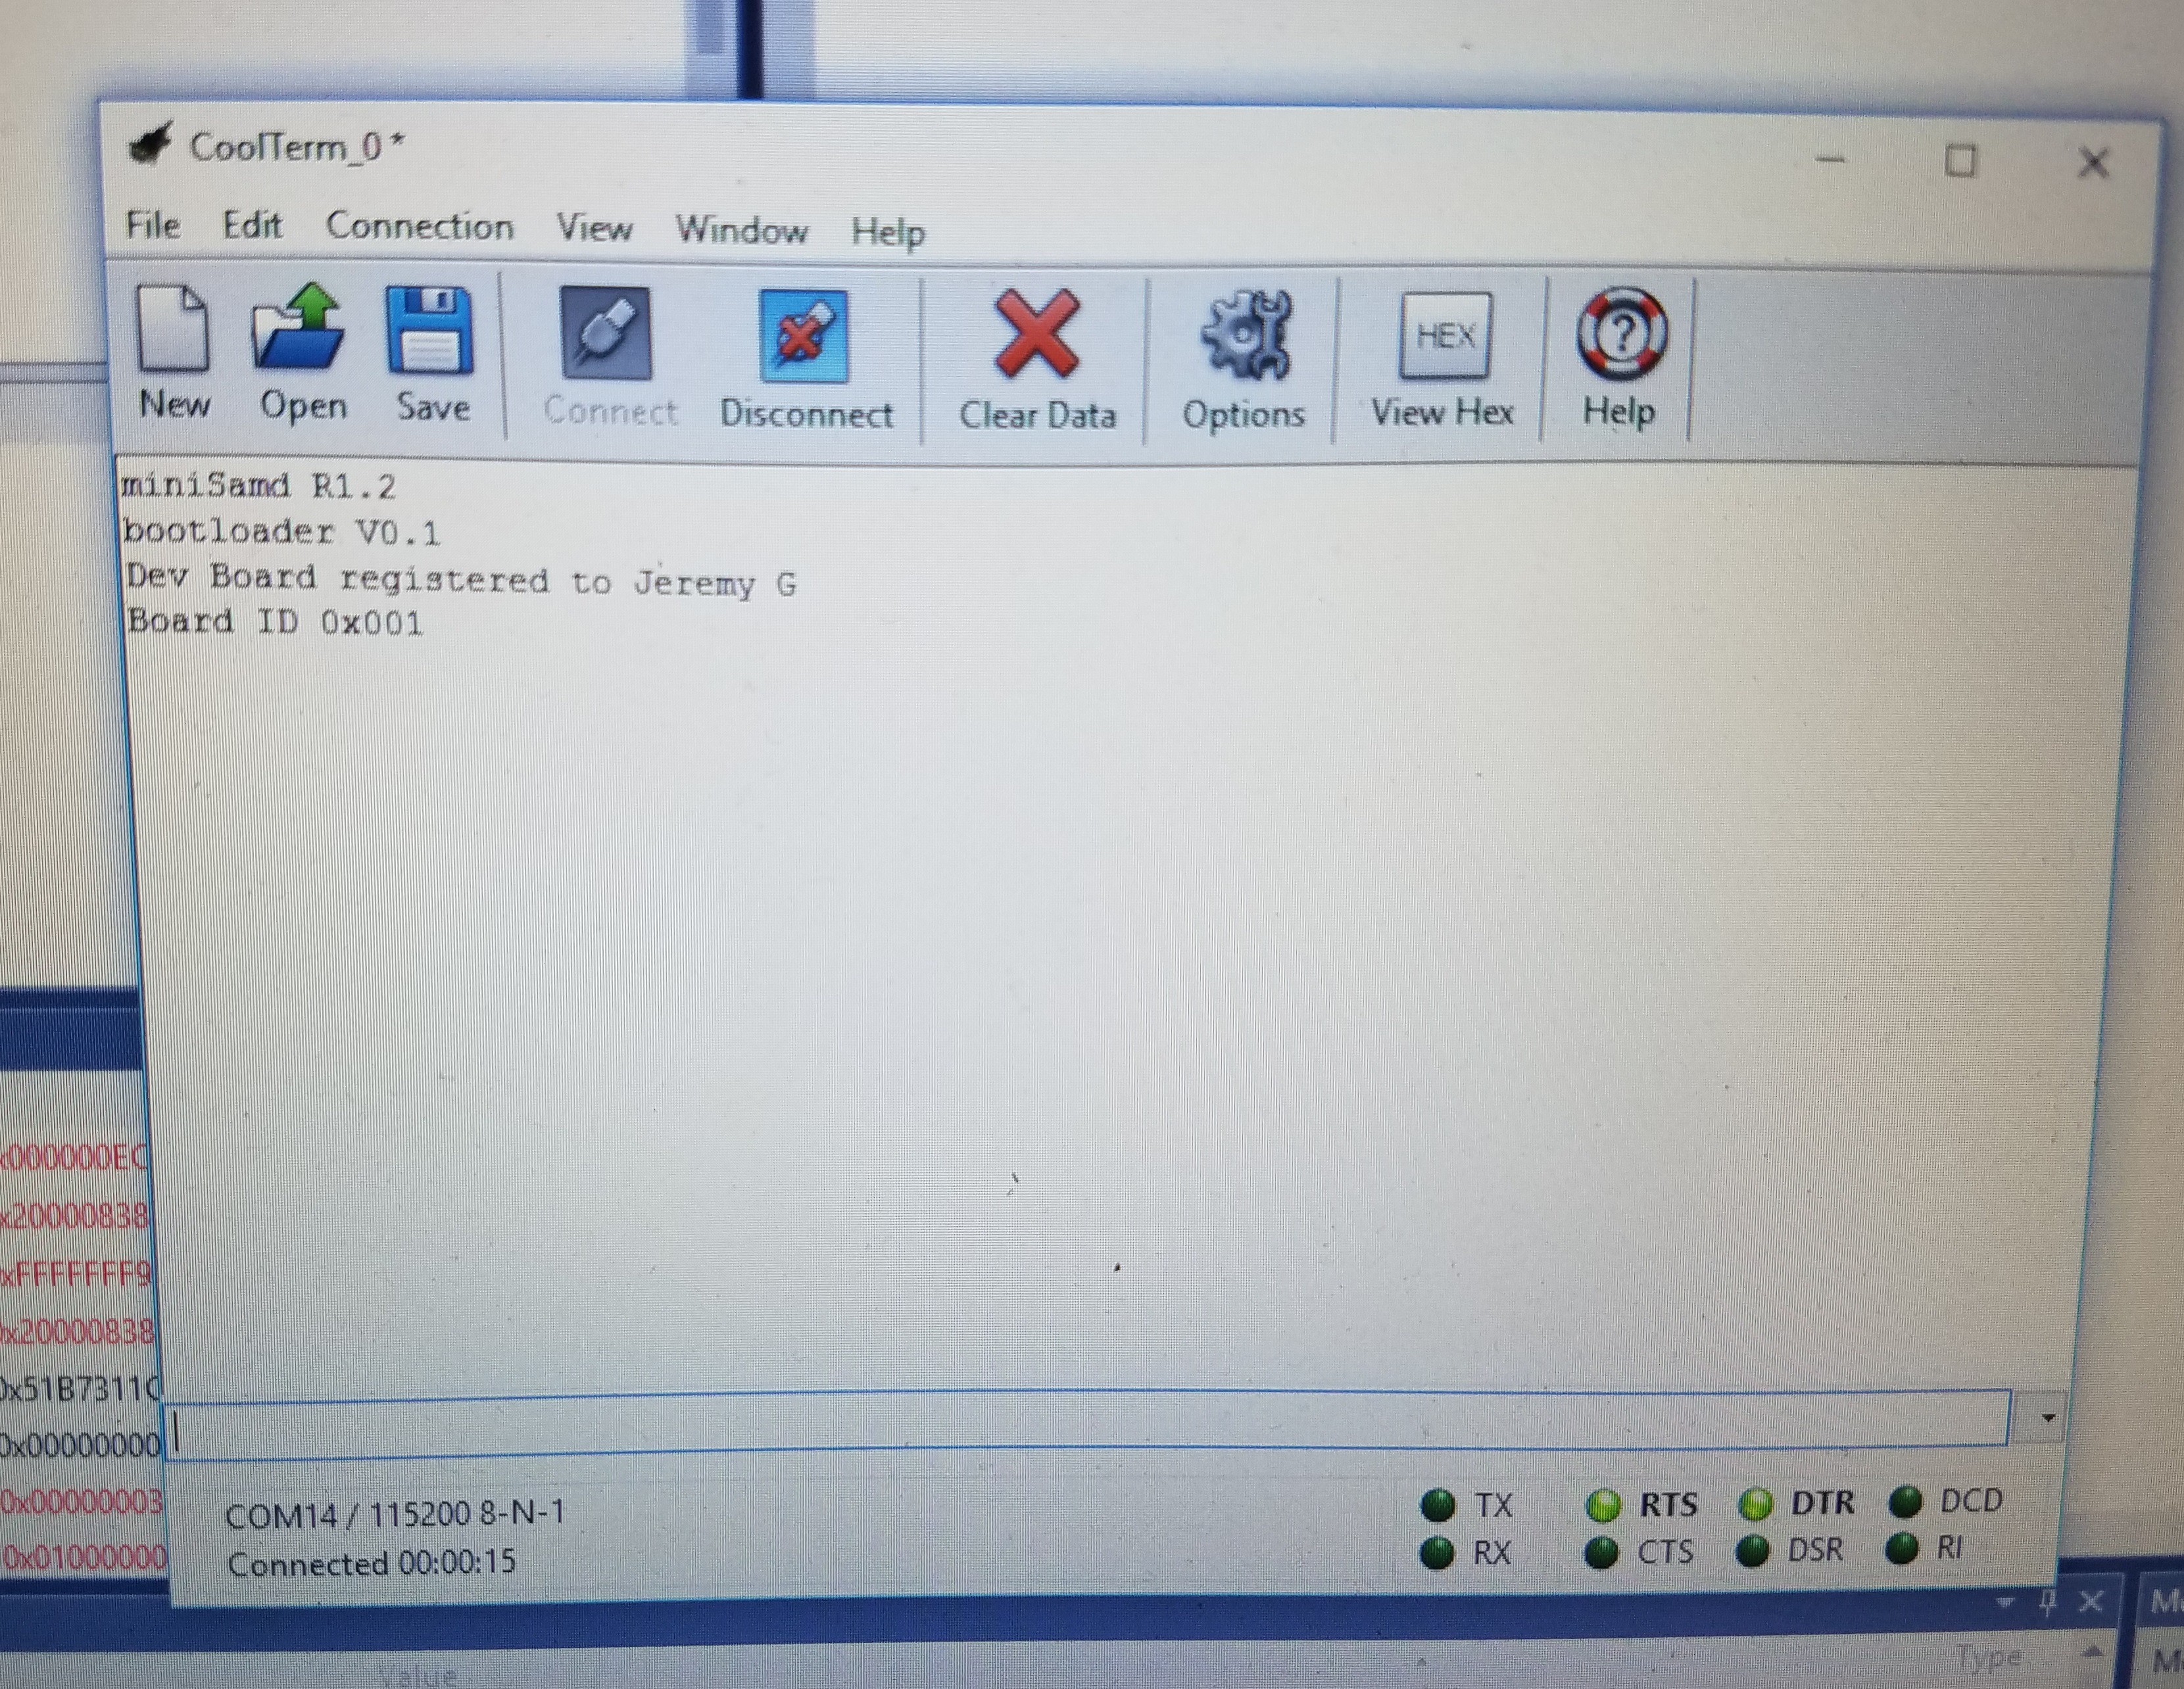
You can load the firmware using Atmel studio 7 with the provided workspace. Once flashed you can open a coms window (i use coolterm) set the com port to the cp2102 device, set the baud rate to 115200 and press connect. After connecting you may need to press the reset button on the micro, you will see the test led light up to let you know you are in bootloader mode.
if you type i and hit enter you should be presented with something like this. Mind you this is a dev version so yours may look a little different.
Creating "Apps" for the miniSam-Zero.
Using Atmel studio 7, select a new C based project. select the ATSAMD09d14 chip when asked. Atmel studio will load all the necessary files into your project. Its 4 files I believe plus the main.c file.
In the right hand panel you will see a folder called device startup, expand this folder and delete the file called samd09d14a_flash.ld. Then right click that folder and select add->add existing-> then select the samd09d14a_flash.ld that is in the github repo.
This ld file tells the compiler to compile your project starting at address 0x00000800. This helps us keep the vector tables and addresses straight when the program runs on top of the bootloader.
Now make your blinky led program or whatever it is you want to try (there are a few example projects in the repo.) and open a cmd prompt.
navigate to
\SamD09-Mini\Trunk\Bootloader\R1_0_current\PythonFrontEnd\
the python script is how you upload your code to the micro.
type
python upload.py -c com# -b 115200 -i yourfilename.binThis will start the upload process, its pretty fast. Once that is finished the micro should reset by itself and start running your program. If not simply press the reset button and that should do it.
To get back into bootloader mode (I will fix this.) run the python script the same time you release the reset button on the micro. you will know that you are in bootloader mode if the red led on PA14 is on.
Conclusion.
So far this has been an awesome learning experience. ~2-3 weeks ago I had absolutely no experience with arm processors. Now I'm hooked. There a little tricky at first to get used to but that's mainly due to the arduino IDE... we won't get into that now.
When I get time I will upload a video of how the process works. I know most people here know how a bootloader works. But for me I didn't really understand how a bootloader worked until I created one.
I will release the board files on both PCBs.io and oshpark.com the latter gives me a small credit to use for other projects. I will also make the miniSam-Zero available on my tindie store pre loaded with this bootloader.
The code and example projects are available on my github repo, linked on the side of the project page.
Until next time, stay happy, stay healthy, and keep hackin.
Discussions
Become a Hackaday.io Member
Create an account to leave a comment. Already have an account? Log In.
Nice, If I have time, I will test that tomorrow on may sam09 board. It should working there also. As far I did looked at your code you used the same pins/pads to connect the SAMD09 and the uart bridge. The uart part of the code looks familiar to me.
To get the offset there is also an alternative way to modify the ...flash.ld: In this document it is described on page 4:
http://www.atmel.com/images/atmel-42238-uart-based-sam-ba-bootloader-for-sam-d20_ap-note_at04189.pdf
Are you sure? yes | no
thanks I completely missed that app note. The uart code is a mix between the failed samd11 serial bootloader found in atmel.force and from a forum post as well as some of my doings, just about the only one I could find on the subject. I'll have to link the post later if I can find it again.
I almost havenit the verification function working. Once that's done the bootloader will be 100%
Are you sure? yes | no
I do have different issues with your bootloader. First it does not work for me:
- my Atmel studio does not like your .hex
- same with the hex file from the project directory.
- The .elf file from your project can be uploded to my SAMD09 but the boot loader does sent nothing over UART after reset.
- Same when I open your bootloader project and rebuilt it with changed CPU.
Will search for the problem later. But maybe there is some thing obvious wrong. I testet with teh version downloaded ~1hour ago.
Are you sure? yes | no
for some reason I can't reply to your newest comment.. anyway I sent you a pm. Id like to figure this out for your board as well. I just compiled for your chip at least and everything went ok. do you have PA15 connected to the DTR pin of your micro?
also, one thing I kinda leave out is if you connect with cool term then hit the reset button it should put the board into bootloader mode as well. seems cool term keeps the DTR pin low (active.) you can toggle it by hitting the little green button.
Are you sure? yes | no