 Timescale
For years now I had Barbecook shaft and bowl BBQ, which I bought from a thrift store for a steal years ago and despite the abuse and 24/7 exposure to the elements, it had lasted quite well with some minor repairs here and there. My previous units were cheap basic BBQ's that helped me learn the basics, but with this bad boy I could finally start doing some fancy gourmet shit!
One of my favorite methods is indirect heating while lightly smoking fish and burgers. This is your basic indirect setup with the coals at the back of the bowl and the protein situated on the grill on the other side. When the coals are burning nicely, damp wood chips are introduced and the bowl is covered with a lid to temper the fire. Typically the protein cooks and smokes for about 15 minutes and then it is ready. It is sort of a crossover between slow-cooking, smoking and barbecuing.
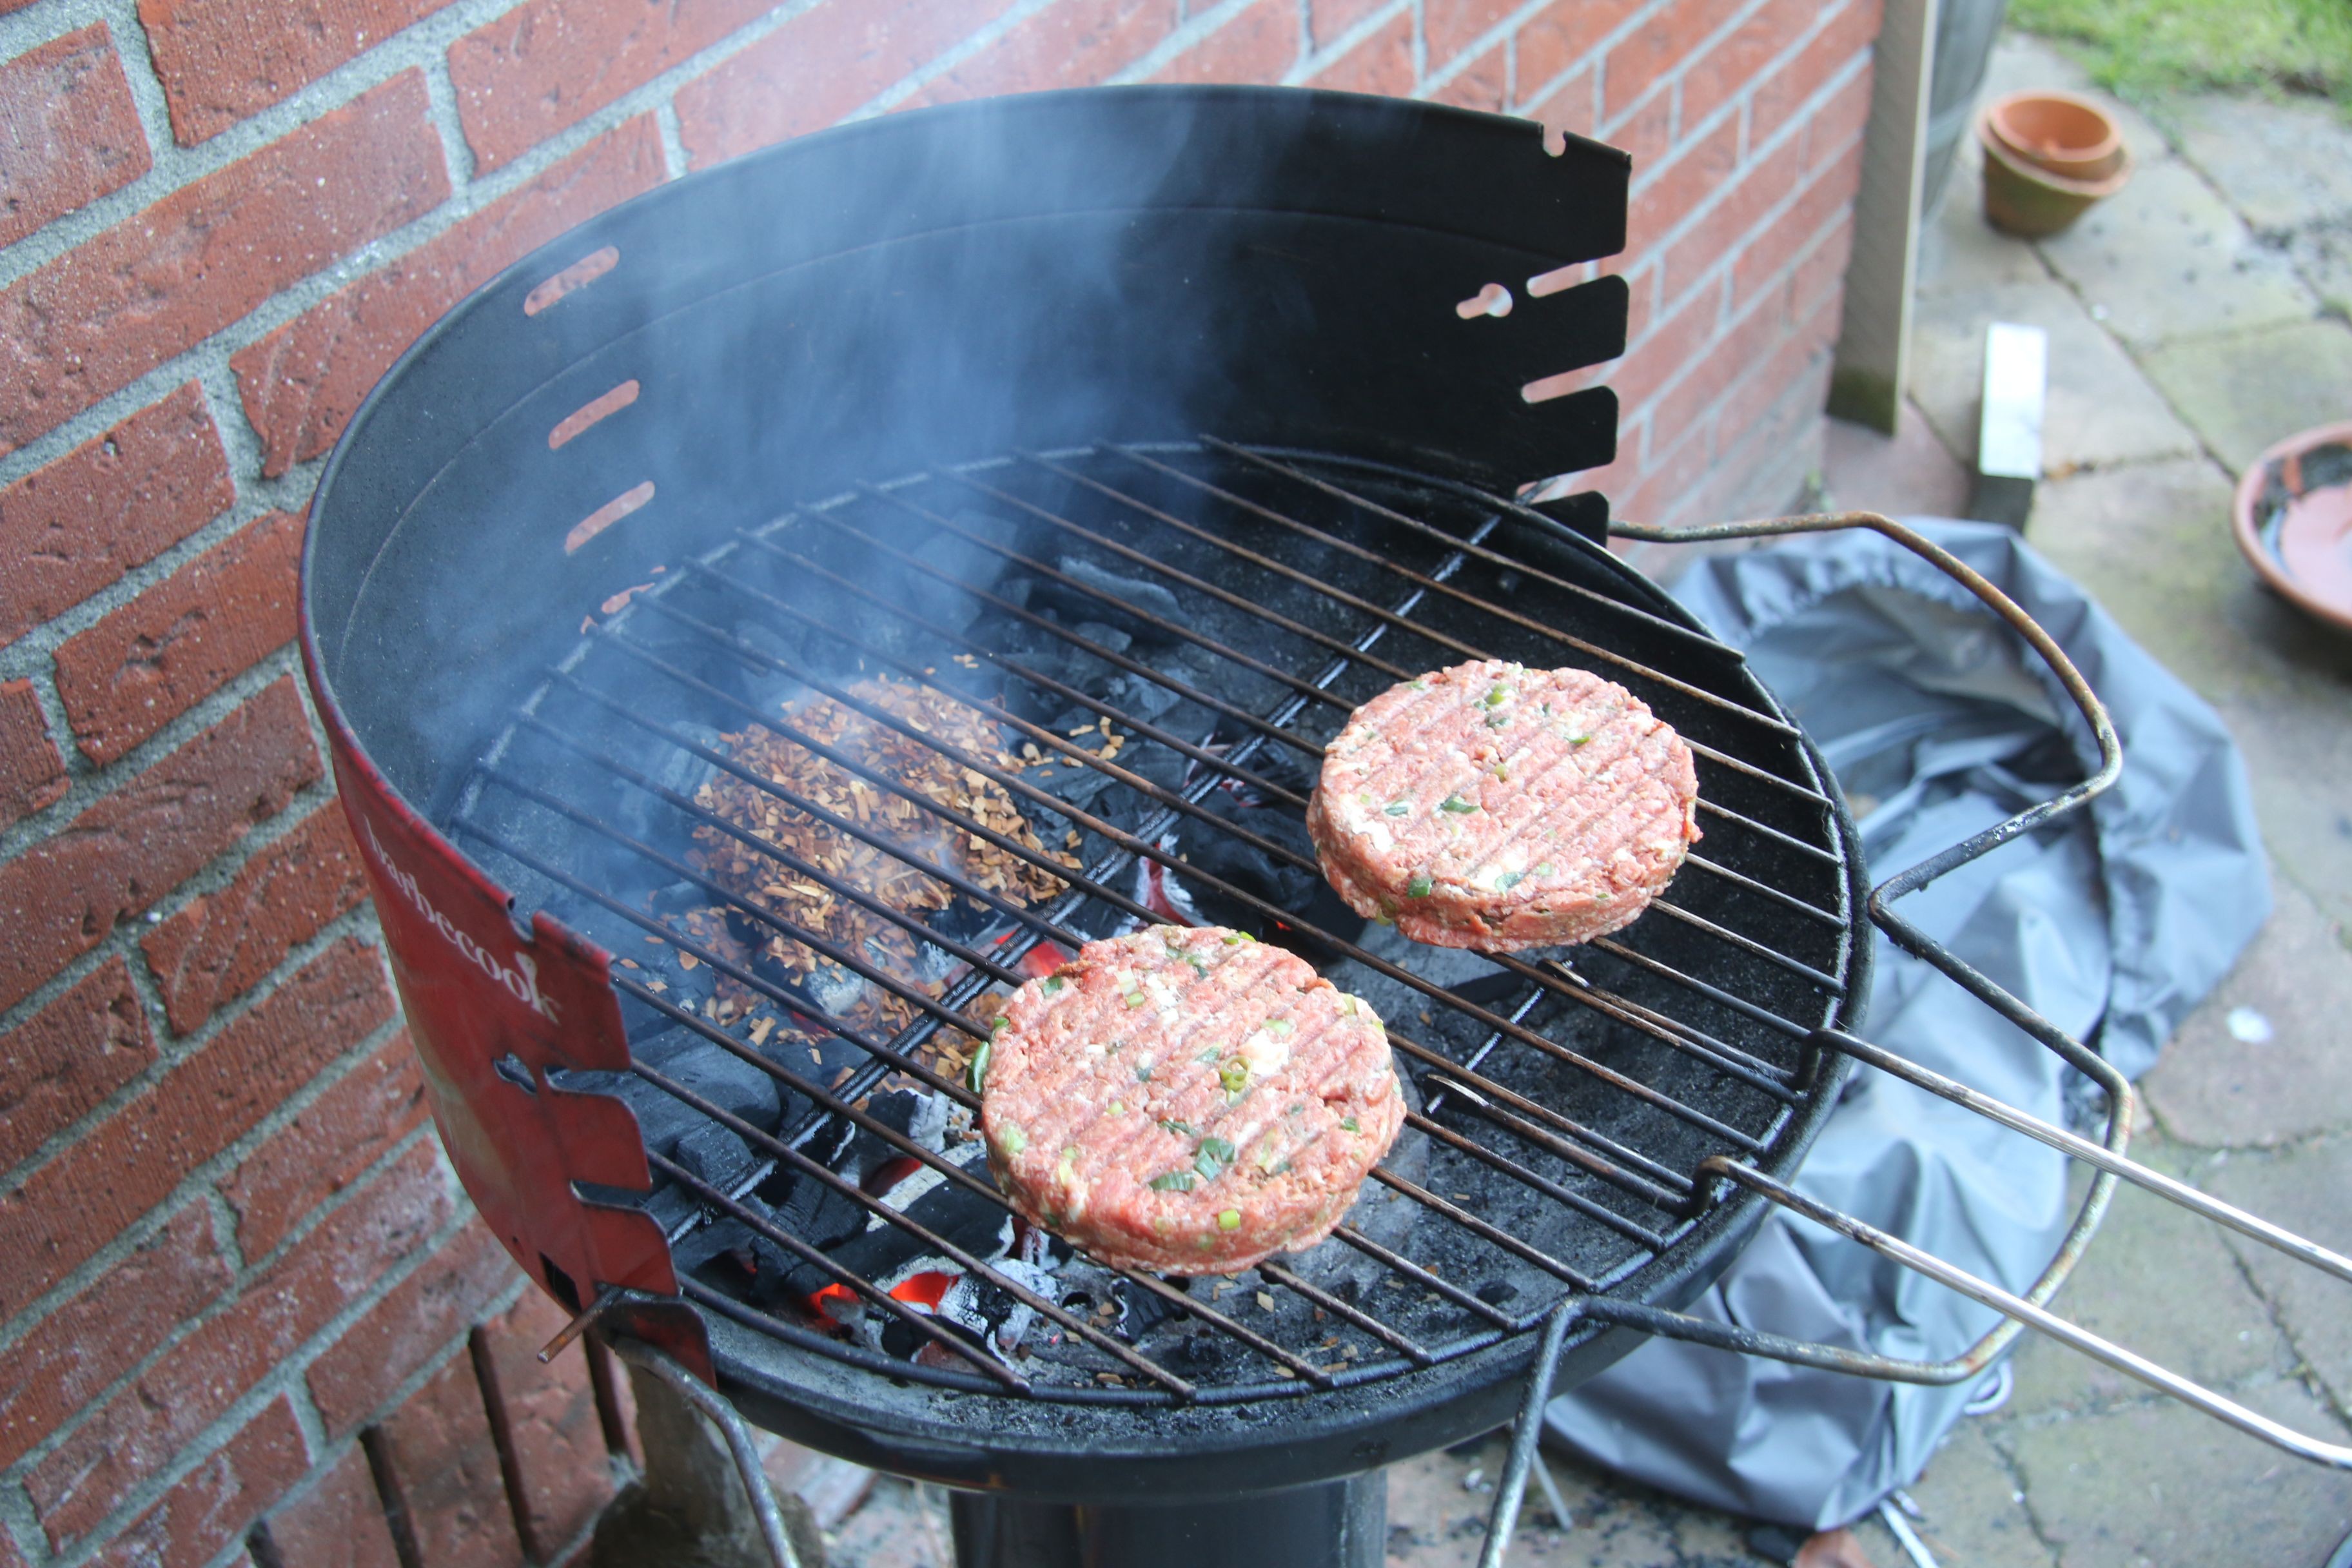
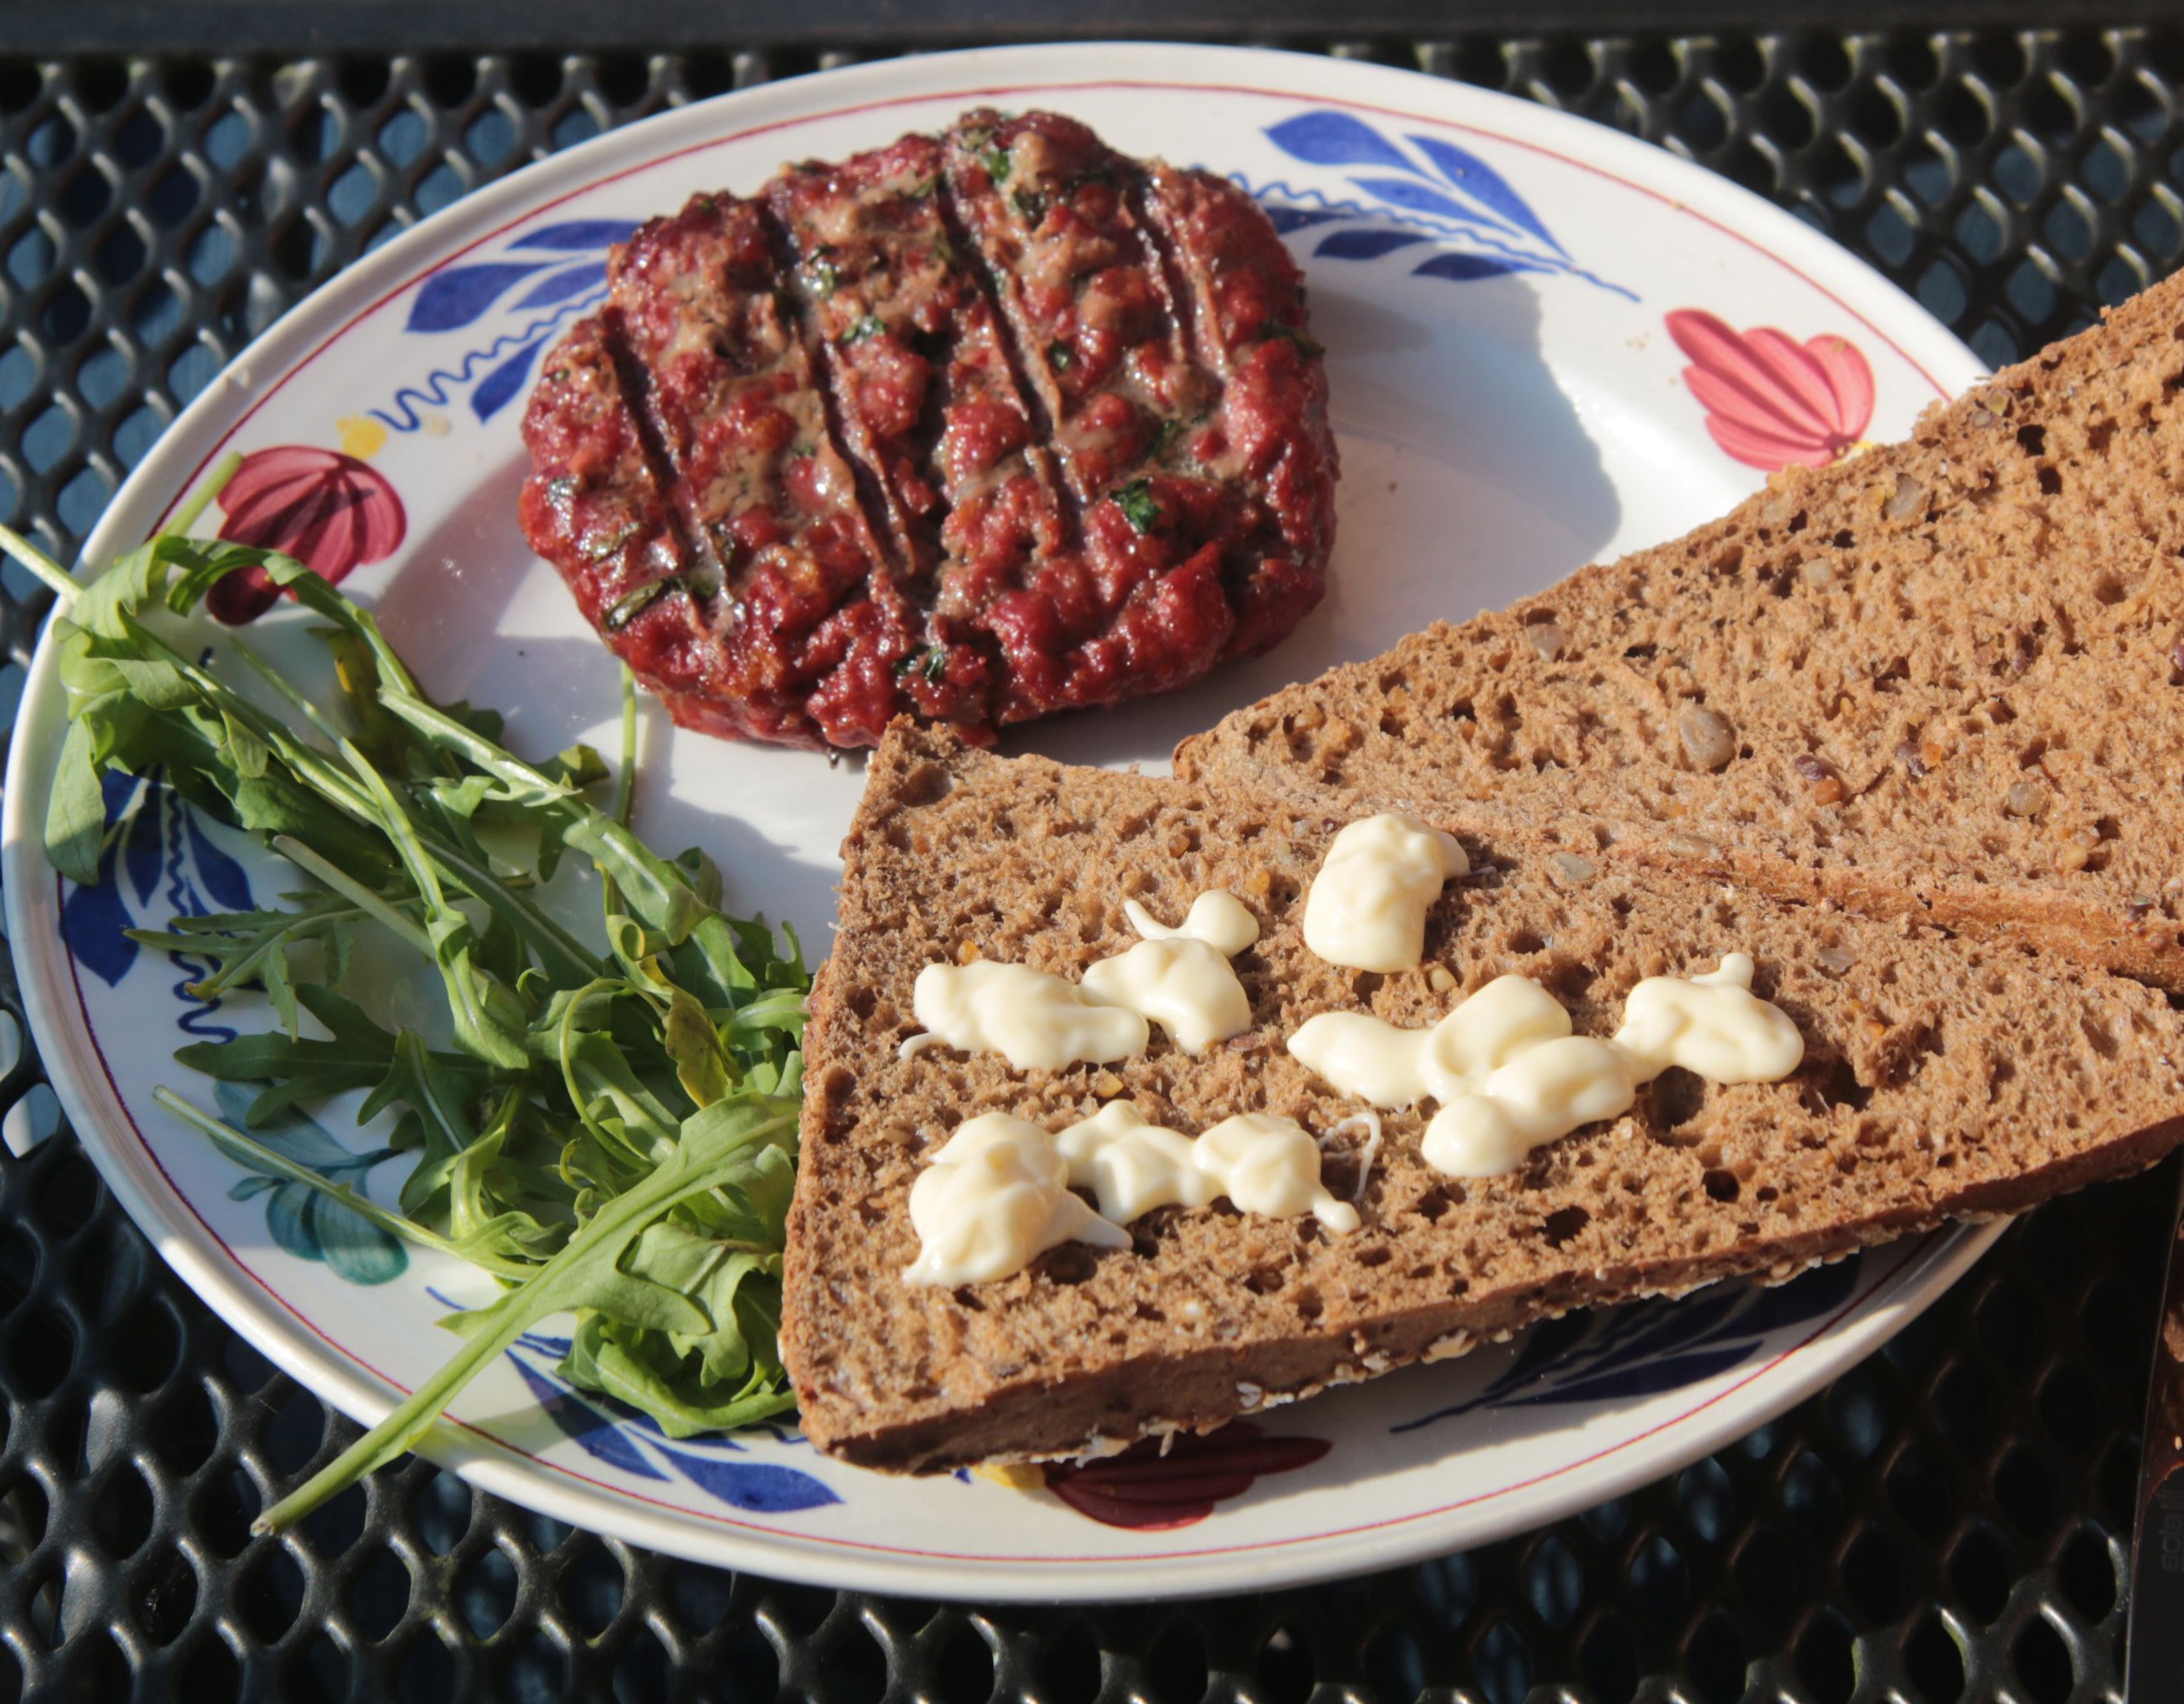
Anyway, these juicy, smokey burgers have been quite the hit with family and friends, but the problem is that I can, at best, manage 4 portions at a time, that is what half the surface gives me. Anymore and part of the protein will burn or drip on the fire, which is precisely what you don't want. Wood smoke == jummy, Charred meat flavor with extra polycyclic aromatic hydrocarbons != jummy.
Because of the excellent build quality of my BBQ (I am not sponsored or employed by Barbecook in any way), when I saw a smoker unit by the same brand on discount I hasitated not and brought it home. A fairly simple unit with a modular design of three parts 2 grills and 2 bowls, it could do a variety of smoking, including hour long low temperature smoking for nice treats like smoked fowl, fish or jerky. This all worked fine, but then there were the problems with the unit.
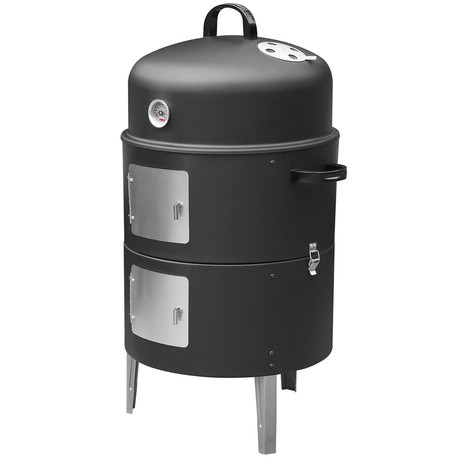
The smoker unit had no fire control what so ever. You can't cut off air from the bottom and the bowl is just that, a bowl! That means that at one point the ashes (as is a incredible insulator), will start to affect the fire. The next issue is that the unit is low to the ground making operating the lower compartments a pain in the back, literally. Having to get down on all fours isn't ideal when operating a thing that is a couple of hundreds degrees c. Also as an archaeologist, I have far superior methods to ruin my back. And finally, to my shock, the build quality was nothing like the similarly branded grill unit. Under the same conditions, the smoker started to rust after 2 years and all the exposed bare metal parts were completely shot. It was time for a proper reconditioning of the smoker and as with any restoration, why not throw in a bit of improvement! Let's hack the smoker!
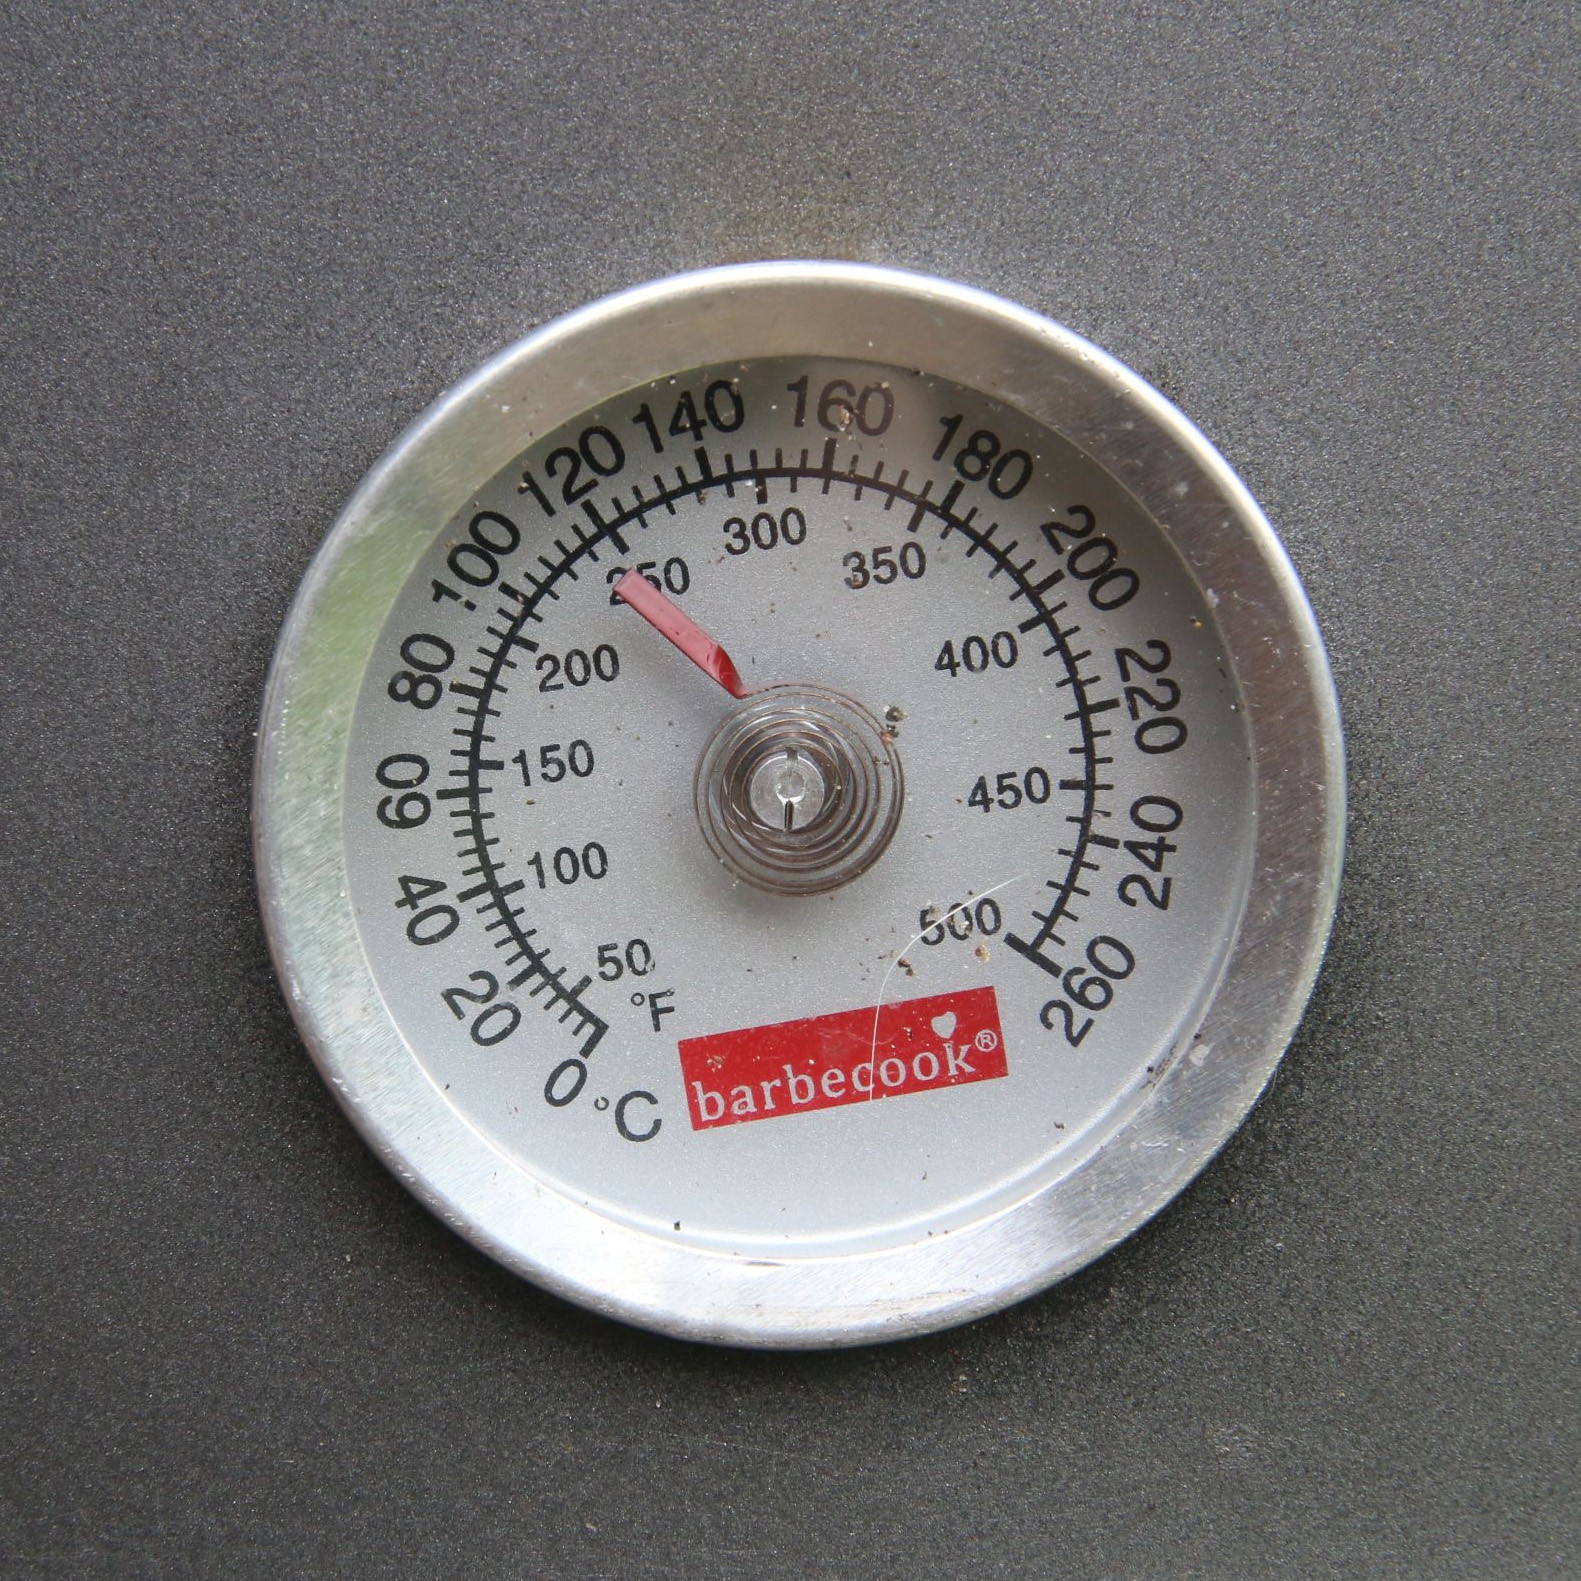
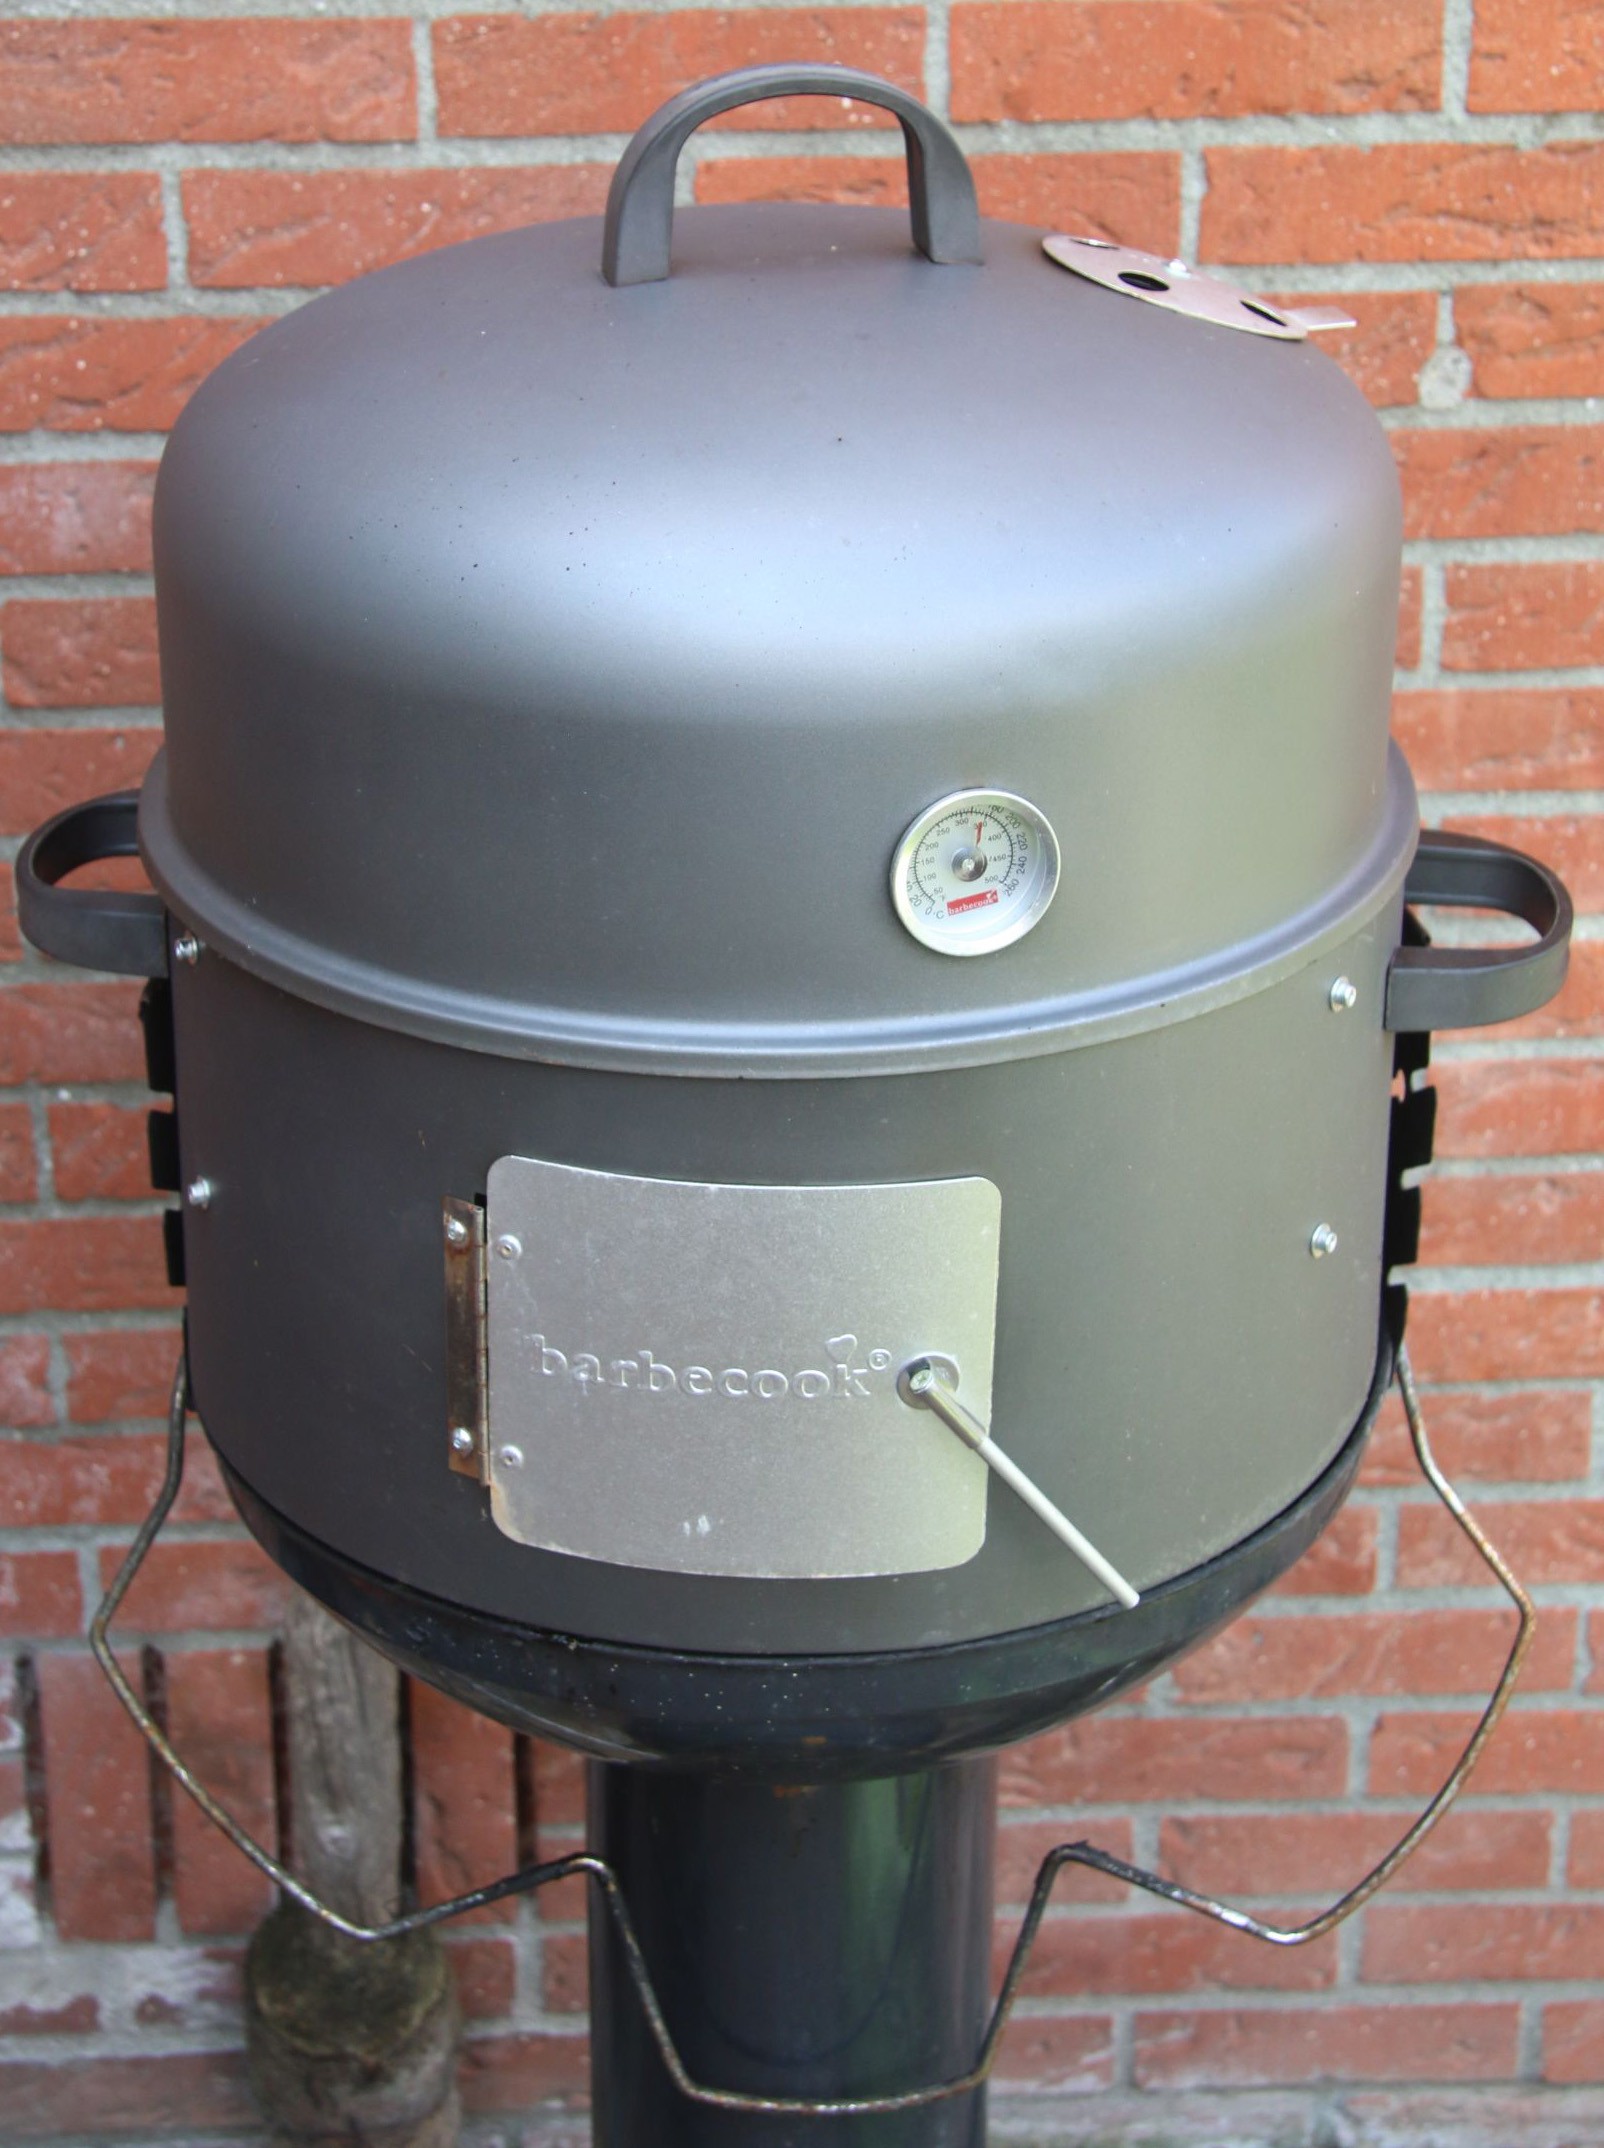
I have used the lid of the smoker on the grill unit ever since I got it. The lid is higher than the one I used previously and it has a temperature gauge build it so I can carefully keep the unit around the temperature the protein requires.
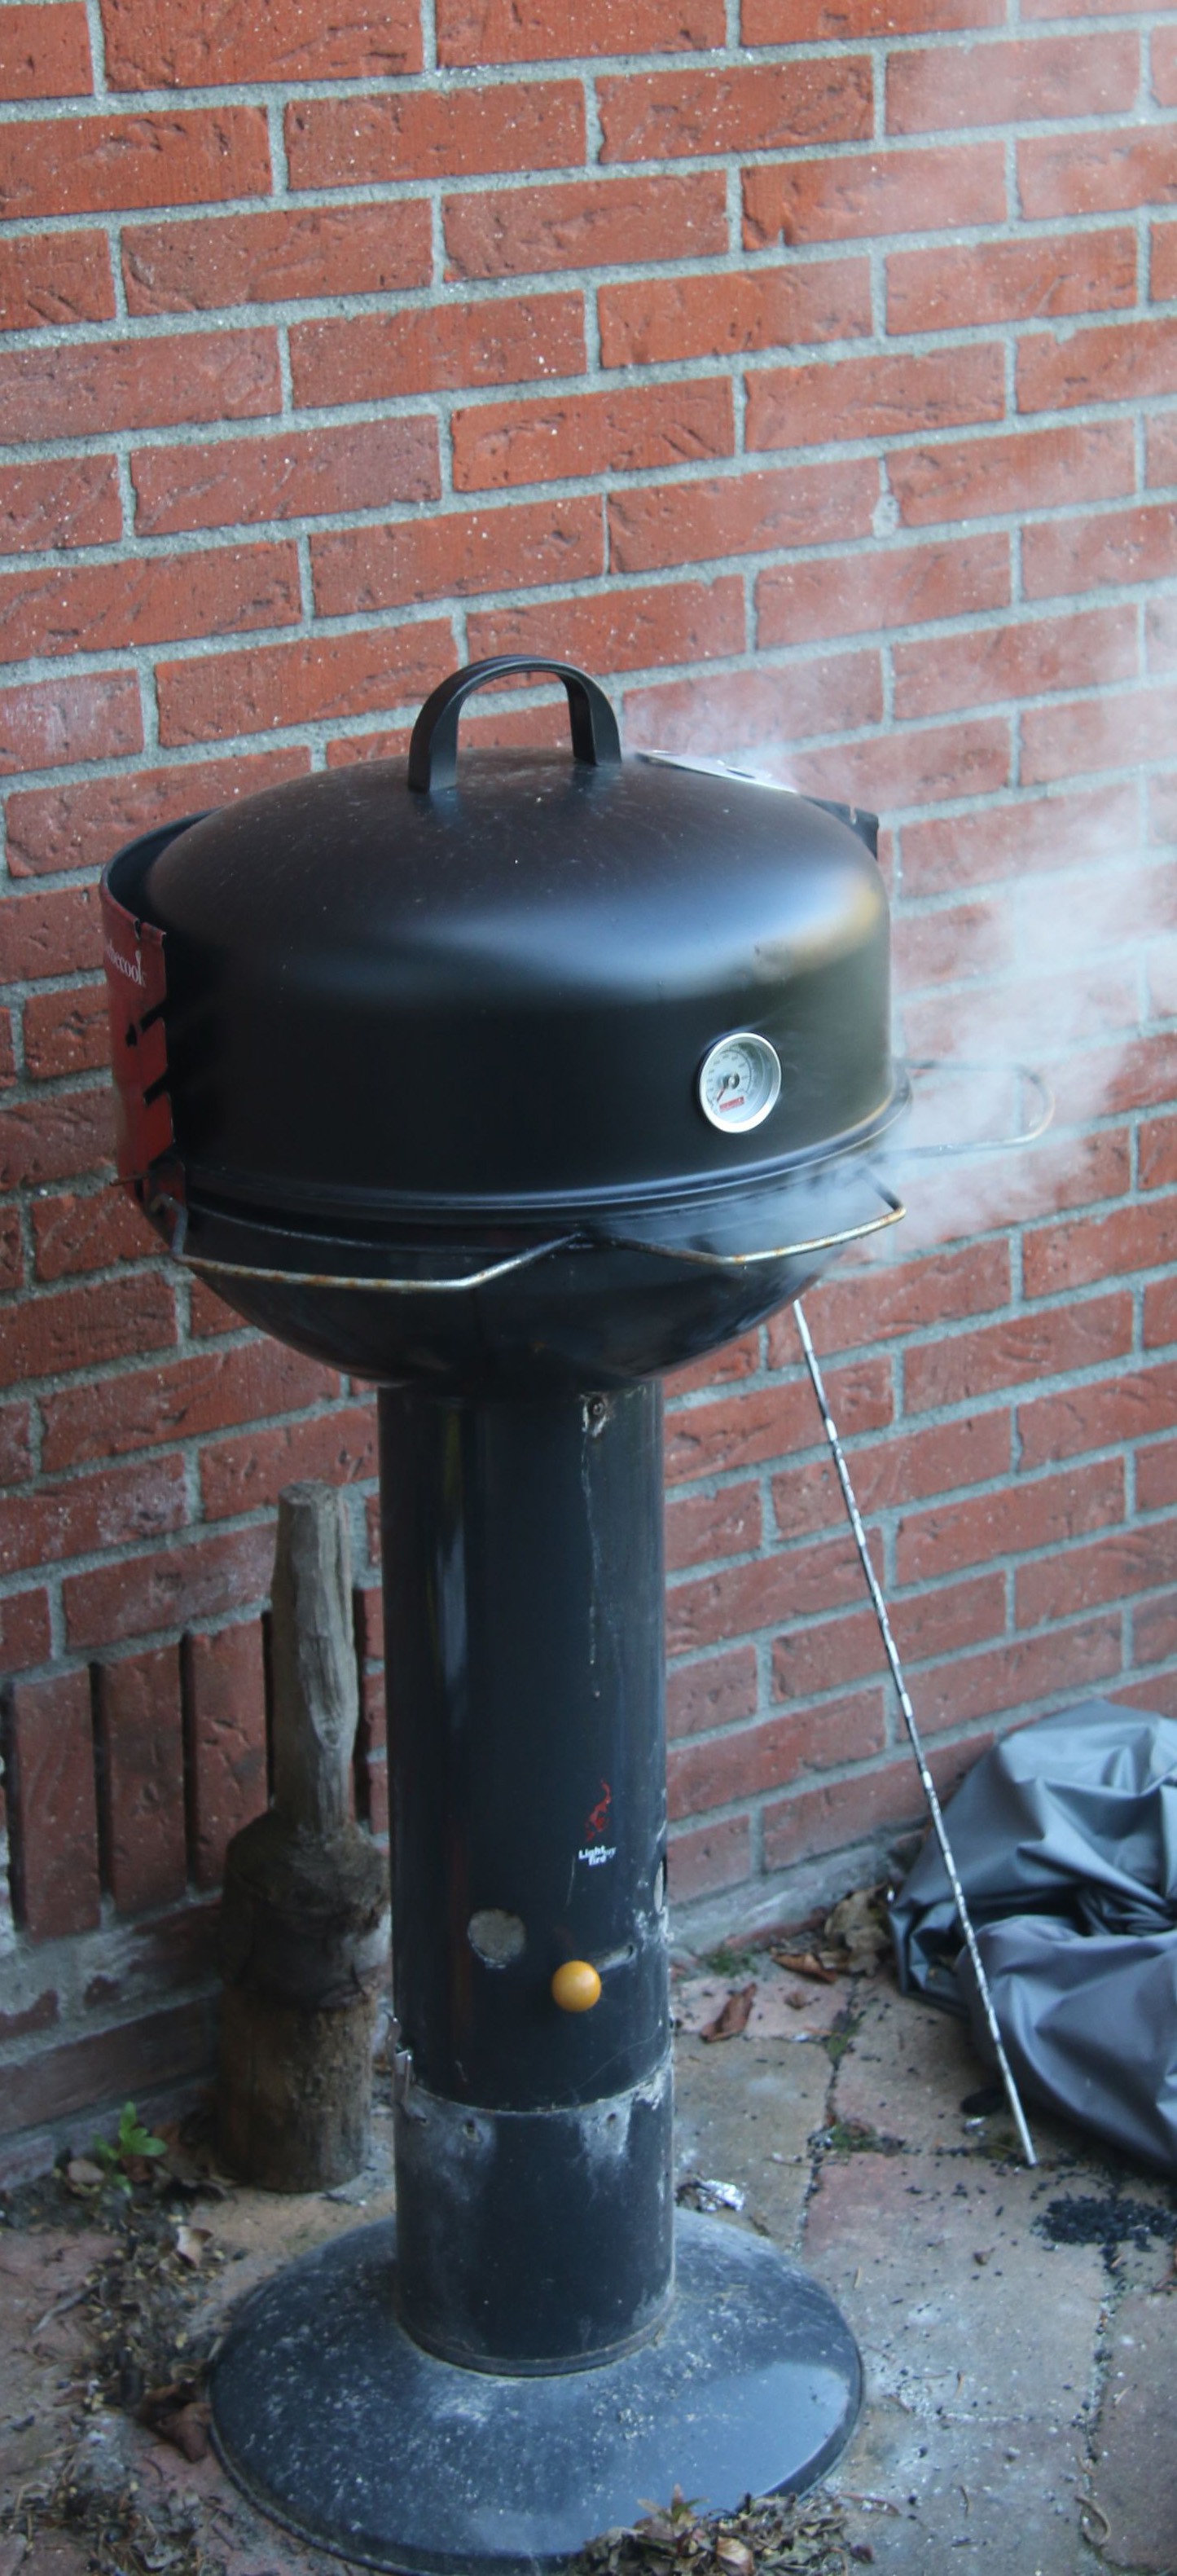
So the lid of the smoker fits the grill unit. What If i could use other parts of the smoker on the grill or truly combine the two. The grill is excellent in controlling temperature and the smokers modularity gives it a wide range of options.
The modifications had to be non-destructive because I like to have the option to use the smoker and the grill at the same time if needs be. The goal was to maximize potential output of the unit so that I could perhaps double the amount of portions per session, but first the unit had to be restored.
Restoring was easy. Sanding the rusting parts down and coating them with a generous amount of high temperature (800 degree should be enough!) spray paint did the trick. Rusted nuts and bolts had to be replaced and that was about it really.
Now it was time to figure out how to combine the two units. Seeing as the circumference for both units were the same, this should not be a problem. The best fit between the grill unit and the smoker was the top barrel unit because it has a flange which sits nicely in the bowl. Normally this part sits on the bottom unit of the smoker and it houses the water bowl. I figured it would be easier to modify the bottom barrel to fit the top barrel of the smoker that to make the bottom part fit the grill.
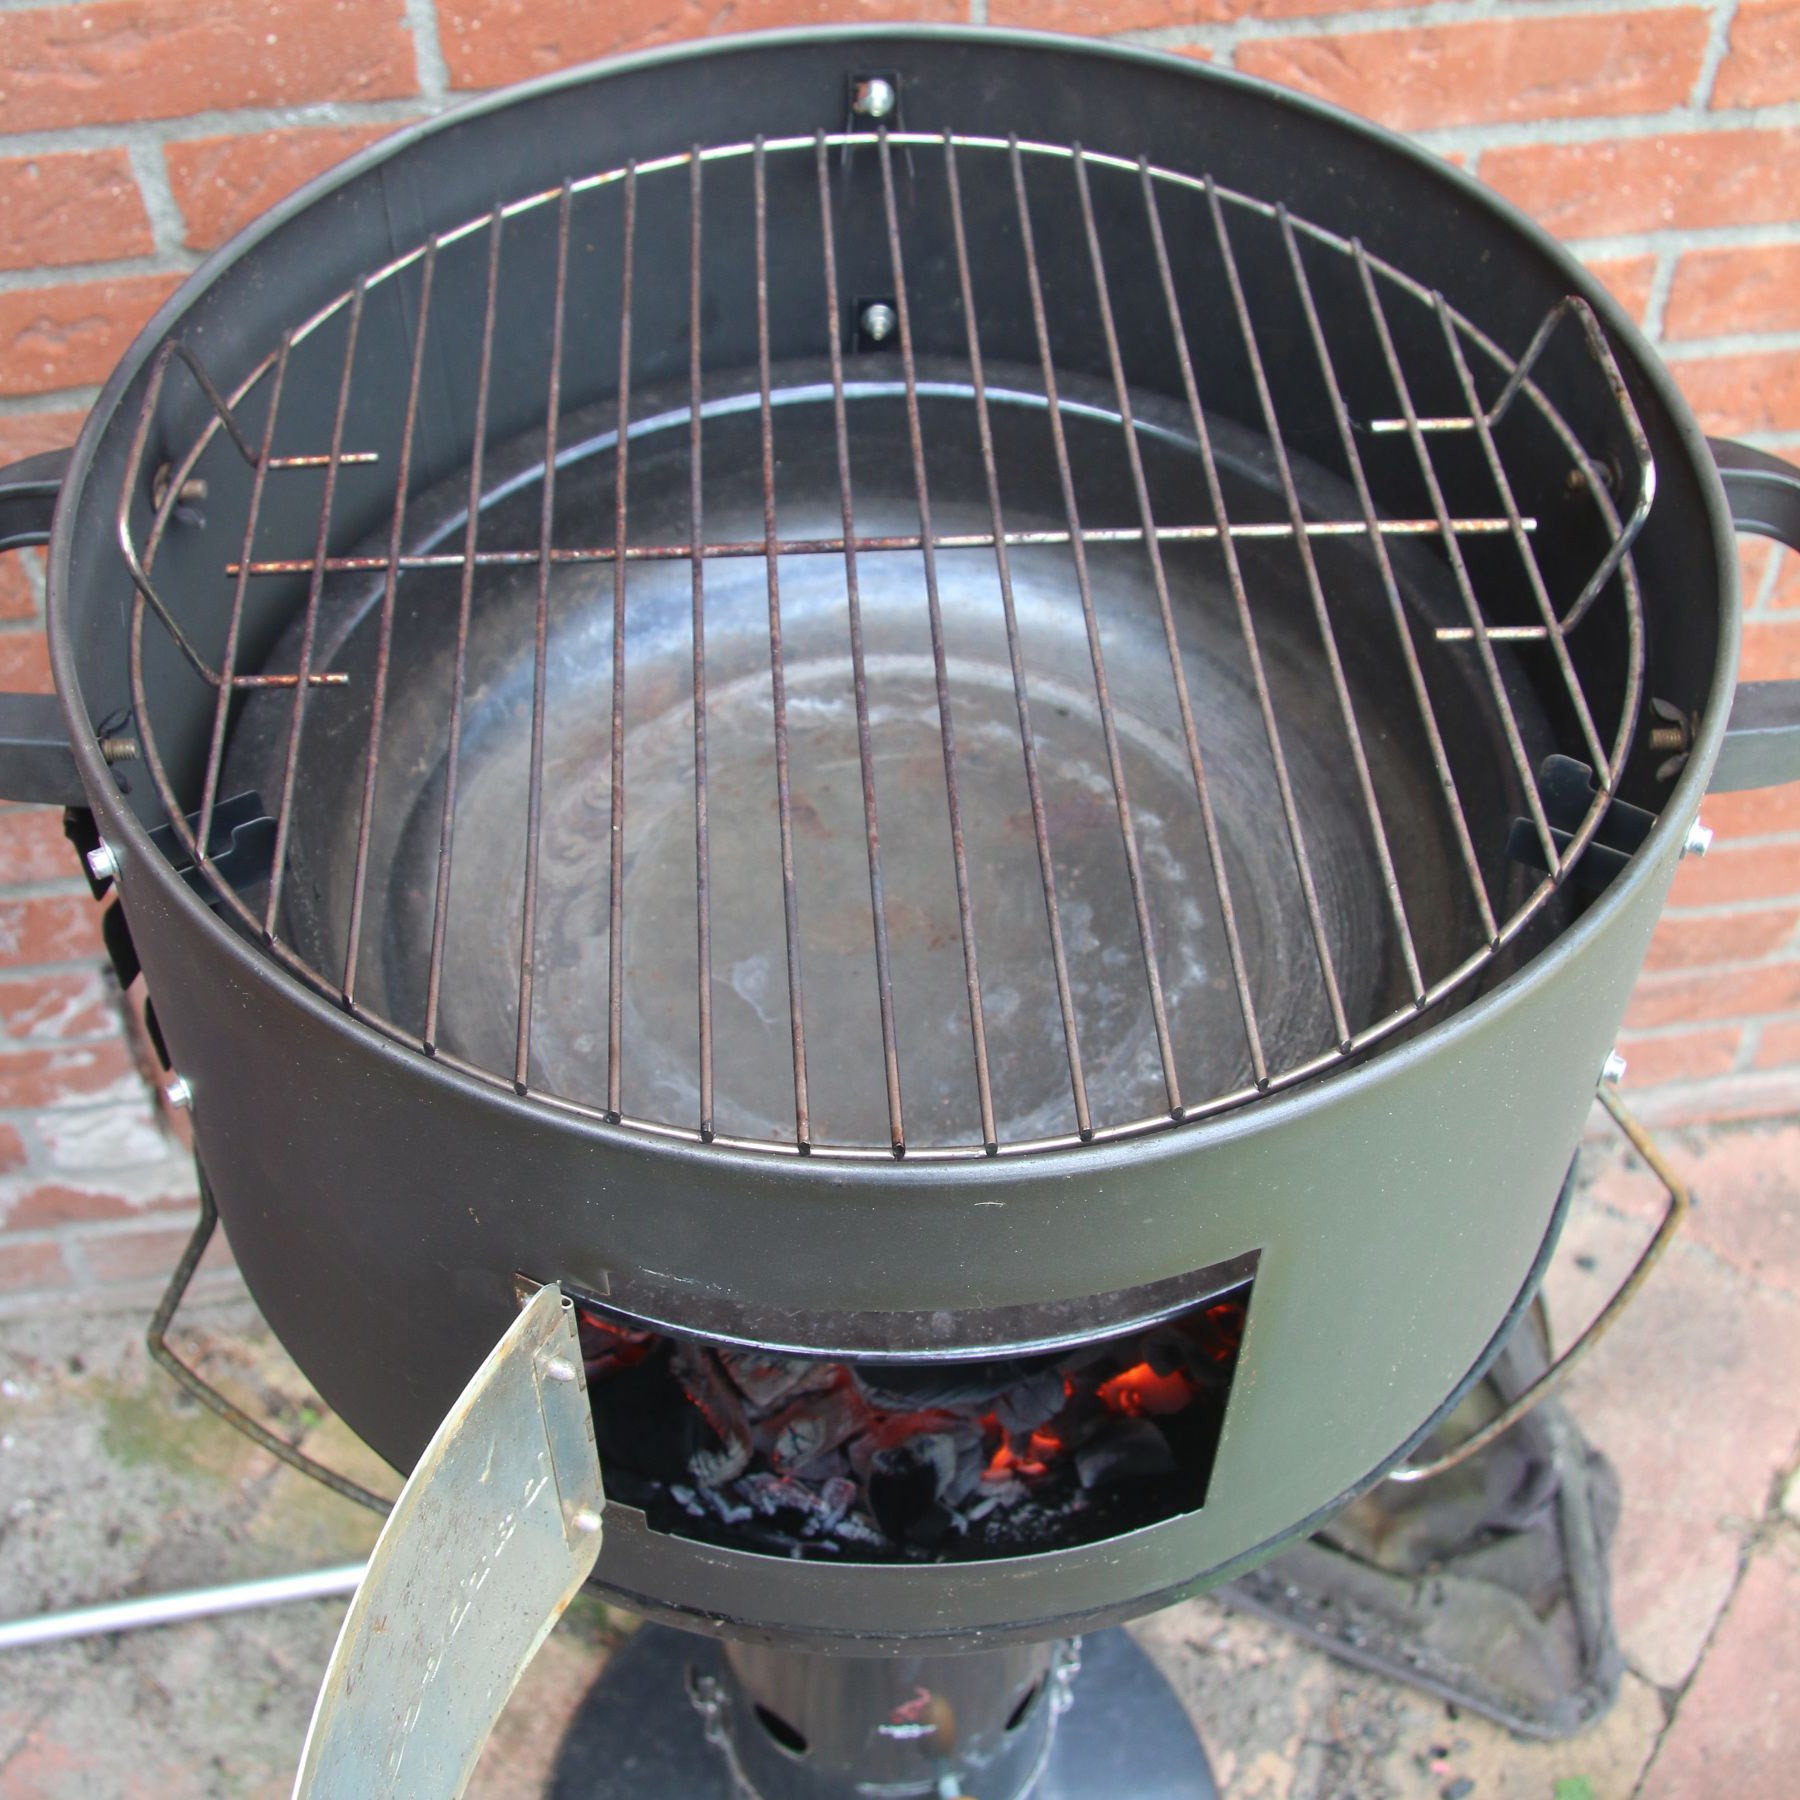
My goal of maximizing output made the choice to forget about the original bottom smoker part easy. The smoker tower is big because you want a fairly low temperature. I want higher temperatures but with all the features of the original smoker. This meant that a indirect heat and smoke setup would only need to be 1 smoker unit high. This meant that the unit that fits the grill the best must be able to hold both the basin and the grill plate. The basin is important because it A. catches the fat from the protein so that it does not fall into the fire and B. it produces water vapor, which not being under pressure, will temper the cooking temperature above. This Modification is as easy as drilling 3 holes and putting in the brackets from the other unit.
To check if the unit works as planned, I started a moderate coal fire and put half a liter of water in the basin. I knew that would all boil away, but this was my intention. I was not going to cook anything, I just wanted to see how the unit performed. It turned out to be trivially easy to control the temperature. Before hitting the key temperature, simply shut off air from the bottom of the grill and monitor when it starts to decline, then open the air intake slightly until you are fairly stable. The water will ensure that the actual temperature in the unit will be a bit lower and far more stable, I estimate roughly 10 degrees lower then the readout. So maintaining 120 degree c for half an hour, which is more than enough for my application (after that, add coal, replenish basis, rinse and repeat.
After the water boiled off, the temperature shot up to 180 degrees in the top unit, which showed me that the tempering effect of the basin was still doing it's thing like I wanted it to. The lower unit style did not change that.
Now it is time to try the unit.. which I have not done yet, but the first result will be shared in an update, making this effectively partly a food blog!
In a potential follow up to this piece, I'll show the new brackets for the former bottom unit, now top unit, and show how I modded it to fit properly the other way around