 fl@C@
fl@C@I just wanted to break out and show the parts that I have and the status on their completion.. I have printed all of these objects and will soon post a side by side comparison of the rendered object and the actual object.. They all came out great in my opinion..I'm quite satisfied with the DaVinci printer... I used to use a rostock but am in the process of converting that to a pcb mill... more on that one later! So here we go....
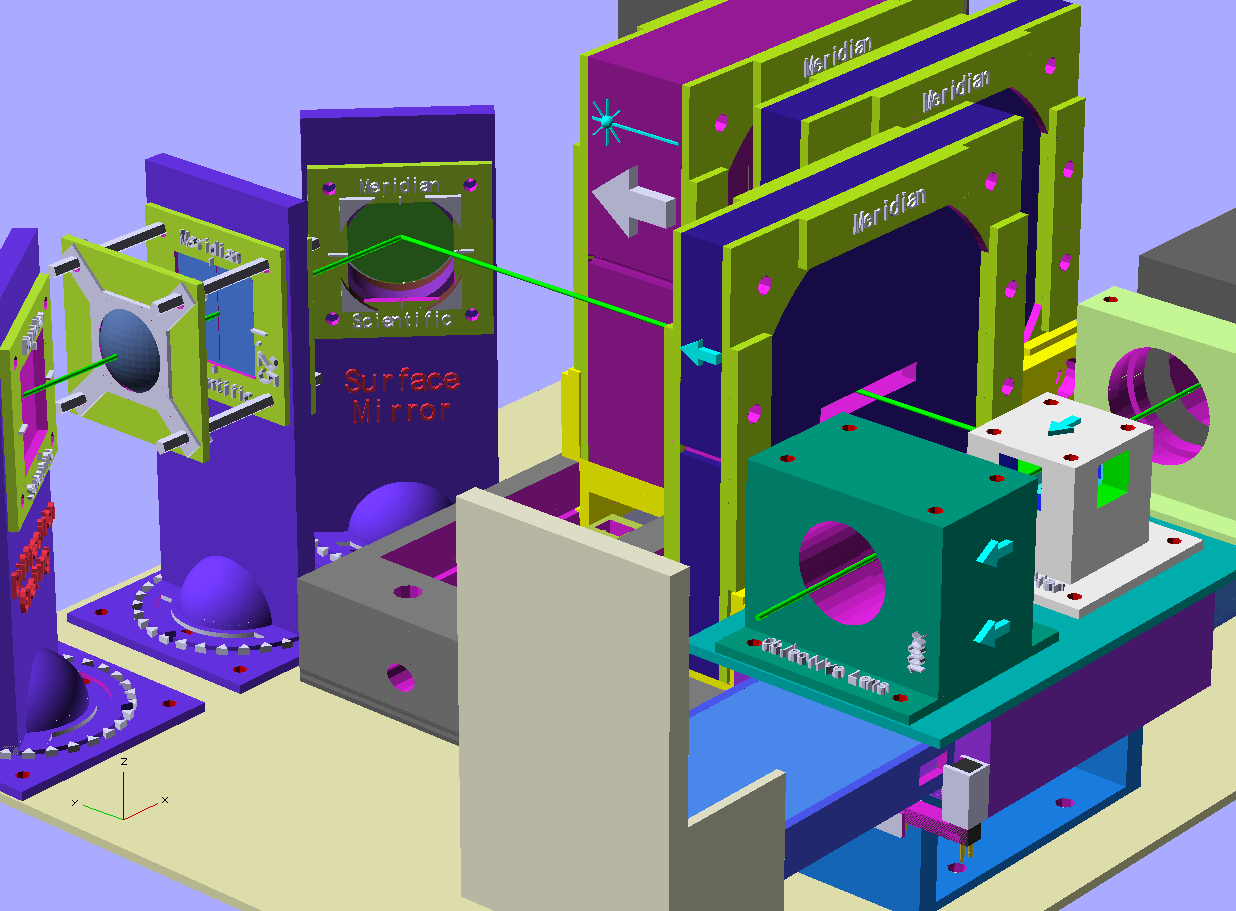
This is the 522nm Short Pass Filter Mount with its brackets... The filter I purchased is a rectangular piece and fits nicely in here.. The brackets are bulky because they are modular (and can be redesigned to fit whatever shape filter you get from eBay.. and the bulky mount allows for keeping the lens at the correct height to intersect with the beam)..
Here we have the 532nm Pass Filter mount... which is considerably shorter than the bulky filters in the sliding tray because it sits on the top shelf with the laser emitter and is the correct height to intersect there. All of these mounts are customizable to fit whatever lens you score off eBay..Mine's 1" round..
Here we have the 550nm Long Pass filter mount.. Also bulky to fit into the tray assembly.. Mine is a pretty small 12.5mm diameter lens so this is mostly mount...

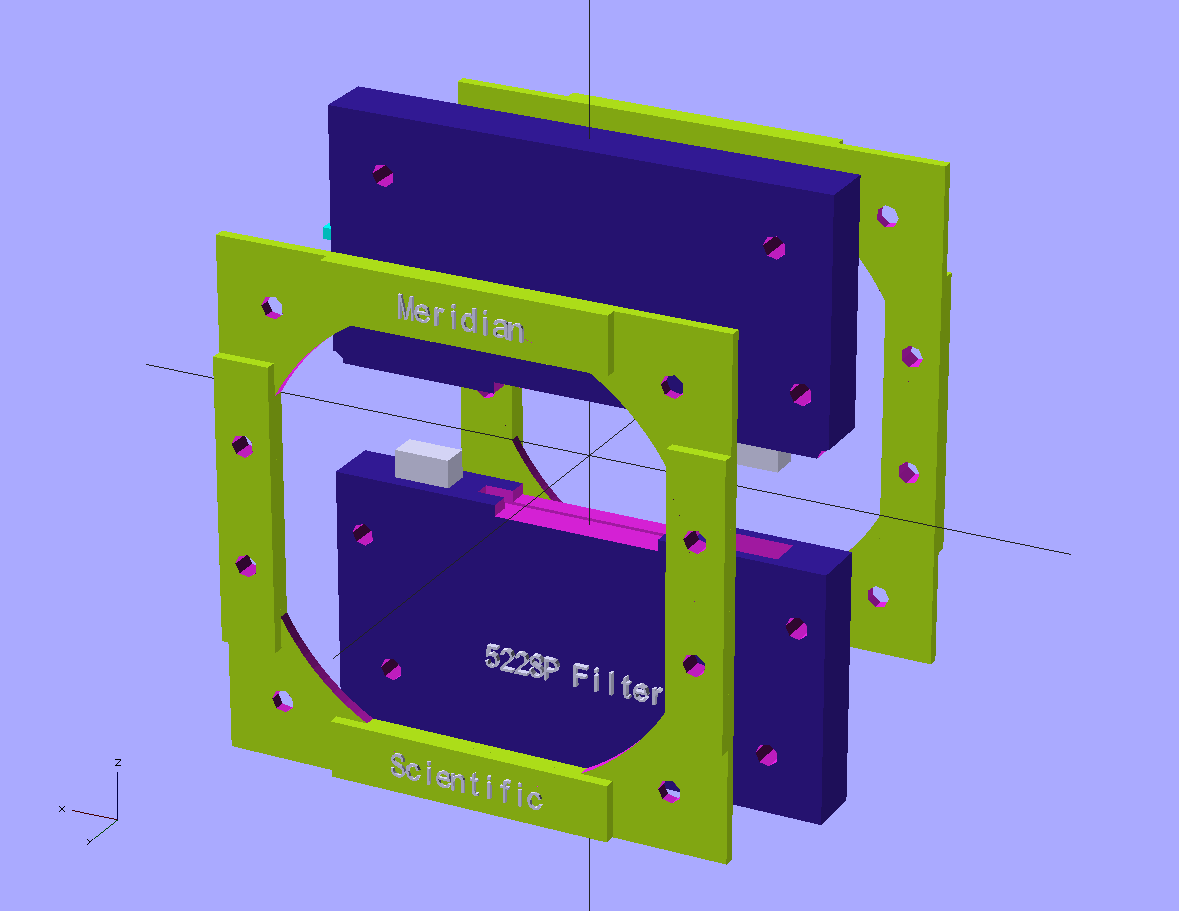
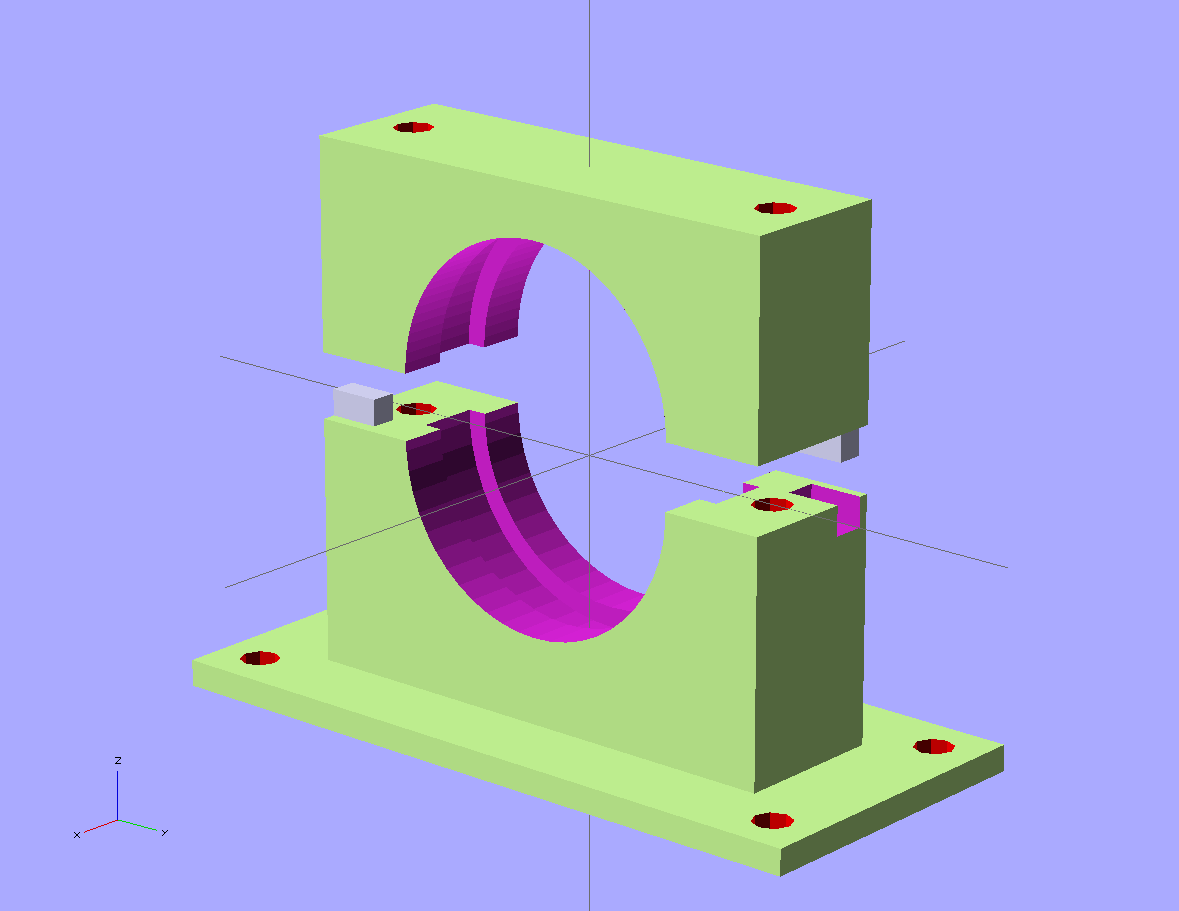
And for my 3rd lens..I decided to first experiment with an interference filter.. I scored one that is 40mm diameter..the biggest lens in my system.. And here's the beauty...the 3rd lens is also modular, meaning you can stick whatever you want in there with only having to modify the mount, not the brackets or anything else..
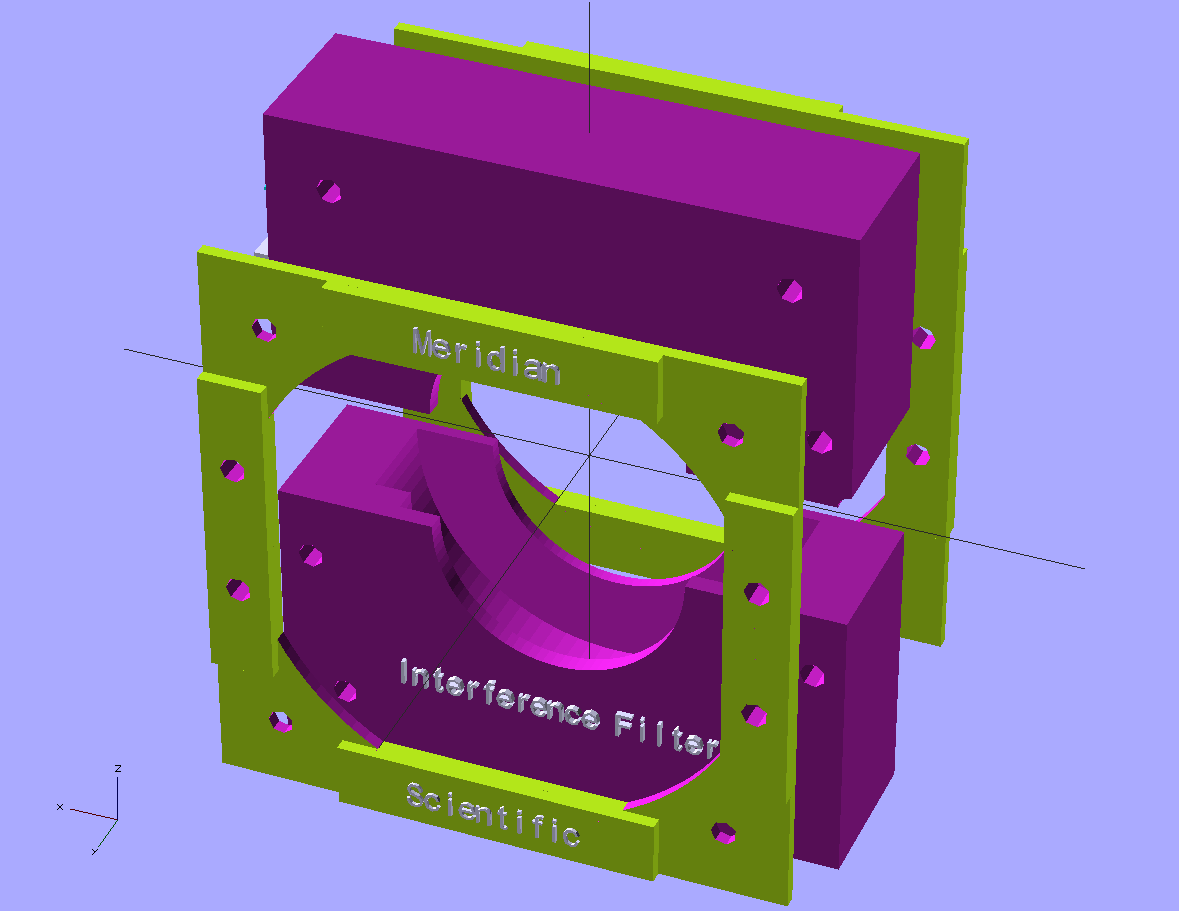
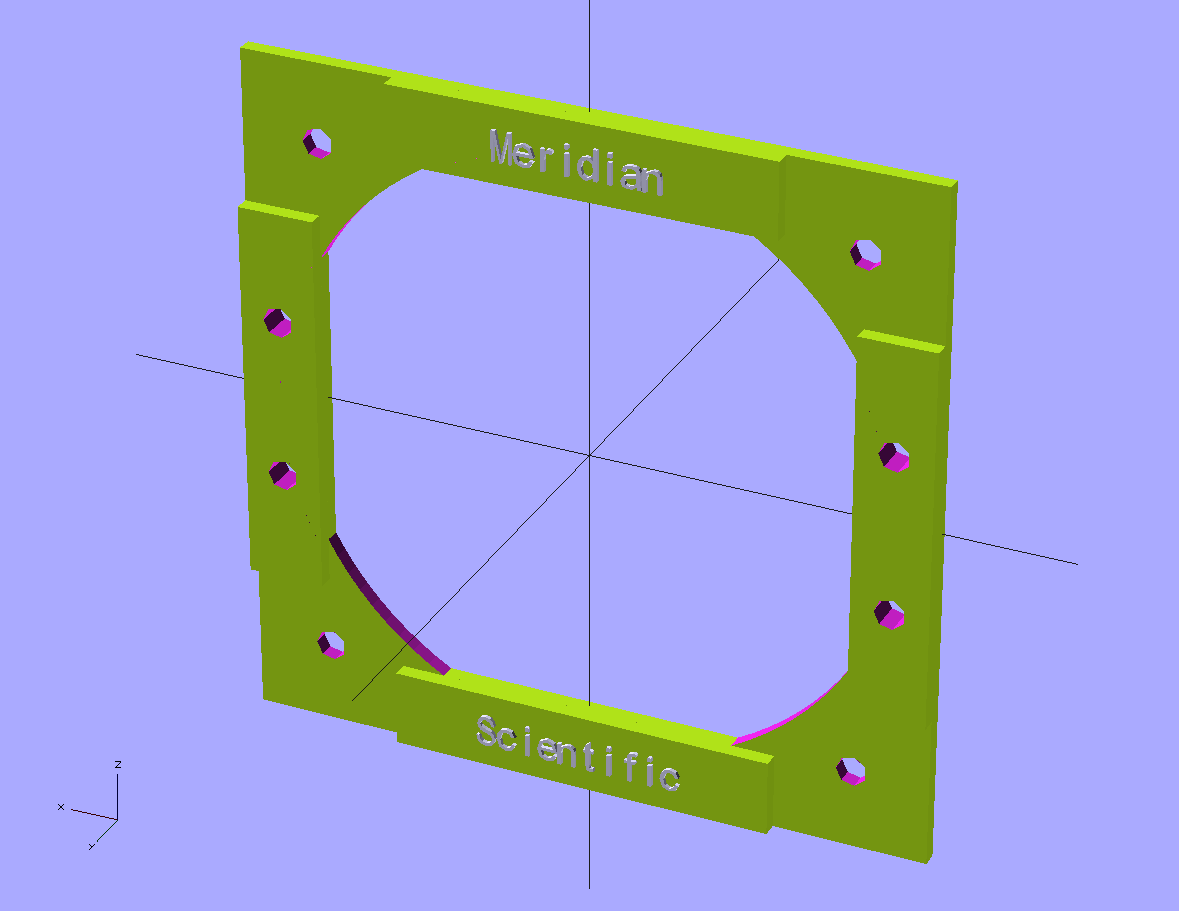
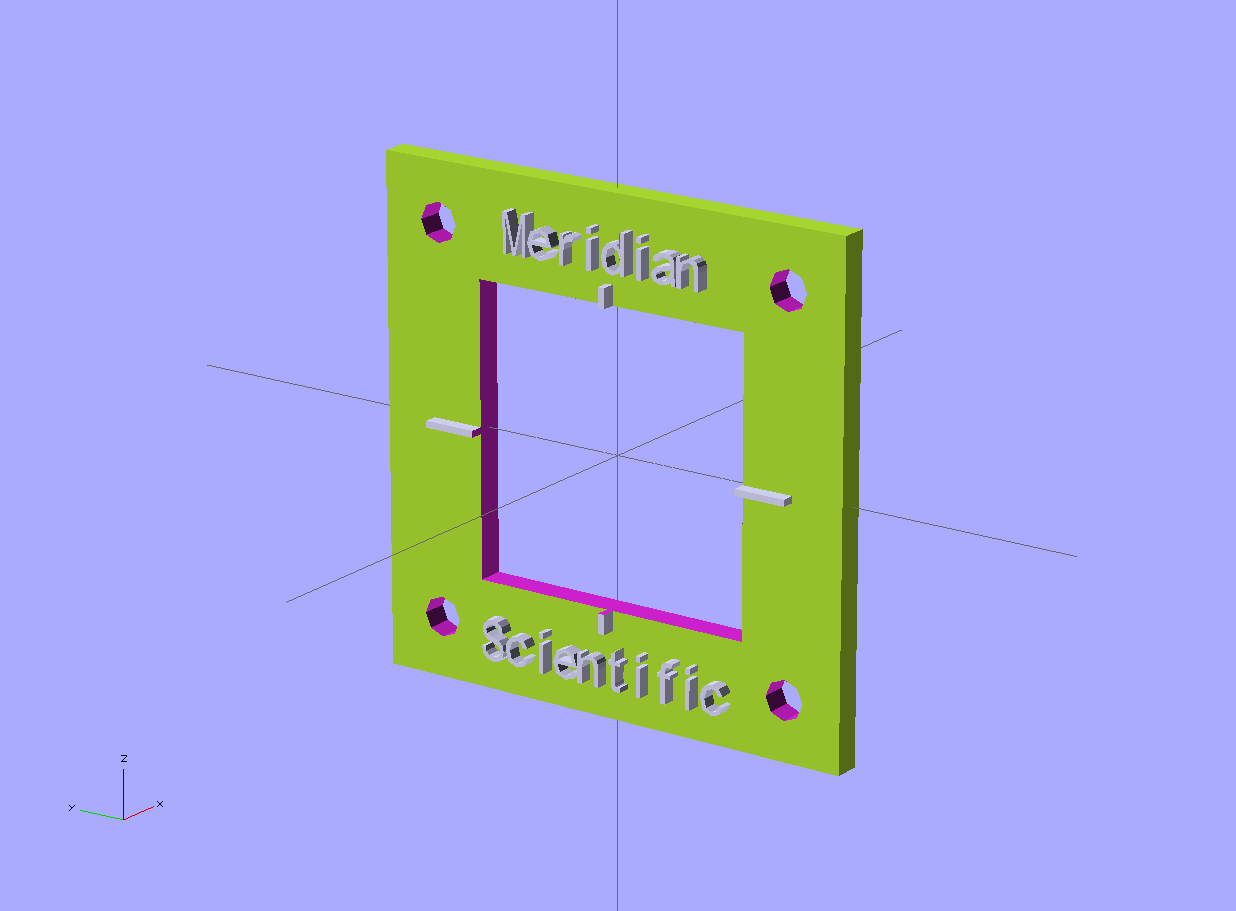
Here is the retaining bracket for the filter mounts...
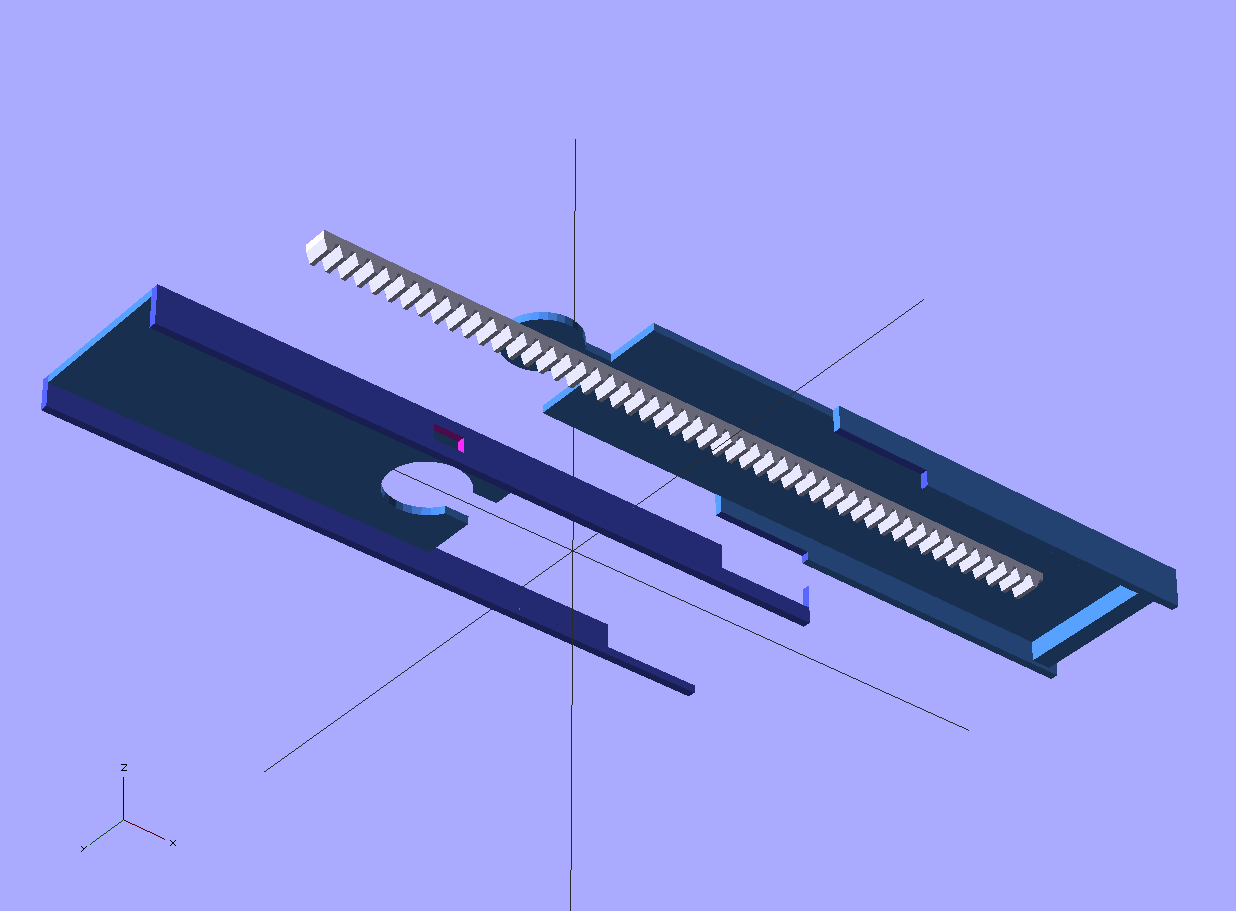
This is the first idea for the cuvette tray.. I wanted an assembly that would open sorta like a cdrom tray though a hole in the front of the case..allowing you to just drop the cuvette in a square hole, and push a button...were it would be pulled in and analyzed...I printed this, mounted up a stepper motor...it works great...not sure if this will end up in my final design...
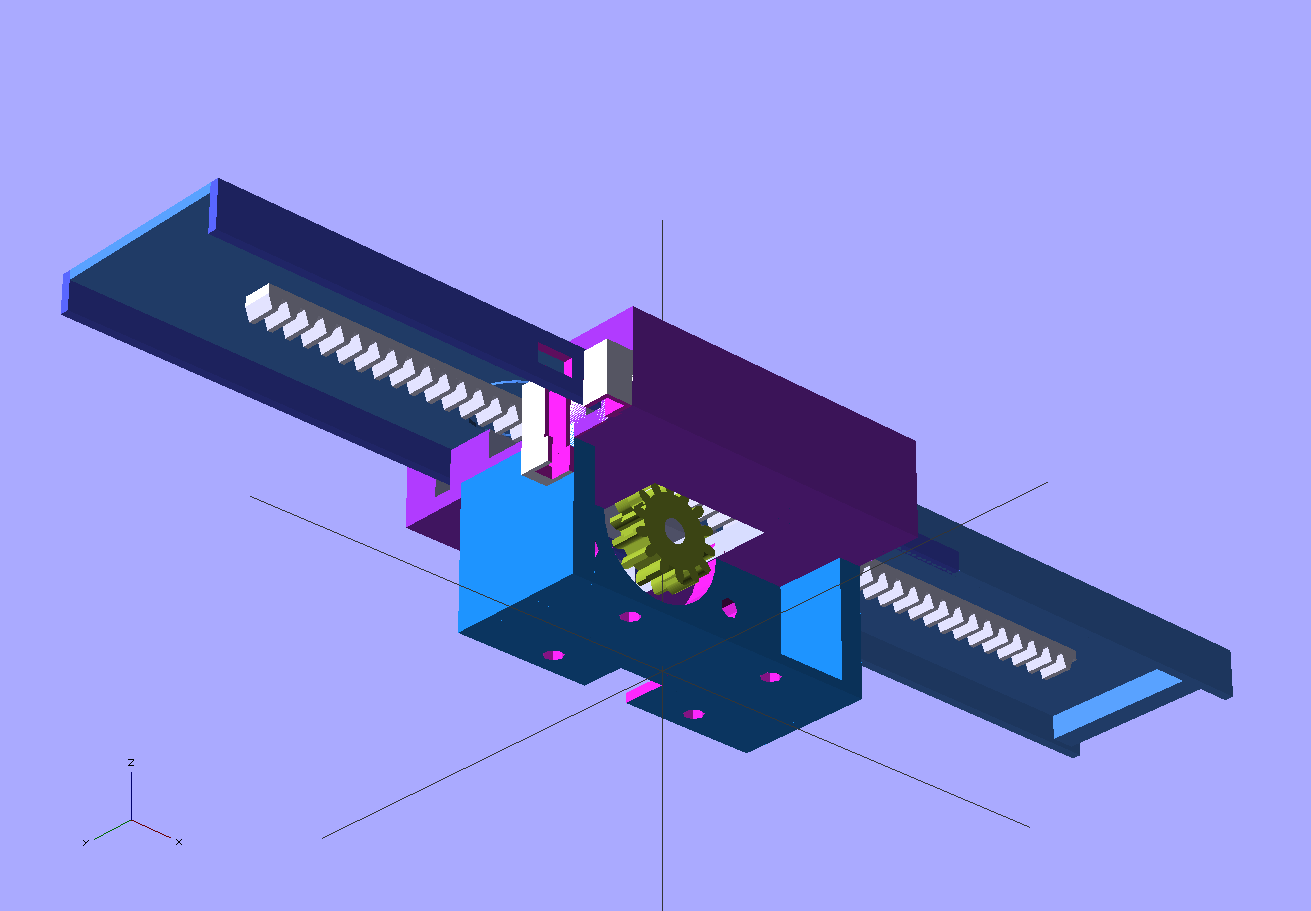
The tray itself is printed in two halves with the rack on one half...because my printer only does 200x200..and this all comes out slightly larger than that..
This is the beam splitter mount.. pretty simple...the cube beam splitter is just that...a 12.5mm cube of glass that splits the beam...it sits right in the middle and is held in place by the top..
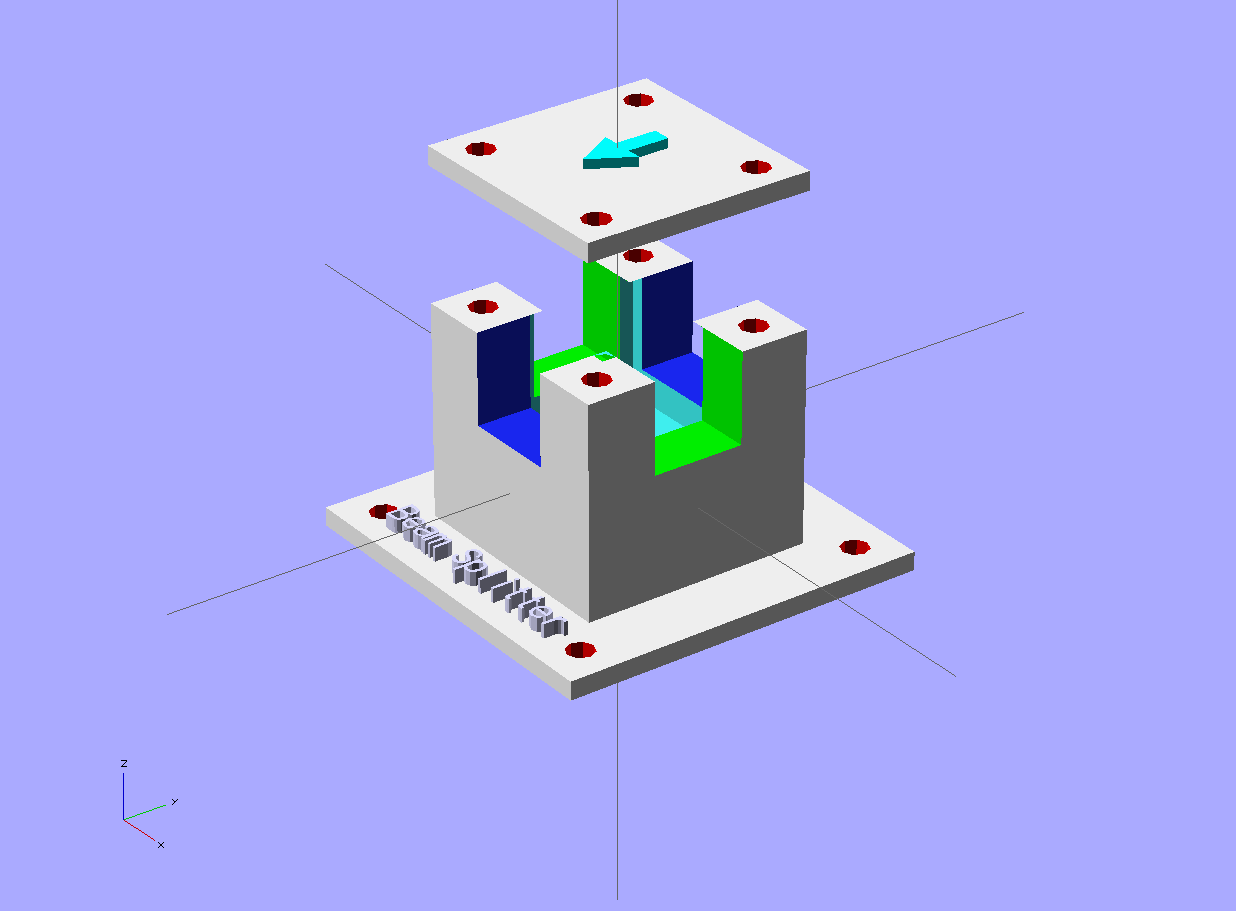
Here is at least a temporary solution to holding the collimating lens...I designed it so it's three parts...the gray face and back....and a standard retaining bracket to hold it together...I did it this way because I needed to save space and also hold the lens at its focal length from the vertical aperture. I will probably change this.
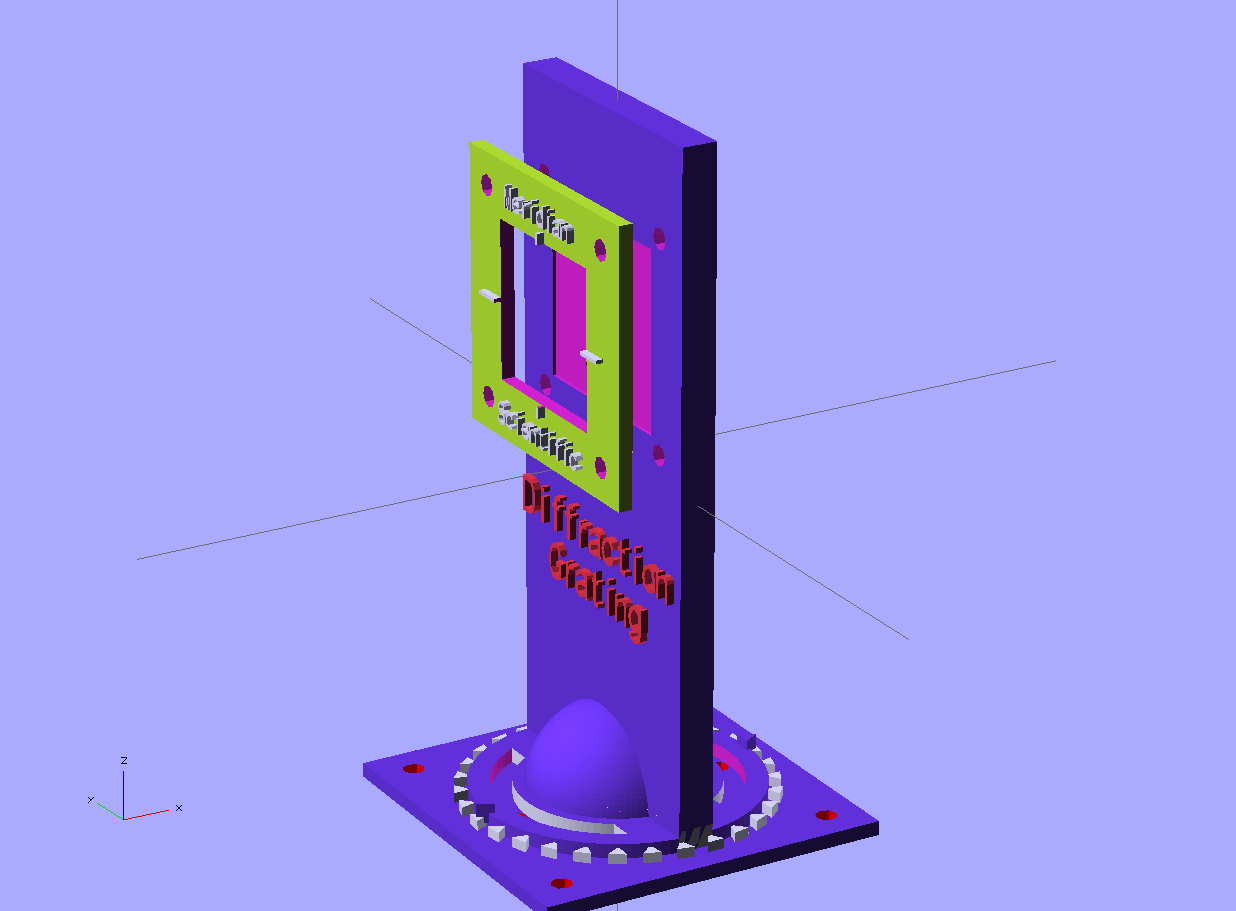
This is my placeholder for the diffraction grating mount.. I haven't gotten this far yet..so I put this in here to make room for it.. This will change...soon.
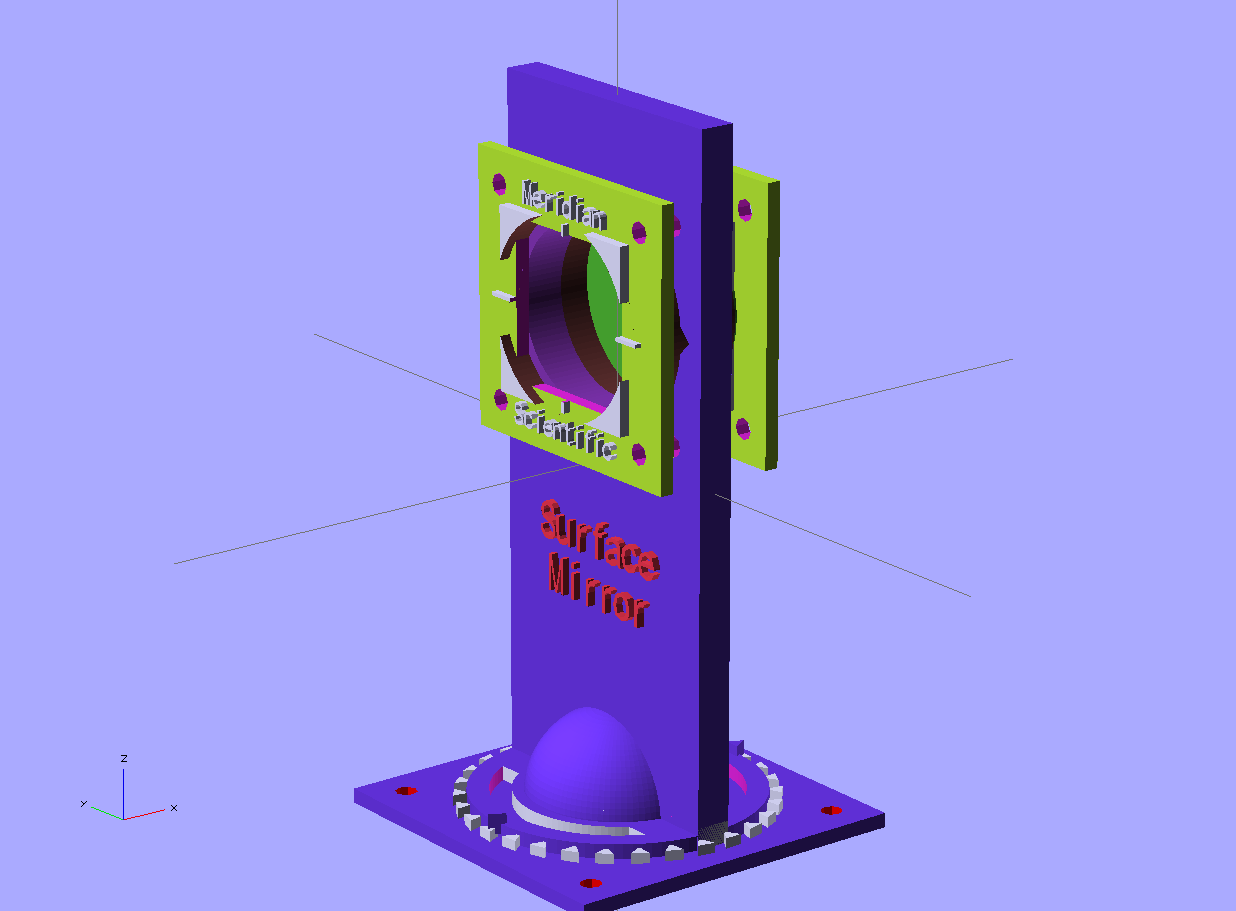
This is my first surface mirror mount.. the retaining brackets are connected through a tunnel and float inside the mount on a spring loaded mount that should allow for making small adjustments to aim the mirror correctly through the vertical aperture. I'm still working on this, and it may change..but it seems ok for the most part..The most challenging part I've designed so far to print..
Here is the microscope objective lens mount... Worked perfect the first time...I added the notches to make it better.

And the optics mount standard retaining bracket.. prints nicely.
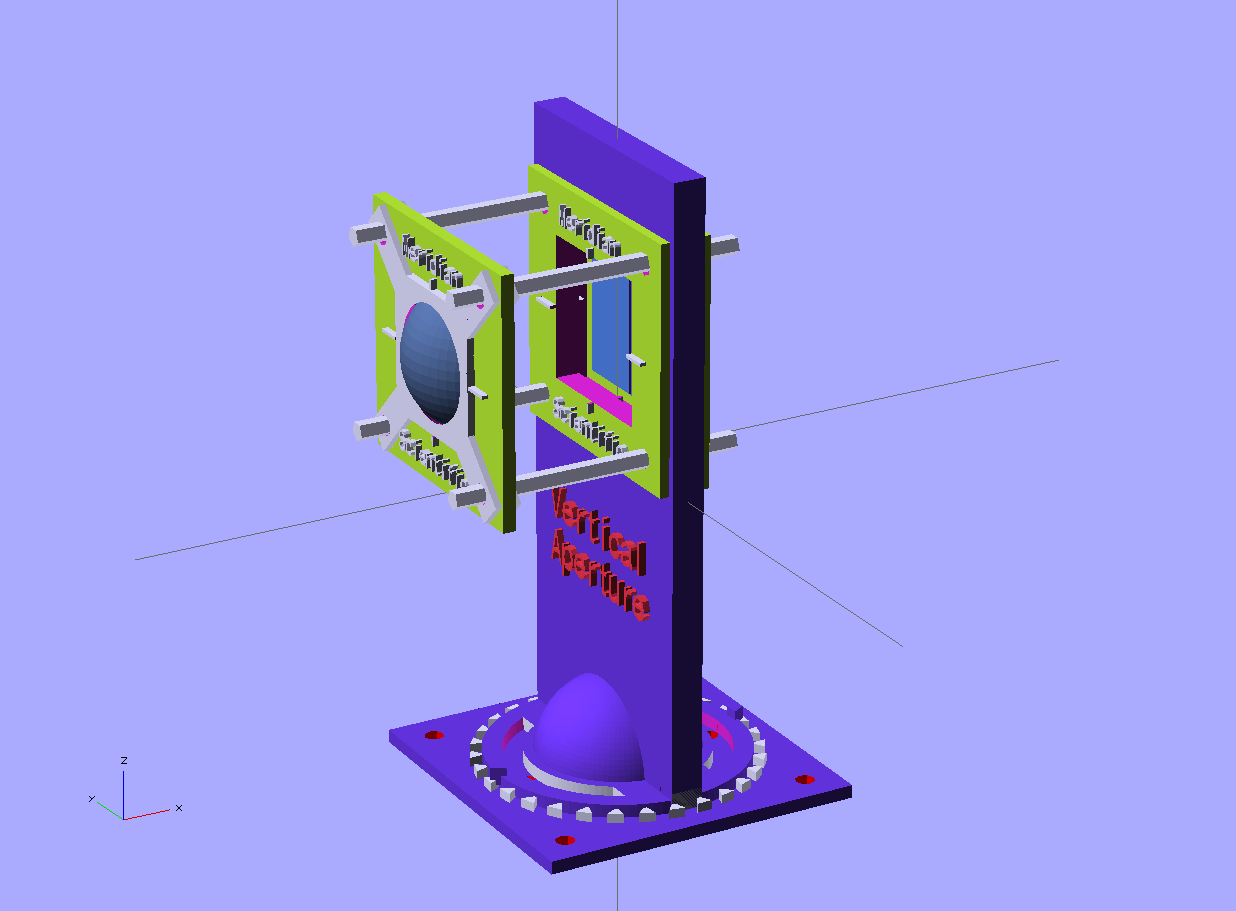
Here is the vertical aperture with the collimating lens mounted in place... this will probably change...
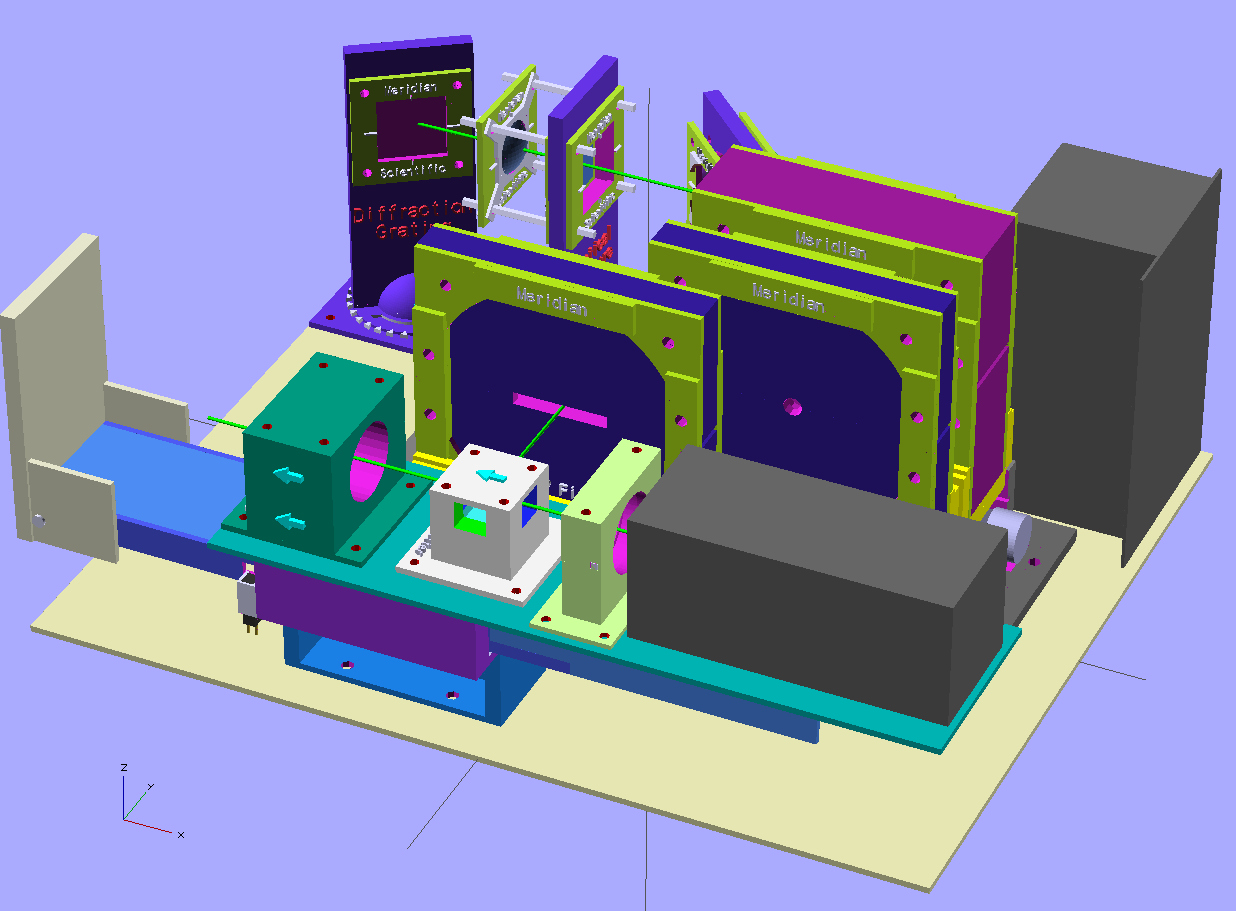
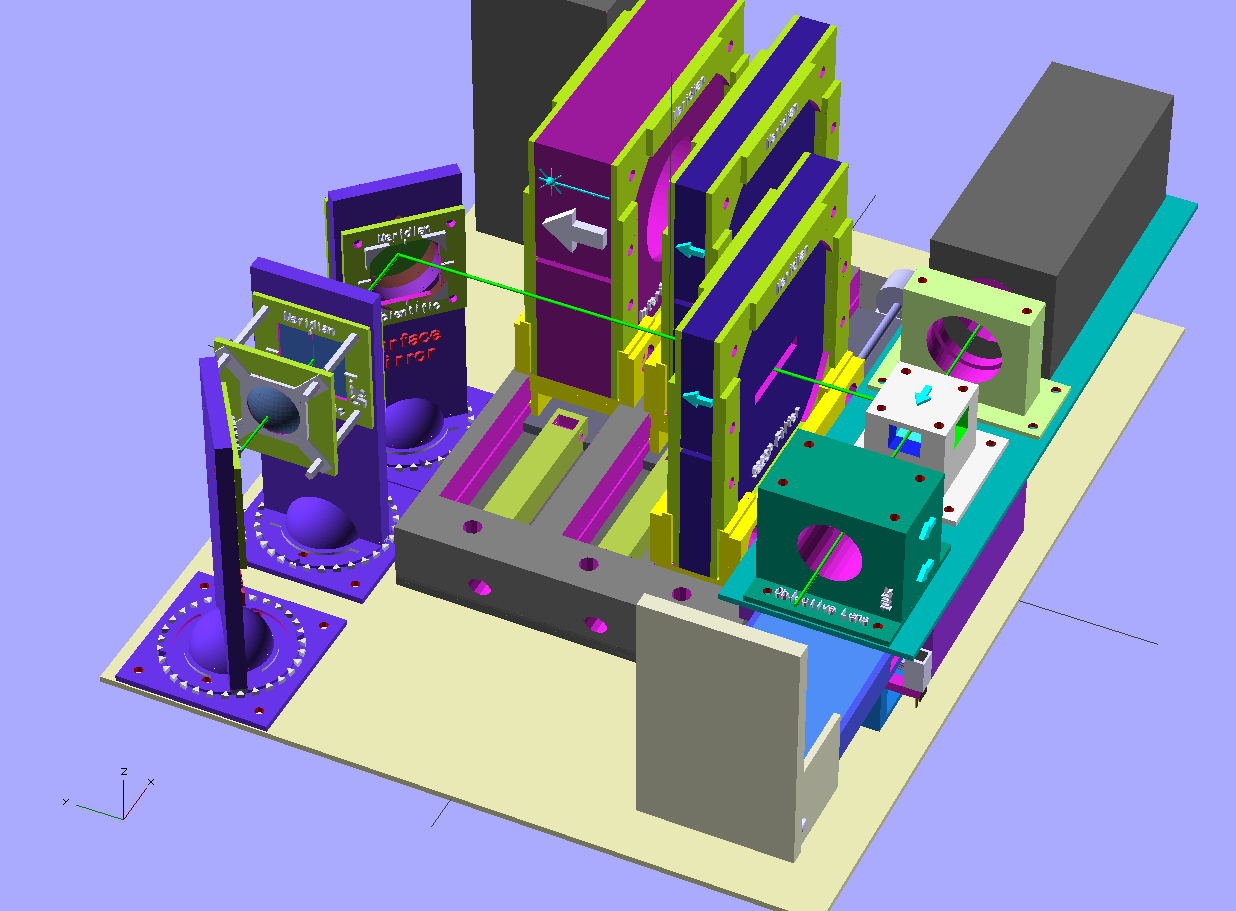
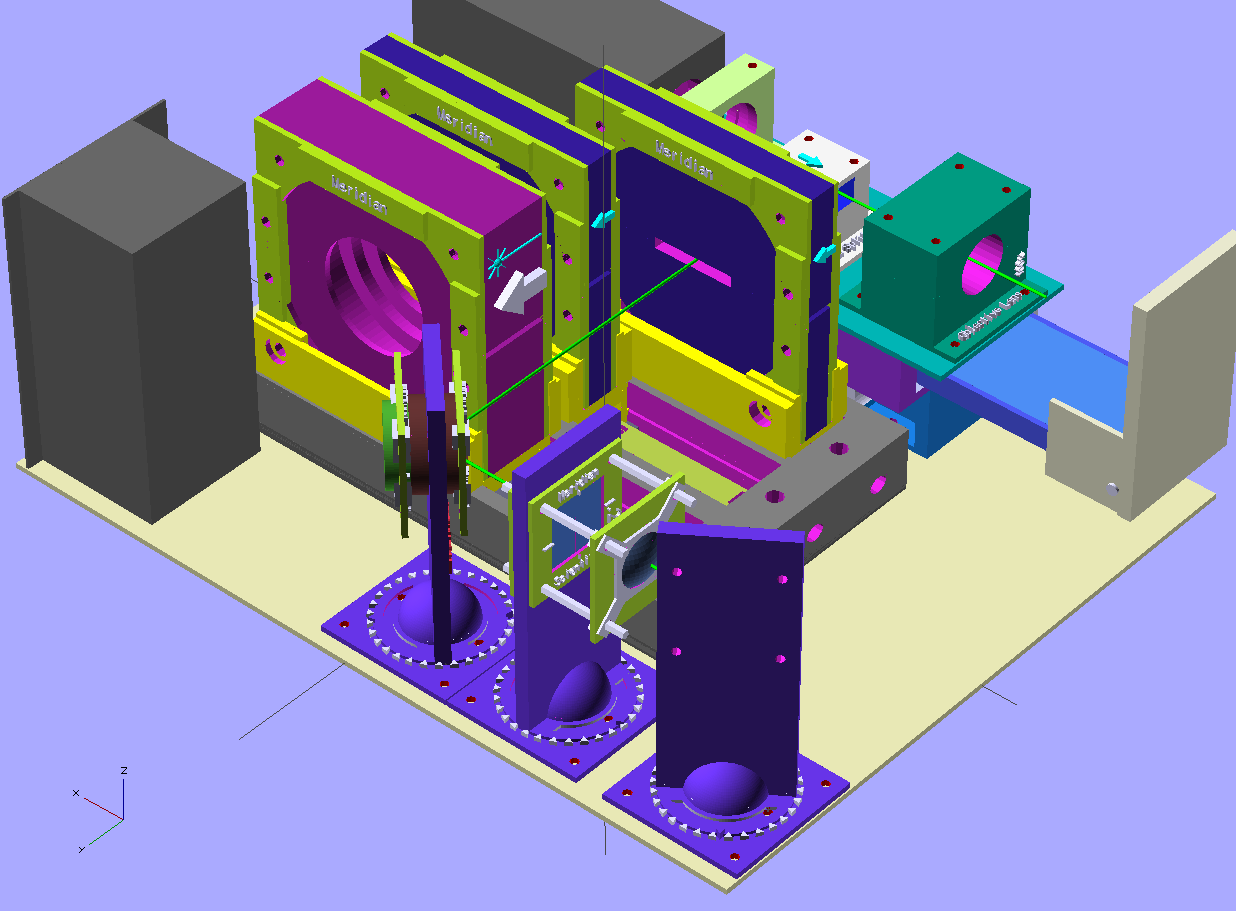
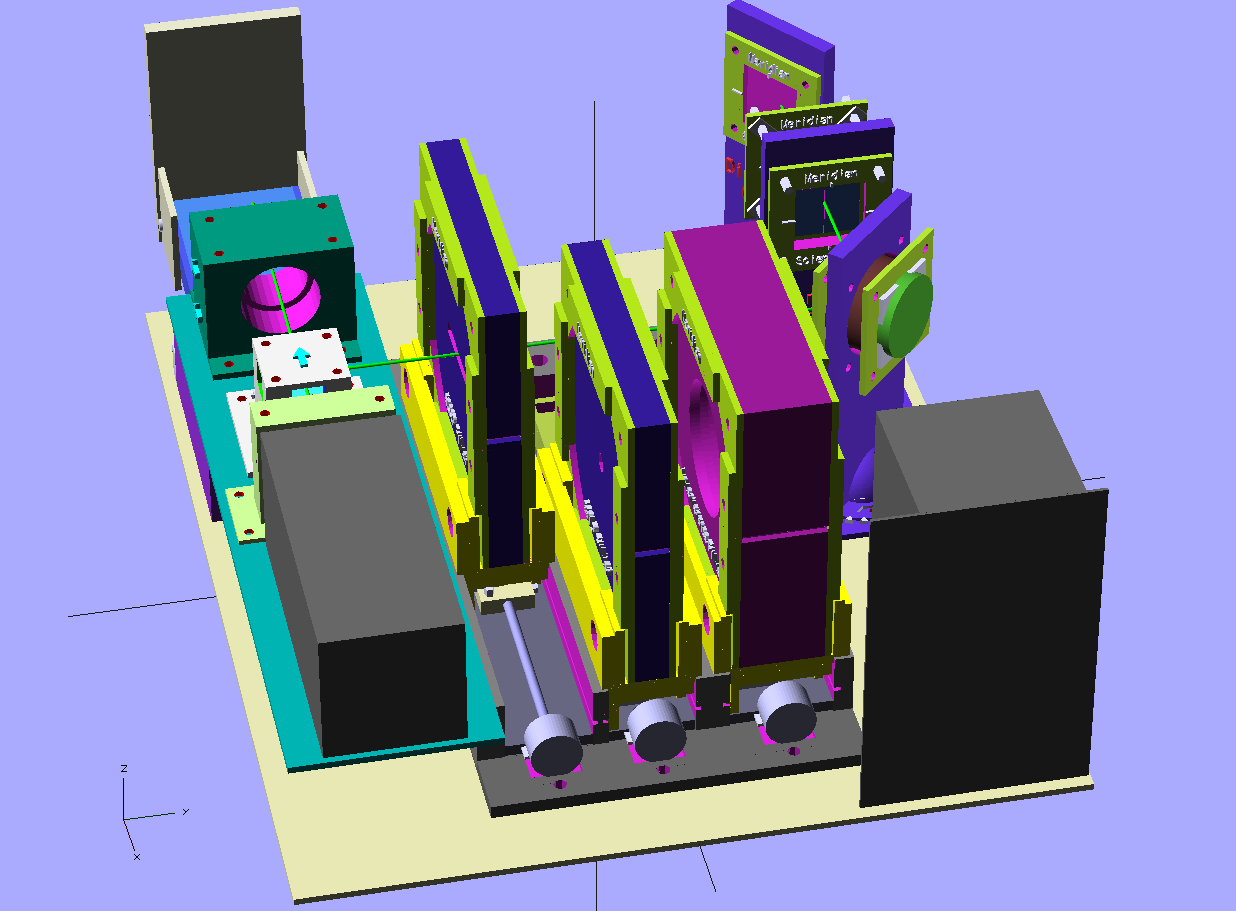
And a few shots of what I have so far from a couple different angles...I think it's coming along nicely, and the printed parts look just like this..(I'll post pics soon)..I printed them in black, with some yellow highlights..
Discussions
Become a Hackaday.io Member
Create an account to leave a comment. Already have an account? Log In.