Close
0%
0%

DNA Lamp

Stupidly tiny DNA shaped led lamp.

Similar projects worth following
Very basic lamp : copper wire, leds and resistors. Looks really fine, but is so frustrating to build... because it is small, really small.

This DNA shaped lamp is about 70mm high and 10mm large. It uses 12 smd leds and 24 smd resistors. Leds use 300 to 400mW, resistors waste about 450mW.

The idea for this DNA Lamp came when I was trying to reduce the price of a rainbow lamp I made. I thought of soldering the WS2811 directly to copper wire instead of using large PCBs.
The Rainbow Lamp is rather large (300mm width, 150mm high), but the tiny soldering of the WS2811 pads on the copper wire made me think of some more tiny and complex shape. The idea for the DNA Lamp was born, I later replaced the WS2811 with 0806 leds, because that looked better.

Because it is so tiny, I had to imagine, test and train tools and process to build it. It took lot (and lot) of time, but you should be able to build it in one afternoon after reading the project log.

The DNA shaped lamp is kind of magic when you finally manage to do it. But lot other shapes are really easier to build. Flower shaped one are the best result/complexity ratio I could make, and beginners may try it first.

  • 12 × 0603 led LED of various colors. Since there are 4 different nucleobases, plus 2 "new" created by made scientists, choose 4 or 6 colors.
  • 24 × 0603 resistor see description for values
  • 1 × Solder paste Get solder paste, not flux
  • 1 × 1.5mm² copper wire (AWG 15 or 16) you'll need less then 1 meter
  • 1 × power connector

View all 8 components

  • Improving the process

    ftregan11/07/2014 at 08:44 0 comments

    I am re-building the lamp from scratch and making some improvement to every steps, taking picture, and updating the instructions.

    The two best improvement for now are:

    • Using polyimide adhesive tape to maintain the components in place while soldering (that I later re-improved by putting the adhesive tape on top of component after they have been aligned instead of trying to align them directly on the tape)
    • Using potentiometer to choose andmeasure the needed resistors instead of trying some complicated graphs and use fixed value resistors to validate.

  • Featured on HaD.io !!!

    ftregan06/20/2014 at 19:00 0 comments

    After this project has been featured on HaD.com, its now on the first line on HaD.io !! I'am really glad that HaD team likes all the time i spent documenting this project.

    I am currently in Moroco for a friend's wedding, but will update the project soon. I found the perfect easy and cheap solution to solder the smds, and am now trying to find the perfect way to solder them on the 1.5mm copper wire that dissipate all the heat from my soldering iron, then there will be no more rechniczl dificulties and I will probably finish the documentation in the next two weeks !

    THanks to the people who like and follow the dna lamp project, it really makes it a bit more magical than it already was.

    fabien.

    ps : i lost my netbook psy and try to use an ipad to write this post.... Sorry for typos.

  • Testing materials for soldering jig

    ftregan06/10/2014 at 11:42 0 comments

    My first prototype has been made without soldering jig. It works, but looking from a close range you can see the component does not have a perfect alignment.

    For now, I tested the following material:

    -Marble is not that good. Even with a good polish, solder then to stick to it.

    -PTFE (teflon). I could not find some 0.5 or 1mm teflon sheet, so I tested with PTFE thread seal tape wrapped on some 2mm aluminum bar. It works: teflon stick a little bit to solder, but is easy to remove with tweezers. But my 2mm aluminum bar does not have sharp enough corners. Since the components are so thin (0.5mm for the resistors I bought, leds are even thinner) I would need a really sharp corner with thin ptfe tape to get a really good result. Anyway it is working.

    -I've been given some 1mm polyimid (kapton) sheet. That seems to work fine but kapton is so slippery... I need to find something to hold the parts of the jigs in place. High temperature glass glue would be fine but mine is too old and I don't want to buy tome more. I could make holes and use 2x2mm metal cylinders to fix the sheets, but polyimid sheets are not easy to buy and I may try to find something else for this tutorial. I ordered adhesive polyimid tape to give it a try.

    -Microscope slides can be a good alternative to marble (1"x2"x glass), I'll try to buy some next time I go near a lab supply shop.

    -Wood is not that bad, but you have to find a particular piece of wood that will not wrap when put in oven at 280°C for one minute.

  • Featured on HaD!

    ftregan06/05/2014 at 13:12 0 comments

    http://hackaday.com/2014/06/04/helix-turning-tool-born-from-necessity/

    That's certainly turned today into a good day :)

    As you know, I had some problems with some steps being duplicated, apparently overwitting the last steps I wrote. I wanted to let the mess as it for HaD Project team to investigate, but when I saw my project featured, ... I hade to clean everything and re-put steps in proper order.

  • Lost one hour of work :(

    ftregan06/04/2014 at 09:35 0 comments

    Something wrong happen when I was saving the last step I wrote in the instructions... now all steps I wrote this morning and are missing :(

    I don't even know what exactly is missing, nor if I kept all the pictures.

    I wrote an email to hack a day project team, I hope they can find the text somewhere in their database...

  • Matching leds intensities

    ftregan06/03/2014 at 09:39 0 comments

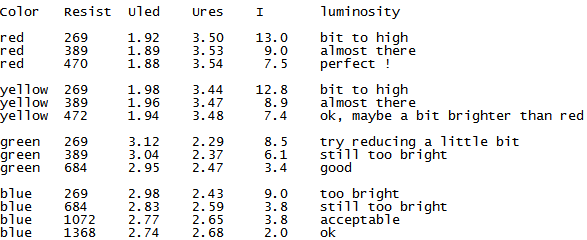
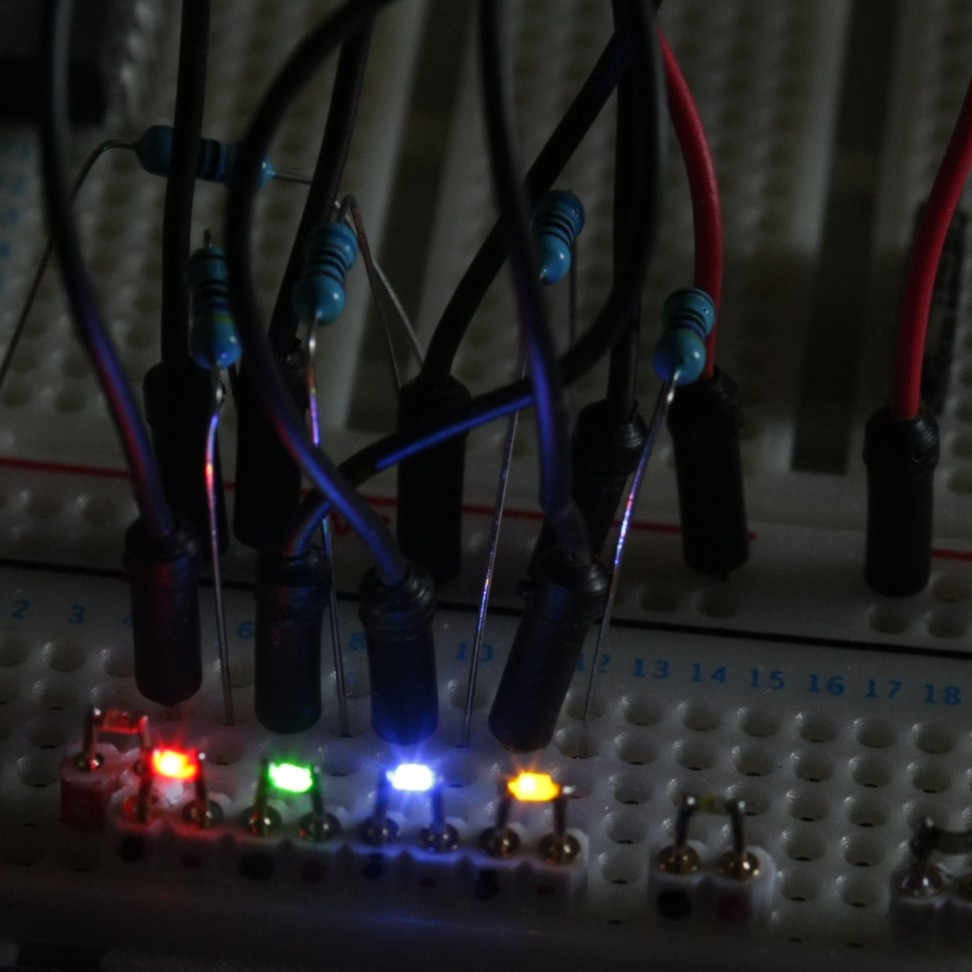
    I played with my leds this morning to see how much current each color sould get in order to have homogenous luminosity. Here are my results:

    Unfortunately, photos of leds are never as nice as reality

    (if you wonder how I soldered the leds, see my tutorial here )
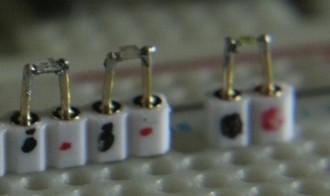
  • Breadbording 0603 components

    ftregan06/02/2014 at 18:22 0 comments

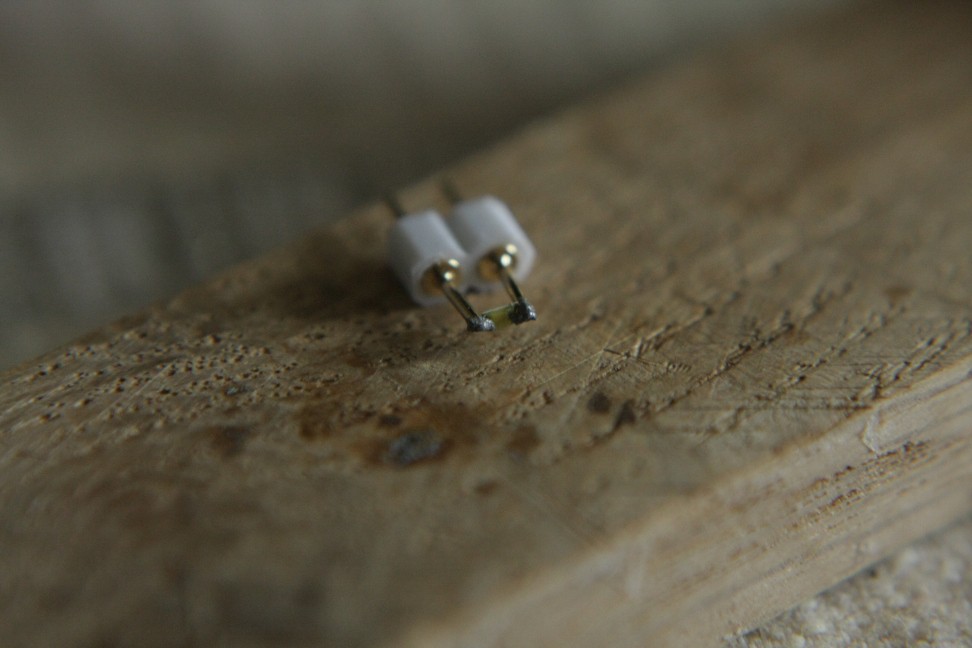
    I needed to make a current vs tension graph of the leds I ordered, but unfortunately the cheap hook I had did not do a great job on so tiny and light component.

    Fortunately, I ended up with a solution I like. 

    See it there if you want: http://hackaday.io/project/1300-Easy-breadbording-of-0603-SMD-components

  • Taking picture for this project

    ftregan06/01/2014 at 11:46 0 comments

    I need a macro extension ring. My "macro" Canon EF 28-70/2.8L just can't take a good picture of a 8x0.8mm led string, even after cropping.

    I order a lens and body cap pair for cheap on aliexpress, hoping to glue them together to make a macro extension ring for cheap.

    For now, my solution is to put a cheap 65mm magnifying glass as close as possible to the front lense of the 28-70. Image quality is not that good but it works.

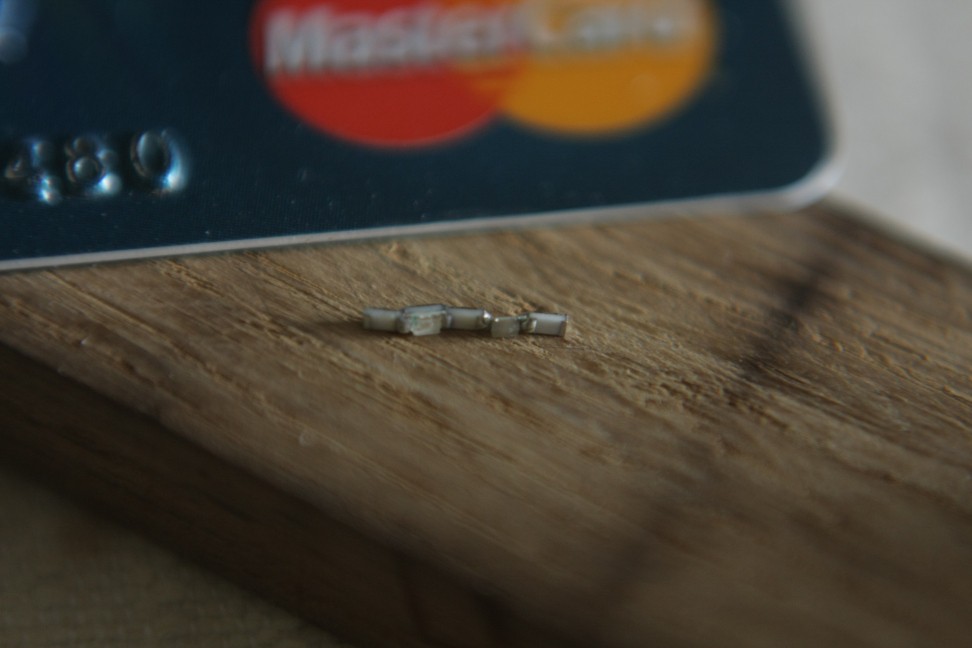
    Old (and expired) credit card just there for size reference. '480' was not part of any information you needed to use this card before it expired ;)

  • The Good Enough Helix Winder

    ftregan06/01/2014 at 11:44 0 comments

    Lots of tutorials/videos on the internet show you how to roll your own springs. Though the produced spring are useful, in the DNA Lamp the two helix will be intertwined we need them really regular. If one turn is 0.2mm longer than expected, when the corresponding turn on the other helix is 0.3mm shorter, the 0.5mm corresponding misalignment will give a "not so cool" feeling.

    After some tries (read: fails), I manage to make a cheap, easy to build, manual helix winder that gives good enough results. I named it Good Enough Helix Winder, but don't know how to pronounce GEHW. 

View all 9 project logs

  • 1
    Step 1

    Breadboard your SMD LEDS

    You will most certainly find my tutorial interesting :)

  • 2
    Step 2

    Choose your PSU

    Take a look at the data sheet (or description of the ebay item) of your leds. It will give you the forward voltage (Fv) of your leds.

    Calculate the needed tension by adding the tension of the colors in your color pairs.

    I chose to use Red-Green and Yellow-Blue pairs. With my leds this means (2.2+3.3) = 5.5V and (2.0+3.3) = 5.3V.

    I need some PSU with a tension higher than that, so I can regulate intensity with resistors. I chose a 9V psu ($2 on ebay!), but if you have a 12V one (more standard), that will be ok too.

    I will use six pairs of leds in my lamp. Each led is rated for 20mA, so I should need (6x20) = 120mA (pairs are in serie). But that would be too bright, I will probably feed at most 10mA to each pair, so 60mA is enough. Cheap wall adapter are now all able to deliver more than 120mA, so you don't worry about that if you do not want to use more than ten pairs.

  • 3
    Step 3

    Choose your color pairs

    We will use one color for each nucleobase. Remember that nucleobases go in pairs, and that the only possible pairs are adenine-tymine and guanine-cytosine, so if you don't want your annoying bio-engineer friend to make sarcastic comments about your DNA Lamp, always use the same two pairs of different colors.

    You can have either:

    -mix of red-blue, blue-ed, yellow-green and green-yellow (I choose this one)

    -mix of red-green, green-red, blue-yellow and yellow-blue

    -mix of green-blue, blue-green, red-yellow and yellow-red

    But you can't have:

    -red-green and red-blue pairs

    -red-red pairs

View all 13 instructions

Enjoy this project?

Share

Discussions

kris-makes wrote 01/03/2022 at 11:18 point

hi! do you have pictures posted somewhere? XD

  Are you sure? yes | no

ftregan wrote 09/17/2014 at 16:49 point
Sorry sorry, life got complicated here and I let it carry me away from fun and beautifull project.

But your comments made me want to finish this tutorial. I'll test a new way to solder leds on copper wire tomorow (the wire act as a radiator and a normal soldering iron is not up to the job) and take pictures while doing it :)

Thanks you for your comments, they helped :)

Fabien.

  Are you sure? yes | no

Adam Fabio wrote 09/17/2014 at 16:44 point
Yup - Dying to see a picture of the helix and the LEDs together!

  Are you sure? yes | no

David Hopkins wrote 09/09/2014 at 14:56 point
have you got a picture of it completed?

  Are you sure? yes | no

Similar Projects

Does this project spark your interest?

Become a member to follow this project and never miss any updates