 Jason Webb
Based on the results of my breadboard prototype I knew that my concept was solid and that the parts that I had chosen would give me the results I was looking for. In particular I knew that the pressure sensor worked great and that my instrumentation amplifier worked as intended to make the sensor's analog output "loud" enough for the Arduino ADC to read.
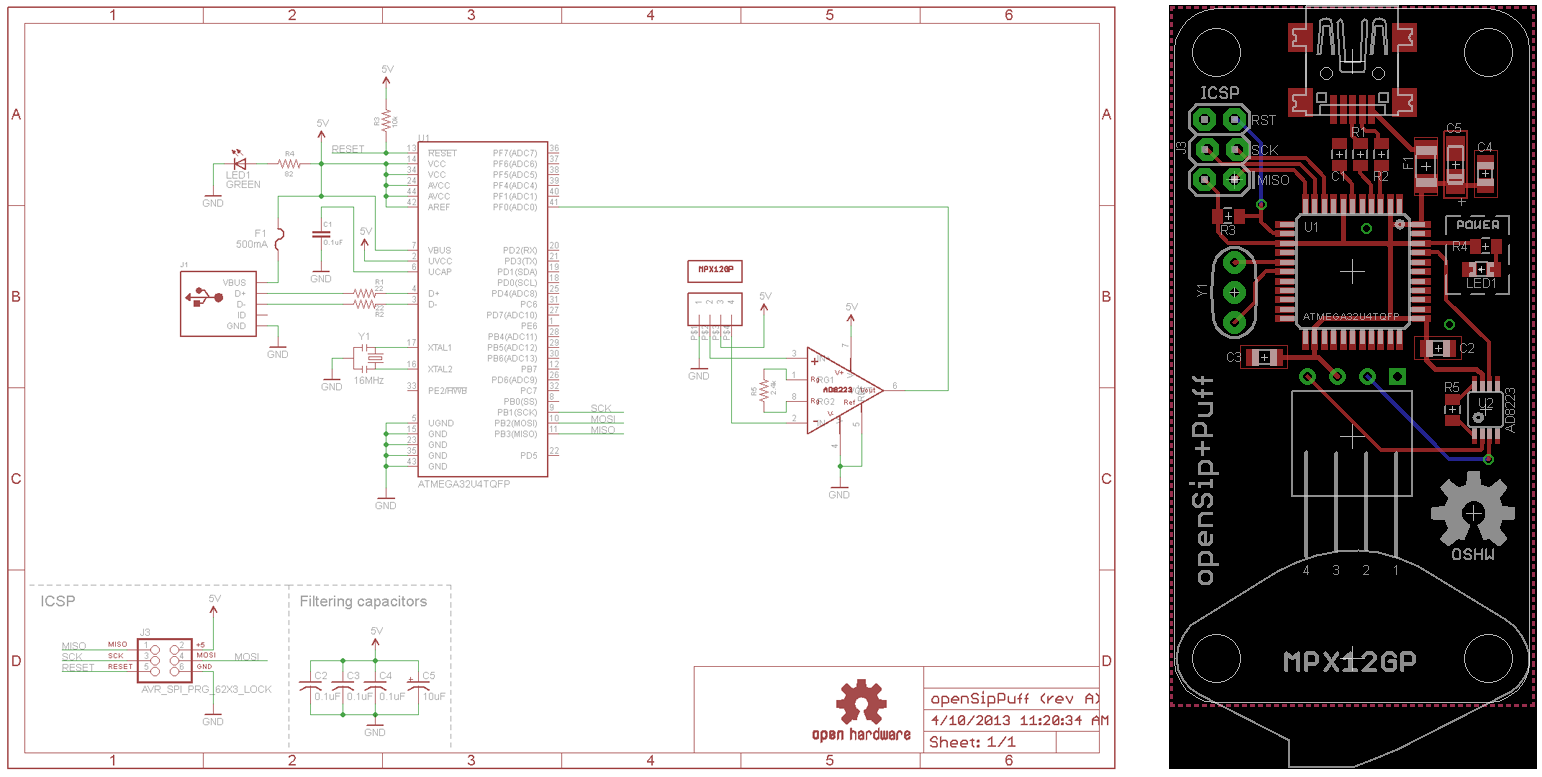
For me the next logical step was to translate my design into a circuit board that I could have fabricated. I used Eagle CAD for this, and whipped up a custom footprint for the pressure sensor.
Note: This is just the initial prototype design, and I have already made newer ones that I will upload and document in upcoming build logs! Just posting it here to share my process.
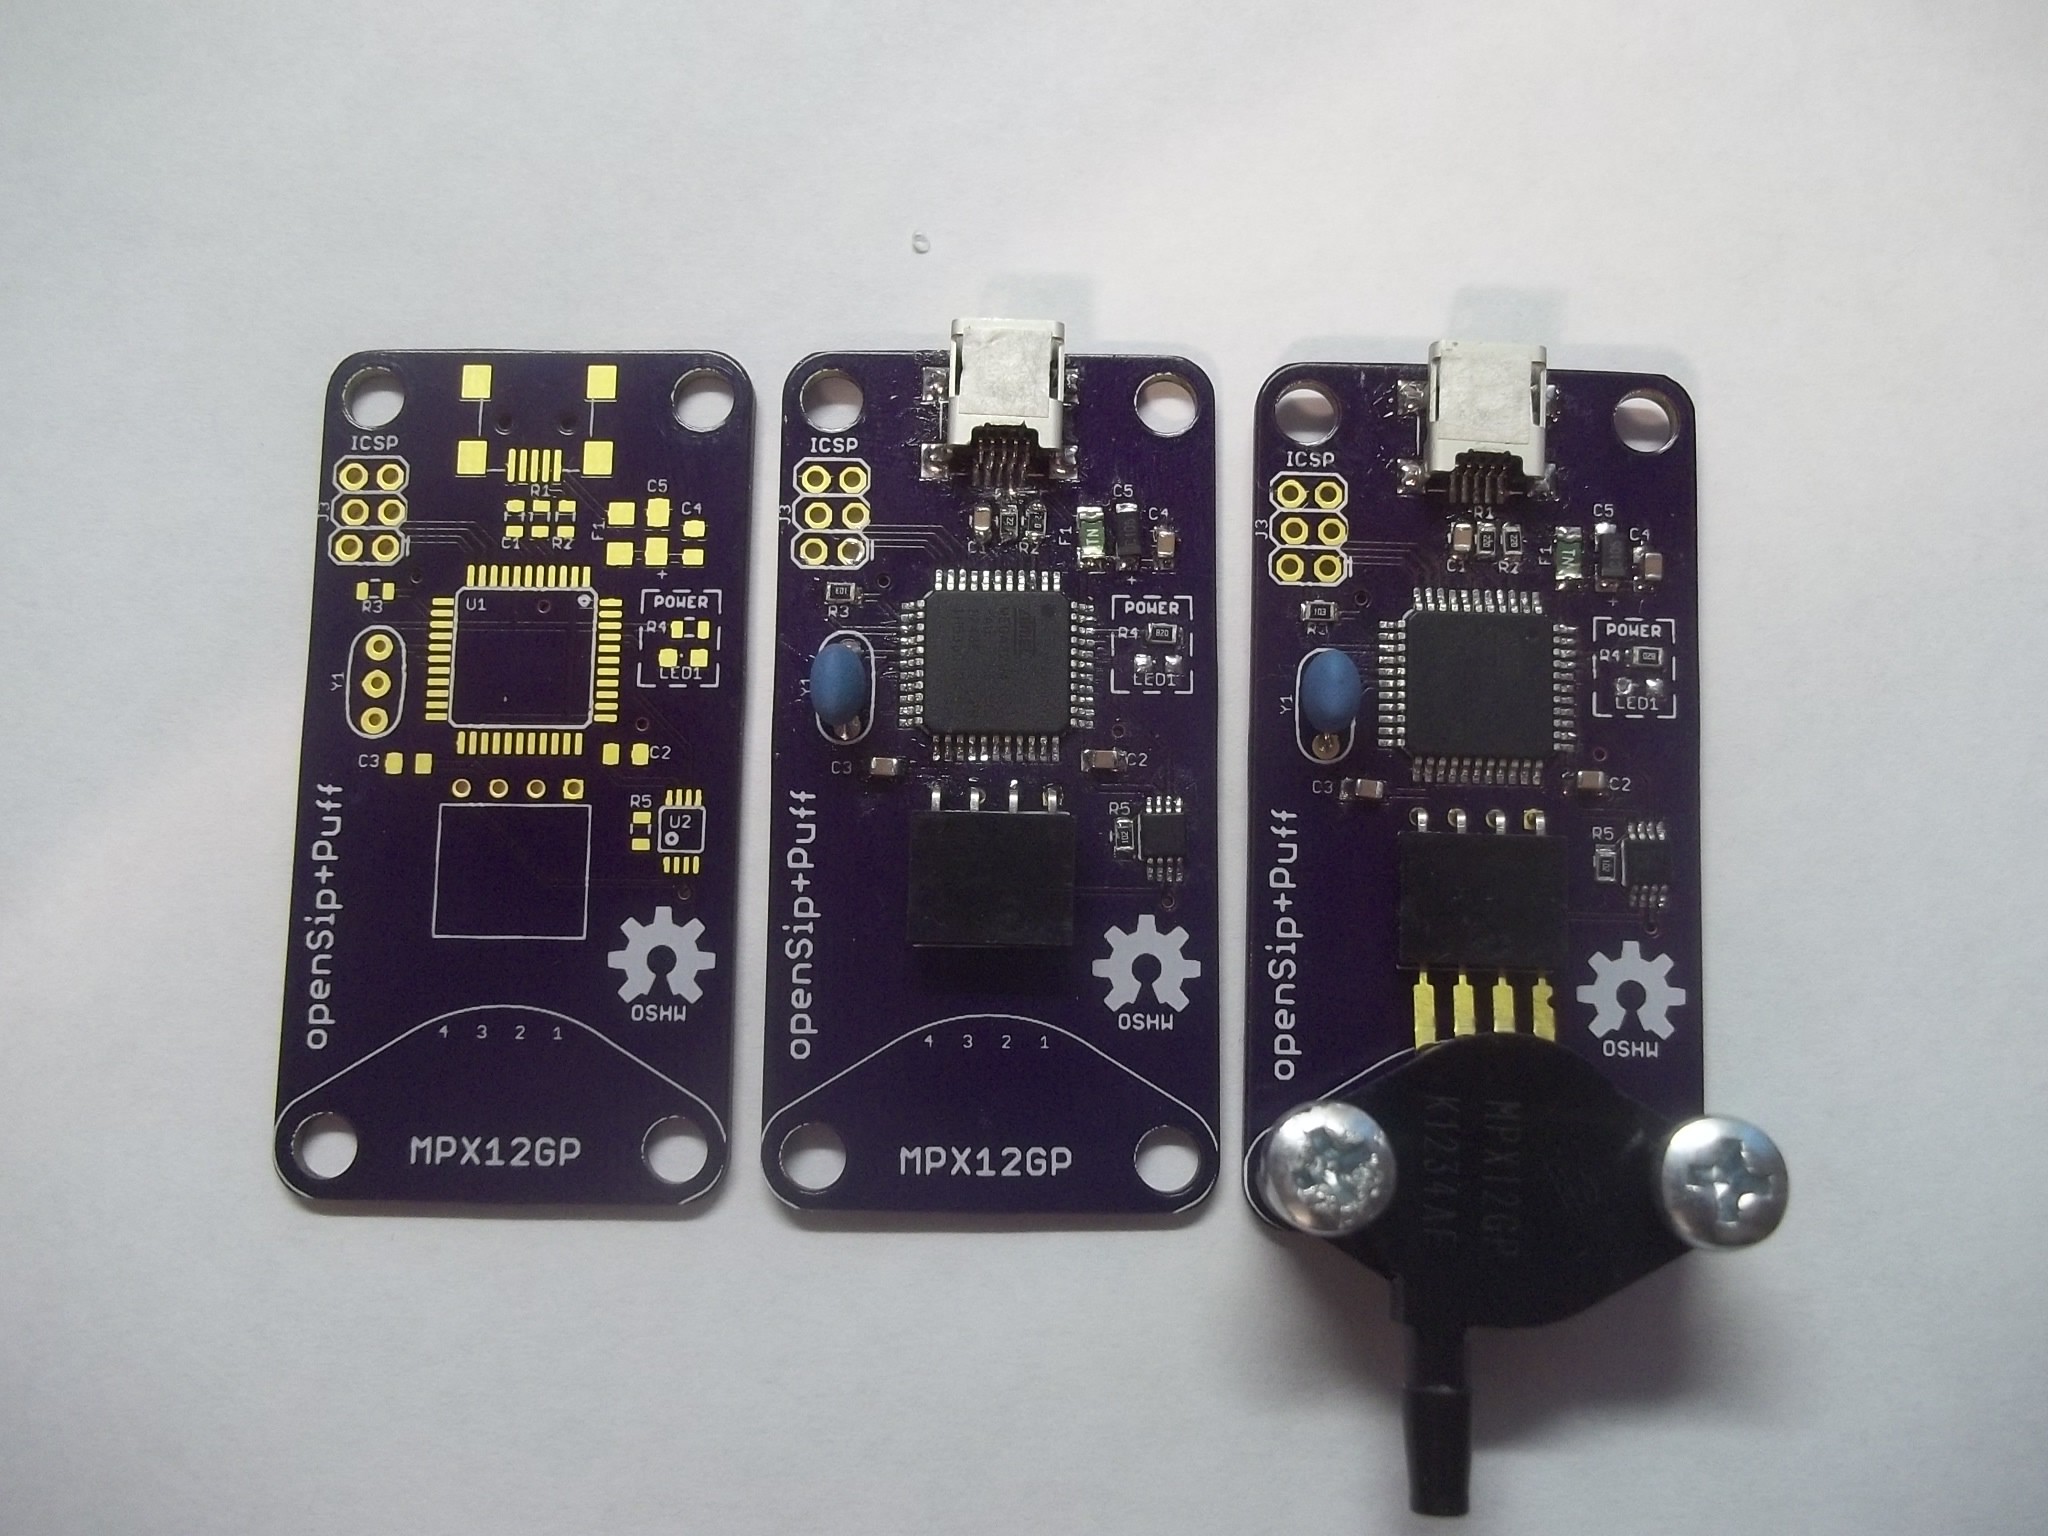
I sent my board design off to OSHPark and ordered my parts from Digikey so that when the boards arrived I could get them assembled right away. Just a couple weeks later I received this package of 3 boards, all for a very reasonable $13.71!
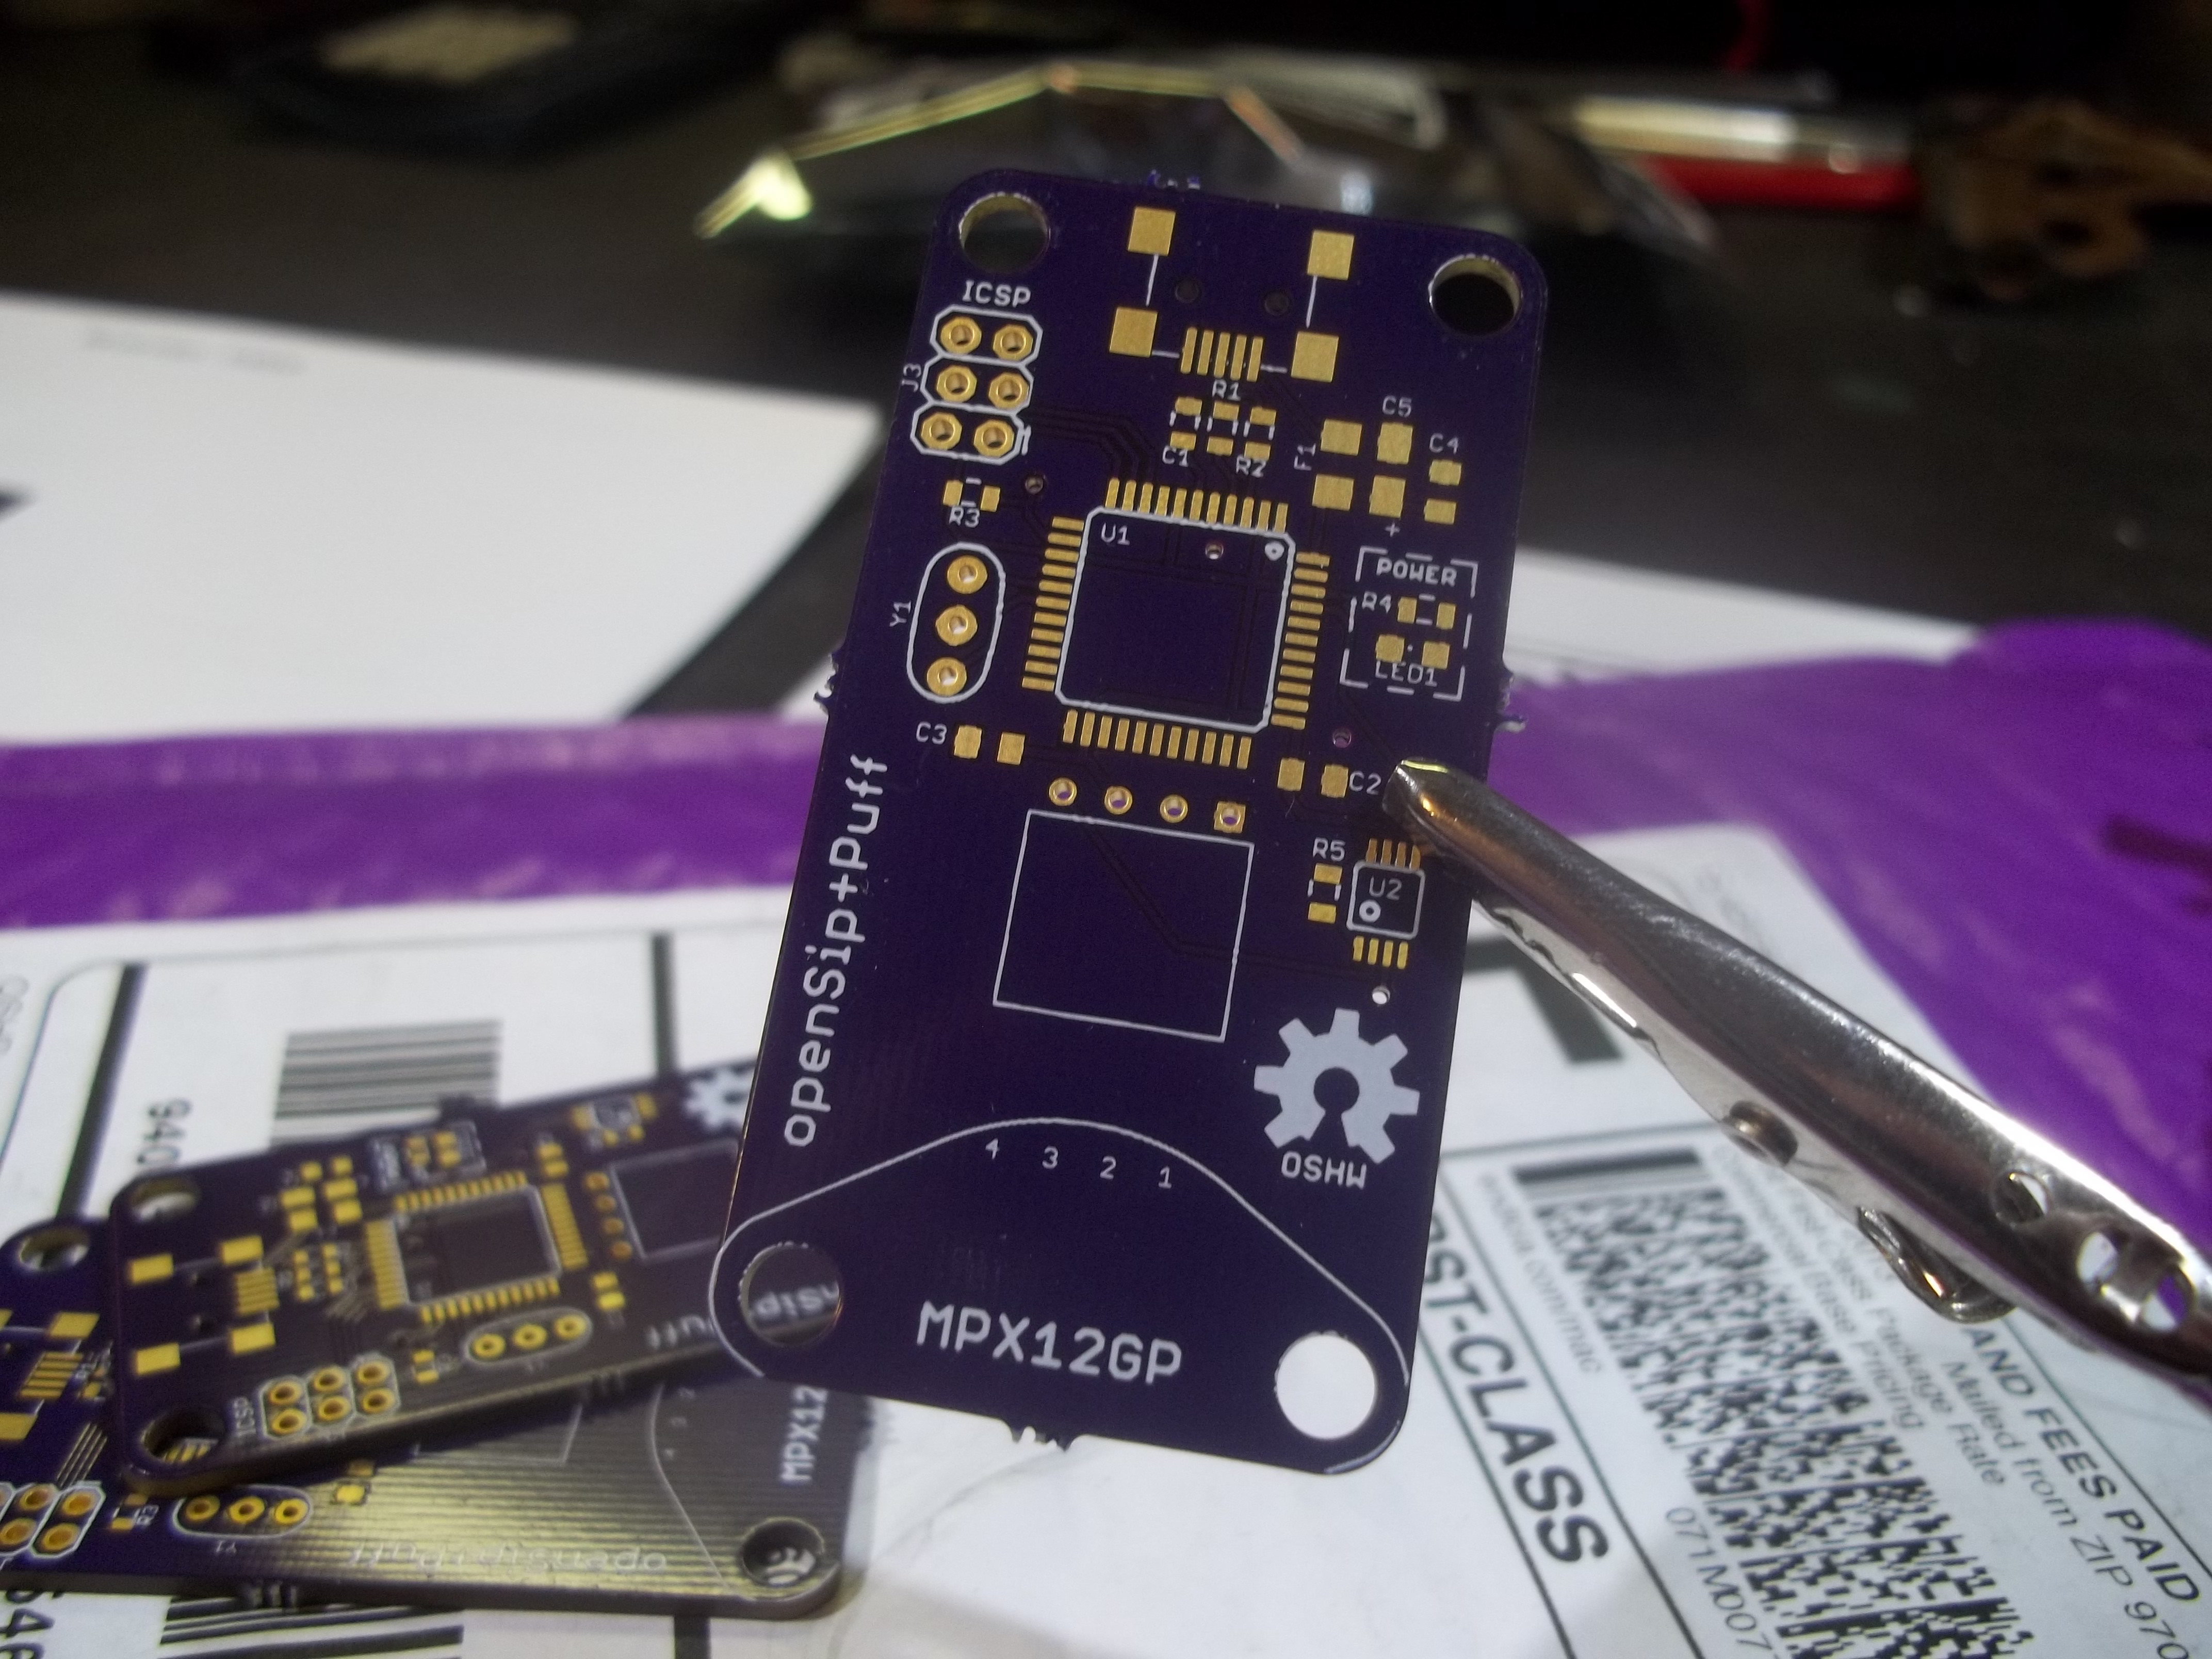
I went ahead and soldered all the parts to the board and ended up with a pretty sweet looking prototype!
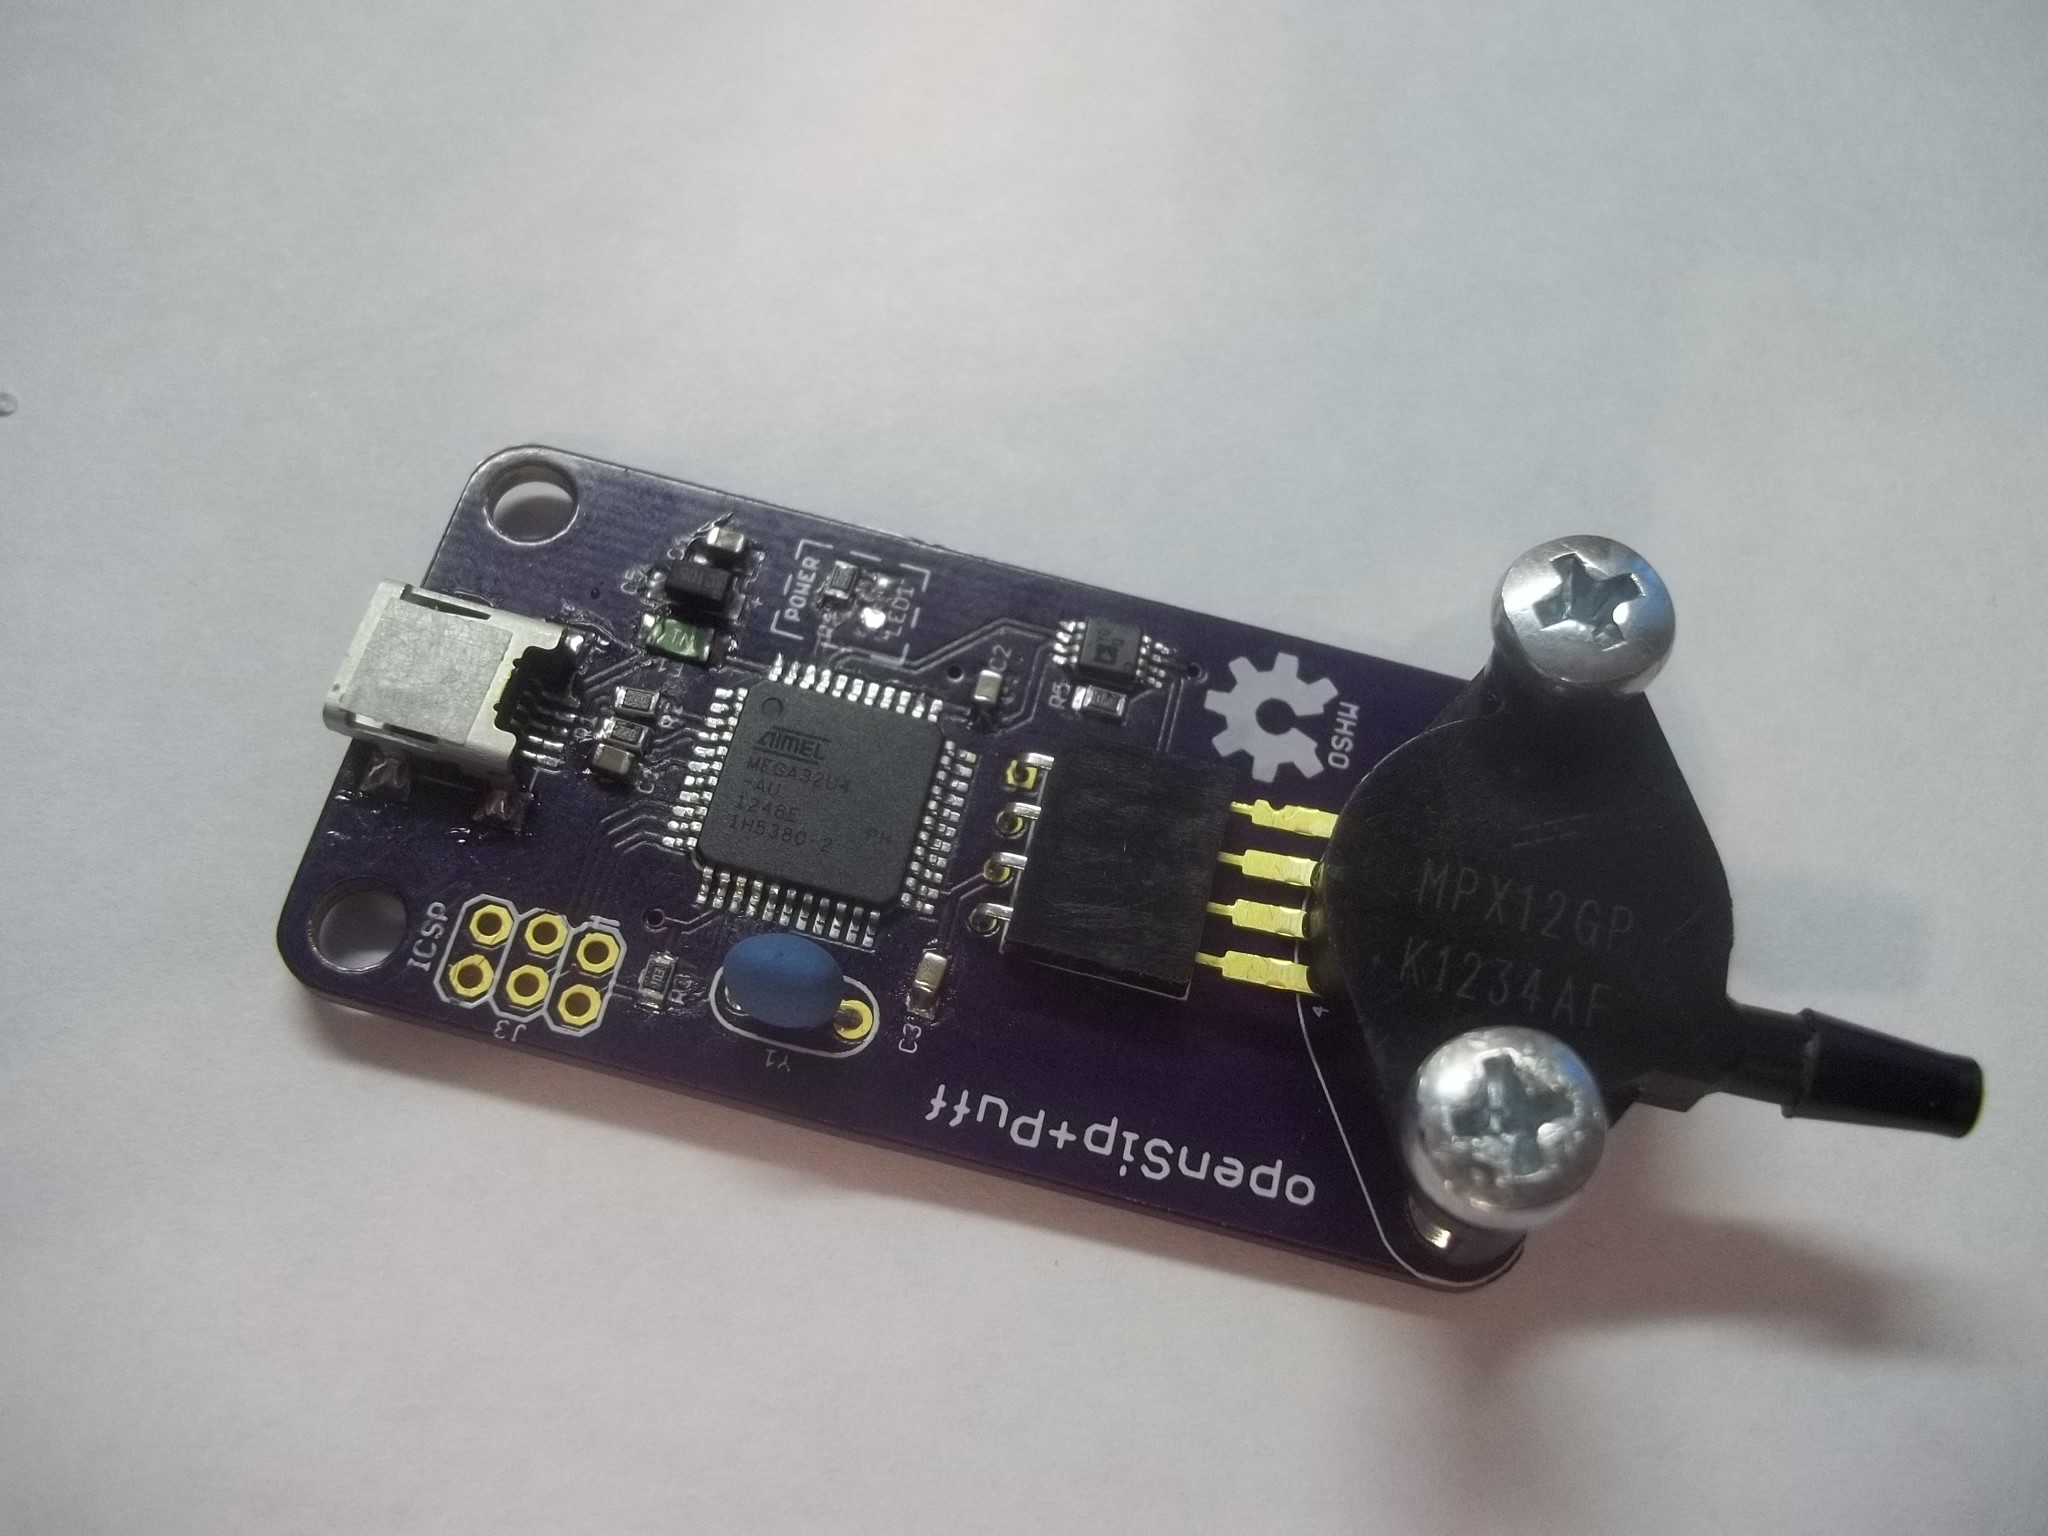
With the hardware assembled the next thing to do is to burn the Arduino Leonardo bootloader onto the ATmega32U4 and start experimenting with firmware sketches.
Discussions
Become a Hackaday.io Member
Create an account to leave a comment. Already have an account? Log In.