 shlonkin
The basic idea of this art is that thread is run in straight lines across an area, anchored by a set of pins around the perimeter. I'll call this structure with pins a loom for lack of a better word. The easiest shape to make would be a square, but a circle has a lot of nice properties that make it ideal for this project.
Rim -
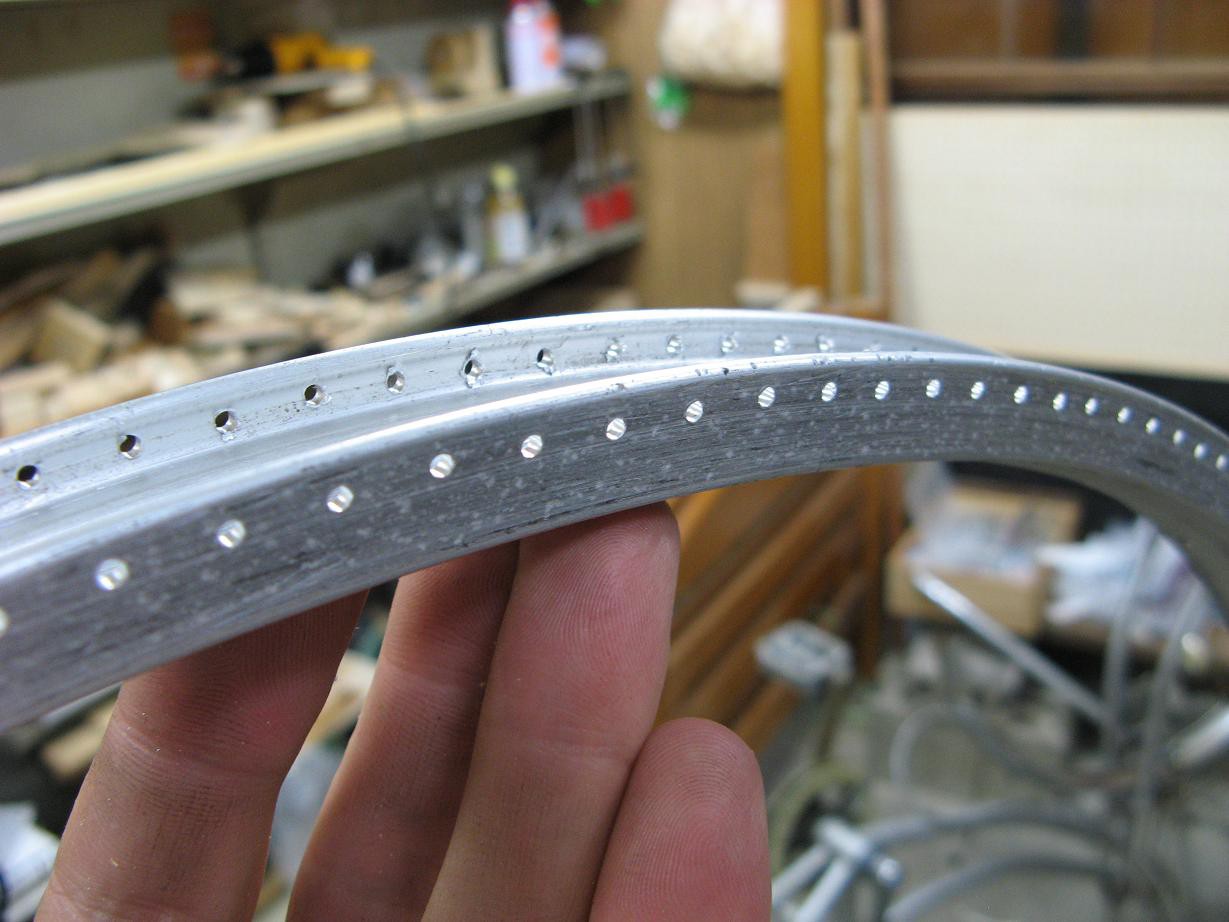
A 26 inch(or any other size) aluminum bicycle wheel provides a very accurate, rigid structure. They are plentiful and free when found in garbage piles. I grabbed a whole bike for use in this project. Just remove the tire and all the spokes then clean it up and it's ready.
The next step, making the holes, requires a bit more work. Here is one key point that will make it so much easier for you: The number of holes is not important. Consistent spacing is. I set out with the goal of 200 holes, which required about a 9.36mm spacing. I took a piece of cardboard from a tissue box and cut a strip just slightly thinner than that to account for marker width. Then I took the finest point marker I had and began at an arbitrary point.
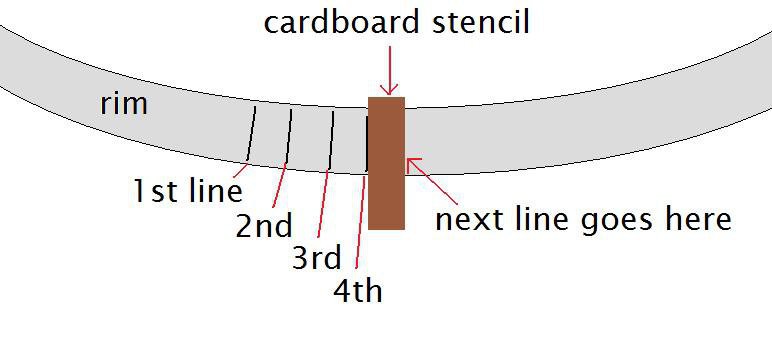
In case your last mark does not land in just the right place, do the last 10 or so lines in pencil. Then if you are off by 3mm in the last interval, adjust those 10 intervals slightly to spread out the error. It will result in about 0.3mm difference per hole which won't be visible in the final product.
Finally, drill the holes on a drill press with something to hold the rim flat because you want everything straight. I used a 2mm bit to work with my pins.
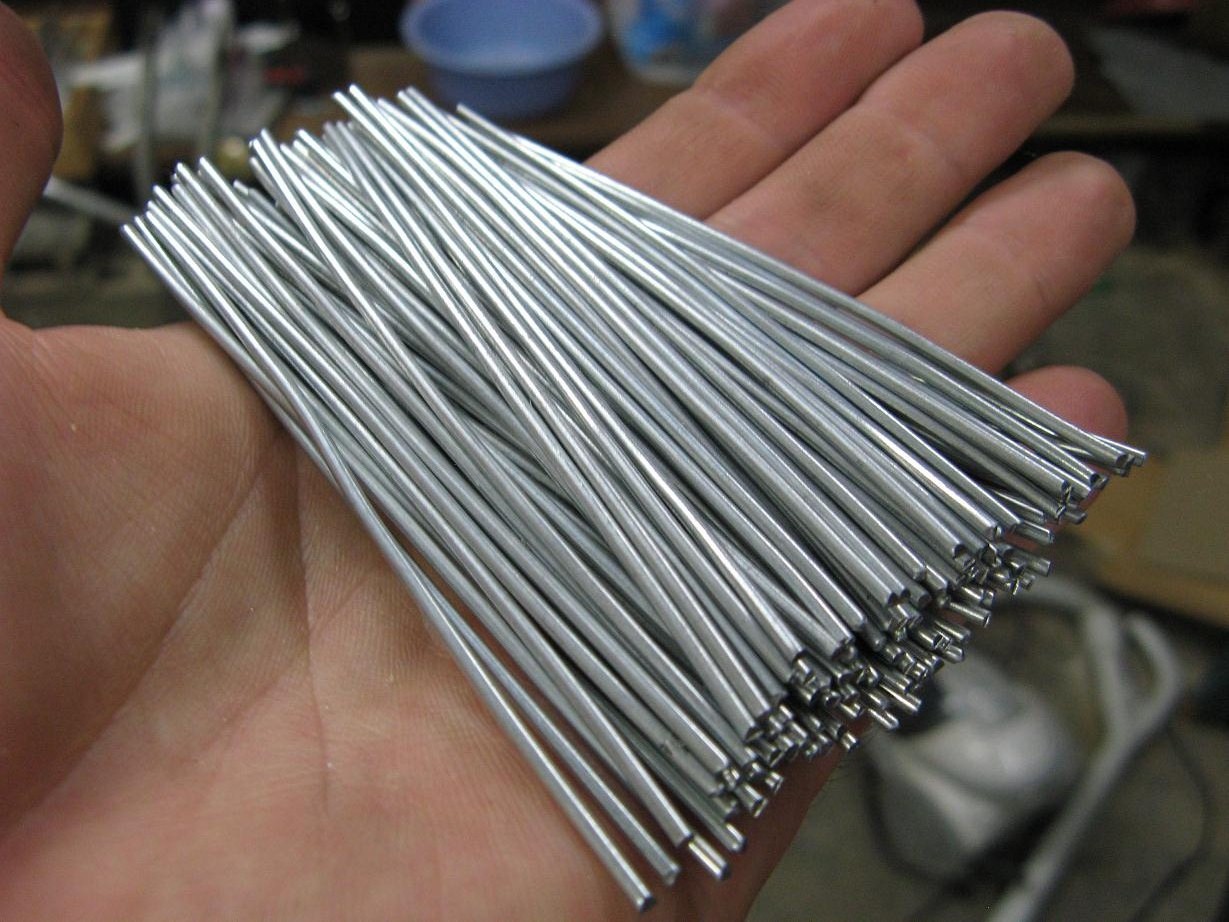
Pins -
There are many ways to do this. You might find one that works better for you. I decided to use 1.6mm steel wire bent like... well, just look at the picture. This setup gives me nice, rigid pins that I can adjust with pliers.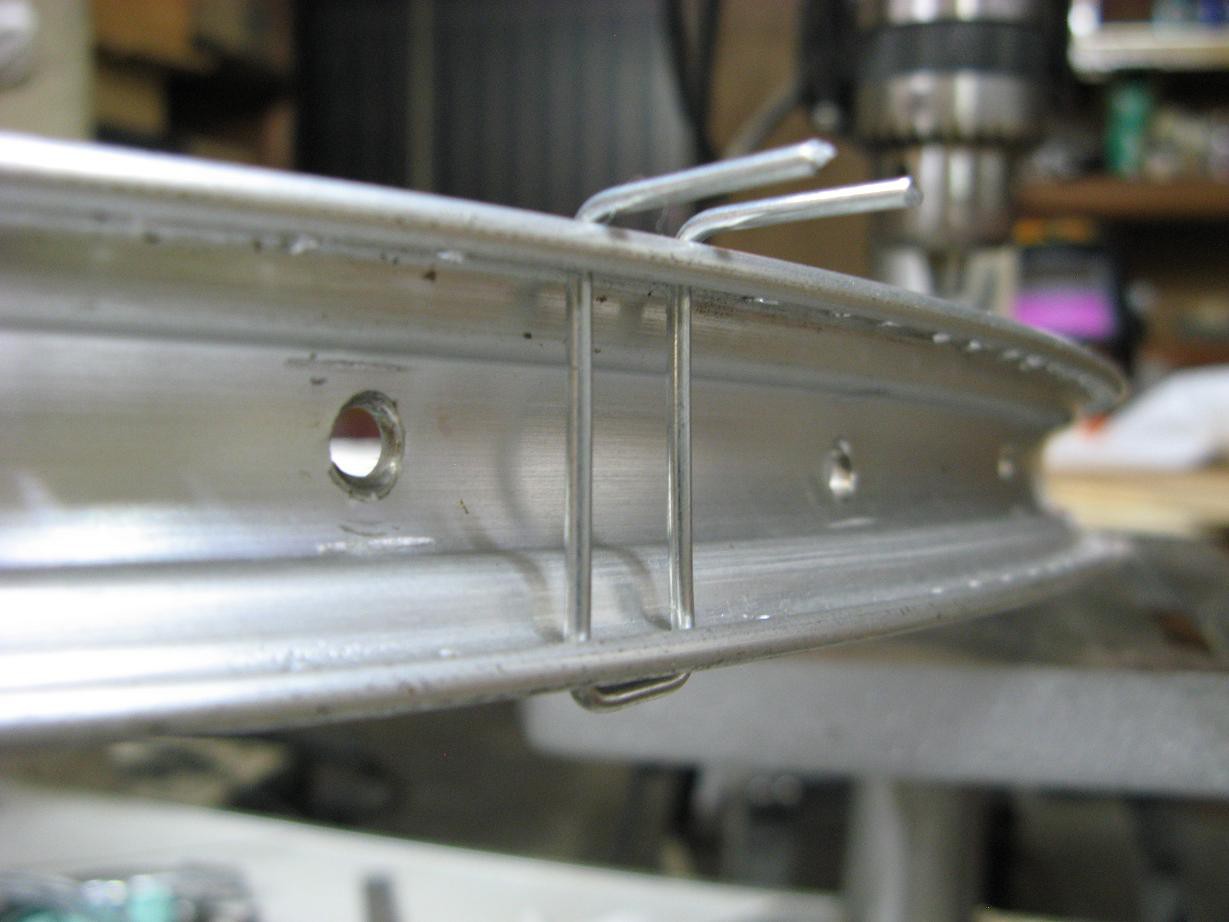 There are going to be a lot of these, so prepare your mind for a little
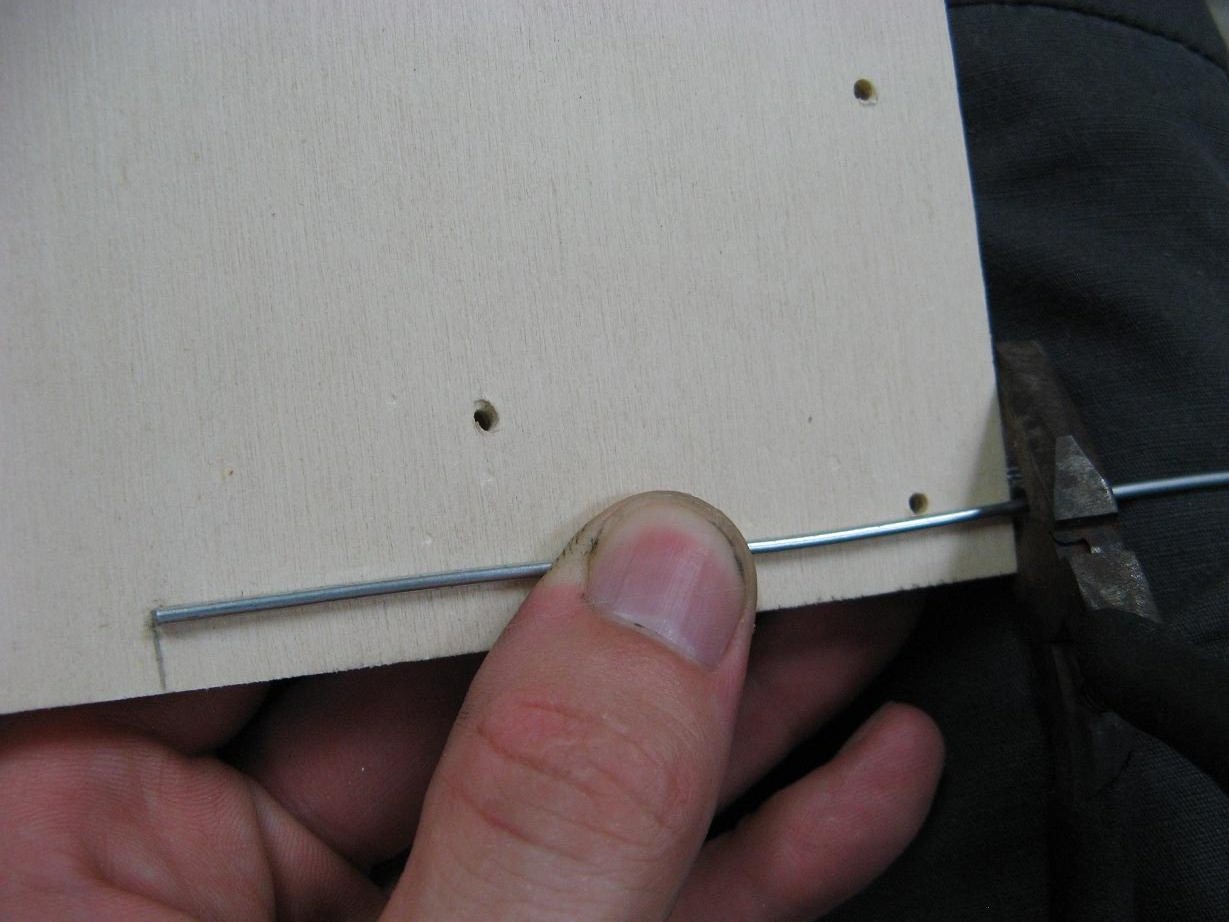
tedious work. Here's the jig to make them the same length. Yes, it's
just a pencil line on a piece of wood.
There are going to be a lot of these, so prepare your mind for a little
tedious work. Here's the jig to make them the same length. Yes, it's
just a pencil line on a piece of wood.
I used a similar jig to bend them right in the middle like this.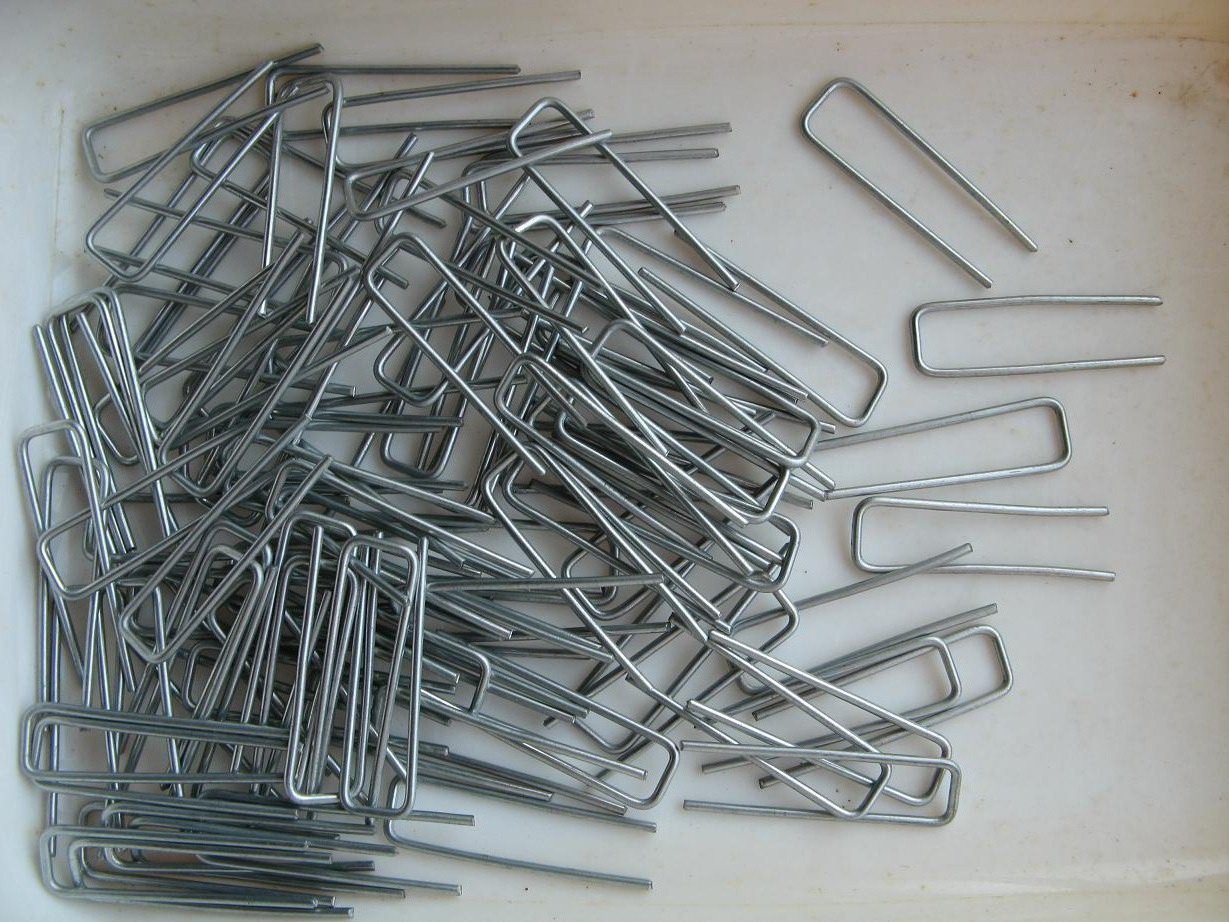 Wait a minute, didn't I say 207? What about the last odd pin? I made a dummy hole for it and cut the wire short on one side.
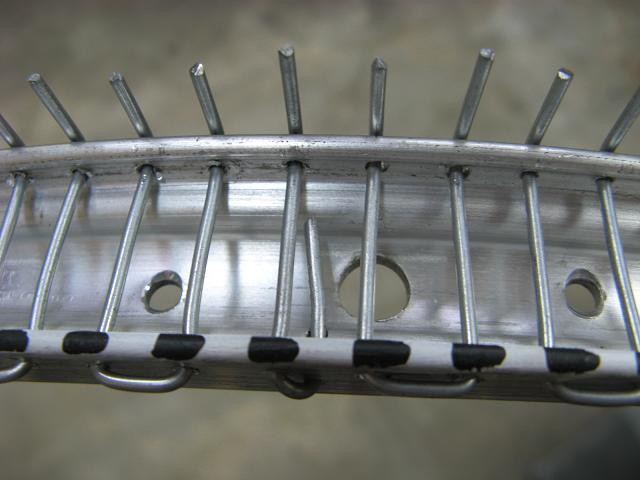 Finally, the loom is complete. I'll tell you about those black spots and bits of wood next time.
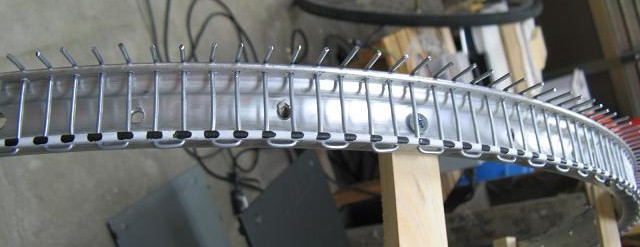
Discussions
Become a Hackaday.io Member
Create an account to leave a comment. Already have an account? Log In.