 Pamungkas Sumasta
As I probably have said on earlier log, I started this project 3-Weeks ago with no intention in mind at all to post the documentation online and let alone submitting to Hackaday Prize contest. I started posting this project from nothing just two days before the due dates of the Automation contest. 4-build logs in less than 24 hours ;) I consider myself to be a pretty good last-minuter.
Having said that, during the build time, I was just too excited in getting it done instead of taking pictures in every single build step. Well, I kinda regret it now. Even then, luckily there were still some pictures I made along the way.
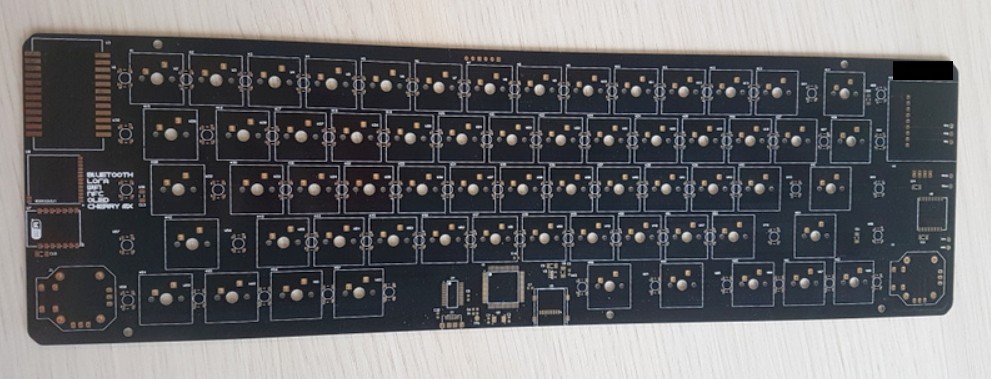
Check the incoming PCB
First thing as always, start with the bare PCB. Not all the PCB you receive have the same production quality. Check things like Sharpness of the silkscreen, scratch, the bending ratio etc. If you order 10-pcs, typically you'll notice that one or two boards just slightly better than the other.
Start with a 'remote' components
Assembling manually something like this need quite a bit of attention, even before grabbing your soldering iron. You have to understand whether in the finished board, this & that particular components are reachable and fixable. If you're onlu dealing with SMT part, normally that's not a big deal, but if you start using Though hole components like the one I use here (Cherry MX), you might need to step back a little bit and decide which one to go first.
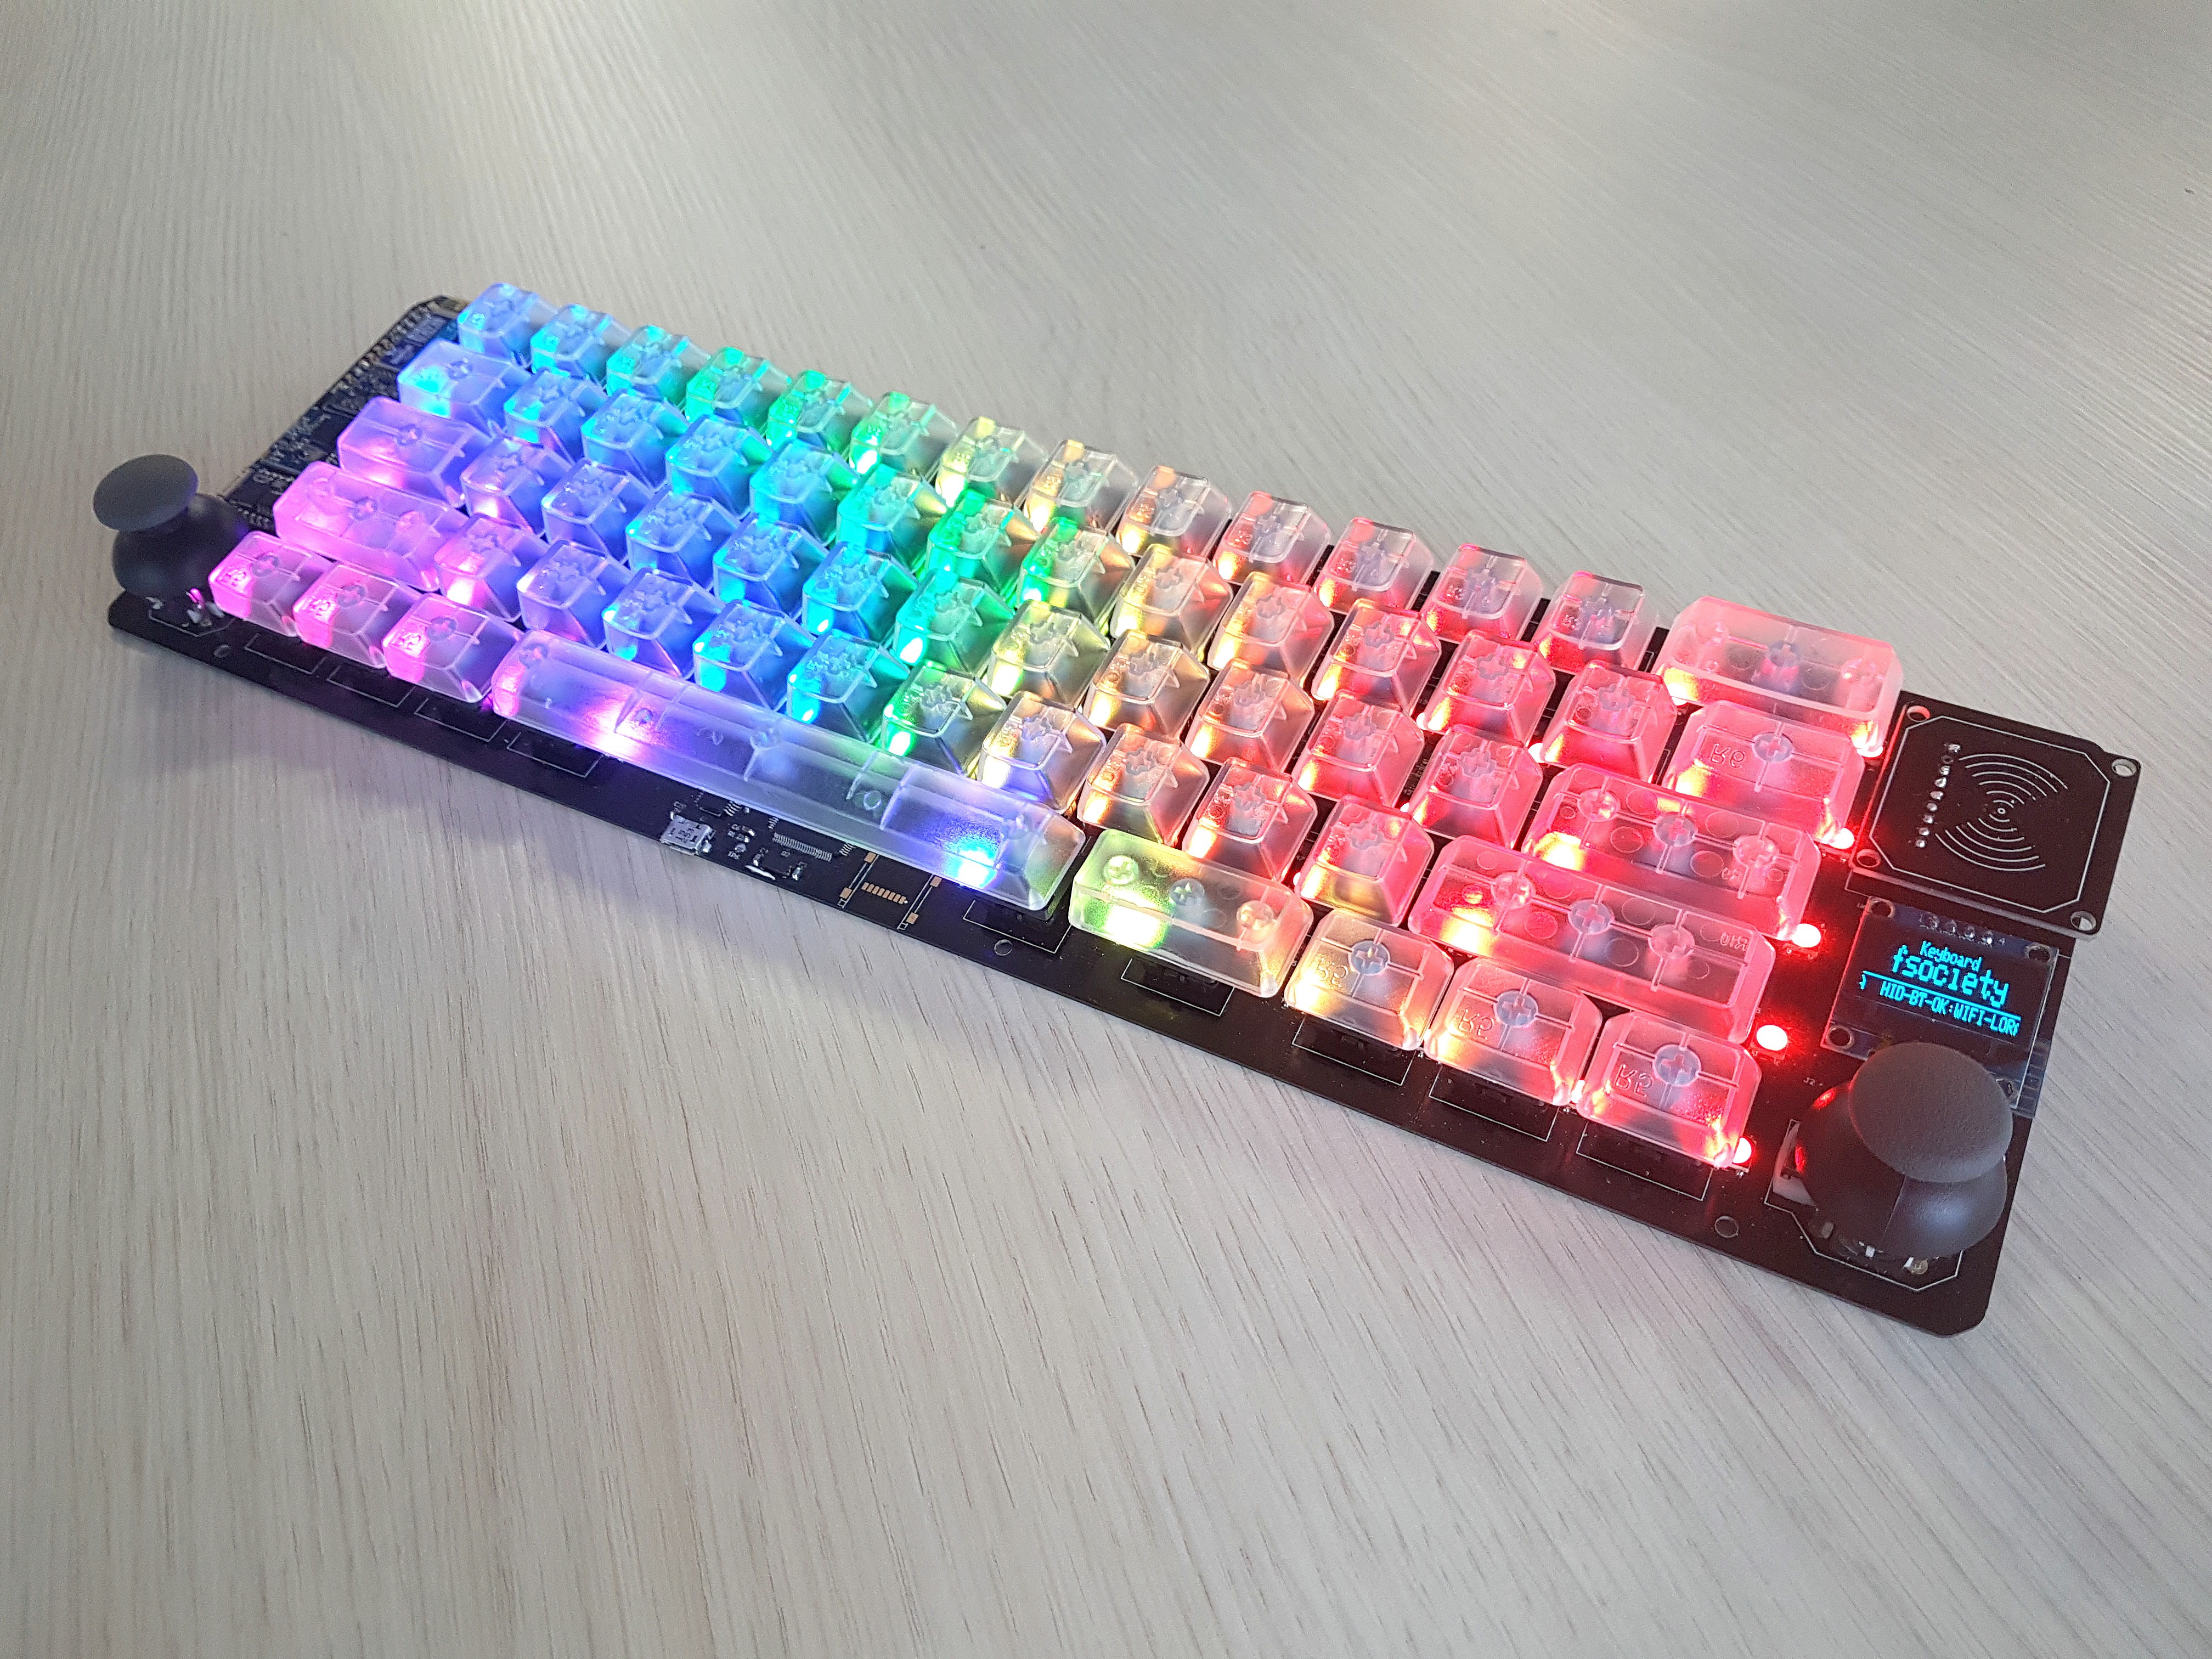
And In this case, it is pretty obvious that you need to solder the WS2812b RGB Leds first. Because once you soldered all the Cherry mx switches, it is simply impossible to solder the LED. Even repairing it is already hard enough without de-soldering the neighboring switches. Well, but wait, while you solder, you can simply just power it up to check if the Cherry mx is working. It needs uC to light up the LED. And as I mentioned on other log, there is a dedicated uC that handles the LED and it located on the bottom side of the PCB.
So the plan was simply to solder the circuitry for the uC, test and flash it with WS2812B demo software, then you can just begin to solder the LED Array.


Make sure you are gaining some 'blessing' from the colorful LED before proceeding. But before proceeding, some more stress or bend test might need to be done. Because well, if you happen to solder the WS2812b not well enough, there is a chance that it stops working after you use and type with the keyboard many times. And remember, because of the placement, it is going to be a hard job to fix.
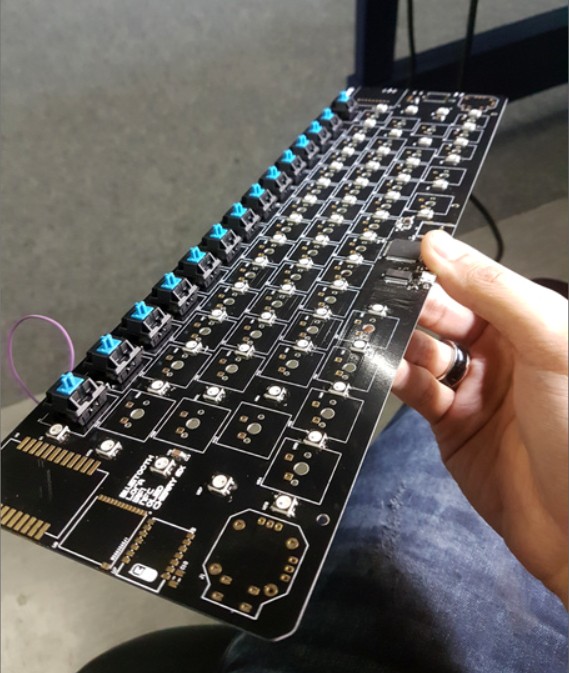
Moving on from the LED, it is time to proceed to more challenging stuff. Yes, soldering the fine pitch components. Primarily in the beginning you only need to solder the ATMEGA2560, the crystal + caps, micro usb for power and wire for programming, that's it. Once you manage to program it through SPI and put bootloader in it, you can then proceed to solder the FTDI FT232RL for programming it through serial.
Once that's done, it is then the time to handle the most exciting part. well yes, the soldering of the Cherry MX. Technically speaking, this is the easier part of all. Cherry MX is a through hole components and I happen to make well enough footprint library. Inserting and soldering the switches was very convenient. See photo below.
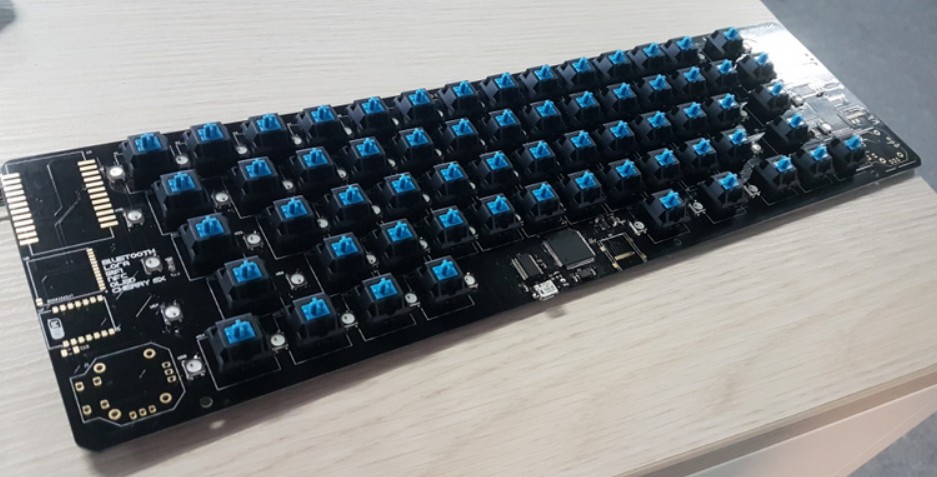
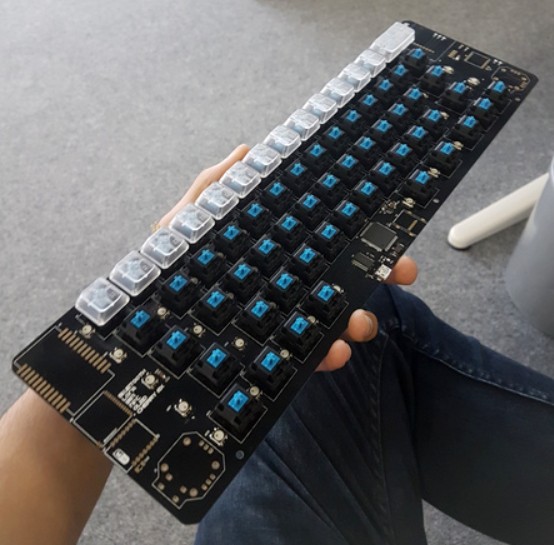
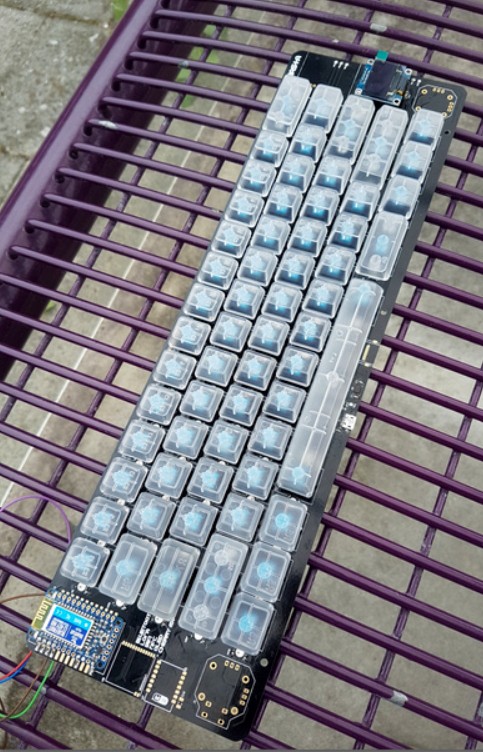
The rest of the module was soldered the following days and I didn't have enough motivation to take a picture of those. but well, in the end it should be something like you see below.
 Thanks for reading !
Discussions
Become a Hackaday.io Member
Create an account to leave a comment. Already have an account? Log In.