 charliex
This year we're switching to the STM32 CPU, we've used the PSOC4 for the last couple of years and it has been great, but the STM32 offers a few things Cypress doesn't yet and the most important one for LayerOne peeps is OSX/Linux support. PSOC and STM32 are my go to chips usually.
I'm using the nucleo F446RE as the dev board at the moment. F446RE with the mbed online compiler which is pretty good, it'll also export to IAR/Keil/STM32 tools and GCC via mbed-cli
The compiler is here developer.mbed.org create or use an existing account and add the F446RE to your profile.
FIrst things is setting up the tools, plug it in and grab the latest drivers.
At this time, board drivers are here stsw-link0009
Also grab stsw-link0004 st-link tool
Install everything, you can compile and upload via a a file system with the Nucleo board.
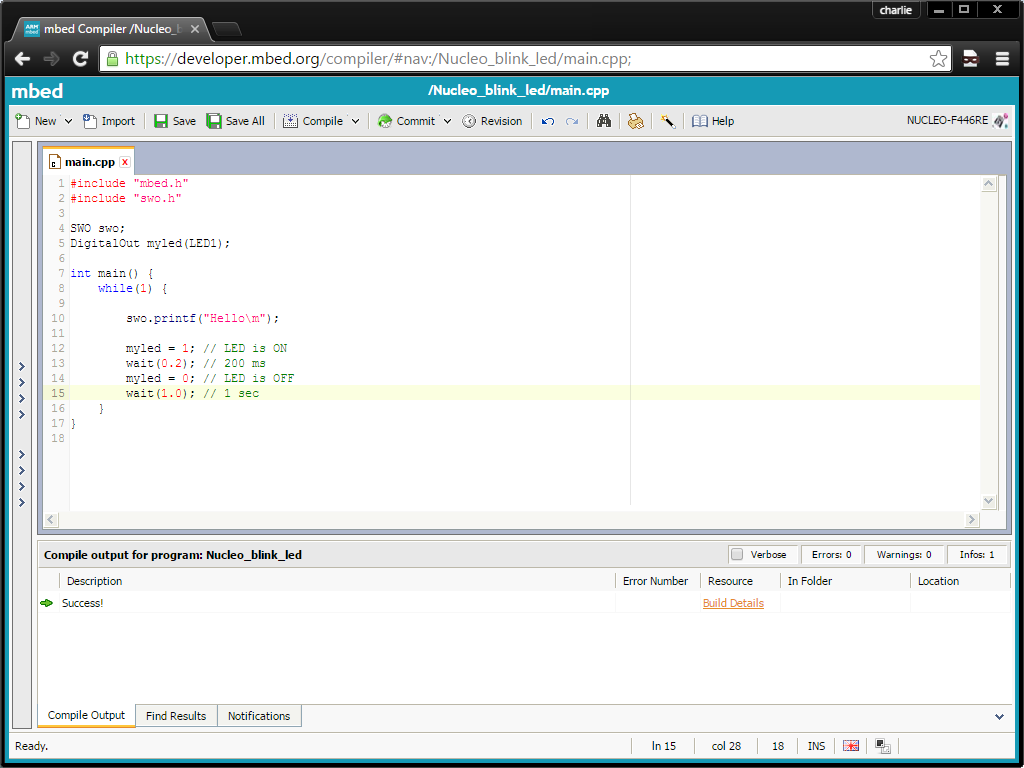
There is an STM32 Nucleo example to blink the led import that into the compiler ,compile it,and copy the .bin file to the Nucleo's mounted drive or via st-link.
#include "mbed.h"

DigitalOut myled(LED1);

int main() {
    while(1) {
        myled = 1; // LED is ON
        wait(0.2); // 200 ms
        myled = 0; // LED is OFF
        wait(1.0); // 1 sec
    }
}
I wasn't able to get uart/usb tx/rx serial working, but i'd rather use the SWO interface anyway. Import the SWO project into your project and add (you can either click on the SWO link and import it, or right click on your project and "Import Library" from "From Import Wizard ..." and type SWO in the search and double click on the SWO from Wim Huiskamp
#include "swo.h"


SWO swo;

....
{
           swo.printf("Hello World\n");
}
#include "mbed.h"
#include "swo.h"

SWO swo;
DigitalOut myled(LED1);

int main() {
    while(1) {

        swo.printf("Hello\n");

        myled = 1; // LED is ON
        wait(0.2); // 200 ms
        myled = 0; // LED is OFF
        wait(1.0); // 1 sec
    }
}
Load ST-link, under ST-LINK, select printf via SWO viewer, system clock as 180000000 (or whatever your clock is set too) and stimulus port 0
Hit "Start"
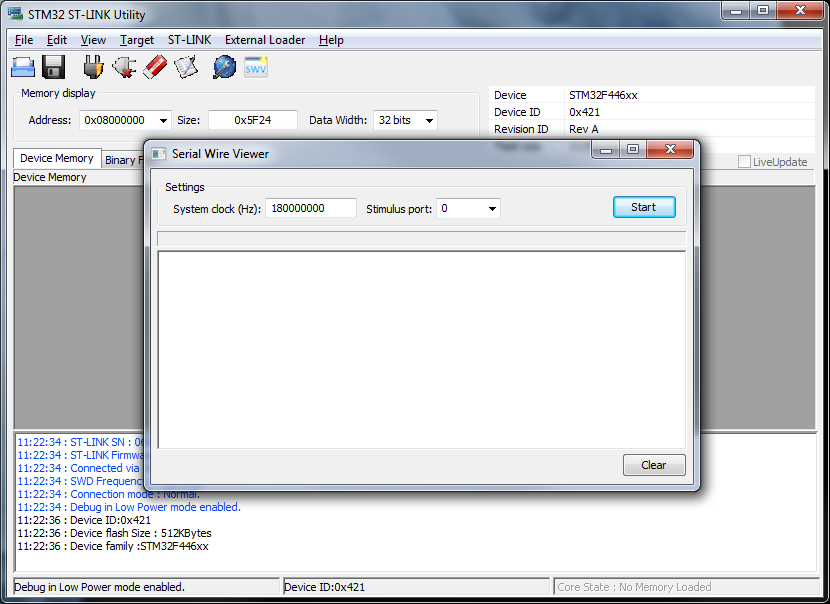 You should be able to see swo.printf's appear here now. Stop it before uploading new .bin's, it'll self cancel if you forget.
Test code for SWO is here SWO test
Now you've got a compiler, dev kit and a way to do printf debugging , the st-link v2 hardware built into the dev kit supports debugging via Keil and IAR as well.
At LayerOne we'll be supplying lots of ST-Link V2 USB programnmers as well for the badge, unless we decide to put one on the board itself. Probably a serial bootloader too. Adding the ST-Link to the board does mean another CPU and a bunch of jelly beans.
So we know the chip is very likely going to be the STM32F446RE , next options are Display, RAM, CAN, SDCARD and so on. For CAN transceivers we're using the MCP2551. Currently I'm using an ILI9341 display driver for testing, but nothing settled yet.
Discussions
Become a Hackaday.io Member
Create an account to leave a comment. Already have an account? Log In.