 charliex
THE DAY AFTER......
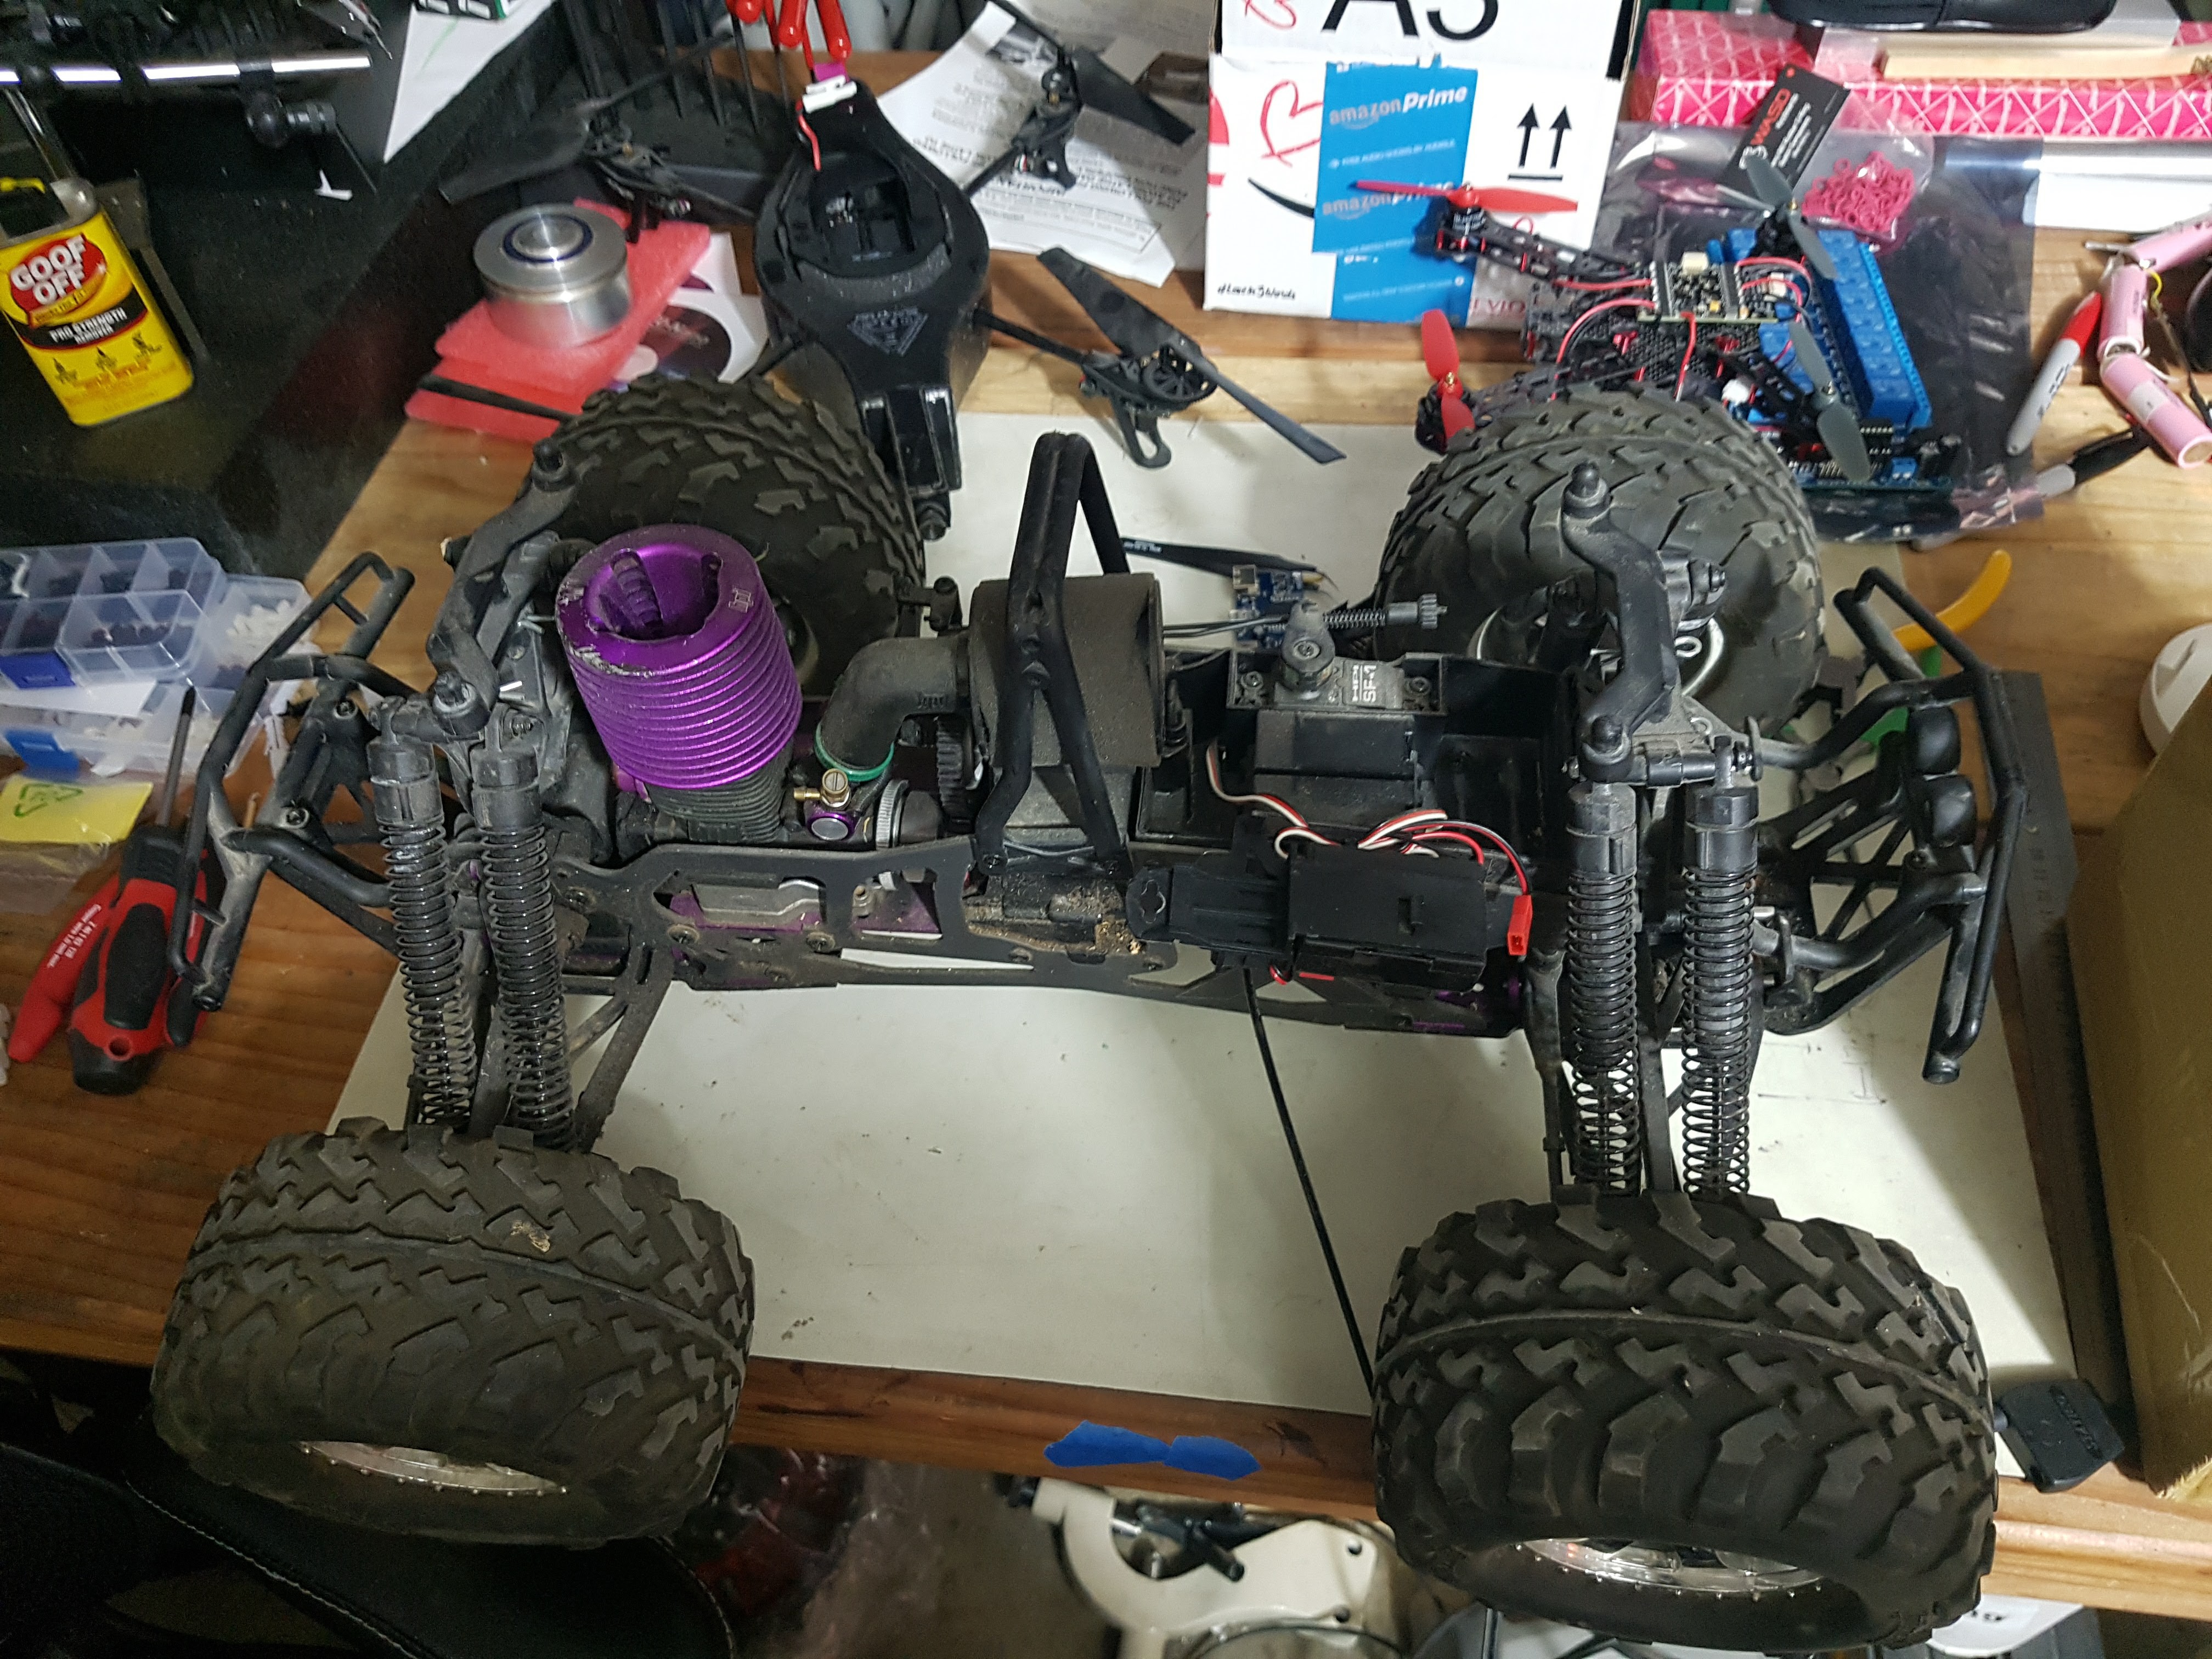
As we walk casually to the workshop, and discuss the various quad copter projects, and my old Traxxas RC truck which I have up the bench to repair it's glow engine and trying to find other radioactive sources to test geiger counters and build RNGs
Probably radioactive las vegas dust
Our attention turns to what we're going to do next with the board, we've been talking to the good folks at crowdsupply as well. So we talk about adding all the features you'd want to see in a board that isn't meant for a 3 day hacking conference.
Adding TMOVs, input protection,SWCAN, LIN, optical and galvanic isolation to USB, talking about USB 3.1, then we looked at a chip upgrade which for some reason i'd convinced myself STMicro had made a 2Ghz STM32, in my defence i'd been spending all week working on Snapdragons for Quads and stuff. We ended up deciding to move up to an even moar powerful chip for the after con board.
Then we played around a bit with a HIL Drone Project in VR with the Vive that i've been playing around with, fun stuff... So far pretty chilled and not too much worry about the board, we even took one of the fried boards from a few weeks ago and changed out the CPU, and removed the power section so even that was fixed up, so far so good.... We turned to sourcing parts and taking about the various battery tests and how one of the battery that claims to be 2x the mAh is half the weight of a decent 18650.
So we start fiddling around with the solution we though we had settled on, an external 18650 case that has USB in and and out, and boosts it to 5V and charges it, I bought a bunch of them from eBay etc to test with as usual.
So far so good.....dun dun duuuuuaaaa
Then I pull out the PCB's I'd ordered with the USB boost on them, and that is when it all goes the usual way, We test a lot, we test all sorts of batteries, charger circuits,. design and redesign but we had a hard time making a circuit that could charge an 18650 and supply 5V, which is why we'd decided to drop out nice TI boost, charger, fuel monitor, auto power switch version which had a large cost and component count, and just use these little self contained power cells, a USB cable to plug into the board and hang it off the badge,. cost is a big factor, and we always end up over budget.
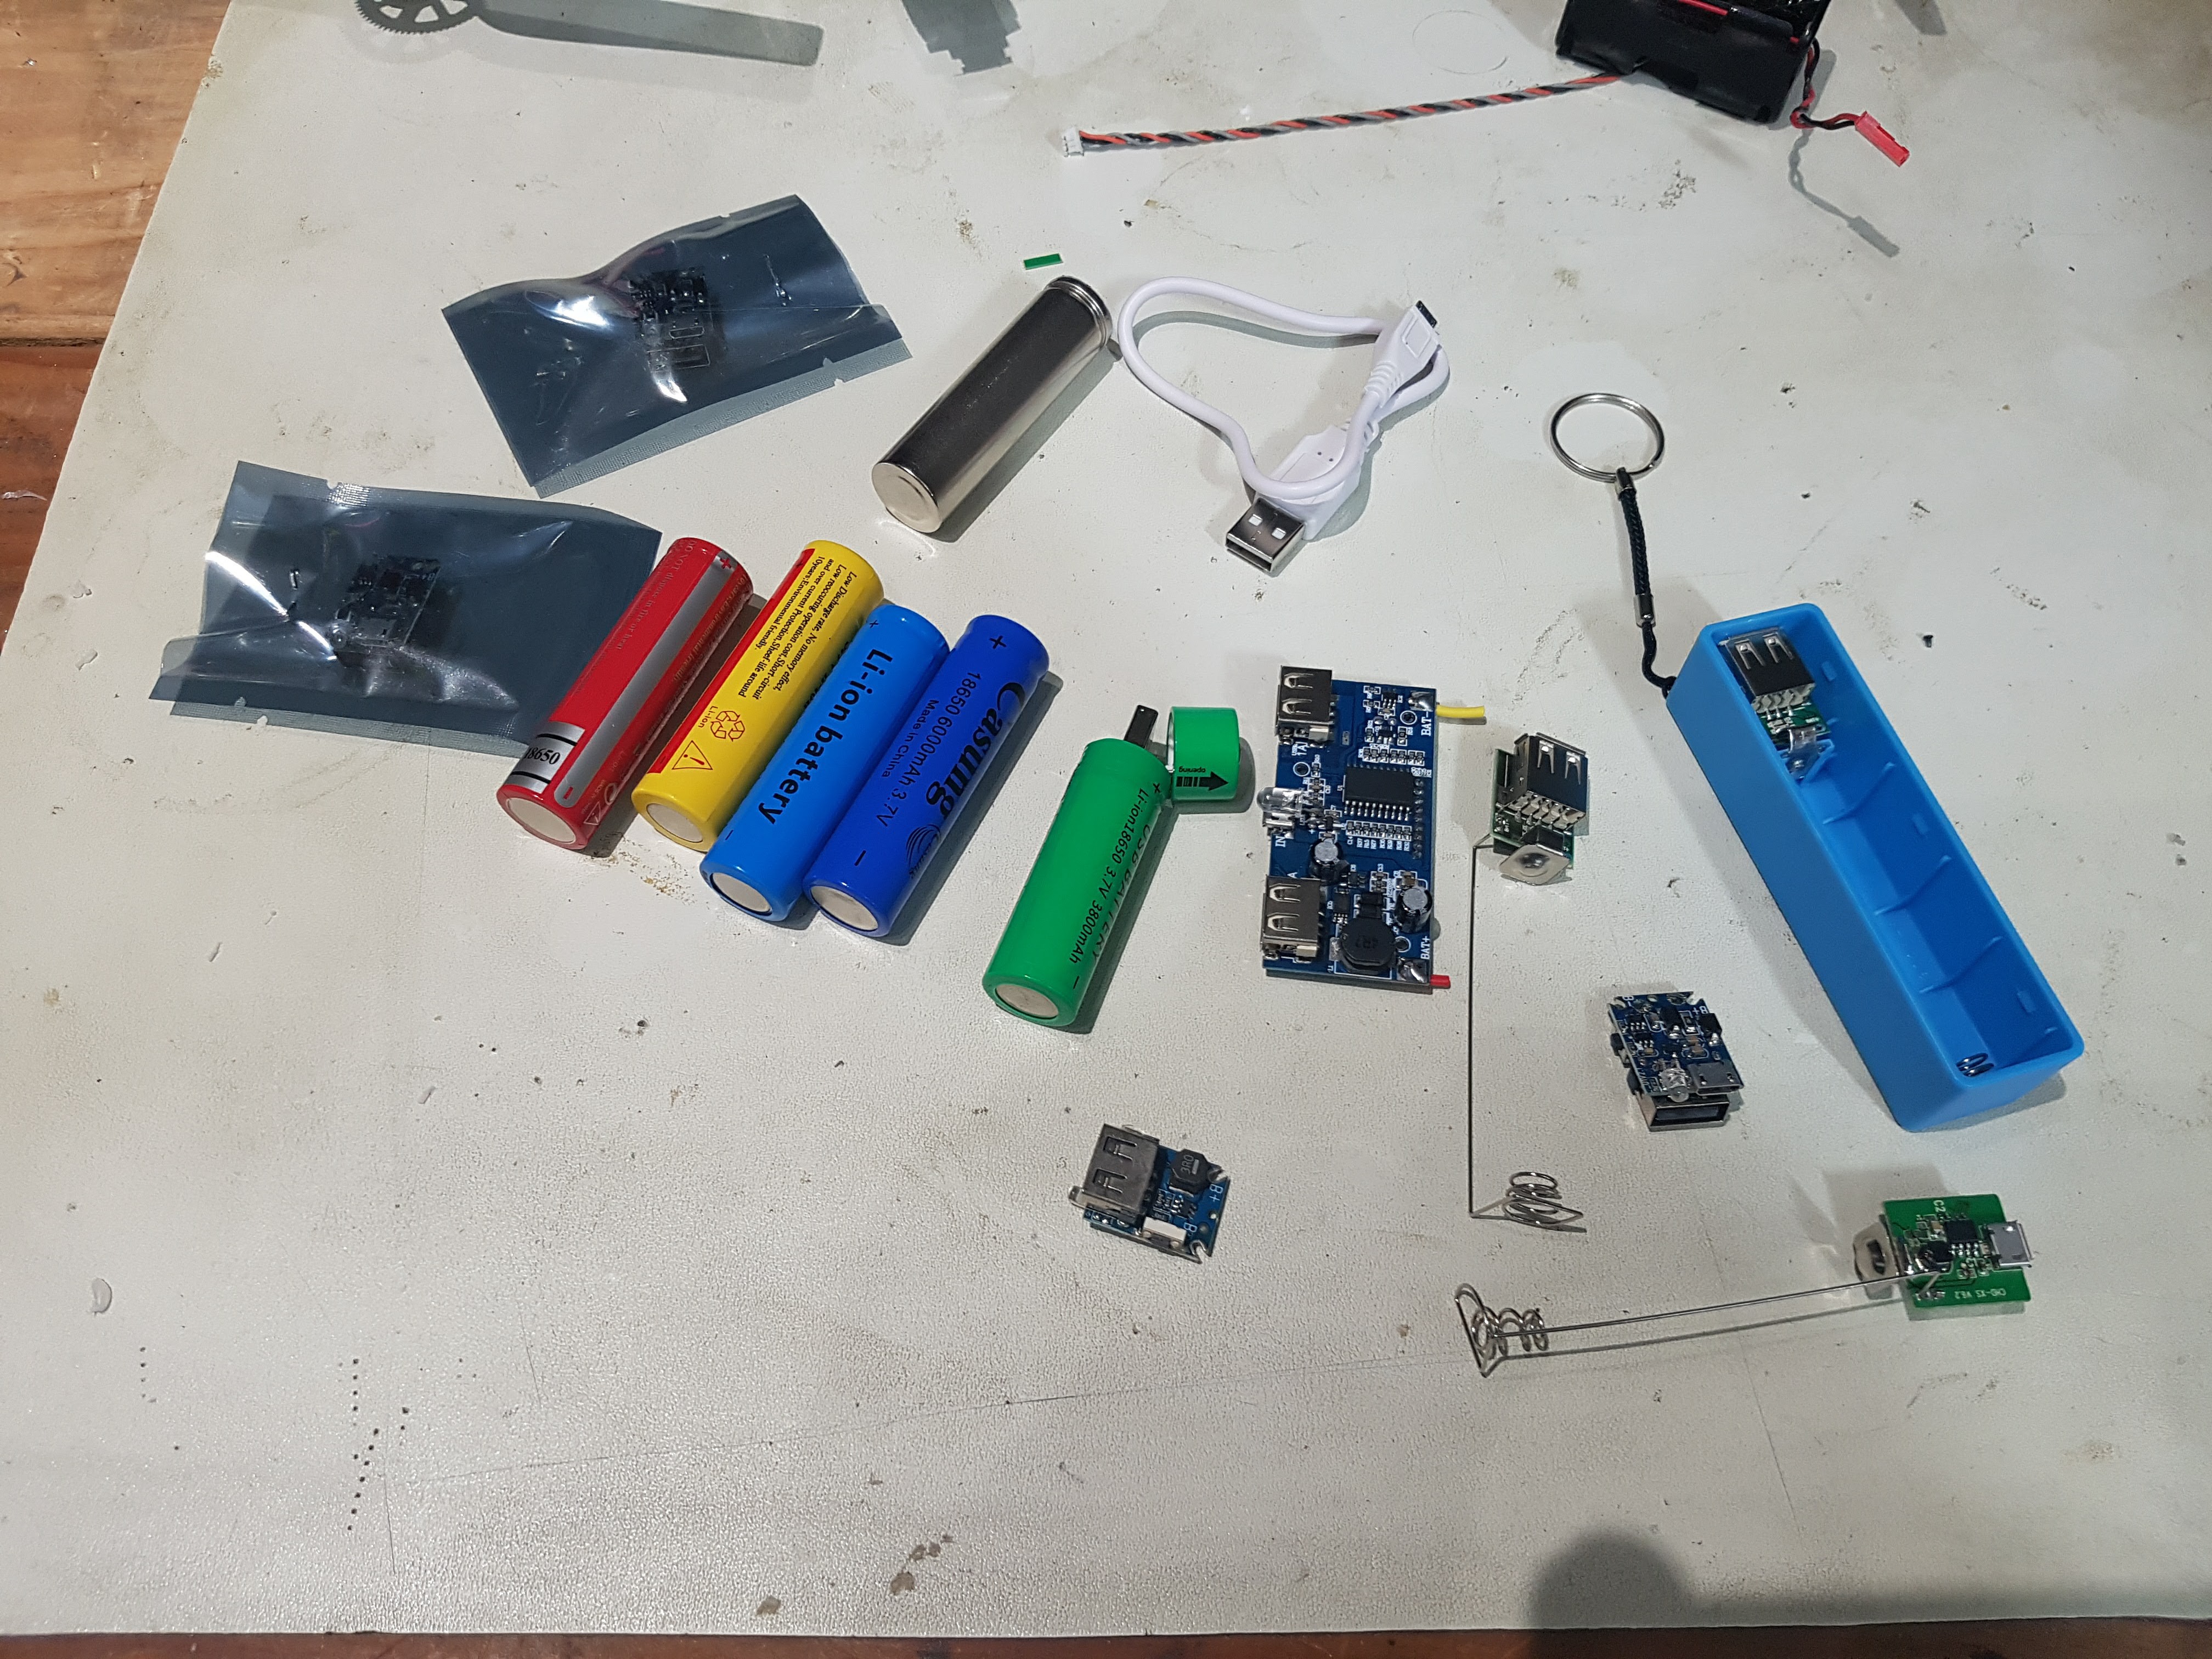
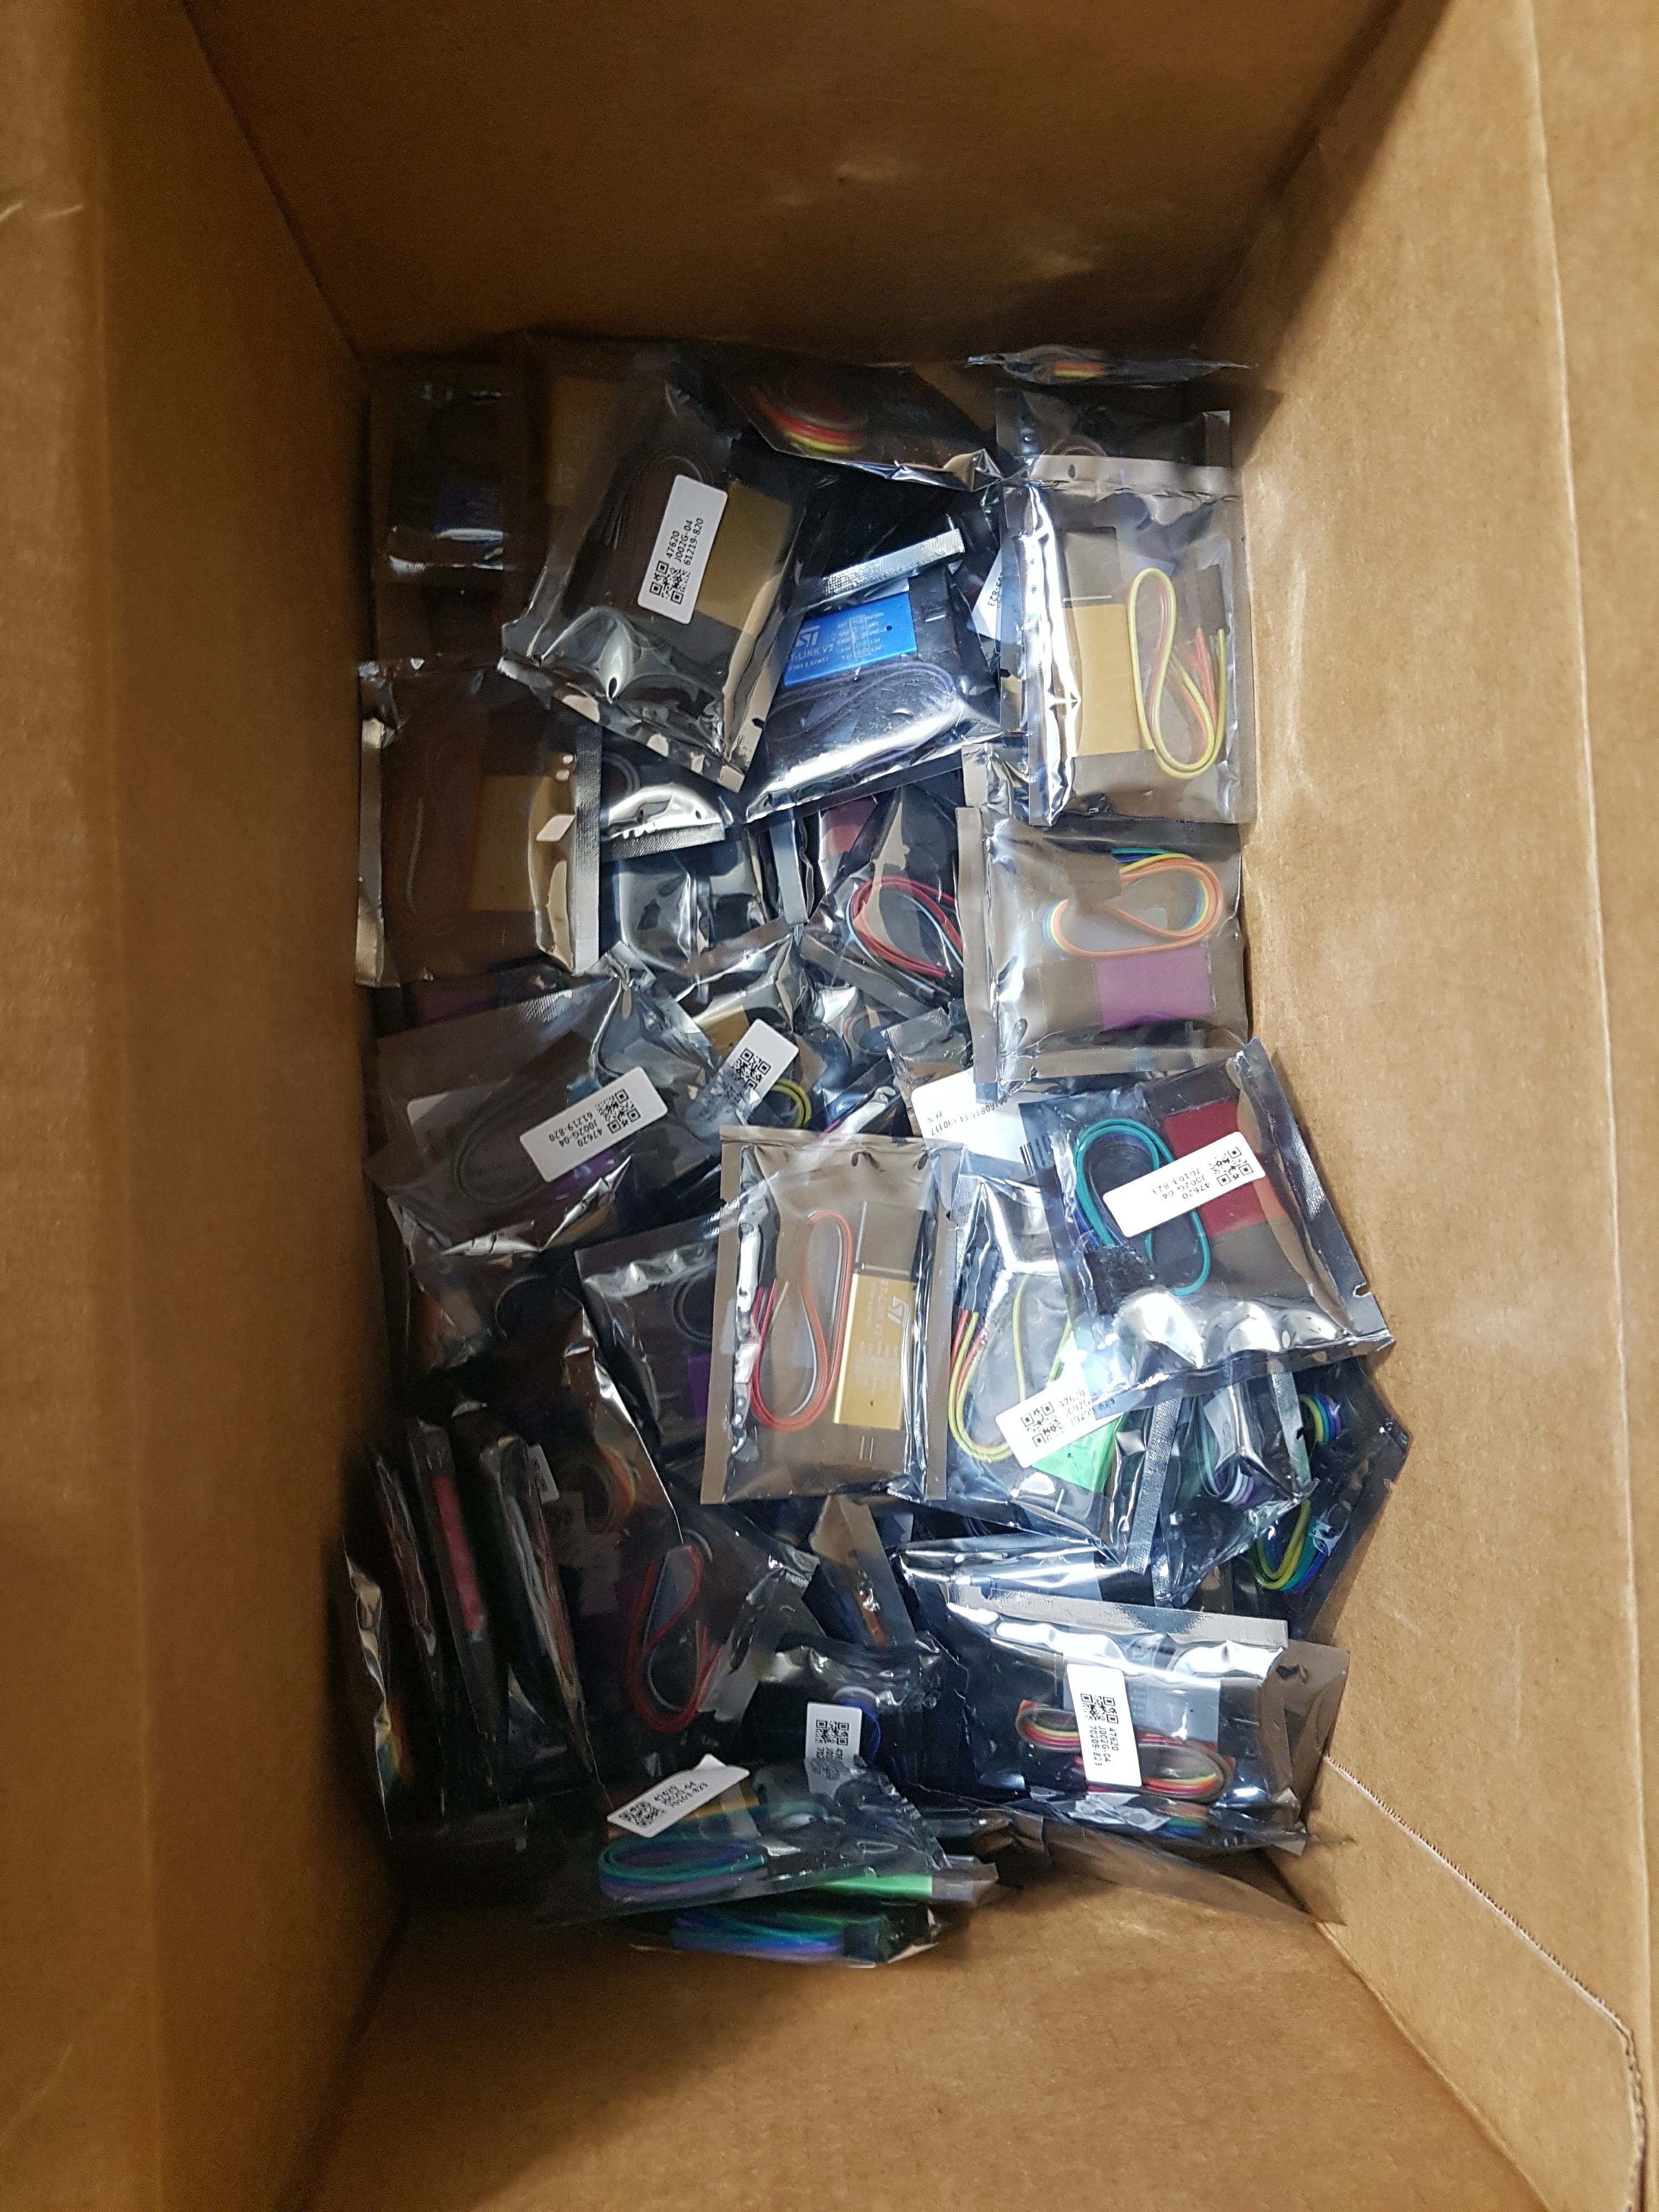
Pictured above are a range of 18650s , the rule is the higher the claimed mAh is , the lower mAh it actually is. the 6000mAh we reckon to be about 1800mAh give or take. We're pulling some of these in for sub $1 and with a draw of about 50mA for the badge.
The ones in the mylar bags are just an eBay lot of the power pack chargers, the one on the right in the blue box is what we were thinking...
Personally we hate it, its a terrible design choice, but it was a struggle to get it on board and be reasonable, and its hard to beat these boards for cost. I don't like using modules to build badges, I get why, it makes sense but I don't have to like it.
So then we start to poke around the boards a bit and see what they're upto, the first one has a bunch of stuff, charger/boost chip, battery monitor, FETs and a lot of components, one has three chips and 6 jellybeans, then we get to one that has about 5 components, a quick RE of the board and its feeding the VUSB via a resistor, a diode to drop the voltage 0.7V into the battery, then a booster and out to the USB with a couple of LEDs, it is an unmarked IC but some searching around we find it.
So far these are the chips commonly found in these powerbank setups
DW01 One Cell Lithium-ion/Polymer Battery Protection IC
High Efficiency 1MHz, 2A Step Up Regulator
Single Lithium Cell Protection IC
Usually a CD43 sized 1.5uH power inductor,. though I see 2.2uH in most datasheets it might be a part on hand thing since thats usually the availability step, 1.5uH and next 2.2uH
A couple of caps, one in , one out, two resistors and an LED.
I find these guys too Battery Charger as usual it would be very unlikely to find any of these parts from a stateside vendor, alibaba or aliexpress, eBay usually.
We work though a few circuits, some of them drop off the protection IC and a lot of people complain it fails anyway, it removes ground from the charger to the battery, so we remove it from one of the power banks and test it it, it is fine and the charge rate is very low.
So now we're down to a circuit with a 1.5uh//1R5 CD43 power inductor, one battery, two caps, two resistors, two LEDS and one IC, just adding the led's doubles the part count, it has all sorts of controls in it, it doesn't charge via the external resistor/diode form VUSB and monitors, it switches to a trickle mode, has fault detection and can switch up the charge rate again if needed. The only thing its not doing for us that we were doing, is an automatic switch off mode, we did have it so we could switch on off from the CPU.
But instead of a cost that is around $3-$4 and some packages that can be more challenging to install, we're around $0.40 of parts, that is getting towards offshore mass production cost levels and an 8 pin SOP08
So I knew it, we submitted out PCBs for manufacturing, they sent me a note Friday saying they'd gone into production and here we are looking at adding back in the charger, and putting the 18650 + holder back on the board, which is a relatively massive chip. We print out the design put the battery holder on place, I need to shift down everything by about 30mm which is a lot for a board that is 96mm,. I check SnapEDA for a CD43 footprint for the inductor, nothing doing so I grab an existing layout from the sparkfun.lbr that is 5mm wide and adjust it to the recommended landing pattern
Then i knock up a MP3401.lbr part. using a combination of reverse engineering the existing board and the internet at large (which can be a terrible idea since like this post, anyone can write whatever they want)
So here is were we are now, our output side already has caps on it elsewhere, but also make sure you have a 10uF there if you're referring to this circuit, and on the LX input maybe a 1R resistor and 2.2nF cap to GND (between the inductor side and pin 1 LX of the MP3401
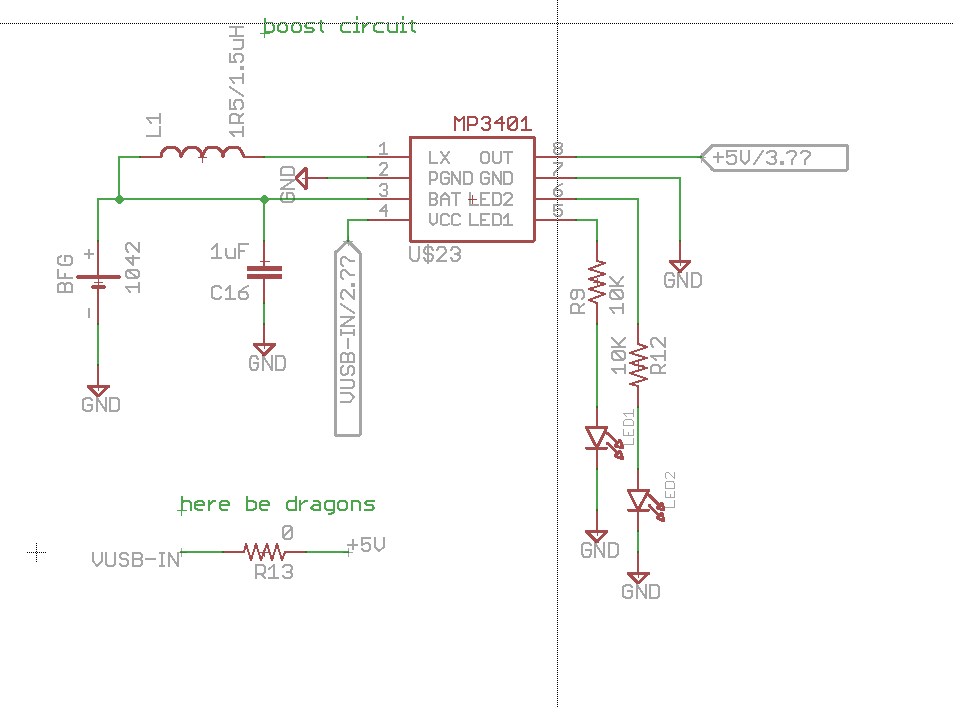
here be dragons is code for a DNP 0ohm jumper in case it all goes pear shaped and we want to bypass this circuit easily. I ordered the MP3401 (which is hard to find a datasheet for) from aliexpress for about 10c shipped, same for the inductor, I typically but at digikey and mouser, but they just can't compete on these parts.
This will do about 700mAh, we're doing around 300mAh , I wouldn't feel comfortable much more than that, what a long way we've come from using coin cells.
It is Sunday morning, and i was planning to do some more quad stuff or fix my poor RC truck which has been like that since about 2008. But now i'm writing this up and telling myself, remember to document as we're going along because we do a lot of neat stuff that usually we forget about or miss, and going to RIP move around and re-route the board, then try to get it in on the current order.
Next is the saga of the LCDs, supply chain is everything but at these levels its hard to deal with. We find a listing on Alibaba for the bare LCDs for about $3.00 (which is about right for singles) and in large quantities $0.60 so we ping the supplier, then think at that cost lets just buy then, the supplier comes back at $5.80 each.... which is more than the cost we buy them mounted to PCB with a control circuit, headers and a giant MMC card, and more than the cost of the 1 off... I mention and they go off and to check but of course never hear from them again, it is a common tactic on these sites, list a low price and then have crazy shipping or just flat out lie, but who's going to say, sure $0.60 is too good to be true, but yes $5.80 in quantity 500 is much better.
Here is the listing.
"Shenzhen Xintengli Car Accessory Co., Ltd." uh uh sounds legit.
mcufriend mostly have what we want, but they never write back, i bought a bunch of stuff from their aliexpress/taobao store , sent and inquiry and they shut down both stores same day, and moved it to their own website, which i signed up for then found out only local delivery but still no replies, 18 yuan! if only they had a 4 wire SPI 3.0" display ( they do ), it took me a while to sign up and I am pretty sure i'm user number #1 as a test account.
WRITE BACK TO US MCUFRIENDS WE DO OCCASIONALLY SET FIRE TO OUR CPUs BUT WE CAN STILL BE FRIENDS !! :)
So if anyone's go a cheap source of ILI9341/5 LCD's with 14 or 18 pin FPC ( no touch screen needed) in SPI 4 wire and not 8 bit parallel, let me know looking for under < $3
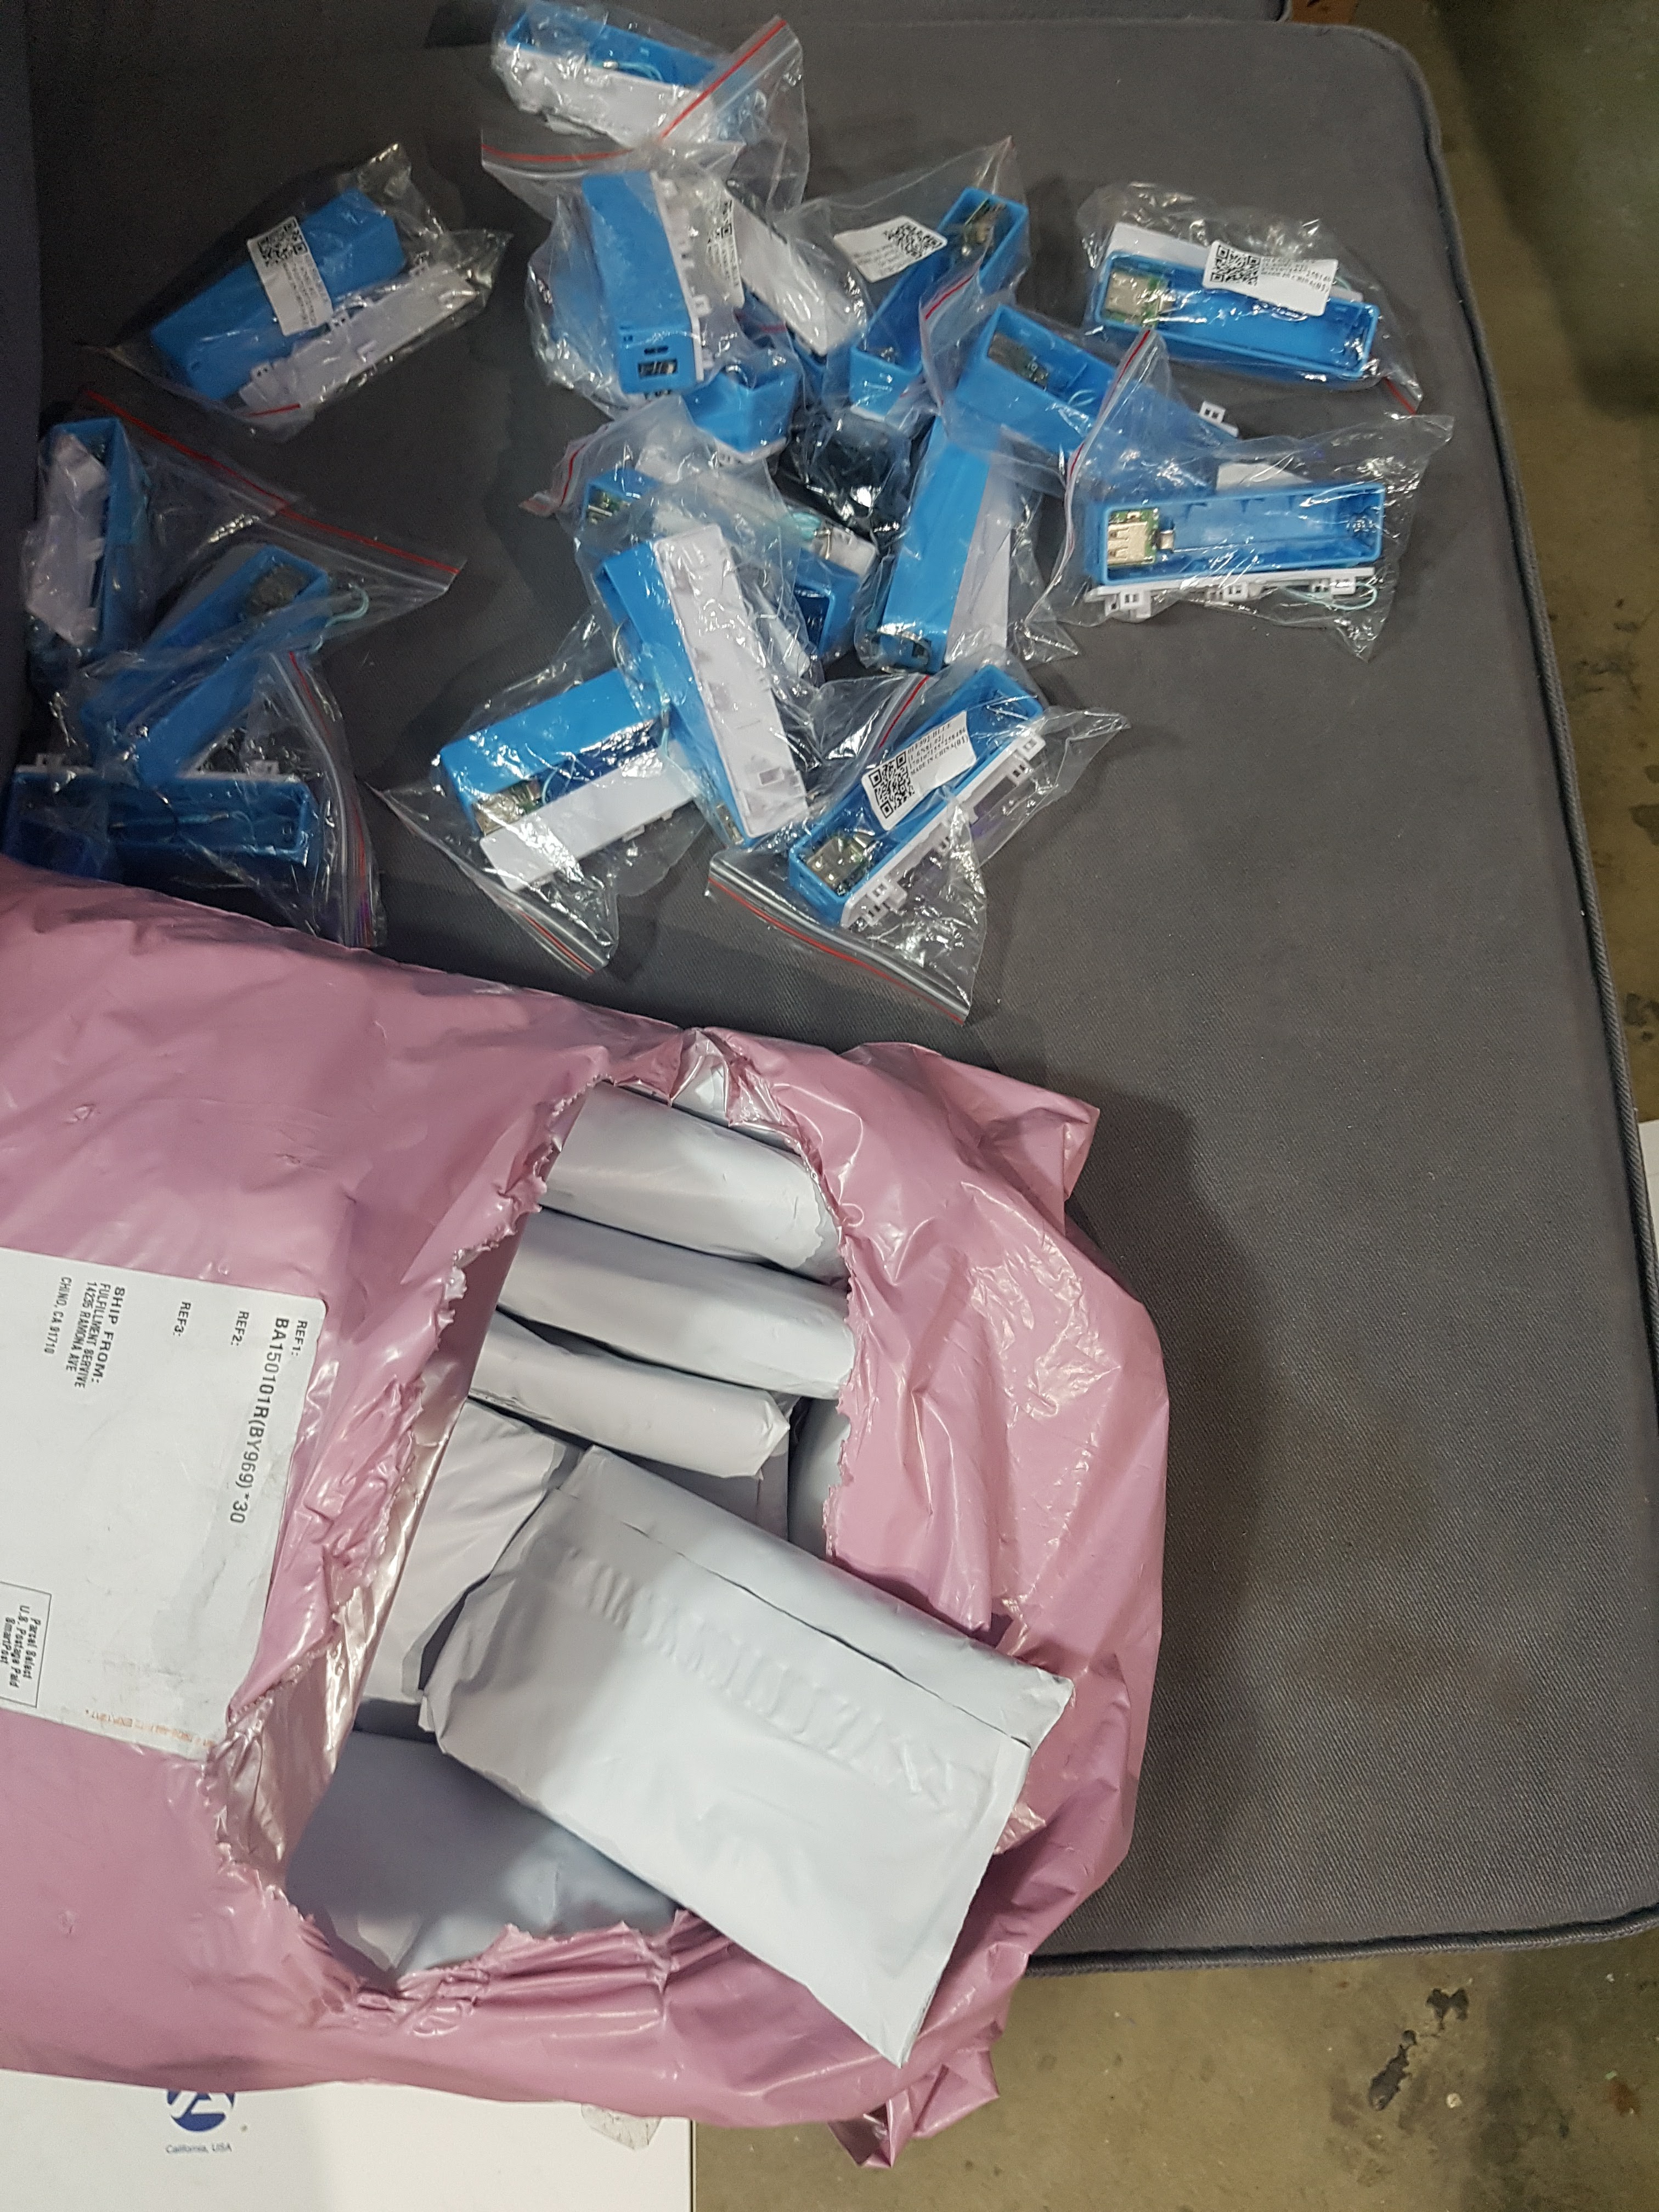
I've also now got a box of mini battery chargers now :) and individually wrapped 6000mAh but really 1800mAh 18650s which we likely won't use for this project.
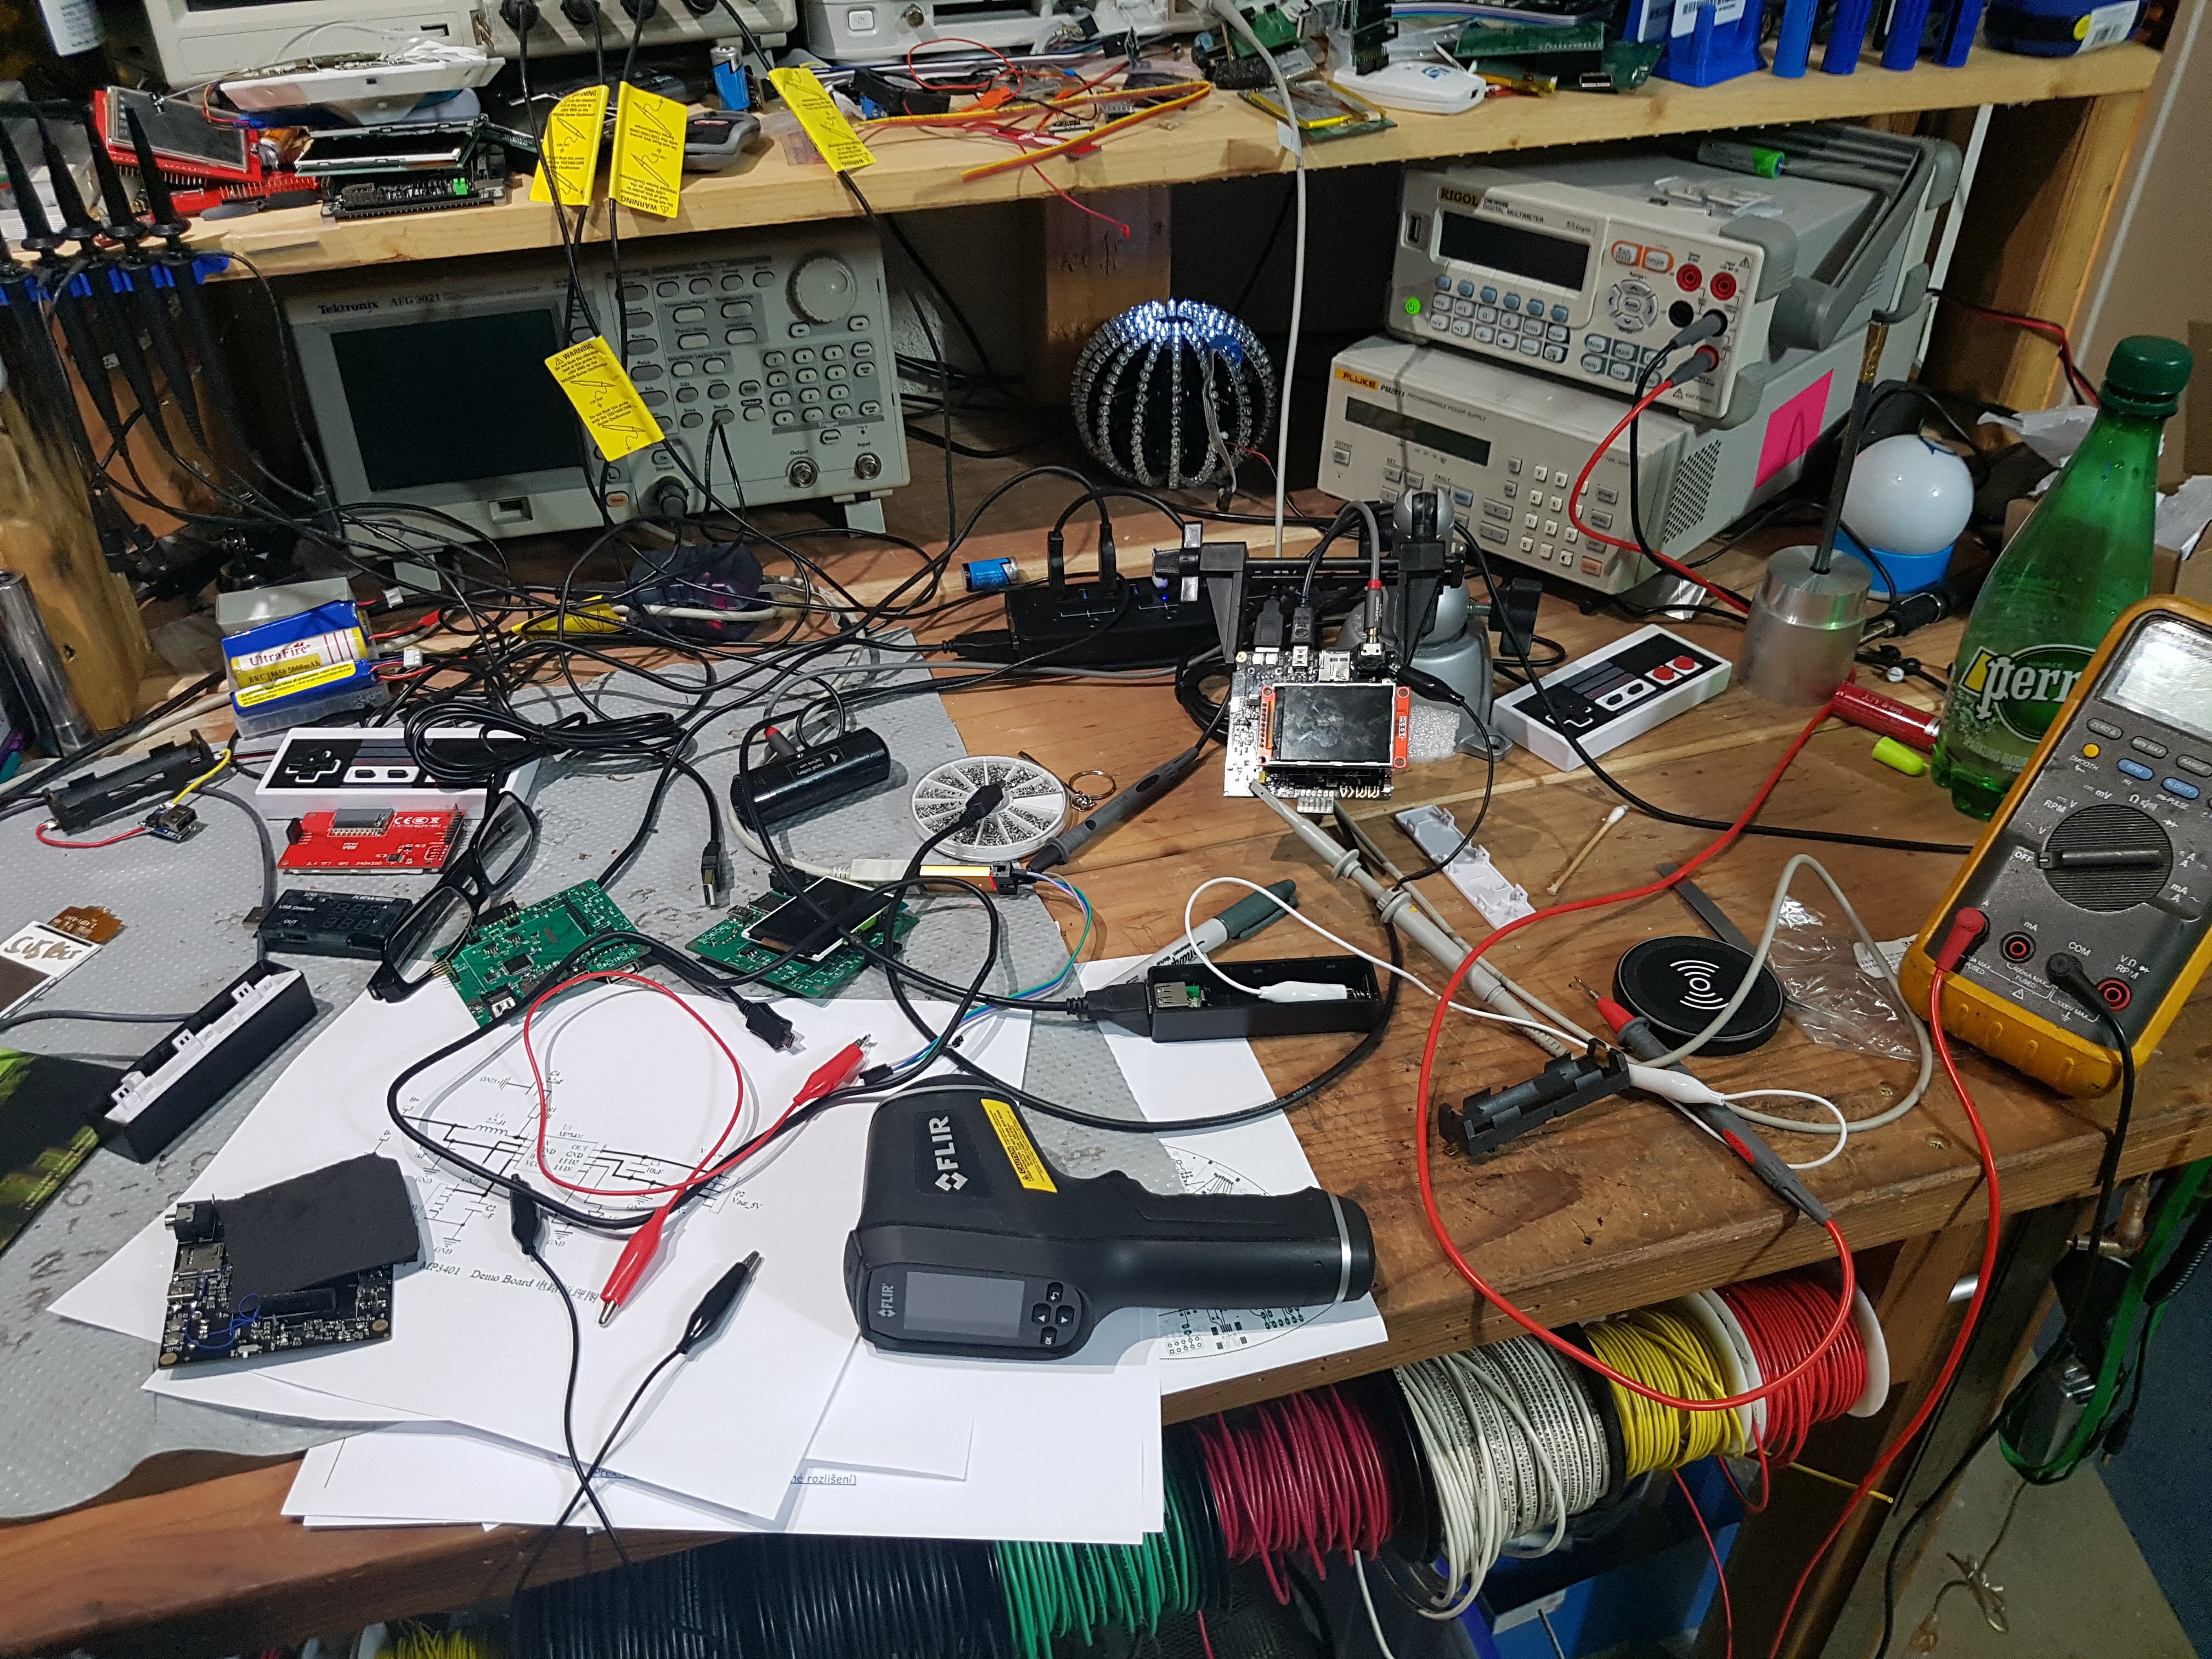 Which reminds me, the Rigol DMM does an odd thing in Auto current mode, it gets wonky when we put it between the battery and boost circuit, which was about 280mA draw and the Rigol wouldn't pass anything at all, I had to manually switch the range to get it to let the current pass (hence the breakout of the trusty fluke) , we checked the signal with the scope and it was pretty clean.
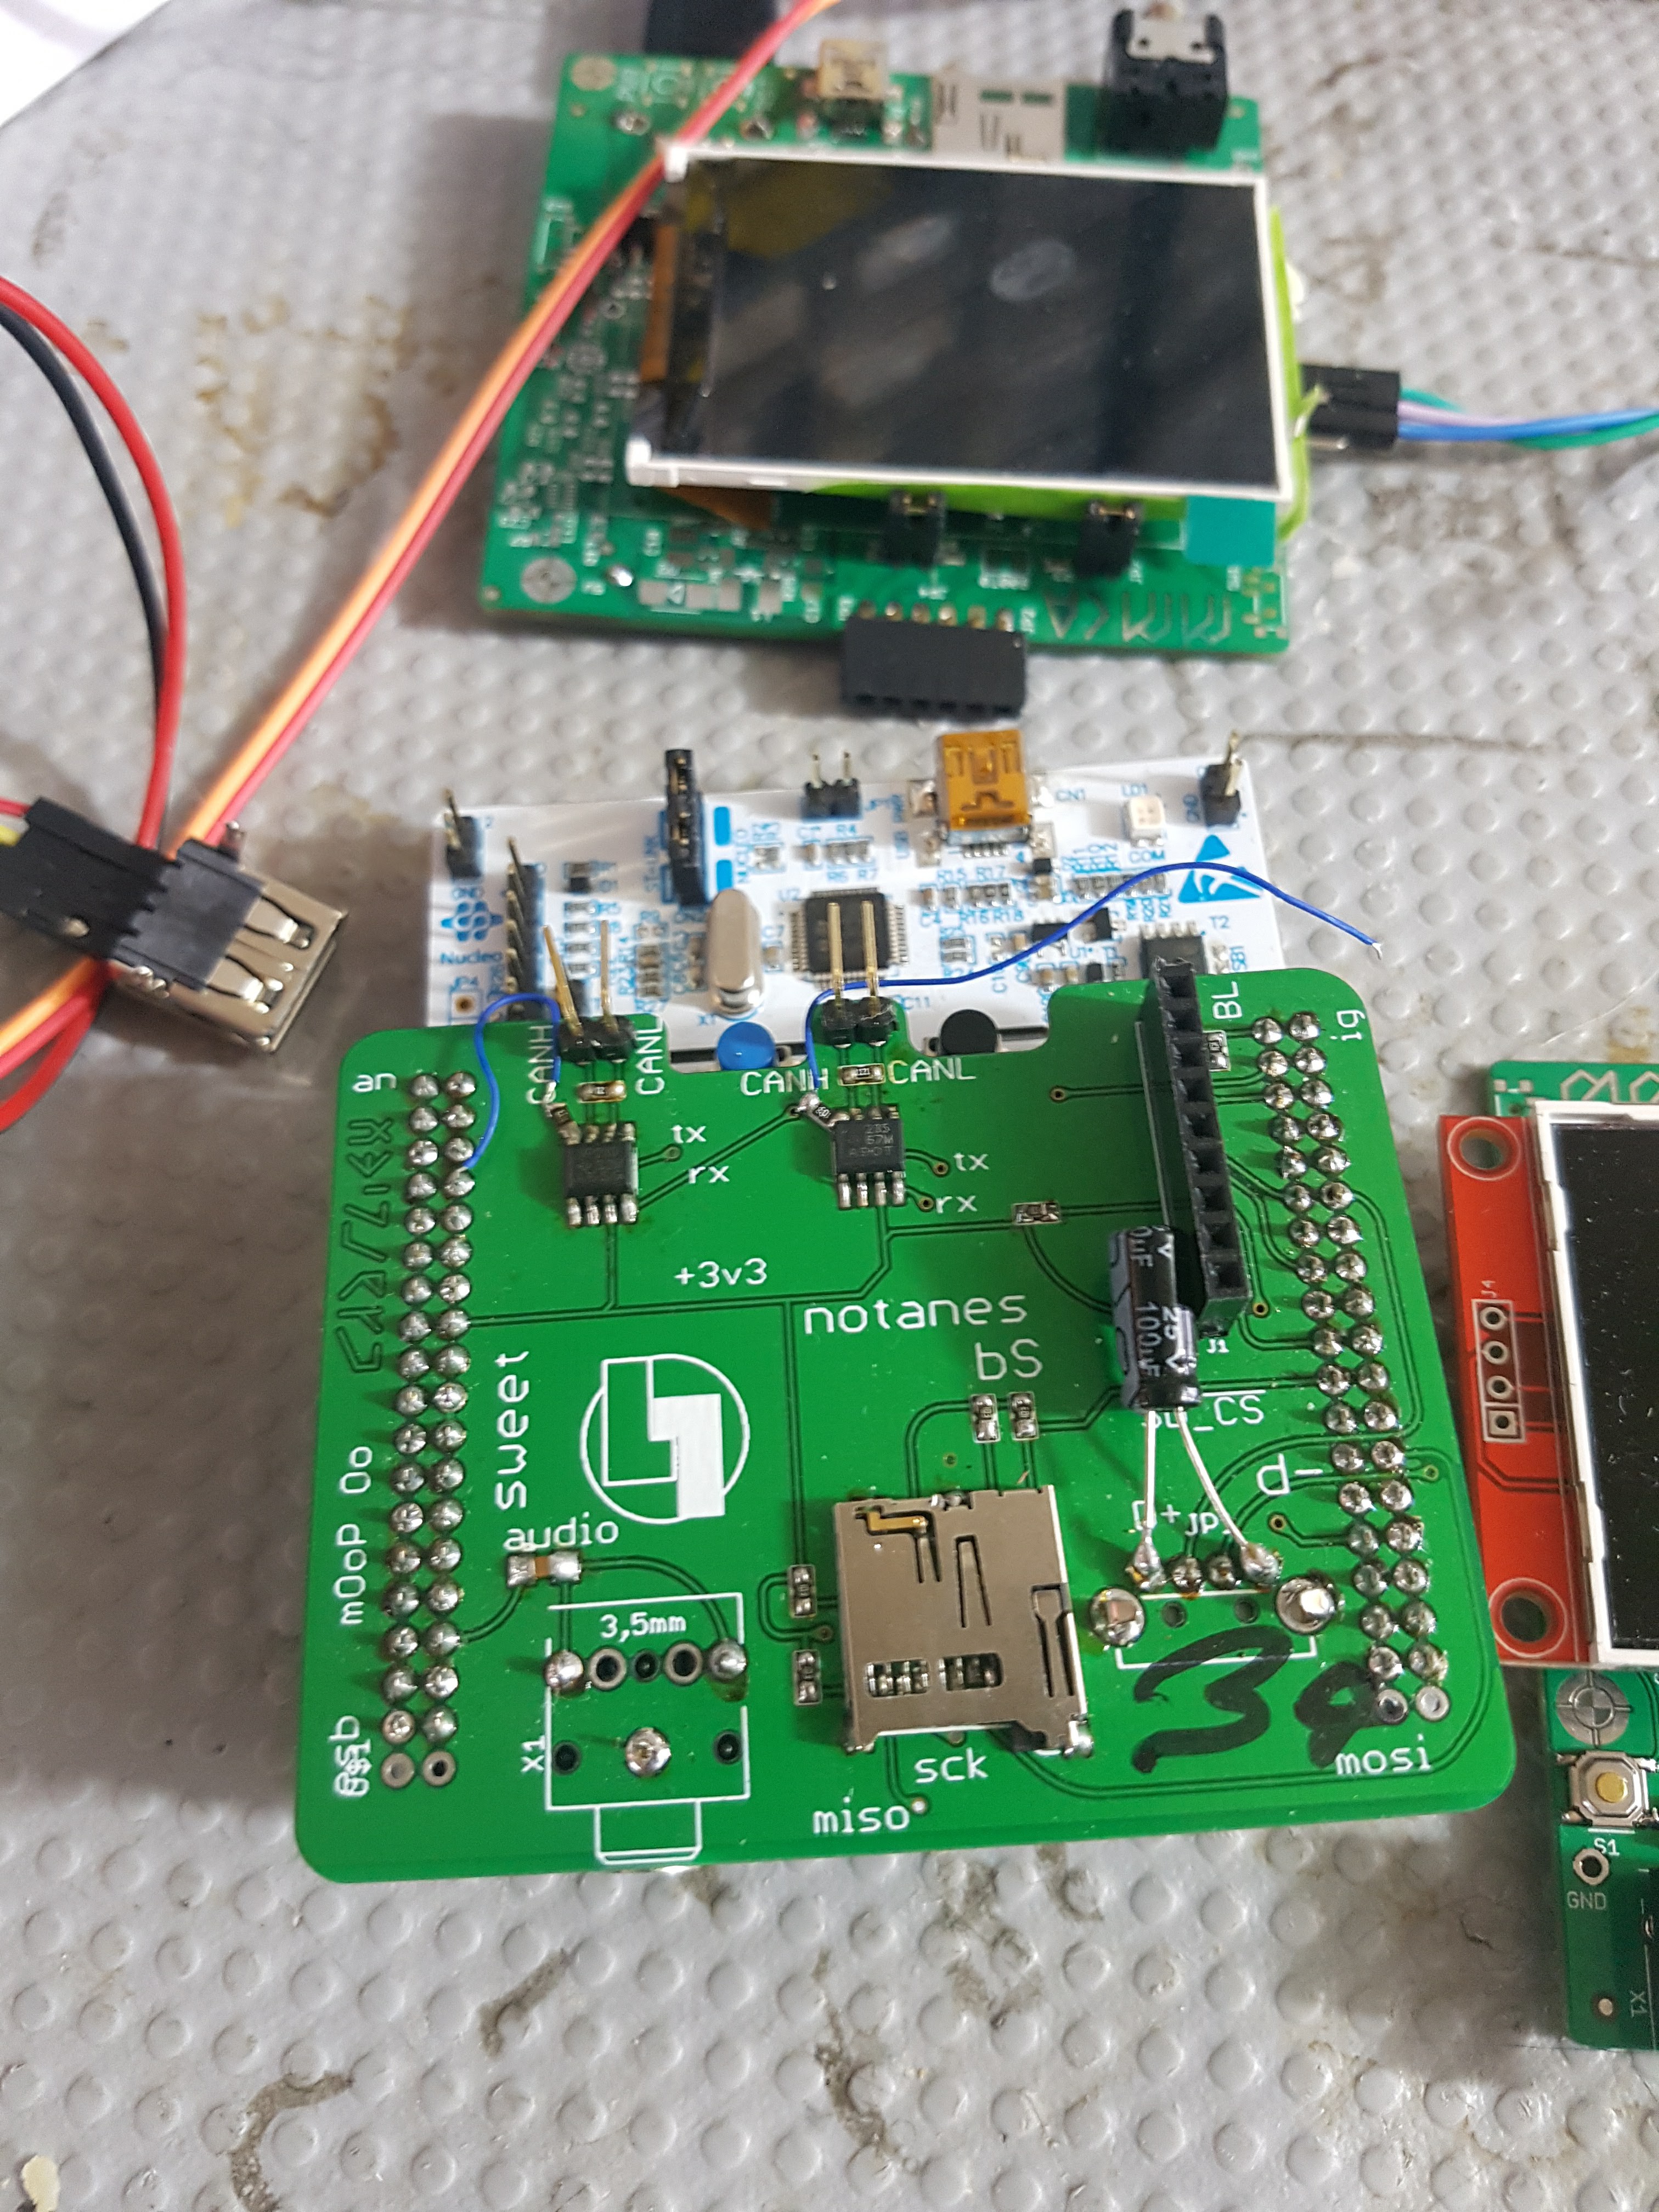
I never did post a photo of the Nucleo 446RE morpho proto here either
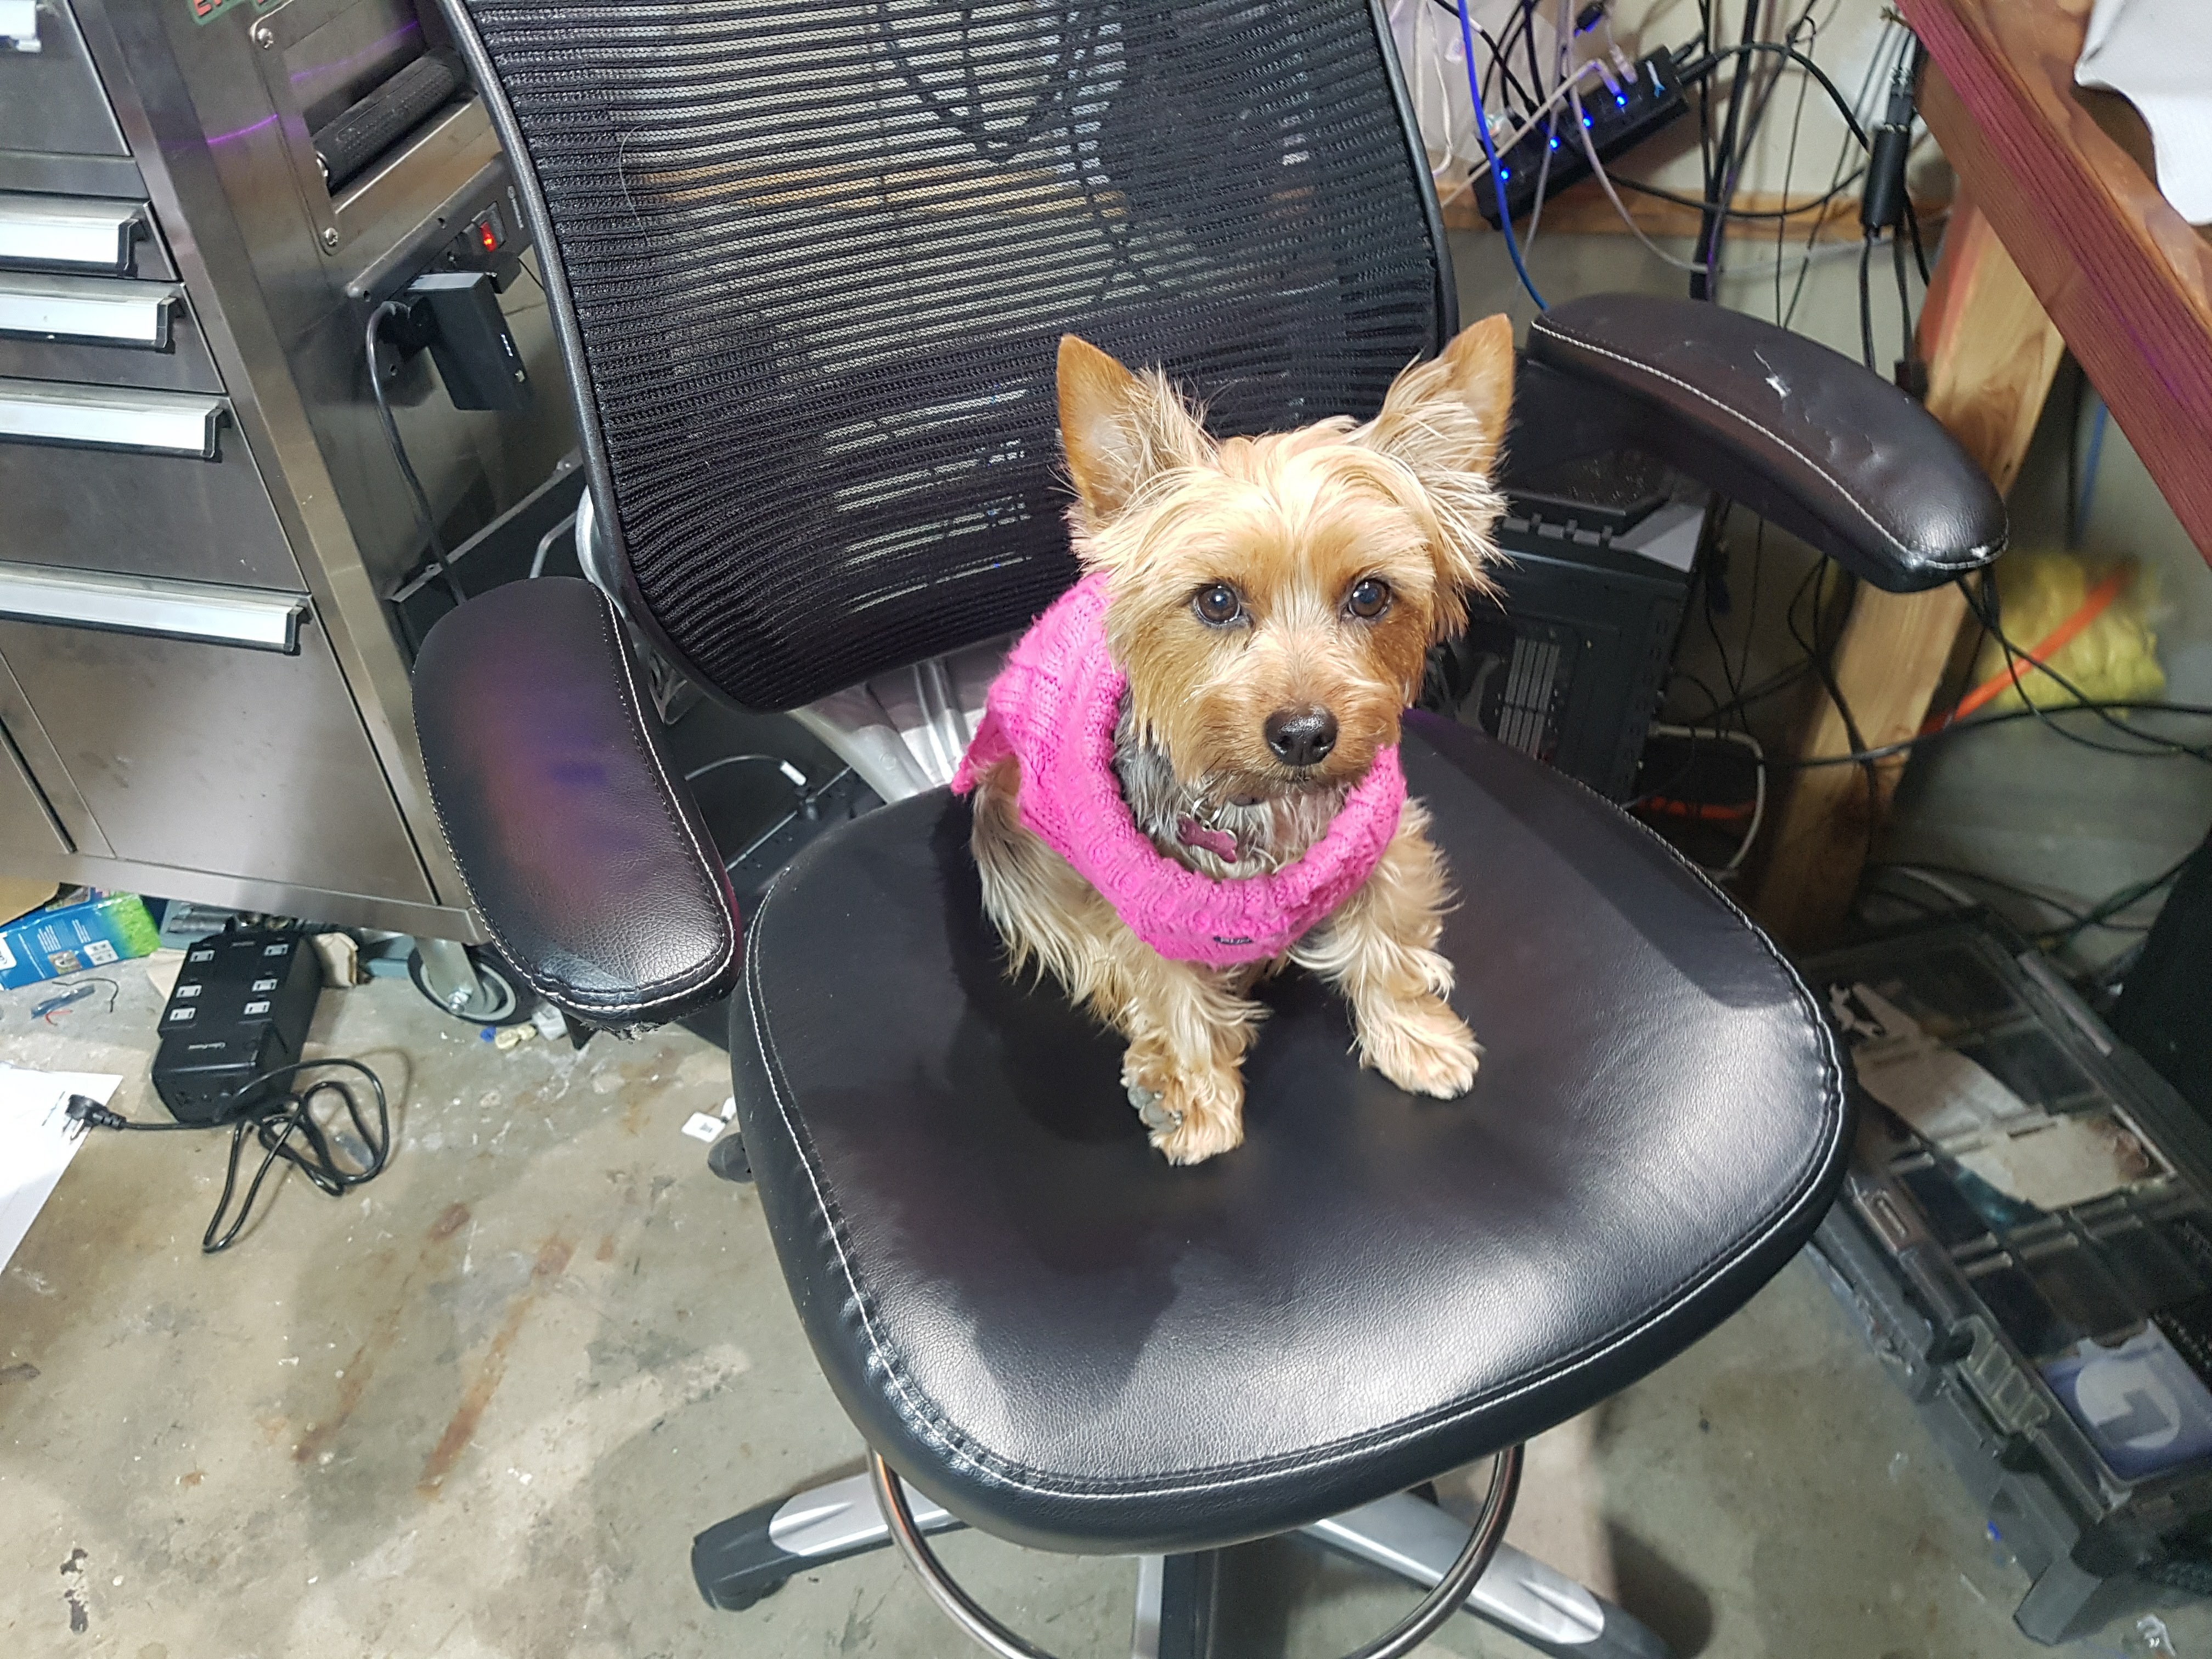
Also my Wife is out of town she is/was exhibiting at GDC so now i have this to deal with too, she tries to either get in every shot or sit in the chair if i move, looking for snacks.
Anyway the editor is beginning to lag like crazy so it is time to end this blog. ttfn
Eagle LBR for theMP3401 , save as mp3401.lbr
<?xml version="1.0" encoding="utf-8"?>
<!DOCTYPE eagle SYSTEM "eagle.dtd">
<eagle version="7.7.0">
<drawing>
<settings>
<setting alwaysvectorfont="no"/>
<setting verticaltext="down"/>
</settings>
<grid distance="0.1" unitdist="inch" unit="inch" style="lines" multiple="1" display="no" altdistance="0.01" altunitdist="inch" altunit="inch"/>
<layers>
<layer number="1" name="Top" color="4" fill="1" visible="yes" active="yes"/>
<layer number="2" name="Route2" color="1" fill="3" visible="no" active="yes"/>
<layer number="3" name="Route3" color="4" fill="3" visible="no" active="yes"/>
<layer number="4" name="Route4" color="1" fill="4" visible="no" active="yes"/>
<layer number="5" name="Route5" color="4" fill="4" visible="no" active="yes"/>
<layer number="6" name="Route6" color="1" fill="8" visible="no" active="yes"/>
<layer number="7" name="Route7" color="4" fill="8" visible="no" active="yes"/>
<layer number="8" name="Route8" color="1" fill="2" visible="no" active="yes"/>
<layer number="9" name="Route9" color="4" fill="2" visible="no" active="yes"/>
<layer number="10" name="Route10" color="1" fill="7" visible="no" active="yes"/>
<layer number="11" name="Route11" color="4" fill="7" visible="no" active="yes"/>
<layer number="12" name="Route12" color="1" fill="5" visible="no" active="yes"/>
<layer number="13" name="Route13" color="4" fill="5" visible="no" active="yes"/>
<layer number="14" name="Route14" color="1" fill="6" visible="no" active="yes"/>
<layer number="15" name="Route15" color="4" fill="6" visible="no" active="yes"/>
<layer number="16" name="Bottom" color="1" fill="1" visible="yes" active="yes"/>
<layer number="17" name="Pads" color="2" fill="1" visible="yes" active="yes"/>
<layer number="18" name="Vias" color="2" fill="1" visible="yes" active="yes"/>
<layer number="19" name="Unrouted" color="6" fill="1" visible="yes" active="yes"/>
<layer number="20" name="Dimension" color="15" fill="1" visible="yes" active="yes"/>
<layer number="21" name="tPlace" color="7" fill="1" visible="yes" active="yes"/>
<layer number="22" name="bPlace" color="7" fill="1" visible="yes" active="yes"/>
<layer number="23" name="tOrigins" color="15" fill="1" visible="yes" active="yes"/>
<layer number="24" name="bOrigins" color="15" fill="1" visible="yes" active="yes"/>
<layer number="25" name="tNames" color="7" fill="1" visible="yes" active="yes"/>
<layer number="26" name="bNames" color="7" fill="1" visible="yes" active="yes"/>
<layer number="27" name="tValues" color="7" fill="1" visible="yes" active="yes"/>
<layer number="28" name="bValues" color="7" fill="1" visible="yes" active="yes"/>
<layer number="29" name="tStop" color="7" fill="3" visible="no" active="yes"/>
<layer number="30" name="bStop" color="7" fill="6" visible="no" active="yes"/>
<layer number="31" name="tCream" color="7" fill="4" visible="no" active="yes"/>
<layer number="32" name="bCream" color="7" fill="5" visible="no" active="yes"/>
<layer number="33" name="tFinish" color="6" fill="3" visible="no" active="yes"/>
<layer number="34" name="bFinish" color="6" fill="6" visible="no" active="yes"/>
<layer number="35" name="tGlue" color="7" fill="4" visible="no" active="yes"/>
<layer number="36" name="bGlue" color="7" fill="5" visible="no" active="yes"/>
<layer number="37" name="tTest" color="7" fill="1" visible="no" active="yes"/>
<layer number="38" name="bTest" color="7" fill="1" visible="no" active="yes"/>
<layer number="39" name="tKeepout" color="4" fill="11" visible="yes" active="yes"/>
<layer number="40" name="bKeepout" color="1" fill="11" visible="yes" active="yes"/>
<layer number="41" name="tRestrict" color="4" fill="10" visible="yes" active="yes"/>
<layer number="42" name="bRestrict" color="1" fill="10" visible="yes" active="yes"/>
<layer number="43" name="vRestrict" color="2" fill="10" visible="yes" active="yes"/>
<layer number="44" name="Drills" color="7" fill="1" visible="no" active="yes"/>
<layer number="45" name="Holes" color="7" fill="1" visible="no" active="yes"/>
<layer number="46" name="Milling" color="3" fill="1" visible="no" active="yes"/>
<layer number="47" name="Measures" color="7" fill="1" visible="no" active="yes"/>
<layer number="48" name="Document" color="7" fill="1" visible="yes" active="yes"/>
<layer number="49" name="Reference" color="7" fill="1" visible="yes" active="yes"/>
<layer number="50" name="dxf" color="7" fill="1" visible="no" active="no"/>
<layer number="51" name="tDocu" color="7" fill="1" visible="yes" active="yes"/>
<layer number="52" name="bDocu" color="7" fill="1" visible="yes" active="yes"/>
<layer number="53" name="tGND_GNDA" color="7" fill="9" visible="no" active="no"/>
<layer number="54" name="bGND_GNDA" color="1" fill="9" visible="no" active="no"/>
<layer number="56" name="wert" color="7" fill="1" visible="no" active="no"/>
<layer number="57" name="tCAD" color="7" fill="1" visible="no" active="no"/>
<layer number="90" name="Modules" color="5" fill="1" visible="yes" active="yes"/>
<layer number="91" name="Nets" color="2" fill="1" visible="yes" active="yes"/>
<layer number="92" name="Busses" color="1" fill="1" visible="yes" active="yes"/>
<layer number="93" name="Pins" color="2" fill="1" visible="no" active="yes"/>
<layer number="94" name="Symbols" color="4" fill="1" visible="yes" active="yes"/>
<layer number="95" name="Names" color="7" fill="1" visible="yes" active="yes"/>
<layer number="96" name="Values" color="7" fill="1" visible="yes" active="yes"/>
<layer number="97" name="Info" color="7" fill="1" visible="yes" active="yes"/>
<layer number="98" name="Guide" color="6" fill="1" visible="yes" active="yes"/>
<layer number="100" name="Muster" color="7" fill="1" visible="no" active="no"/>
<layer number="101" name="Patch_Top" color="12" fill="4" visible="yes" active="yes"/>
<layer number="102" name="Vscore" color="7" fill="1" visible="yes" active="yes"/>
<layer number="103" name="fp3" color="7" fill="1" visible="no" active="yes"/>
<layer number="104" name="Name" color="7" fill="1" visible="yes" active="yes"/>
<layer number="105" name="Beschreib" color="9" fill="1" visible="yes" active="yes"/>
<layer number="106" name="BGA-Top" color="4" fill="1" visible="yes" active="yes"/>
<layer number="107" name="BD-Top" color="5" fill="1" visible="yes" active="yes"/>
<layer number="108" name="fp8" color="7" fill="1" visible="no" active="yes"/>
<layer number="109" name="fp9" color="7" fill="1" visible="no" active="yes"/>
<layer number="110" name="fp0" color="7" fill="1" visible="no" active="yes"/>
<layer number="111" name="LPC17xx" color="7" fill="1" visible="yes" active="yes"/>
<layer number="112" name="tSilk" color="7" fill="1" visible="yes" active="yes"/>
<layer number="116" name="Patch_BOT" color="9" fill="4" visible="yes" active="yes"/>
<layer number="121" name="_tsilk" color="7" fill="1" visible="yes" active="yes"/>
<layer number="122" name="_bsilk" color="7" fill="1" visible="yes" active="yes"/>
<layer number="123" name="tTestmark" color="7" fill="1" visible="no" active="yes"/>
<layer number="124" name="bTestmark" color="7" fill="1" visible="no" active="yes"/>
<layer number="125" name="_tNames" color="7" fill="1" visible="yes" active="yes"/>
<layer number=

Discussions
Become a Hackaday.io Member
Create an account to leave a comment. Already have an account? Log In.
Yoo the CSS seems broken down here =D Nice update, I learned a lot!
Are you sure? yes | no
hmm i'll take a look, cheers and thanks :)
Are you sure? yes | no