The pockets for the LEDs are 1/2" holes drilled partway into the wood. A 3/16" hole was then drilled from the back of the plank to each pocket. Pretty simple, and easy to do with a drill press.
Each LED is wired with 4 wires (GND, VIN, DIN, DOUT). I used scrap 28 gauge wire that I had on hand, which was smaller than I'm used to working with. The process of splicing and soldering wires together took a couple of hours. My technique for working with the wires definitely got better as I went
Once this was done, I was able to verify that all of the LEDs worked, and then proceed to finish up the project. I was super lazy and just used the already programmed ATTiny 85 setup from the sink lighting project that I had at my previous apartment.
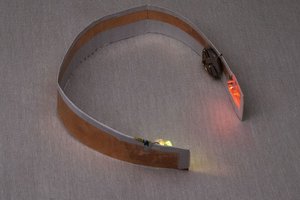
The first thing to tidy up was to protect the wiring. I initially bought a bunch of binding bars with the idea that i'd be able to slide all the wiring inside of these. However, these ended up being thicker than I desired (about 1/4"). Desiring to flatten them somewhat, I found the plastic to be very formable if heated, but also showed a tendency to collapse on themselves, and I ultimately did not have the patience to develop a technique for making these work.
Instead, I ended up wrapping packing tape around the back edge with packing tape... Yes, it looks horrible on close inspection. I added some random lacquer around the edges of the tape to help ensure it stays in place, perhaps.
To cover the LEDs, I ordered 1/2"Dx1/16" acrylic disks from ebay. It turned out I had created holes that were several hundredths larger than 0.5", so I had to find a way to hold these disks in place. I ended up doing the following: (1) put a disk on a piece of masking tape; (2) put hot glue around the edge of the disk; (3) quickly press the disk into the LED's hole and hold for a few seconds for the glue to set; (4) remove tape; (5) use a razor blade to trim excess hot glue and make the surface flush; (6) use a heat gun as needed to warm up the hot glue and make the acrylic disks more flush as neded.
Finally, I painted the shelf white. I covered the acrylic disks in blue masking tape, of course. Hooray for the $1 spare paint sampler from Lowe's that still was 20x as much paint as I needed!
The shelf is actually at about a 5 degree slope from horizontal, so the glasses lean against the wall. I live in earthquake land after all...
The rest of the project was just hiding the wiring under/behind the cabinets. The PIR motion sensor is of course visible, but other than that the project is completely hidden from view!
The end product is pretty nice to look at, particularly when the lights are off.
 Gertlex
 Scott Clandinin
 terrag
 Roger
Roger
 Adam Redfern