Close
0%
0%

MagSpoofPI

Be able to make & upload MagSpoof with variable tracks, to use it without Arduino dependencies, and implement it on the same Raspberry GPIO.

Similar projects worth following
Be able to build and upload the MagSpoof's code to the Attiny85 on the Raspberry Pi's GPIO. With the functionality of enabling or disabling the MagSpoof implementing a pin from same Raspberry Pi. Making a new software and hardware integration using as base the original Samy Kamkar code but with avr-gcc compiler; As result, we will be able to generate a new versatile tool to test new technologies like tokenization processes where we will be able to update tracks in real time.

New Version: https://salmg.net/2017/01/16/samykam/

The makefile and the modified MagSpoof library are in my github: https://github.com/salmg/MagSpoofPI

Specific details: https://salmg.net/2016/08/27/magspoofpi/

New video implementing this project against Samsung Pay tokenization flaw: https://youtu.be/zuDdb3XSupE

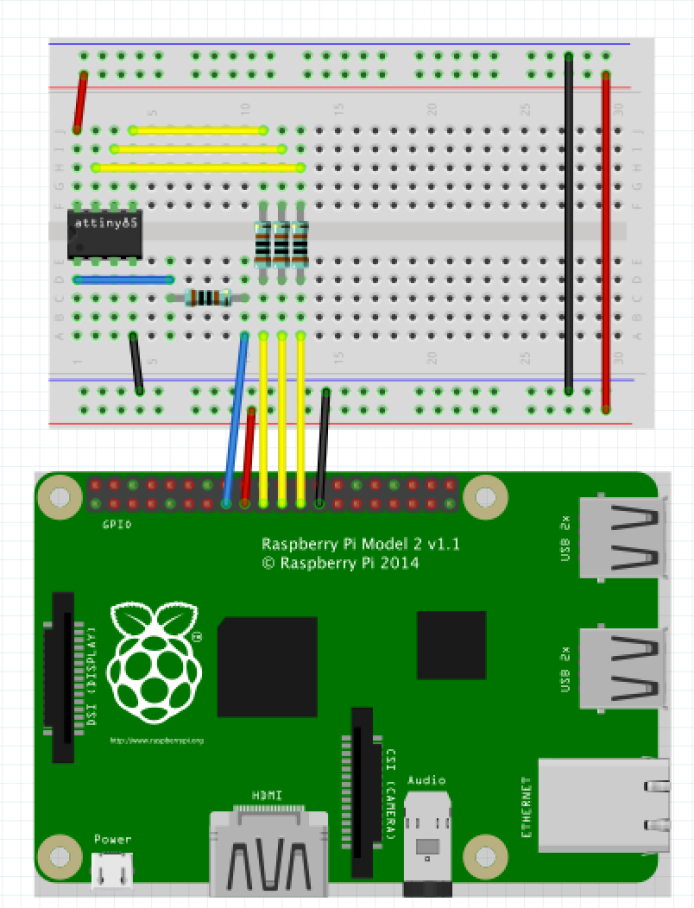
@Sabasacustico added the schematics for the project https://github.com/salmg/MagSpoofPI/tree/master/Schematic open hardware for all.

  • 4 × Resistor 1k
  • 1 × Resistor 10k
  • 1 × Raspberry Pi
  • 1 × Half Breadboard Electronic Components / Misc. Electronic Components
  • 1 × MagSpoof https://samy.pl/magspoof/

View all 6 components

View all 5 project logs

  • 1
    Step 1

    The only necessary changes in the original MagSpoof design to work with this project:

    -Remove the button and replaced it with a 10k resistor.

    I will use Raspberry Pi pin numbers(board numbers), NOT GPIO numbers to describe this instructions.

    We will need four 1k resistors, connecting the Raspberry pins:

    -Raspberry pin 15 as reset button, to the Attiny’s PB5.
    -Raspberry pin 19(MOSI) to PB0.
    -Raspberry pin 21(MISO) to PB1.
    -Raspberry pin 23(SCK) to PB2.

    Then connecting the Raspberry Pi GND(pin 25) to Attiny’ GND and Raspberry DC power 3.3(pin 17) to Attiny’s VCC. Example:

    The pin 7 will help to control(on/off) the MagSpoof after a succeed installation of MagSpoofPI. So the end user will be able to enable/disable the MagSpoof without removing it from the Raspberry PI GPIO. So the pin 7 is connected to a 10K resistor. The another end of the resistor to GND.

    Completed configuration example:

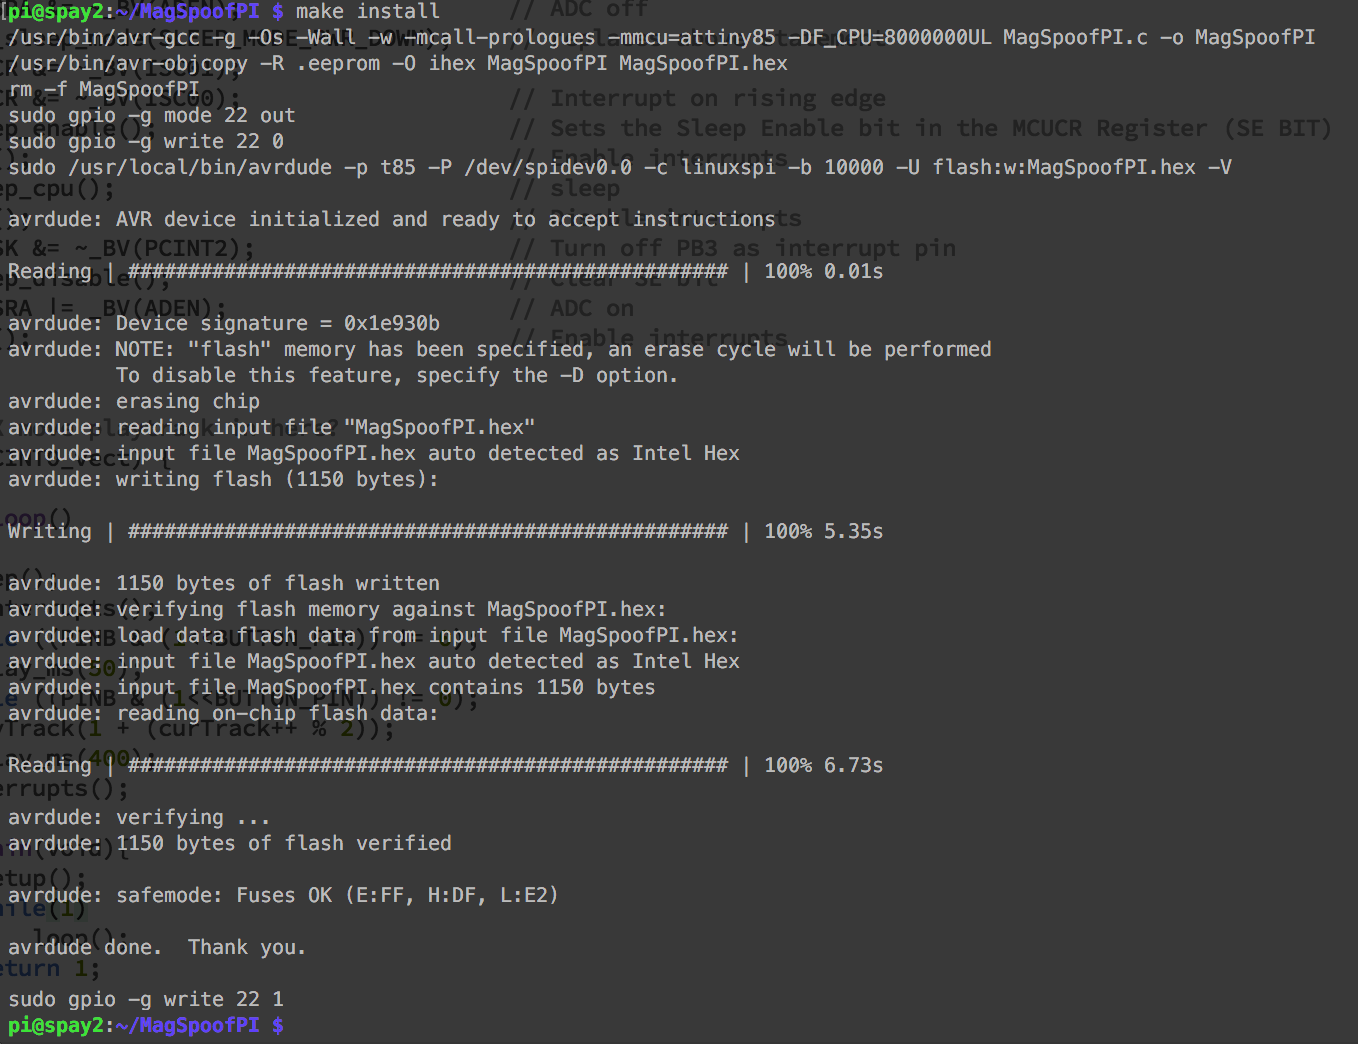
    After this, you can find the instructions to install the MagSpoofPI library in the github repository.

View all instructions

Enjoy this project?

Share

Discussions

Caltempa wrote 06/24/2017 at 23:52 point

need a magspoof built how much

  Are you sure? yes | no

Similar Projects

Does this project spark your interest?

Become a member to follow this project and never miss any updates