 Michael Murillo
The Beginning
When this project started I was moving apartments about every year, so the only firm requirement was that I could fit the server in a traveling rack. Travel racks are most often used for smaller audio gear, not large server equipment, and have about 19" of space between both rails. This eliminated all but a few server chassis as most servers are 25" in depth or longer. It also needed to be large enough to fit a GPU and provide enough power for it, eliminating servers with less than 500W power supplies. Also, I limited myself to used equipment on eBay. As such, the first parts ordered where:
Step 1: GPU Power
I knew from the start that I would need to figure out how to mount the graphics card sideways as a 2U tall chassis would not support a graphics card plugged directly into the motherboard. The graphics card also needed the power pins on the rear of the card instead of the side so that it wouldn't interfere with the case. What I didn't expect was that although the power supply was rated for enough power, it didn't have the right Molex connectors for the GPU. This site has a good overview of the different connectors commonly found on power supplies. The power supply came with:
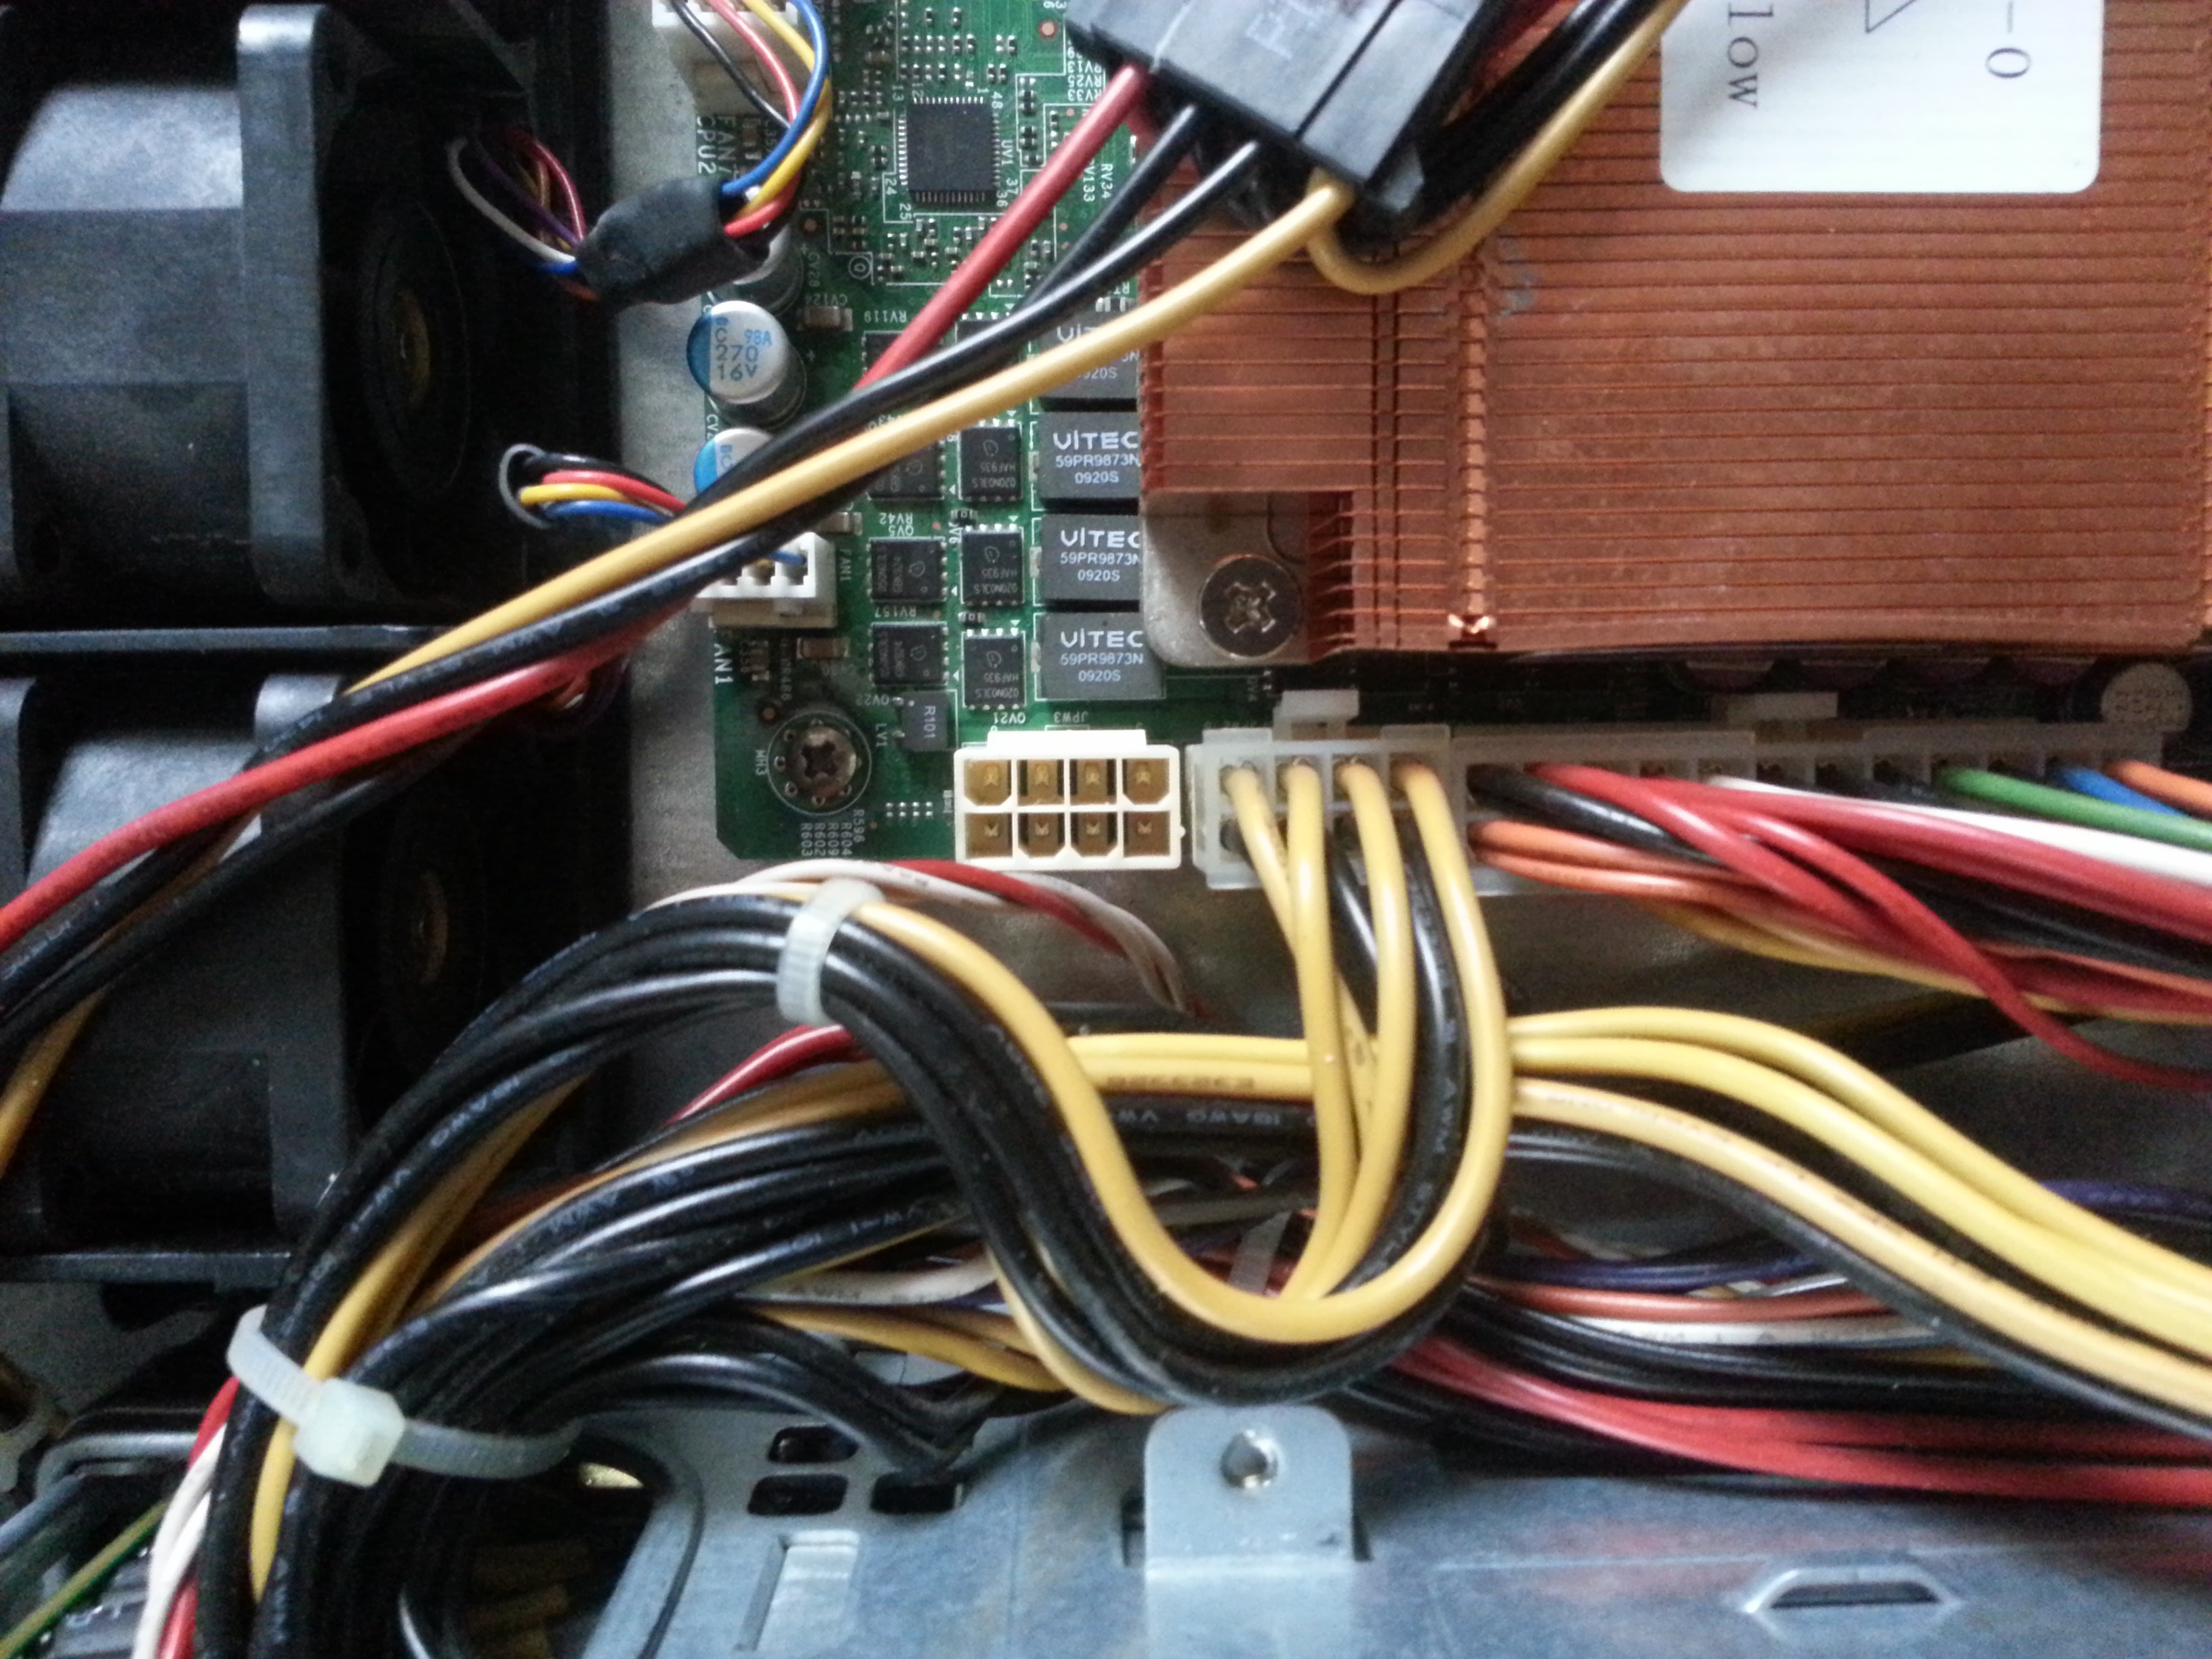
- 24 pin ATX (picture 1 below)
- 2x 8 pin EPS +12V (picture 1 below)
- 4 pin ATX +12V (not pictured, unused on original setup)
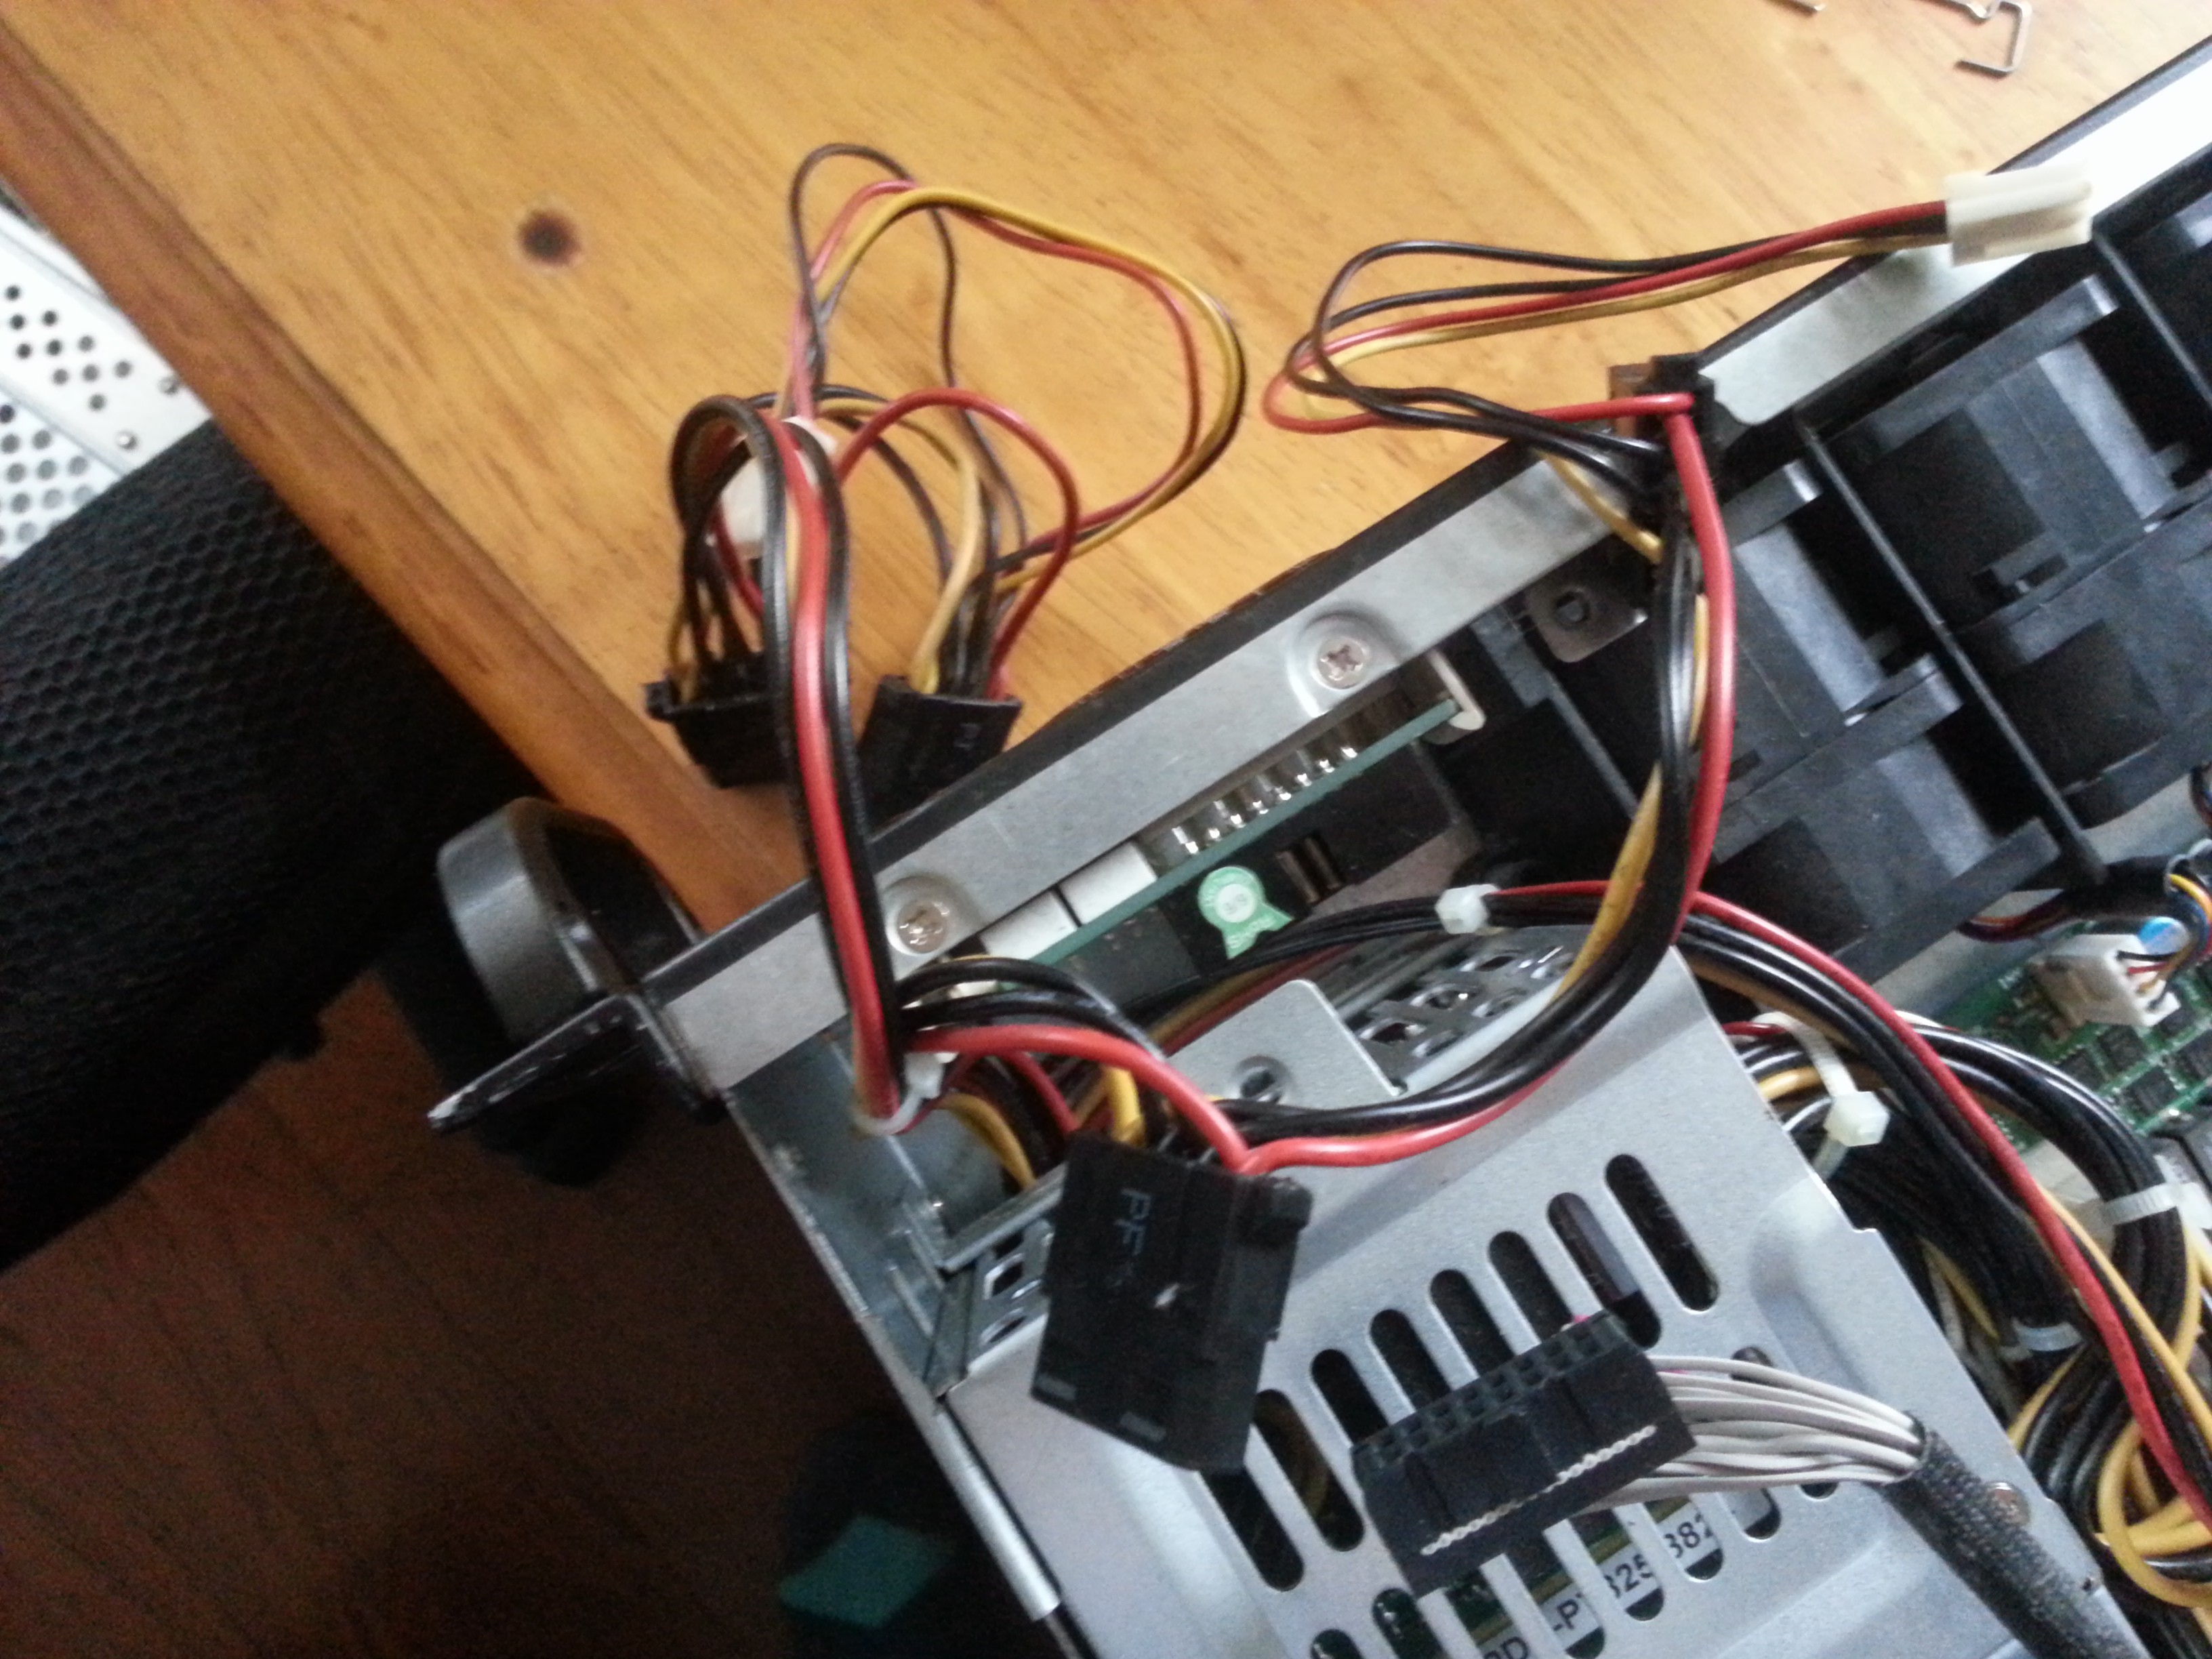
- A few 4 pin peripheral power cables (2nd picture, 1 in use for the HDD backplane)
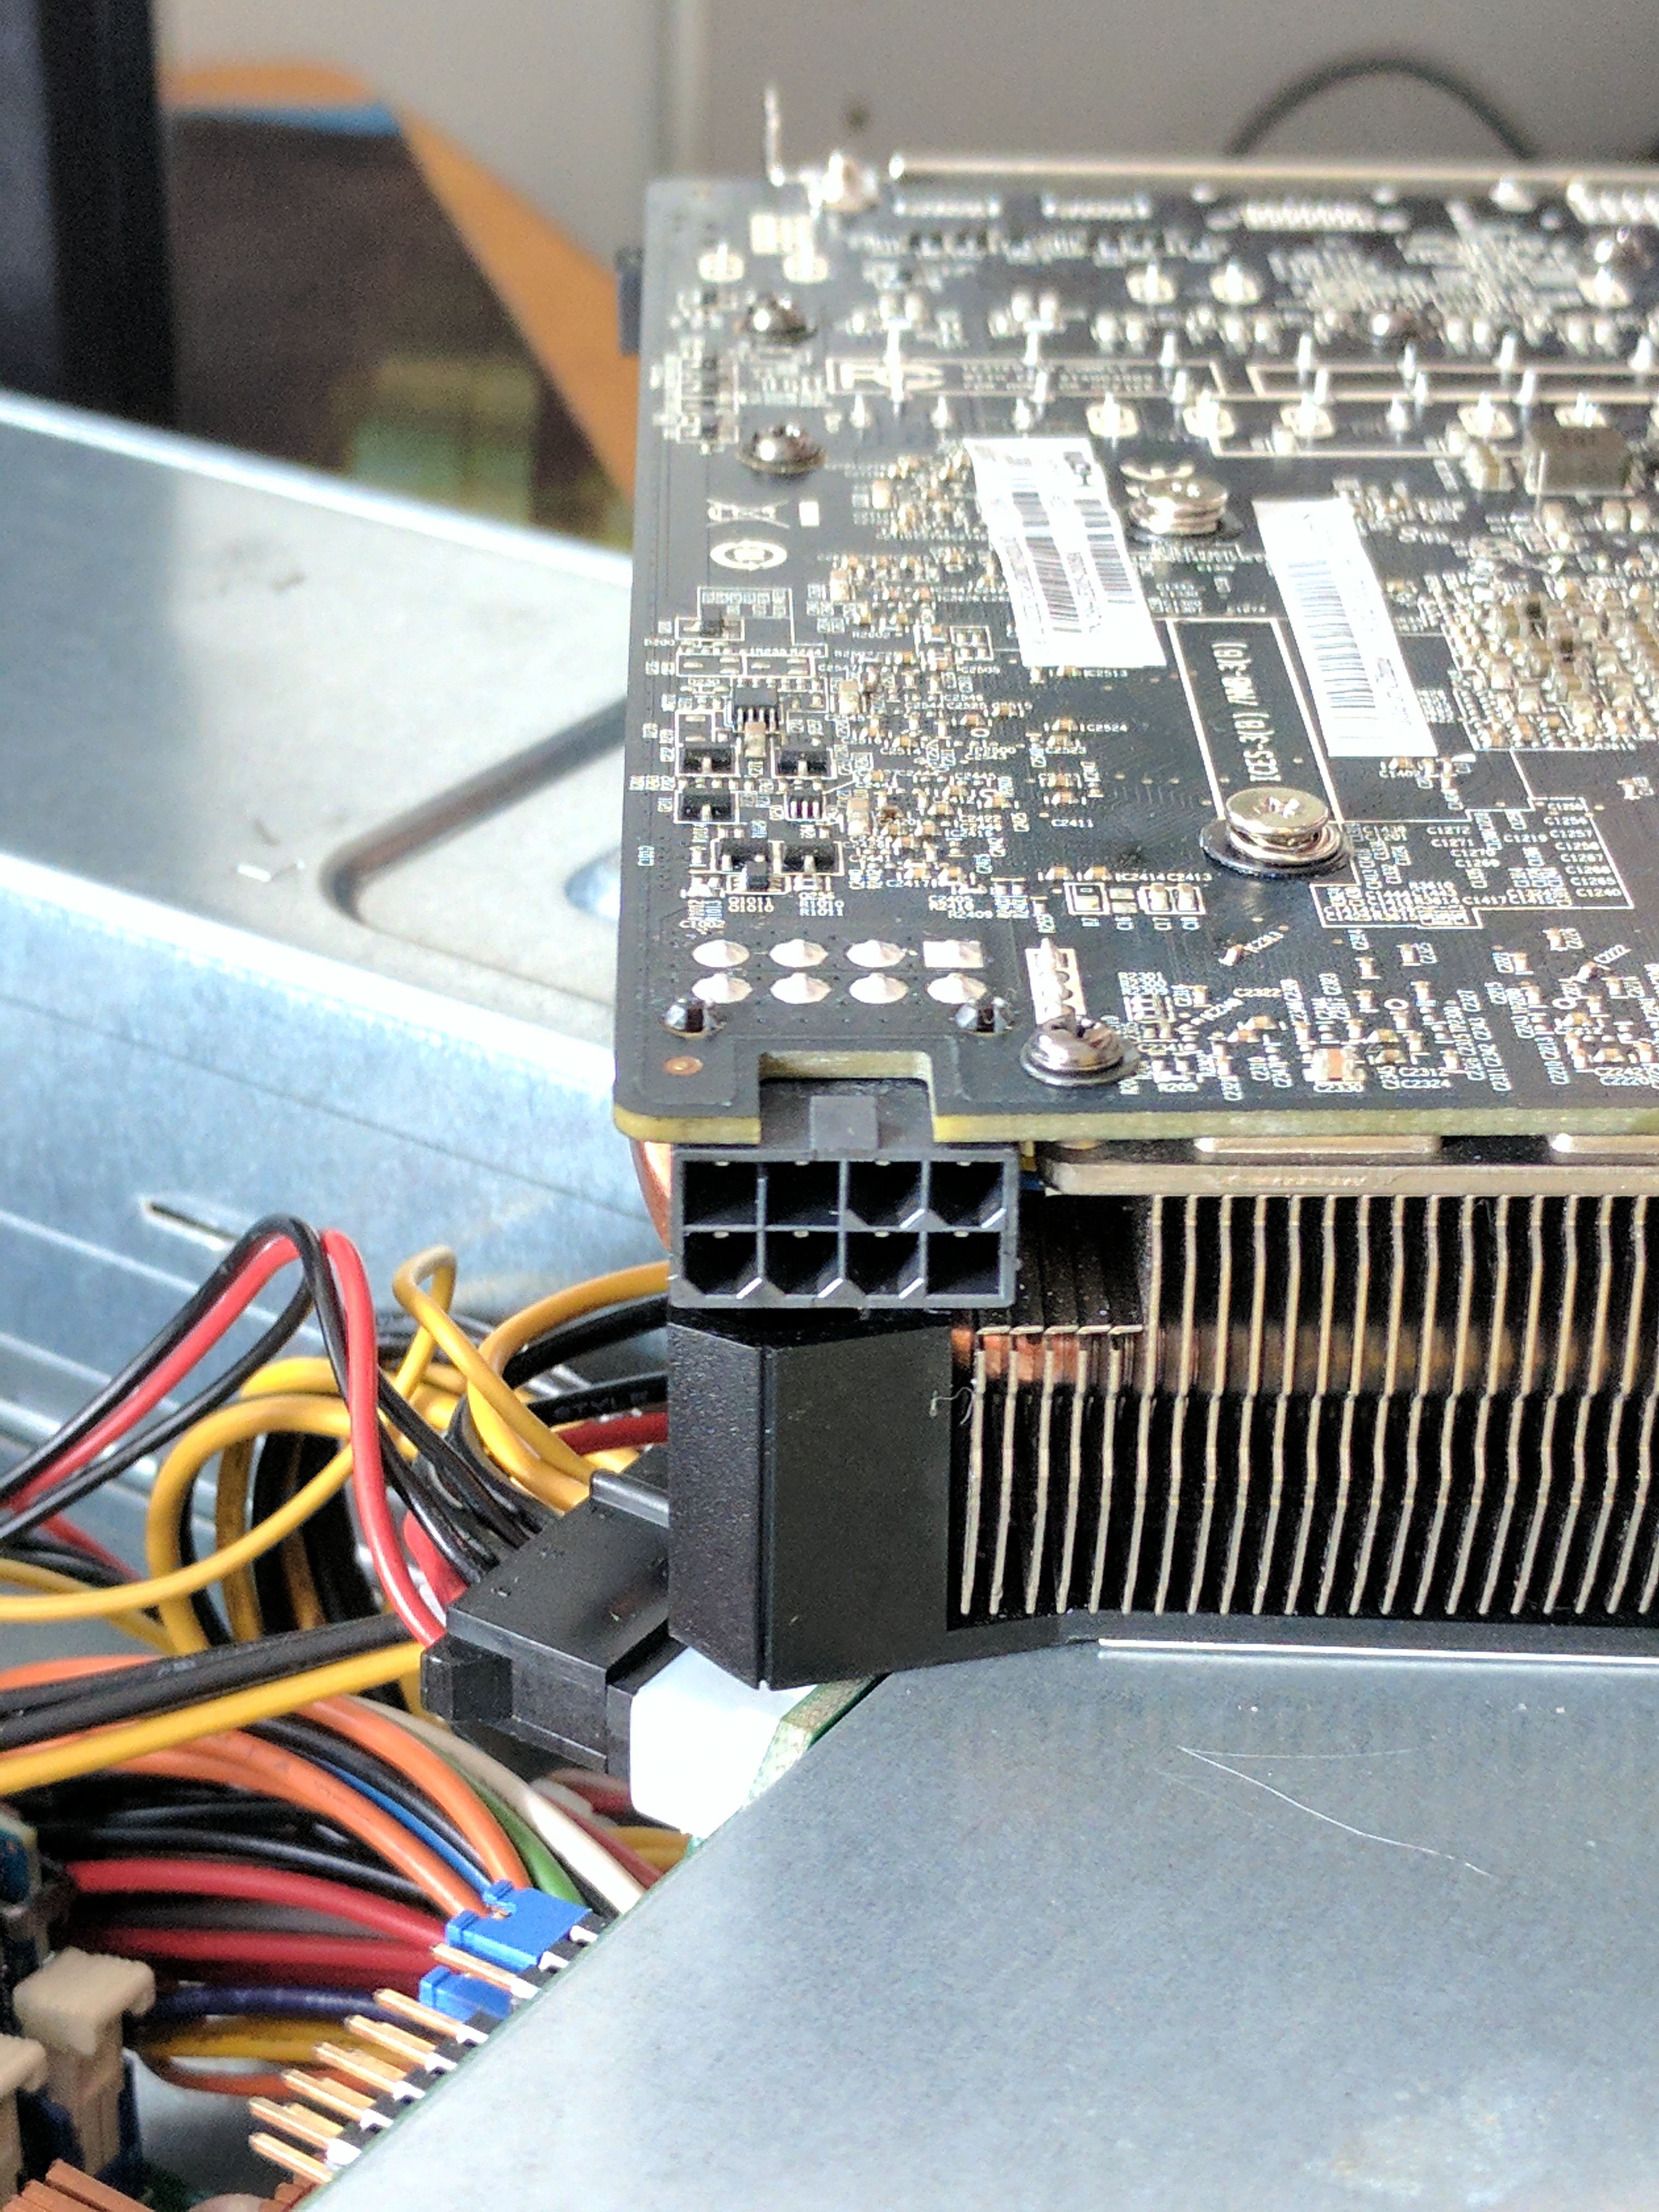
But I needed an 8 pin PCIe cable (3rd picture). So now the question is, will the power supply reliably power a GPU if it was not designed to? 700W should have ample room, but I now needed to dig through PC standards documentation to make sure.
The two relevant standards are ATX (used for chassis and general PC power specifications) and PCI (also referred to as PCIe, used for the data and power connectors on a GPU). Trying to dig around for official ATX and PCIe specifications was not as easy as I thought it would be. ATX was developed by Intel and a lot of their specifications used to be on formfactors.org which is now defunct (it redirects to an intel page with minimal information). Similarly, PCI-SIG, the organization responsible for PCIe specifications, hides their documentation behind a steep paywall unless you join their membership program designed for device manufacturing companies.
Wikipedia had some PCIe power specifications with sources cited to the aforementioned paywall documents. Usually, I trust Wikipedia, but to feel more comfortable I kept searching for something with a more direct connection to the PCI-SIG group. Eventually, I found this electromechanical updates slideshow from a conference, pages 7-11 detail what the different pins of the PCIe power cable do. For those unfamiliar with GPU cards, they come in a few different power variants. Some have no external power and consume only 75W from the motherboard. Others have different permutations of 6 pin and/or 8 pin connectors: the 6 pin variant provides an additional 75W, and the 8 pin variant provides 150W. Reading the previously linked slideshow you'll notice that the only difference between the 6 pin and 8 pin variant are two additional ground pins, not an additional 12V/GND pair. So how do these extra cables provide more power? They don't, they're just for shorting sense pins on the GPU to tell it that the power supply is capable of providing enough current.
The ATX specifications turned out to help determine if my power supply could provide enough power. Servers do use ATX connector standards, but the power supplies themselves are not standard ATX power supplies used in desktop PCs. Instead, they use various proprietary power supplies and proprietary...
Read more »
 Kayser-Sosa
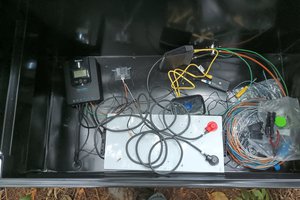
 Peter McCloud
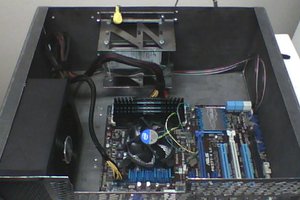
 Jake
Jake
 Øystein